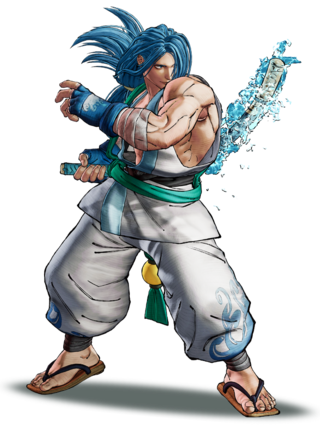
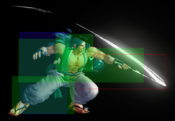
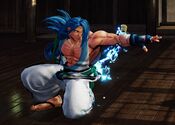
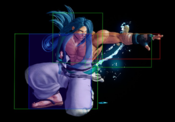
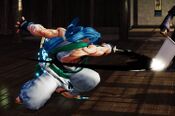
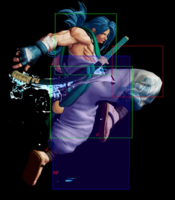
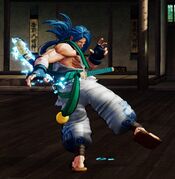
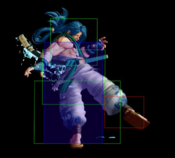
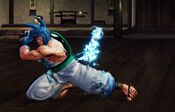
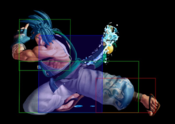
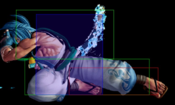
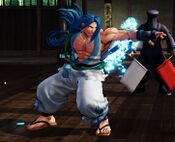
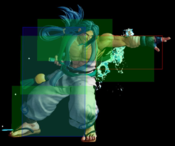
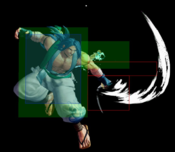
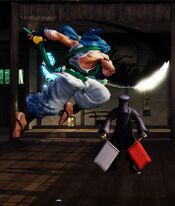
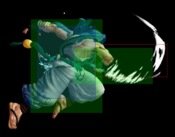
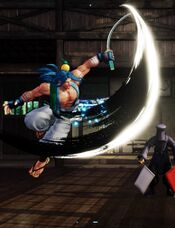
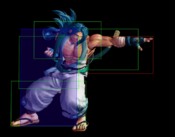
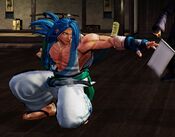
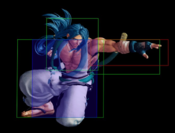
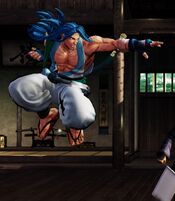
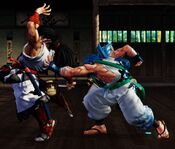
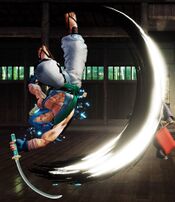
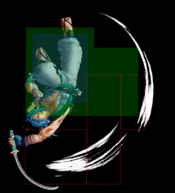
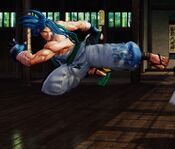
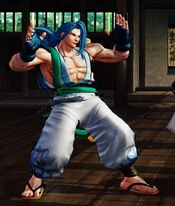
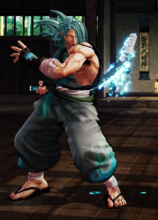
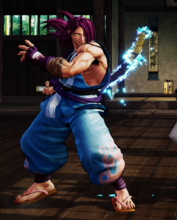
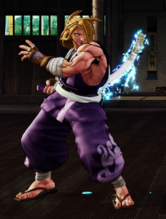
Sogetsu Kazama
風間 蒼月, Kazama Sōgetsu
|
- Damage Taken: 105%
- Rage Factor: 0.22
- Rage Duration: 9 seconds
- Jump: 48 frames (Slow)
- Forward Walk Speed: 0.25 (Slow)
- Back Walk Speed: 0.2 (Slow)
- Dash Speed: 1.3 (Fast)
- Back Dash: 27 frames
- Weapon Pickup / Drop: 40 / 37 frames
|
Introduction
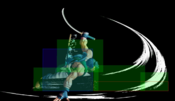
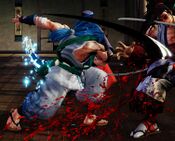
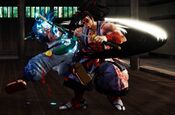
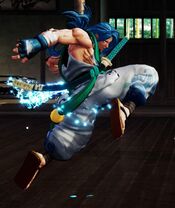
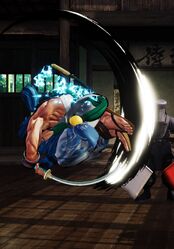
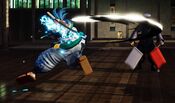
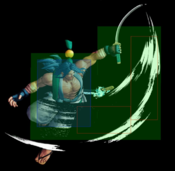
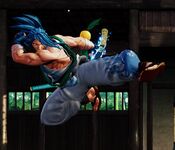
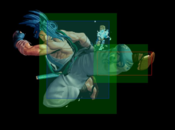
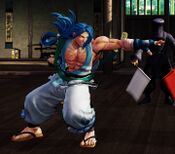
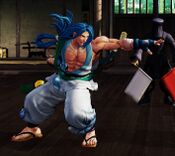
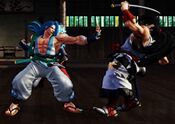
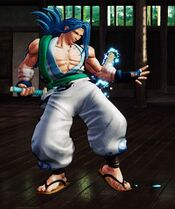
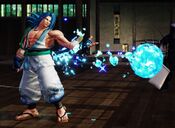
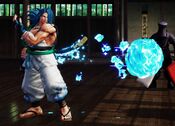
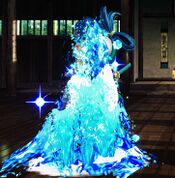
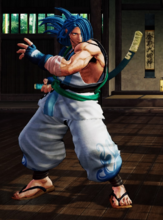
The stylish Kazama brother returns in 7 with his moveset hearkening back to his 5SP/4-Slash iteration. Sogetsu's most defining gameplay traits are his dominance in neutral, due to his long heavy normals and water pillars which can hit the opponent from almost anywhere on the screen, and his okizeme, due to his Moon Rise AKA bubble holding down his opponents and allowing for loopable knockdown situations. These traits combined with his teleports turn playing neutral against Sogetsu into a test of patience and knowledge checks.
Playstyle
 Sogetsu Kazama is an elegant setplay character who bullies opponents with oki after punishing openings. Sogetsu Kazama is an elegant setplay character who bullies opponents with oki after punishing openings.
|
| Strengths |
Weaknesses
|
- Good normals: His far cancellable 5B, a recoil cancellable 2C that doubles as a sweep and his far-reaching 66C ensure that poke wars against Sogetsu are almost always in his favor.
- Full screen SSM: He has access to a fullscreen, low-hitting SSM, giving him a very threatening option at any range.
- Bubble: His bubbles give Sogetsu access to some scary okizeme, which is a luxury few can afford in SamSho
- Unblockable setups using his bubble: The threat of bubble is enhanced with Rage Explosion, giving solid unblockable combos
- Solid Guard Crush options
- Hard to punish when blocked: Most of Sogetsu's moves can be done from pretty far away, making them hard to punish when blocked
|
- Commital neutral: Although his options are scary, they're also situational. Guessing wrong can be very costly for Sogetsu.
- Low damage on average: Most bubble combos and setups are rather short and end in a knockdown.
- Weak to zoning: Sogetsu has no real way to deal with fast projectiles, forcing him to hold pressure from fireball characters.
|
Gameplan
Sogetsu's gameplan revolves around screen control and fishing for knockdowns, so he can run his bubble oki after.
Neutral
Playing Sogetsu's Neutral requires good reads and awareness as well as patience since he relies on them to keep opponents from getting too close, though he benefits from the run-ins of the opponent, that's the major way for him to deal damage. He has a few key moves for neutral being: 2C, 5B, 623S.
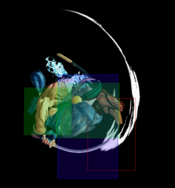
For most characters, it's hard to not get in and place an attack attempt on Soggy. As if they attempt on something at mid range, they will be knocked out of it by pillar before they can get it out. The best might be a trade but they will be kept out again. On Soggy's side, it's important to get to know the rhythm of your opponent so you can raise the pillar at the right place to keep out the opponent and to catch any jump-ins. Soggy's pillars cover 80% of the space around the screen, but again it really requires good awareness to make it 80% instead of 8%.
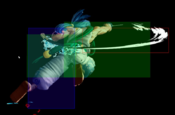
When the opponent finally made it to mid screen or less, they have entered the best range for Soggy. His 2C at max range is relativly safe when he recoil-cancels into a B pillar on block, this move will put the opponent at a little less than full screen and they will need to get close again. Another great move for this range is his 5B as it is one of the best pokes that goes for half screen, it can check most dash-ins, and can confirm into pillar on hit, making it better than it already was. His 5C can also be used to check in for dash-ins, but a hard read is required so don't use it too much. This is the ideal range for Soggy's full potential.
If the opponent gets a bit closer, Soggy would usually go for a grab to push the opponent for some space, or neutral jump to check dash-ins with his fast j.C. The slash of j.C covers a lot of space around him (front and below) also making it a great air to air along with its speed. A great way for pushing the opponent away again when used in combo with 2C.
Overall, Soggy's neutral is solid from anywhere midscreen to a little less than full screen. It requires good reads and patience as most opponents need to dash-in on Soggy to get their damage dealt. Getting into a good habit of taking notes on the opponents would be a great advantage for his neutral.
Okizeme
Mostly revolves around running high-low mix using his bubble/236S. A good Sogetsu will have a variety of setups on hand, ensuring opponents always get hit by his bubble.
For a comprehensive list of Sogetsu bubble setups, check out Lewd_Stares' bubble oki flowchart
Normal Moves
Far Slashes
5A
5A
|
| Damage
|
Guard
|
Startup
|
Active
|
Recovery
|
Total
|
Hit Adv
|
Block Adv
|
Guard Dmg
|
Cancel
|
Recoil
|
Deflectable
|
Unarmed
|
| 30
|
Mid
|
6
|
4
|
11
|
20
|
-2
|
-5
|
5
|
Yes
|
No
|
No
|
No
|
Sogetsu quickly chops at his opponent.
|
|
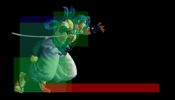
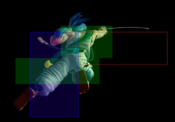
Toggle Hitboxes Toggle Hitboxes
|
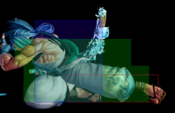
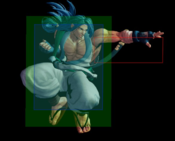
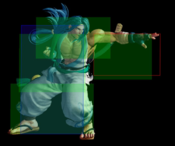
5B
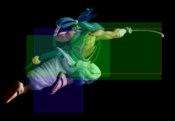
5B Frame 1 Frames 2-4
|
| Damage
|
Guard
|
Startup
|
Active
|
Recovery
|
Total
|
Hit Adv
|
Block Adv
|
Guard Dmg
|
Cancel
|
Recoil
|
Deflectable
|
Unarmed
|
| 100
|
Mid
|
12
|
4
|
20
|
35
|
-3
|
-12
|
10
|
Yes
|
Yes
|
Yes
|
No
|
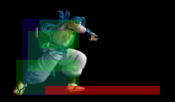
Sogetsu does a downward slash with his curved sword.
- Sogetsu's main mid-screen poke.
- Special cancellable, allowing for quick knockdowns with 623S even at tip range, which makes his pokes hard to contest due to the threat of him special cancelling into his pillars.
- One of his primary combo tools after throw.
|
|
Toggle Hitboxes Toggle Hitboxes
|
5C
5C
|
| Damage
|
Guard
|
Startup
|
Active
|
Recovery
|
Total
|
Hit Adv
|
Block Adv
|
Guard Dmg
|
Cancel
|
Recoil
|
Deflectable
|
Unarmed
|
| 220
|
Mid
|
21~23
|
4
|
30
|
53
|
KD
|
-20~-18
|
25
|
No
|
No
|
Yes
|
No
|
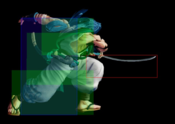
Sogetsu lunges forward with his sword.
- On hit, always wallbounces and knocks down, allowing for oki.
- Does not recoil, making it a somewhat risky, but rewarding option in neutral.
|
|
Toggle Hitboxes Toggle Hitboxes
|
2A
2A
|
| Damage
|
Guard
|
Startup
|
Active
|
Recovery
|
Total
|
Hit Adv
|
Block Adv
|
Guard Dmg
|
Cancel
|
Recoil
|
Deflectable
|
Unarmed
|
| 30
|
Mid
|
6
|
4
|
11
|
19
|
-1
|
-4
|
5
|
Yes
|
No
|
No
|
No
|
Sogetsu does a quick crouching chop.
- Same as 5A but with better frame advantage.
|
|
Toggle Hitboxes Toggle Hitboxes
|
2B
2B
|
| Damage
|
Guard
|
Startup
|
Active
|
Recovery
|
Total
|
Hit Adv
|
Block Adv
|
Guard Dmg
|
Cancel
|
Recoil
|
Deflectable
|
Unarmed
|
| 80
|
Mid
|
10
|
2
|
20
|
31
|
-1
|
-12
|
10
|
Yes
|
Yes
|
Yes
|
No
|
Sogetsu slashes at his opponent's ankles.
- Special cancellable.
- Shorter range than 5B, but with faster startup.
|
|
Toggle Hitboxes Toggle Hitboxes
|
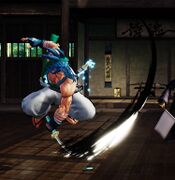
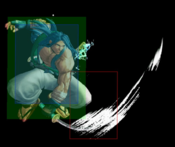
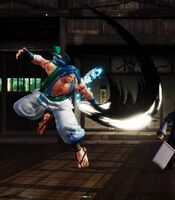
2C
2C
|
| Damage
|
Guard
|
Startup
|
Active
|
Recovery
|
Total
|
Hit Adv
|
Block Adv
|
Guard Dmg
|
Cancel
|
Recoil
|
Deflectable
|
Unarmed
|
| 150
|
Low
|
18
|
3
|
33
|
53
|
KD
|
-28
|
25
|
No
|
Yes
|
No
|
No
|
Sogetsu leans forward and does a low slash.
- Recoil cancellable, making it the preferred option to use in neutral.
- Gives a good enough knockdown on hit to set a bubble.
- Hard to punish on block due to the aforementioned recoil cancel option, allowing Sogetsu to frametrap with pillar at any time.
|
|
Toggle Hitboxes Toggle Hitboxes
|
Near Slashes
n.5B
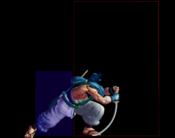
n.5B Frame 1 Frames 2-3
|
| Damage
|
Guard
|
Startup
|
Active
|
Recovery
|
Total
|
Hit Adv
|
Block Adv
|
Guard Dmg
|
Cancel
|
Recoil
|
Deflectable
|
Unarmed
|
| 90
|
Mid
|
10
|
3
|
22
|
33
|
-3
|
-12
|
10
|
Yes
|
Yes
|
Yes
|
No
|
Sogetsu quickly slashes downwards.
- His main combo tool after a deep jump-in.
|
|
Toggle Hitboxes Toggle Hitboxes
|
n.5C
n.5C Frames 1-2 Frames 3-4
|
| Damage
|
Guard
|
Startup
|
Active
|
Recovery
|
Total
|
Hit Adv
|
Block Adv
|
Guard Dmg
|
Cancel
|
Recoil
|
Deflectable
|
Unarmed
|
| 200
|
Mid
|
18
|
4
|
31
|
52
|
-5
|
-28
|
25
|
No
|
Yes
|
Disarm
|
No
|
Sogetsu does a stationary spinning slash.
- Recoil cancellable.
- Same as 5C in animation, but worse overall due to no knockdown and less damage.
- Has suprisingly tall hitbox, which makes it useful as an anti-air
- In most situations where you get to use n.5C, it's better to do 2C instead for the knockdown, since they share the same startup and recoil cancel properties.
|
|
Toggle Hitboxes Toggle Hitboxes
|
Kicks
5D
5D
|
| Damage
|
Guard
|
Startup
|
Active
|
Recovery
|
Total
|
Hit Adv
|
Block Adv
|
Guard Dmg
|
Cancel
|
Recoil
|
Deflectable
|
Unarmed
|
| 50
|
Mid
|
13~16
|
4
|
14
|
30
|
-2~+1
|
-4~-1
|
5
|
No
|
No
|
No
|
Yes
|
Sogetsu does a quick, curved knee strike.
- Gains low invuln on the 7th frame of startup which lasts for 12 frames.
- Safe on block in most cases, allowing for tickthrow situations.
|
|
Toggle Hitboxes Toggle Hitboxes
|
6D
6D
|
| Damage
|
Guard
|
Startup
|
Active
|
Recovery
|
Total
|
Hit Adv
|
Block Adv
|
Guard Dmg
|
Cancel
|
Recoil
|
Deflectable
|
Unarmed
|
| 50
|
Low
|
10
|
5
|
14
|
28
|
-3
|
-6
|
5
|
Yes
|
No
|
No
|
Yes
|
Sogetsu does a quick kick at his opponent's ankles.
- Hits low.
- Special cancellable.
- Reaches slightly further than his 2D.
- Useful for high-low mix, as it's a standing low.
|
|
Toggle Hitboxes Toggle Hitboxes
|
2D
2D
|
| Damage
|
Guard
|
Startup
|
Active
|
Recovery
|
Total
|
Hit Adv
|
Block Adv
|
Guard Dmg
|
Cancel
|
Recoil
|
Deflectable
|
Unarmed
|
| 20
|
Low
|
6
|
3
|
9
|
17
|
+1
|
-2
|
5
|
No
|
No
|
No
|
Yes
|
Sogetsu does a low kick.
- Solid range for a 2D.
- Used for high-low mix.
|
|
Toggle Hitboxes Toggle Hitboxes
|
3D
3D
|
| Damage
|
Guard
|
Startup
|
Active
|
Recovery
|
Total
|
Hit Adv
|
Block Adv
|
Guard Dmg
|
Cancel
|
Recoil
|
Deflectable
|
Unarmed
|
| 30
|
Low
|
12~19
|
8
|
22
|
41
|
-5~+2
|
-14~-7
|
5
|
No
|
No
|
No
|
Yes
|
Sogetsu does a sliding kick.
- Similar to his 66D, but doesn't knock down on hit.
- Travels further than 66D.
|
|
Toggle Hitboxes Toggle Hitboxes
|
Dash Normals
66A
66A
|
| Damage
|
Guard
|
Startup
|
Active
|
Recovery
|
Total
|
Hit Adv
|
Block Adv
|
Guard Dmg
|
Cancel
|
Recoil
|
Deflectable
|
Unarmed
|
| 30
|
Mid
|
11
|
5
|
16
|
31
|
-4
|
-9
|
5
|
No
|
No
|
No
|
No
|
Sogetsu does a running chop.
- Standard running poke in neutral.
|
|
Toggle Hitboxes Toggle Hitboxes
|
66B
66B
|
| Damage
|
Guard
|
Startup
|
Active
|
Recovery
|
Total
|
Hit Adv
|
Block Adv
|
Guard Dmg
|
Cancel
|
Recoil
|
Deflectable
|
Unarmed
|
| 100
|
High
|
21
|
2
|
30
|
52
|
KD(+71)
|
-16
|
10
|
No
|
No
|
No
|
No
|
Sogetsu does a running somersault slash.
- Knocks down on hit, allowing for bubble oki after.
- Has decent forward momentum.
|
|
Toggle Hitboxes Toggle Hitboxes
|
66C
66C
|
| Damage
|
Guard
|
Startup
|
Active
|
Recovery
|
Total
|
Hit Adv
|
Block Adv
|
Guard Dmg
|
Cancel
|
Recoil
|
Deflectable
|
Unarmed
|
| 140
|
Mid
|
10~13
|
5
|
30
|
48
|
KD(+85)
|
-18~-15
|
20
|
No
|
No
|
Disarm
|
No
|
Sogetsu does a running circular slash.
- A running version of his 5C without the wallbounce and forward momentum. Grants knockdown on hit.
- Because of the lack of momentum, it makes for a very solid poke that's hard to punish unless it's done preemptively, especially when spaced correctly.
- Shares the tall hitbox of his n.5C.
|
|
Toggle Hitboxes Toggle Hitboxes
|
66D
66D
|
| Damage
|
Guard
|
Startup
|
Active
|
Recovery
|
Total
|
Hit Adv
|
Block Adv
|
Guard Dmg
|
Cancel
|
Recoil
|
Deflectable
|
Unarmed
|
| 70
|
Low
|
9~16
|
8
|
20
|
36
|
KD(+97)
|
-15~-8
|
5
|
No
|
No
|
No
|
Yes
|
Sogetsu does a running slide.
- Knocks down on hit, but has less forward momentum than 3D.
|
|
Toggle Hitboxes Toggle Hitboxes
|
Air Normals
j.A
j.A
|
| Damage
|
Guard
|
Startup
|
Active
|
Recovery
|
Total
|
Hit Adv
|
Block Adv
|
Guard Dmg
|
Cancel
|
Recoil
|
Deflectable
|
Unarmed
|
| 30
|
High
|
5
|
4
|
-
|
-
|
-
|
-
|
5
|
No
|
No
|
No
|
No
|
Sogetsu does a quick downward air slash.
- Solid air-to-air.
- Faster than j.B, but has worse reach.
|
|
Toggle Hitboxes Toggle Hitboxes
|
j.B
j8.B
|
| Damage
|
Guard
|
Startup
|
Active
|
Recovery
|
Total
|
Hit Adv
|
Block Adv
|
Guard Dmg
|
Cancel
|
Recoil
|
Deflectable
|
Unarmed
|
| 120
|
High
|
10
|
4
|
-
|
-
|
-
|
-
|
10
|
No
|
No
|
No
|
No
|
Sogetsu does a wide air slash forward.
- Similar to jA but with bigger reach.
|
|
Toggle Hitboxes Toggle Hitboxes
|
j.B
j7/9.B
|
| Damage
|
Guard
|
Startup
|
Active
|
Recovery
|
Total
|
Hit Adv
|
Block Adv
|
Guard Dmg
|
Cancel
|
Recoil
|
Deflectable
|
Unarmed
|
| 100
|
High
|
8
|
2
|
-
|
-
|
-
|
-
|
10
|
No
|
No
|
No
|
No
|
Sogetsu does a downwards air slash.
- Bigger vertical reach than his j8B.
|
|
Toggle Hitboxes Toggle Hitboxes
|
j.C
j.C
|
| Damage
|
Guard
|
Startup
|
Active
|
Recovery
|
Total
|
Hit Adv
|
Block Adv
|
Guard Dmg
|
Cancel
|
Recoil
|
Deflectable
|
Unarmed
|
| 150
|
High
|
12
|
3
|
-
|
-
|
-
|
-
|
20
|
No
|
No
|
No
|
No
|
Sogetsu does a wide, downwards air slash
- Generous hitbox, making for a good jump-in.
- His best air-to-ground move.
|
|
Toggle Hitboxes Toggle Hitboxes
|
j.D
j.D
|
| Damage
|
Guard
|
Startup
|
Active
|
Recovery
|
Total
|
Hit Adv
|
Block Adv
|
Guard Dmg
|
Cancel
|
Recoil
|
Deflectable
|
Unarmed
|
| 30
|
High
|
8
|
14
|
-
|
-
|
-
|
-
|
5
|
No
|
No
|
No
|
Yes
|
Sogetsu does a quick air kick.
- Standard air kick.
- Your best jump-in when unarmed.
|
|
Toggle Hitboxes Toggle Hitboxes
|
Unarmed Normals
u.5S
u.5S
|
| Damage
|
Guard
|
Startup
|
Active
|
Recovery
|
Total
|
Hit Adv
|
Block Adv
|
Guard Dmg
|
Cancel
|
Recoil
|
Deflectable
|
Unarmed
|
| 50
|
Mid
|
6
|
4
|
11
|
20
|
+2
|
-5
|
5
|
No
|
No
|
No
|
Only
|
Sogetsu does a quick chop.
- Standard unarmed attack. Functionally similar to 5A
|
|
Toggle Hitboxes Toggle Hitboxes
|
u.2S
u.2S
|
| Damage
|
Guard
|
Startup
|
Active
|
Recovery
|
Total
|
Hit Adv
|
Block Adv
|
Guard Dmg
|
Cancel
|
Recoil
|
Deflectable
|
Unarmed
|
| 50
|
Mid
|
6
|
3
|
11
|
19
|
+1
|
-4
|
5
|
No
|
No
|
No
|
Only
|
Sogetsu does a quick crouching chop.
- Functionally similar to 2A.
|
|
Toggle Hitboxes Toggle Hitboxes
|
ju.S
ju.S
|
| Damage
|
Guard
|
Startup
|
Active
|
Recovery
|
Total
|
Hit Adv
|
Block Adv
|
Guard Dmg
|
Cancel
|
Recoil
|
Deflectable
|
Unarmed
|
| 50
|
High
|
6
|
10
|
-
|
-
|
-
|
-
|
5
|
No
|
No
|
No
|
Only
|
Sogetsu does a quick air chop.
- Standard unarmed air attack.
|
|
Toggle Hitboxes Toggle Hitboxes
|
u.66S
u.66S
|
| Damage
|
Guard
|
Startup
|
Active
|
Recovery
|
Total
|
Hit Adv
|
Block Adv
|
Guard Dmg
|
Cancel
|
Recoil
|
Deflectable
|
Unarmed
|
| 50
|
Mid
|
11
|
7
|
14
|
31
|
KD(+107)
|
-5
|
5
|
No
|
No
|
No
|
Only
|
Sogetsu does a dashing chop.
- Like all dashing unarmed normals, knocks down.
|
|
Toggle Hitboxes Toggle Hitboxes
|
Universal Mechanics
Guard Break
Guard Break (Throw) 5C+D / 6C+D 5C+D / 6C+D 4C+D 4C+D
|
| Version
|
Damage
|
Guard
|
Startup
|
Active
|
Recovery
|
Total
|
Hit Adv
|
Block Adv
|
Guard Dmg
|
Cancel
|
Recoil
|
Deflectable
|
Unarmed
|
| Neutral / Forward
|
0
|
Throw
|
3
|
-
|
71
|
74
|
+20
|
-
|
-
|
-
|
-
|
-
|
Yes
|
| Back
|
0
|
Throw
|
5
|
-
|
69
|
74
|
+25
|
-
|
-
|
-
|
-
|
-
|
Yes
|
Universal throw.
- Allows for a short combo after.
- Opponents can be thrown into bubbles, allowing for setups.
|
|
Surprise Attack
Surprise Attack (Overhead)
5B+C Armed Armed Unarmed Unarmed
|
| Version
|
Damage
|
Guard
|
Startup
|
Active
|
Recovery
|
Total
|
Hit Adv
|
Block Adv
|
Guard Dmg
|
Cancel
|
Recoil
|
Deflectable
|
Unarmed
|
| Armed
|
60
|
High
|
21
|
2
|
26
|
48
|
+2
|
-16
|
10
|
No
|
No
|
No
|
No
|
Sogetsu does a vertical somersault slash.
- Universal overhead. Doesn't knock down.
- Essential to his high-low mix, as the lack of a knockdown allows people to get pushed into bubbles, giving Sogetsu a higher reward off of it than most characters.
|
| Unarmed
|
60
|
High
|
20
|
4
|
21
|
43
|
KD(+100)
|
-11
|
10
|
No
|
No
|
No
|
Only
|
Sogetsu does a jumping kick.
- Universal overhead.
- Unlike most unarmed overheads, has no forward momentum.
- Knocks down.
|
|
Toggle Hitboxes Toggle Hitboxes
|
Dodge
Dodge
5A+B
|
| Damage
|
Guard
|
Startup
|
Active
|
Recovery
|
Total
|
Hit Adv
|
Block Adv
|
Guard Dmg
|
Cancel
|
Recoil
|
Deflectable
|
Unarmed
|
| N/A
|
-
|
1
|
16
|
22
|
38
|
-
|
-
|
-
|
-
|
-
|
-
|
Yes
|
|
|
|
Stance Break
Stance Break
A+B during Just Defense
|
| Damage
|
Guard
|
Startup
|
Active
|
Recovery
|
Total
|
Hit Adv
|
Block Adv
|
Guard Dmg
|
Cancel
|
Recoil
|
Deflectable
|
Unarmed
|
| 0
|
Mid
|
5
|
-
|
-
|
52
|
KD
|
-24
|
-
|
-
|
-
|
-
|
Yes
|
|
|
|
Counter (Deflect) / Blade Catch
Counter (Deflect) / Blade Catch
236A+B Weapon Deflect Weapon Deflect Blade Catch Blade Catch
|
| Version
|
Damage
|
Guard
|
Startup
|
Active
|
Recovery
|
Total
|
Hit Adv
|
Block Adv
|
Guard Dmg
|
Cancel
|
Recoil
|
Deflectable
|
Unarmed
|
| Armed
|
0
|
N/A
|
2
|
11
|
34
|
46
|
+35~+59
|
-
|
-
|
-
|
-
|
-
|
No
|
Universal deflect. Light/medium slashes stun the opponent on successful deflect. Heavy/running slashes disarm the opponent on successful deflect.
|
| Unarmed
|
0
|
N/A
|
2
|
12
|
9
|
22
|
KD
|
-
|
-
|
-
|
-
|
-
|
Only
|
Universal Blade Catch. Knocks down and disarms, regardless of slash strength.
|
|
Rage Explosion
Rage Explosion
5A+B+C
|
| Damage
|
Guard
|
Startup
|
Active
|
Recovery
|
Total
|
Hit Adv
|
Block Adv
|
Guard Dmg
|
Cancel
|
Recoil
|
Deflectable
|
Unarmed
|
| 0
|
Unblockable
|
21
|
1
|
-
|
58
|
0
|
-
|
-
|
-
|
-
|
-
|
No
|
Universal Rage Explosion.
- Due to the explosion putting the opponent in unblockable, 0 damage hitstun with high pushback, it's possible to push people into your bubbles with specific setups, allowing for very risky, but potentially game-winning conversions.
|
|
Lightning Blade
Lightning Blade (Issen)
5A+B+C during Rage Explosion
|
| Damage
|
Guard
|
Startup
|
Active
|
Recovery
|
Total
|
Hit Adv
|
Block Adv
|
Guard Dmg
|
Cancel
|
Recoil
|
Deflectable
|
Unarmed
|
| 300~709
|
Mid
|
9
|
-
|
-
|
-
|
KD
|
-44
|
-
|
-
|
-
|
-
|
No
|
Universal Issen. Damage scales off of missing health.
|
|
Command Moves
Wall Jump
Wall Jump
(near wall)9
|
| Damage
|
Guard
|
Startup
|
Active
|
Recovery
|
Total
|
Hit Adv
|
Block Adv
|
Guard Dmg
|
Cancel
|
Recoil
|
Deflectable
|
Unarmed
|
| -
|
-
|
-
|
-
|
-
|
-
|
-
|
-
|
-
|
-
|
-
|
-
|
Yes
|
|
|
|
Special Moves
Moon Glow
Moon Glow
623S Abunai desu yo. Abunai desu yo.
|
| Version
|
Damage
|
Guard
|
Startup
|
Active
|
Recovery
|
Total
|
Hit Adv
|
Block Adv
|
Guard Dmg
|
Cancel
|
Recoil
|
Deflectable
|
Unarmed
|
| A / Rage
|
100 / 144(48x3)
|
Mid
|
12 / 18
|
10
|
28
|
56 / 56
|
KD(+117) /KD(+107)
|
-18 / -10
|
5 / 9
|
No
|
No
|
No
|
No
|
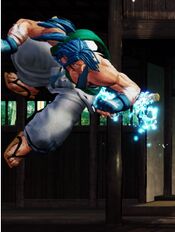
Sogetsu summons a water pillar that sprouts from the ground.
- Knocks down on hit.
- Sogetsu's main screen control and combo tool.
- Rage version hits an additional 2 times and grants a better knockdown.
- A version hits a character's length away from him.
- Has head invulnerability for the first 11 frames of startup, making it an excellent anti-air.
- His ender after n5B.
|
| B / Rage
|
100 / 144(48x3)
|
Mid
|
18 / 18
|
10
|
33/31
|
60 / 58
|
KD(+115) / KD+109)
|
-22 / -12
|
5 / 9
|
No
|
No
|
No
|
No
|
- Hits midscreen.
- Sogetsu's main combo tool and confirm from 5B.
|
| C / Rage
|
100 / 144(48x3)
|
Mid
|
18 / 18
|
10
|
37/33
|
64 / 61
|
KD(+90) / KD(+112)
|
-26 / -15
|
5 / 9
|
No
|
No
|
No
|
No
|
- Hits almost fullscreen.
- Sogetsu's main punish tool for fireball attempts
|
|
Toggle Hitboxes Toggle Hitboxes
|
Moon Rise
Moon Rise
236S
|
| Version
|
Damage
|
Guard
|
Startup
|
Active
|
Recovery
|
Total
|
Hit Adv
|
Block Adv
|
Guard Dmg
|
Cancel
|
Recoil
|
Deflectable
|
Unarmed
|
| A
|
30
|
Mid
|
51
|
110
|
16
|
65
|
+24
|
+8
|
5
|
No
|
No
|
No
|
No
|
Also referred to as "bubble".
Sogetsu places a water bubble onto the screen that stuns opponents on hit.
- Sogetsu's infamous oki tool.
- Bubble placements vary with slash strength.
- Holding the slash button after the bubble comes out does Aquatic Moon Rise.
- Essential to his gameplan, as it's the crux of his okizeme and his main setup tool.
- The bubble will stay active for 110 frames before disappearing.
- A version places the bubble a character length away from Sogetsu.
|
| B
|
30
|
Mid
|
61
|
110
|
14
|
73
|
+26
|
+10
|
5
|
No
|
No
|
No
|
No
|
- Places the bubble at mid-screen length.
|
| C
|
30
|
Mid
|
71
|
110
|
12
|
82
|
+27
|
+11
|
5
|
No
|
No
|
No
|
No
|
Sets the bubble nearly fullscreen.
|
|
Toggle Hitboxes Toggle Hitboxes
|
Aquatic Moon Rise
Aquatic Moon Rise
236[S]
|
| Damage
|
Guard
|
Startup
|
Active
|
Recovery
|
Total
|
Hit Adv
|
Block Adv
|
Guard Dmg
|
Cancel
|
Recoil
|
Deflectable
|
Unarmed
|
| 30
|
Mid
|
-
|
110
|
-
|
159
|
+39
|
+23
|
5
|
No
|
No
|
No
|
No
|
- Holding the slash button after doing 236S allows Sogetsu to move the bubble and alter its position as long as the bubble is active.
- Sogetsu cannot move while the bubble is being moved.
- Used in setups where the default bubble position won't work for some setups, as well as area denial.
|
|
New Moon
New Moon
214S
|
| Version
|
Damage
|
Guard
|
Startup
|
Active
|
Recovery
|
Total
|
Hit Adv
|
Block Adv
|
Guard Dmg
|
Cancel
|
Recoil
|
Deflectable
|
Unarmed
|
| A
|
N/A
|
-
|
19
|
25
|
15
|
58
|
-
|
-
|
-
|
No
|
No
|
No
|
No
|
Also referred to as "teleport".
Sogetsu vanishes into a water puddle before reemerging.
- Used mainly for repositioning and after recoil cancels, although it can be used to close in and punish certain moves.
- Sogetsu's position after teleporting depends on the slash strength used.
- A version teleports Sogetsu at the end of the screen.
|
| B
|
N/A
|
-
|
19
|
25
|
9
|
52
|
-
|
-
|
-
|
No
|
No
|
No
|
No
|
- Teleports Sogetsu right in front of the opponent.
- Very situational teleport.
- Can be used as a hard callout for jumps, as it places you right below the opponent during the height of their jump arc when done during jump startup.
|
| C
|
N/A
|
-
|
19
|
25
|
13
|
52
|
-
|
-
|
-
|
No
|
No
|
No
|
No
|
- Teleports Sogetsu right behind the opponent.
- Used to punish certain fullscreen moves and to check if the opponent is paying attention.
- Risky to use against aware opponents.
- Has strike invulnerabilty for the first 3 frames after emerging, but still has a throw hurtbox.
|
|
Supers
Weapon Flipping Technique
Lunar Slash
236B+C No longer burstable. No longer burstable.
|
| Damage
|
Guard
|
Startup
|
Active
|
Recovery
|
Total
|
Hit Adv
|
Block Adv
|
Guard Dmg
|
Cancel
|
Recoil
|
Deflectable
|
Unarmed
|
| 408 (36x6,60x2,72)
|
Mid
|
1+15
|
81
|
60
|
-
|
KD
|
-40
|
-
|
No
|
No
|
No
|
No
|
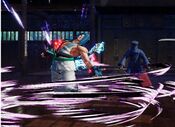
Sogetsu attacks the opponent with a flurry of spinning slashes before stabbing his sword into the ground and finishing the opponent with a water blast.
- Solid damage WFT.
- Rather fast startup, so it can be combo'd into from his B buttons, even at tip range, and from most setups.
- Very unsafe on block.
|
|
Toggle Hitboxes Toggle Hitboxes
|
Super Special Move
Blood Moon Prison
641236C+D
|
| Damage
|
Guard
|
Startup
|
Active
|
Recovery
|
Total
|
Hit Adv
|
Block Adv
|
Guard Dmg
|
Cancel
|
Recoil
|
Deflectable
|
Unarmed
|
| 640
|
Low
|
10+24
|
1
|
70
|
-
|
KD
|
-59
|
-
|
No
|
No
|
No
|
No
|
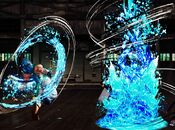
Sogetsu sends forward a wave of water that traps the opponent in a big water bubble, then tosses two water shurikens into the bubble to shred the opponent before making the bubble burst with a water droplet.
- Goes fullscreen, allowing for very heavy punishes on certain moves, making the opponent wary of using them.
- Hits low.
- Fast enough to be done from most successful medium slash deflects.
|
|
Toggle Hitboxes Toggle Hitboxes
|
Combos
List combos, use numpad notation.
- 5B xx 623B / WFT
Mid range punish combo.
- n.5B xx 623A / WFT
Close range punish combo.
- 5CD / 4CD...
Throw...
- 5B xx 623B / WFT
Standard throw follow up.
- n.5B xx 623A / WFT
Corner throw follow up.
- 5C
The optimal basic follow up, only after back throw.
- jump C (Deep hit)...
- 5B xx 623B / WFT
Midscreen combo.
- n.5B xx 623A / WFT
Corner combo.
- 5C / n.5C
Universal combo after jump C deep hit.
- Lighting Blade
Issen combo.
- 236S (Ground hit)...
- 2C
Basic follow up with decent range for a knock down.
- 5B xx 623B / WFT
Midscreen follow up.
- n.5B xx 623A / WFT
Corner follow up.
- 5C / n.5C / 66C
5C is more damaging than pillar combo or 2C but need to be fast to connect.
- SSM
SSM follow up.
- Lighting Blade
Issen combo.
- 236S (Air hit)...
- 623S
Juggle combo.
- j.C / 5C
Inconsistent but will connect.
Guard Crush
- n.5C / 5C...
After recovery...
- SSM
SSM follow up. (Be careful with opponent bursting to avoid it)
- The only reason to not cancel the recovery is for SSM, or else go for the one below for optimal damage.
- n.5C / 5C...
Cancel recovery...
- Lighting Blade
Universal Issen combo.
- 236A(Hold)...
Control the bubble by holding back to connect...
- 5B xx 623B / WFT
Follow up with medium combos. Knocks down.
- n.5C
Follow up with a heavy. MAX damage (Slight more than pillar combo) without rage but no knock down.
Videos
Colors
External Links
