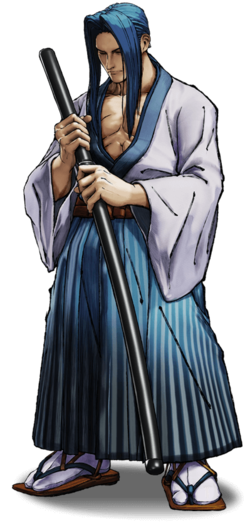
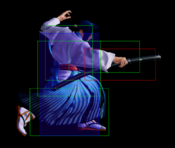
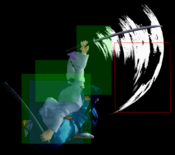
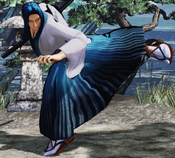
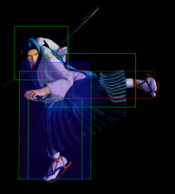
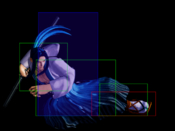
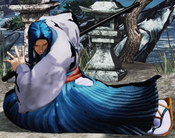
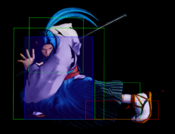
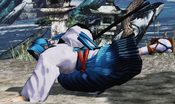
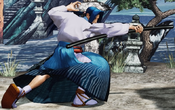
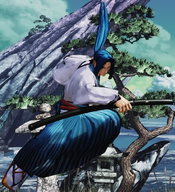
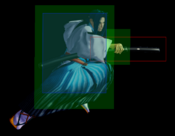
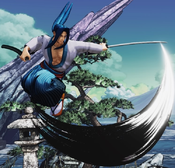
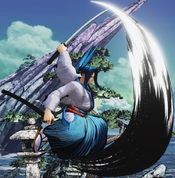
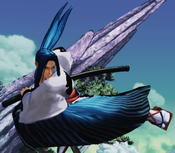
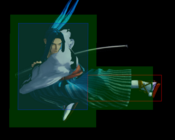
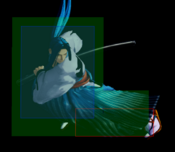
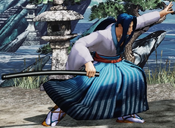
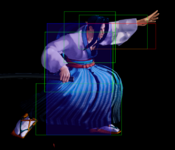
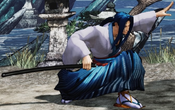
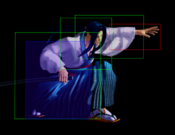
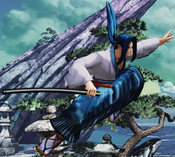
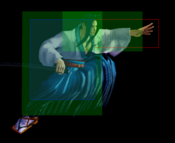
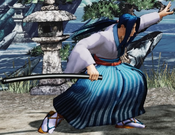
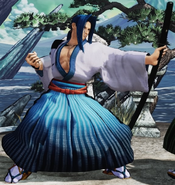
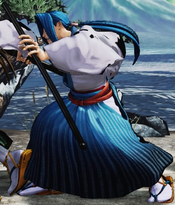
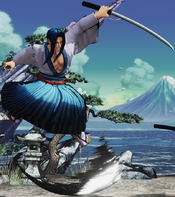
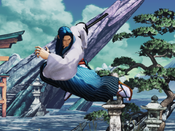
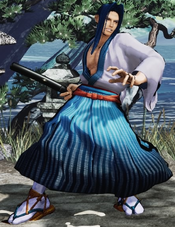
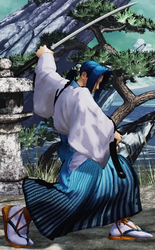
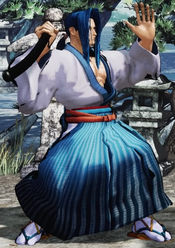
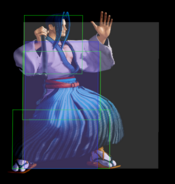
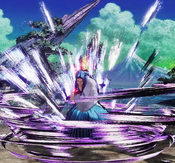
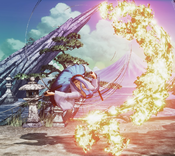
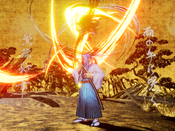
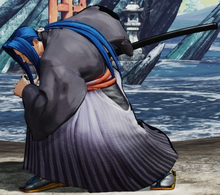
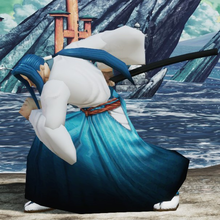
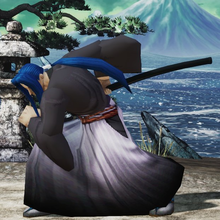
Ukyo Tachibana
橘 右京, Tachibana Ukyō
|
- Damage Taken: 105%
- Rage Factor: 0.12 (Worst Rage Gain)
- Rage Duration: 20 seconds (Longest Duration)
- Jump: 61 frames (Extremely Slow)
- Forward Walk Speed: 0.3 (Average)
- Back Walk Speed: 0.23 (Average)
- Dash Speed: 1.25 (Average)
- Back Dash: 27 frames (Cancelable from frame 9)
- Weapon Pickup / Drop: 40 / 79 frames
|
Introduction
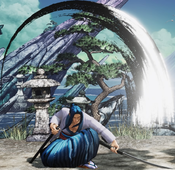
Ukyo has everything you could ask for in a character: Fast movement, long reach, damaging punishes, reliable anti-airs, great mixups, you name it. He specializes in harassing the opponent from mid-screen with fast, high priority normals and punishing mistakes with his far-reaching strikes or a quickly executed TK Tsubame. Once Ukyo has scored a knockdown, he can employ his deadly mixup-game, which include an instant overhead and a grounded cross-up.
While Tsubame is nowhere near the terror it was in previous games (most notably Samsho 2), it comes out in only 5 frames, granting him near unrivaled control over the airspace and making up for his unusually floaty jump. On the ground, 2B is fast and covers the space directly above your head, so jumping is almost always a bad idea against Ukyo. Like Haohmaru, he can also “fake” his Hiken Sasameyuki special to make the opponent commit to something stupid.
If you want a character who’s basically guaranteed to be strong in one way or another, look no further than Ukyo. Play him if you like simple effective playstyles, good neutral, mixups, long blue hair, or want to raise awareness for tuberculosis.
Playstyle
 Ukyo Tachibana is a defensive mixup character with strong grounded neutral and one of the best 50/50 mixups in the game. Ukyo Tachibana is a defensive mixup character with strong grounded neutral and one of the best 50/50 mixups in the game.
|
| Strengths |
Weaknesses
|
- Strong ground game: Ukyo has excellent dashes and a strong suite of fast and long-ranged pokes that make him a strong contender in grounded neutral. He is great at keeping opponents on their toes and scaring them into blocking, allowing him to start his mixup game.
- Mix-up machine: The dreaded Tsubame Gaeshi is one of the scariest instant overheads in the game due to its high damage and fast startup. Ukyo supplements this with his numerous excellent lows to create a strong mix-up game. He also has good meaty normals for forcing opponents to block and can use his Concealed Sabre Snowfall Slash special to punish wakeup spot dodges and inflict chip damage.
- Good punishes: Ukyo's 3D, 66C and Tsubame Gaeshi are all very fast punishment options that lead into invaluable knockdowns. He also has numerous strong cancel options into his Concealed Sabre Phantom Strike, granting good damage and knockdowns off of most punishes.
- Good anti-air: Tsubame Gaeshi works as a great reaction AA due to its fast startup and strong aerial hitbox. The disjointed hitbox of 3D also makes it useful as a situational AA.
- Good SSM: Fast and very long-ranged SSM.
|
- Really floaty: Ukyo has one of the longest jump arcs in the game, making reaction anti-airing him trivial for all characters and forcing him to stay on the ground to play his neutral game.
- Unsafe: The Achilles' heel of Ukyo's mix-up game is that Tsubame Gaeshi is very unsafe and he can lose a lot of life if he overextends and guesses wrong. His long-ranged running tools such as his 66C and slides can also get him punished hard if thrown out on a whim.
- Below average health and damage: Ukyo takes more damage than most characters and needs to land a lot of hits for the win, affording him little room for error.
- Mediocre WFT: Ukyo's WFT has projectile invincibility on startup but is too slow to work well for this purpose. He can also only combo into it off of a deflect or a back throw.
|
Gameplan
Ukyo is best thought as a mix up character. Due to his variety of strengths, He can be played in a multitude of ways but to bring out his strengths he should be played mix heavy using moves like 3d and tsubami to knock down your opponent. Doing so will get you a high-low mix-up on your opponent's wake-up. You can also incorporate a tic throw which is done by 2d run-up grab which will lead into a grab micro walk 5b 236 heavy which will also give you a knockdown.
Neutral
Generally you want to control space and harass with 5B, 2a as your primary poke. Recoil cancel on block into 236S if you read they will press a button. Look for whiff punish with 5B, 2C, 66C, 6D, 66D, and Tsubame. Shut down jump-ins with Tsubame, 2B, and air-to-air j.B and j.C. Reflect projectiles with backdash Tsubame. Score a knockdown and use the momentum to either regain space or go in to apply his oki mixups. Ukyo is very good at punishing from all ranges, n.2B is 6 frames start up, 5B is 9 frames and combo into 236A, 2C is 12 frames and cover a lot of space. Since his low defense and low reward from throw combo (comparing to 5B xx 236A), it's not recommended to throw frequently as Ukyo.
Okizeme
Uses 2D to check low and then 3D / Tsubame, n.2B gives you plus frames if timed correctly, follow up with 214B / 3D / Tsubame mix up (both on hit and on block). 3D is safe on block if timed correctly, BD & TK Tsubame is strong but the risk is more than reward. 66B hits from behind and it covers all 3 ways of wake up, but it's very punishable on block, therefore don't abuse it especially when the opponent is at max rage.
Normal Moves
Far Slashes
5A
5A
|
| Damage
|
Guard
|
Startup
|
Active
|
Recovery
|
Total
|
Hit Adv
|
Block Adv
|
Guard Dmg
|
Cancel
|
Recoil
|
Deflectable
|
Unarmed
|
| 50
|
Mid
|
8
|
2
|
16
|
25
|
-5
|
-5
|
5
|
Yes
|
Yes
|
Yes
|
No
|
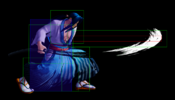
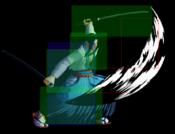
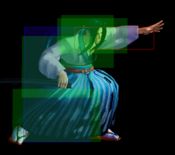
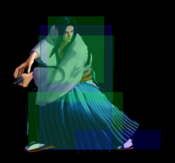
Good poke, slightly less range but 1 frame faster and safer on block, however it doesn't combo into 236S like far 5B makes it much less useful.
|
|
Toggle Hitboxes Toggle Hitboxes
|
5B
5B
|
| Damage
|
Guard
|
Startup
|
Active
|
Recovery
|
Total
|
Hit Adv
|
Block Adv
|
Guard Dmg
|
Cancel
|
Recoil
|
Deflectable
|
Unarmed
|
| 80
|
Mid
|
9
|
2
|
25
|
35
|
-6
|
-12
|
10
|
Yes
|
Yes
|
Yes
|
No
|
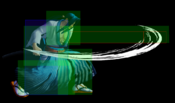
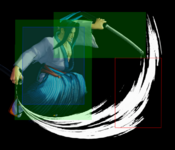
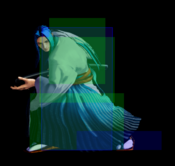
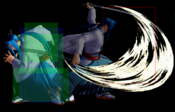
This is Ukyo's go-to normal move in neutral, and it combos into all versions of 236S if close enough. Very fast for a far B normal, you can whiff cancel into 214D to reduces its recovery, and recoil cancel into 236A to catch the opponent by surprise (although it's unsafe). You can combine these two together by input 5B xx 214D 236A quickly, he will throw an apple on whiff and combo on hit and recoil cancel on block (although takes some practice).
Since version 2.10, it has expanded lower hitbox.
|
|
Toggle Hitboxes Toggle Hitboxes
|
5C
5C
|
| Damage
|
Guard
|
Startup
|
Active
|
Recovery
|
Total
|
Hit Adv
|
Block Adv
|
Guard Dmg
|
Cancel
|
Recoil
|
Deflectable
|
Unarmed
|
| 240(160,80)
|
Mid
|
12
|
2 (7) 2
|
30
|
52
|
-4
|
-28
|
25
|
No
|
Yes
|
Disarm
|
No
|
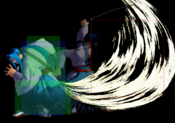
Fast heavy slash, but far 5B xx 236C combo is faster for punish with the same range and damage. Throw into 5C is useful to keep the opponent standing, for example during rage explosion it's much better to keep the pressure, rather than waiting for the opponent to wake up. Its first hit also deals a lot more damage than 5B, make it more likely to finish the opponent before they can rage explosion.
|
|
Toggle Hitboxes Toggle Hitboxes
|
2A
2A
|
| Damage
|
Guard
|
Startup
|
Active
|
Recovery
|
Total
|
Hit Adv
|
Block Adv
|
Guard Dmg
|
Cancel
|
Recoil
|
Deflectable
|
Unarmed
|
| 40
|
Mid
|
5
|
2
|
13
|
19
|
-2
|
-5
|
5
|
Yes
|
Yes
|
Yes
|
No
|
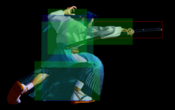
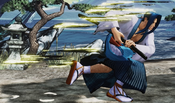
Fastest far slash normal. Less range than 5B but even faster. Relatively safe on block.
|
|
Toggle Hitboxes Toggle Hitboxes
|
2B
2B
|
| Damage
|
Guard
|
Startup
|
Active
|
Recovery
|
Total
|
Hit Adv
|
Block Adv
|
Guard Dmg
|
Cancel
|
Recoil
|
Deflectable
|
Unarmed
|
| 100
|
Mid
|
10
|
1 (1) 2
|
26
|
39
|
-9
|
-12
|
10
|
No
|
Yes
|
Yes
|
No
|
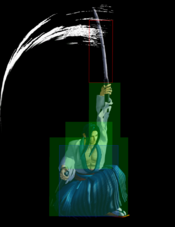
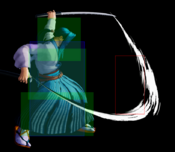
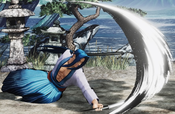
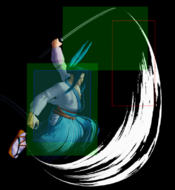
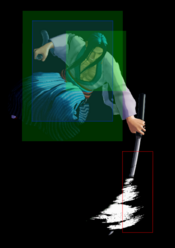
Useful anti-air, though finicky to time against many jump attacks. Be aware of spacing to not get near 2B instead. Very strong at protecting the space near and above his head, in a few situations where Tsubame doesn't work.
|
|
Toggle Hitboxes Toggle Hitboxes
|
2C
2C
|
| Damage
|
Guard
|
Startup
|
Active
|
Recovery
|
Total
|
Hit Adv
|
Block Adv
|
Guard Dmg
|
Cancel
|
Recoil
|
Deflectable
|
Unarmed
|
| 200
|
Mid
|
12
|
2
|
32
|
45
|
-6
|
-10
|
25
|
No
|
No
|
Disarm
|
No
|
Long range punisher and one of your best moves for whiff punishing. It's -10 on block making it difficult to punish when space correctly. But it's negative on hit making it punishable on hit by certain characters.
|
|
Toggle Hitboxes Toggle Hitboxes
|
Near Slashes
n.5A
n.5A
|
| Damage
|
Guard
|
Startup
|
Active
|
Recovery
|
Total
|
Hit Adv
|
Block Adv
|
Guard Dmg
|
Cancel
|
Recoil
|
Deflectable
|
Unarmed
|
| 30
|
Mid
|
5
|
3
|
9
|
16
|
+1
|
-2
|
5
|
Yes
|
No
|
Yes
|
No
|
No recoil animation. Use as an up-close defensive button in scramble situations.
|
|
Toggle Hitboxes Toggle Hitboxes
|
n.5B
n.5B
|
| Damage
|
Guard
|
Startup
|
Active
|
Recovery
|
Total
|
Hit Adv
|
Block Adv
|
Guard Dmg
|
Cancel
|
Recoil
|
Deflectable
|
Unarmed
|
| 90
|
Mid
|
8
|
2
|
22
|
31
|
-3
|
-12
|
10
|
Yes
|
Yes
|
Yes
|
No
|
Combos into 236S for damage and knockdown. Use as a close range punisher.
|
|
Toggle Hitboxes Toggle Hitboxes
|
n.2A
n.2A
|
| Damage
|
Guard
|
Startup
|
Active
|
Recovery
|
Total
|
Hit Adv
|
Block Adv
|
Guard Dmg
|
Cancel
|
Recoil
|
Deflectable
|
Unarmed
|
| 30
|
Mid
|
5
|
5
|
7
|
16
|
+1
|
-2
|
5
|
Yes
|
No
|
Yes
|
No
|
No recoil animation. Similar in use to n.5A.
|
|
Toggle Hitboxes Toggle Hitboxes
|
n.2B
n.2B
|
| Damage
|
Guard
|
Startup
|
Active
|
Recovery
|
Total
|
Hit Adv
|
Block Adv
|
Guard Dmg
|
Cancel
|
Recoil
|
Deflectable
|
Unarmed
|
| 80
|
Mid
|
6
|
6
|
12
|
23
|
+3
|
-2
|
10
|
Yes
|
No
|
Yes
|
No
|
Fastest attack that leads to a combo. Good frame advantage on hit and safe on block with many active frames, can be up to +8 on meaty for extra combo. It has no recoil animation, therefore n.2B cancel into 214S is completely safe on block and not interruptale (unless the opponent jumps or DP after blocking n.2B)
|
|
Toggle Hitboxes Toggle Hitboxes
|
n.2C
n.2C
|
| Damage
|
Guard
|
Startup
|
Active
|
Recovery
|
Total
|
Hit Adv
|
Block Adv
|
Guard Dmg
|
Cancel
|
Recoil
|
Deflectable
|
Unarmed
|
| 220(150,70)
|
Mid
|
15
|
3 (5) 2
|
28
|
52
|
-2
|
-28
|
25
|
No
|
Yes
|
Disarm
|
No
|
Does less damage than 5C but less negative on hit. Outclassed by other normals.
|
|
Toggle Hitboxes Toggle Hitboxes
|
Kicks
5D
5D
|
| Damage
|
Guard
|
Startup
|
Active
|
Recovery
|
Total
|
Hit Adv
|
Block Adv
|
Guard Dmg
|
Cancel
|
Recoil
|
Deflectable
|
Unarmed
|
| 50
|
Mid
|
8
|
4
|
15
|
26
|
-6
|
-9
|
5
|
No
|
No
|
No
|
Yes
|
Solid keepout kick with a nice hitbox.
|
|
Toggle Hitboxes Toggle Hitboxes
|
6D
6D
|
| Damage
|
Guard
|
Startup
|
Active
|
Recovery
|
Total
|
Hit Adv
|
Block Adv
|
Guard Dmg
|
Cancel
|
Recoil
|
Deflectable
|
Unarmed
|
| 40
|
Low
|
5
|
11
|
24
|
34
|
-8~+2
|
-17~-7
|
5
|
No
|
No
|
No
|
Yes
|
Fast low slide that doesn't knocks down since version 1.70, but plus frames on hit allows him to create new mix-ups. Good for long range punishing, stuffing dash in attempts, and catching people who stand block midscreen in fear of Tsubame. Unsafe on block unless spaced to tip range. (He would get throw even on hit from close range)
|
|
Toggle Hitboxes Toggle Hitboxes
|
2D
2D
|
| Damage
|
Guard
|
Startup
|
Active
|
Recovery
|
Total
|
Hit Adv
|
Block Adv
|
Guard Dmg
|
Cancel
|
Recoil
|
Deflectable
|
Unarmed
|
| 20
|
Low
|
6
|
4
|
8
|
17
|
+1
|
-2
|
5
|
No
|
No
|
No
|
Yes
|
Solid low kick and pressure tool, 1 frame slower than average but plus on hit and safe on block. Use to stagger into Tsubame / 3D / tick throw mix-up.
|
|
Toggle Hitboxes Toggle Hitboxes
|
3D
3D
|
| Damage
|
Guard
|
Startup
|
Active
|
Recovery
|
Total
|
Hit Adv
|
Block Adv
|
Guard Dmg
|
Cancel
|
Recoil
|
Deflectable
|
Unarmed
|
| 70
|
Low
|
5
|
10
|
18
|
32
|
KD
|
-11~-2
|
5
|
No
|
No
|
No
|
Yes
|
Super fast sweep with a good hitbox. This is your low mix-up with IOH Tsubame. One of your best moves to meaty with because since it's fast, active for a long time, hits low, safe on block (when meatied), and sets up 50/50 guessing situations for the opponent on their wake-up, since version 1.70 it's much more punishable on block and recover slower. n.2B into 3D is a very good block string and combos on meaty.
|
|
Toggle Hitboxes Toggle Hitboxes
|
Dash Normals
66A
66A
|
| Damage
|
Guard
|
Startup
|
Active
|
Recovery
|
Total
|
Hit Adv
|
Block Adv
|
Guard Dmg
|
Cancel
|
Recoil
|
Deflectable
|
Unarmed
|
| 40
|
Mid
|
11
|
7
|
9
|
26
|
-3
|
-19
|
5
|
No
|
Yes
|
Yes
|
No
|
Very unsafe on block and little reward on hit. Carries some momentum forward from his dash. Useful for space control with the long active frames and low recovery. Can also crossunder anti-air, though Ukyo can use 66C for that purpose.
|
|
Toggle Hitboxes Toggle Hitboxes
|
66B
66B
|
| Damage
|
Guard
|
Startup
|
Active
|
Recovery
|
Total
|
Hit Adv
|
Block Adv
|
Guard Dmg
|
Cancel
|
Recoil
|
Deflectable
|
Unarmed
|
| 110
|
Mid
|
27
|
2
|
36
|
64
|
KD
|
-22
|
10
|
No
|
Yes
|
Disarm
|
No
|
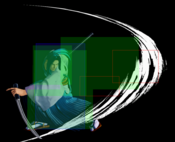
Ukyo runs half screen and slash, if the opponent is closer than round begin distance, he will go behind and hits cross up. It chases back roll and auto correct directions, can be very confusing to deal with on wakeup, but it's very unsafe on block and throwable before hitting, so don't overly abuse it.
|
|
Toggle Hitboxes Toggle Hitboxes
|
66C
66C
|
| Damage
|
Guard
|
Startup
|
Active
|
Recovery
|
Total
|
Hit Adv
|
Block Adv
|
Guard Dmg
|
Cancel
|
Recoil
|
Deflectable
|
Unarmed
|
| 150
|
Mid
|
11
|
4
|
34
|
48
|
KD
|
-12~-9
|
20
|
No
|
No
|
Disarm
|
No
|
Essentially running 2C. His highest damage long-range punisher. Since version 2.10 it now has longer active frames and reduced recovery.
|
|
Toggle Hitboxes Toggle Hitboxes
|
66D
66D
|
| Damage
|
Guard
|
Startup
|
Active
|
Recovery
|
Total
|
Hit Adv
|
Block Adv
|
Guard Dmg
|
Cancel
|
Recoil
|
Deflectable
|
Unarmed
|
| 40
|
Low
|
6
|
10
|
20
|
35
|
-7~+2
|
-16~-7
|
5
|
No
|
No
|
No
|
Yes
|
Very fast slide kick that NO LONGER knocks down, unsafe on block so spacing is very important. Space it correctly to make it difficult to punish on block.
|
|
Toggle Hitboxes Toggle Hitboxes
|
Air Normals
j.A
j.A
|
| Damage
|
Guard
|
Startup
|
Active
|
Recovery
|
Total
|
Hit Adv
|
Block Adv
|
Guard Dmg
|
Cancel
|
Recoil
|
Deflectable
|
Unarmed
|
| 40
|
High
|
7
|
10
|
-
|
-
|
-
|
-
|
5
|
No
|
No
|
No
|
No
|
Defensive air to air poke, very active.
|
|
Toggle Hitboxes Toggle Hitboxes
|
j.B
j.B
|
| Damage
|
Guard
|
Startup
|
Active
|
Recovery
|
Total
|
Hit Adv
|
Block Adv
|
Guard Dmg
|
Cancel
|
Recoil
|
Deflectable
|
Unarmed
|
| 100
|
High
|
5
|
4
|
-
|
-
|
-
|
-
|
10
|
No
|
No
|
No
|
No
|
Quick slash that hits below Ukyo then at a downwards angle. Decent air-to-air. Can be used as instant overhead or jump in cross up. Instant overhead is very punishable even on hit, only use it to close out a round.
|
|
Toggle Hitboxes Toggle Hitboxes
|
j.8C
j.8C
|
| Damage
|
Guard
|
Startup
|
Active
|
Recovery
|
Total
|
Hit Adv
|
Block Adv
|
Guard Dmg
|
Cancel
|
Recoil
|
Deflectable
|
Unarmed
|
| 160
|
High
|
10
|
4
|
-
|
-
|
-
|
-
|
20
|
No
|
No
|
No
|
No
|
Strong horizontal air-to-air with very good range.
|
|
Toggle Hitboxes Toggle Hitboxes
|
j.7/9C
j.7/9C
|
| Damage
|
Guard
|
Startup
|
Active
|
Recovery
|
Total
|
Hit Adv
|
Block Adv
|
Guard Dmg
|
Cancel
|
Recoil
|
Deflectable
|
Unarmed
|
| 150
|
High
|
11
|
4
|
-
|
-
|
-
|
-
|
20
|
No
|
No
|
No
|
No
|
General air-to-air, similar in use to anti-air Tsubame. Off of a forward jump air-to-air, you can take advantage of the air reset situation to dash behind the opponent's landing for mixup. Since Ukyo is so vulnerable to anti-air, you won't likely to use it as a jump in attack.
|
|
Toggle Hitboxes Toggle Hitboxes
|
j.D
j.D
|
| Damage
|
Guard
|
Startup
|
Active
|
Recovery
|
Total
|
Hit Adv
|
Block Adv
|
Guard Dmg
|
Cancel
|
Recoil
|
Deflectable
|
Unarmed
|
| 30,20
|
High
|
5
|
4 (4) 8
|
-
|
-
|
-
|
-
|
5
|
No
|
No
|
No
|
Yes
|
Kicks twice in the air but only hits once against airborne opponent, rarely hits twice against standing opponent. Use if you find yourself needing a quick air-to-air, or when unarmed.
|
|
Toggle Hitboxes Toggle Hitboxes
|
Unarmed Normals
u.5S
u.5S
|
| Damage
|
Guard
|
Startup
|
Active
|
Recovery
|
Total
|
Hit Adv
|
Block Adv
|
Guard Dmg
|
Cancel
|
Recoil
|
Deflectable
|
Unarmed
|
| 50
|
Mid
|
5
|
2
|
17
|
23
|
+2
|
-3
|
5
|
No
|
No
|
No
|
Only
|
Standard unarmed attack which is plus on hit.
|
|
Toggle Hitboxes Toggle Hitboxes
|
u.2S
u.2S
|
| Damage
|
Guard
|
Startup
|
Active
|
Recovery
|
Total
|
Hit Adv
|
Block Adv
|
Guard Dmg
|
Cancel
|
Recoil
|
Deflectable
|
Unarmed
|
| 50
|
Mid
|
6
|
2
|
17
|
24
|
+2
|
-3
|
5
|
No
|
No
|
No
|
Only
|
Similar to unarmed 5S but 1 frame slower with good range.
|
|
Toggle Hitboxes Toggle Hitboxes
|
ju.S
ju.S
|
| Damage
|
Guard
|
Startup
|
Active
|
Recovery
|
Total
|
Hit Adv
|
Block Adv
|
Guard Dmg
|
Cancel
|
Recoil
|
Deflectable
|
Unarmed
|
| 50
|
High
|
9
|
9
|
-
|
-
|
-
|
-
|
5
|
No
|
No
|
No
|
Only
|
Air to air slap, very active.
|
|
Toggle Hitboxes Toggle Hitboxes
|
u.66S
u.66S
|
| Damage
|
Guard
|
Startup
|
Active
|
Recovery
|
Total
|
Hit Adv
|
Block Adv
|
Guard Dmg
|
Cancel
|
Recoil
|
Deflectable
|
Unarmed
|
| 50
|
Mid
|
6
|
8
|
11
|
24
|
KD
|
-3
|
5
|
No
|
No
|
No
|
Only
|
Unarmed dash attack. Safe on block, very active.
|
|
Toggle Hitboxes Toggle Hitboxes
|
Universal Mechanics
Guard Break
Guard Break (Throw) 5C+D / 6C+D 5C+D / 6C+D 4C+D 4C+D
|
| Version
|
Damage
|
Guard
|
Startup
|
Active
|
Recovery
|
Total
|
Hit Adv
|
Block Adv
|
Guard Dmg
|
Cancel
|
Recoil
|
Deflectable
|
Unarmed
|
| Neutral / Forward
|
0
|
Throw
|
3
|
1
|
71
|
74
|
+20
|
-
|
-
|
-
|
-
|
-
|
Yes
|
| Back
|
0
|
Throw
|
5
|
1
|
69
|
74
|
+25
|
-
|
-
|
-
|
-
|
-
|
Yes
|
Universal throw, can follow up with combos. Back throw has slower start up but better frame advantage. There is no throw tech, but throws are very punishable on whiff.
|
|
Toggle Hitboxes Toggle Hitboxes
|
Surprise Attack
Surprise Attack (Overhead)
5B+C Armed Armed Unarmed Unarmed
|
| Version
|
Damage
|
Guard
|
Startup
|
Active
|
Recovery
|
Total
|
Hit Adv
|
Block Adv
|
Guard Dmg
|
Cancel
|
Recoil
|
Deflectable
|
Unarmed
|
| Armed
|
70
|
High
|
19
|
3
|
24
|
45
|
+1
|
-14
|
10
|
No
|
No
|
No
|
No
|
Fast universal overhead with very short range. The hop will avoid lows, throws, and some projectiles. Slightly plus on hit to maintain pressure after. A lower risk/reward alternative to Tsubame Gaeshi.
|
| Unarmed
|
60
|
High
|
20
|
2
|
34
|
45
|
±0
|
-13
|
10
|
No
|
No
|
No
|
Only
|
Universal unarmed overhead, doesn't knock down.
|
|
Toggle Hitboxes Toggle Hitboxes
|
Dodge
Dodge
5A+B
|
| Damage
|
Guard
|
Startup
|
Active
|
Recovery
|
Total
|
Hit Adv
|
Block Adv
|
Guard Dmg
|
Cancel
|
Recoil
|
Deflectable
|
Unarmed
|
| N/A
|
-
|
1
|
16
|
22
|
38
|
-
|
-
|
-
|
-
|
-
|
-
|
Yes
|
Universal dodge. Avoids all attacks for a brief moment, and is mainly used to avoid throws.
Complete invincibility from frames 1 to 10. Strike invincibility from frames 11 to 16.
|
|
Stance Break
Stance Break
A+B during Just Defense
|
| Damage
|
Guard
|
Startup
|
Active
|
Recovery
|
Total
|
Hit Adv
|
Block Adv
|
Guard Dmg
|
Cancel
|
Recoil
|
Deflectable
|
Unarmed
|
| 0
|
Mid
|
5
|
10
|
38
|
52
|
KD
|
-24
|
-
|
-
|
-
|
-
|
Yes
|
|
|
|
Toggle Hitboxes Toggle Hitboxes
|
Counter (Deflect) / Blade Catch
Counter (Deflect) / Blade Catch
236A+B Weapon Deflect Weapon Deflect Blade Catch Blade Catch
|
| Version
|
Damage
|
Guard
|
Startup
|
Active
|
Recovery
|
Total
|
Hit Adv
|
Block Adv
|
Guard Dmg
|
Cancel
|
Recoil
|
Deflectable
|
Unarmed
|
| Armed
|
0
|
N/A
|
2
|
12
|
33
|
46
|
+35~+59
|
-
|
-
|
-
|
-
|
-
|
No
|
Universal counter that works against mid-guard normal slashes. Upon successful counter, you can follow up with any attack except throws.
The amount of time to follow up depends on timing and the strength of slash, and deflecting medium slashes staggering the opponent for longest amount of time.
Additionally, if you deflect a heavy slash or running medium slash, the opponent will be disarmed.
|
| Unarmed
|
0
|
N/A
|
2
|
11
|
10
|
22
|
KD
|
-
|
-
|
-
|
-
|
-
|
Only
|
Universal unarmed counter, works against the same slashes as deflect.
Upon successful blade catch, your will disarm your opponent and knock down the opponent to the corner, regardless of the strength of slash.
|
|
Toggle Hitboxes Toggle Hitboxes
|
Rage Explosion
Rage Explosion
5A+B+C
|
| Damage
|
Guard
|
Startup
|
Active
|
Recovery
|
Total
|
Hit Adv
|
Block Adv
|
Guard Dmg
|
Cancel
|
Recoil
|
Deflectable
|
Unarmed
|
| 0
|
Unblockable
|
21
|
3
|
35
|
58
|
0
|
-
|
-
|
-
|
-
|
-
|
No
|
Activate the rage explosion gauge and push back the opponent, available once per match. In order to activate, the character must be on the ground with the weapon on hand.
It can be activated during hit stun / throw staggering / weapon deflected / recoil cancel / normal cancel / blocking, but not during action recovery.
It's nearly the same as max rage with extra damage buff (140% vs 120%), and it pauses the timer count down, also allows access to Lighting Blade.
The less amount of health remaining when activates, the more amount of rage explosion gauge it begins with.
Rage explosion ends if the gauge runs out, WFT connects, Lighting Blade used, or the round ended. Then the rage gauge disappears for the rest of match.
The activation push back is unblockable, and its hit-box extends all the way up to top of the screen.
|
|
Toggle Hitboxes Toggle Hitboxes
|
Lightning Blade
Lightning Blade (Issen)
5A+B+C during Rage Explosion
|
| Damage
|
Guard
|
Startup
|
Active
|
Recovery
|
Total
|
Hit Adv
|
Block Adv
|
Guard Dmg
|
Cancel
|
Recoil
|
Deflectable
|
Unarmed
|
| 300~709
|
Mid
|
9
|
8
|
65
|
81
|
KD
|
-44
|
-
|
-
|
-
|
-
|
No
|
Dashes full screen and slash across the opponent in classic style. Has full invincibility 1~16 and can anti-air. Damage scales up based on remaining health.
|
|
Toggle Hitboxes Toggle Hitboxes
|
Special Moves
Concealed Sabre Phantom Strike
Concealed Sabre Phantom Strike
236S Zanzou Fumikomi Giri Zanzou Fumikomi Giri Second hit Third hit
|
| Version
|
Damage
|
Guard
|
Startup
|
Active
|
Recovery
|
Total
|
Hit Adv
|
Block Adv
|
Guard Dmg
|
Cancel
|
Recoil
|
Deflectable
|
Unarmed
|
| A
|
100
|
Mid
|
16~18
|
2
|
34~37
|
51~56
|
KD(+107)
|
-20
|
12
|
-
|
-
|
-
|
No
|
| B
|
120 (20,100)
|
Mid
|
15~24
|
2 (25) 3
|
37~47
|
81~99
|
KD(+102)
|
-24
|
24
|
-
|
-
|
-
|
No
|
| C
|
160 (20,40,100)
|
Mid
|
15~24
|
2 (25) 2 (26) 2
|
44~54
|
115~134
|
KD(+105)
|
-39
|
26
|
-
|
-
|
-
|
No
|
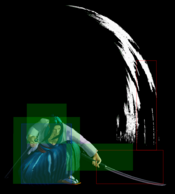
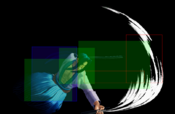
Pseudo-rekka that has Ukyo send afterimages to slice you. Strength determines range and amount of slashes. Startup and recovery depend on proximity to opponent. Combos off of throw and medium normals for solid damage, and more importantly a knockdown. Outside of combos, it is generally best to use this as a recoil cancel on blocked normals to dissuade the opponent from trying to press buttons. All versions are unsafe on block, but mixing up the amount of hits will make the opponent second guess when they can press a button and potentially miss their punish.
|
|
Toggle Hitboxes Toggle Hitboxes
|
Concealed Sabre Snowfall Slash
Concealed Sabre Snowfall Slash
214S Hiken Sasameyuki Hiken Sasameyuki Hit order varies between versions
|
| Version
|
Damage
|
Guard
|
Startup
|
Active
|
Recovery
|
Total
|
Hit Adv
|
Block Adv
|
Guard Dmg
|
Cancel
|
Recoil
|
Deflectable
|
Unarmed
|
| A
|
100(20x5)
|
Mid
|
19
|
29
|
16
|
63
|
+5
|
-2
|
20(4*5)
|
-
|
-
|
-
|
No
|
| B
|
160(20x8)
|
Mid
|
19
|
46
|
16
|
80
|
+5
|
-2
|
28(4*7)
|
-
|
-
|
-
|
No
|
| C
|
220(20x11)
|
Mid
|
22
|
46
|
24
|
113
|
-3
|
-10(Last Hit)
|
32(4*8)
|
-
|
-
|
-
|
No
|
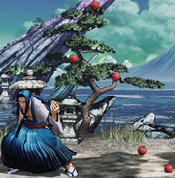
Ukyo throws an apple and slash it. Strength of the button determines amount of slashes. It deals decent amount of chip damage, and all versions are safe on block (vulnerable to projectiles and jump attacks if whiff completely). Mix it up with 214D to deceive the opponent.
|
|
Toggle Hitboxes Toggle Hitboxes
|
Swordless Sabre Snowfall Slash
Swordless Sabre Snowfall Slash
214D Hiken Sasameyuki Hiken Sasameyuki
|
| Damage
|
Guard
|
Startup
|
Active
|
Recovery
|
Total
|
Hit Adv
|
Block Adv
|
Guard Dmg
|
Cancel
|
Recoil
|
Deflectable
|
Unarmed
|
| N/A
|
-
|
-
|
-
|
-
|
22
|
-
|
-
|
-
|
-
|
-
|
-
|
Yes
|
To be an Ukyo main, you must throw at least 20 apples per round. Fakes his 214S series and only throws the apple. Best use is as a whiff cancel far 5B to shorten the recovery. One tactic with this move is to scare the opponent from approaching out of fear of the slash followup, then commit to 214A/B/C when you read that they will overextend. Also run up throw after 214D is another very good mix-up.
|
|
Concealed Sabre Swallow Swipe
Concealed Sabre Swallow Swipe
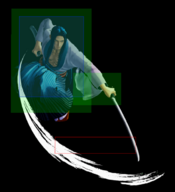
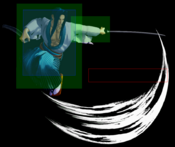
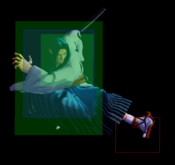
j.1236S Tsubame Gaeshi A/B hitboxes Faint blue boxes are for reflecting projectiles C/Rage hitboxes below
|
| Version
|
Damage
|
Guard
|
Startup
|
Active
|
Recovery
|
Total
|
Hit Adv
|
Block Adv
|
Guard Dmg
|
Cancel
|
Recoil
|
Deflectable
|
Unarmed
|
| A
|
140
|
High
|
3
|
5
|
16(Landing)
|
-
|
KD
|
-28(Backdash)
|
26
|
-
|
-
|
-
|
No
|
| B
|
160
|
High
|
3
|
5
|
23(Landing)
|
-
|
KD
|
-35(Backdash)
|
26
|
-
|
-
|
-
|
No
|
| C
|
180
|
High
|
10
|
7
|
41(Landing)
|
-
|
KD
|
-53(Backdash)
|
26
|
-
|
-
|
-
|
No
|
| Rage
|
222 (30x6,42)
|
High
|
3
|
7
|
41(Landing)
|
-
|
KD
|
-53(Backdash)
|
29
|
-
|
-
|
-
|
No
|
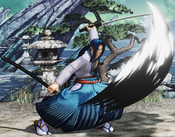
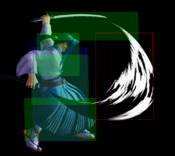
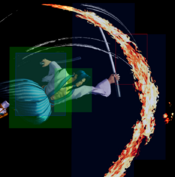
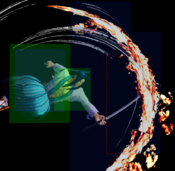
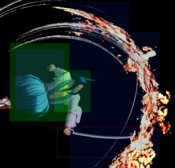
His classic signature move. Fast start up and far reaching, instant overhead that knocks down, also works as anti-air, fast punishing, and projectile reflector. The only downside is that it's very punishable on block.
There are 3 ways to input it, Regular Tsubame, Back Dash Tsubame and Tiger Knee Tsubame (refering to Sagat in Street Fighter series).
Regular Tsubame:
Regular Tsubame is generally only good for air to air, and the Rage version has very good range and it hits multiple times, however it's not quite easy to land all hits from far distance. It can also mix up with jumping attacks, but it's more punishable than TK Tsubame. Heavy version hits cross-up but only at specific distance and it's high risk and low reward. Because Ukyo's jump falls like a parachute, attacking from the air generally not a good idea.
BD Tsubame:
Backdash Tsubame has a quite few uses, to reflect projectiles while staying close to the ground, and to make his overhead safer on block at the cost of less range, and to anti-air against jump in or chasing back jump, and to hit opponent's extended hurtbox while poking. The input is 441236S. Essentially just backdash then input the Tsubame while you are airborne. Light version has the best risk reward ratio, and Rage BD Tsubame deals lots of damage, although it's difficult to land full hits. Tsubame reflects all reflectable projectiles, including Rimururu's rolling ice ball and Tam Tam's high skull. Backdash Tsubame start up is 11/11/18/11 frame for Light/Medium/Heavy/Rage versions respectively. NOTE: Instant Tsubame (412364S) is no longer a good way to input in the current version because it requires extremely fast execution. BD Tsubame also got nerf in version 1.70 for the landing distance, making it guaranteed punishable by far heavy slashes.
TK Tsubame:
TK Tsubame is used for anti-air, fast punish and instant overhead. Although it's more unsafe on block than BD Tsubame (punishable by a few SSMs), but Ukyo bounces back much further than BD Tsubame if spacing correctly, making it very unlikely to get punished by far heavy slash. However it's much more dangerous on whiff, while he lands right in front of the opponent. Light version has the best risk reward ratio, while Medium version is best for anti-air, Heavy version can anti-air even higher than medium version but will WHIFF a crouching opponent, and Rage version is good for anti-air with big damage (It's very unlikely to land full hits against crouching opponents).
The TK Tsubame input is 12369S. If you get 236S instead, you are pressing the button too early (you need to put a slight delay between hitting diagonal and hitting the button, precisely a 2 frame delay for the fastest possible TK. The timing is slower than VSP). If you get a jumping normal, you are pressing the button too late. Because jumping special input is accepted from frame 3, Light and Medium versions have 6 frame start up if input perfectly (extra 1 frame against crouching opponents), Rage version is one of Ukyo's fastest attacks coming out on frame 5 with no difference in startup between crouching and standing opponents (Compared to 3D it has more range and is more damaging. Just keep in mind the timing to get a 5 frame TK Tsubame is strict and messing it up could mean getting 236C). Heavy version is 12 frame start up but it's not good for punish, because it doesn't hit ground opponent immediately, and it whiffs against crouching opponents and sometimes even against standing opponents.
|
|
Toggle Hitboxes Toggle Hitboxes
|
Supers
Weapon Flipping Technique
6 Swallow Flash
236B+C Tsubame Rokuren Tsubame Rokuren
|
| Damage
|
Guard
|
Startup
|
Active
|
Recovery
|
Total
|
Hit Adv
|
Block Adv
|
Guard Dmg
|
Cancel
|
Recoil
|
Deflectable
|
Unarmed
|
| 384(448)
|
High
|
1+20~47
|
2
|
42 (landing)
|
-
|
KD
|
-53
|
-
|
-
|
-
|
-
|
No
|
Available only during Max Rage or Rage Explosion. Disarms on hit. Ukyo leaps forward for far distance. If he comes in contact with the opponent he then uses Tsubame six times in a row. Hitbox activates 5f after contact. It has projectile invincibility from frame 1 all the way until it hits or lands, makes it a decent tool for stopping opponent from spamming projectiles. His WFT doesn't combo from normals and is way too slow for anti-air, but it does combo from back throw. Since Ukyo's Max Rage lasts for quite a long time, you can add even more pressure on the opponent by adding throws into your 50-50 arsenal. If the opponent uses rage explosion to burst out, his max rage and WFT are still available, and the next successful weapon deflect is guaranteed to follow up with SSM.
- Becomes active after reaching a certain proximity to the opponent's center point, effectively ignoring extended hurtboxes. Proximity detection begins on frame 15 post super flash, lasts for up to 29 frames. Active frames appear 5 frames after detecting proximity.
|
|
Toggle Hitboxes Toggle Hitboxes
|
Super Special Move
Eightfold Path of Gloom
641236C+D Yaegasumi Yaegasumi
|
| Damage
|
Guard
|
Startup
|
Active
|
Recovery
|
Total
|
Hit Adv
|
Block Adv
|
Guard Dmg
|
Cancel
|
Recoil
|
Deflectable
|
Unarmed
|
| 680
|
Mid
|
10+21~36
|
3
|
59
|
-
|
KD
|
-39
|
-
|
-
|
-
|
-
|
No
|
Available only once per match. Full invincibility from frame 1 to 10. Ukyo runs full screen and slash the opponent while reciting a poem.
Although it's 1 frame slower than average, its dashing speed is very fast. It's guaranteed to connect after success weapon deflect and also a powerful long range punish tool.
For example Ukyo could back dash to dodge throw and punish it with SSM. It also punishes Basara's backdash 236C, as well as Tam Tam's jump C instant overhead on block or on standing hit.
Poem translation:
"Tasogare ya
Ryou no te ni saku
Manjushage"
"Twilight
Blooming in both hands
Red spider lily"
|
|
Toggle Hitboxes Toggle Hitboxes
|
Combos
- (n.5B / n.2B) xx 236C
Go-to punish combo with 250 / 240 damage, near 2B deals 10 less damage but start up 2 frames faster.
- (n.5B / n.2B) xx 214B
Combo which keeps the opponent on the ground, deals 230 / 220 damage from point blank distance, near 2B into 214S is safe on block (even the near 2B is blocked). 214B is preferred because 214C doesn't combo.
- 5B xx 236A/B/C
Mid range poke / punish combo, 236A is preferred because it always connects (unless the opponent extends his hurt box), while B and C version combo depends on the distance.
- 4CD / 5CD...
- (5B / n.5B) xx 236C
Micro walks forward to connect, n.5B deals a tiny bit more damage, walks one step forward after back throw to connect (or connects in the corner with ease).
- 5C
Micro walks forward to connect, same damage as above, sometimes it's better to keep the opponent on the ground (e.g. during rage explosion)
- Lighting Blade
Issen follow up, deals a little more damage than 5C if you have an almost full bar.
- 4CD WFT
Only connects from back throw.
- Jump B/C (deep hit)...
- 5C / 2C / n.2C
Standard knock down combo.
- (5B / n.5B / n.2B combos)
Same as regular combo.
- Lighting Blade
Issen combo.
- n.2B (meaty hits) 3D
Meaty pressure combo, only connects if near 2B hits meaty with good timing.
- n.2B (meaty hits) 12369A
Fancy combo, only connects if near 2B hits meaty perfectly.
- 214B (meaty hits) 3D
Fancy combo, only connects at point blank distance and 214B partially hits the waking up opponent (up to 5 hits).
- 214B (air hits) Lighting Blade
Fancy combo, only connects if the opponent jumps into the 214B. (Can be set up by making CPU back dash on block in the corner, then Ukyo uses n.2B cancels into 214B)
- 4CD 214C
Fancy combo, deals a little less damage than 5B follow up, a good way to set your opponent in rage.
Guard Crush
- 5C...
Combo from second hit...
- WFT
More damage than going straight into WFT.
- Lightning Blade
Universal Issen combo, combo from second hit.
- 214C
MAX damage out of GC but no knock down.
- 5C...
Cancel second hit...
- 214B xx 12369C(Rage)
Corner only combo with insane damage, somewhat inconsistent.
- 214D...
The second hit wouldn't come out...
- n.5B xx 236C
Standard combo.
- n.5C
Same damage as medium combo but no knock down.
- SSM
SSM follow up. (Be careful with opponent bursting to avoid it)
Videos
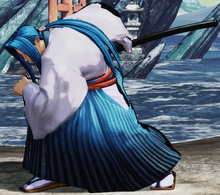
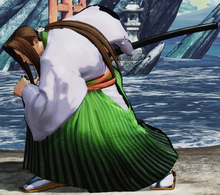
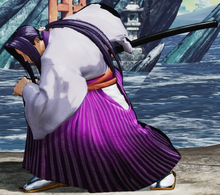
Colors
Default
3D Retro Costume
External Links
