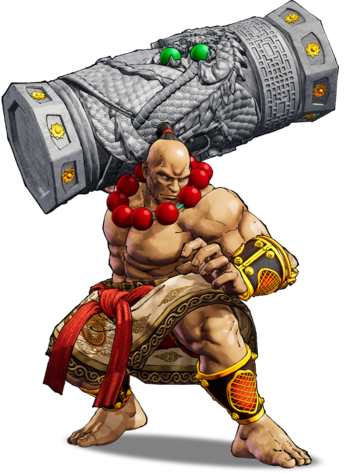
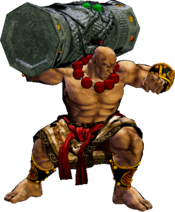
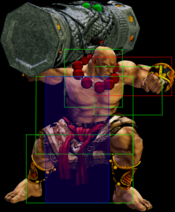
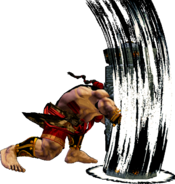
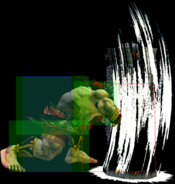
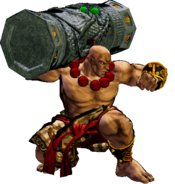
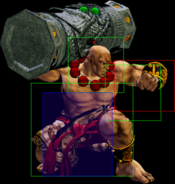
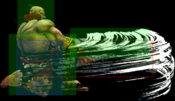
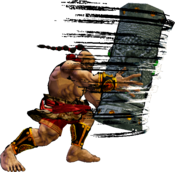
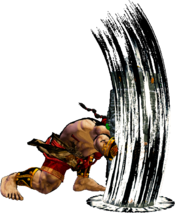
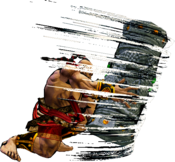
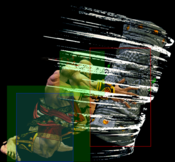
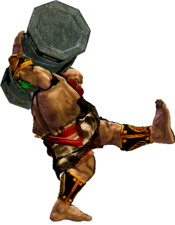
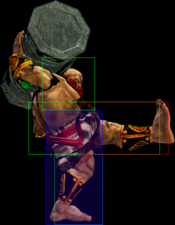
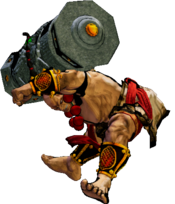
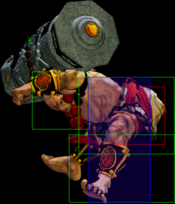
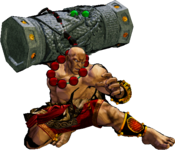
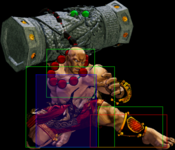
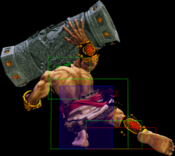
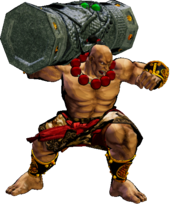
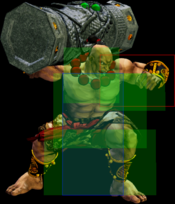
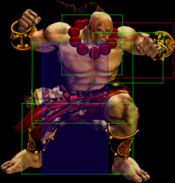
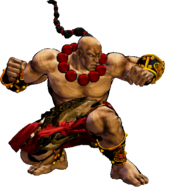
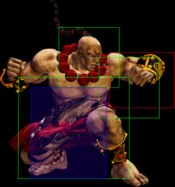
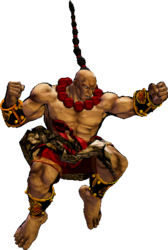
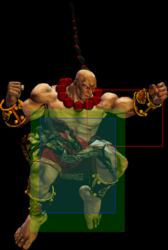
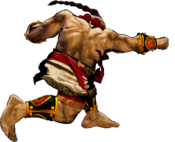
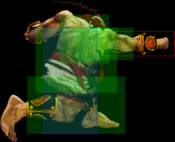
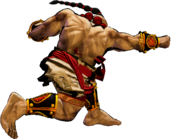
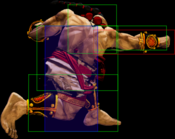
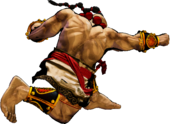
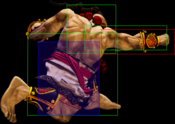
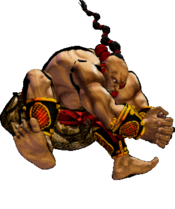
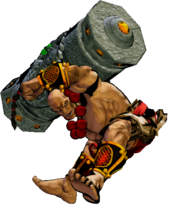
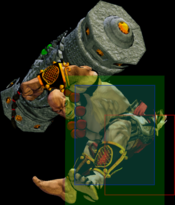
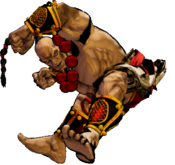
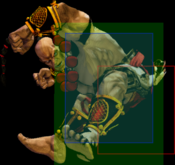
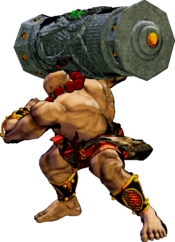
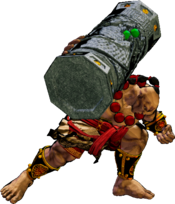
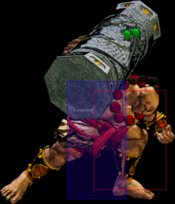
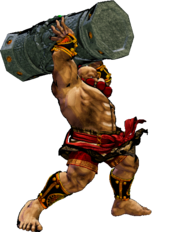
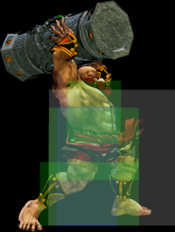
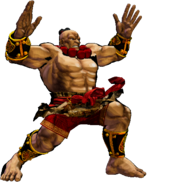
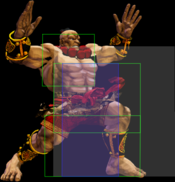
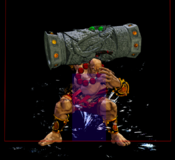
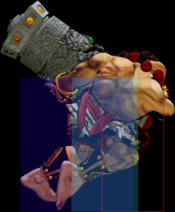
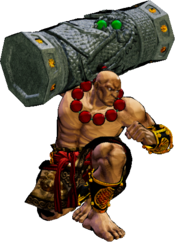
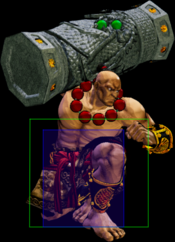
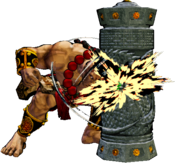
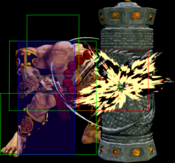
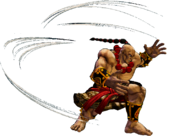
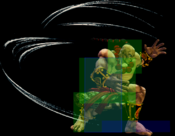
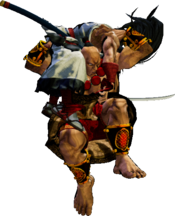
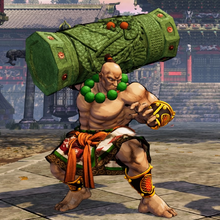
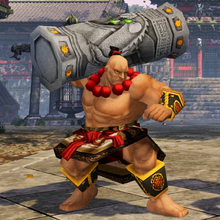
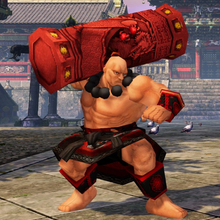
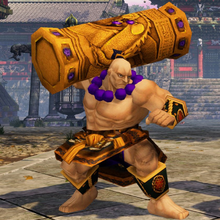
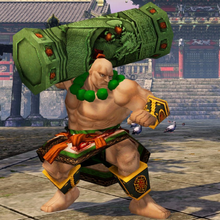
Wan-Fu
王虎 (ワンフー), Wanfū
|
- Damage Taken: 95%
- Rage Factor: 0.28
- Rage Duration: 8 seconds
- Jump: 48 frames (Slow)
- Forward Walk Speed: 0.25 (Slow)
- Back Walk Speed: 0.2 (Slow)
- Forward Crouch Walk Speed: 0.2
- Back Crouch Walk Speed: 0.085
- Dash Speed: 1.0 (Very Slow)
- Back Dash: 27 frames
- Weapon Pickup / Drop: 35 / 51 frames
|
Introduction
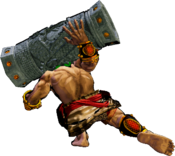
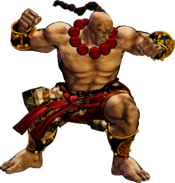
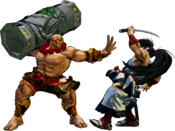
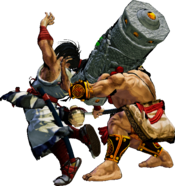
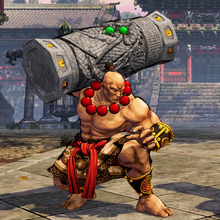
Wan-Fu makes his triumphant return to Samurai Shodown, ready to show off his great Chinese power. With his SamSho II physique and a fancy new pillar to match, Wan-Fu is as hardy as he looks, being able to scramble you with or without his weapon in hand. With the pillar, he comes packed with high-damage combos and pillar tosses which all leave him plus on block, including a crossup variant. When unarmed, Wan-Fu gains access to a quick, far-reaching command grab and heavy punches, which enable him to continue his momentum with a simple-but-effective strike/throw mixup while away from his weapon. In concept, Wan-Fu plays an explosive offense that flows between having turn-stealing pillar throws and hard-hitting grapples.
However, his strong vortex ability comes at the cost of his neutral game, with his pillar only reaching so far and his fists even less so. Against characters who can keep him out effortlessly, Wan-Fu must often bet on a pillar throw or similar risks to score a knockdown, let alone make it into close range. If that fails, there's not much an unarmed Wan-Fu can do but soldier on.
Playstyle
 Wan-Fu is a midrange specialist that can unlock powerful strike-throw offense by throwing his weapon right at you. Wan-Fu is a midrange specialist that can unlock powerful strike-throw offense by throwing his weapon right at you.
|
| Strengths |
Weaknesses
|
- Good when disarmed: Wan-Fu is much more capable than the average character when disarmed, owing to his fantastic unarmed normals and unique unarmed command grab that allows him to establish strike/throw pressure.
- Good pokes: Wan-Fu has great B buttons for playing the midrange. He also has very deep-hitting jump normals that are hard to counter-poke.
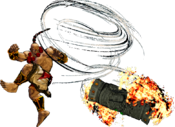
- Pillar throw: True Confucius Thunder Bomb aka "pillar throw" is a peculiar special that disarms Wan-Fu but is very plus on block and has lots of active frames and an enormous hitbox. It's a swiss army knife that works well for crossup gimmicks, recoil reversals, anti-airing and anti-fireball and allows him to setup his unarmed pressure game.
- Low-profile crouch walk: Wan-Fu's crouch walk allows him to duck under certain high-profile moves in neutral, such as many character's f.5Bs.
|
- Needs to disarm himself: In order to effectively make use of pillar throw, Wan-Fu needs to disarm himself constantly. Despite the strength of his unarmed game, this comes with the usual caveats of being disarmed and he can be caught in a bad situation if he's disarmed when the opponent rage explodes.
- Mediocre WFT: Wan-Fu's WFT can only be combo'd off a back throw and disarms himself regardless of if it hits or not. This means he needs to commit to his unarmed game if he chooses to land WFT or to give up the knockdown by picking back up his weapon.
- No cancels from far: Wan-Fu's only cancellable normals are his proximity normals, reducing the effectiveness of his punishes.
- Crouch walk gives up space: Wan-Fu has both a forward and backward crouch walk, meaning that he has to back up towards the corner in order to defend with crouch blocking.
- Big: As a wider-than-average character, Wan-Fu is subject to unique crossups.
|
Gameplan
Armed
Wan-Fu has a few important tools here that he lacks without his weapon - namely recoil cancels, pillar tosses and better anti-airs. 5B and 66B are your best options to recoil stuff into, and in neutral Wan-Fu ideally wants to be within range to connect these. His light pillar swing is a relatively safe RC option, but Wan-Fu can also recoil cancel into one of his pillar tosses as a wager to win neutral. In addition to giving him a high profile, the resulting explosion of these pillar tosses grants Wan-Fu plenty of advantage on block, giving him time to start his unarmed mixup game. The heavy pillar toss is particularly useful, as Wan-Fu has the potential to sneak in some dirty crossups (e.g. spacing the toss so the pillar will hit mid-air while Wan-Fu is flying in front of them, then explode while he's landing behind them). Keep an eye on where each toss will make the pillar land, in addition to considering where your opponent will be upon the explosion. A knowledgeable opponent will use backdashes to escape the range of your heavy pillar toss and punish your landing if it whiffs, so don't just throw it out randomly. For all of your pillar tosses, 5B range gives you the most flexibility when choosing which pillar to throw.
If you score a knockdown, then Wan-Fu has a decent vortex game with standard tools such as running kicks and overheads timed and spaced to cover both front and neutral wakeups. A weird quirk with his overhead when armed is that it doesn't knock down, but can be linked into a light combo if it hits late enough. If you're feeling lucky, you can also go for his 2C, his pillar sweep, which knocks down and does a good amount of damage all at the cost of having heavy recoil (read: free damage for opponents with far B combos). Even riskier is his 66C, which has a surprisingly high hitbox for catching jumpers but doesn't even recoil. Finally, the aforementioned heavy pillar toss is great for his vortex but requires good spacing.
While he's still got his pillar, Wan-Fu has decent anti-air options. Though he has a DP, only the Rage version is invincible on startup - however, his heavy DP has some upper-body invuln. His pillar swings also serve as a far anti-air if needs be. As both of these are situational (his DP's hitboxes are very narrow), Wan-Fu often relies on his air-to-airs to swat opponents out of the air, with his j.B in particular reaching far enough that Wan-Fu can air-to-air at a reasonable distance. The drawback to these is that they come out slow and will often get beat by other air normals. Wan-Fu usually has to start his jumping slashes early, but it is possible for opponents to catch on to this.
Wan-Fu's last line of air defense is his jumping pillar toss. This is Wan-Fu's best anti-air option by far thanks to its great big hitbox and its active frames even if Wan-Fu gets hit after it has come out (the pillar won't leave his hands if he is hit during startup, however). Another important property of this move is that Wan-Fu bounces back after throwing the pillar, travelling further back the higher he throws it. Given the slight pause as he throws it, this can also be used to bait an anti-air Issen if timed right (if your opponent isn't expecting it, that is - if they are, well aren't you fucked).
Unarmed
After losing the pillar, Wan-Fu shifts gears into a new playstyle. Unlike most characters when unarmed, Wan-Fu retains a lot of basic tools that allow him to function reasonably well, including crossups, a great overhead, strong meaties and a command grab. However, his lack of range when armed is compounded here and he struggles even harder against strong zoners like Mina - while his pillar at least gives him one shot to break through their defense, here he can only play patiently, walking forward and JD'ing his way through. Also keep in mind that you can't Rage Explode while unarmed.
When you're up close, you have quite a few options. As a grappler, opponents will naturally fear your five-frame, long-reaching, hard-hitting command grab, but SamSho's one-frame jumps, backdashes and dodges make it easy to avoid. Luckily, you have your trusty heavy punch for just the occasion. The standing version is what you'll want to use, as it reaches higher than when crouching and it always knocks down on hit. Not only does its great range catch both jumpers and backdashers, but it's quick enough that you actually recover two frames quicker than a dodge on the same frame (when done meaty enough, this practically guarantees a command grab against a dodge). Failing that, his jumping heavy punch will always knock down an airborne opponent and it also does a decent amount of damage. Regarding the command grab itself, your best options to tick into it are 2S and 2D - two of either from point blank will still leave you with enough range to land the command grab, assuming they don't jump out.
Wan-Fu still retains a basic-but-effective vortex without his weapon. His unarmed overhead knocks down on hit, so there is no longer a need to space this to connect a link combo. Furthermore, its high profile means that this can also catch jumpers. Be careful with landing this meaty all the time though, as some opponents can use the pre-animation invuln of SSMs to punish you hard. Aside from that, Wan-Fu also keeps his running kick for the vortex and his 6D as a much safer meaty option.
While the unarmed state has its own set of advantages, its main drawback is that its burst damage simply doesn't compare to what Wan-Fu is capable of with his weapon, especially when combos are thrown into the mix. This is your main incentive for retrieving your pillar, along with all the other boons that holding a weapon grants you.
Normal Moves
Far Slashes
5A
5A
|
| Damage
|
Guard
|
Startup
|
Active
|
Recovery
|
Total
|
Hit Adv
|
Block Adv
|
Guard Dmg
|
Cancel
|
Recoil
|
Deflectable
|
Unarmed
|
| 30
|
Mid
|
6
|
4
|
11
|
20
|
+1
|
-2
|
5
|
Yes
|
No
|
No
|
No
|
Quick elbow strike. Combo-able into light specials and good to keep the opponent away during scrambles since it can't be deflected.
|
|
Toggle Hitboxes Toggle Hitboxes
|
5B
5B
|
| Damage
|
Guard
|
Startup
|
Active
|
Recovery
|
Total
|
Hit Adv
|
Block Adv
|
Guard Dmg
|
Cancel
|
Recoil
|
Deflectable
|
Unarmed
|
| 100
|
Mid
|
13
|
4
|
21
|
37
|
-4
|
-12
|
10
|
No
|
Yes
|
Yes
|
No
|
Pillar thrust. You'll have to use this for a punish if you're not quite in range for more damaging options. This is also useful for recoil cancels.
|
|
Toggle Hitboxes Toggle Hitboxes
|
5C
5C
|
| Damage
|
Guard
|
Startup
|
Active
|
Recovery
|
Total
|
Hit Adv
|
Block Adv
|
Guard Dmg
|
Cancel
|
Recoil
|
Deflectable
|
Unarmed
|
| 280
|
Mid
|
25
|
2
|
44
|
70
|
-6
|
-16
|
25
|
No
|
Yes
|
Disarm
|
No
|
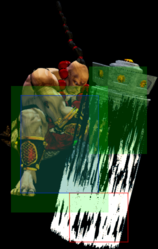
Wan-Fu slams his pillar to the ground. Less range than his far mediums. Your highest-damaging normal. This causes a heavy recoil on block. An esoteric about this move is that, if it trades, then Wan-Fu can follow up with another heavy slash or something else.
|
|
Toggle Hitboxes Toggle Hitboxes
|
2A
2A
|
| Damage
|
Guard
|
Startup
|
Active
|
Recovery
|
Total
|
Hit Adv
|
Block Adv
|
Guard Dmg
|
Cancel
|
Recoil
|
Deflectable
|
Unarmed
|
| 30
|
Mid
|
7
|
4
|
11
|
21
|
+1
|
-2
|
5
|
Yes
|
No
|
No
|
No
|
Quick elbow strike but lower to the ground. Combo-able into light specials.
|
|
Toggle Hitboxes Toggle Hitboxes
|
2B
2B
|
| Damage
|
Guard
|
Startup
|
Active
|
Recovery
|
Total
|
Hit Adv
|
Block Adv
|
Guard Dmg
|
Cancel
|
Recoil
|
Deflectable
|
Unarmed
|
| 120
|
Mid
|
17
|
3
|
28
|
41
|
-4
|
-12
|
10
|
No
|
Yes
|
Yes
|
No
|
Low pillar thrust. These far mediums are your longest-reaching pokes.
|
|
Toggle Hitboxes Toggle Hitboxes
|
2C
2C
|
| Damage
|
Guard
|
Startup
|
Active
|
Recovery
|
Total
|
Hit Adv
|
Block Adv
|
Guard Dmg
|
Cancel
|
Recoil
|
Deflectable
|
Unarmed
|
| 180
|
Low
|
16
|
4
|
27
|
46
|
KD(+94)
|
-28
|
25
|
No
|
No
|
No
|
No
|
Long-ranged sweep. Knocks down, but is unsafe. Fortunately, you can recoil cancel this.
|
|
Toggle Hitboxes Toggle Hitboxes
|
Near Slashes
n.5B
n.5B
|
| Damage
|
Guard
|
Startup
|
Active
|
Recovery
|
Total
|
Hit Adv
|
Block Adv
|
Guard Dmg
|
Cancel
|
Recoil
|
Deflectable
|
Unarmed
|
| 80
|
Mid
|
8
|
3
|
23
|
33
|
-3
|
-12
|
10
|
Yes
|
Yes
|
Disarm
|
No
|
These close mediums are your main combo tools. Compared to n.2B, this comes out faster and works better as a meaty. It can also be used in niche anti-air situations e.g. vs. Charlotte.
|
|
Toggle Hitboxes Toggle Hitboxes
|
n.5C
n.5C
|
| Damage
|
Guard
|
Startup
|
Active
|
Recovery
|
Total
|
Hit Adv
|
Block Adv
|
Guard Dmg
|
Cancel
|
Recoil
|
Deflectable
|
Unarmed
|
| 220
|
Mid
|
17
|
3
|
28
|
47
|
-3
|
-28
|
25
|
No
|
Yes
|
Disarm
|
No
|
Close punishment tool. Most of the time you'll want to use your BnB punishes over this, as they do more damage and knock down. This causes a heavy recoil on block.
|
|
Toggle Hitboxes Toggle Hitboxes
|
n.2B
n.2B
|
| Damage
|
Guard
|
Startup
|
Active
|
Recovery
|
Total
|
Hit Adv
|
Block Adv
|
Guard Dmg
|
Cancel
|
Recoil
|
Deflectable
|
Unarmed
|
| 90
|
Mid
|
13
|
4
|
21
|
37
|
-2
|
-12
|
10
|
Yes
|
Yes
|
Yes
|
No
|
Does a smidge more damage than n.5B, but the extra two frames of startup mean that it's harder to connect in back throw combos and it punishes a few less things. Go for this if you know you've got enough time.
|
|
Toggle Hitboxes Toggle Hitboxes
|
Kicks
5D
5D
|
| Damage
|
Guard
|
Startup
|
Active
|
Recovery
|
Total
|
Hit Adv
|
Block Adv
|
Guard Dmg
|
Cancel
|
Recoil
|
Deflectable
|
Unarmed
|
| 50
|
Mid
|
12
|
4
|
13
|
28
|
-1
|
-3
|
5
|
No
|
No
|
No
|
Yes
|
Mighty foot. It's safe on block and has okay reach by Wan-Fu standards, but it's not a move you'll use often. Landing this will put you in the right distance for a spaced overhead.
|
|
Toggle Hitboxes Toggle Hitboxes
|
6D
6D
|
| Damage
|
Guard
|
Startup
|
Active
|
Recovery
|
Total
|
Hit Adv
|
Block Adv
|
Guard Dmg
|
Cancel
|
Recoil
|
Deflectable
|
Unarmed
|
| 60
|
Mid
|
10
|
5
|
20
|
34
|
KD(+100)
|
-9
|
5
|
No
|
No
|
No
|
Yes
|
Goofy-looking, but not a bad move for what it is. Useful as a punish sometimes for its quick startup, decent range and knockdown properties.
|
|
Toggle Hitboxes Toggle Hitboxes
|
2D
2D
|
| Damage
|
Guard
|
Startup
|
Active
|
Recovery
|
Total
|
Hit Adv
|
Block Adv
|
Guard Dmg
|
Cancel
|
Recoil
|
Deflectable
|
Unarmed
|
| 20
|
Low
|
5
|
4
|
9
|
17
|
0
|
-3
|
5
|
No
|
No
|
No
|
Yes
|
Wan-Fu's quickest normal. The pushback on these is small enough that you can fire off two of these from point blank and still be able to land your command grab. Otherwise not very useful.
|
|
Toggle Hitboxes Toggle Hitboxes
|
3D
3D
|
| Damage
|
Guard
|
Startup
|
Active
|
Recovery
|
Total
|
Hit Adv
|
Block Adv
|
Guard Dmg
|
Cancel
|
Recoil
|
Deflectable
|
Unarmed
|
| 70
|
Low
|
12
|
4
|
22
|
37
|
KD(+99)
|
-9
|
5
|
No
|
No
|
No
|
Yes
|
Long-ranged sweep. Not a bad tool, especially when you're unarmed.
|
|
Toggle Hitboxes Toggle Hitboxes
|
Dash Normals
66A
66A
|
| Damage
|
Guard
|
Startup
|
Active
|
Recovery
|
Total
|
Hit Adv
|
Block Adv
|
Guard Dmg
|
Cancel
|
Recoil
|
Deflectable
|
Unarmed
|
| 50
|
Mid
|
5
|
7
|
18
|
29
|
-4
|
-9
|
5
|
No
|
No
|
No
|
No
|
Running elbow. Not cancellable unlike the other light slashes.
|
|
Toggle Hitboxes Toggle Hitboxes
|
66B
66B
|
| Damage
|
Guard
|
Startup
|
Active
|
Recovery
|
Total
|
Hit Adv
|
Block Adv
|
Guard Dmg
|
Cancel
|
Recoil
|
Deflectable
|
Unarmed
|
| 100
|
Mid
|
12
|
4
|
21
|
37
|
-4
|
-35
|
10
|
No
|
Yes
|
Disarm
|
No
|
Running pillar thrust. It has more range than 66C and it is recoil cancellable. Despite its heavy recoil it is great for cancelling into something like a pillar toss or a swing. You should aim to stay in a range where you can comfortably connect this or his other medium slashes.
|
|
Toggle Hitboxes Toggle Hitboxes
|
66C
66C
|
| Damage
|
Guard
|
Startup
|
Active
|
Recovery
|
Total
|
Hit Adv
|
Block Adv
|
Guard Dmg
|
Cancel
|
Recoil
|
Deflectable
|
Unarmed
|
| 150
|
Mid
|
15
|
4
|
36
|
54
|
KD(+63)
|
-17
|
20
|
No
|
Yes
|
Disarm
|
No
|
Reaches deceptively high up, so it can catch jumpers who think you're going for a run-up grab. This is a great move for punishing with - not necessarily in terms of damage, but because it grants a close knockdown. This is a good lead into starting your vortex game. You can't recoil cancel this, so be careful.
|
|
Toggle Hitboxes Toggle Hitboxes
|
66D
66D
|
| Damage
|
Guard
|
Startup
|
Active
|
Recovery
|
Total
|
Hit Adv
|
Block Adv
|
Guard Dmg
|
Cancel
|
Recoil
|
Deflectable
|
Unarmed
|
| 70
|
Low
|
11
|
3
|
27
|
40
|
KD(+95)
|
-13
|
5
|
No
|
No
|
No
|
Yes
|
Standard low-hitting running kick. As good for your vortex game as these usually are, especially given that this one retains 3D's relatively long range.
|
|
Toggle Hitboxes Toggle Hitboxes
|
Air Normals
j.A
j.A
|
| Damage
|
Guard
|
Startup
|
Active
|
Recovery
|
Total
|
Hit Adv
|
Block Adv
|
Guard Dmg
|
Cancel
|
Recoil
|
Deflectable
|
Unarmed
|
| 50
|
High
|
9
|
7
|
-
|
-
|
-
|
-
|
5
|
No
|
No
|
No
|
No
|
Crosses up. Easier to land as a jump-in than j.D overall and does a good job at stuffing things.
|
|
Toggle Hitboxes Toggle Hitboxes
|
j.B
j.B
|
| Damage
|
Guard
|
Startup
|
Active
|
Recovery
|
Total
|
Hit Adv
|
Block Adv
|
Guard Dmg
|
Cancel
|
Recoil
|
Deflectable
|
Unarmed
|
| 100
|
High
|
11
|
4
|
-
|
-
|
-
|
-
|
10
|
No
|
No
|
No
|
No
|
Air-to-air. Allows for far jump-in combos. Its startup is sluggish so you'll want to start this early when anti-airing. Works well when jumping away.
|
|
Toggle Hitboxes Toggle Hitboxes
|
j.C
j.C Frame 15 above, frame 16 below
|
| Damage
|
Guard
|
Startup
|
Active
|
Recovery
|
Total
|
Hit Adv
|
Block Adv
|
Guard Dmg
|
Cancel
|
Recoil
|
Deflectable
|
Unarmed
|
| 150
|
High
|
15
|
2
|
-
|
-
|
-
|
-
|
20
|
No
|
No
|
No
|
No
|
What you usually want to jump in with. Covers good vertical distance, but isn't the best air-to-air given its slow startup and poor horizontal reach.
|
|
Toggle Hitboxes Toggle Hitboxes
|
j.D
j.D
|
| Damage
|
Guard
|
Startup
|
Active
|
Recovery
|
Total
|
Hit Adv
|
Block Adv
|
Guard Dmg
|
Cancel
|
Recoil
|
Deflectable
|
Unarmed
|
| 30
|
High
|
8
|
9
|
-
|
-
|
-
|
-
|
5
|
No
|
No
|
No
|
Yes
|
A staple of his moveset since 1993. This is your crossup for when you don't have your pillar on you. Has great priority like you would expect from a move like this, even beating moves like Iroha's far 5C.
|
|
Toggle Hitboxes Toggle Hitboxes
|
Unarmed Normals
u.5S
u.5A/B
|
| Damage
|
Guard
|
Startup
|
Active
|
Recovery
|
Total
|
Hit Adv
|
Block Adv
|
Guard Dmg
|
Cancel
|
Recoil
|
Deflectable
|
Unarmed
|
| 50
|
Mid
|
6
|
4
|
11
|
20
|
+1
|
-2
|
5
|
No
|
No
|
No
|
Only
|
It's 5A but you can't cancel it.
|
|
Toggle Hitboxes Toggle Hitboxes
|
u.2S
u.2A/B
|
| Damage
|
Guard
|
Startup
|
Active
|
Recovery
|
Total
|
Hit Adv
|
Block Adv
|
Guard Dmg
|
Cancel
|
Recoil
|
Deflectable
|
Unarmed
|
| 50
|
Mid
|
6
|
4
|
12
|
21
|
0
|
-3
|
5
|
No
|
No
|
No
|
Only
|
It's 2A but you can't cancel it. Like 2D, hitting two of these at point blank still leaves you at a range where you can land your command grab.
|
|
Toggle Hitboxes Toggle Hitboxes
|
ju.S
ju.A/B
|
| Damage
|
Guard
|
Startup
|
Active
|
Recovery
|
Total
|
Hit Adv
|
Block Adv
|
Guard Dmg
|
Cancel
|
Recoil
|
Deflectable
|
Unarmed
|
| 50
|
High
|
6
|
5
|
-
|
-
|
-
|
-
|
5
|
No
|
No
|
No
|
Only
|
|
|
|
Toggle Hitboxes Toggle Hitboxes
|
u.66S
u.66S
|
| Damage
|
Guard
|
Startup
|
Active
|
Recovery
|
Total
|
Hit Adv
|
Block Adv
|
Guard Dmg
|
Cancel
|
Recoil
|
Deflectable
|
Unarmed
|
| 50
|
Mid
|
8
|
4
|
19
|
30
|
KD(+105)
|
-7
|
5
|
No
|
No
|
No
|
Only
|
Looks like his u.5C and knocks down like it, but doesn't do damage equivalent to it. Bummer.
|
|
Toggle Hitboxes Toggle Hitboxes
|
u.5C
u.5C
|
| Damage
|
Guard
|
Startup
|
Active
|
Recovery
|
Total
|
Hit Adv
|
Block Adv
|
Guard Dmg
|
Cancel
|
Recoil
|
Deflectable
|
Unarmed
|
| 100
|
Mid
|
12
|
3
|
22
|
36
|
KD(+102)
|
-6
|
12
|
No
|
No
|
No
|
Only
|
God hand. Reaches fairly far, does good damage and knocks down. Great as a meaty if you suspect they will try to jump out of your command grab.
|
|
Toggle Hitboxes Toggle Hitboxes
|
u.2C
u.2C
|
| Damage
|
Guard
|
Startup
|
Active
|
Recovery
|
Total
|
Hit Adv
|
Block Adv
|
Guard Dmg
|
Cancel
|
Recoil
|
Deflectable
|
Unarmed
|
| 100
|
Mid
|
12
|
3
|
22
|
36
|
+1
|
-4
|
12
|
No
|
No
|
No
|
Only
|
God hand but lower. This doesn't knock down but hurts just the same.
|
|
Toggle Hitboxes Toggle Hitboxes
|
ju.C
ju.C
|
| Damage
|
Guard
|
Startup
|
Active
|
Recovery
|
Total
|
Hit Adv
|
Block Adv
|
Guard Dmg
|
Cancel
|
Recoil
|
Deflectable
|
Unarmed
|
| 90
|
High
|
14
|
3
|
-
|
-
|
KD
|
-
|
12
|
No
|
No
|
No
|
Only
|
Remember Kyo's j.2C? Well, this is just that. Knocks down if it hits an opponent in the air and is useful as a jump-in.
|
|
Toggle Hitboxes Toggle Hitboxes
|
Universal Mechanics
Guard Break
Guard Break (Throw)
5/6C+D / 4C+D Neutral / Forward Throw Back Throw Back Throw
|
| Version
|
Damage
|
Guard
|
Startup
|
Active
|
Recovery
|
Total
|
Hit Adv
|
Block Adv
|
Guard Dmg
|
Cancel
|
Recoil
|
Deflectable
|
Unarmed
|
| Neutral / Forward
|
0
|
Throw
|
3
|
1
|
71
|
74
|
+20
|
N/A
|
-
|
No
|
No
|
No
|
Yes
|
Universal throw. Can be followed up with an attack.
|
| Back
|
0
|
Throw
|
5
|
1
|
69
|
74
|
+25
|
N/A
|
-
|
No
|
No
|
No
|
Yes
|
Universal throw. Can be followed up with an attack.
|
|
Toggle Hitboxes Toggle Hitboxes
|
Surprise Attack
Surprise Attack (Overhead)
5B+C Armed Armed Unarmed Unarmed
|
| Version
|
Damage
|
Guard
|
Startup
|
Active
|
Recovery
|
Total
|
Hit Adv
|
Block Adv
|
Guard Dmg
|
Cancel
|
Recoil
|
Deflectable
|
Unarmed
|
| Armed
|
60
|
High
|
20
|
7
|
20
|
46
|
+1~+7
|
-14~-8
|
10
|
No
|
No
|
No
|
No
|
Universal overhead. Does not knock down, but can be linked from into a light slash if spaced far enough.
|
| Unarmed
|
60
|
High
|
20
|
7
|
20
|
46
|
KD
|
-14~-8
|
10
|
No
|
No
|
No
|
Only
|
Universal unarmed overhead. Knocks down on hit.
|
|
Toggle Hitboxes Toggle Hitboxes
|
Dodge
Dodge
5A+B
|
| Damage
|
Guard
|
Startup
|
Active
|
Recovery
|
Total
|
Hit Adv
|
Block Adv
|
Guard Dmg
|
Cancel
|
Recoil
|
Deflectable
|
Unarmed
|
| -
|
-
|
1
|
16
|
22
|
38
|
-
|
-
|
-
|
-
|
-
|
-
|
Yes
|
Universal dodge. Frames 1-10 fully invincible, 11-16 strike invincible.
|
|
Stance Break
Stance Break
A+B during Just Defense
|
| Damage
|
Guard
|
Startup
|
Active
|
Recovery
|
Total
|
Hit Adv
|
Block Adv
|
Guard Dmg
|
Cancel
|
Recoil
|
Deflectable
|
Unarmed
|
| 0
|
Mid
|
5
|
10
|
38
|
52
|
KD
|
-24
|
-
|
No
|
-
|
-
|
Yes
|
|
|
|
Toggle Hitboxes Toggle Hitboxes
|
Counter / Blade Catch
Counter / Blade Catch
236A+B Counter Counter Blade Catch Blade Catch
|
| Version
|
Damage
|
Guard
|
Startup
|
Active
|
Recovery
|
Total
|
Hit Adv
|
Block Adv
|
Guard Dmg
|
Cancel
|
Recoil
|
Deflectable
|
Unarmed
|
| Armed
|
0
|
N/A
|
2
|
11
|
34
|
46
|
+35~+59
|
-
|
-
|
-
|
-
|
-
|
No
|
Universal counter. Allows you to follow up with a guaranteed attack of your own. The follow up depends on the strength of the attack you counter. If you counter a heavy slash, your opponent will be disarmed.
|
| Disarmed
|
0
|
N/A
|
2
|
12
|
9
|
22
|
KD
|
N/A
|
-
|
N/A
|
N/A
|
N/A
|
Only
|
Universal counter. While disarmed, your counter will disarm and knock away your opponent regardless of slash level used.
|
|
Toggle Hitboxes Toggle Hitboxes
|
Rage Explosion
Rage Explosion
5A+B+C
|
| Damage
|
Guard
|
Startup
|
Active
|
Recovery
|
Total
|
Hit Adv
|
Block Adv
|
Guard Dmg
|
Cancel
|
Recoil
|
Deflectable
|
Unarmed
|
| 0
|
Unblockable
|
21
|
3
|
35
|
58
|
0
|
-
|
-
|
-
|
-
|
-
|
No
|
Unblockable pushback attack.
|
|
Toggle Hitboxes Toggle Hitboxes
|
Lightning Blade
Lightning Blade (Issen)
5A+B+C during Rage Explosion
|
| Damage
|
Guard
|
Startup
|
Active
|
Recovery
|
Total
|
Hit Adv
|
Block Adv
|
Guard Dmg
|
Cancel
|
Recoil
|
Deflectable
|
Unarmed
|
| 300~709
|
Mid
|
9
|
8
|
65
|
81
|
KD
|
-44
|
-
|
No
|
No
|
No
|
No
|
Has projectile invulnerability and anti-airs. Damage scales up based on remaining health.
|
|
Toggle Hitboxes Toggle Hitboxes
|
Command Moves
Crouch Walk
Crouch Walk
1 or 3 Crouch Walk Crouch Walk
|
| Damage
|
Guard
|
Startup
|
Active
|
Recovery
|
Total
|
Hit Adv
|
Block Adv
|
Guard Dmg
|
Cancel
|
Recoil
|
Deflectable
|
Unarmed
|
| -
|
-
|
-
|
-
|
-
|
-
|
-
|
-
|
-
|
-
|
-
|
-
|
Yes
|
Wan-Fu can move forward or backward while he is crouching. Wan-Fu's head is invulnerable during forward crouchwalk allowing him to go under some fireballs or normals (e.g. Jubei's far 5B).
|
|
Toggle Hitboxes Toggle Hitboxes
|
Special Moves
True Confucius Thunder Bomb
True Confucius Thunder Bomb
214S
|
| Version
|
Damage
|
Guard
|
Startup
|
Active
|
Recovery
|
Total
|
Hit Adv
|
Block Adv
|
Guard Dmg
|
Cancel
|
Recoil
|
Deflectable
|
Unarmed
|
| A
|
120(200~140)
|
High, Mid
|
26
|
22+16
|
4
|
67
|
KD(+115)
|
+16~
|
10
|
No
|
No
|
No
|
No
|
| B
|
120(200~140)
|
High, Mid
|
31
|
23+16
|
0
|
69
|
KD(+122)
|
+20~
|
10
|
No
|
No
|
No
|
No
|
| C
|
120(200~140)
|
High, Mid
|
31
|
21+16
|
6
|
73
|
KD(+120)
|
+14~
|
10
|
No
|
No
|
No
|
No
|
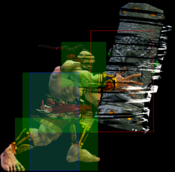
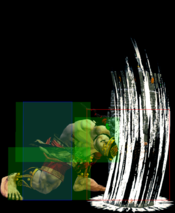
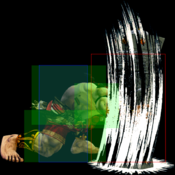
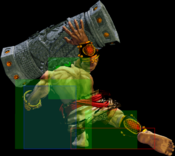
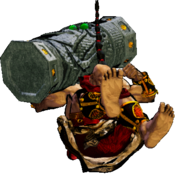
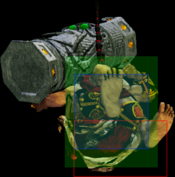
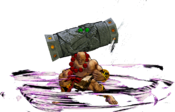
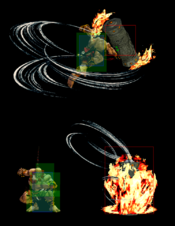
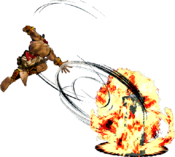
Wan-Fu jumps and tosses his pillar diagonally downward. The A and B versions jump straight upward while the C version jumps forward before dropping the pillar, giving it crossup potential. Be careful with opponents who dash or backdash to escape the C version. The opponent can be hit while the pillar is flying through the air, and the pillar itself can hit overhead. When blocked, the resulting explosion leaves Wan-Fu at a great frame advantage, allowing him to go for a free mixup if close enough and to position himself otherwise. A great move, but if it doesn't hit its mark then you'll be left unarmed and likely farther away from the opponent than when you started. Despite how safe on block it is, Wan Fu is somehow low enough to the ground that people can hit him with Issen before the pillar hits them.
Something weird about both the ground and air pillar is that the later it hits during the explosion, the more damage it will deal for some reason.
|
| Version
|
Damage
|
Guard
|
Startup
|
Active
|
Recovery
|
Total
|
Hit Adv
|
Block Adv
|
Guard Dmg
|
Cancel
|
Recoil
|
Deflectable
|
Unarmed
|
| Air
|
120(200~140)
|
High, Mid
|
15
|
9~24+16
|
Until Landing+19
|
-
|
KD
|
+1~
|
10
|
No
|
No
|
No
|
No
|
You can also throw the pillar while jumping. In addition to its other uses, this can also be used as an anti-air. Unlike the ground version, it is safe to use if you want to bait people to use Issen, and if they don't throw it out they have to block the pillar so you land safely (although weaponless)
Also it can be done extremely low to the ground and the pillar will still have to be blocked high.
|
|
Toggle Hitboxes Toggle Hitboxes
|
Spirit Blast Massacre
Spirit Blast Massacre
236S Same hitbox for each version and each hit
|
| Version
|
Damage
|
Guard
|
Startup
|
Active
|
Recovery
|
Total
|
Hit Adv
|
Block Adv
|
Guard Dmg
|
Cancel
|
Recoil
|
Deflectable
|
Unarmed
|
| A
|
100
|
Mid
|
11
|
4
|
33
|
47
|
KD(+91)
|
-16
|
10
|
No
|
No
|
No
|
No
|
| B
|
130 [50,80]
|
Mid
|
17
|
4 (16) 4
|
43
|
83
|
KD(+95)
|
-26
|
22
|
No
|
No
|
No
|
No
|
| C
|
180 [40,40,100]
|
Mid
|
21
|
4 (16) 4 (25) 4
|
60
|
133
|
KD(+78)
|
-43
|
35
|
No
|
No
|
No
|
No
|
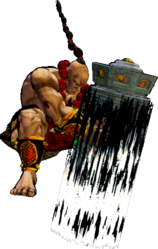
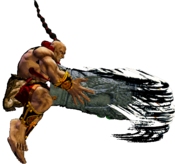
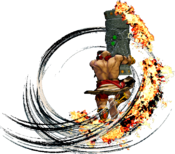
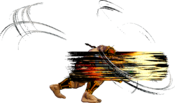
Wan-Fu swings his pillar right round, strength determines how many times. Decent as a recoil option. Best used as a combo ender and more flexible in this regard than his DP given its range. The B and C versions have a small window of lower-body invuln on startup. If a non-ending swing trades, you can juggle the opponent with a light DP.
Be careful not to get the C version blocked as it can be punished with a Super Special Move, which leaves it better used in combos than in neutral.
|
|
Toggle Hitboxes Toggle Hitboxes
|
Spirit Blast Whirlwind
Spirit Blast Whirlwind
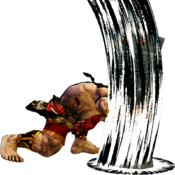
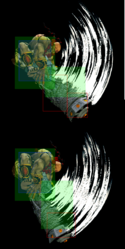
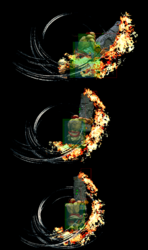
623S 623A pictured top to bottom: 13F, 14~15F, 16~18F
|
| Version
|
Damage
|
Guard
|
Startup
|
Active
|
Recovery
|
Total
|
Hit Adv
|
Block Adv
|
Guard Dmg
|
Cancel
|
Recoil
|
Deflectable
|
Unarmed
|
| A
|
110
|
Mid
|
13
|
6
|
57
|
75
|
KD(+74)
|
-47
|
12
|
No
|
No
|
No
|
No
|
| B
|
140 [80,60]
|
Mid
|
16
|
10
|
55
|
80
|
KD(+83)
|
-48
|
24
|
No
|
No
|
No
|
No
|
| C
|
160 [100,60]
|
Mid
|
16
|
10
|
71
|
96
|
KD(+67)
|
-63
|
26
|
No
|
No
|
No
|
No
|
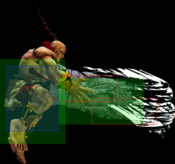
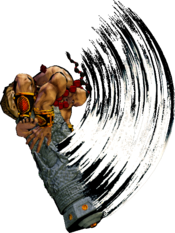
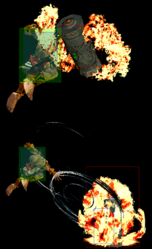
Standard DP-type move. The hitbox is a bit narrow so depending on the opponent this might miss them if they're right above you. Medium version is air invulnerable while Heavy is fully invulnerable, yet both have the same startup, with medium version being slightly less punishable on block (still SSM punishable though).
Quite slow for an antiair so make sure you react on time.
|
| Version
|
Damage
|
Guard
|
Startup
|
Active
|
Recovery
|
Total
|
Hit Adv
|
Block Adv
|
Guard Dmg
|
Cancel
|
Recoil
|
Deflectable
|
Unarmed
|
| Rage
|
190 [100,40,30,20]
|
Mid
|
16
|
10
|
71
|
96
|
KD(+74)
|
-63
|
28
|
No
|
No
|
No
|
No
|
Fully invincible and his most damaging special. Like all DPs, be careful not to whiff this!
|
|
Toggle Hitboxes Toggle Hitboxes
|
Pilar of Rage
Pillar of Rage
214D Same hitbox for both hits
|
| Damage
|
Guard
|
Startup
|
Active
|
Recovery
|
Total
|
Hit Adv
|
Block Adv
|
Guard Dmg
|
Cancel
|
Recoil
|
Deflectable
|
Unarmed
|
| 100 (180 to self)
|
Unblockable
|
43
|
1 (24) 1
|
63
|
131
|
KD(+39)
|
-
|
-
|
No
|
No
|
No
|
No
|
Wan-Fu puts his pillar down and headbutts it to enrage himself, sacrificing part of his vitality in exchange. Letting the whole animation play will bring you to full rage.
The headbutts themselves are unblockable, but attempting to set these up to catch a forward roll or something is impractical given its slow, reactable startup. One other application is to use it when you are about to get timerscammed so you start the next round with full rage (think V Special's Rasetsumaru). Otherwise, this move is kinda useless.
|
|
Toggle Hitboxes Toggle Hitboxes
|
Spirit Blast Flayer
Spirit Blast Flayer
236D
|
| Damage
|
Guard
|
Startup
|
Active
|
Recovery
|
Total
|
Hit Adv
|
Block Adv
|
Guard Dmg
|
Cancel
|
Recoil
|
Deflectable
|
Unarmed
|
| 180
|
-
|
5
|
1
|
51
|
56
|
KD
|
-
|
-
|
No
|
No
|
No
|
Only
|
This right here is what makes unarmed Wan-Fu special. Fast, great range, easy to tick into and one of his most damaging moves on its own. Though this has less recovery frames than the standard throw (you're less likely to eat an SSM for whiffing this), it is still heavily punishable so you'll still have to keep an eye out for jumpers.
|
|
Toggle Hitboxes Toggle Hitboxes
|
Supers
Weapon Flipping Technique
Spirit Blast Detonation
236B+C
|
| Damage
|
Guard
|
Startup
|
Active
|
Recovery
|
Total
|
Hit Adv
|
Block Adv
|
Guard Dmg
|
Cancel
|
Recoil
|
Deflectable
|
Unarmed
|
| 350
|
Mid
|
1+12
|
18+10
|
73
|
114
|
KD
|
-38
|
-
|
No
|
No
|
No
|
No
|
Available only during Max Rage or Rage Explosion. Disarms on hit, in addition to disarming Wan-Fu himself. Don't expect this to leave you plus like his other pillar tosses. Like most supers, this can be combo'd into - refer to the combo section for details.
|
|
Toggle Hitboxes Toggle Hitboxes
|
Super Special Move
True Spirit Blast Calamity
641236C+D
|
| Damage
|
Guard
|
Startup
|
Active
|
Recovery
|
Total
|
Hit Adv
|
Block Adv
|
Guard Dmg
|
Cancel
|
Recoil
|
Deflectable
|
Unarmed
|
| 670 [100,200,370]
|
Mid
|
10+20~55
|
5
|
65
|
99~134
|
KD
|
-51
|
-
|
No
|
No
|
No
|
No
|
Available only once per match. Wan-Fu charges forward and then thrusts his pillar forward once he either reaches his opponent or has run about a full screen's distance.
|
|
Toggle Hitboxes Toggle Hitboxes
|
Combos
List combos, use numpad notation.
Midscreen
- 5A or 2A ...
- 623A - Higher damage.
- 236A - Better range.
- n.5B / n.2B ...
- 236C - Most damaging non-rage combo.
- 623C (Rage) - Rage version of DP deals more damage than 236C.
- WFT - Misses crouching opponents (barring Earthquake).
- j.C (Deep hit) ...
- WFT - Works on all crouching opponents.
- Land, Jump C - Works vs. Earthquake.
- 5BC, 5A/2A ...
- 5BC ...
- 5A/2A ... - You'll want to use 5A because it comes out faster and it is easier to combo into DP with.
- Forward throw ...
- 2C - Deals more damage.
- 66C - Deals less damage but leaves you closer. Better to start oki with.
- u.5C - Knocks down.
- WFT - Only possible vs. Earthquake due to his height.
- Back throw ...
- 5C - Does not knock down.
- n.2B ... - Optimal damage, can confirm into WFT or 236C/623C
- WFT - Works with everyone.
Corner
- Forward throw ...
- n.5B/2B ... - May need to walk a bit if you're not fully cornered.
Guard Crush
- n.5C...
After recovery...
- (n.5B/n.2B) xx 236C / 623C / WFT
Most damaging follow up without rage / in rage / WFT combo.
- SSM
SSM follow up. (Be careful with opponent bursting to avoid it)
- n.5C...
Cancel recovery...
- Lighting Blade
Universal Issen combo.
- 5C...
Cancel recovery...
- 236C
Most damaging without rage.
- 623C
Most damaging in rage.
- WFT
Go straight into WFT..
- Lighting Blade
Universal Issen combo.
Videos
Colors
Default
3D Retro Costume
External Links
