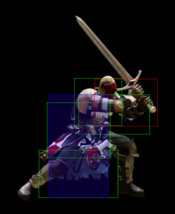
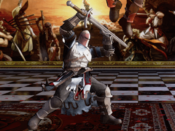
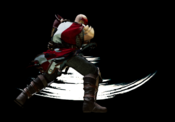
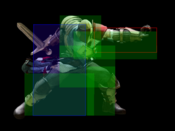
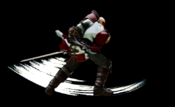
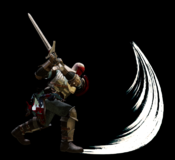
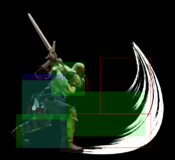
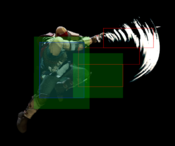
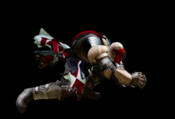
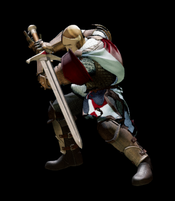
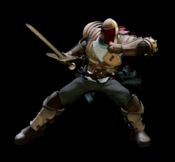
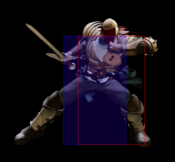
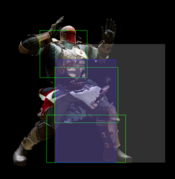
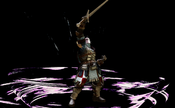
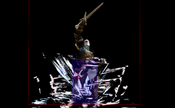
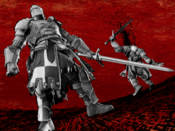
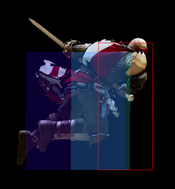
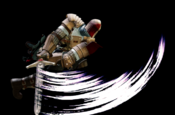
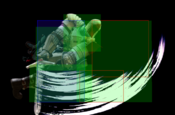
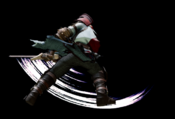
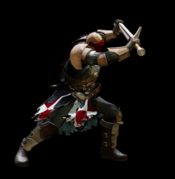
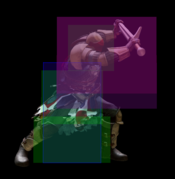
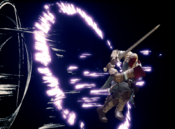
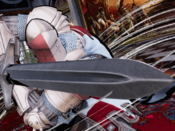
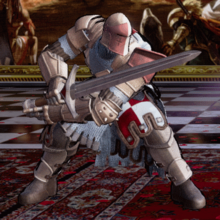
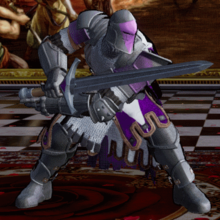
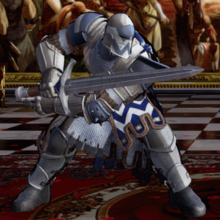
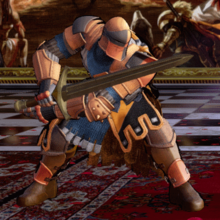
Warden
ウォーデン, Warden
|
- Damage Taken: 95%
- Rage Factor: 0.22
- Rage Duration: 12 seconds
- Jump: 42 frames (Very Fast)
- Forward Walk Speed: 0.3 (Average)
- Back Walk Speed: 0.23 (Average)
- Dash Speed: 1.1 (Slow)
- Back Dash: 27 frames
- Weapon Pickup / Drop: 40 / 50 frames
|
Introduction
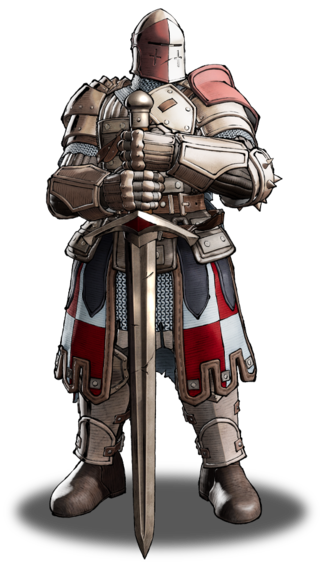
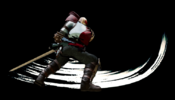
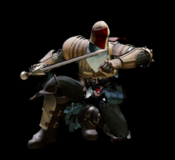
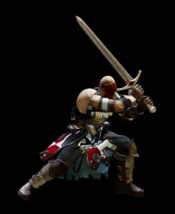
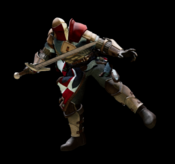
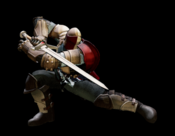
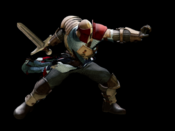
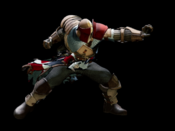
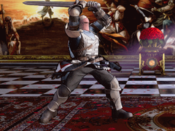
As a guest character from the game series For Honor, Warden is here to challenge you to a fight of life and death in defense of his loyalty to his home country.
He is pretty well adapted to the game with his amazing aerial attacks as most of the characters in the game rely on. He depends on his short jumps to apply constant pressure from the air, and to test the patience of his opponent to block the attack or the ability for them to anti air him. His j.A and j.B are great moves for air to air so he doesn't struggle too much with other characters with amazing aerials.
Aside from his jumps, his unique move set of command normals are useful for a mix of his own. His stand mediums, near heavy and dashing medium are able to follow up with another move that is an overhead, it will mostly hit if the opponent tries to move. But he do not have to go for an overhead but can follow up with his long reaching 2C for a low or set up for a grab. This ability makes him one of the strong mix-up characters of the game. As one of the few characters with a command parry, his is one of the easy ones to use but it does require a certain knowledge for follow up attack, as it doesn't automatically follow up with attacks.
Overall, you will found yourself playing him for big damage and easy inputs. His mix requires some practice to be used at its full potential. Though he might struggle to get in on some character but he's a strong well balanced guy that you would like to try out (especially if you are a fan of For Honor).
Playstyle
 Warden is a rushdown monster who gets up close and personal with great run pressure, target combo loops, strong 50/50s and oppressive jump normals. Warden is a rushdown monster who gets up close and personal with great run pressure, target combo loops, strong 50/50s and oppressive jump normals.
|
| Strengths |
Weaknesses
|
- Great pressure: With a great suite of running normals, a short jump arc and air buttons that cover every angle, Warden has great tools for leveraging running throw pressure.
- Great 50/50: Warden has a fantastic B+C that he can offset with his excellent 66D and 2C lows to punish blocking with ease.
- Good close-ranged normals: Warden has one of the best f.5As in the game, a spammable 2D and a great anti-air hurtbox on his cl.5A, forcing opponents to respect his close-ranged pressure.
- Target combos: Warden's unique For Honor-inspired target combo follow-ups allow him to get advantageous standing resets off of his punishes and catch backdashes against those who try to escape his pressure. He can also target combo cancel his f.5C to bait out reactions.
- n.5B's Guard Point: Guard point on n.5B gives him unique anti-air and ground punishment options
|
- Bad at midrange: Warden's normals from midscreen lack range and he loses long-ranged poking wars against almost all characters.
- Needs to jump: Due to his reliance on jump normals, Warden's neutral presence is sigificant reduced against characters with strong grounded anti-airs.
- Horrible recoil: Warden has some of the worst recoil reversal games due to his lack of viable special moves. His 2C and 5C can both be raw punished on reaction with lows, special moves and run up throw.
- Gets zoned: Warden needs to get very close to get his game started and his lack of any anti-fireball options does him no favors.
- Shoulder charge sucks: This special is generally too slow to be practical and can be easily raw thrown or jumped over on reaction.
- High risk: Warden's game relies on forcing aggression to open up opponents, which necessitates risk taking and makes it hard for him to hold down a life lead.
|
Gameplan
Warden can pressure, with his shallow hop and his big buttons.
Neutral
The basic idea of his neutral is his j.B and j.C, most characters that lack a good anti air is hard to get around being pressured by j.C, and his j.B is an amazing air to air, or even use j.A to prevent people from jumping higher than him. Something to do, j.C pressure, suddenly empty jump and grab. His 2C has amazing range to use as a punish or mix-up.
Some good mix from grab: 5B, feint, 2C (low). 5B, B (high). 5B, feint, grab(reset for more). Etc.
His parry is also a good one, it reflects projectiles and parry air normals, the follow up has to be done manually, see the combo section for more info.
Okizeme
His UOH has amazing range making it hard to punish at long range. You may use your jump with a button or no button to pressure a wake up or to bait out stuff.
Normal Moves
Far Slashes
5A
5A
|
| Damage
|
Guard
|
Startup
|
Active
|
Recovery
|
Total
|
Hit Adv
|
Block Adv
|
Guard Dmg
|
Cancel
|
Recoil
|
Deflectable
|
Unarmed
|
| 50
|
Mid
|
7
|
4
|
12
|
22
|
-3
|
-5
|
5
|
Yes
|
Yes
|
Yes
|
No
|
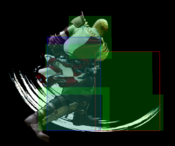
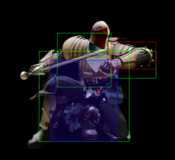
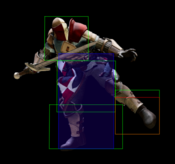
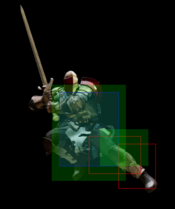
Warden does a quick, half-sword style thrust with his sword.
- Fast poke with decent range.
- An excellent anti-air against far jump-ins, especially those with extended hurtboxes like Yoshitora's j.C, which 5A will beat cleanly at even the apex of Yoshi's jump arc.
- Whiffs on crouching opponents at max range.
|
|
Toggle Hitboxes Toggle Hitboxes
|
5B
5B
|
| Damage
|
Guard
|
Startup
|
Active
|
Recovery
|
Total
|
Hit Adv
|
Block Adv
|
Guard Dmg
|
Cancel
|
Recoil
|
Deflectable
|
Unarmed
|
| 120
|
Mid
|
14
|
4
|
25
|
42
|
-4
|
-12
|
10
|
No
|
Yes
|
Yes
|
No
|
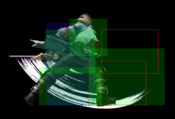
Warden moves forward and swings his sword downwards.
- Forward moving slash attack with a little bit less range than you would expect.
- Your only far normal that can go into the B/D-followup mindgame, though you are -7 after feint here, so you might just want to use 5B on it's own sometimes.
- Difficult to space because of the step forward. Warden has no good recoil options, so you need to be more careful than usual when poking from max range.
|
|
Toggle Hitboxes Toggle Hitboxes
|
5C
5C
|
| Damage
|
Guard
|
Startup
|
Active
|
Recovery
|
Total
|
Hit Adv
|
Block Adv
|
Guard Dmg
|
Cancel
|
Recoil
|
Deflectable
|
Unarmed
|
| 320
|
Mid
|
27
|
2
|
46
|
74
|
-8
|
-16
|
25
|
No
|
Yes
|
Disarm
|
No
|
Warden steps forward and does a heavy downward swing.
- Slow, but long reaching heavy, that also happens to be the most powerful 5C in the game, in terms of raw damage.
- Doesn't combo after back throw or jump C deep hit.
- You can input D to cancel the animation before the slash comes out, giving a little bit more depth to this otherwise fairly standard-issue 5C.
- Total recovery 22F when feinted
|
|
Toggle Hitboxes Toggle Hitboxes
|
2A
2A
|
| Damage
|
Guard
|
Startup
|
Active
|
Recovery
|
Total
|
Hit Adv
|
Block Adv
|
Guard Dmg
|
Cancel
|
Recoil
|
Deflectable
|
Unarmed
|
| 30
|
Mid
|
5
|
4
|
10
|
18
|
-1
|
-4
|
5
|
Yes
|
No
|
No
|
No
|
Warden does a quick strike with his elbow.
- Fast, undeflectable, attack with very short reach.
- One of Warden's three 5f options.
- Although this normal is usually outclassed by 2D, you can cancel 2A into things like deflect or your parry, making it scary to directly challenge Warden in scrambles.
|
|
Toggle Hitboxes Toggle Hitboxes
|
2B
2B
|
| Damage
|
Guard
|
Startup
|
Active
|
Recovery
|
Total
|
Hit Adv
|
Block Adv
|
Guard Dmg
|
Cancel
|
Recoil
|
Deflectable
|
Unarmed
|
| 100
|
Mid
|
12
|
3
|
20
|
34
|
-2
|
-12
|
10
|
Yes
|
Yes
|
Yes
|
No
|
Warden does a quick downwards chop with his blade.
- Hits mid.
- Your main way to cancel into WFT.
- Range is a bit farther than 5A despite its looks.
|
|
Toggle Hitboxes Toggle Hitboxes
|
2C
2C
|
| Damage
|
Guard
|
Startup
|
Active
|
Recovery
|
Total
|
Hit Adv
|
Block Adv
|
Guard Dmg
|
Cancel
|
Recoil
|
Deflectable
|
Unarmed
|
| 150
|
Low
|
20
|
4
|
28
|
51
|
KD(+93)
|
-28
|
25
|
No
|
Yes
|
No
|
No
|
Warden leans forward and does a sweeping swing.
- Long range low sweep that knocks down on hit.
- Having a button like this makes it incredibly difficult for your opponent to try recoil-into-deflect shenanigans.
- In addition to that, Warden can also threaten an almost unseeable High/Low between 2C and 5BC from very far away, making it stressful to establish the midrange against him.
- 20f startup means you can combo this from a forward throw, although 66C is usually preferrable if you want the knockdown.
|
|
Toggle Hitboxes Toggle Hitboxes
|
Near Slashes
n.5A
n.5A
|
| Damage
|
Guard
|
Startup
|
Active
|
Recovery
|
Total
|
Hit Adv
|
Block Adv
|
Guard Dmg
|
Cancel
|
Recoil
|
Deflectable
|
Unarmed
|
| 30
|
Mid
|
5
|
5
|
10
|
19
|
-2
|
-5
|
5
|
Yes
|
No
|
No
|
No
|
Warden jabs the opponent with the pommel of his sword.
- Very similar to 2A - cancellable and non-deflectable.
|
|
Toggle Hitboxes Toggle Hitboxes
|
n.5B
n.5B Guard Point Guard Point Crushing Counterstrike Crushing Counterstrike
|
| Damage
|
Guard
|
Startup
|
Active
|
Recovery
|
Total
|
Hit Adv
|
Block Adv
|
Guard Dmg
|
Cancel
|
Recoil
|
Deflectable
|
Unarmed
|
| 80
|
Mid
|
13
|
2
|
25
|
39
|
-6
|
-12
|
10
|
Yes
|
Yes
|
Yes
|
No
|
Warden does a downwards swing.
- Very important multi-purpose normal in Warden's arsenal. Has a guard-point against mid and high-hitting attacks from frames 4-8.
- You generally want to cancel this into it's followup, which is always a true combo.
- On mid-air counter hit, n.5B puts the opponent in a free juggle state, making anti-airs with it very rewarding (though the timing is quite strict).
|
|
Toggle Hitboxes Toggle Hitboxes
|
n.5C
n.5C
|
| Damage
|
Guard
|
Startup
|
Active
|
Recovery
|
Total
|
Hit Adv
|
Block Adv
|
Guard Dmg
|
Cancel
|
Recoil
|
Deflectable
|
Unarmed
|
| 220
|
Mid
|
15
|
3
|
30
|
47
|
-3
|
-28
|
25
|
No
|
Yes
|
Disarm
|
No
|
Warden leans forward and does an overhead swing.
- Powerful, fast, close heavy with built-in mindgames.
- Your max damage option after both forward and back throw, no microwalk required.
- Can be feinted by inputting D during startup just like 5C.
- Total recovery 16F when feinted
|
|
Toggle Hitboxes Toggle Hitboxes
|
Kicks
5D
5D
|
| Damage
|
Guard
|
Startup
|
Active
|
Recovery
|
Total
|
Hit Adv
|
Block Adv
|
Guard Dmg
|
Cancel
|
Recoil
|
Deflectable
|
Unarmed
|
| 50
|
Low
|
11
|
4
|
12
|
26
|
-3
|
-6
|
5
|
Yes
|
No
|
No
|
Yes
|
Warden does a quick kick at his opponent's ankles.
- Standing low kick.
- Cancellable.
|
|
Toggle Hitboxes Toggle Hitboxes
|
6D
6D
|
| Damage
|
Guard
|
Startup
|
Active
|
Recovery
|
Total
|
Hit Adv
|
Block Adv
|
Guard Dmg
|
Cancel
|
Recoil
|
Deflectable
|
Unarmed
|
| 30
|
Mid
|
11
|
5
|
10
|
25
|
-2
|
-5
|
5
|
No
|
No
|
No
|
Yes
|
Warden does an upwards kick.
- Decent forward kick.
- Generally safe on block if spaced well.
|
|
Toggle Hitboxes Toggle Hitboxes
|
2D
2D
|
| Damage
|
Guard
|
Startup
|
Active
|
Recovery
|
Total
|
Hit Adv
|
Block Adv
|
Guard Dmg
|
Cancel
|
Recoil
|
Deflectable
|
Unarmed
|
| 20
|
Low
|
5
|
4
|
9
|
17
|
±0
|
-3
|
5
|
No
|
No
|
No
|
Yes
|
Warden does a quick low kick.
- Usually your best 5f option as it can't easily be walked out of after n.5BBD.
- Very low-commitment normal.
|
|
Toggle Hitboxes Toggle Hitboxes
|
3D
3D
|
| Damage
|
Guard
|
Startup
|
Active
|
Recovery
|
Total
|
Hit Adv
|
Block Adv
|
Guard Dmg
|
Cancel
|
Recoil
|
Deflectable
|
Unarmed
|
| 70
|
Low
|
11
|
7
|
24
|
41
|
KD(+94)
|
-14
|
5
|
No
|
No
|
No
|
Yes
|
Warden does a sweeping kick.
- Fast-ish knockdown low kick that outranges your other options by a fair bit.
- Good button to throw out, just outside of scramble range as it's considerably faster (and a bit safer) than your 2C, usually only punsihable by 5B-class normals.
|
|
Toggle Hitboxes Toggle Hitboxes
|
Dash Normals
66A
66A
|
| Damage
|
Guard
|
Startup
|
Active
|
Recovery
|
Total
|
Hit Adv
|
Block Adv
|
Guard Dmg
|
Cancel
|
Recoil
|
Deflectable
|
Unarmed
|
| 50
|
Mid
|
5
|
6
|
19
|
29
|
-4
|
-9~-7
|
5
|
No
|
No
|
No
|
No
|
Warden does a palm strike.
- Non-deflectable.
- Decent "stop-sign" move, though you generally give up your turn on both block and hit.
|
|
Toggle Hitboxes Toggle Hitboxes
|
66B
66B
|
| Damage
|
Guard
|
Startup
|
Active
|
Recovery
|
Total
|
Hit Adv
|
Block Adv
|
Guard Dmg
|
Cancel
|
Recoil
|
Deflectable
|
Unarmed
|
| 80
|
Mid
|
10
|
2
|
20
|
31
|
-1
|
-35
|
10
|
Yes
|
Yes
|
Disarm
|
No
|
Warden moves forward and does a downwards swing.
- Almost the same motion as n.5B but without the guard point.
- Opens up pseudo-throw loops for Warden, as he can go into 66BBD after both throws and set up another throw attempt immediately afterwards, if they respect you enough.
|
|
Toggle Hitboxes Toggle Hitboxes
|
66C
66C
|
| Damage
|
Guard
|
Startup
|
Active
|
Recovery
|
Total
|
Hit Adv
|
Block Adv
|
Guard Dmg
|
Cancel
|
Recoil
|
Deflectable
|
Unarmed
|
| 160
|
Mid
|
15
|
4
|
36
|
54
|
KD(+96)
|
-17
|
20
|
No
|
No
|
Disarm
|
No
|
Warden does a running golf swing.
- Standard running heavy slash.
- Your most damaging knockdown from throws.
- Doesn't recoil, so you are generally n.5C punishable if you get this blocked.
- Has a large vertical hitbox for Anti-Airs or pickups after Anti-Air Parry (214S).
|
|
Toggle Hitboxes Toggle Hitboxes
|
66D
66D
|
| Damage
|
Guard
|
Startup
|
Active
|
Recovery
|
Total
|
Hit Adv
|
Block Adv
|
Guard Dmg
|
Cancel
|
Recoil
|
Deflectable
|
Unarmed
|
| 70
|
Low
|
11
|
10
|
24
|
44
|
KD
|
-17~-8
|
5
|
No
|
No
|
No
|
Yes
|
Warden does a running slide kick
- Faster, less damaging alternative to 2C.
|
|
Toggle Hitboxes Toggle Hitboxes
|
Air Normals
j.A
j.A
|
| Damage
|
Guard
|
Startup
|
Active
|
Recovery
|
Total
|
Hit Adv
|
Block Adv
|
Guard Dmg
|
Cancel
|
Recoil
|
Deflectable
|
Unarmed
|
| 50
|
High
|
9
|
3
|
-
|
-
|
-
|
-
|
5
|
No
|
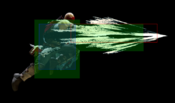
No
|
No
|
No
|
Warden does a quick upwards air slash.
- Fast air to air slash, that hits diagonally above your head.
- Perfect for swatting your opponents out of the sky if they get too comfortable up there.
|
|
Toggle Hitboxes Toggle Hitboxes
|
j.B
j.B
|
| Damage
|
Guard
|
Startup
|
Active
|
Recovery
|
Total
|
Hit Adv
|
Block Adv
|
Guard Dmg
|
Cancel
|
Recoil
|
Deflectable
|
Unarmed
|
| 100
|
High
|
12
|
4
|
-
|
-
|
-
|
-
|
10
|
No
|
No
|
No
|
No
|
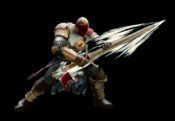
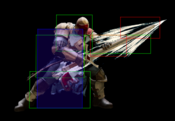
Warden does a long-reaching air thrust.
- Air slash with very long reach, but whiffs against crouching opponents.
- Has long hit stun and very easy to combo with standing mid slashes.
|
|
Toggle Hitboxes Toggle Hitboxes
|
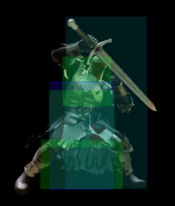
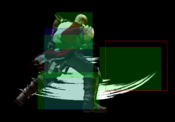
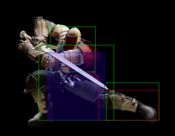
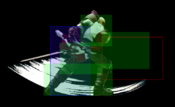
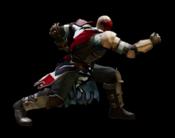
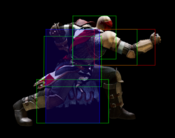
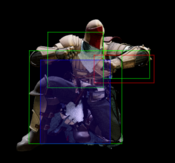
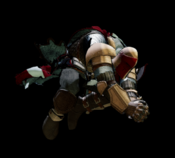
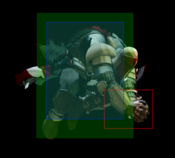
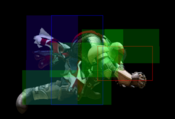
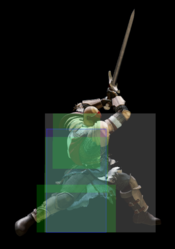
j.C
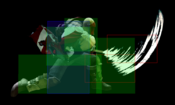
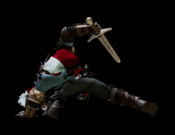
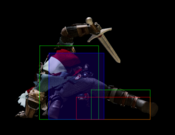
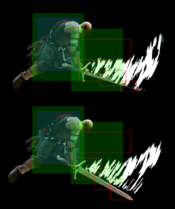
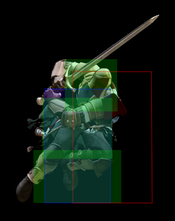
j.C Pictured from top to bottom: Frame 14, Frame 15
|
| Damage
|
Guard
|
Startup
|
Active
|
Recovery
|
Total
|
Hit Adv
|
Block Adv
|
Guard Dmg
|
Cancel
|
Recoil
|
Deflectable
|
Unarmed
|
| 160
|
High
|
14
|
2
|
-
|
-
|
-
|
-
|
20
|
No
|
No
|
No
|
No
|
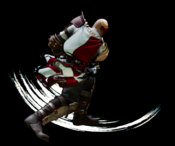
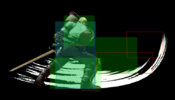
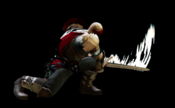
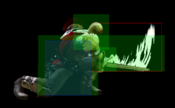
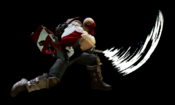
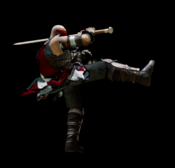
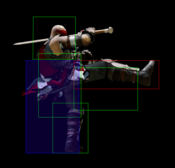
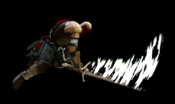
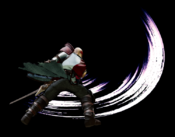
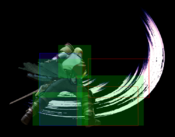
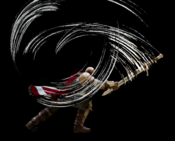
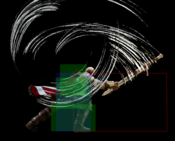
Warden does a strong downward air swing, Helm Breaker style.
- Jump heavy slash with good reach and downwads hitbox.
- Can cross up against crouching opponents.
|
|
Toggle Hitboxes Toggle Hitboxes
|
j.D
j.D
|
| Damage
|
Guard
|
Startup
|
Active
|
Recovery
|
Total
|
Hit Adv
|
Block Adv
|
Guard Dmg
|
Cancel
|
Recoil
|
Deflectable
|
Unarmed
|
| 30
|
High
|
8
|
11
|
-
|
-
|
-
|
-
|
5
|
No
|
No
|
No
|
Yes
|
Warden does a quick downward air kick.
- Standard jump kick with a somewhat low hitbox.
- Also crosses up.
|
|
Toggle Hitboxes Toggle Hitboxes
|
Unarmed Normals
u.5S
u.5S
|
| Damage
|
Guard
|
Startup
|
Active
|
Recovery
|
Total
|
Hit Adv
|
Block Adv
|
Guard Dmg
|
Cancel
|
Recoil
|
Deflectable
|
Unarmed
|
| 50
|
Mid
|
6
|
7
|
14
|
26
|
±0
|
-5
|
5
|
No
|
No
|
No
|
Only
|
Warden does a standing hook punch.
- Has good reach for an unarmed normal.
|
|
Toggle Hitboxes Toggle Hitboxes
|
u.2S
u.2S
|
| Damage
|
Guard
|
Startup
|
Active
|
Recovery
|
Total
|
Hit Adv
|
Block Adv
|
Guard Dmg
|
Cancel
|
Recoil
|
Deflectable
|
Unarmed
|
| 50
|
Mid
|
6
|
3
|
16
|
24
|
+2
|
-3
|
5
|
No
|
No
|
No
|
Only
|
Warden does a quick elbow strike
- Same as 2A with slightly better damage.
|
|
Toggle Hitboxes Toggle Hitboxes
|
ju.S
ju.S
|
| Damage
|
Guard
|
Startup
|
Active
|
Recovery
|
Total
|
Hit Adv
|
Block Adv
|
Guard Dmg
|
Cancel
|
Recoil
|
Deflectable
|
Unarmed
|
| 50
|
High
|
8
|
11
|
-
|
-
|
-
|
-
|
5
|
No
|
No
|
No
|
Only
|
Warden does a jumping double hammerfist downwards.
- Has a good downwards hitbox.
|
|
Toggle Hitboxes Toggle Hitboxes
|
u.66S
u.66S
|
| Damage
|
Guard
|
Startup
|
Active
|
Recovery
|
Total
|
Hit Adv
|
Block Adv
|
Guard Dmg
|
Cancel
|
Recoil
|
Deflectable
|
Unarmed
|
| 50
|
Mid
|
5
|
7
|
17
|
28
|
KD
|
-8
|
5
|
No
|
No
|
No
|
Only
|
Warden does a running palm strike.
- Same as 66A but knocks down the opponent.
|
|
Toggle Hitboxes Toggle Hitboxes
|
Universal Mechanics
Guard Break
Guard Break (Throw)
5/6C+D / 4C+D Neutral / Forward Throw Blue Box at Warden's feet needs to connect with the opponent's blue collision box Back Throw
|
| Version
|
Damage
|
Guard
|
Startup
|
Active
|
Recovery
|
Total
|
Hit Adv
|
Block Adv
|
Guard Dmg
|
Cancel
|
Recoil
|
Deflectable
|
Unarmed
|
| Neutral / Forward
|
0
|
Throw
|
3
|
1
|
71
|
74
|
+20
|
N/A
|
-
|
No
|
No
|
No
|
Yes
|
Universal throw.
- Can be followed up with an attack.
|
| Back
|
0
|
Throw
|
5
|
1
|
69
|
74
|
+25
|
N/A
|
-
|
No
|
No
|
No
|
Yes
|
Universal throw.
- Can be followed up with an attack.
|
|
Toggle Hitboxes Toggle Hitboxes
|
Surprise Attack
Surprise Attack (Overhead)
5B+C Armed Armed Unarmed Unarmed
|
| Version
|
Damage
|
Guard
|
Startup
|
Active
|
Recovery
|
Total
|
Hit Adv
|
Block Adv
|
Guard Dmg
|
Cancel
|
Recoil
|
Deflectable
|
Unarmed
|
| Armed
|
70
|
High
|
20
|
2
|
27
|
48
|
±0
|
-16
|
10
|
No
|
No
|
No
|
No
|
Warden thrusts his sword downwards
- Universal overhead.
- One of the few non-airborne UOHs.
|
| Unarmed
|
70
|
High
|
20
|
2
|
23
|
44
|
+2
|
-12
|
10
|
No
|
No
|
No
|
Only
|
Warden slams down with a double hammerfist.
- Unarmed universal overhead.
- One of the few non-airborne UOHs.
|
|
Toggle Hitboxes Toggle Hitboxes
|
Dodge
Dodge
5A+B
|
| Damage
|
Guard
|
Startup
|
Active
|
Recovery
|
Total
|
Hit Adv
|
Block Adv
|
Guard Dmg
|
Cancel
|
Recoil
|
Deflectable
|
Unarmed
|
| 0
|
N/A
|
1
|
16
|
22
|
38
|
N/A
|
N/A
|
-
|
N/A
|
N/A
|
N/A
|
Yes
|
Universal dodge.
- Avoids all attacks for a brief moment, and is mainly used to avoid throws.
Complete invincibility from frames 1 to 10. Strike invincibility from frames 11 to 16.
|
|
Stance Break
Stance Break
A+B during Just Defense
|
| Damage
|
Guard
|
Startup
|
Active
|
Recovery
|
Total
|
Hit Adv
|
Block Adv
|
Guard Dmg
|
Cancel
|
Recoil
|
Deflectable
|
Unarmed
|
| 0
|
Mid
|
5
|
10
|
38
|
52
|
KD
|
-24
|
-
|
No
|
-
|
-
|
Yes
|
|
|
|
Toggle Hitboxes Toggle Hitboxes
|
Counter / Blade Catch
Counter / Blade Catch
236A+B Counter Counter Blade Catch Blade Catch
|
| Version
|
Damage
|
Guard
|
Startup
|
Active
|
Recovery
|
Total
|
Hit Adv
|
Block Adv
|
Guard Dmg
|
Cancel
|
Recoil
|
Deflectable
|
Unarmed
|
| Armed
|
0
|
N/A
|
2
|
12
|
33
|
46
|
+35~+59
|
N/A
|
-
|
N/A
|
N/A
|
N/A
|
No
|
Universal counter. Allows you to follow up with a guaranteed attack of your own. The amount of time you have to followup depends on the strength of the attack you counter, with heavy attacks staggering the opponent for the longest amount of time. Additionally, if you counter a heavy slash or a running slash, your opponent will be disarmed.
|
| Disarmed
|
0
|
N/A
|
2
|
11
|
10
|
22
|
KD
|
N/A
|
-
|
N/A
|
N/A
|
N/A
|
Yes
|
Universal counter. While disarmed, your counter will disarm and knock away your opponent regardless of slash level countered.
|
|
Toggle Hitboxes Toggle Hitboxes
|
Rage Explosion
Rage Explosion
5A+B+C
|
| Damage
|
Guard
|
Startup
|
Active
|
Recovery
|
Total
|
Hit Adv
|
Block Adv
|
Guard Dmg
|
Cancel
|
Recoil
|
Deflectable
|
Unarmed
|
| 0
|
Unblockable
|
21
|
3
|
35
|
58
|
0
|
-
|
-
|
-
|
-
|
-
|
No
|
Unblockable pushback attack.
|
|
Toggle Hitboxes Toggle Hitboxes
|
Lightning Blade
Lightning Blade (Issen)
5A+B+C during Rage Explosion
|
| Damage
|
Guard
|
Startup
|
Active
|
Recovery
|
Total
|
Hit Adv
|
Block Adv
|
Guard Dmg
|
Cancel
|
Recoil
|
Deflectable
|
Unarmed
|
| 300~709
|
Mid
|
9
|
8
|
65
|
81
|
KD
|
-44
|
-
|
No
|
No
|
No
|
No
|
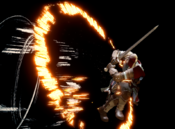
Has full invincibility and can anti-air. Damage scales up based on remaining health.
|
|
Toggle Hitboxes Toggle Hitboxes
|
Command Moves
Vanguard's Advance
Vanguard's Advance
(after n5B or 66B) B
|
| Damage
|
Guard
|
Startup
|
Active
|
Recovery
|
Total
|
Hit Adv
|
Block Adv
|
Guard Dmg
|
Cancel
|
Recoil
|
Deflectable
|
Unarmed
|
| 100
|
Mid
|
19
|
3
|
37
|
58
|
-5
|
-19
|
10
|
No
|
No
|
No
|
No
|
Warden follows up his initial swing with another downwards swing.
- The second slash that combos after near 5B or 66B.
- It's almost always a good idea to go for this, since it won't come out on block due to both n.5B and 66B deflecting on block. But keep in mind it can be punished if n.5B or 66B triggers an air reset such as during a back dash.
- Cancel window is 14~19F for n.5B and 11~14F for 66B.
|
|
Toggle Hitboxes Toggle Hitboxes
|
Vanguard's Advance (2 / Cancel)
Vanguard's Advance (2 / Cancel)
(after n5BB or 66BB) B or D Slash Feint
|
| Version
|
Damage
|
Guard
|
Startup
|
Active
|
Recovery
|
Total
|
Hit Adv
|
Block Adv
|
Guard Dmg
|
Cancel
|
Recoil
|
Deflectable
|
Unarmed
|
| B
|
200
|
High
|
31
|
3
|
40
|
73
|
KD
|
-15
|
15
|
No
|
No
|
No
|
No
|
| D
|
N/A
|
N/A
|
-
|
-
|
33
|
-
|
+1
|
N/A
|
0
|
No
|
No
|
No
|
No
|
Warden finishes his combo with a heavy hitting overhead swing.
- Hits overhead.
- Does chip damage but punishable on block.
- Has a 1 frame gap in between hits, so opponents can DP on reaction. Cancelling into feint will leave you +1 and just outside of throw range, giving you a slight advantage in the upcoming scramble.
- Opponents holding back will usually be safe from microwalk throw, so check them low with moves like 2D or 5D to keep them from walking away.
- Cancels Vanguard's Advance on frame 25
|
|
Toggle Hitboxes Toggle Hitboxes
|
Guardian's Assault (Slash / Cancel)
Guardian's Assault (Slash / Cancel)
(after 5B) B or D Slash Feint
|
| Version
|
Damage
|
Guard
|
Startup
|
Active
|
Recovery
|
Total
|
Hit Adv
|
Block Adv
|
Guard Dmg
|
Cancel
|
Recoil
|
Deflectable
|
Unarmed
|
| B
|
220
|
High
|
31
|
3
|
40
|
73
|
KD
|
-15
|
15
|
No
|
No
|
No
|
No
|
| D
|
N/A
|
N/A
|
-
|
-
|
31
|
-
|
-7
|
N/A
|
0
|
No
|
No
|
No
|
No
|
Warden follows up his forward-moving swing with a heavy downward swing.
- 5B>B is usually preferable to 5C after a far grounded parry, since it rewards you with a knockdown.
- Leaves you -7 after feint, but since opponents are more likely to try and take their turn here, you might catch them off-guard.
- 5B>D is still fairly safe if spaced well, leaving you just outside Warden's own 5A range. Don't throw the overhead out recklessly.
- Cancel window from 5B is 15~24F for both strike and feint
|
|
Toggle Hitboxes Toggle Hitboxes
|
Warden's Wrath (Slash / Cancel)
Warden's Wrath (Slash / Cancel)
(after n5C) C or D Slash Feint
|
| Version
|
Damage
|
Guard
|
Startup
|
Active
|
Recovery
|
Total
|
Hit Adv
|
Block Adv
|
Guard Dmg
|
Cancel
|
Recoil
|
Deflectable
|
Unarmed
|
| C
|
240
|
High
|
31
|
3
|
40
|
73
|
KD
|
-15
|
20
|
No
|
No
|
No
|
No
|
| D
|
N/A
|
N/A
|
-
|
-
|
37
|
-
|
+2
|
N/A
|
0
|
No
|
No
|
No
|
No
|
Warden follows up his initial overhead swing with another, heavier one.
- Your most damaging route after a successful parry, netting you a whopping 370 damage without rage.
- n.5C>D leaves you at +2 but a little bit farther away than n.5B>B>D, so it might be more difficult to press your advantage, especially after a throw, where even your 5A will miss.
- Cancel window from n.5C is 16~24F for both strike and feint
|
|
Toggle Hitboxes Toggle Hitboxes
|
Special Moves
Parry
Parry
214S
|
| Damage
|
Guard
|
Startup
|
Active
|
Recovery
|
Total
|
Hit Adv
|
Block Adv
|
Guard Dmg
|
Cancel
|
Recoil
|
Deflectable
|
Unarmed
|
| 0
|
N/A
|
6
|
15
|
23
|
43
|
+30
|
N/A
|
-
|
No
|
No
|
No
|
No
|
Warden half-swords his blade and attempts to block an opponent's attack, then counterattacks on successful block.
- A parry move that counters mid and high slash and sword specials (not working against low attacks and punch / kick / hilt attacks, neither lighting blade and SSM ).
- Upon success parry ground attacks, it stuns the opponent and makes Warden's chain attacks into combos (except 66BBB). The opponent can rage explosion to burst out of the stun.
- Upon success parry air attacks, it juggles the opponent and allows follow-ups.
- It reflects projectiles as well, save for the following:
- Tam-Tam's low skull
- Rimururu's rolling ice ball
- Mina's low arrow.
|
|
Toggle Hitboxes Toggle Hitboxes
|
Shoulder Bash
Shoulder Bash
236S Level 1 & 2 Only becomes active when Warden collides with the opponent Level 3
|
| Version
|
Damage
|
Guard
|
Startup
|
Active
|
Recovery
|
Total
|
Hit Adv
|
Block Adv
|
Guard Dmg
|
Cancel
|
Recoil
|
Deflectable
|
Unarmed
|
| Level 1
|
40(60)
|
Mid
|
23 (15)
|
18*
|
22
|
45~71
|
+8
|
+1
|
10
|
No
|
No
|
No
|
No
|
| Level 2
|
40(60)
|
Mid
|
33 (25)
|
24*
|
22
|
55~97
|
+18
|
+4
|
15
|
No
|
No
|
No
|
No
|
| Level 3
|
40(60)
|
Unblockable
|
53 (45)
|
45*
|
22
|
75~122
|
+23
|
N/A
|
-
|
No
|
No
|
No
|
No
|
Warden does a running shoulder charge that knocks the opponent off balance.
- Hold slash button to increase its level, each level runs further distance and has more frame advantage:
- Level 2 version will juggle airborne opponent and allows follow up combo.
- Level 3 version runs full screen and becomes unblockable attack with 1 hit armor (takes 40% damage, works on any attack except WFT, SSM and lighting blade), however it doesn't hit airborne opponent.
- During max rage, it charges the level faster with extra damage.
- Charge windows are 1~25F for lvl 1, 26~45F for lvl 2, 46F+ for lvl 3. While in Rage they shorten to 1~17F, 18~37F, and 38F+ respectively.
- You can cancel your backdash into the shoulder bash.
- Active Frames: This move becomes active when Warden's collision box makes contact with the opponent's. It is then active for 3 frames and moves straight to the recovery animation. The listed active frame duration is how long this collision check lasts.
- If Warden reaches the corner of the stage during tackle, Warden will skip straight to the recovery animation.
- Because of the way this move checks for collision with the opponent, it effectively ignores extended hurtboxes.
|
|
Toggle Hitboxes Toggle Hitboxes
|
Supers
Weapon Flipping Technique
Blackstone Bash
236B+C
|
| Damage
|
Guard
|
Startup
|
Active
|
Recovery
|
Total
|
Hit Adv
|
Block Adv
|
Guard Dmg
|
Cancel
|
Recoil
|
Deflectable
|
Unarmed
|
| 384(448)
|
Mid
|
1+15
|
5
|
44
|
64
|
KD
|
-42
|
-
|
No
|
No
|
No
|
No
|
Warden does a forward thrust, then attacks his opponent with a flurry of swings and finishes with a shoulder bash.
- Available only during Max Rage or Rage Explosion. Disarms on hit.
- Strong WFT that covers half of the screen.
- Easily combo'd into due to its startup.
|
|
Toggle Hitboxes Toggle Hitboxes
|
Super Special Move
Catapult
641236C+D
|
| Damage
|
Guard
|
Startup
|
Active
|
Recovery
|
Total
|
Hit Adv
|
Block Adv
|
Guard Dmg
|
Cancel
|
Recoil
|
Deflectable
|
Unarmed
|
| 700[100,600]
|
Mid
|
10+21
|
3
|
66
|
99
|
KD
|
-48
|
-
|
No
|
No
|
No
|
No
|
Warden grabs the blade end of his sword and slams the base of the blade into his opponent's shoulder, pulling him in, then ordering his catapult to open fire.
- Standard SSM with with long reach.
- Starts up 1 frame slower than average.
- Available once per match.
- It has full invincibility frames 1~10.
|
|
Toggle Hitboxes Toggle Hitboxes
|
Combos
List combos, use numpad notation.
Midscreen
- (n.5B / 66B / 2B) xx WFT
WFT punish combo.
- (Deep hit jC / jB)...
- n.5C
Knocks down the opponent from jump C, mix up from jump B.
- n.5BB / 66BB
Strong follow up with mix up.
- (n.5B / 66B / 2B) xx WFT
WFT combo after jump deep hit.
- Lighting Blade
Issen combo.
- jB WFT
WFT combo from far away jump hit.
- 5CD / 4CD...
- 66BB
Strong follow up with mix up, 66B at close range to continue the pressure
- n.5C
Corner only, more damage with mix up.
- 66C / 2C
Knocks down.
- 2B xx WFT
The optimal WFT combo after throw.
- 236S (level 1) n5A / 2A / 2D
A little extra damage.
- 236S (level 2 air hit) 5A / 2B / n5B / n5C
2B is much easier to land than n5C, also with good damage and 2C / BC mix up after air reset.
- 236S (level 2 air hit) Lighting Blade
Issen combo.
- 236S (level 2 and 3)...
- n.5C / n.5BB
Strong follow up with mix up.
- 2B xx WFT
Optimal WFT combo.
- Lighting Blade
Issen combo.
- JC (Deep hit) 236S (level 1 rage version) n5A
Fancy combo, not useful.
Parry
- n.5B (air parry) xx WFT
Anti air WFT combo, connects on ground parry as well.
- 214S (ground parry)...
- 5BB / 5C / n.5BBB / n5CC
Normal follow ups from low to high damage. Heavy slash follow ups have more damage.
- (2B / 66B) xx WFT
WFT combo follow up.
- Lighting Blade
Issen follow up, needs to wait a little bit otherwise it would become n5C / 5B.
- 214S (air parry)...
- 66C
Connects from close or mid range. (About the range of 5A)
- WFT
Dash immediately after parry to connect, it covers similar range of the combo above.
- 5C
Only from close range or near corner, micro walk forward to connect.
- 236S (level 2 rage) n5C
Corner only, not useful
Guard Crush
- n.5C...D...
Feint...
- Lighting Blade
Universal Issen combo. (Don't have to feint can just cancel)
- SSM
SSM follow up. (Be careful with opponent bursting to avoid it)
- j.C xx n.5C
Deep jump heavy combo into standing heavy.
- 2B xx WFT
WFT combo after feint.
- j.C xx 2B xx WFT
Deep jump heavy combo into WFT combo.'
- 5C...
Cancel recovery...
- 236S(Hold)...
Hold for lvl 3 charge...
- 66C
Knocks down.
- 2B xx WFT
WFT combo after charge.
- Lighting Blade
Issen after charge.
Videos
Colors
External Links
