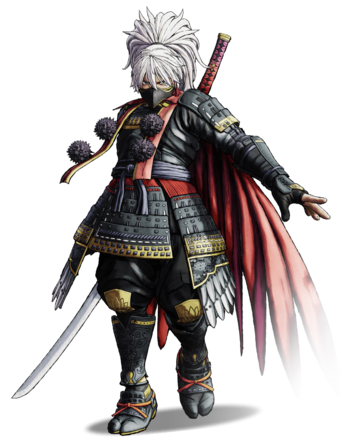
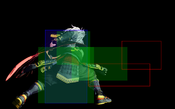
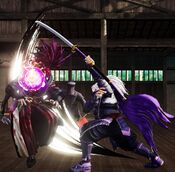
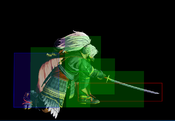
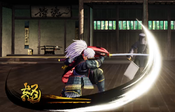
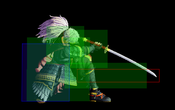
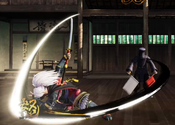
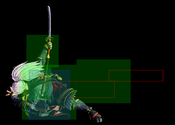
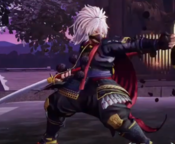
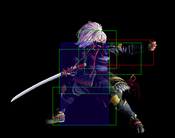
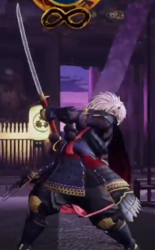
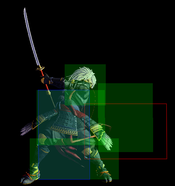
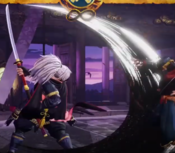
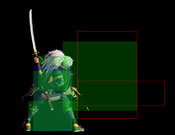
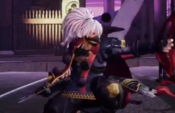
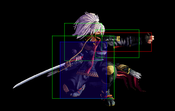
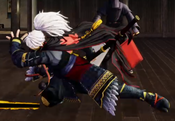
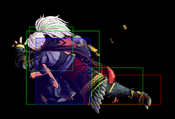
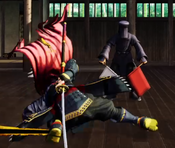
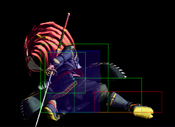
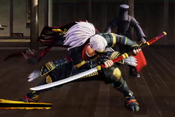
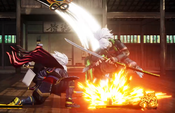
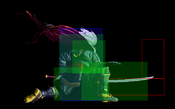
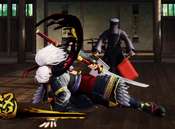
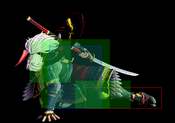
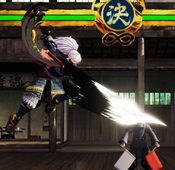
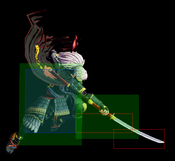
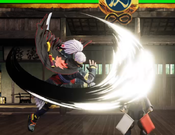
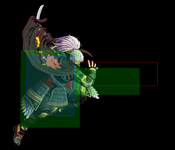
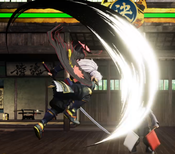
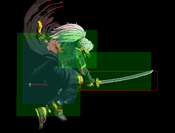
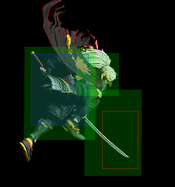
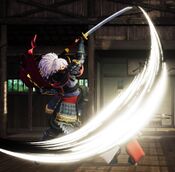
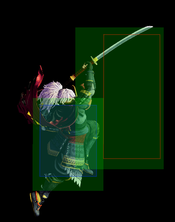
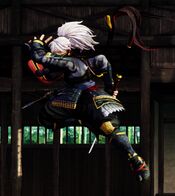
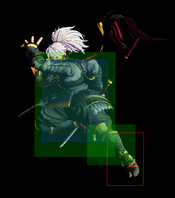
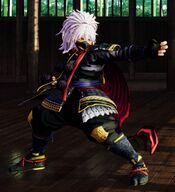
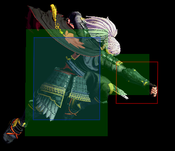
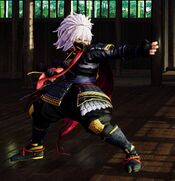
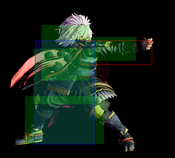
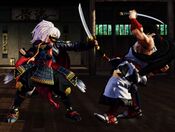
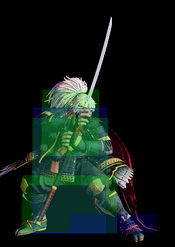
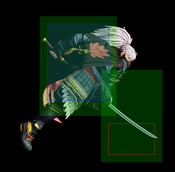
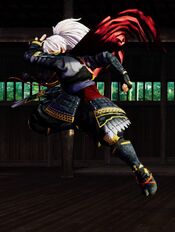
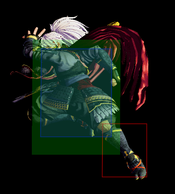
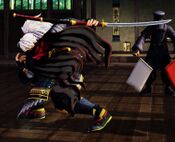
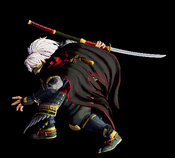
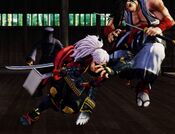
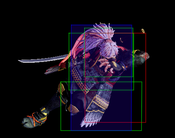
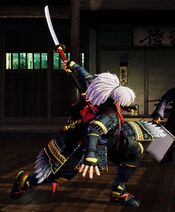
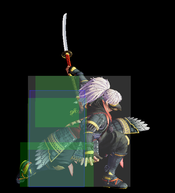
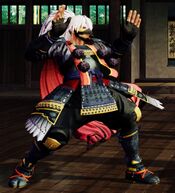
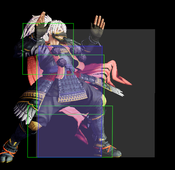
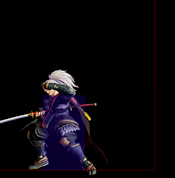
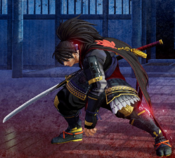
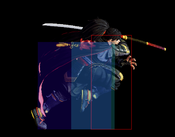
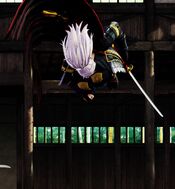
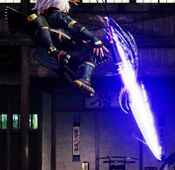
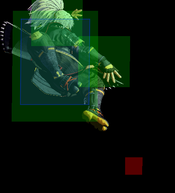
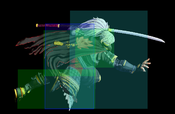
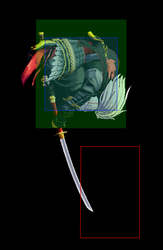
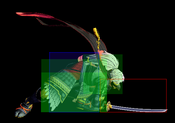
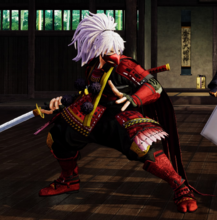
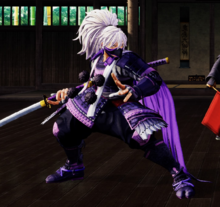
Yashamaru Kurama
鞍馬 夜叉丸, Kurama Yashamaru
|
- Damage Taken: 100%
- Rage Factor: 0.32
- Rage Duration: 14 seconds
- Jump: 46 frames (Average. Has a Double Jump)
- Forward Walk Speed: 0.3 (Average)
- Back Walk Speed: 0.23 (Average)
- Dash Speed: 1.25 (Average)
- Back Dash: 27 frames
- Weapon Pickup / Drop: 40 / 80 frames
|
Introduction
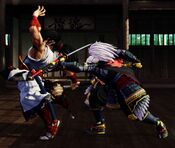
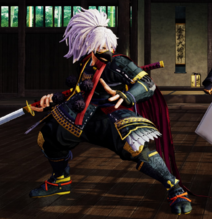
Yashamaru is a relatively straightforward character focused on fundamentals and aerial mobility. He is one of the two characters in the game with access to a double-jump, which allows him to play his neutral game from the air as well as from the ground. His long-reaching, damaging strikes lend themselves naturally to a keepout playstyle, although he also has a basic, yet functional mixup between his 66C overhead and 66D low slide.
Another thing that makes Yashamaru unique is how much he benefits from Rage: EX Arctic Tempest can cross up, depending on range, and his raged 5C and EX Wintry Gust both grant a followup on hit. It is not uncommon for Yashamaru to deal 40% damage or more when enraged. However, with just 3 Special moves at his disposal, Yashamarus kit feels somewhat limited compared to the rest of the cast. His offense is also extremely unsafe, meaning he has to commit to hard reads from time to time.
Playstyle
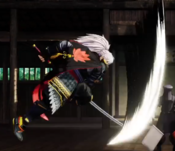
 High-flyer Yashamaru Kurama controls the match with amazing air control, strong mix-up tools, great pokes and unique and powerful enhancements when enraged. High-flyer Yashamaru Kurama controls the match with amazing air control, strong mix-up tools, great pokes and unique and powerful enhancements when enraged.
|
| Strengths |
Weaknesses
|
- Double jump: His double jump gives him (almost) unrivaled maneuverability in neutral, allowing for unique mix-up options.
- Excellent 50/50: Yashamaru gets very good mixup options, mainly due to the aforementioned double jump.
- Rage enhancements: Rather than just a single special, Yashamaru's entire kit gets an upgrade when his rage bar fills. Gets further buffs when popping rage explosions, along with a visual change.
- Great anti-air: Yashamaru's n.5C has a huge disjointed off-the-ground hitbox and incredibly fast startup, making it every effective for punishing jump attempts.
- Above-average reach on his normals: Yashamaru has some of the more further-reaching pokes and punishes of the cast, making him scary at most ranges.
- Good Punishment: Wide range of consistent punishment options
|
- Highly Punishable Mixups: While strong, Yashamaru's mixup tools are all extremely punishable and will often result in lost rounds if they are blocked.
- Unconventional WFT: Yasha has no real way of comboing into his WFT, making its use limited
- Reliant on Rage: If he wants to use specials, he has to have rage available, since most of his base form specials aren't very good or are highly situational.
|
Gameplan
Yashamaru is primarily a defensive character who relies on whittling the opponent down with single button pokes, air to airs, baits and punishes. Along with Haohmaru, he is the main face of the game, meaning that his restrictive nature and low execution barrier teaches the player how to be patient and use the system mechanics effectively, making him great for beginners and the old-school crowd alike. To put it simply, he isn't good because he has strong tools, he is good because he is efficient at dealing with other character's strong tools.
This is all thanks to the one tool that sets him apart from every other character in the game; the double jump. It's a simple yet robust movement option that opens up a whole world of depth for Yashamaru. The very act of jumping itself is already a good option in this game, but chuck a second jump in the mix and suddenly it can seem hopeless to land any kind of meaningful damage on him. You will be and should be double jumping a lot. It forces your opponent to make decisions such as committing to a DP or going in for an air-to-air. This is where you bait and punish the opponent for overextending. Jump forward to elicit the DP, then jump back and punish it hard with a heavy slash or Super Special Move (SSM). This is how and where you'll be scoring most of your damage.
Running with the life lead is key and Yashamaru has more than enough options to do so. However, if the opponent threads the needle correctly and knocks you down, or if they steal the life lead, that's when Yashamaru's true weaknesses are exploited. Unlike a lot of other characters, he can't just dictate neutral with a fireball and a DP. He has no invincible reversals, reliable grounded anti airs or escape options. Almost everything other than aerial buttons and pokes are very punishable. Once they take back the lead, the match starts to become this pitiful cat and mouse chase where Yashamaru is forced to make hard reads to get in and steal it back.
He is drastically changed in rage more so than others, so Just Defending whenever you can is the meaningful optimization that separates the intermediate players and the high level ones. Not only does his damage output increase tenfold but his Arctic Tempest (DP / 623+S) turns into an imperative cross up tool used to catch your opponent off guard in the hopes of taking the life lead back whenever you're at a deficit.
Be smart and be crafty with your double jump. Always put the ball in their court and force them to approach you. Sit on that life lead and play lame. That is Yashamaru's true strength and that is his gameplan.
Yashamaru's air specials have a height restriction, which means that if you want to tiger knee them, you can't simply perform a 2369 motion like other characters. Instead, you will need to add another grounded directional at the end. 4, 1, 2, 3 and 6 all work, so simply find what is most comfortable for you. For example, if you wanted to tiger knee j.236C for the quick overhead in rage, rather than inputting 2369C you would use something like 23696C, but any grounded direction works.
Neutral
Because of his double jump, Yashamaru's neutral falls outside of the norm. He has an unorthodox method of attaining damage and screen control but it is most certainly a great one. Because of his aerial options, he adopts the philosophy of "air footsies" as a means for whiff punishing the opponent. This means that anything from air-to-air attempts to DPs can be exploited.
On the ground, it's easy to imagine that his far medium slash (otherwise known as 5B) is his greatest poke. It has a long amount of range when compared to most characters and it serves well as a means of whiff punishment and interrupting forward movement. Other than this, however, he doesn't really have any other grounded pokes he can mix it up with. This means that his ground control alone is quite linear and can be easily adapted to and shut down with a deflect (qcf+A/B). It's always best to keep yourself at the mid-range to intercept their approach with 5B instead of going in yourself.
His running Heavy Slash (66C) is a full screen overhead which knocks the opponent away on hit, granting a good grip of damage while giving the opportunity to either run in or back away safely. He is also airborne during the animation which means it can travel over a number of low attacks and fireballs. Examples include Kyoshiro's fireball, Haohmaru's fireball, Jubei's fireball and Wu Ruixang's floor trap. Introducing this method of punishing projectiles will make the opponent second guess their options for zoning. If blocked, it is dangerously punishable, so it holds a lot of risk.
If you find yourself up close with the opponent, he doesn't have tremendous options. The two most common tools used in this situation are 2D (crouching kick) and Surprise Attack (universal overhead, B+C). 2D is his safest and quickest attack option but it barely offers any reward. It is mostly used to check the opponent's movement and blocking habits to condition them to guard low. After conditioning them with 2D, Surprise Attack will have a higher chance of hitting. If it connects, you have the advantage (+3) which means you can continue to attack safely. It is punishable when blocked, but correctly spacing it slightly further away from the opponent will render it a lot harder to punish with anything meaningful. Mixing these options up with a Guard Break (throw, C+D) is all he really has offensively at close range.
His ground control doesn't bare a lot of nuance. This opens up his stronger and more effective air game. Because of his double jump, he can dodge and weave his way throughout the space with ease, dictating the pace of the match. His air buttons have a gargantuan amount of range.
Jumping Light Slash (jump A) is an incredibly fast and reliable air-to-air. Yashamaru has no real normal/special anti-airs so jump back A is a great way of sniping them while keeping your distance. Its downward hitbox makes it a menace in real match situations. Jumping Kick (jump D) is also a quick vertical attack but with a lot less range. It is actually a lot harder for the opponent to anti air with a button than his other jumping attacks so it does have its niche uses. Jumping Medium Slash (jump B) is almost used in the exact same way as jump A but in a more horizontal capacity. It is slightly slower than jump A but also deals more damage, so you will more commonly use them in conjunction with one another to be as risk free as possible. He has two versions of jumping Heavy Slash (jump C), a neutral jump one and a forward/back jump one. Neutral jump C is a huge button that come crashing down vertically yet also covers a large amount of space in front of him. Forward/back jump C is a monstrous button that sweeps almost all around him. These are the heavy hitters which will cause your opponent to think twice before confronting him in the air again. There is a catch, however. They may do damage and cover a great amount of space, but they are among the slowest air buttons in the game. This means that an unnecessary reliance or abuse of jump heavies will usually result in taking the opponent's faster air-to-air. Yashamaru thrives in being as annoying and risk free as possible, so be wary. Never forget to use every single one of his air buttons in tandem with each other.
Okizeme
His EX Arctic Tempest (623+S) is an effective crossup tool which can put them in the exact same knockdown situation if landed successfully. The trajectory can be altered depending on which version of the attack you use, so placing it correctly on top of the opponent's head can be next to impossible for them to block because they just don't know which side it's hitting them on. If this is blocked then prepare to eat a heavy punish.
EX Azure Gale (236+S) passes through the opponent on contact. This means that, when timed correctly with their wakeup, it can actually cross them up. The timing is incredibly tricky and it can be hard to pull off considering rolls. This is also punishable if blocked.
His WFT can be used as a meaty attack which can score you a lot of free chip damage. If used from the correct range, the opponent will have no choice but to wake up and block the oncoming barrage of tengu feathers while being completely safe. It isn't uncommon to win matches through chip damage this way. This move is very unsafe if performed too close to an opponent who is rolling towards you.
Most invincible reversals in this game have a lot of startup. This means that a well timed meaty Close 2A (crouching light slash) can be used to intercept jumps, back dashes and other attacks on their wakeup while still being safe against a wakeup DP. When used correctly, the meaty Close 2A will recover before the active frames of their reversal come out, so you will be able to block in time for a hefty punish. This works against Charlotte, Genjuro (WITHOUT rage), Shiki and Yoshitora to name a few.
Normal Moves
Far Slashes
5A
5A
|
| Damage
|
Guard
|
Startup
|
Active
|
Recovery
|
Total
|
Hit Adv
|
Block Adv
|
Guard Dmg
|
Cancel
|
Recoil
|
Deflectable
|
Unarmed
|
| 30
|
Mid
|
9
|
-
|
-
|
28
|
-7
|
-5
|
5
|
Yes
|
Yes
|
Yes
|
No
|
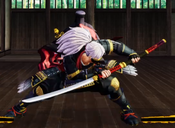
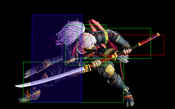
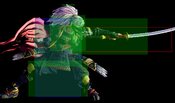
Yashamaru does a quick strike with the hilt of his nodachi.
- Above-average range for a light normal.
- Deflectable.
|
|
Toggle Hitboxes Toggle Hitboxes
|
5B
5B
|
| Damage
|
Guard
|
Startup
|
Active
|
Recovery
|
Total
|
Hit Adv
|
Block Adv
|
Guard Dmg
|
Cancel
|
Recoil
|
Deflectable
|
Unarmed
|
| 100
|
Mid
|
14
|
-
|
-
|
38
|
-4
|
-12
|
10
|
No
|
Yes
|
Yes
|
No
|
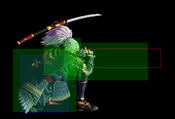
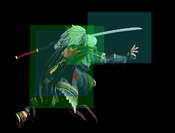
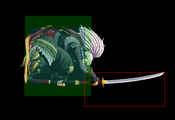
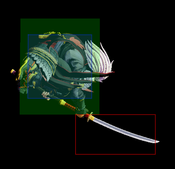
Yashamaru leans forward and thrusts forward with his blade.
- One of the best moves in Yashamaru's arsenal, due to its great horizontal range and longer than average active frames, making it very strong in neutral and very effective for checking dashes and projectiles.
- The long active frames will even catch opponents jumping or backdashing in many scenarios.
- These traits also make it easy to deflect, however.
- While this move is a very important staple of Yashamaru's ground game, it shouldn't be overused due to aware opponents being able to deflect it easily.
|
|
Toggle Hitboxes Toggle Hitboxes
|
5C
5C 5C's regular strike 5C's regular strike 5C's rage-only followup. 5C's rage-only followup.
|
| Version
|
Damage
|
Guard
|
Startup
|
Active
|
Recovery
|
Total
|
Hit Adv
|
Block Adv
|
Guard Dmg
|
Cancel
|
Recoil
|
Deflectable
|
Unarmed
|
| 5C
|
300
|
Mid
|
27
|
-
|
-
|
74
|
-7
|
-16
|
25
|
No
|
Yes
|
Disarm
|
No
|
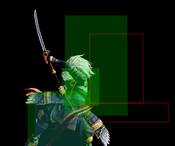
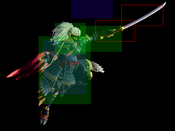
Yashamaru grips his nodachi with both hands and does a heavy-hitting downward slash.
- Yashamaru's 5C compensates for its painfully slow startup and recovery with the second hardest-hitting button in the entire game, with it only being outdamaged by Warden's far 5C.
- Able to punish whiff throws by backdash and micro walks forward before pressing the deadly C button.
- Guaranteed to punish after a successful weapon deflect, making Yashamaru's deflect very strong even without SSM.
|
| Rage
|
480 (360,120)
|
-
|
-
|
-
|
-
|
-
|
KD
|
-
|
-
|
-
|
-
|
-
|
No
|
5C gets upgraded with max rage, gaining a followup attack by pressing C again, doing additional damage and giving a knockdown, since it counts as an additional heavy slash.
|
|
Toggle Hitboxes Toggle Hitboxes
|
2A
2A
|
| Damage
|
Guard
|
Startup
|
Active
|
Recovery
|
Total
|
Hit Adv
|
Block Adv
|
Guard Dmg
|
Cancel
|
Recoil
|
Deflectable
|
Unarmed
|
| 30
|
Mid
|
9
|
-
|
-
|
29
|
-8
|
-5
|
5
|
Yes
|
Yes
|
Yes
|
No
|
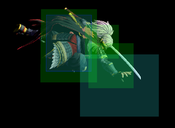
Yashamaru does a crouching hilt attack.
- Functionally similar to his 5A.
|
|
Toggle Hitboxes Toggle Hitboxes
|
2B
2B
|
| Damage
|
Guard
|
Startup
|
Active
|
Recovery
|
Total
|
Hit Adv
|
Block Adv
|
Guard Dmg
|
Cancel
|
Recoil
|
Deflectable
|
Unarmed
|
| 100
|
Mid
|
12
|
-
|
-
|
40
|
-8
|
-12
|
10
|
Yes
|
Yes
|
Yes
|
No
|
Yashamaru does a crouching downwards slash.
- A faster and shorter range alternative to 5B.
- Hits low to the ground, despite the animation, making it unreliable as an anti-air.
- Special cancellable.
- Confirms into 236A at any range except the very tip of the hitbox.
|
|
Toggle Hitboxes Toggle Hitboxes
|
2C
2C
|
| Damage
|
Guard
|
Startup
|
Active
|
Recovery
|
Total
|
Hit Adv
|
Block Adv
|
Guard Dmg
|
Cancel
|
Recoil
|
Deflectable
|
Unarmed
|
| 180 [100,80]
|
Low,Low
|
11,29
|
-
|
-
|
66
|
-7
|
-28
|
25
|
No
|
Yes
|
No
|
No
|
Yashamaru does two wide crouching sweeps with his blade.
- A two hitting low with great range and very fast start-up.
- This move can catch opponents off guard from a respectable distance away. When combined with 5B it's a very effective part of Yashamaru's grounded neutral, as they cover each others' respective weaknesses.
- However, due to this move hitting very low to the ground, it can be high profiled by most universal overheads. Overuse this move will also see you eating jump-ins more often than not.
|
|
Toggle Hitboxes Toggle Hitboxes
|
Near Slashes
n.5A
n.5A
|
| Damage
|
Guard
|
Startup
|
Active
|
Recovery
|
Total
|
Hit Adv
|
Block Adv
|
Guard Dmg
|
Cancel
|
Recoil
|
Deflectable
|
Unarmed
|
| 30
|
Mid
|
5
|
-
|
-
|
19
|
-2
|
-5
|
5
|
Yes
|
No
|
No
|
No
|
Yashamaru does a quick backfist strike.
- Standard n.5A.
- Special cancellable.
|
|
Toggle Hitboxes Toggle Hitboxes
|
n.5B
n.5B
|
| Damage
|
Guard
|
Startup
|
Active
|
Recovery
|
Total
|
Hit Adv
|
Block Adv
|
Guard Dmg
|
Cancel
|
Recoil
|
Deflectable
|
Unarmed
|
| 80
|
Mid
|
7
|
-
|
-
|
29
|
-2
|
-12
|
10
|
Yes
|
Yes
|
Yes
|
No
|
Yashamaru quickly grabs his nodachi with both hands and does a fast upward slash.
- Along with n.2B, this is Yashamaru's go-to close range combo starter, usually used to cancel into 236A.
- Doesn't anti-air very well, despite the animation.
|
|
Toggle Hitboxes Toggle Hitboxes
|
n.5C
n.5C
|
| Damage
|
Guard
|
Startup
|
Active
|
Recovery
|
Total
|
Hit Adv
|
Block Adv
|
Guard Dmg
|
Cancel
|
Recoil
|
Deflectable
|
Unarmed
|
| 220
|
Mid
|
13
|
-
|
-
|
43
|
-3
|
-28
|
25
|
No
|
Yes
|
Disarm
|
No
|
Yashamaru does an upwards crescent slash.
- Doesn't hit as hard as its far counterpart, but its much faster startup makes it easier to use as a punish option.
- Yashamaru steps back slightly during the move's startup, so it has a tendency to whiff in certain unconventional spacings.
- Does have a pretty generous upwards hitbox, making it a decent situational anti-air for people right above you.
|
|
Toggle Hitboxes Toggle Hitboxes
|
n.2A
n.2A
|
| Damage
|
Guard
|
Startup
|
Active
|
Recovery
|
Total
|
Hit Adv
|
Block Adv
|
Guard Dmg
|
Cancel
|
Recoil
|
Deflectable
|
Unarmed
|
| 30
|
Mid
|
5
|
-
|
-
|
18
|
-1
|
-4
|
5
|
Yes
|
No
|
No
|
No
|
Yashamaru does a crouching backfist strike.
- Crouching version of his n.5A, but slightly safer on block.
|
|
Toggle Hitboxes Toggle Hitboxes
|
n.2B
n.2B
|
| Damage
|
Guard
|
Startup
|
Active
|
Recovery
|
Total
|
Hit Adv
|
Block Adv
|
Guard Dmg
|
Cancel
|
Recoil
|
Deflectable
|
Unarmed
|
| 90
|
Mid
|
10
|
-
|
-
|
33
|
-3
|
-12
|
10
|
Yes
|
Yes
|
Yes
|
No
|
Yashamaru does a quick sweeping strike with his sword.
- The other combo starter along with n.5B.
- Slower start up but deals a little bit more damage.
|
|
Toggle Hitboxes Toggle Hitboxes
|
n.2C
n.2C
|
| Damage
|
Guard
|
Startup
|
Active
|
Recovery
|
Total
|
Hit Adv
|
Block Adv
|
Guard Dmg
|
Cancel
|
Recoil
|
Deflectable
|
Unarmed
|
| 200 [140,60]
|
Mid,Mid
|
11
|
-
|
-
|
71
|
KD
|
-28
|
25
|
No
|
Yes
|
Disarm
|
No
|
Yashamaru stabs the opponent, then follows up with an upwards slash, launching his opponent.
- Unlike 2C, THIS IS NOT A LOW.
- However, it does grant better damage, making it an effective punish option.
- Second hit can whiff on air hit, leaving Yashamaru wide open.
|
|
Toggle Hitboxes Toggle Hitboxes
|
Kicks
5D
5D
|
| Damage
|
Guard
|
Startup
|
Active
|
Recovery
|
Total
|
Hit Adv
|
Block Adv
|
Guard Dmg
|
Cancel
|
Recoil
|
Deflectable
|
Unarmed
|
| 50
|
Mid
|
11
|
-
|
-
|
25
|
-2
|
-5
|
5
|
No
|
No
|
No
|
Yes
|
Yashamaru does a forward-moving donkey kick.
- Slow forward kick with decent range.
|
|
Toggle Hitboxes Toggle Hitboxes
|
6D
6D
|
| Damage
|
Guard
|
Startup
|
Active
|
Recovery
|
Total
|
Hit Adv
|
Block Adv
|
Guard Dmg
|
Cancel
|
Recoil
|
Deflectable
|
Unarmed
|
| 30
|
Low
|
10
|
-
|
-
|
25
|
-3
|
-6
|
5
|
No
|
No
|
No
|
Yes
|
Yashamaru does a quick ankle kick.
- Standard standing low kick.
- Slower than 2D but with more range.
|
|
Toggle Hitboxes Toggle Hitboxes
|
2D
2D
|
| Damage
|
Guard
|
Startup
|
Active
|
Recovery
|
Total
|
Hit Adv
|
Block Adv
|
Guard Dmg
|
Cancel
|
Recoil
|
Deflectable
|
Unarmed
|
| 20
|
Low
|
5~7
|
3
|
-
|
17
|
±0~+2
|
-3~-1
|
5
|
No
|
No
|
No
|
Yes
|
|
|
|
Toggle Hitboxes Toggle Hitboxes
|
3D
3D
|
| Damage
|
Guard
|
Startup
|
Active
|
Recovery
|
Total
|
Hit Adv
|
Block Adv
|
Guard Dmg
|
Cancel
|
Recoil
|
Deflectable
|
Unarmed
|
| 70
|
Low
|
9
|
-
|
-
|
38
|
KD
|
-13
|
5
|
No
|
No
|
No
|
Yes
|
Yashamaru does a sliding sweep.
- Fast sweep kick with surprisingly good range.
|
|
Toggle Hitboxes Toggle Hitboxes
|
Dash Normals
66A
66A
|
| Damage
|
Guard
|
Startup
|
Active
|
Recovery
|
Total
|
Hit Adv
|
Block Adv
|
Guard Dmg
|
Cancel
|
Recoil
|
Deflectable
|
Unarmed
|
| 30
|
Mid
|
8
|
-
|
-
|
22
|
-2
|
-19
|
5
|
No
|
Yes
|
Yes
|
No
|
Yasha does a running hilt attack.
- Functionally a running version of his f.5A.
|
|
Toggle Hitboxes Toggle Hitboxes
|
66B
66B
|
| Damage
|
Guard
|
Startup
|
Active
|
Recovery
|
Total
|
Hit Adv
|
Block Adv
|
Guard Dmg
|
Cancel
|
Recoil
|
Deflectable
|
Unarmed
|
| 100
|
Mid
|
11
|
-
|
-
|
35
|
-4
|
-35
|
10
|
No
|
Yes
|
Disarm
|
No
|
Yashamaru lunges forward and thrusts with his blade.
- A running version of Yashamaru's far 5B, but slightly faster and with added forward momentum from his dash.
- Despite all of this move's benefits, the risks are even greater than 5B's, as deflecting dash medium & heavy attacks causes a disarm, forcing Yasha to use it sparingly.
|
|
Toggle Hitboxes Toggle Hitboxes
|
66C
66C
|
| Damage
|
Guard
|
Startup
|
Active
|
Recovery
|
Total
|
Hit Adv
|
Block Adv
|
Guard Dmg
|
Cancel
|
Recoil
|
Deflectable
|
Unarmed
|
| 160
|
High
|
24
|
-
|
-
|
81
|
KD(+66)
|
-35
|
20
|
No
|
No
|
Disarm
|
No
|
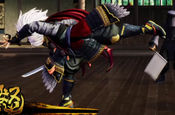
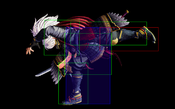
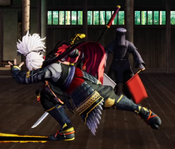
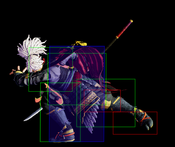
Yashamaru does a leaping slash.
- Lunging overhead that horizontally tracks to the opponent's position, meaning that as long as they're on the ground this move will connect no matter what, even from fullscreen.
- Yashamaru is considered airborne during this move.
- Due to the horizontal tracking, this move can be a reliable whiff punish against many attacks that leave opponents far away from Yashamaru, and the airborne properties even let him high profile certain attacks like Kyoshiro's projectile.
- As it is an overhead, this move can open up unsuspecting opponents when used sparingly.
- Hits airborne opponents, meaning it can catch backdashes in neutral and can be used as a follow up for certain moves, like after hitting rage enhanced j214X, for example.
|
|
Toggle Hitboxes Toggle Hitboxes
|
66D
66D
|
| Damage
|
Guard
|
Startup
|
Active
|
Recovery
|
Total
|
Hit Adv
|
Block Adv
|
Guard Dmg
|
Cancel
|
Recoil
|
Deflectable
|
Unarmed
|
| 70
|
Low
|
5~11
|
7
|
27~21
|
38
|
KD(+91~+97)
|
-17~-11
|
5
|
No
|
No
|
No
|
Yes
|
Yashamaru does a sliding sweep.
- Standard running sweep. Knocks down.
|
|
Toggle Hitboxes Toggle Hitboxes
|
Air Normals
j.A
j.A The bird's beak The bird's beak
|
| Damage
|
Guard
|
Startup
|
Active
|
Recovery
|
Total
|
Hit Adv
|
Block Adv
|
Guard Dmg
|
Cancel
|
Recoil
|
Deflectable
|
Unarmed
|
| 30
|
High
|
8
|
-
|
-
|
-
|
-
|
-
|
5
|
No
|
No
|
No
|
No
|
Yashamaru does an airborne downward thrust.
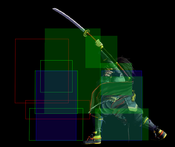
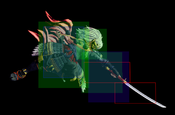
- Yashamaru's go-to air to air, due to quick startup and deceptively large hitbox.
- Performing this as a backwards jumping air to air stuffs a great majority of jump in attempts cleanly. Even opponents jumping at normally safe distances can still get smacked by this from a neutral/forward jump.
- Learning to use this move effectively is essential for playing Yashamaru, as it keeps opponents from trying to contest him from above and forces them to deal with his highly efficient ground game.
- Aside from its use as the most important air to air in his kit, this move also works as sort of a ground to air poke, letting Yashamaru start his offense and run mind games on block, and if hit particularly deep can grant a followup combo on the ground.
|
|
Toggle Hitboxes Toggle Hitboxes
|
j.B
j.B The bird's wingspan The bird's wingspan
|
| Damage
|
Guard
|
Startup
|
Active
|
Recovery
|
Total
|
Hit Adv
|
Block Adv
|
Guard Dmg
|
Cancel
|
Recoil
|
Deflectable
|
Unarmed
|
| 100
|
High
|
11
|
-
|
-
|
-
|
-
|
-
|
10
|
No
|
No
|
No
|
No
|
Yasha does a forward air slash.
- Slower than j.A and doesn't have nearly the same vertical range, but compensates with larger horizontal range. One example where you might consider using this over j.A would be against characters with floatier jumps, such as Tam Tam and Ukyo.
|
|
Toggle Hitboxes Toggle Hitboxes
|
j.C
j.8C The bird's talons The bird's talons
|
| Damage
|
Guard
|
Startup
|
Active
|
Recovery
|
Total
|
Hit Adv
|
Block Adv
|
Guard Dmg
|
Cancel
|
Recoil
|
Deflectable
|
Unarmed
|
| 160
|
High
|
16
|
-
|
-
|
-
|
-
|
-
|
20
|
No
|
No
|
No
|
No
|
Yashamaru does a downward air slash.
- Air to ground attack with larger than average vertical range, primarily used as a punish against blocked DPs (that aren't Yoshitora's). You'll need to practice the timing for landing this into n.2C, as the somewhat lengthy startup makes it easy to mistime. If you perform it too late, Yashamaru will land before the active frames come out.
- Aside from this purpose, it also sees situational use in combo jump pressure.
|
|
Toggle Hitboxes Toggle Hitboxes
|
j.7/9C
j.7/9C The bird's...other talons? The bird's...other talons?
|
| Damage
|
Guard
|
Startup
|
Active
|
Recovery
|
Total
|
Hit Adv
|
Block Adv
|
Guard Dmg
|
Cancel
|
Recoil
|
Deflectable
|
Unarmed
|
| 200
|
High
|
15
|
-
|
-
|
-
|
-
|
-
|
20
|
No
|
No
|
No
|
No
|
Yashamaru does a wide slash below him.
- Yashamaru's primary jump in.
- Despite the appearance it does have a respectable downwards hitbox.
- Like n.jC, you'll need to perform it slightly earlier than normal in order for the move to come out before Yashamaru hits the ground, but if you do it too early you won't get a true followup from it.
- This move also makes for a high reward callout air to air.
|
|
Toggle Hitboxes Toggle Hitboxes
|
j.D
j.D
|
| Damage
|
Guard
|
Startup
|
Active
|
Recovery
|
Total
|
Hit Adv
|
Block Adv
|
Guard Dmg
|
Cancel
|
Recoil
|
Deflectable
|
Unarmed
|
| 30
|
High
|
10
|
-
|
-
|
-
|
-
|
-
|
5
|
No
|
No
|
No
|
Yes
|
Yashamaru does an air kick.
- Starndard air kick with good downwards hit-box.
|
|
Toggle Hitboxes Toggle Hitboxes
|
Unarmed Normals
u.5S
u.5S
|
| Damage
|
Guard
|
Startup
|
Active
|
Recovery
|
Total
|
Hit Adv
|
Block Adv
|
Guard Dmg
|
Cancel
|
Recoil
|
Deflectable
|
Unarmed
|
| 50
|
Mid
|
5
|
-
|
-
|
26
|
-1
|
-6
|
5
|
No
|
No
|
No
|
Only
|
Yashamaru does a backfist attack.
- Standard unarmed ground normal.
|
|
Toggle Hitboxes Toggle Hitboxes
|
u.2S
u.2S
|
| Damage
|
Guard
|
Startup
|
Active
|
Recovery
|
Total
|
Hit Adv
|
Block Adv
|
Guard Dmg
|
Cancel
|
Recoil
|
Deflectable
|
Unarmed
|
| 50
|
Mid
|
5
|
-
|
-
|
26
|
-1
|
-6
|
5
|
No
|
No
|
No
|
Only
|
Yashamaru does a crouching backfist.
- Functionally the same as n.2A.
|
|
Toggle Hitboxes Toggle Hitboxes
|
ju.S
ju.S
|
| Damage
|
Guard
|
Startup
|
Active
|
Recovery
|
Total
|
Hit Adv
|
Block Adv
|
Guard Dmg
|
Cancel
|
Recoil
|
Deflectable
|
Unarmed
|
| 50
|
High
|
6
|
-
|
-
|
-
|
-
|
-
|
5
|
No
|
No
|
No
|
Only
|
Yashamaru does a downward hitting palm strike.
- Standard unarmed air normal. Comes out pretty fast.
|
|
Toggle Hitboxes Toggle Hitboxes
|
u.66S
u.66S
|
| Damage
|
Guard
|
Startup
|
Active
|
Recovery
|
Total
|
Hit Adv
|
Block Adv
|
Guard Dmg
|
Cancel
|
Recoil
|
Deflectable
|
Unarmed
|
| 50
|
Mid
|
5
|
-
|
-
|
30
|
KD
|
-10
|
5
|
No
|
No
|
No
|
Only
|
Yashamaru does a running backfist punch.
- Visually the same as his u.5S and his n.5A, but with slight forward momentum and a knockdown on hit.
|
|
Toggle Hitboxes Toggle Hitboxes
|
Universal Mechanics
Guard Break
Guard Break (Throw) 5C+D / 6C+D 5C+D / 6C+D 4C+D 4C+D
|
| Version
|
Damage
|
Guard
|
Startup
|
Active
|
Recovery
|
Total
|
Hit Adv
|
Block Adv
|
Guard Dmg
|
Cancel
|
Recoil
|
Deflectable
|
Unarmed
|
| Neutral / Forward
|
0
|
Throw
|
3
|
-
|
71
|
74
|
+20
|
-
|
-
|
-
|
-
|
-
|
Yes
|
| Back
|
0
|
Throw
|
5
|
-
|
69
|
74
|
+25
|
-
|
-
|
-
|
-
|
-
|
Yes
|
Universal throw, can follow up with combos. Back throw has slower start up but better frame advantage. There is no throw tech, but throws are very punishable on whiff.
|
|
Toggle Hitboxes Toggle Hitboxes
|
Surprise Attack
Surprise Attack (Overhead)
5B+C Armed Armed Unarmed Unarmed
|
| Version
|
Damage
|
Guard
|
Startup
|
Active
|
Recovery
|
Total
|
Hit Adv
|
Block Adv
|
Guard Dmg
|
Cancel
|
Recoil
|
Deflectable
|
Unarmed
|
| Armed
|
70
|
High
|
20~21
|
-
|
-
|
42
|
+3
|
-10
|
10
|
No
|
No
|
No
|
No
|
Universal overhead which doesn't knocks down, its range is decent and has plus frame on hit. Avoiding lows and throws, not quite easy to punish on block.
|
| Unarmed
|
60
|
High
|
20~21
|
-
|
-
|
43
|
+2
|
-11~-10
|
10
|
No
|
No
|
No
|
Only
|
Universal unarmed overhead, doesn't knocks down.
|
|
Toggle Hitboxes Toggle Hitboxes
|
Dodge
Dodge
5A+B
|
| Damage
|
Guard
|
Startup
|
Active
|
Recovery
|
Total
|
Hit Adv
|
Block Adv
|
Guard Dmg
|
Cancel
|
Recoil
|
Deflectable
|
Unarmed
|
| N/A
|
-
|
1
|
16
|
22
|
38
|
-
|
-
|
-
|
-
|
-
|
-
|
Yes
|
Universal dodge. Avoids all attacks for a brief moment, and is mainly used to avoid throws.
Complete invincibility from frames 1 to 10. Strike invincibility from frames 11 to 16.
|
|
Toggle Hitboxes Toggle Hitboxes
|
Stance Break
Stance Break
A+B during Just Defense
|
| Damage
|
Guard
|
Startup
|
Active
|
Recovery
|
Total
|
Hit Adv
|
Block Adv
|
Guard Dmg
|
Cancel
|
Recoil
|
Deflectable
|
Unarmed
|
| 0
|
Mid
|
5
|
-
|
-
|
52
|
KD
|
-24
|
-
|
-
|
-
|
-
|
Yes
|
|
|
|
Toggle Hitboxes Toggle Hitboxes
|
Counter (Deflect) / Blade Catch
Counter (Deflect) / Blade Catch
236A+B Weapon Deflect Weapon Deflect Blade Catch Blade Catch
|
| Version
|
Damage
|
Guard
|
Startup
|
Active
|
Recovery
|
Total
|
Hit Adv
|
Block Adv
|
Guard Dmg
|
Cancel
|
Recoil
|
Deflectable
|
Unarmed
|
| Armed
|
0
|
N/A
|
2
|
11
|
34
|
46
|
+35~+59
|
-
|
-
|
-
|
-
|
-
|
No
|
|
|
| Unarmed
|
0
|
N/A
|
2
|
12
|
9
|
22
|
KD
|
-
|
-
|
-
|
-
|
-
|
Only
|
Universal unarmed counter.
|
|
Toggle Hitboxes Toggle Hitboxes
|
Rage Explosion
Rage Explosion
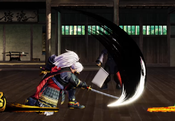
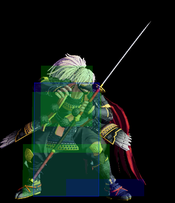
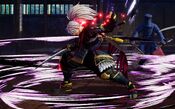
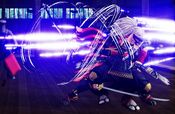
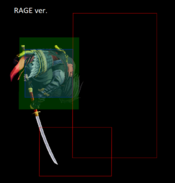
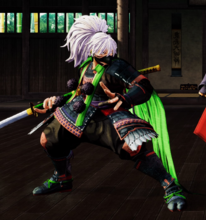
5A+B+C Yashamaru also gets a visual change while in Rage Explosion. Yashamaru also gets a visual change while in Rage Explosion.
|
| Damage
|
Guard
|
Startup
|
Active
|
Recovery
|
Total
|
Hit Adv
|
Block Adv
|
Guard Dmg
|
Cancel
|
Recoil
|
Deflectable
|
Unarmed
|
| 0
|
Unblockable
|
21
|
1
|
-
|
58
|
0
|
-
|
-
|
-
|
-
|
-
|
No
|
Universal Rage Explosion.
While the Rage Explosion itself is the same as all other characters, Yashamaru gets unique benefits from having max Rage, along with additional benefits when activating Rage Explosion, which are as follows:
While having max Rage/being in Rage Explosion:
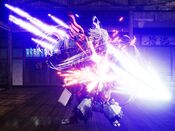
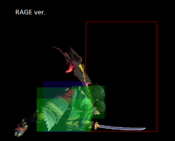
- Yashamaru gains a new followup to his far 5C, 5C> C, an upwards slash which does additional damage and knocks the opponent down on hit.
- Yashamaru gets an enhanced version of all of his specials with added damage and properties:
- His Wintry Gust launches higher and recovers faster, letting Yashamaru follow up from it.
- His Azure Gale does an additional 2 hits and travels further.
- His Arctic Tempest does an additional 9 hits (on full connect) and auto-corrects on side-switch, allowing Yashamaru to cross up opponents with it.
Furthermore, Yashamaru gains the following buffs only while in Rage Explosion:
- Yashamaru gains faster dash startup, additional dash speed and less dash recovery
- His Ebony Tengu Feathers gain an additional 10 hits and come out faster.
|
|
Toggle Hitboxes Toggle Hitboxes
|
Lightning Blade
Lightning Blade (Issen)
5A+B+C during Rage Explosion
|
| Damage
|
Guard
|
Startup
|
Active
|
Recovery
|
Total
|
Hit Adv
|
Block Adv
|
Guard Dmg
|
Cancel
|
Recoil
|
Deflectable
|
Unarmed
|
| 300~709
|
Mid
|
9
|
-
|
-
|
-
|
KD
|
-44
|
-
|
-
|
-
|
-
|
No
|
Universal Lightning Blade.
|
|
Toggle Hitboxes Toggle Hitboxes
|
Command Moves
Double Jump
Double Jump
j.7 or j.8 or j.9 Double Jump Double Jump
|
| Damage
|
Guard
|
Startup
|
Active
|
Recovery
|
Total
|
Hit Adv
|
Block Adv
|
Guard Dmg
|
Cancel
|
Recoil
|
Deflectable
|
Unarmed
|
| -
|
-
|
-
|
-
|
-
|
-
|
-
|
-
|
-
|
-
|
-
|
-
|
Yes
|
Yashamaru can do a second jump in any upwards direction.
- The crux of Yashamaru's game plan in nearly all aspects. It adds another layer to his neutral with the ability to harass opponents from above, especially if he can occupy a sweet spot just outside their ideal punish range. It also combines with combo jump to give him a very unique pressure/mixup game.
- It should be noted that while the second jump will give you a second chance at avoiding an anti air Issen, you will inevitably need to return to the ground from that jump, meaning you are still not entirely safe.
|
|
Special Moves
Wintry Gust
Wintry Gust
j.214S
|
| Version
|
Damage
|
Guard
|
Startup
|
Active
|
Recovery
|
Total
|
Hit Adv
|
Block Adv
|
Guard Dmg
|
Cancel
|
Recoil
|
Deflectable
|
Unarmed
|
| Normal
|
180 [80,100]
|
Mid
|
17
|
-
|
-
|
-
|
KD
|
-
|
20
|
No
|
No
|
No
|
No
|
| Rage
|
180 [60,120]
|
Mid
|
17
|
-
|
-
|
-
|
KD
|
-
|
20
|
No
|
No
|
No
|
No
|
Yashamaru tosses his blade down in the air and moves backward, teleporting behind the enemy on hit and launching them into the air.
- Angle of the projectile varies with button strength.
- On ground hit, Yashamaru teleports behind the opponent to launch them into the air.
- On air hit, hits opponent for low damage and knocks down.
- Can be jump cancelled on whiff/block, adding another layer of mix to Yashamaru's air movement and approach.
- This move is primarily used as a whiff punish tool against projectiles or stopping opponents from getting close.
- Rage enhanced version launches higher and recovers faster, allowing for followups.
|
|
Toggle Hitboxes Toggle Hitboxes
|
Azure Gale (Ground)
Azure Gale (Ground)
236S (Ground)
|
| Version
|
Damage
|
Guard
|
Startup
|
Active
|
Recovery
|
Total
|
Hit Adv
|
Block Adv
|
Guard Dmg
|
Cancel
|
Recoil
|
Deflectable
|
Unarmed
|
| A / Rage
|
100 / 204 (42×2,120)
|
Mid
|
15 / 15
|
-
|
-
|
75 / 75
|
KD (+76) / KD (+87)
|
-18
|
18 / 9
|
No
|
No
|
No
|
No
|
| B / Rage
|
100 / 204 (42×2,120)
|
Mid
|
22 / 22
|
-
|
-
|
? / 90
|
KD (+76) / KD (+87)
|
-18
|
18 / 9
|
No
|
No
|
No
|
No
|
| C / Rage
|
100 / 204 (42×2,120)
|
Mid
|
18 / 17
|
-
|
? / [30]
|
81 / ?
|
KD / KD (+87)
|
N/A
|
-
|
No
|
No
|
No
|
No
|
Yashamaru lunges forward at the opponent with a thrusting strike.
- A and B versions are both horizontal strikes, with A version being faster but with shorter range. C version goes upwards at a 45 degree angle.
- 236A is commonly used as a combo part and slow recoil cancel tool, while 236B is a long range punish tool.
- Despite its appearance, C version is NOT an invincible anti-air, and the sharp angle makes it difficult (but far from impossible) to use as an anti-air, although it only hits grounded opponents.
- Rage enhanced versions travel further and do an additional 2 hits and additional damage.
- While in rage, the B version gains projectile invuln for most of the travel duration, and the C version gains head invuln on startup.
|
|
Toggle Hitboxes Toggle Hitboxes
|
Azure Gale (Air)
Azure Gale (Air)
236S (Air)
|
| Version
|
Damage
|
Guard
|
Startup
|
Active
|
Recovery
|
Total
|
Hit Adv
|
Block Adv
|
Guard Dmg
|
Cancel
|
Recoil
|
Deflectable
|
Unarmed
|
| A / Rage
|
100 / 204 (42×2,120)
|
N/A
|
15 / 14
|
-
|
[30]
|
-
|
KD
|
N/A
|
-
|
No
|
No
|
No
|
No
|
| B / Rage
|
100 / 204 (42×2,120)
|
N/A
|
15 / 14
|
-
|
[30]
|
-
|
KD
|
N/A
|
-
|
No
|
No
|
No
|
No
|
| C / Rage
|
100 / 204 (42×2,120)
|
High
|
17 / 16
|
-
|
[40]
|
-
|
KD
|
-22 / -20
|
18 / 9 * n
|
No
|
No
|
No
|
No
|
Yashamaru does a lunging air thrust.
- Airborne versions of Azure Gale. The A and B versions have the same start-up and landing recovery, and the B version has longer range.
- C version dives to the ground at a 45 degree angle.
- Has minimum height restriction and therefore cannot be TK'd.
- These can be used essentially as budget air dashes to fly over things like Rimururu WFT or to escape the corner (although it's not completely safe).
- They can also be used as air to air (they don't hit grounded opponents at all), but Yashamaru generally has better options.
- While in rage, A and B versions gain air attack invuln and the C version loses its height restriction, allowing for it to be TK'd for a quick overhead attack that knocks down.
|
|
Toggle Hitboxes Toggle Hitboxes
|
Arctic Tempest
Arctic Tempest
623S
|
| Version
|
Damage
|
Guard
|
Startup
|
Active
|
Recovery
|
Total
|
Hit Adv
|
Block Adv
|
Guard Dmg
|
Cancel
|
Recoil
|
Deflectable
|
Unarmed
|
| A/B/C
|
140 (30x2,80)
|
High
|
30
|
-
|
-
|
(118)
|
KD / KD (+59) / KD
|
-27 (-19)
|
18
|
No
|
No
|
No
|
No
|
| Rage
|
192 (6×10,12,120)
|
High
|
30~33
|
4
|
-
|
-
|
KD (+57)
|
-19
|
24
|
No
|
No
|
No
|
No
|
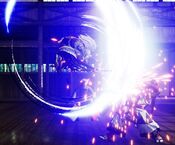
Yashamaru does two somersault slashes before slamming down his blade on the opponent.
- Numbers on Block and Total in paranthesis () means while in "Rage".
- Button pressed determines the distance he jumps at his opponent.
- Can be utilized as a recoil cancel option thanks to its high profile properties. It can also whiff punish certain things from afar, but 5B has a much better risk-reward ratio.
- The rage version deals extra damage, 9 additional hits and auto-corrects on side-switch allowing it to cross up, making it a useful mix-up tool, although it's still quite punishable on block. Đ
- Does 36 less damage if it hits from behind.
|
|
Toggle Hitboxes Toggle Hitboxes
|
Supers
Weapon Flipping Technique
Ebony Tengu Feathers
236B+C
|
| Version
|
Damage
|
Guard
|
Startup
|
Active
|
Recovery
|
Total
|
Hit Adv
|
Block Adv
|
Guard Dmg
|
Cancel
|
Recoil
|
Deflectable
|
Unarmed
|
| Max Rage
|
360 (36x10)
|
Mid
|
1+19
|
-
|
-
|
-
|
KD
|
-43~±0
|
-
|
No
|
No
|
No
|
No
|
| Rage Explosion
|
560 (28x20)
|
Mid
|
1+19
|
-
|
-
|
-
|
KD
|
-6~+33
|
-
|
No
|
No
|
No
|
No
|
Yashamaru sends a storm of shining tengu feathers at his opponent.
- Available only during Max Rage or Rage Explosion.
- Disarms on hit.
- Gains 10 additional hits and damage during Rage Explosion, while having less startup and recovery, making it safe on block.
- These projectiles deal quite a bit of chip damage (40/60 respectively) and they are not reflectable. However, this WFT doesn't combo at all, not even off a back throw into the corner.
- Although the horizontal range and active frames are great, many characters can jump over and punish it.
- Furthermore, should the opponent choose to burn their resources, every character can Rage Explosion after the screen freeze and then use Issen to beat it (or at least RE while blocking to avoid most of the chip damage).
- It's mostly used for meaty chip damage after 236A, or SSM alternative for punishing blocked DP / spot dodge throw / close range weapon deflect (not reliable for mid range deflect, the projectiles are too slow, and RE Issen can sometimes punish it).
- It can be used as a situational anti-air, because the first projectile appears at frame 10 (although it travels slowly and doesn't hit the opponent until frame 24), and only one hit is enough to disarm the opponent.
- The WFT projectile hitbox starts at Yashamaru's cape behind his back, meaning that it can catch people trying to roll behind you after getting knocked down. Does not hit behind you otherwise though, even if they're right next to you.
|
|
Toggle Hitboxes Toggle Hitboxes
|
Super Special Move
Skand's Divine Squall
641236C+D
|
| Damage
|
Guard
|
Startup
|
Active
|
Recovery
|
Total
|
Hit Adv
|
Block Adv
|
Guard Dmg
|
Cancel
|
Recoil
|
Deflectable
|
Unarmed
|
| 700
|
Mid
|
10+20
|
-
|
-
|
-
|
KD
|
-50
|
-
|
No
|
No
|
No
|
No
|
Yashamaru launches the opponent into the air and assaults them with a flurry of teleporting slashes before skewering them with his nodachi.
- Starndard SSM with above average reach and damage.
- Fast enough to connect after light deflect.
|
|
Toggle Hitboxes Toggle Hitboxes
|
Combos
List combos, use numpad notation.
- (n.5B / n.2B) xx 236A
Yashamaru's bread 'n butter combo. Commonly used as punish combo, especially in max rage where it does even more damage than near 5C / near 2C / far 2C.
- 2B xx 236A
Mid range poke / punish combo, great for auto confirm but it does combo if only the tip of 2B hits.
- Rage j.214S...
- 236C
The regular follow up with most damage. Normal 236C also hits in case of just running out of rage. 236B / Air 236B deals the same damage but much more difficult to connect.
- Rage 623C
A tiny bit less damage than above, but faster to finish and lands right in front of the opponent for wake up offense.
- 66C
Same damage as above, even faster to finish, but much more difficult to connect (dash for a few frames to connect).
- 66 j.B
Less damage but create air reset quickly but also difficult to connect, jump A also his but the damage is too little.
- Lighting Blade
Issen follow up, dash right next to the opponent's landing spot to connect.
- 4CD / 5CD...
- 2B xx 236A
New combo since version 1.70, allows Yashamaru to deal much more damage during max rage. Upon rage 236A hits, press 5D or 5A and then WFT for meaty chip damage.
- 2C
Give up some damage to keep the opponent on the ground (e.g. during rage explosion)
- Lighting Blade
Issen follow up, deals a tiny bit more damage than 2B combo only if you have an almost full bar, not recommended.
- Jump B/C (deep hit)...
- n.5C / 2C / n.2C
Standard knock down combo.
- (n.5B / n.2B) xx 236A
Same as regular combo, far 2B usually doesn't combo into 236A because of the deep hit push back, use 5B or Rage 236A instead.
- Lighting Blade
Issen combo.
Guard Crush
- n.5C...
After recovery...
- n.2B xx 236A
Follow up with medium combo. Knocks down.
- n.5C
Max damage without rage but no knock down.
- SSM
SSM follow up. (Be careful with opponent bursting to avoid it)
- 5C...
After recovery...
- 2B xx 236A
Follow up with medium combo. Knocks down.
- 5C
Max damage without rage but no knock down.
- n.5C / 5C...
Cancel recovery...
- Lighting Blade
Universal Issen combo.
- WFT
Look he can actually get WFT now...
- n.5C...
After recovery... (Swaggy route in rage)
- j214A...
Neutral jump j214A...
- 623S
Pizza cutter.
- 236C
Azure Gale.
Videos
Colors
External Links
