 花諷院骸羅, Kafuin Gaira
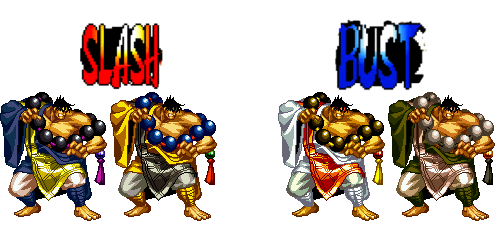 Colors
Introduction
Gaira’s illustrious college football career came to a grinding halt when he accidentally killed someone during a game. He was expelled and sent to serve as a monk at a local Buddhist shrine in the hopes that he would learn to control his temper. He didn’t.
Gaira is the boisterous nephew of Samurai Shodown 2 veteran Nicotine Caffeine. He uses his large stature, the strength that comes with it, free guard cancels, and huge normals with surprising speed to pummel, grapple, and SHOUT his opponents into submission.
Slash Gaira could be classified as a more 'mixup' oriented incarnation, for lack of a better descriptor. He boasts an incredible anti-air grab, two threatening hitgrabs that form a high/low mixup at close range, and an all purpose shoulder tackle that provides corner carry and makes his punishes seriously hurt. This versatile toolkit lends itself to conditioning the opponent to block a certain way and hurting them for it. A lot.
Bust Gaira is all grappler, all the time, mixups be damned. He gains a 236S series that keeps him close to the opponent and counterpokes like nobody's business, but his command throw is the star of the show. It cashes in hard on unjumpable setups, can combo on hit AND block, and it’s one of the best guard cancels a monk could ask for. He wants nothing more than to be in his opponent's face and hammer toss them to the ends of feudal Japan.
| Strengths |
Weaknesses
|
- High damage, long range buttons, and speed to match
- Slash has one of the strongest anti airs in the game
- Bust doesn't even need to mix up the opponent for his damage
|
- Large hurtbox makes him especially susceptible to combos and crossups
- Slash has to correctly guess and condition the opponent for large damage
- Bust has little in the way of combo game and his toolset is limited
|
Stats
| Damage taken
|
Rage rate
|
Rage duration
|
Throw startup
|
Deflect advantage
|
Deflect disadvantage modifier
|
| 95%
|
100%
|
3.5 sec
|
14f
|
+30
|
±0
|
Normal Moves
Far Slashes
5A
- (Properties) - Deflectable. Air Unblockable.
- (Description) - A very swift hook that moves Gaira forward with each use. Not his go-to anti-air, but I suppose you could tag someone with this. For whatever reason this can be deflected. (??????)
|
5B
- (Properties) - Cancellable. Deflectable. Air Unblockable
- (Description) - Gaira's primary poke, boasting great reach, decent speed, and decent damage. Gaira swings his beads at a slight downward angle, striking anyone caught in their path. No whiffing on crouching characters in this game, folks. While special cancellable, Gaira is sadly too far away to connect into anything. Bust can't even land a command throw afterwards. There's always 22AB though.
|
5C
- (Properties) - Deflectable. Air Unblockable
- (Description) - Remember when I said Far 5B had great reach? Well, so does Far 5C, hitting at right about the same max distance. Gaira takes a mighty step forward and clocks his opponent in the jaw with his mala beads. After the initial strike, Gaira takes a step back to his original position. Very good for stopping your opponent if they're carelessly running towards you, or underestimate Gaira's range. Has a sad propensity to whiff on small crouchers such as Shizumaru.
|
2A
- (Properties) - Air Unblockable
- (Description) - Not much to say here. Just a basic crouching jab. Hits mid, decent speed, but doesn't move Gaira forward like his Far 5A. Punching closer to the ground seems to remove the whole "can be deflected" thing though.
|
2B
- (Properties) - Deflectable. Air Unblockable
- (Description) - Similar to Gaira's Far 2A, his Far 2B is a less versatile version of his Far 5B. It has less range and is hilariously punishable on block thanks to no recoil animation, so no real reason to use this over its standing variant, or even 2C.
|
2C
- (Properties) - Deflectable. Air Unblockable.
- (Properties) - Gaira swings his beads in a horizontal path similar to Far 2B, but it's better in every way. It's faster, safer, and comes with the damage associated with heavy slashes! Getting hit by this will ruin anyone's day.
|
Near Slashes
n.5A
- (Properties) - Deflectable. Air Unblockable
- (Properties) - A standard jab. Decent speed/range, all things considered. You can use this if you think you're opponent is going to try to up back, but also if you don't want to use Gaira's other hard read AA options for whatever reason.
|
n.5B
- (Properties) - Cancellable. Deflectable. Air Unblockable
- (Description) - Gaira quickly thrusts his mighty arm upward, striking the opponent in the face with a fistful of mala beads. This will absolutely blow up bad jump-ins and crossup attempts. But what makes this normal -- and Samurai Shodown 3 Gaira as a whole -- so unique, is the generous special cancel window, giving both Slash and Bust Gaira opportunities for some REAL damage. As such, it's his quickest general punish tool.
|
n.5C
- (Properties) - Cancellable. Deflectable. Air Unblockable.
- (Description) - This. Normal. Gaira hoists his mala beads over his head before bringing them down with the force of a dharmapala. Now, normally getting hit by a heavy slash is enough to ruin anyone's day, but both Slash and Bust Gaira have their own options to cancel into, making this Gaira's best punish tool.
|
n.2A
- (Properties) - Air Unblockable
- (Description) - It's like Far 2A but if Far 2A was Near-er
|
n.2B
- (Properties) - Cancellable. Deflectable. Air Unblockable
- (Description) - Gaira swings his mala beads upward, taking a moment to close his eyes in prayer afterwards. Like Far 2B, Near 2B has no recoil animation on block. Unlike Far 2B, you can cancel it! Though he has safer and faster normals for more general situations, be sure to take advantage of this if you ever spy the opportunity -- particularly in Bust Technique.
|
n.2C
- (Properties) - Deflectable. Air Unblockable
- (Description) - This one's got some serious T-Rex arm range (be careful about your proximity to the opponent!). It's his fastest heavy button -- faster than his mediums, in fact. But you need to be point blank to land it, and for it to deal its full damage, it needs to hit on the first active frame.
|
Overheads
5BC
- (Properties) - Hits high.
- (Description) - Deceptive overhead with good range. It feels like a KOF short hop for some reason. Just about as punishable as your standard 5BC when poorly spaced, and air blockable to boot, but the forward hop combined with big reach and low crushing capability keeps this one in a comfy niche.
|
u.5BC
- (Properties) - Hits high.
- (Description) - Safer AND more active than the armed overhead?? Okay.
|
Kicks
5D
- (Properties) - Cancellable (First hit only). Air Unblockable
- (Description) - Das Boot. Decent range for a kick, and hits twice up close, once bring his knee up, the second when he sticks his leg out. The real reason to use this move is that it's his fastest non-recoiling button with a special cancel window, which is ESPECIALLY good news for Ol' Bust Gaira. The only problem is that both hits can whiff on certain crouching characters; specifics are noted in the Strategy section. As such, trying to tag your opponent with this on wakeup is tricky, and the recovery is HUGE if not cancelled, so be careful with it.
|
6D
- (Properties) - Cancellable. Air Unblockable. Deflectable(?????????)
- (Description) - Gaira tries to scuff his opponent's shoes, but a majority of the roster are wearing geta, so it doesn't really work out for him, thus hitting mid instead of low. Similar to 5D, this kick is special cancellable on hit and block, allowing you to set up inescapable command grab setups when timed right. This move is also kara-cancellable, but, with it being special cancellable on hit/block already, you probably won't be kara-ing it much.
- About the whole "deflect" thing, don't ask. We don't know either.
|
2D
- (Properties) - Air Unblockable.
- (Description) - This, again, hits mid so don't be alarmed when your opponent stand blocks this. Decent range, like all of Gaira's kicks, but it lacks the same special cancellable window that 5D/6D have. Because of that, as well as the slightly less bad 3D completely outclassing it, you likely won't be seeing this used all that much.
|
3D
- (Properties) - Air Unblockable. Knockdown.
- (Description) - I bet you'll never guess how this kick hits. Surprise! It hits mid. Similar to 2D, between stand blocking this kick and it not having a special cancellable window, you likely won't be using this all that much as Gaira. It still functions like a sweep though and scores a knockdown on hit, so if you're fiending for that KD, go for it, I suppose.
|
Jumping Normals
nj.A
- (Properties) - Hits high.
- (Description) - If Gaira's j7/9.A is N.Hawk's diagonal jumping jab, then Gaira's neutral jump A is like, Zangief's neutral jump headbutt. But only in the sense both characters do a headbutt. Between the short range on this, and how high up Gaira hits, don't expect to use this normal all that often, if ever.
|
j.A
- (Properties) - Hits high.
- (Description) - If you're familiar with N.Hawk's j7/9.LP in Super Turbo, then this is the Samurai Shodown 3 equivalent. Gaira's fist is pretty much active for the entire time he's airborne, and you can even score a deep hit jump in with this. Just don't expect to beat out any O.Ken DPs with this.
|
j.B
- (Properties) - Hits high.
- (Description) - Incredibly similar to Gaira's 2B/C. Gaira crouches down in midair and swings his beads in front of him horizontally. Probably he best air to air in terms of speed and hitting-directly-in-front-of-him-ness.
|
nj.C
- (Properties) - Hits high.
- (Description) - This gosh dang normal. Expect to use this normal quite a few times, because it's bonkers. It does about the same amount of damage as it's diagonal jumping heavy slash cousin, but where j8.C shines is where it hits, which is about 4 stories beneath Gaira. Seriously, if you time it right he can almost IOH with this normal for gigantic damage.
|
j.C
- (Properties) - Hits high.
- (Description) - Big boy overhead swing equals big boy damage. Gaira comes crashing down on top of his opponents with the weight of an incredibly powerful 18-year old wielding giant mala beads. Can actually be a really good anti-air if the opponent jumps before Gaira and is slightly underneath him in the air. The range on this also makes it a good jump-in.
|
j.D
- (Properties) - Hits high.
- (Description) - Similar to Gaira's 66D, which will be be discussed later. Gaira sticks his leggy out and kicks the opponent in the face. While not nearly as active as j7/9.A, you can also score a deep hit jump in with this normal, opening the opponent up to big damage if timed correctly.
|
Dashing Normals
66A
- (Properties) - Deflectable somehow. Hits high. Air Unblockable.
- (Description) - A lightning fast dashing headbutt. It hits high, but Gaira has basically no lows. A relatively quick and noncommittal way to approach while hitting your opponent. As is SamSho 3 standard, you can use the autocorrect on this to run under a jumping opponent and bop them out of the air with this. Both Techniques can get some shenanigans going afterwards, being 421S mixups for Slash and an inescapable 2146CD for Bust.
|
66B
- (Properties) - Deflectable. Hits high. Knocks down.
- (Description) - Gaira sprints forward and quickly strikes the opponent with an overhead bead strike, knocking them down on hit and doing decent damage. Shame he still has so few lows to mix it up with.
|
66C
- (Properties) - Unblockable. Scary. Knocks down.
- (Description) - Gaira leans back and takes a moment to gather his thoughts about whether or not he really wants to do this, then charges forward with the shoulder tackle that got him banned from college ball. As far as 66C's go, this actually has some decent range on it. It's pretty good as a meaty if you don't mind it knocking them halfway across the screen, but it gets better in the corner. As with most 66C's, use very sparingly.
|
66D
- (Properties) - Hits high. Gimmicky. Restands on air hit?????
- (Description) - This move. This weird wacky dropkick looking move. You'll either love it or hate it. You'll either go for it a lot or not at all. On hit, it will do some hefty hitstun to the opponent, leading to Big Buddhist Damage, *especially* if you land close enough to them. On block, you'll probably get hit and it will hurt a lot because that's Samurai Shodown 3. Or you might just jump right over them and also get hurt a lot.
|
Unarmed Normals
u.5S
- (Properties) - Air Unblockable
- (Description) - Just a regular ol' fashion uppercut. Decent anti-air, but to actually hit with it on the ground Gaira's gotta be pretty darn close, though it sometimes whiffs on crouching.
|
u.2S
- (Properties) - Air Unblockable
- (Description) - See Armed 2A
|
uj.S
- (Properties) - Hits high.
- (Description) - Apparently Gaira keeps all of his active frames stored in his mala beads, because this stays out nowhere near as long as j7/9.A does.
|
u.66S
- (Properties) - Hits high. Air Unblockable.
- (Description) - Same dashing headbutt as 66A, but now slightly slower and able to be spaced so it's safer on block.
|
Command Moves
- 「Buchinomeshi」 - j.2C (Slash Only)
- (Properties) - Hits high. Knocks down.
- (Description) - Similar to j7/9.C, but Gaira's beads glow, and they knockdown, and it doesn't do alot of damage, so it's actually not that similar to j7/9.C, actually.
|
- 「Hyakkan Otoshi」 - j.2D (can be used unarmed)
- (Properties) - Hits high. Knocks down.
- (Description) - Yet another Street Fighter Lite Normal! Gaira does a falling knee drop, which stays active for it's entirety, knocking down on hit. Due to the knock down it causes, you sadly can't score a deep hit off of this.
|
Special Moves
Universal
- 「Jishin Gan」 - 22AB
- (Properties) - Hits low(!). Air blockable first hit. Knockdown when close.
- (Description) - Ground pound. Gaira leaps up and crashes down, making the ground around him explode when he lands. If the opponent is too far away to get hit by the explosions, they stumble a little. The explosions hit low and are air unblockable, and Gaira has a hitbox on his beads before hitting the ground. Air blocking the beads will make the opponent land on the explosions for a funny guard break, but if they block it high enough in the air you can be punished on the way down. Mostly used just to pester opponents or make them think twice about running at you. Can also corpsehop, making it a gimmick crossup in oki situations.
|
- 「Katsu!」 - 214A (can be used unarmed)
- (Properties) - Reflects projectiles. Knockdown. Air unblockable.
- (Description) - Classic Gaira fireball reflector. It comes out fast, stuffs approaches, and (of course) reflects fireballs. The active frames leave a little something to be desired and its recovery is long, but it's a strong and simple tool to toss out if the opponent is hankering to get in on you. It’s particularly good as a guard cancel because the motion will have you holding back anyways -- just do the motion, block an attack, and mash A like your life depends on it. Instant Katsu.
|
- WFT「Kenbu」 - 23623AB
- (Properties) - Knockdown. Air unblockable.
- (Description) - Super flashy autocombo WFT that can confirm off of his most choice punish normals and also be a funky little anti-poke/anti-air tool. Just be careful when using it too close because it has a blind spot up close. Slash Gaira in specific might see more use for this since he has an easier time setting up stuns than he would in Bust.
|
Slash
- 「Midare Uchi」 - 236AB
- (Properties) - Knockdown. Air unblockable.
- (Description) - Essentially a multi-hitting explosive 5B with some forward movement. Minus a trillion on block, does ok chip damage. Exists to come out when you wanted a WFT.
|
- 「Kachi Age」 - 623S
- (Properties) - Air unblockable. Knockdown.
- (Description) - Charging shoulder ram that hits multiple times depending on what strength is used, ending with a stern uppercut. Jubei players from other games may recognize this one. Deals okay damage and a billion stun, and as such is incredibly threatening for Slash Gaira's punishes. Has rather long gaps between each hit, so quick normals can interrupt it, and the recovery after the uppercut is pretty lengthy as well. If Gaira whiffs or otherwise runs past his opponent with this, he barrels all the way to the opposite side of the screen, and they cannot run to punish him.
|
- 「Tsukamuzo: Kumitenjo」 - 421A (can be used unarmed)
- (Properties) - Air unblockable. Knockdown.
- (Description) - Gotcha jumping! An AA grab that reaches deceptively far, deals great damage, is absurdly active, and has a great hitbox. If your opponent insists on jumping around, a few of these should hopefully discourage them. If not, just keep grabbing their jumps. Works wonders if jumping is their go-to corner escape option. Make that umbrella kid regret ever leaving the ground.
|
- 「Tsukamuzo: Ishi Atama」 - 421B (can be used unarmed)
- (Properties) - Hits high. Knockdown.
- (Description) - Gotcha high! Damaging overhead hitgrab that crushes lows until its hitbox comes out. Cannot be combo'd into. This has really nice range. If you see the opponent down/backing a lot, hit ‘em with one of these. Gaira will headbutt them several times, likely scaring the opponent into blocking high, which will then lead into…..
|
- 「Tsukamuzo: Shiri Mekuri」 - 421C (can be used unarmed)
- (Properties) - Hits low. Knockdown.
- (Description) - Gotcha low! Gaira’s incredibly fast low hitgrab that packs a lot of hurt. Also cannot be combo'd into. Gaira does a nifty little slide during the startup, making its range actually pretty good. It also has a really long-lasting active period for some reason. Upon connecting, Gaira will grasp his opponent’s shin and pancake flip them onto their back. Its combination of range, convenient input, and lightning fast startup makes it a great guard cancel option.
|
Bust
- 「Buchikoroshi」 - 236S
- (Properties) - Air unblockable. Knockdown.
- (Description) - Kind of a weird autocombo -- if the first hit connects, Gaira’s hapless victim is sent bouncing off the wall back in his general direction, where he uppercuts them so hard his beads explode. Doesn’t deal very much damage despite looking super flashy, but its overall ability to beat out the opponent’s pokes and keep you in their face cannot be overstated. Important to note is that the opponent will always land behind you, so be careful about putting yourself in the corner.
- (A version) - Gaira does a grounded version of his j8.A. Supposedly the version used for anti-airing, but the short active period doesn't work in its favor.
- (B version) - Gaira does his Far 5A but slides further forward. Deals the most damage of the 236S variants. Can anti-air opponents jumping from far away.
- (C version) - Gaira does his 66C, but again with much further range and a hitbox that'll stuff all sorts of attacks. The most generally useful one. Do it pretty much whenever.
|
- 「Enshin Satsu: Ten」 - 2146AB
- (Properties) - Unblockable. Knockdown.
- (Description) - A leaping command grab, and nothing too spectacular despite the pedigree of being a Gaira grab. Like with Enshin Satsu Chi, you need to spin your stick during the animation to squeeze out more damage. Its primary (gimmicky) use is that it can function as a very slow long-range guard cancel if your opponent throws out something big and you don’t have any other options that’ll reach.
|
- 「Enshin Satsu: Chi」 - 2146CD
- (Properties) - Unblockable. Knockdown.
- (Description) - The big grab you know Gaira for, demanding you spin your stick like a madman during the animation for maximum damage. Like all other command grabs in the game, it can grab an opponent in blockstun, but unlike the others it can also be easily combo’d into from his best punish normals. This naturally means it can and will do huge damage in pretty much any situation you can sneak it in. It also holds the distinction of being the only throw that will consistently snag Bust Nakoruru while she’s on the wolf. In exchange for being two frames slower than other command throws, this one has three active frames, giving it some increased utility during unjumpable setups. Abuse everything about this move.
|
Strategy
5D Interactions on crouching characters
The second hit of Gaira’s 5D has a tendency to miss on several crouching characters and only being able to hit up close on others.
5D will completely whiff on crouching: Nakoruru and Rimururu.
5D will hit if spaced on: Gaira, Ukyo, Amakusa, and Zankuro
The second hit of 5D will whiff up close on: Genjuro, Shizumaru, Galford, Ukyo, and Hanzo.
Both hits of 5D will hit on: Basara, Haohmaru, Gaira, Kyoshiro, Amakusa, and Zankuro.
Slash
Slash has the more consistent combo game of the Techniques, and uses this to his full advantage. Any punish into 623S will deal great damage, and thanks to this Slash also has easier access to stuns, making his strong punishes a lot more dangerous. 421S is also an incredible set of tools, giving you one of the best anti airs in the game, an overhead that avoids throws and lows, and an incredibly fast knockdown low option. He's fairly honest in this Technique, if your definition of honesty includes constant mixups.
Tipz n’ Trickz:
-421B can be used as a guard cancel vs Amakusa or Basara to negate their 2D pressure thanks to its low invincibility, or against command throw blockstrings in general thanks to its throw invincibility. 421A is great vs characters that have strong air options and normals such as Bust Shizumaru, Ukyo, and Basara, and really just good against anyone with a particularly itchy trigger finger for jumping. 421C, if all else fails, will almost certainly connect as a guard cancel before they recover -- it's REALLY fast.
-421B/421C theoretically forms a 50/50 after a blocked non-recoiling button (n.2B/5D/6D) in the vein of an unjumpable Enshin Satsu setup, but they don't combo, so your opponent has to correctly block the button, and then incorrectly block the followup. You're better off just directly using them on the opponent's wakeup or otherwise trying your luck with some other oki. 421C's huge active window is a nice bonus for this.
Bust
Bust focuses solely on getting in the opponents face, and keeping them still long enough in neutral to do it. Make ample use of 22AB, 214A, and anti airing with 236S to keep them grounded and blocking. When you do finally get in, pester them with your cancellable normals to land your command grab.
Once you do land either Enshin Satsu grab, you can set up an easy unjumpable. After landing the grab, simply run behind them and cancel n.2B into 2146CD. Timed right, this guarantees yet another 2146CD, looping into itself once again. Or you could abuse Enshin Satsu Chi's three whole active frames and directly meaty them with it during the unjumpable frame.
Tipz n’ Trickz:
-236C as a movement tool (it's very good at moving you in, might we add) can also corpsehop, if you want to look cool about your oki.
-n.2B and 5D/6D are how you get your throw combos/tick throws, since they all can be cancelled on block. n.2B is the best case scenario, but it requires close proximity and is the slowest. 5D whiffs on certain crouchers at some distances and only cancels on the first hit, but is much faster. 6D is basically a n.2B with no distance requirement, but it's still pretty slow and stubby.
-Enshin Satsu Chi is very powerful when using it after a crossunder anti air as well. Run under them, 66A, and time the command grab. Since they’re stuck in the backturn animation, they can’t jump out and have to hold the damage.
Combos
Universal
Corner stun TOD:
66D, n.5C xx 214A [stun] 66D, n.5C xx 214A
A reliable, easy corner TOD off of everyones favorite normal. Can be done midscreen on characters with wider hurtboxes, but both forms have more consistent midscreen versions.
Slash
Front hit n.5C Stun ToD: n.5C xx 623C [stun] n.5C xx 623C
- Reliable TOD off of your prime punish normal.
Front hit stun ToD 2: 66D [microwalk] n.5C xx 623A [stun] n.5C 623C
- Another kill combo, but it can be difficult due to 66D not giving you enough time to walk forward if it connects from too far away in the neutral. Be strict as usual with your spacing against the small characters so 66D doesn’t whiff. This cannot be performed on Zankuro or Gaira himself, due to their height making 66D land too early.
Bust
Front hit BnB: n5C xx 2146CD
- Welcome to what you’ll be doing for larger punishes. This alone will delete the majority of your opponent’s lifebar if you’re good at spinning your stick during the command throw. Replace 2146CD with 236B if you don’t care about the damage and really want the side switch I guess.
Front hit stun ToD: 66D walk forward n5C xx 236C/214A [stun] n5C 2146CD
- Bust Gaira’s combo game is somewhat more limited than Slash’s, but at least the stun followup is consistent across the cast. Don’t forget to spin your stick during the command throw so it kills. Against Nakoruru, Shizumaru, and Rimururu you have to space the 66D so that Gaira’s foot hits them directly, but for all others (sans standing Zankuro and Gaira, who are too tall) you just have to hit them up close.
Back hit n.5C Stun TOD: n.5C xx 236B [stun] n.5C 2146CD
- A fairly reliable TOD off of your prime punish normal. Works on either front or back hit on Shizumaru, Kyoshiro, and Gaira, and only on front hit for Ukyo and Zankuro. Not possible on Haohmaru.
External Links

