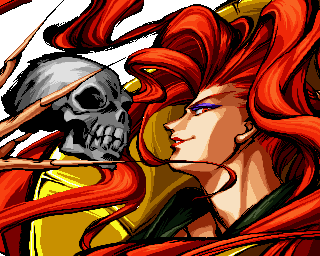
 天草四朗時貞, Amakusa Shiro Tokisada
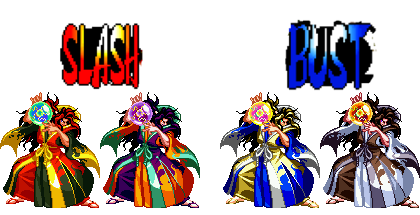 Colors
Introduction
Mormons will come to your house to knock on your door. Amakusa, the devoted Catholic he is, will come to your house to knock your shins off with his steel toed boots.
Amakusa does not live up to his future reputation as a tricky midrange mixup monster at all in SamSho 3. He has a very fast and deceptively hard to punish teleport that lets him close the gap in an instant, but nearly every other special he has is woefully slow and punishable. His normals are awkward and rife with blind spots, and would make fine anti-airs if they weren't air blockable. Surely he has great combos to make up for these issues, right? Kind of. He has one “great combo.” That combo is 2D into itself as many times as you can manage. Get good at this and get good at using his teleport if you seriously want to play him. At least his damage is huge if he manages to land a clean heavy or a 2D combo, but you’re better off forgetting 90% of his moves and sticking to the 2D spam. It bears repeating: get good at his movement and get good at his 2D stun combos. If you can’t do either of those, you shouldn’t be playing Amakusa.
Slash is arguably the more consistent Technique in neutral, featuring a usable fireball in Shirei Jin. His WFT can also be a slow hail-mary reversal. Nothing else he has is really worth writing home about.
Bust, the poor soul, is stuck having without a doubt the worst, most useless fireball in the entire game. In exchange, his WFT has no invincibility but starts up very fast -- fast enough to be used in combos and stuff stray pokes. This alone makes Bust Amakusa far more threatening if he’s in Desperation, because one stray WFT will easily erase half a lifebar. He also comes with a far superior selection of colors if that’s what interests you.
| Strengths |
Weaknesses
|
- Hits like a truck
- Best 2D in the game with a front hit TOD combo
- Teleports provides him extra movement
- Slash's zoning with fireball is relatively better
- Bust WFT is much faster and can combo
|
- Hardly much difference between Slash and Bust, and they're both weak
- Teleports are also predicatable
- 90% of his moves are air blockable or otherwise irredeemably bad
- No real reward for back hits
- He's a zoning archetype that can't zone
|
Stats
| Damage taken
|
Rage rate
|
Rage duration
|
Throw startup
|
Deflect advantage
|
Deflect disadvantage modifier
|
| 105%
|
98.05%
|
4 sec
|
14f
|
+26
|
±0
|
Normal Moves
Far Slashes
5A
- (Properties) - Air unblockable.
- (Description) - A quick forward reaching slap. Your standard jab with the expected speed and range. One of Amakusa’s only unblockable anti-air options. Whiffs over the shorter crouching characters.
|
5B
- (Properties) - Hits low.
- (Description) - Amakusa flings his orb diagonally downwards towards the opponent’s ankles. A pesky poke with solid range. The low property is nice, but with 5BC as his only other mixup tool, it’s not too much of an added threat.
|
5C
- (Properties) - Deflectable.
- (Description) - Amakusa magics his orb a good distance forward horizontally. Hurts a lot. Whiffs over Shizumaru, Ukyo, Rimururu, and Nakoruru while crouching.
|
2A
- (Properties) - Air unblockable.
- (Description) - It’s his 5A, but down on one knee.
|
2B
- (Properties) - Looks fancy.
- (Description) - Amakusa lobs his orb diagonally upwards, where it does a loop and returns to him. Has slightly further horizontal reach than his other far slashes. Does not have a recoil animation on block.
|
2C
- (Properties) - Air unblockable. Deflectable.
- (Description) - Amakusa projects his orb into the opponent’s legs. Like 5C, it hurts.
|
Near Slashes
n.5A
- (Properties) - Air unblockable.
- (Description) - 5A, yet again.
|
n.5B
- (Properties) -
- (Description) - Amakusa swings his orb into the skies, travelling in an arc above him. Fantastic trajectory in practice, before you realize that it’s slow and tragically blockable in the air, making it highly punishable. It also entirely whiffs versus non-jumping characters.
|
n.5C
- (Properties) -
- (Description) - Amakusa raises his orb before dunking it onto the opponent. Another button with a promising anti-air trajectory cut short by being blockable in the air. At least it starts up faster than n.5B. It also whiffs versus all crouching characters except for Genjuro, Gaira, and Kyoshiro.
|
n.2A
- (Properties) - Air unblockable.
- (Description) - A lot like his n.5A, which is a lot like his 5A.
|
n.2B
- (Properties) -
- (Description) - Identical to his regular 2B. Whiffs through pretty much everyone at point blank range. Why aren't you using 2D at this range anyways.
|
n.2C
- (Properties) - Deflectable.
- (Description) - Amakusa shoves his orb into the opponent’s shins for sadly way less damage than his other heavies. Also whiffs through skinnier characters if you're too close to them. Can link off of a back hit 2D if you want to show off.
|
Overheads
5BC
- (Properties) - Hits high.
- (Description) - Not super slow for an overhead. Its range is on the slightly better side thanks to Amakusa's forward movement, but it remains incredibly punishable on block or standing hit. Considering Amakusa's reliance on 2D strings for everything from pressure to damage, this move ends up being surprisingly important for his gameplan. But certain characters' hurtboxes will make this whiff if they're crouching, at either point blank or any distance. These problem characters are listed below in the strategy section.
|
u.5BC
- (Properties) - Hits high.
- (Description) - The god 2D but done from a hop. If you really must try to run your mixup game without your trusty orb.
|
Kicks
5D
- (Properties) - Hits high. Air unblockable.
- (Description) - Weird rising knee. Having two whole grounded overheads sounds like a blessing until you realize this one whiffs on even more characters while crouching unless they're already in the blocking animation. It is even more punishable than 5BC as well, considering a crouching opponent will recover in time to smack you for using it. Might be a gimmicky way to hop over a grounded fireball or anti-air for no reward, but seriously just use the teleport.
|
6D
- (Properties) - Hits low.
- (Description) - Amakusa takes a step forward and kicks the opponent in the ankle. A standing low with OK range isn’t the worst button to have, but it’s not 2D so it might as well not exist.
|
2D
- (Properties) - Hits low. 神ゲー button.
- (Description) - Amakusa swiftly sticks his foot out and ends worlds. Does ridiculous damage and easily links into itself repeatedly, leading to stuns and KOs with minimal effort. This button is the reason you’re playing this character.
|
3D
- (Properties) - Hits low. Knocks down.
- (Description) - Amakusa holds his orb close and does a typical sliding sweep. Very unsafe on block.
|
Jumping Normals
nj.A
- (Properties) - Hits high.
- (Description) - It’s his 5A again, but in the air. Stays active for a decent amount of time. Fast enough to be good air-to-air but has little purpose otherwise.
|
j.A
- (Properties) - Hits high.
- (Description) - Amakusa sticks his hand out diagonally downwards. Has a better angle versus opponents lower to the ground but is otherwise identical to nj.A. Maybe use after a close range chicken block.
|
j.B
- (Properties) - Hits high.
- (Description) - Amakusa propels his orb forwards at a slight downwards/diagonal angle. Decent range and angle for pestering opponents air-to-ground as well as air-to-air.
|
j.C
- (Properties) - Hits high.
- (Description) - Amakusa tosses his orb forwards at a slight diagonally upwards angle. Similar range to j.B but with an angle more suited for hitting other opponents in the air. Actually a pretty okay button.
|
j.D
- (Properties) - Hits high.
- (Description) - It’s the God Button, but in the air. Less special here than on the ground. Probably his best normal for jump-ins, because timing it right will let you start up your 2D combos.
|
Dashing Normals
66A
- (Properties) -
- (Description) - 5A is back, and this time it hits twice! Maybe try a tick throw or just start running the 2D train after this.
|
66B
- (Properties) - Air unblockable.
- (Description) - Amakusa lunges his orb forward with an outstretched hand. Doesn’t really do anything of note outside of whiffing over the shorter crouching characters.
|
66C
- (Properties) - Unblockable.
- (Description) - A slower, more extravagant version of n.5C. It also happens to be unblockable. Doesn’t whiff over crouchers, but the hitbox is fairly unremarkable. If this knocks down, you won the lottery.
|
66D
- (Properties) - Hits low. Knockdown.
- (Description) - Identical to his 3D and just as unsafe.
|
Unarmed Normals
u.5S
- (Properties) -
- (Description) - Slappy.
|
u.2S
- (Properties) -
- (Description) - Crouch slappy.
|
uj.S
- (Properties) -
- (Description) - Jumping slappy.
|
u.66S
- (Properties) -
- (Description) - Somehow not a slap. He just kind of points at you.
|
Command Moves
- 「Sankaku Tobi」 - j.3/6/9 near wall
- (Description) - Amakusa's wall jump. May be useful for escaping the corner. Would be more useful if it wasn't for Amakusa's floaty jump and mediocre at best air buttons.
|
Special Moves
Universal
- 「Oumaga Toki」 - 41236D/63214D
- (Description) - Quick teleport. Amakusa zips in his chosen direction (41236D forwards, 63214D backwards) until he travels a specific distance or reaches a wall, where he will have one frame of vulnerable recovery. This move allows him to possibly get in on any bad move and 2D you for it. He can be thrown, and isn’t fully invincible on startup, but the opponent will need a command throw or a hitgrab to really punish him for it. If he didn't have this, he would be almost completely unable to get in. Use it well because your life depends on it.
|
- 「Nanji, Anten Nyumetsu Seyo」 - 641236C~S/D
- (Properties) - Knockdown.
- (Description) - Pseudo-DP attack where Amakusa goes up to the top-center of the screen and sits there. Press any slash button to divebomb the opponent or kick to simply drop without attacking. Both options are very unsafe and slow to come out. If he jumps over his opponent and does the dive attack back at them, any punish will be a backhit. It does a few hits of chip damage on block, at least.
|
- 「Shoki Dan」 - 421A
- (Properties) - Stun.
- (Description) - A weird move. It starts up reasonably fast, has a lot of active frames, and can hit multiple times on block. It deals no damage and instantly stuns the opponent if it hits. You might catch a stray poke with this once in a while. Good luck converting off of it -- Amakusa stands and poses for a while after it connects, leaving the victim plenty of time to mash out.
|
- 「Kairetsu Sho」 - 632C (can be used unarmed)
- (Properties) - Knockdown.
- (Description) - Bitchslaps. It catches and deals full damage on hit, and does okay damage. Thanks to how good 2D is (get used to hearing that), you don’t really see it outside of a funky anti-air or for style purposes.
|
Slash
- 「Shirei Jin」 - 236S
- (Properties) - Air blockable. Knockdown.
- (Description) - Flaming demon skull fireball that knocks down on hit. Is a way for Slash Amakusa to pester the opponent from longer ranges without standing there wide open to punishment, but it's hardly threatening. Stronger versions go faster and recover slightly slower. Painfully standard as fireballs go.
|
- 「Tensho Fuu'ou Jin」 - 4646S
- (Properties) - Air blockable. Knockdown.
- (Description) - Weird, weird move even when looking past its input. Amakusa sends out his orb to a location decided by the slash input (4646A = close, 4646B = midscreen, 4646C = fullscreen), where it then travels a short distance forward. If it hits the opponent, it will drag them up and drop them for a good chunk of damage. Even on a trade, the attack will still drop them. Only problem is you can duck it on reaction, no small thanks to how slow it is. He is also left unarmed until his orb comes back to him. Almost entirely useless.
|
- WFT「Kyomei Jusatsu Jin」 - 4623BC
- (Properties) - Air unblockable. Knockdown.
- (Description) - Niche tool -- redeeming qualities are that it does ridiculous damage and is invincible for a brief period before the active frames. Can be used after a stun to ensure you don’t mess up your kick timing.
|
Bust
- 「Meifu Mashou Dan」 - 236S
- (Properties) - Bad. Air blockable.
- (Description) - The worst projectile in pretty much anything, despite being a really awesome lightning ball. Sluggish startup, completely horrendous recovery, and limited range with little reward on hit all in all makes this a bad move. As if that wasn't enough, unlike with Shirei Jin, Amakusa is left unarmed for a brief period after throwing it! Only use if you want to stunt on the opponent.
|
- 「Kouma Shourai Ha」 - 4646S
- (Properties) - Hits low. Knockdown.
- (Description) - Guess what, weird move. Amakusa sends his orb out, creating a portal that travels along the ground. Heavier versions go farther and have significantly worse recovery. If it connects with the opponent, they’re sucked in and spat back out for good damage. It also hits low, but this only catches sleepers. Just like Tensho Fuu’ou Jin, it works on trades and leaves him unarmed until his orb comes back. Also like Tensho Fuu'ou Jin, almost entirely useless.
|
- WFT「Kyomei Jusatsu Jin」 - 4623BC
- (Properties) - Air unblockable. Knockdown.
- (Description) - A good move for once. Starts way faster than Slash's equivalent and keeps the massive damage, only losing out on the invulnerability in exchange. If you have access to this, you can pretty freely stick it out, or even combo into it off of a throw. If it wasn't for this, Bust Amakusa would be completely irredeemable -- and he's still edging on that.
|
Strategy
Universal
Incredibly simple gameplay. Whenever possible, spam 2D to pressure the opponent, and if it hits, keep spamming it to do his front hit TOD combo. Teleporting here and there to avoid getting hurt and close the distance with the opponent, or resorting to hit and run tactics when necessary, and that's all you really need to do. Most everything else Amakusa has isn't worthwhile, other than maybe circle stepping to do a backhit combo once in a while if the opportunity presents itself. Don't attempt to play the zoning game with him, since his buttons all suck otherwise and his fireball in either technique hardly does much. His jump buttons are somewhat better when jumping backwards to, again, avoid taking further damage or play hit and run when needed, but suck altogether as jump-ins.
5BC Character Interactions
As noted above, Amakusa's 5BC will whiff on numerous characters while they're crouching, eliminating its use as a way to punish these characters for down/backing. Noted below are which characters it will whiff on and the situations it whiffs in.
- Shizumaru (all spacings)
- Ukyo (all spacings)
- Nakoruru (all spacings)
- Rimururu (all spacings)
- Basara (point blank)
- Galford (point blank)
- Hanzo (point blank, only on P2 side)
Slash
Slash carries the benefit of having a real fireball, albeit still slow. You can still use it to secure space or chip, just not very effectively.
Shoki Dan can be used to catch stray pokes, since its instant stun at least lets you hit with a f.5C if not a full 2D BNB.
Slash can't combo into his WFT as easy as Bust, but it comes with startup invul and can be used as a reversal if you can somehow get it to come out consistently.
Bust
Bush's "fireball", if you could call it one, should be avoided at all costs. Unless it's a single hit chip kill, leave it be.
Slaps can work as a pseudo anti air or in the same way as Shoki Dan.
Bust's WFT has faster startup and no invul, allowing him to properly combo into it and counter poke with it.
Combos
Universal
- Stun BnB: 2Dx4 [stun] 2Dx4
- This is what keeps Amakusa relevant. His 2D is one of the most abusable kicks in the entire game. It combos into itself and deals great damage. The above sequence will kill characters with lower defense modifiers. Just be sure to properly time your reps instead of mashing, otherwise you’ll whiff.
- Back hit stun BnB: n.5C 2C
- Not really something you’ll be landing often outside of a corner back throw (character specific) or a big circle step, but it’s worth learning if you want to kill without having to link as many 2D reps. Does about as much damage as a 2D stun combo.
- Front throw midscreen ToD: f.throw 2Dx4 [stun] j.D 2Dx5
- Character specific and requires a forward walk after the forward throw to connect. Will reliably kill high defense characters. Good luck.
Bust
- Throw WFT BnB: f/b.throw 4623BC
- Fairly standard throw combo, but is extremely threatening with Amakusa's high damage WFT. Only possible for Bust due to WFT starting up faster compared to Slash.
- Back hit WFT BnB: n.5C 4623BC
- The other main combo Bust Amakusa likes to use his WFT for. Seriously damaging.
External Links

