
水邪, Suija
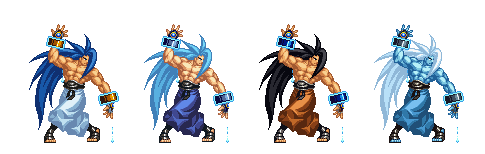
Colors
Introduction
SHYAAAAAAAAAAAAAAAAAAAAAAAAAAAAAAAAAAAAA
Suija's a very flighty character who wants to bait you into doing something stupid or make you freeze up, usually with a well-placed bubble, before hitting you for it. He's got a lot of tricky offense/defense/runaway courtesy of bubble alone, and a bunch of other ways to change his air momentum to boot. All of this airborne trickery comes at the cost of having no actual grounded specials, which forces him to kara cancel or tiger knee to get his specials out low to the ground. Being that he's constantly in the air, he has countless opportunities to connect with deep jumping attacks, which can potentially give him huge damage output.
Relying on so many input tricks and relatively tight windows to connect with attacks and having an esoteric gameplan means Suija is very difficult to play optimally compared to almost the entire cast, so if you play him and want to really get good, you're in it for the long haul.
| Strengths |
Weaknesses
|
- Incredibly safe offensive options with bubble cancels.
- Bubbles are also a great defensive tool.
- Super good tick throw game, courtesy of bubbles.
- Lots of ways to change his air movement. Bubble, etc.
- Bubbles just kind of rock.
|
- Bubble punishes require a good read or careless opponent.
- Slow, unsafe low attacks make his high-low game a lot less scary.
- Grounded punishes are limited outside of heavies/throws.
- Worst recoil cancel options across the whole cast.
- High execution floor, higher execution ceiling.
|
Data
- Damage taken: 105%
- Rage duration: 30 seconds
- Amount to rage: 39
- Walk speed: 336
- Backwalk speed: 336
- Dash speed: 1728
- Jump duration: 54 frames
- Width: 16
- Throw range: 16
- Throw recovery: 46 frames
- Tier placing: B
Normals
Far Slashes
5A
5A
|
| Damage
|
Guard
|
Cancel
|
Invul
|
Property
|
Level
|
| 4
|
Mid
|
1~3(3) / 7~15(9)
|
-
|
-
|
-
|
| Startup
|
Active
|
Recovery
|
Hit Adv
|
Backhit Adv
|
Block Adv
|
| 7
|
4
|
9
|
-3
|
-3
|
-8
|
|
Quick jab. The recovery isn't as good as it could be but it comes out quick enough to make it a good poke all around.
Like Sogetsu's 5A, this is actually really solid antiair, and can shut characters like Enja down.
|
|
5B
5B
|
| Damage
|
Guard
|
Cancel
|
Invul
|
Property
|
Level
|
| 13
|
Mid
|
x
|
-
|
Recoil cancel,
Deflectable (Medium)
|
-
|
| Startup
|
Active
|
Recovery
|
Hit Adv
|
Backhit Adv
|
Block Adv
|
| 11
|
2
|
25
|
-9
|
-1
|
-9
|
|
Suija leans forward for a sideways punch. Quick and surprisingly long range, but the recovery is slow, so be careful about whiffing it.
|
|
5AB
5AB
|
| Damage
|
Guard
|
Cancel
|
Invul
|
Property
|
Level
|
| 28
|
Mid
|
11~13(3)
|
12-27f below knee
|
12-32f airborne
|
-
|
| Startup
|
Active
|
Recovery
|
Hit Adv
|
Backhit Adv
|
Block Adv
|
| 20
|
4
|
27
|
KD
|
KD
|
-26
|
|
Long range airborne forwards rush. Damage and range are really nice, as is the forced knockdown. As Suija is in the air relatively early in this attack, it will go over many low attacks/fireballs, force resets, and evade throws. This airborne period can also cancel into any air special -- Shougetsu becomes an extremely long range and fast overhead out of this, for example.
Can be good antiair at the right ranges, as Suija will dash under the opponent. Just be careful of n.5AB range.
|
|
2A
2A
|
| Damage
|
Guard
|
Cancel
|
Invul
|
Property
|
Level
|
| 4
|
Mid
|
1~3(3) / 7~15(9)
|
-
|
-
|
-
|
| Startup
|
Active
|
Recovery
|
Hit Adv
|
Backhit Adv
|
Block Adv
|
| 7
|
3
|
11
|
-4
|
-4
|
-9
|
|
Good range low height jab. Good general spacing tool, less likely to get beaten out in footsies than 5A but the lower angle makes it more vulnerable to jumps and hops.
|
|
2B
2B
|
| Damage
|
Guard
|
Cancel
|
Invul
|
Property
|
Level
|
| 13
|
Mid
|
1~3(3) / 12~19(8)
|
-
|
Deflectable (Medium)
|
-
|
| Startup
|
Active
|
Recovery
|
Hit Adv
|
Backhit Adv
|
Block Adv
|
| 12
|
3
|
17
|
-2
|
+6
|
-9
|
|
Similar to 5B, only lower to the ground and with somewhat lower priority. The range is still impressive, and it recovers noticeably faster, making it harder for the opponent to whiff punish. Overall the better move in most situations.
|
|
2AB
2AB
|
| Damage
|
Guard
|
Cancel
|
Invul
|
Property
|
Level
|
| 28
|
Mid
|
20~39(20)
|
-
|
-
|
-
|
| Startup
|
Active
|
Recovery
|
Hit Adv
|
Backhit Adv
|
Block Adv
|
| 15
|
5
|
35
|
KD
|
KD
|
-21
|
|
Suija's only launcher, you will want to master using this move. The startup feels slower than it is and it doesn't hit very far horizontally, but it has substantial vertical range and is cancelable into all of his air moves, which means he can actually combo off of it.
Throwing this outside of their block range allows you to whiff cancel it into bubble if you don't confirm a hit. Very handy.
|
|
Near Slashes
n.5A
n.5A
|
| Damage
|
Guard
|
Cancel
|
Invul
|
Property
|
Level
|
| -
|
-
|
-
|
-
|
-
|
-
|
| Startup
|
Active
|
Recovery
|
Hit Adv
|
Backhit Adv
|
Block Adv
|
| -
|
-
|
-
|
-
|
-
|
-
|
|
Same as 5A.
|
|
n.5B
n.5B
|
| Damage
|
Guard
|
Cancel
|
Invul
|
Property
|
Level
|
| -
|
-
|
-
|
-
|
Recoil cancel,
Deflectable (Medium)
|
-
|
| Startup
|
Active
|
Recovery
|
Hit Adv
|
Backhit Adv
|
Block Adv
|
| -
|
-
|
-
|
-
|
-
|
-
|
|
Slower than 5B, with less range and damage. As Suija has no useful ground cancels, this is garbage and you should stick to 2B for your close range medium of choice.
|
|
n.5AB
n.5AB
|
| Damage
|
Guard
|
Cancel
|
Invul
|
Property
|
Level
|
| -
|
-
|
-
|
-
|
Recoil cancel,
Deflectable (Heavy)
|
-
|
| Startup
|
Active
|
Recovery
|
Hit Adv
|
Backhit Adv
|
Block Adv
|
| -
|
-
|
-
|
-
|
-
|
-
|
|
Double fisted beatdown. Does not knock down, oddly enough! Since this starts relatively fast it's a good punisher if you're just a bit too far for 2AB. Would be more useful if not for the overlap with 5AB.
|
|
n.2A
n.2A
|
| Damage
|
Guard
|
Cancel
|
Invul
|
Property
|
Level
|
| -
|
-
|
-
|
-
|
-
|
-
|
| Startup
|
Active
|
Recovery
|
Hit Adv
|
Backhit Adv
|
Block Adv
|
| -
|
-
|
-
|
-
|
-
|
-
|
|
Same as 2A.
|
|
n.2B
n.2B
|
| Damage
|
Guard
|
Cancel
|
Invul
|
Property
|
Level
|
| -
|
-
|
-
|
-
|
-
|
-
|
| Startup
|
Active
|
Recovery
|
Hit Adv
|
Backhit Adv
|
Block Adv
|
| -
|
-
|
-
|
-
|
-
|
-
|
|
Same as 2B
|
|
n.2AB
n.2AB
|
| Damage
|
Guard
|
Cancel
|
Invul
|
Property
|
Level
|
| -
|
-
|
-
|
-
|
-
|
-
|
| Startup
|
Active
|
Recovery
|
Hit Adv
|
Backhit Adv
|
Block Adv
|
| -
|
-
|
-
|
-
|
-
|
-
|
|
Same as 2AB.
|
|
Overheads
5BC
5BC
|
| Damage
|
Guard
|
Cancel
|
Invul
|
Property
|
Level
|
| 15
|
High
|
1~19(19)
|
-
|
-
|
-
|
| Startup
|
Active
|
Recovery
|
Hit Adv
|
Backhit Adv
|
Block Adv
|
| 20
|
5
|
13
|
KD
|
KD
|
-12
|
|
Recovers a tad faster than a normal overhead, and unlike the rest is airborne starting from frame 1. The main usage of this outside of its standard evasive properties is that you can cancel the startup into any of Suija's air moves, giving you good positioning for a bubble.
|
|
u.5BC
u.5BC
|
| Damage
|
Guard
|
Cancel
|
Invul
|
Property
|
Level
|
| 6
|
High
|
x
|
-
|
-
|
-
|
| Startup
|
Active
|
Recovery
|
Hit Adv
|
Backhit Adv
|
Block Adv
|
| 20
|
7
|
14
|
KD
|
KD
|
-15
|
|
Hops straight up for a j.C that knocks down for no apparent reason. Not the most useful overhead ever, but sometimes you might need this to make space so you can pick up your weapon.
|
|
Kicks
5C
5C
|
| Damage
|
Guard
|
Cancel
|
Invul
|
Property
|
Level
|
| 6
|
Mid
|
1~12(12)
|
1-11f throw invul, 12-28f below knee invul
|
-
|
-
|
| Startup
|
Active
|
Recovery
|
Hit Adv
|
Backhit Adv
|
Block Adv
|
| 13
|
4
|
17
|
-17 (-3)
|
+5
|
-16
|
|
Advancing Kazama knee. The second hit advantage number is if it hits a crouching opponent. It's throw invulnerable like the rest, and is airborne with some mild low crush properties when he moves forward. You can also kara cancel into air specials, most notably the lowest possible bubble. But you can be punished on standing hit or block by an attentive opponent if you actually go through with the kick, rendering it undeservingly risky if you flub the cancel.
|
|
6C
6C
|
| Damage
|
Guard
|
Cancel
|
Invul
|
Property
|
Level
|
| 8
|
Low
|
1~4(4)
|
-
|
-
|
-
|
| Startup
|
Active
|
Recovery
|
Hit Adv
|
Backhit Adv
|
Block Adv
|
| 20
|
2
|
1
|
+15
|
+23
|
+2
|
|
Slow startup, fast recovery low kick with huge frame advantage on hit. Can combo into WFT at super close range but it's difficult to confirm. Pretty nice oki, and you're plus even if it's blocked. This is how you bully a scared opponent in the corner.
|
|
2C
2C
|
| Damage
|
Guard
|
Cancel
|
Invul
|
Property
|
Level
|
| 2
|
Low
|
1~2(2) / 5~15(11)
|
-
|
-
|
-
|
| Startup
|
Active
|
Recovery
|
Hit Adv
|
Backhit Adv
|
Block Adv
|
| 5
|
2
|
12
|
-4
|
-4
|
-9
|
|
Very fast low kick. Basically a faster, lower version of 2A. Still vulnerable to hops and other assorted jumps, though.
|
|
3C
3C
|
| Damage
|
Guard
|
Cancel
|
Invul
|
Property
|
Level
|
| 8
|
Low
|
x
|
-
|
13-30f low profile
|
-
|
| Startup
|
Active
|
Recovery
|
Hit Adv
|
Backhit Adv
|
Block Adv
|
| 13
|
12
|
20
|
KD
|
KD
|
-27
|
|
Long range slide. Startup animation is slow but slightly deceptive, so it can be hard to see coming. You can sneak under some fireballs and assorted horizontal attacks with this, but the startup makes it difficult to time.
Punishable at any range, so use carefully.
|
|
Jumping
j.A
j.8A
|
| Damage
|
Guard
|
Cancel
|
Invul
|
Property
|
Level
|
| -
|
-
|
-
|
-
|
-
|
-
|
| Startup
|
Active
|
Recovery
|
Hit Adv
|
Backhit Adv
|
Block Adv
|
| -
|
-
|
-
|
-
|
-
|
-
|
|
Suija holds his hands out for the opponent to run into. Starts fast and has a lot of active frames, but the hitbox doesn't allow you to do instant overheads or fuzzy guards like Kazuki's and Sogetsu's. Nice way to come down from a bubble, as it beats pretty much anything you throw at it.
|
|
j.8A
j.A
|
| Damage
|
Guard
|
Cancel
|
Invul
|
Property
|
Level
|
| -
|
-
|
-
|
-
|
-
|
-
|
| Startup
|
Active
|
Recovery
|
Hit Adv
|
Backhit Adv
|
Block Adv
|
| -
|
-
|
-
|
-
|
-
|
-
|
|
Air slap. Range is good, active for a decent amount of time. It'd be good to reset with air to air if Suija's jump wasn't so slow.
|
|
j.8B
j.8B
|
| Damage
|
Guard
|
Cancel
|
Invul
|
Property
|
Level
|
| -
|
-
|
-
|
-
|
-
|
-
|
| Startup
|
Active
|
Recovery
|
Hit Adv
|
Backhit Adv
|
Block Adv
|
| -
|
-
|
-
|
-
|
-
|
-
|
|
Downwards bonk. Slow, few active frames. Mostly a worse version of j.8A, with only a slight damage increase to its name.
|
|
j.B
j.B
|
| Damage
|
Guard
|
Cancel
|
Invul
|
Property
|
Level
|
| -
|
-
|
-
|
-
|
-
|
-
|
| Startup
|
Active
|
Recovery
|
Hit Adv
|
Backhit Adv
|
Block Adv
|
| -
|
-
|
-
|
-
|
-
|
-
|
|
Leans forward for a punch. Quick, but not active for long and barely more range than j.7/9A. You usually see this used when coming down from a low bubble to keep them at bay.
|
|
j.AB
j.AB
|
| Damage
|
Guard
|
Cancel
|
Invul
|
Property
|
Level
|
| -
|
-
|
-
|
-
|
-
|
-
|
| Startup
|
Active
|
Recovery
|
Hit Adv
|
Backhit Adv
|
Block Adv
|
| -
|
-
|
-
|
-
|
-
|
-
|
|
Slowish, but huge ranged swipe with a good active period. Does a ton of damage and is a great all purpose "get out of my way" move if used early enough. Very easy to deep hit with, and you want to deep hit with it. Use liberally.
|
|
j.C
j.C
|
| Damage
|
Guard
|
Cancel
|
Invul
|
Property
|
Level
|
| -
|
-
|
-
|
-
|
-
|
-
|
| Startup
|
Active
|
Recovery
|
Hit Adv
|
Backhit Adv
|
Block Adv
|
| -
|
-
|
-
|
-
|
-
|
-
|
|
Surprisingly long ranged kick, it's good to use but it's not out for very long. Good to use off of a bubble, especially when lower to the ground such as off of a 5C cancel.
|
|
Dashing
66A
66A
|
| Damage
|
Guard
|
Cancel
|
Invul
|
Property
|
Level
|
| -
|
-
|
-
|
-
|
-
|
-
|
| Startup
|
Active
|
Recovery
|
Hit Adv
|
Backhit Adv
|
Block Adv
|
| -
|
-
|
-
|
-
|
-
|
-
|
|
Slow, slow, slow jab. Only really useful as an alternate dash recovery.
|
|
66B
66B
|
| Damage
|
Guard
|
Cancel
|
Invul
|
Property
|
Level
|
| -
|
-
|
-
|
-
|
-
|
-
|
| Startup
|
Active
|
Recovery
|
Hit Adv
|
Backhit Adv
|
Block Adv
|
| -
|
-
|
-
|
-
|
-
|
-
|
|
Hops high up in the air and comes down for some double-fisted pain. Using this too close to the opponent makes Suija sail harmlessly right over them. The cancel window doesn't enable combos as usual, but it lets Suija get in position for air specials, usually a quick crossup with either j.214S or j.1236S. The spacing and timing are slightly different for each one, so be sure to get them both down if you want to take advantage of this.
As such, 66B is not very good as the high in the high/low mixup. It is instead a left/right because an opponent expecting the crossup dive or trying to jump out will get hit if you just let it rock.
|
|
66AB
66AB
|
| Damage
|
Guard
|
Cancel
|
Invul
|
Property
|
Level
|
| -
|
-
|
-
|
7-29f below knee invul
|
-
|
-
|
| Startup
|
Active
|
Recovery
|
Hit Adv
|
Backhit Adv
|
Block Adv
|
| -
|
-
|
-
|
-
|
-
|
-
|
|
Suija slows down for whatever reason and then does 5AB. The startup and range are okay, and he still avoids lows. But because Suija slows down most players will be able to block before he gets in range, and it's pretty horrible on block. Only real use is cross under anti-air.
|
|
66C
66C
|
| Damage
|
Guard
|
Cancel
|
Invul
|
Property
|
Level
|
| -
|
-
|
-
|
-
|
8-17f low profile
|
-
|
| Startup
|
Active
|
Recovery
|
Hit Adv
|
Backhit Adv
|
Block Adv
|
| -
|
-
|
-
|
-
|
-
|
-
|
|
Now here's an interesting move. Unlike most dashing kicks, this does not knock down. This seems bad at first, but Suija's speed and ability to space this means you can use it to try and get in. Has the same low profile hurtbox as 3C and starts up faster, so you can sneak under a lot of attempts to stuff your approach using this. You're also left at a nice advantage on hit.
The last few frames are cancelable. As such, that makes this good deflection bait if you think they're going to try and punish.
|
|
Unarmed
u.5S
u.5S
|
| Damage
|
Guard
|
Cancel
|
Invul
|
Property
|
Level
|
| -
|
-
|
-
|
-
|
-
|
-
|
| Startup
|
Active
|
Recovery
|
Hit Adv
|
Backhit Adv
|
Block Adv
|
| -
|
-
|
-
|
-
|
-
|
-
|
|
Same as 5A, but slightly faster and without his weapon.
|
|
u.2S
u.2B
|
| Damage
|
Guard
|
Cancel
|
Invul
|
Property
|
Level
|
| -
|
-
|
-
|
-
|
-
|
-
|
| Startup
|
Active
|
Recovery
|
Hit Adv
|
Backhit Adv
|
Block Adv
|
| -
|
-
|
-
|
-
|
-
|
-
|
|
Same as 2A, but slightly faster and without his weapon.
|
|
ju.S
ju.S
|
| Damage
|
Guard
|
Cancel
|
Invul
|
Property
|
Level
|
| -
|
-
|
-
|
-
|
-
|
-
|
| Startup
|
Active
|
Recovery
|
Hit Adv
|
Backhit Adv
|
Block Adv
|
| -
|
-
|
-
|
-
|
-
|
-
|
|
Pretty much his normal j7/9.A except a bit less damage.
|
|
u.66S
u.66S
|
| Damage
|
Guard
|
Cancel
|
Invul
|
Property
|
Level
|
| -
|
-
|
-
|
-
|
-
|
-
|
| Startup
|
Active
|
Recovery
|
Hit Adv
|
Backhit Adv
|
Block Adv
|
| -
|
-
|
-
|
-
|
-
|
-
|
|
Same as his 66A, only now it knocks down. Still ridiculously slow, though, so it's not recommended.
|
|
System
Deflect
Deflect
216D
|
| Damage
|
Guard
|
Cancel
|
Invul
|
Property
|
Level
|
| -
|
-
|
-
|
-
|
-
|
-
|
| Startup
|
Active
|
Recovery
|
Hit Adv
|
Backhit Adv
|
Block Adv
|
| -
|
-
|
-
|
-
|
-
|
-
|
|
Ordinary, average deflect. Suija's only grounded special, which means this is the only thing he can cancel into from the ground. Useful for that alone.
|
|
Taunt Disarm
Taunt Disarm
Start x 3
|
| Damage
|
Guard
|
Cancel
|
Invul
|
Property
|
Level
|
| -
|
-
|
-
|
-
|
-
|
-
|
| Startup
|
Active
|
Recovery
|
Hit Adv
|
Backhit Adv
|
Block Adv
|
| -
|
-
|
-
|
-
|
-
|
-
|
|
Spins around in the air for a bit before tossing his bracelets on the ground. This goes over lows and throws, because Suija is floating.
|
|
Weapon Pickup
Weapon Pickup
5A near weapon
|
| Damage
|
Guard
|
Cancel
|
Invul
|
Property
|
Level
|
| -
|
-
|
-
|
-
|
-
|
-
|
| Startup
|
Active
|
Recovery
|
Hit Adv
|
Backhit Adv
|
Block Adv
|
| -
|
-
|
-
|
-
|
-
|
-
|
|
Reasonably fast.
|
|
Special Moves
Specials
j.623S
Engetsu
j.623S
|
| Damage
|
Guard
|
Cancel
|
Invul
|
Property
|
Level
|
| -
|
-
|
-
|
-
|
-
|
-
|
| Startup
|
Active
|
Recovery
|
Hit Adv
|
Backhit Adv
|
Block Adv
|
| -
|
-
|
-
|
-
|
-
|
-
|
- The bubble. This is Suija's most defining move, and one you would do well to learn how to use. When activated, he stops in place, puts a bubble around him, which autoguards all attacks, and then he can recover in any direction he wants. He can be air thrown out of this, so watch out.
- Because he can kara cancel into this from many of his grounded moves, it can work effectively as a counter on a good read. However, he can't punish any A slashes, and can only barely punish most B slashes, so its use in that way is limited to heavier attacks. This is detailed more below.
- Due to the air control you get from this, it makes it good to use with feints and whiffed attacks, such as doing a 2AB just outside of their range so that it catches them. Bubbling will also refresh your walljump if you previously used it, so you can do some irritating runaway as a result.
- If you do a quick bubble just over their head, you can set up a crossup with Shougetsu or Shizuki.
-
- By holding a direction, Suija can control how he falls out after the bubble ends. Holding left or right causes him to fall downwards, holding any upwards direction will make him jump in that direction, effectively giving him a double jump. Very useful. Be creative with setups for this.
|
|
j.1236S
Shougetsu
j.1236S
|
| Damage
|
Guard
|
Cancel
|
Invul
|
Property
|
Level
|
| -
|
-
|
-
|
-
|
-
|
-
|
| Startup
|
Active
|
Recovery
|
Hit Adv
|
Backhit Adv
|
Block Adv
|
| -
|
-
|
-
|
-
|
-
|
-
|
- Suija spins hitting all around him for decent damage. It's a good move to combo into from 2AB, and since it hits all around him it covers angles other jumping attacks would normally miss. You can also kara cancel to this from 5AB for a long range overhead/anti-jump. A consistent way to do the cancel is to input it as 1236AB~S. The recovery is garbage, though, so be careful about having it blocked.
- For the most part this keeps the momentum you had before you activate, except just a little bit faster. This slight change means you can setup ambiguous crossups with well angled jumps or from 66B. When used as a TK input, it can work as an anti-air for specific angles.
|
|
j.421S
Getsurinha
j.421S
|
| A
|
Damage
|
Guard
|
Cancel
|
Invul
|
Property
|
Level
|
| -
|
-
|
-
|
-
|
-
|
-
|
| Startup
|
Active
|
Recovery
|
Hit Adv
|
Backhit Adv
|
Block Adv
|
| -
|
-
|
-
|
-
|
-
|
-
|
| B
|
Damage
|
Guard
|
Cancel
|
Invul
|
Property
|
Level
|
| -
|
-
|
-
|
-
|
-
|
-
|
| Startup
|
Active
|
Recovery
|
Hit Adv
|
Backhit Adv
|
Block Adv
|
| -
|
-
|
-
|
-
|
-
|
-
|
| AB
|
Damage
|
Guard
|
Cancel
|
Invul
|
Property
|
Level
|
| -
|
-
|
-
|
-
|
-
|
-
|
| Startup
|
Active
|
Recovery
|
Hit Adv
|
Backhit Adv
|
Block Adv
|
| -
|
-
|
-
|
-
|
-
|
-
|
- Shoots a number of water blobs out. 1 for A, 2 for B, and 3 for AB. The first blob will always do the most damage, and the A version is the fastest. Like other projectiles, this will pop your opponent up for a free pursuit if it hits them from behind. As long as the blobs come out in time, they'll keep moving even if you get hit, so it can trade if they try to hit you out of it. The ground recovery is extremely bad so be sure that you actually connect with this!
- One gimmick you can do is jumping in on them and doing the A version just before landing. If they expect a low or throw they are likely to get hit trying to prevent it. Another is that the blobs have hitboxes while they're behind Suija, so you can hop over the opponent with 5BC right before they get up and use this for a crossup. You're still stuck with the terrible ground recovery though, so don't do this much if at all.
- With all that in mind this is best used for occasional chip damage or anti-jump.
|
|
j.214S
Shizuki
j.214S
|
| Damage
|
Guard
|
Cancel
|
Invul
|
Property
|
Level
|
| -
|
-
|
-
|
-
|
-
|
-
|
| Startup
|
Active
|
Recovery
|
Hit Adv
|
Backhit Adv
|
Block Adv
|
| -
|
-
|
-
|
-
|
-
|
-
|
- Dive catch move. Suija dives diagonally forwards and if his hands touch the opponent, he'll throw them for massive damage. This can be blocked, and since it leaves you at point blank range you're probably going to get hurt, so don't just throw it out randomly. If Suija catches someone in the air, it will reset them, which you most definitely do not want. When done at the right angle, this will cross up the opponent. This is usually done off of 66B, but if you know the way it moves you can space yourself for it easily enough.
- Suija has to actually be able to reach the opponent in order to connect with this. If he gets pushed out by his opponent's collision box, the hands will not connect and it will simply whiff, so you have to try to hit him higher up.
|
|
Weapon Flipping Technique
Tenshou: Suichuuha
j.236CD
|
| Damage
|
Guard
|
Cancel
|
Invul
|
Property
|
Level
|
| 2xn + 30
|
Mid
|
x
|
-
|
-
|
-
|
| Startup
|
Active
|
Recovery
|
Hit Adv
|
Backhit Adv
|
Block Adv
|
| 6
|
90
|
-
|
KD
|
KD
|
??
|
- One of the fastest supers in the game, with extreme vertical reach. The first hit does not extend far horizontally, but will spread out with time, making it good against any air. Do not try to hit Suija until after the water animation is completely done! It might look finished, but you still have to wait, or you'll get disarmed anyway and feel stupid for it.
- The main uses are that you can combo this off of any deep hit, bait throw/hop attempts out, and come out quick enough to stuff most attacks, particularly dashing attacks. The biggest downside is that Suija rages for a long, long time, and you will more likely want to keep that instead, since you are giving up time slow shenanigans for it. You're also in recovery for a very long time afterwards, so you can possibly be punished on hit.
|
|
Combos
Normal
- Suija's only practical launcher, this leads to all of his best combos.
- Normally your best option, it does the most damage.
- Does slightly more damage than the above, only works near corner and harder to time.
- On backhit or far hit, they'll be popped too high up to hit with Shougetsu, so you have to use this. On backhit do 8BC after Suija lands from 2AB so it connects.
- Backup option in case you flub the cancel.
- The only other combo that works on backhit. Hurts. A lot. Most likely you'll want to do this, but you might want to save your rage instead since Suija's lasts a long time.
- Be warned that if you hit them from too far out with 2AB, the WFT won't connect.
- Sneak in a bit more damage. Only works if the 5AB hits them in the air or from behind and they're close to the corner.
- Another corner only combo. Delay the pursuit so it doesn't whiff.
- Tiny bit more damage off your ground slide. Handy.
- Sure, why not.
- Your only knockdown combo off of 6C that isn't WFT. Not very good damage, though.
- Pretty lenient link, but requires basically point blank range (not as strict in the corner) and it's difficult to confirm the hit because of how fast you need to input it.
- Requires backhit and close range. Tighter link than the above combo. Funny but you're better off just doing the WFT anti air instead of crossing under them with this.
Time slow
- 5C/5BC xx j.623A (j.C or 2C) BCD
- 50/50 out of a low bubble with both high/low leading to Issen. You can mix in 6C after landing.
- Standard launcher combo. 2AB launching means it and any followups cannot be exploded.
- 2AB xx j.623A j.AB 2AB BCD
- Flashy launcher combo. Don't bubble too early or j.AB won't connect. You can do another bubble cancel into j.AB before the Issen but that's overkill and very difficult to do.
- 66C leaving them standing means you don't need to hard commit to 2AB to whiff punish during time slow. 66C is explodable though.
- Requires quite a bit of time for the first hit, and you're probably better off with the Issen, but if you want to show off here you go.
Strategies
General
Damage and defense
- Punishers:
- 2AB xx whatever - See the combo list above. This is always the best option if you have enough time for it.
- 5AB - Slow, but the range is huge so it can beat whiffs out cleanly.
- 3C 2BC - Good on a long range hit.
- j.214S - It's kind of slow, but the range is nice and you can beat a lot of things on reaction with it. You need to already be somewhat high up in the air for this.
- Antiairs:
- 5A - Sogetsu's god poke returns. If they don't have a good downwards slice this will win out almost always.
- 2AB xx whatever - Slow, but if they're coming down on you from above, and you have the time to do it, you should always go for this. Again, see the combo list.
- 5AB - When timed right this dashes under them, making Suija difficult to hit.
- 66AB - The autocorrect on dashing normals means this is a good option if you run under them with it.
- 66C - Not from the front unless they already whiffed a button for some reason or lack a strong downwards air attack, so as usual you cross under them with it. You can link into a quick TK WFT if this backhits on their landing, but it's tight.
- kara j.623S - Prevents them from following up with an attack on landing, since you'll likely have the advantage if you time it right.
- tk.12369S - Upwards flying Shougetsu. Not as fast as it looks, but can work in a pinch.
- tk.2369CD - WFT beats all.
Bubble details
- If you are fighting against Suija, do not use heavy or punishable attacks and he will not be able to follow up his bubble easily. Easier said than done, but it's not as strong as it looks.
- This is going to get pretty heavy into frames, so skip to the last line if you don't care why.
- All bubbles have 6 frames of vulnerable recovery before you can attack.
- The primary ways of getting into bubbles are from 5C, 5BC, 44, and 2AB. Each of these has its ups and downs.
- 5C is the hardest to get an instant bubble from. You can input it like 6235C~B but you have to be fast. The primary advantage of this is that you are at the lowest point on the ground, and thus recover the fastest. You have 10 frames between the bubble ending and Suija landing, giving you enough time to do j.6 j.B(3 frame window) or j.C(4 frame window). Note that for a deep hit, you still need to hit the two frame window.
- 5BC is the easiest to cancel from, advances forwards, and the best option for going into a deep j.AB. Optimally, there is a minimum of 11 frames before landing. Normally, it will be more like 15-20.
- 44 is also very easy to cancel, and is usually used to bait whiffs or safely escape from throws. Note that this is the only bufferable action that gets you airborne. Optimally, there is a minimum of 11 frames before landing. Normally 15-20, though.
- 2AB is normally used as a whiff cancel, so that if they stick something out they will get hit, and if not you're safe in the bubble. It takes quite some time to land again afterwards, so be careful.
- The hitstun on deep hits should be known before you try to make use of this:
| Move
|
Startup
|
Frame adv
|
Min. req.
block disadv.
|
Followups
|
| j.7/9 j.A |
6 |
+13 |
-10 |
3C / j.236CD
|
| j.7/9 j.B |
7 |
+19 |
-10 |
n.5AB / 2AB / 3C / j.236CD
|
| j.C |
6 |
+18 |
-10 |
n.5AB / 2AB / 3C / j.236CD
|
| j.AB |
14 |
+38 |
-15 |
5AB / n.5AB / 2AB / 3C / j.236CD
|
- Table key:
- Move is the attack used on the way down.
- Startup is how many frames of startup the attack has. Note that you still need to hit the two frame window just before landing in order to deep hit.
- Frame advantage is how much time Suija will have to attack afterwards.
- Minimum required block disadvantage is how disadvantageous the opponent's attack must be, as listed on their frame data, in order to connect with the move. This is given an optimal scenario, where Suija is attacked on the bubble's last autoguard frame, the best air cancel(5C for all but j.AB) is used, the minimum height required to attack is used, and the minimum deep hit time occurs. Usually, you will need more frame disadvantage, because they will not connect on the last frame.
- Followups are the best options Suija has afterwards.
- Now the important parts, for attacks blocked by bubbles:
- Basically no A slashes can be punished, as they recover too fast.
- Most normal B slashes are between -9 and -14, meaning they cannot be punished with a j.AB, and require an optimal scenario to punish with any other attack.
- Nearly all AB slashes and most specials can be punished relatively easily, but require the opponent to actually use them.
- You can't deep hit on someone who is airborne, so pretty much any jump or hop will nullify anything you want to do after.
- For him to get a lot out of bubble tricks, it basically requires both a very good read and the opponent being willing to throw something large enough out that it can be punished.
Frame Data
| Move
|
Damage
|
Startup
|
Active
|
Total
|
Cancel
|
Weapon
Clash
|
Hit
Adv.
|
Backhit
Adv.
|
Block
Adv.
|
Guard
|
Notes
|
| 5A |
4 |
7 |
4 |
20 |
1~3(3) / 7~15(9) |
- |
-3 |
-3 |
-8 |
Mid |
Weak attack
|
| 5B |
13 |
11 |
2 |
38 |
x |
5~10(6) |
-9 |
-1 |
-9 |
Mid |
Medium attack, Deflectable(med)
|
| 5AB |
28 |
20 |
4 |
51 |
11~13(3) |
- |
KD |
KD |
-26 |
Mid |
Knockdown attack
|
| 2A |
4 |
7 |
3 |
21 |
1~3(3) / 7~15(9) |
- |
-4 |
-4 |
-9 |
Mid |
Weak attack
|
| 2B |
13 |
12 |
3 |
32 |
1~3(3) / 12~19(8) |
- |
-2 |
+6 |
-9 |
Mid |
Medium attack, Deflectable(med)
|
| 2AB |
28 |
15 |
5 |
55 |
20~39(20) |
- |
KD |
KD |
-21 |
Mid |
Knockdown attack
|
| n.5A |
4 |
7 |
4 |
20 |
1~3(3) / 7~15(9) |
- |
-3 |
-3 |
-8 |
Mid |
Weak attack
|
| n.5B |
9 |
13 |
2 |
38 |
1~4(4) / 13~35(23) |
9~12(4) |
-7 |
+1 |
-9 |
Mid |
Medium attack, Deflectable(med)
|
| n.5AB |
28 |
15 |
2 |
56 |
1~6(6) |
13 |
-4 |
+6 |
-21 |
Mid |
Heavy attack, Deflectable(heavy)
|
| n.2A |
4 |
7 |
3 |
21 |
1~3(3) / 7~15(9) |
- |
-4 |
-4 |
-9 |
Mid |
Weak attack
|
| n.2B |
13 |
12 |
3 |
32 |
1~3(3) / 12~19(8) |
- |
-2 |
+6 |
-9 |
Mid |
Medium attack, Deflectable(med)
|
| n.2AB |
28 |
15 |
5 |
55 |
20~39(20) |
- |
KD |
KD |
-21 |
Mid |
Knockdown attack
|
| 5C |
6 |
13 |
4 |
34 |
1~12(12) |
- |
-17 (-3) |
+5 |
-16 |
Mid |
Medium attack
1-11f throw invul
12-28f below knee invul
|
| 6C |
8 |
20 |
2 |
23 |
1~4(4) |
- |
+15 |
+23 |
+2 |
Low |
Medium attack
|
| 2C |
2 |
5 |
2 |
19 |
1~2(2) / 5~15(11) |
- |
-4 |
-4 |
-9 |
Low |
Weak attack
|
| 3C |
8 |
13 |
12 |
45 |
x |
- |
KD |
KD |
-27 |
Low |
Knockdown attack
|
| j8.A |
7 |
4 |
18 |
29 |
x |
- |
-- |
-- |
-- |
High |
Weak attack, Deflectable(weak)
|
| j8.B |
11 |
14 |
4 |
33 |
x |
- |
-- |
-- |
-- |
High |
Medium attack, Deflectable(med)
|
| j7/9.A |
7 |
6 |
10 |
23 |
x |
- |
-- |
-- |
-- |
High |
Weak attack
|
| j7/9.B |
11 |
7 |
2 |
32 |
x |
- |
-- |
-- |
-- |
High |
Weak attack, Deflectable(med)
|
| j.AB |
25 |
14 |
4 |
49 |
1~5(5) |
- |
-- |
-- |
-- |
High |
Heavy attack, Deflectable(heavy)
|
| j.C |
6 |
6 |
8 |
19 |
x |
- |
-- |
-- |
-- |
High |
Medium attack
|
| ju.C |
6 |
6 |
8 |
19 |
x |
- |
-- |
-- |
-- |
High |
Medium attack
|
| 5BC |
15 |
20 |
5 |
38 |
1~19(19) |
- |
KD |
KD |
-12 |
High |
Medium attack Knockdown attack
|
| u.5BC |
6 |
20 |
7 |
41 |
x |
- |
KD |
KD |
-15 |
High |
Medium attack Knockdown attack
|
| 66A |
8 |
15 |
7 |
27 |
x |
- |
-2 |
-2 |
-7 |
Mid |
Weak attack
|
| 66B |
14 |
31 |
9 |
52 |
5~30(26) |
- |
KD |
KD |
-15 |
High |
Medium attack Knockdown attack
|
| 66AB |
16 |
13 |
4 |
52 |
1~6(6) |
- |
KD |
KD |
-34 |
Mid |
Knockdown attack
7-29f below knees invincible
|
| 66C |
9 |
8 |
10 |
25 |
1~4(4) / 22~25(4) |
- |
+1 |
+9 |
-12 |
Low |
Medium attack
|
| u.5S |
4 |
5 |
4 |
18 |
1~2(2) |
- |
-3 |
-3 |
-8 |
Mid |
Weak attack
|
| u.2S |
4 |
5 |
3 |
19 |
1~2(2) |
- |
-4 |
-4 |
-9 |
Mid |
Weak attack
|
| ju.S |
6 |
6 |
10 |
23 |
x |
- |
-- |
-- |
-- |
High |
Weak attack
|
| u.66S |
8 |
15 |
7 |
27 |
x |
- |
KD |
KD |
-7 |
Mid |
Knockdown attack
|
| u.66C |
9 |
8 |
10 |
25 |
1~4(4)/22~25(4) |
- |
+1 |
+9 |
-12 |
Low |
Medium attack
|
| 2BC |
6 |
18 |
3 |
46 |
1~4(4) |
- |
-- |
-- |
-- |
Mid |
|
| u.2BC |
6 |
18 |
3 |
46 |
1~4(4) |
- |
-- |
-- |
-- |
Mid |
|
| 8BC |
13 |
39 |
2 |
72 |
1~19(19) |
- |
-- |
-- |
-- |
Mid |
|
| u.8BC |
13 |
39 |
2 |
72 |
1~19(19) |
- |
-- |
-- |
-- |
Mid |
|
| Shougetsu - j.1236S |
17 |
15 |
26 |
x |
x |
- |
KD |
KD |
-39 |
High |
Medium attack Knockdown attack
|
| Shizuki - j.214S |
30 |
19 |
x |
x |
x |
- |
KD |
KD |
-18 |
High |
Medium attack
|
| Engetsu - j.623A |
x |
x |
x |
15 |
x |
- |
x |
x |
x |
x |
3-9f autoguard
|
| Engetsu - j.623B |
x |
x |
x |
27 |
x |
- |
x |
x |
x |
x |
3-21f autoguard
|
| Engetsu - j.623AB |
x |
x |
x |
48 |
x |
- |
x |
x |
x |
x |
3-42f autoguard
|
| Getsurinha - j.421A |
21 |
10 |
x |
x |
x |
- |
?? |
KD |
?? |
Mid |
|
| Getsurinha - j.421B |
21, 8 |
14 |
x |
x |
x |
- |
?? |
KD |
?? |
Mid |
|
| Getsurinha - j.421AB |
21, 8, 3 |
19 |
x |
x |
x |
- |
?? |
KD |
?? |
Mid |
|
| Tenshou: Suichuuha - j.236CD |
2xn + 30 |
6 |
90 |
x |
x |
- |
KD |
KD |
?? |
Mid |
|


