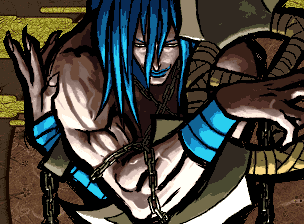
首切り 破沙羅, Kubikiri Basara
Colors
Introduction
The youkai out for revenge for his murdered wife. OYASUMIIIIII will never be the same.
As a character, Basara is all about strange movement mixups, keeping his opponent at specific ranges due to his weapon being on a chain, abusing the hell out of his 236c puff move and command throw, and generally bouncing around like a goon. He is one of the few characters in the game with a walljump. Unfortunately, the moderate damage and movement options also mean he takes increased damage from everything in the game, 130%.
| Strengths |
Weaknesses
|
- Normals have great reach.
- THE PUFF combined with command grab can be very stifling for opponents to get out of.
- Fast and tricky movement.
- All manner of fakeouts to make the opponent react poorly.
- Surprisingly high damage.
- Zoning is nontraditional but can be quite powerful.
- Great mixups after you get the opponent to respect your options.
|
- He dies if he gets hit. He straight up dies.
- Reversal options are largely telegraphed and unsafe.
- Fakeouts have noticeable tells if the opponent is looking for them.
- Most of his normals aren't good for up close defense outside of mashing.
- His defense is just really not that great.
- Requires a lot of hard work and perfect play to get the most out of his tools.
- His overheads are a lot more threatening than his lows.
- It bears repeating that he takes a LOT of damage.
|
Data
- Damage taken: 130%
- Rage duration: 20 seconds
- Amount to rage: 16
- Walk speed: 480
- Backwalk speed: 416
- Dash speed: 880(1792) (Basara's dash starts slow then accelerates)
- Jump duration: 45 frames
- Width: 24
- Throw range: 12
- Throw recovery: 42 frames
- Tier placing: B
Normals
Far Slashes
5A
5A
|
| Damage
|
Guard
|
Cancel
|
Invul
|
Property
|
Level
|
| 3
|
Mid
|
1~2(2)
|
-
|
-
|
Weak
|
| Startup
|
Active
|
Recovery
|
Hit Adv
|
Backhit Adv
|
Block Adv
|
| 5
|
2
|
8
|
0
|
0
|
-5
|
|
Quick short range jab tool. One of Basara's fastest normals and one of the few normals he has that does not have a disjointed hurtbox.
|
|
5B
5B
|
| Damage
|
Guard
|
Cancel
|
Invul
|
Property
|
Level
|
| 5,5,5
|
Mid
|
1~8(8)
|
-
|
-
|
Medium
|
| Startup
|
Active
|
Recovery
|
Hit Adv
|
Backhit Adv
|
Block Adv
|
| 12
|
1
|
-
|
+1
|
+9
|
-11
|
|
Basara throws his weapon horitontally at arm-level. Reaches about halfscreen and hits three times along the way. Has high recovery for a medium and you can suffer immensely for throwing this out at the wrong time. High risk, low reward, and generally not even as useful as the crouching variant.
|
|
5AB
5AB
|
| Damage
|
Guard
|
Cancel
|
Invul
|
Property
|
Level
|
| 26
|
Mid
|
1~5(5)
|
-
|
-
|
Heavy
|
| Startup
|
Active
|
Recovery
|
Hit Adv
|
Backhit Adv
|
Block Adv
|
| 16
|
24
|
19
|
-3
|
+7
|
-34
|
|
Good range heavy, but still quite punishable by most on block. Has some use in mixups. Destroys most projectiles, for what it's worth.
|
|
2A
2A
|
| Damage
|
Guard
|
Cancel
|
Invul
|
Property
|
Level
|
| 3
|
Mid
|
1~2(2)
|
-
|
-
|
Weak
|
| Startup
|
Active
|
Recovery
|
Hit Adv
|
Backhit Adv
|
Block Adv
|
| 5
|
2
|
5
|
+3
|
+3
|
-2
|
|
Quick crouching jab. A fast normal that can be used as a defensive tool when the opponent is up close since recovery is so quick.
|
|
2B
2B
|
| Damage
|
Guard
|
Cancel
|
Invul
|
Property
|
Level
|
| 5,5,5
|
Low
|
1~5(5)
|
-
|
-
|
Medium
|
| Startup
|
Active
|
Recovery
|
Hit Adv
|
Backhit Adv
|
Block Adv
|
| 15
|
1
|
-
|
+1
|
+9
|
-11
|
|
Horizontal weapon throw that glides along the ground. Hits low three times, which sometimes throws people off for slight damage. Again, the hitbox disappears once the weapon is returning, and Basara is vulnerable. Use with care. The low-hitter you need for mixups.
|
|
2AB
2AB
|
| Damage
|
Guard
|
Cancel
|
Invul
|
Property
|
Level
|
| 30
|
Mid
|
1~3(3)
|
-
|
-
|
Heavy
|
| Startup
|
Active
|
Recovery
|
Hit Adv
|
Backhit Adv
|
Block Adv
|
| 24
|
16
|
44
|
-21
|
-11
|
-51
|
|
A midrange anti-air heavy with tremendous startup and even worse recovery. Outdone as a punish by 5AB and as anti-air by the 236S series.
|
|
Near Slashes
n.5A
n.5A
|
| Damage
|
Guard
|
Cancel
|
Invul
|
Property
|
Level
|
| 3
|
Mid
|
1~2(2)
|
-
|
-
|
Weak Attack
|
| Startup
|
Active
|
Recovery
|
Hit Adv
|
Backhit Adv
|
Block Adv
|
| 5
|
2
|
7
|
+1
|
+1
|
-4
|
|
Fast jab attack. The attack to use if you want to push them away a little bit and you need a decent hitbox. Not deflectable.
|
|
n.5B
n.5B
|
| Damage
|
Guard
|
Cancel
|
Invul
|
Property
|
Level
|
| 8
|
Mid
|
1~2(2) / 10~23(14)
|
-
|
Deflectable (Medium),
Weapon Clash 9(9) / 12~14(3)
|
Medium Attack
|
| Startup
|
Active
|
Recovery
|
Hit Adv
|
Backhit Adv
|
Block Adv
|
| 10
|
2
|
23
|
-7
|
+1
|
-9
|
|
Attack with the chain. Not the best option to use at this distance.
|
|
n.5AB
n.5AB
|
| Damage
|
Guard
|
Cancel
|
Invul
|
Property
|
Level
|
| 28
|
Mid
|
1~5(5)
|
-
|
Deflectable (Heavy),
Weapon Clash 16~18(3)
|
Heavy Attack
|
| Startup
|
Active
|
Recovery
|
Hit Adv
|
Backhit Adv
|
Block Adv
|
| 19
|
4
|
25
|
+8
|
+18
|
-21
|
|
The punish with the better hitbox. Very unwise to use in any other situation.
|
|
n.2A
n.2A
|
| Damage
|
Guard
|
Cancel
|
Invul
|
Property
|
Level
|
| 3
|
Mid
|
1~2(2)
|
-
|
-
|
Weak Attack
|
| Startup
|
Active
|
Recovery
|
Hit Adv
|
Backhit Adv
|
Block Adv
|
| 5
|
2
|
5
|
+3
|
+3
|
-2
|
|
Very similar to n.5A, slightly lower hitbox.
|
|
n.2B
n.2B
|
| Damage
|
Guard
|
Cancel
|
Invul
|
Property
|
Level
|
| 8
|
Mid
|
1~4(4) / 15~22(8)
|
-
|
Deflectable (Medium),
Weapon Clash 13~14(2) / 23~25(3)
|
Medium Attack
|
| Startup
|
Active
|
Recovery
|
Hit Adv
|
Backhit Adv
|
Block Adv
|
| 15
|
8
|
15
|
-5
|
+3
|
-9
|
|
Essentially no use, just like the standing version. Takes just as long to start as n.2AB, less damage.
|
|
n.2AB
n.2AB
|
| Damage
|
Guard
|
Cancel
|
Invul
|
Property
|
Level
|
| 16, 18
|
Mid
|
1~3(3)
|
-
|
-
|
Heavy Attack
|
| Startup
|
Active
|
Recovery
|
Hit Adv
|
Backhit Adv
|
Block Adv
|
| 15
|
-
|
42
|
+7
|
+15
|
-19
|
|
Slightly faster startup than n.5AB, but hits twice which can be bad.
|
|
Overheads
|
|
5BC:
Low invulnerability, fairly mid range overhead.
|
Kicks
|
|
5C:
- An upward kick which has at least one use: to stop Enja jumpins.
|
|
|
6C:
- Properties: Hits high.
- A delayed kick that moves upward and forward before the active frames.
|
|
|
2C:
- Pissant kick. Great at close range interrupting and not much else.
|
Jumping
|
|
j.A:
- Sometimes used as a quick aerial when there's not enough time for j.AB. Has some neat properties including a tendency to crossup.
|
|
|
j.AB:
- An excellent air heavy that makes deephitting trivially easy, although it's even better as air-to-air. Can cross up rarely.
|
|
|
j.1/3/6C
- properties: Knockdown
- Flipkick. Basara flips over in the air and bonks you on the head. Instant knockdown, can instantly do a 8bc if it lands in corner. (not sure what this is used for if someone else can fill this out)
|
Dashing
|
|
66A:
- Shoulder ram. Fantastic for applying sudden pressure. It might catch low-flying enemies without the risks of 66AB.
|
|
|
66B:
- Overhead. Has a high delay but is also cancellable into the 623C command grab.
|
|
|
66AB:
- Wide arcing circular slash with high recovery. Good as a split second punish if you know they can't block it. If they do block it, you can try to be cheeky, because it has a cancel window during the recovery for some reason. You can't make any combos with this, but you might catch an overzealous punish or two.
|
|
|
66C:
- Low-hitting kick. The pitiful damage doesn't justify the mixup capabilities.
|
Unarmed
Pursuits
|
|
Small Pursuit - 2BC:
- Guaranteed after a succesful WFT (236CD)
|
|
|
Big Pursuit - 8BC:
- Requires godlike timing, but usable after a puff hits them out of the air or 66C.
|
System
|
|
Taunt Disarm - Start Start Start:
- You can sometimes disarm yourself after deploying a puff with 236+C but before it connects.
|
Specials
|
|
Chisashi - 236S
- Basara throws his blade out at an angle above him, distance depending on A/B/AB. 236A is closest, just below 5B range, 236B goes a little over half, 236AB will travel full screen.
- If blocked before circling down, the weapon immediately heads home. The hitbox of the blade otherwise disappears shortly after beginning the return trip. For this reason, if it travels over them without being blocked, it can pose a double threat if it circles down immediately behind them. Despite appearances however this attack can never cross up and only hits mid.
|
|
|
Sorasashi - j.236S
- This is like Basara's 236S attack from the ground, except performed from the air and angled downwards. Can only be tossed from the height of the jump, and like all the attacks from the air, is an overhead. j.236A tosses the blade almost directly downwards, just slightly in front of Basara. j.236B comes out from a 45 degree angle and will hit just a little past midscreen. j.236AB moves almost completely horizontally.
- GIMMICK MODE: j.236AB can be used off a backdash from Basara for a super fast nearly fullscreen overhead. You can catch people trying to chase you with this occasionally, but faster characters can reliably punish on block or whiff.
- ANNOYING MODE: This move is damn near impossible to use from the corner in the air (not that you'd want to) because Basara has a walljump that is activated by hitting 6.
|
|
|
Nuedama - 236C
- THE PUFF. Basara pauses for a second and throws a big purple puff that travels upwards in an arc and homes in on the enemy. Its range is about one full screen, although it can still be backed away from when you walk forward. This move is amazing. It is Basara's main zoning tool, because if you keep the other character at a good distance it is very hard to punish and gives you an amazing tool to work with for your own pressure. NEVER TOSS THIS IF THE OTHER CHARACTER IS CLOSE TO YOU, the startup is long and they are going to hit you. They will hit you. It will give them counterhit bonus and it is going to hit. Seriously, this move opens up ALL of Basara's pressure game. If you're standing more than half a screen away it's time to start thinking about THE PUFF. Basara can also setup an unblockable scenario like Genjuro and Sogetsu with this move.
GIMMICK MODE: Dash forward, hop behind opponent the second before the puff lands, hit 5ab, enjoy too much damage for such a stupid trick.
|
|
|
Tomobiki - 623C
- Basara's command throw. Basara grabs the opponent and pulls them down into a pit of shadow before his blade, a squirt of blood, and the opponent come flying back out of it. Pretty good move. Not really much to say, the damage isn't outstanding, but it punishes people who start standing still from THE PUFF, and the range is a little bit (not by much) further than a CD throw.
|
|
|
Kage Ide - 623S
- Basara teleport DP. Basara drops into a pit like his 214c move and instantly appears in front of the other character with a leaping slash. The damage doesn't seem to change on the slash used (a/b/ab), so I guess it just depends on how high you feel like going before the other person hits you for using this not really all that good DP. This also whiffs constantly if the other person is moving. Its best use is going around projectiles to hit your opponent the instant they recover, but not really the best option you have the majority of the time.
- Also has a mild potential for chip deaths, but this is stifled by the fact that if they move at all while you are underground, they'll likely only take one tick of damage. Good as a surprise or longshot attack only.
|
|
|
Sashiashi - j.2C
- Puff-foot. Basara sticks his foot straight down and it glows with a purple energy and bounces back up into the air on hit or block. Not a lot of blockstun on this, but can be used to cross up for a little bit of damage, and the recovery bouncing you back into the air means you can catch people trying to poke you when you're coming back down. This move can actually make Basara step on and bounce off of quite a few projectiles, namely Tam Tam's skulls, Sogetsu's bubbles, Haohmaru's and Rasetsumaru's tornados, Hanzo's fire, Genjuro's cards, Gaira's Katsu, Kyoshiro's Ootsunami, Nakoruru's Mamahaha, and even Mizuki's and Kusaregedo's WFTs. Click here for a video showcase. You have to land right on top of the projectile though, if you're too far off center it won't work. You can also control the direction of your jump after a stomp. Not a great move, but not awful and it's available while disarmed.
|
|
|
Kage Damashi - 421x
- Basara shadow fakeout, an important move to get used to using with Basara, as it allows for a ton of opportunities for actually moving/punishing people trying to hit the clone/etc. It recovers fast, it cancels from roll, it's good. It's also available while disarmed.
- 421A - Basara clone jumps forward
- 421B - Basara clone jumps straight up
- 421C - Basara clone jumps backwards
- 421AB - Basara clone walks forwards
- 421BC - Basara clone dashes forwards
- 421AC - Basara clone rolls forwards
- 421BD - Basara clone does a 214c shadow hole forward
|
|
|
Kage Sui - 214C
- Basara drops into a pit, which you can then move by holding C. This move is not really that great, it's startup is somewhat quick but the recovery is NOT. Basara is not hittable while in the pit but they're going to hit you when you pop back up. Mainly a gimmick but undoubtedly has a variety of novel uses. Available while disarmed.
|
|
|
Kagemai: Yumebiki - 236CD - WFT
- Basara's WFT. This is actually a pretty decent WFT if you can hit confirm off the puff. Basara hops back then dashes forward very quickly delivering a flurry of punches and slashes before ending by grabbing the opponent and making a big slash with his shuriken blade thing. His dead wife's portrait shows up in the after image of the slash, isn't that sweet. The hop back is melee invul as well so you can use it to counter people being really obvious with moves.
- Very unsafe if blocked, but if you made a PUFF right before doing this, you might besafe as they will have to keep blocking a bit longer.
|
Combos
Normal
- Tall characters only.
- 236C ABC 5AB (unblockable)
Backhit
Puff Mixups
-
- If they jump into it, you can heavy pursuit if you are close enough
- Roll cancel into cmd grab, inescapable if they stand still
- Pretty safe and if they try to dash at you, they will eat both attacks
- Low-hitting variant
- High-hitting variant
- Another kind of grab attempt
- Jump-in pressure, warning: not invincible
- Deep hitting is the best possible outcome if they are also hit by the puff
- Much easier time if you are trying to crossup
- The puff can prevent some characters from punishing your super attempts
- Bait an attack, careful with this
- the oldest trick in the book
- Unblockable with the right positioning
Time Slow
Strategies
General
Basara is the character that requires you to know all options he has and always controlling the situation, as well as flow of the entire match. In good hands, this guy is extremely dangerous, and I'd even say that he's not for beginners either. Having solid options for opening up the opponent, you'll want to prevent dumb turtling with Basara, and it's pretty necessary in some matchups, like against Ukyo, who likes to sit out his lead in the corner. But your mixups are sometimes or even mostly stronger than your opponent's attempts to win by life lead. Also, you have almost godlike space control, but it's pretty unsafe if you're careless about it. When the opponent tries to pressurize you, there's (j.)236, 2/5AB, puff and 2B in your pocket, and these options are intuitive, excluding special situations or advanced things you can pull out, so there's chance that even Basara can turtle at some moments. Speaking about brute offense, if I can call it like that, this character hasn't much to do simple pressure, maybe except of dash-ins or close jump-ins that are not safe either, and there's roll cancel to cmd grab trick, which you can abuse sometimes, though it doesn’t always succeed.
Frame Data
| Move
|
Damage
|
Startup
|
Active
|
Total
|
Cancel
|
Weapon
Clash
|
Hit
Adv.
|
Backhit
Adv.
|
Block
Adv.
|
Guard
|
Notes
|
| 5A |
3 |
5 |
2 |
15 |
1~2(2) |
- |
+0 |
+0 |
-5 |
Mid |
Weak attack
|
| 5B |
5, 5, 5 |
12 |
1 |
49 |
1~8(8) |
- |
+1 |
+9 |
-11 |
Mid |
Medium attack
|
| 5AB |
26 |
16 |
24 |
59 |
1~5(5) |
- |
-3 |
+7 |
-34 |
Mid |
Heavy attack
|
| 2A |
3 |
5 |
2 |
12 |
1~2(2) |
- |
+3 |
+3 |
-2 |
Mid |
Weak attack
|
| 2B |
5, 5, 5 |
15 |
1 |
51 |
1~5(5) |
- |
+1 |
+9 |
-11 |
Low |
Medium attack
|
| 2AB |
30 |
24 |
16 |
84 |
1~3(3) |
- |
-21 |
-11 |
-51 |
Mid |
Heavy attack
|
| n.5A |
3 |
5 |
2 |
14 |
1~2(2) |
- |
+1 |
+1 |
-4 |
Mid |
Weak attack
|
| n.5B |
8 |
10 |
2 |
35 |
1~2(2) / 10~23(14) |
9(9) / 12~14(3) |
-7 |
+1 |
-9 |
Mid |
Medium attack, Deflectable(med)
|
| n.5AB |
28 |
19 |
4 |
48 |
1~5(5) |
16~18(3) |
+8 |
+18 |
-21 |
Mid |
Heavy attack, Deflectable(heavy)
|
| n.2A |
3 |
5 |
2 |
12 |
1~2(2) |
- |
+3 |
+3 |
-2 |
Mid |
Weak attack
|
| n.2B |
8 |
15 |
8 |
38 |
1~4(4) / 15~22(8) |
13~14(2) / 23~25(3) |
-5 |
+3 |
-9 |
Mid |
Medium attack, Deflectable(med)
|
| n.2AB |
16, 18 |
15 |
x |
57 |
1~3(3) |
- |
+7 |
+15 |
-19 |
Mid |
Heavy attack
|
| 5C |
6 |
9 |
10 |
35 |
1~2(2) / 33~35(3) |
- |
+11 |
+21 |
-21 |
Mid |
Heavy attack
|
| 6C |
7 |
29 |
4 |
39 |
1~2(2) |
- |
KD |
KD |
-5 |
High |
Medium attack Knockdown attack
|
| 2C |
2 |
3 |
2 |
13 |
1~2(2) |
- |
+0 |
+0 |
-5 |
Low |
Weak attack
|
| 3C |
6 |
12 |
5 |
39 |
38~39(2) |
- |
KD |
KD |
-22 |
Low |
Knockdown attack
|
| j.A |
6 |
7 |
2 |
30 |
x |
- |
-- |
-- |
-- |
High |
Weak attack, Deflectable(weak)
|
| j.B |
11 |
15 |
4 |
27 |
x |
- |
-- |
-- |
-- |
High |
Medium attack, Deflectable(med)
|
| j.AB |
26 |
14 |
3 |
33 |
x |
- |
-- |
-- |
-- |
High |
Heavy attack, Deflectable(heavy)
|
| j.C |
4 |
14 |
10 |
33 |
x |
- |
-- |
-- |
-- |
High |
Weak attack
|
| ju.C |
4 |
14 |
10 |
33 |
x |
- |
-- |
-- |
-- |
High |
Weak attack
|
| 5BC |
14 |
20 |
8 |
44 |
x |
- |
KD |
KD |
-18 |
High |
Medium attack Knockdown attack
|
| u.5BC |
14 |
20 |
8 |
44 |
x |
- |
KD |
KD |
-18 |
High |
Medium attack Knockdown attack
|
| 66A |
8 |
4 |
10 |
25 |
1~3(3) |
- |
-3 |
+5 |
-16 |
Mid |
Medium attack
|
| 66B |
11 |
20 |
7 |
39 |
12~17(6) |
- |
KD |
KD |
-14 |
High |
Medium attack Knockdown attack
|
| 66AB |
16 |
12 |
4 |
59 |
1~4(4) / 34~59(26) |
- |
KD |
KD |
-42 |
Mid |
Knockdown attack
|
| 66C |
6 |
12 |
5 |
30 |
x |
- |
KD |
KD |
-13 |
Low |
Knockdown attack
|
| u.5S |
3 |
7 |
2 |
16 |
1~4(4) |
- |
+1 |
+1 |
-4 |
Mid |
Weak attack
|
| u.2S |
3 |
7 |
2 |
18 |
1~4(4) |
- |
-1 |
-1 |
-6 |
Mid |
Weak attack
|
| ju.S |
4 |
8 |
2 |
29 |
x |
- |
-- |
-- |
-- |
High |
Medium attack
|
| u.66S |
8 |
4 |
10 |
25 |
1~3(3) |
- |
KD |
KD |
-16 |
Mid |
Knockdown attack
|
| u.66C |
6 |
12 |
5 |
30 |
x |
- |
KD |
KD |
-13 |
Low |
Knockdown attack
|
| 2BC |
4 |
14 |
5 |
30 |
1~4(4) / 28~30(3) |
- |
-- |
-- |
-- |
Mid |
|
| u.2BC |
4 |
14 |
5 |
30 |
1~4(4) / 28~30(3) |
- |
-- |
-- |
-- |
Mid |
|
| 8BC |
11 |
41 |
3 |
84 |
x |
- |
-- |
-- |
-- |
Mid |
|
| u.8BC |
11 |
41 |
3 |
84 |
x |
- |
-- |
-- |
-- |
Mid |
|
| Toukotsu Wari - j.1/3C |
8 |
11 |
x |
x |
x |
- |
KD |
KD |
-- |
High |
Medium attack Knockdown attack
6 damage second half
|
| Sashiashi - j.2C |
16 |
3 |
x |
x |
x |
- |
?? |
?? |
?? |
High |
Heavy attack
|
| Chisashi - 236A |
17 |
12 |
40 |
77 |
x |
- |
KD |
KD |
-24 |
Mid |
Knockdown attack
|
| Chisashi - 236B |
17 |
14 |
42 |
88 |
x |
- |
KD |
KD |
-24 |
Mid |
Knockdown attack
|
| Chisashi - 236AB |
17 |
16 |
47 |
100 |
x |
- |
KD |
KD |
-24 |
Mid |
Knockdown attack
|
| Sorasashi - j.236A |
17 |
8 |
37 |
x |
x |
- |
KD |
KD |
?? |
High |
Medium attack Knockdown attack
|
| Sorasashi - j.236B |
17 |
8 |
37 |
x |
x |
- |
KD |
KD |
?? |
High |
Medium attack Knockdown attack
|
| Sorasashi - j.236AB |
17 |
12 |
37 |
x |
x |
- |
KD |
KD |
?? |
High |
Medium attack Knockdown attack
|
| Nuedama - 236C |
10 |
35 |
x |
48 |
x |
- |
+25 |
+33 |
+0 |
Mid |
|
| Kage Ide - 623A |
1, 25 |
33 |
2 |
88 |
x |
- |
KD |
KD |
-45 |
Mid |
Knockdown attack
1-11f throw invincible
12-30f full invincible
|
| Kage Ide - 623B |
1, 25 |
30 |
2 |
93 |
x |
- |
KD |
KD |
-53 |
Mid |
Knockdown attack
1-11f throw invincible
12-27f full invincible
|
| Kage Ide - 623AB |
1, 25 |
27 |
2 |
104 |
x |
- |
KD |
KD |
-67 |
Mid |
Knockdown attack
1-11f throw invincible
12-24f full invincible
|
| Kage Sui - 214C |
x |
x |
x |
70 |
x |
- |
-- |
-- |
-- |
Mid |
12-55f full invincible
|
| Kage Sui - u.214C |
x |
x |
x |
74 |
x |
- |
-- |
-- |
-- |
Mid |
16-29f full invincible
|
| Tomobiki - 623C |
23 |
6 |
3 |
46 |
x |
- |
KD |
KD |
KD |
Mid |
|
| Kage Damashi - 421x |
x |
x |
x |
33 |
x |
- |
-- |
-- |
-- |
Mid |
|
| Kagemai: Yumebiki - 236CD |
30 |
24 |
19 |
63 |
x |
- |
KD |
KD |
-54 |
Mid |
1-19f full invincible
20-40f lower body invincible
|


