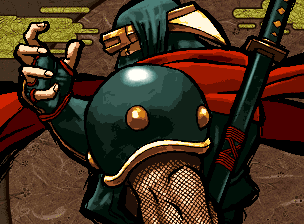
服部 半蔵, Hattori Hanzo

Colors
Introduction
As you may or may not know, Hattori Hanzo is a ninja. A real ninja, like a Japanese historical figure, reincarnated by SNK into the Samurai Shodown universe.
Hanzo is a very mobile character who can be very hard to pin down. He lacks some of the poking tools other characters have, namely an anti air. Being a ninja, he won't let that stop him. Using a combination of projectiles, mixups, and mindgames Hanzo will fight his way to victory. His command grab looks cool.
| Strengths |
Weaknesses
|
- Very fast and damaging 2AB sweep with whiff cancel potential.
- Baku'en Ryuu controls a lot of space, deals good damage, and sets up tick throws and mixups.
- All of his specials can be used while unarmed, even his WFT!
- Very good command grabs that range from quick and weak to slow and damaging. His WFT is a command grab, too.
- Great mobility. Can punish from a distance with 66C, long range backdash with an early cancel window, and lots of teleports.
|
- No high damage long range normals -- his 5AB slashes really suck.
- Backdash takes a long time to finish and can be easily punished with a good read.
- Low damage anti-airs.
- Mixups leave him wide open if blocked or whiffed.
- Doesn't get good damage outside of punishes.
|
Data
- Damage taken: 110%
- Rage duration: 20 seconds
- Amount to rage: 34
- Walk speed: 576
- Backwalk speed: 512
- Dash speed: 1900
- Jump duration: 49 frames
- Width: 8
- Throw range: 16
- Throw recovery: 42 frames
- Tier placing: A
Normals
Far Slashes
5A
5A
|
| Damage
|
Guard
|
Cancel
|
Invul
|
Property
|
Level
|
| 5
|
Mid
|
8~26(18)
|
-
|
Deflectable (Weak)
|
Weak
|
| Startup
|
Active
|
Recovery
|
Hit Adv
|
Backhit Adv
|
Block Adv
|
| 9
|
2
|
15
|
-6
|
-6
|
-3
|
|
Not an awful poke, but 5B is generally better at its effective ranges. Special cancel is useful for canceling into teleports and projectiles, more so further out than up close (like off a wiffed or max range poke).
|
|
5B
5B
|
| Damage
|
Guard
|
Cancel
|
Invul
|
Property
|
Level
|
| 11
|
Mid
|
-
|
-
|
Deflectable (Medium)
Recoil Cancel
Weapon Clash 8(1)
|
Medium
|
| Startup
|
Active
|
Recovery
|
Hit Adv
|
Backhit Adv
|
Block Adv
|
| 13
|
2
|
23
|
-7
|
+1
|
-9
|
|
Good range and speed, your primary all around poking move. Recoil on block is useful for going into fireball.
|
|
5AB
5AB
|
| Damage
|
Guard
|
Cancel
|
Invul
|
Property
|
Level
|
| 5+24
|
Mid
|
-
|
-
|
Deflectable (Heavy)
Recoil Cancel
|
Heavy
|
| Startup
|
Active
|
Recovery
|
Hit Adv
|
Backhit Adv
|
Block Adv
|
| 34
|
5
|
39
|
-4
|
+6
|
-21
|
|
Possibly the worst 5AB in the game. Extremely long startup. On rare occasions this could maybe dodge and punish some low attacks but you'll probably live longer if you don't try it.
|
|
2A
2A
|
| Damage
|
Guard
|
Cancel
|
Invul
|
Property
|
Level
|
| 5
|
Mid
|
8~12(5)
|
-
|
Deflectable (Weak)
|
Weak
|
| Startup
|
Active
|
Recovery
|
Hit Adv
|
Backhit Adv
|
Block Adv
|
| 8
|
2
|
11
|
-2
|
-2
|
-3
|
|
Not very fast but good on block making it useful for tick throws.
|
|
2B
2B
|
| Damage
|
Guard
|
Cancel
|
Invul
|
Property
|
Level
|
| 7
|
Mid
|
10~27(18)
|
-
|
Deflectable (Medium)
|
Medium
|
| Startup
|
Active
|
Recovery
|
Hit Adv
|
Backhit Adv
|
Block Adv
|
| 10
|
2
|
21
|
-6
|
+2
|
-9
|
|
A little faster than 5B, but inferior range and recovery.
|
|
2AB
2AB
|
| Damage
|
Guard
|
Cancel
|
Invul
|
Property
|
Level
|
| 28
|
Low
|
18~21(4)
|
-
|
Knockdown
Recoil Cancel
|
Heavy
|
| Startup
|
Active
|
Recovery
|
Hit Adv
|
Backhit Adv
|
Block Adv
|
| 14
|
2
|
32
|
KD
|
KD
|
-21
|
|
Very important punishing move, can be cancelled into Big Pursuit (8BC).
|
|
Near Slashes
n.5A
n.5A
|
| Damage
|
Guard
|
Cancel
|
Invul
|
Property
|
Level
|
| 4
|
Mid
|
9~23(15)
|
-
|
Deflectable (Weak)
Weapon Clash 5~8(4)
|
Weak
|
| Startup
|
Active
|
Recovery
|
Hit Adv
|
Backhit Adv
|
Block Adv
|
| 9
|
2
|
12
|
-4
|
-4
|
-3
|
|
Not a bad poke, good for tick throws.
|
|
n.5B
n.5B
|
| Damage
|
Guard
|
Cancel
|
Invul
|
Property
|
Level
|
| 7
|
Mid
|
9~35(27)
|
-
|
Deflectable (Medium)
Recoil Cancel
Weapon Clash 5~8(4)
|
Medium
|
| Startup
|
Active
|
Recovery
|
Hit Adv
|
Backhit Adv
|
Block Adv
|
| 9
|
3
|
23
|
-8
|
0
|
-9
|
|
Similar to n.5A but with slower recovery, more damage and added recoil cancel.
|
|
n.5AB
n.5AB
|
| Damage
|
Guard
|
Cancel
|
Invul
|
Property
|
Level
|
| 5+24
|
Mid
|
25(1)
|
-
|
Deflectable (Heavy)
Recoil Cancel
Weapon Clash 26~32(6)
|
Heavy
|
| Startup
|
Active
|
Recovery
|
Hit Adv
|
Backhit Adv
|
Block Adv
|
| 22
|
3
|
55
|
-10
|
0
|
-21
|
|
Another 2-hit heavy, another 2-hit disappointment. It's slightly better than his far 5AB, but you have no reason to not just use 2AB in its stead.
|
|
Kicks
5C
5C
|
| Damage
|
Guard
|
Cancel
|
Invul
|
Property
|
Level
|
| 6
|
Mid
|
1~32(32)
|
-
|
-
|
-
|
| Startup
|
Active
|
Recovery
|
Hit Adv
|
Backhit Adv
|
Block Adv
|
| 6
|
4
|
22
|
-8
|
0
|
-21
|
|
Really ghetto anti air that needs to be done early and does no damage. Shallow jumpins could easily trade or stuff it.
|
|
6C
6C
|
| Damage
|
Guard
|
Cancel
|
Invul
|
Property
|
Level
|
| 6
|
Low
|
-
|
-
|
Knockdown
|
-
|
| Startup
|
Active
|
Recovery
|
Hit Adv
|
Backhit Adv
|
Block Adv
|
| 9
|
6
|
13
|
KD
|
KD
|
-14
|
|
Low hit, can be useful as a punisher or a poke in some situations.
|
|
2C
2C
|
| Damage
|
Guard
|
Cancel
|
Invul
|
Property
|
Level
|
| 2
|
Low
|
-
|
-
|
-
|
-
|
| Startup
|
Active
|
Recovery
|
Hit Adv
|
Backhit Adv
|
Block Adv
|
| 5
|
4
|
7
|
-1
|
-1
|
-6
|
|
Really important poke, used for tick throws as just as a safe poke in general. Not to be overused, though.
|
|
3C
3C
|
| Damage
|
Guard
|
Cancel
|
Invul
|
Property
|
Level
|
| 7
|
Low
|
-
|
-
|
Knockdown
|
-
|
| Startup
|
Active
|
Recovery
|
Hit Adv
|
Backhit Adv
|
Block Adv
|
| 9
|
10
|
15
|
KD
|
KD
|
-20
|
|
A really long range sweep, often can catch people off guard at the beginning of a round granting you knockdown. Slow startup means you want to be careful to be a good distance when you use this move.
|
|
Jumping
j.A
j.A
|
| Damage
|
Guard
|
Cancel
|
Invul
|
Property
|
Level
|
| 6
|
High
|
-
|
-
|
Deflectable (Weak)
|
Weak
|
| Startup
|
Active
|
Recovery
|
Hit Adv
|
Backhit Adv
|
Block Adv
|
| 9
|
3
|
12
|
-
|
-
|
-
|
|
For when you need something even faster than j.B.
|
|
j.B
j.B
|
| Damage
|
Guard
|
Cancel
|
Invul
|
Property
|
Level
|
| 9
|
High
|
-
|
-
|
Deflectable (Medium)
|
Medium
|
| Startup
|
Active
|
Recovery
|
Hit Adv
|
Backhit Adv
|
Block Adv
|
| 11
|
1
|
22
|
-
|
-
|
-
|
|
Good air to air.
|
|
j.AB
j.AB
|
| Damage
|
Guard
|
Cancel
|
Invul
|
Property
|
Level
|
| 24
|
High
|
-
|
-
|
Deflectable (Heavy)
|
Heavy
|
| Startup
|
Active
|
Recovery
|
Hit Adv
|
Backhit Adv
|
Block Adv
|
| 13
|
3
|
35
|
-
|
-
|
-
|
|
Really average j.AB with downward hitbox, but not really amazing enough to be a good jumpin.
|
|
j.C
j.C
|
| Damage
|
Guard
|
Cancel
|
Invul
|
Property
|
Level
|
| 4
|
High
|
-
|
-
|
-
|
-
|
| Startup
|
Active
|
Recovery
|
Hit Adv
|
Backhit Adv
|
Block Adv
|
| 6
|
4
|
14
|
-
|
-
|
-
|
|
Fast kick that hits at a downwards angle.
|
|
Dashing
66A
66A
|
| Damage
|
Guard
|
Cancel
|
Invul
|
Property
|
Level
|
| 6
|
Mid
|
1~8(8)
|
-
|
Deflectable (Heavy)
|
Weak
|
| Startup
|
Active
|
Recovery
|
Hit Adv
|
Backhit Adv
|
Block Adv
|
| 9
|
2
|
18
|
-2
|
+6
|
-21
|
|
Dashing version of his 5A.
|
|
66B
66B
|
| Damage
|
Guard
|
Cancel
|
Invul
|
Property
|
Level
|
| 9
|
Low
|
1~6(6)
|
-
|
Knockdown
|
Medium
|
| Startup
|
Active
|
Recovery
|
Hit Adv
|
Backhit Adv
|
Block Adv
|
| 7
|
2
|
27
|
KD
|
KD
|
-21
|
|
Low hitting dash sweep, important in his dashing mixup. Can be followed up with a Small Pursuit (2BC) afterwards.
|
|
66AB
66AB
|
| Damage
|
Guard
|
Cancel
|
Invul
|
Property
|
Level
|
| 14
|
Mid
|
1~16(16)
|
-
|
Knockdown
Crossup
|
Heavy
|
| Startup
|
Active
|
Recovery
|
Hit Adv
|
Backhit Adv
|
Block Adv
|
| 22
|
6
|
27
|
KD
|
KD
|
-21
|
|
Dashover crossup move. It makes you airborne so it will beat any attempts to throw cleanly. Also very important for dashing mixup.
|
|
66C
66C
|
| Damage
|
Guard
|
Cancel
|
Invul
|
Property
|
Level
|
| 4
|
Low
|
1~2(2)
|
-
|
Knockdown
|
-
|
| Startup
|
Active
|
Recovery
|
Hit Adv
|
Backhit Adv
|
Block Adv
|
| 3
|
10
|
16
|
KD
|
KD
|
-21
|
|
Amazing punishing tool and suprising poking tool. This move has a ton of forward momentum in addition to Hanzo's already fast (fastest) dash speed, allowing him to punish pretty much anything punishable even from far away. Also will catch people off guard who are not expecting a low from half the screen away. However it's unsafe on block if you are too close. Guarantees a Small Pursuit (2BC) if it connects.
|
|
Unarmed
u.5S
u.5S
|
| Damage
|
Guard
|
Cancel
|
Invul
|
Property
|
Level
|
| 4
|
Mid
|
-
|
-
|
-
|
Medium
|
| Startup
|
Active
|
Recovery
|
Hit Adv
|
Backhit Adv
|
Block Adv
|
| 5
|
5
|
14
|
-1
|
+7
|
-14
|
|
Ninja chest punch.
|
|
u.2S
u.2S
|
| Damage
|
Guard
|
Cancel
|
Invul
|
Property
|
Level
|
| 4
|
Mid
|
-
|
-
|
-
|
Medium
|
| Startup
|
Active
|
Recovery
|
Hit Adv
|
Backhit Adv
|
Block Adv
|
| 5
|
2
|
14
|
+2
|
+10
|
-11
|
|
Hanzo punches the opponent in the gut, being significantly more effective than the chest punch. It has a better hitbox and recovery.
|
|
ju.S
ju.S
|
| Damage
|
Guard
|
Cancel
|
Invul
|
Property
|
Level
|
| 4
|
High
|
-
|
-
|
-
|
Medium
|
| Startup
|
Active
|
Recovery
|
Hit Adv
|
Backhit Adv
|
Block Adv
|
| 5
|
4
|
13
|
-
|
-
|
-
|
|
Ninja jump punch.
|
|
u.66S
u.66S
|
| Damage
|
Guard
|
Cancel
|
Invul
|
Property
|
Level
|
| 4
|
Mid
|
1~14(14)
|
-
|
Knockdown
|
Medium
|
| Startup
|
Active
|
Recovery
|
Hit Adv
|
Backhit Adv
|
Block Adv
|
| 5
|
10
|
1
|
KD
|
KD
|
-6
|
|
Dash punch that knocks down.
|
|
Pursuits
2BC
2BC Small Pursuit Small Pursuit
|
| Damage
|
Guard
|
Cancel
|
Invul
|
Property
|
Level
|
| 6
|
-
|
-
|
-
|
-
|
-
|
| Startup
|
Active
|
Recovery
|
Hit Adv
|
Backhit Adv
|
Block Adv
|
| 16
|
3
|
30
|
-
|
-
|
-
|
|
Usable after any of Hanzo's tech knockdowns, including the 63214BC.
|
|
u.2BC
u.2BC Unarmed Small Pursuit Unarmed Small Pursuit
|
| Damage
|
Guard
|
Cancel
|
Invul
|
Property
|
Level
|
| 4
|
-
|
-
|
-
|
-
|
-
|
| Startup
|
Active
|
Recovery
|
Hit Adv
|
Backhit Adv
|
Block Adv
|
| 9
|
4
|
8
|
-
|
-
|
-
|
|
8BC
8BC Big Pursuit Big Pursuit
|
| Damage
|
Guard
|
Cancel
|
Invul
|
Property
|
Level
|
| 12
|
-
|
-
|
-
|
-
|
-
|
| Startup
|
Active
|
Recovery
|
Hit Adv
|
Backhit Adv
|
Block Adv
|
| 39
|
3
|
42
|
-
|
-
|
-
|
|
Any fireball knockdown or 2AB guarantees this (but you have to cancel into from your 2AB).
|
|
u.8BC
u.8BC Unarmed Big Pursuit Unarmed Big Pursuit
|
| Damage
|
Guard
|
Cancel
|
Invul
|
Property
|
Level
|
| 6
|
-
|
5~20(16)
|
-
|
-
|
-
|
| Startup
|
Active
|
Recovery
|
Hit Adv
|
Backhit Adv
|
Block Adv
|
| 39
|
5
|
36
|
-
|
-
|
-
|
|
System
Deflect
Deflect 216D 216D
|
| Damage
|
Guard
|
Cancel
|
Invul
|
Property
|
Level
|
| -
|
-
|
-
|
-
|
-
|
-
|
| Startup
|
Active
|
Recovery
|
Hit Adv
|
Backhit Adv
|
Block Adv
|
| -
|
-
|
-
|
-
|
-
|
-
|
|
Deflects.
|
|
Weapon Pickup
Weapon Pickup u.5A u.5A
|
| Damage
|
Guard
|
Cancel
|
Invul
|
Property
|
Level
|
| -
|
-
|
-
|
-
|
-
|
-
|
| Startup
|
Active
|
Recovery
|
Hit Adv
|
Backhit Adv
|
Block Adv
|
| -
|
-
|
-
|
-
|
-
|
-
|
|
Picks up weapon.
|
|
Taunt Disarm
Taunt Disarm 3 x Start 3 x Start
|
| Damage
|
Guard
|
Cancel
|
Invul
|
Property
|
Level
|
| -
|
-
|
-
|
-
|
-
|
-
|
| Startup
|
Active
|
Recovery
|
Hit Adv
|
Backhit Adv
|
Block Adv
|
| -
|
-
|
-
|
-
|
-
|
-
|
|
Hanzo taunts...and disarms. Not that much of a flex as Hanzo since you can still use all of your specials anyway.
Hanzo can sometimes self-disarm after sending a slow fireball (214+B) but before it connects.
|
|
Sankaku Tobi
Sankaku Tobi j.9 or j.3 near wall j.9 or j.3 near wall
|
| Damage
|
Guard
|
Cancel
|
Invul
|
Property
|
Level
|
| -
|
-
|
-
|
-
|
-
|
-
|
| Startup
|
Active
|
Recovery
|
Hit Adv
|
Backhit Adv
|
Block Adv
|
| -
|
-
|
-
|
-
|
-
|
-
|
|
Ninja wall jump
|
|
Backdash
Backdash 44 44
|
| Damage
|
Guard
|
Cancel
|
Invul
|
Property
|
Level
|
| -
|
-
|
-
|
-
|
-
|
-
|
| Startup
|
Active
|
Recovery
|
Hit Adv
|
Backhit Adv
|
Block Adv
|
| -
|
-
|
-
|
-
|
-
|
-
|
|
Hanzo does a handstand into backflip across about half the screen, the distance covered makes it a really effective movement and escape tool. In addition to that, it's special cancelable during the handstand into any of his grounded specials (even grab), as well as j.236S. Being able to do this cancel is a vital part of Hanzo's game.
|
|
Special Moves
Specials
Reppuu Shuriken
Reppuu Shuriken j.236S j.236S
|
| A
|
Damage
|
Guard
|
Cancel
|
Invul
|
Property
|
Level
|
| 8
|
High
|
-
|
-
|
-
|
-
|
| Startup
|
Active
|
Recovery
|
Hit Adv
|
Backhit Adv
|
Block Adv
|
| 15
|
-
|
-
|
-26
|
KD
|
-51
|
| B
|
Damage
|
Guard
|
Cancel
|
Invul
|
Property
|
Level
|
| 8x2
|
High
|
-
|
-
|
-
|
-
|
| Startup
|
Active
|
Recovery
|
Hit Adv
|
Backhit Adv
|
Block Adv
|
| 17
|
-
|
-
|
-9
|
KD
|
-45
|
| AB
|
Damage
|
Guard
|
Cancel
|
Invul
|
Property
|
Level
|
| 8x3
|
High
|
-
|
-
|
-
|
-
|
| Startup
|
Active
|
Recovery
|
Hit Adv
|
Backhit Adv
|
Block Adv
|
| 21
|
-
|
-
|
-8
|
KD
|
-40
|
|
Throwing star projectile from the air with godawful recovery. It actually hits overhead so you can catch people off guard with it sometimes. You can also do this move from Hanzo's backdash. He throws more projectiles if you press a heavier slash button.
|
|
Baku'enryuu
Baku'enryuu 214S 214S
|
| A
|
Damage
|
Guard
|
Cancel
|
Invul
|
Property
|
Level
|
| 12
|
Mid
|
-
|
-
|
Knockdown
|
-
|
| Startup
|
Active
|
Recovery
|
Hit Adv
|
Backhit Adv
|
Block Adv
|
| 27
|
-
|
25
|
KD
|
KD
|
-13
|
| B
|
Damage
|
Guard
|
Cancel
|
Invul
|
Property
|
Level
|
| 14
|
Mid
|
-
|
-
|
Knockdown
|
-
|
| Startup
|
Active
|
Recovery
|
Hit Adv
|
Backhit Adv
|
Block Adv
|
| 31
|
-
|
30
|
KD
|
KD
|
-16
|
| AB
|
Damage
|
Guard
|
Cancel
|
Invul
|
Property
|
Level
|
| 16
|
Mid
|
-
|
1-10F throw invincible
|
Knockdown
|
-
|
| Startup
|
Active
|
Recovery
|
Hit Adv
|
Backhit Adv
|
Block Adv
|
| 34
|
-
|
29
|
KD
|
KD
|
-16
|
|
Baku'enryuu is a key move for Hanzo. People moving recklessly will get hit by it easily.
- 214A: Fastest startup, slowly travels about half the screen before dissipating.
- 214B: Medium startup, slowly travels across the whole screen.
- 214AB: Slowest startup, but travels full screen very quickly which can catch people off guard.
|
|
Mozu Otoshi
Mozu Otoshi 623A/B 623A/B 623AB 623AB
|
| A
|
Damage
|
Guard
|
Cancel
|
Invul
|
Property
|
Level
|
| 18
|
Unblockable
|
-
|
-
|
Knockdown
|
-
|
| Startup
|
Active
|
Recovery
|
Hit Adv
|
Backhit Adv
|
Block Adv
|
| 3
|
1
|
39
|
-KD
|
KD
|
-
|
| B
|
Damage
|
Guard
|
Cancel
|
Invul
|
Property
|
Level
|
| 24
|
Unblockable
|
-
|
-
|
Knockdown
|
-
|
| Startup
|
Active
|
Recovery
|
Hit Adv
|
Backhit Adv
|
Block Adv
|
| 7
|
1
|
29
|
KD
|
KD
|
-
|
| AB
|
Damage
|
Guard
|
Cancel
|
Invul
|
Property
|
Level
|
| 40
|
Unblockable
|
-
|
-
|
Knockdown
|
-
|
| Startup
|
Active
|
Recovery
|
Hit Adv
|
Backhit Adv
|
Block Adv
|
| 13
|
1
|
24
|
KD
|
KD
|
-
|
| 6623S
|
Damage
|
Guard
|
Cancel
|
Invul
|
Property
|
Level
|
| 16
|
Unblockable
|
-
|
-
|
Knockdown
|
-
|
| Startup
|
Active
|
Recovery
|
Hit Adv
|
Backhit Adv
|
Block Adv
|
| 3
|
1
|
19
|
-KD
|
KD
|
-
|
|
Hanzo's command grab, probably his most defining move along with Baku'en Ryuu. Damage is unaffected by character defenses, which is nice against guys like Gedo. Normally you will be using this move from a roll forward (cancelled), or sometimes a dash when a Baku'en Ryuu setup is involved.
- 623A: Fastest version of the grab and probably the one you will use the most.
- 623B: More damage but slower, least useful version, but timing makes it easy to tick throw with off a close A slash attack.
- 623AB: Very strong damage and quite slow. A very useful mixup and punishing tool. Slightly better range than the others, too.
- Mozu Otoshi (Hayate) - 6623S: Can only be used after dashing for a certain period (~half the screen), and will always come out over the other versions so long as you cancel from a dash. Speed is the same as the A version, but it recovers almost twice as fast. Hanzo has forward momentum during the startup and it positions both characters more towards your back than the other versions. At more than half-screen separation, it is useful to dash into this command throw immediately after sending an A or B fireball. This works when they are far enough that the A fireball will expire before reaching them, leaving them in a throwable state. The B fireball trick is better for bigger separation, as at max range Hanzo can actually dash in front of the fireball and throw them before they start blocking the fireball. The threat of this combination will force many characters to jump over slow fireballs.
|
|
Ninpou Shizune
Ninpou Shizune 22S 22S
|
| Damage
|
Guard
|
Cancel
|
Invul
|
Property
|
Level
|
| -
|
-
|
-
|
21-26f fully invincible
|
-
|
-
|
| Startup
|
Active
|
Recovery
|
Hit Adv
|
Backhit Adv
|
Block Adv
|
| 26
|
-
|
-
|
-
|
-
|
-
|
|
Hanzo does a teleport animation then phases out briefly before reappearing. This move is very useful both as a feint to his other teleports, and moreso as a bait against grabs and pokes. You can sort of think of this move as a 2D that you can cancel into with shorter duration.
|
|
Ninpou Enbu
Ninpou Enbu 421+Any 421+Any
|
| Damage
|
Guard
|
Cancel
|
Invul
|
Property
|
Level
|
| -
|
-
|
-
|
-
|
-
|
-
|
| Startup
|
Active
|
Recovery
|
Hit Adv
|
Backhit Adv
|
Block Adv
|
| -
|
-
|
-
|
-
|
-
|
-
|
|
Hanzo does a teleport animation then goes into one of 4 different teleports. Generally considered to be too slow to be useful against an experienced player, however if a Baku'en Ryuu setup is involved it can be quite tricky.
- 421A: Teleports to the left side of the screen, then hops out from behind a curtain into the air, you can do an air attack on the way down.
- 421B: Teleports to the left side of the screen, then flickers a moment before completely recovering.
- 421C: Teleports to the right side of the screen, then hops out from behind a curtain into the air, you can do an air attack on the way down.
- 421D: Teleports to the right side of the screen, then flickers a moment before completely recovering.
|
|
Utsusemi Tenbu
Utsusemi Tenbu 63214AC 63214AC 63214BC 63214BC
|
| AC
|
Damage
|
Guard
|
Cancel
|
Invul
|
Property
|
Level
|
| 15
|
High
|
-
|
-
|
Knockdown
|
-
|
| Startup
|
Active
|
Recovery
|
Hit Adv
|
Backhit Adv
|
Block Adv
|
| ?
|
10
|
?
|
KD
|
KD
|
-37
|
| BC
|
Damage
|
Guard
|
Cancel
|
Invul
|
Property
|
Level
|
| 20
|
Low
|
-
|
1-6f fully invincible
7-13f throw invincible
|
Knockdown
|
-
|
| Startup
|
Active
|
Recovery
|
Hit Adv
|
Backhit Adv
|
Block Adv
|
| 12
|
2
|
30
|
-KD
|
KD
|
-27
|
|
Hanzo teleports away, then waits for the opponent to be on the ground if they aren't already before showing up and doing a pre-designated attack. Also generally considered to be too slow to be effective against an experienced player, and an unsafe mixup. Only real use is that it will generally stuff retaliations against the teleport attack so if your opponent just mashes pokes every time you do a teleport move, this will probably beat it.
- Ninpou Utsusemi Tenbu - 63214AC: Comes in from the air with an overhead attack, it's reactable.
- Ninpou Utsusemi Chizan - 63214BC: Comes in from the ground crouching, and does a low hitting sword sweep.
|
|
Migawari no Jutsu
Migawari no Jutsu 6464642AC or 6464642BC during hitstun 6464642AC or 6464642BC during hitstun
|
| AC
|
Damage
|
Guard
|
Cancel
|
Invul
|
Property
|
Level
|
| 15
|
High
|
-
|
-
|
Knockdown
|
-
|
| Startup
|
Active
|
Recovery
|
Hit Adv
|
Backhit Adv
|
Block Adv
|
| ?
|
10
|
?
|
KD
|
KD
|
-37
|
| BC
|
Damage
|
Guard
|
Cancel
|
Invul
|
Property
|
Level
|
| 20
|
Low
|
-
|
1-6f fully invincible
7-13f throw invincible
|
Knockdown
|
-
|
| Startup
|
Active
|
Recovery
|
Hit Adv
|
Backhit Adv
|
Block Adv
|
| 12
|
2
|
30
|
-KD
|
KD
|
-27
|
|
Hanzo leaves behind a log and appears elsewhere to counterattack his enemy, can only be used from hitstun. It becomes more difficult to do the shorter the hitstun, so use it for punishing long multihit moves and heavy attacks with a ton of hitstun like Haoh's AB.
It might be better if you think of this as [64]x3 > 2 > S. Or alternatively [64]xN > 2 > S. So long as you make sure you end at 4~2. Try to mash [64] throughout the hitstop and then time the down input with the end of hitstop.
- Migawari no Jutsu: Hotoke - 6464642AC: Counterattack from the air (overhead).
- Migawari no Jutsu: Oni - 6464642BC: Counterattack from the ground (low).
The frame data listed here is of course for the follow-up attacks, not the actual "log out" part of the move, which happens instantly. As you can see they are exactly the same as for his "Utusemi Tenbu" specials.
|
|
Kuuten Geki
Kuuten Geki j.[1/2/3/4/6]C
(Next to opponent in air) j.[1/2/3/4/6]C
(Next to opponent in air)
|
| Damage
|
Guard
|
Cancel
|
Invul
|
Property
|
Level
|
| 21
|
-
|
-
|
-
|
Knockdown
|
-
|
| Startup
|
Active
|
Recovery
|
Hit Adv
|
Backhit Adv
|
Block Adv
|
| -
|
-
|
-
|
KD
|
KD
|
-
|
|
Airthrow. While it's not listed on the frame data, it does a fixed 21 damage. As with all airthrows, you have to do it from slightly below the opponent.
|
|
Weapon Flipping Technique
Shin Mozu Otoshi
Shin Mozu Otoshi 236CD
(with full rage meter) 236CD
(with full rage meter)
|
| Damage
|
Guard
|
Cancel
|
Invul
|
Property
|
Level
|
| 45
|
Unblockable
|
-
|
-
|
Knockdown
Disarm
|
-
|
| Startup
|
Active
|
Recovery
|
Hit Adv
|
Backhit Adv
|
Block Adv
|
| 5
|
1
|
37
|
KD
|
KD
|
-
|
|
Like his 623A, but a little slower and does huge damage. 5F startup and ability to be used from dashes/rolls means it's a great punisher for just about anything. Can sneak it in as a tick throw on respectful or bewildered opponents. Be warned that it is not invulnerable.
|
|
Combos
Normal
- 2AB xx 8BC Bread n' Butter, punish anything you can with it, also combos off deep jumps.
- 214S 8BC Useful confirm for adding threat to your projectiles, just go into 2BC if you confirm late.
- (3C or 66C or 66B) 2BC Make your sissy moves do slightly more damage.
- 6C 8BC Does not combo on Amakusa and Kyoshiro.
Time slow
Nothing special here, his AB attacks other than 2AB are all very laggy during Time Slow making them not very useful. Get in as many 5Bs in as you can before meter runs out before using Issen. If you need to start from a dash use dashing A since it's your only dash attack that doesn't knock over.
However, Time Slow is a good chance for Hanzo to land his 623AB outside of a punish.
Strategies
Neutral Game
Hanzo's neutral game is really heavily reliant more than anything on his very fast dash, and very fast/cancelable backdash. Dash under bad jumps, backdash out of dodge to avoid unnecessary risks. When you have enough breathing room try to get out a 214B/AB, or just 214A if you don't have much time. Once you have a fireball out their options are very limited and you can start to turn things in your favor. Also be looking for opportunities to land dash in grab / 66C.
Hanzo may not do a lot of damage all at once except for when punishing with 2AB or 623AB, but he can annoy people into making those mistakes.
Dashing Mixups
Without Baku'en Ryuu
- Knockdown...
- > Dash, AB Crossup, beats most DPs by means of avoiding them entirely.
- > Dash, B Uncrossup, low, combos into 2BC.
- > Dash, 623A If you dashed far enough, the dashing version will come out, using a normal grab will work just fine.
With Baku'en Ryuu
- Knockdown...
- > 214AB Doesn't actually grant you any followup, but it's pretty much inescapable, eats wakeup jumps / mashes / whathaveyou for free. Isn't generally needed unless you are especially far.
- > 214A/B... Most common option, both give time for followup, use 214B when you are outside of 214A range.
- > Dash, BR blocked...
- > Dashing AB
- > Dashing B
- > tick into Dashing 623A
- > Crossup 421B/C... Depending on how far you were and how fast you did the teleport, the projectile may or may not crossup.
- > 623A
- > BC
- > 2AB
- > 214A... This is from outside of 214A range, meaning it's a bluff.
- > Dashing AB
- > Dashing B
- > tick into Dashing 623A
- You can also roll into your command grabs if you so please, sometimes you can use it to roll through an attack.
Teleport Mindgames
While Hanzo's teleports are rather iffy as ambiguous mixup, they do have a lot of mindgame potential, especially once you start canceling into them.
Hanzo's fastest teleport is actually his teleport feint, 22S. Probably the one you want to be using the most as well since there's much less risk involved. A simple practical use for it is to 22S just outside of your opponents effective range, and as they wait for the followup dash in and 66C or regular/command grab.
For example, off a knockdown in the corner you're unable to go into much of a dashing mixup. As your opponent stands up you can do 22S and on reappearing 623A for a tick throw to get around the huge throw protection window on wakeup. You can also cancel into any of his teleports off a wiffed special cancelable poke, or his backdash, giving you even more options.
Here's another example: Close 5B (blocked) > 22A > Grab. Same situation right? Obviously they are going to catch on. Next time do close 5B (blocked) > 421B/D (whichever teleports you away) > 66C to punish a wiffed poke. You can really do anything after teleporting back, but the idea is to do something they never thought you could do. For the record, 22A > 2AB is faster than 63214BC and is also much safer.
Further expanding on that possibility, you could 5B (blocked) > 22A > 2AB > cancel recoil into something else / confirm into 2BC. As you can see the possibilities are basically only limited by your imagination.
Frame Data
| Move
|
Damage
|
Startup
|
Active
|
Total
|
Cancel
|
Weapon
Clash
|
Hit
Adv.
|
Backhit
Adv.
|
Block
Adv.
|
Guard
|
Notes
|
| 5A |
5 |
9 |
2 |
26 |
8~26(18) |
8(1) |
-6 |
-6 |
-3 |
Mid |
Weak attack, Deflectable(weak)
|
| 5B |
11 |
13 |
2 |
38 |
x |
10~12(3) |
-7 |
+1 |
-9 |
Mid |
Medium attack, Deflectable(med)
|
| 5AB |
5, 24 |
34 |
5 |
77 |
x |
- |
-4 |
+6 |
-21 |
Mid |
Medium, Heavy attack, Deflectable(heavy)
|
| 2A |
5 |
8 |
1 |
20 |
8~12(5) |
- |
-2 |
-2 |
-3 |
Mid |
Weak attack, Deflectable(weak)
|
| 2B |
7 |
10 |
2 |
34 |
10~27(18) |
- |
-6 |
+2 |
-9 |
Mid |
Medium attack, Deflectable(med)
|
| 2AB |
28 |
14 |
2 |
48 |
18~21(4) |
- |
KD |
KD |
-21 |
Low |
Knockdown attack
|
| n.5A |
4 |
9 |
2 |
23 |
9~23(15) |
5~8(4) |
-4 |
-4 |
-3 |
Mid |
Weak attack, Deflectable(weak)
|
| n.5B |
7 |
9 |
3 |
35 |
9~35(27) |
5~8(4) |
-8 |
+0 |
-9 |
Mid |
Medium attack, Deflectable(med)
|
| n.5AB |
5, 24 |
22 |
3 |
80 |
25(1) |
26~32(6) |
-10 |
+0 |
-21 |
Mid |
Medium, Heavy attack, Deflectable(heavy)
|
| n.2A |
5 |
8 |
1 |
20 |
8~12(5) |
- |
-2 |
-2 |
-3 |
Mid |
Weak attack, Deflectable(weak)
|
| n.2B |
7 |
10 |
2 |
34 |
10~27(18) |
- |
-6 |
+2 |
-9 |
Mid |
Medium attack, Deflectable(med)
|
| n.2AB |
28 |
14 |
2 |
48 |
18~21(4) |
- |
KD |
KD |
-21 |
Low |
Knockdown attack
|
| 5C |
6 |
6 |
4 |
32 |
1~32(32) |
- |
-8 |
+0 |
-21 |
Mid |
Medium attack
|
| 6C |
6 |
9 |
6 |
28 |
x |
- |
KD |
KD |
-14 |
Low |
Knockdown attack
|
| 2C |
2 |
5 |
4 |
16 |
x |
- |
-1 |
-1 |
-6 |
Low |
Weak attack
|
| 3C |
7 |
9 |
10 |
34 |
x |
- |
KD |
KD |
-20 |
Low |
Knockdown attack
|
| j.A |
6 |
9 |
3 |
24 |
x |
- |
-- |
-- |
-- |
High |
Weak attack, Deflectable(weak)
Sword tip unhittable
|
| j.B |
9 |
11 |
1 |
34 |
x |
- |
-- |
-- |
-- |
High |
Medium attack, Deflectable(med)
|
| j.AB |
24 |
13 |
3 |
51 |
x |
- |
-- |
-- |
-- |
High |
Heavy attack, Deflectable(heavy)
|
| j.C |
4 |
6 |
4 |
22 |
x |
- |
-- |
-- |
-- |
High |
Medium attack
|
| ju.C |
4 |
6 |
4 |
22 |
x |
- |
-- |
-- |
-- |
High |
Medium attack
|
| 5BC |
16 |
20 |
4 |
41 |
x |
- |
KD |
KD |
-15 |
High |
Medium attack Knockdown attack
|
| u.5BC |
6 |
25 |
2 |
67 |
1~13(13) |
- |
KD |
KD |
-36 |
High |
Medium attack Knockdown attack
|
| 66A |
6 |
9 |
2 |
29 |
1~8(8) |
- |
-2 |
+6 |
-21 |
Mid |
Medium attack, Deflectable(heavy)
|
| 66B |
9 |
7 |
2 |
36 |
1~6(6) |
- |
KD |
KD |
-21 |
Low |
Knockdown attack
|
| 66AB |
14 |
22 |
6 |
55 |
1~16(16) |
- |
KD |
KD |
-29 |
Mid |
Knockdown attack
|
| 66C |
4 |
3 |
10 |
29 |
1~2(2) |
- |
KD |
KD |
-21 |
Low |
Knockdown attack
|
| u.5S |
4 |
5 |
5 |
24 |
x |
- |
-1 |
+7 |
-14 |
Mid |
Medium attack
|
| u.2S |
4 |
5 |
2 |
21 |
x |
- |
+2 |
+10 |
-11 |
Mid |
Medium attack
Extended arm unhittable
|
| ju.S |
4 |
5 |
4 |
22 |
x |
- |
-- |
-- |
-- |
High |
Medium attack
|
| u.66S |
4 |
5 |
10 |
16 |
1~14(14) |
- |
KD |
KD |
-6 |
Mid |
Knockdown attack
|
| u.66C |
4 |
3 |
10 |
29 |
1~2(2) |
- |
KD |
KD |
-21 |
Low |
Knockdown attack
|
| 2BC |
6 |
16 |
3 |
49 |
x |
- |
-- |
-- |
-- |
Mid |
|
| u.2BC |
4 |
9 |
4 |
21 |
x |
- |
-- |
-- |
-- |
Mid |
|
| 8BC |
12 |
39 |
3 |
84 |
x |
- |
-- |
-- |
-- |
Mid |
|
| u.8BC |
6 |
39 |
5 |
80 |
5~20(16) |
- |
-- |
-- |
-- |
Mid |
|
| Ninpou Baku'en Ryuu - 214A |
12 |
27 |
x |
52 |
x |
- |
KD |
KD |
-13 |
Mid |
Knockdown attack
|
| Ninpou Baku'en Ryuu - 214B |
14 |
31 |
x |
59 |
x |
- |
KD |
KD |
-16 |
Mid |
Knockdown attack
|
| Ninpou Baku'en Ryuu - 214AB |
16 |
34 |
x |
63 |
x |
- |
KD |
KD |
-17 |
Mid |
Knockdown attack
1-10f throw invincible
|
| Reppu Shuriken - j.236A |
8 |
15 |
x |
x |
x |
- |
-26 |
KD |
-51 |
High |
Medium attack
|
| Reppu Shuriken - j.236B |
8x2 |
17 |
x |
x |
x |
- |
-9 |
KD |
-45 |
High |
Medium attack
|
| Reppu Shuriken - j.236AB |
8x3 |
21 |
x |
x |
x |
- |
-8 |
KD |
-40 |
High |
Medium attack
|
| Mozu Otoshi - 623A |
18 |
3 |
1 |
43 |
x |
- |
KD |
KD |
KD |
Mid |
Fixed damage.
|
| Mozu Otoshi - 623B |
24 |
7 |
1 |
37 |
x |
- |
KD |
KD |
KD |
Mid |
Fixed damage.
|
| Mozu Otoshi - 623AB |
40 |
13 |
1 |
38 |
x |
- |
KD |
KD |
KD |
Mid |
Fixed damage.
|
| Mozu Otoshi - 6623S |
16 |
3 |
1 |
24 |
x |
- |
KD |
KD |
KD |
Mid |
Fixed damage.
|
| Ninpou Utsusemi Tenbu - 63214AC |
15 |
? |
10 |
? |
x |
- |
KD |
KD |
-37 |
High |
Knockdown attack
|
| Ninpou Utsusemi Tenbu - u.63214AC |
10 |
? |
10 |
? |
x |
- |
KD |
KD |
-37 |
High |
Knockdown attack
|
| Ninpou Utsusemi Chizan - 63214BC |
20 |
12 |
2 |
44 |
x |
- |
KD |
KD |
-27 |
Low |
Knockdown attack
1-6f fully invincible
7-13f throw invincible
|
| Ninpou Utsusemi Chizan - u.63214BC |
14 |
12 |
9 |
38 |
x |
- |
KD |
KD |
-21 |
Low |
Knockdown attack
1-5f fully invincible
6-32f throw invincible
|
| Migawari no Jutsu: Hotoke - 6464642AC |
15 |
? |
10 |
? |
x |
- |
KD |
KD |
-37 |
High |
Knockdown attack
|
| Migawari no Jutsu: Hotoke - u.6464642AC |
10 |
? |
10 |
? |
x |
- |
KD |
KD |
-37 |
High |
Knockdown attack
|
| Migawari no Jutsu: Oni - 6464642BC |
20 |
12 |
2 |
44 |
x |
- |
KD |
KD |
-27 |
Low |
Knockdown attack
1-6f fully invincible
7-13f throw invincible
|
| Migawari no Jutsu: Oni - u.6464642BC |
14 |
12 |
9 |
38 |
x |
- |
KD |
KD |
-21 |
Low |
Knockdown attack
1-5f fully invincible
6-32f throw invincible
|
| Ninpou Shizune - 22S |
x |
x |
x |
26 |
x |
- |
-- |
-- |
-- |
Mid |
21-26f fully invincible
|
| Shin Mozu Otoshi - 236CD |
45 |
5 |
1 |
43 |
x |
- |
KD |
KD |
KD |
Mid |
|


