劉 雲飛, Liu Yunfei
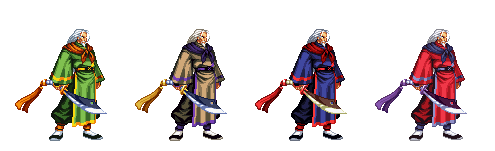
Colors
Introduction
Kicked off from a Chinese wire-fu movie set for one too many lectures.
Yunfei's focus is on his really wild movement options. He's the only character in the game with airdashes, and they're all good. His actual attacks are average at best, although he has a solid ranged high/low mixup. His rage balance easily give him the strongest time slow and Issen in the game, which is to the benefit of his ability to make the opponent edgy. Playing him requires a lot of creativity and trickery, so if that's your bag he's the old dude for you.
His main weaknesses stem from his difficulty in dealing with wide area type moves, such as Genjuro's DP, being grounded due to fear of the opponent's time slow, and simply being outpaced in the damage war.
| Strengths |
Weaknesses
|
- Has a ridiculous amount of air control, between his airdashes, footstomp, and dive attacks.
- Command grab is not only invincible to throws itself, but drains the opponent of his rage. Even drains rage explosion!
- Charged wave is very, very scary.
- Rage balance is heavily geared towards absurd meditation.
- Sweet victory dance.
|
- For all his movement he's still pretty easy to knock out out of the air.
- The limitations on his airdashes prevent you from trying more elaborate tricks.
- Has difficulty forcing damage.
- Doesn't really get to rage much.
|
Data
- Damage taken: 115%
- Rage duration: 60 seconds
- Amount to rage: 51
- Walk speed: 416
- Backwalk speed: 336
- Dash speed: 1600
- Jump duration: 44 frames
- Width: 8
- Throw range: 20
- Throw recovery: 46 frames
- Tier placing: A
Normal Moves
Slashes
Yunfei has no distinction between near and far slashes.
5A
5A
|
| Damage
|
Guard
|
Cancel
|
Invul
|
Property
|
Level
|
| 5
|
Mid
|
1~11(11)
|
-
|
Deflectable (weak),
Recoil cancel
|
Weak
|
| Startup
|
Active
|
Recovery
|
Hit Adv
|
Backhit Adv
|
Block Adv
|
| 12
|
3
|
14
|
-7
|
-7
|
-3
|
- An inexplicably slow standing poke that is safer on block than on hit and can be ducked by most of the cast. Stick to 5B.
|
|
5B
5B
|
| Damage
|
Guard
|
Cancel
|
Invul
|
Property
|
Level
|
| 10
|
Mid
|
1~2 (2)
|
-
|
Deflectable (Medium),
Recoil Cancel,
Weapon Clash 7~8 (2)
|
Medium
|
| Startup
|
Active
|
Recovery
|
Hit Adv
|
Backhit Adv
|
Block Adv
|
| 9
|
4
|
18
|
-4
|
+4
|
-9
|
- Mid-height slash. Lame range but starts up fast and has decent damage.
|
|
5AB
5AB
|
| Damage
|
Guard
|
Cancel
|
Invul
|
Property
|
Level
|
| 10, 19
|
Mid
|
17~22 (6)
|
-
|
Deflectable (Heavy),
Weapon Clash 7~8 (2)
|
Heavy
|
| Startup
|
Active
|
Recovery
|
Hit Adv
|
Backhit Adv
|
Block Adv
|
| 17
|
3
|
49
|
-3
|
+7
|
-21
|
- Startup and range are not so hot, but the first hit can be cancelled into both his WFT and his 236AB, making it a great choice for a punisher.
|
|
2A
2A
|
| Damage
|
Guard
|
Cancel
|
Invul
|
Property
|
Level
|
| 5
|
Low
|
1~4 (4)
|
-
|
-
|
Weak
|
| Startup
|
Active
|
Recovery
|
Hit Adv
|
Backhit Adv
|
Block Adv
|
| 13
|
3
|
9
|
-2
|
-2
|
-3
|
- A low poke that starts really slow like 5A but recovers much quicker and is generally safer. Sometimes okay for spacing, but usually not the ideal move. At least you can't deflect it.
|
|
2B
2B
|
| Damage
|
Guard
|
Cancel
|
Invul
|
Property
|
Level
|
| 11
|
Mid
|
1~9 (9)
|
-
|
Deflectable (Medium),
Weapon Clash 6~9 (4)
|
Medium
|
| Startup
|
Active
|
Recovery
|
Hit Adv
|
Backhit Adv
|
Block Adv
|
| 10
|
4
|
27
|
-3
|
+5
|
-9
|
- Long range mid-height slash with a cool sword twirl at the end. It's Yunfei's longest reaching normal and very very useful, as it can act as a late anti-air for lousy jumps or stop hops from the distance. Even without the recoil cancel it's pretty safe on block, so spam away.
|
|
2AB
2AB
|
| Damage
|
Guard
|
Cancel
|
Invul
|
Property
|
Level
|
| 25
|
Mid
|
26~39 (14)
|
-
|
-
|
Heavy
|
| Startup
|
Active
|
Recovery
|
Hit Adv
|
Backhit Adv
|
Block Adv
|
| 17
|
11
|
23
|
KD
|
KD
|
-21
|
- Slow startup and bad horizontal range, but launches the opponent for a juggle combo and hits surprisingly high up, making it a good choice for antiair or punishing.
- This is good to use just outside of block range, since it will catch any outstretched limbs and jumps, and on whiff you can cancel it into any air special for the mixup of your choice.
- Will combo with j.236AB if it hits from up close on the ground, otherwise combo with 8BC.
- Despite appearances, this does NOT have recoil cancel on block. Be careful.
|
|
Overheads
5BC
5BC
|
| Damage
|
Guard
|
Cancel
|
Invul
|
Property
|
Level
|
| 16
|
High
|
4~19 (16)
|
-
|
-
|
Medium
|
| Startup
|
Active
|
Recovery
|
Hit Adv
|
Backhit Adv
|
Block Adv
|
| 20
|
4
|
17
|
KD
|
KD
|
-15
|
- A surprisingly long ranged overhead. Good as a surprise mixup with 6C, but it moves him forward far enough to where getting blocked means he's eating a punish. You can kara cancel this to potentially fake the overhead and go for something else or just get into the air in general.
|
|
U.5BC
u.5BC
|
| Damage
|
Guard
|
Cancel
|
Invul
|
Property
|
Level
|
| 8
|
High
|
5~20 (15)
|
-
|
-
|
Medium
|
| Startup
|
Active
|
Recovery
|
Hit Adv
|
Backhit Adv
|
Block Adv
|
| 21
|
4
|
20
|
KD
|
KD
|
-18
|
- A midrange overhead with a hilarious animation. Damage makes it not worth the effort unless you think you can get a knockdown from it.
|
|
Kicks
5C
5C
|
| Damage
|
Guard
|
Cancel
|
Invul
|
Property
|
Level
|
| 4 - 4
|
Mid
|
18~26 (9)
|
-
|
-
|
Weak
|
| Startup
|
Active
|
Recovery
|
Hit Adv
|
Backhit Adv
|
Block Adv
|
| 9
|
4
|
28
|
KD
|
KD
|
-19
|
- Two kick combo. This usually sends the opponent flying for a reset if both kicks connect, but it's possible for only the first hit to connect and result in a knockdown.
- You're airborne and can cancel after the second hit, making this an ideal setup for airdash mixups. A basic example is to cancel this to j.236C to fly along with them so you land next to them for a throw or poke mixup. You don't have frame advantage here, so be careful.
|
|
2C
2C
|
| Damage
|
Guard
|
Cancel
|
Invul
|
Property
|
Level
|
| 2
|
Low
|
1~4 (4) - 14~19 (5)
|
6-13f throw invuln
|
-
|
Weak
|
| Startup
|
Active
|
Recovery
|
Hit Adv
|
Backhit Adv
|
Block Adv
|
| 6
|
8
|
5
|
-3
|
-3
|
-8
|
- Low poke that comes out fast, has a lot of active frames, and recovers reasonably fast. It's pretty lame on block, unfortunately.
- Since you can cancel the recovery, one trick you can do is 2C 623C. If you're still in range it's more or less a free command grab.
|
|
6B
6C
|
| Damage
|
Guard
|
Cancel
|
Invul
|
Property
|
Level
|
| 6
|
Low
|
1~4 (4)
|
-
|
-
|
Medium
|
| Startup
|
Active
|
Recovery
|
Hit Adv
|
Backhit Adv
|
Block Adv
|
| 13
|
4
|
11
|
KD
|
KD
|
-10
|
- Startup isn't the best, but it hits low and surprisingly far. It combos into 8BC easily for good damage. The decent active frames let it serve as a pretty much safe meaty. Very useful move.
- Mix it with his overhead for an easy high/low.
|
|
3C
3C
|
| Damage
|
Guard
|
Cancel
|
Invul
|
Property
|
Level
|
| 6
|
Low
|
1~9 (9)
|
-
|
-
|
Medium
|
| Startup
|
Active
|
Recovery
|
Hit Adv
|
Backhit Adv
|
Block Adv
|
| 10
|
13
|
9
|
KD
|
KD
|
-17
|
- A short range kick with a lot of active frames that knocks down on hit. If this were cancelable it'd be good, but it's not.
- Due to the sheer quantity of active frames, it might be okay to use if you expect the opponent to dash into your foot, but most of the time it's just a waste of a kick.
|
|
Jumping
9A
j.A
|
| Damage
|
Guard
|
Cancel
|
Invul
|
Property
|
Level
|
| 8
|
High
|
6~9 (4)
|
-
|
Deflectable (Weak)
|
Weak
|
| Startup
|
Active
|
Recovery
|
Hit Adv
|
Backhit Adv
|
Block Adv
|
| 6
|
4
|
4
|
-
|
-
|
-
|
- Slice that hits in an arc directly in front of Yunfei with a nice active period. This is actually very useful because it's his fastest air normal and hits further horizontally than j.B. The damage is okay for its speed. Since it's cancelable, you can use this to set up airdash mixups or runaway.
- A good way to use this is to simply whiff cancel this or j.B into an airdash, just in case the opponent runs into it trying to hit you. This usually winds up being safer than a raw airdash.
|
|
9B
j.B
|
| Damage
|
Guard
|
Cancel
|
Invul
|
Property
|
Level
|
| 11
|
High
|
8~11 (4)
|
-
|
Deflectable (Medium)
|
Medium
|
| Startup
|
Active
|
Recovery
|
Hit Adv
|
Backhit Adv
|
Block Adv
|
| 8
|
4
|
3
|
-
|
-
|
-
|
- Slice that hits at a downwards angle. Just barely slower than j.A, and the same active period. The upper part of the attack doesn't hit the opponent, so be careful.
- Otherwise, since it's cancelable, this is at least as useful as j.A is, depending on the angle you come in at.
|
|
9AB
j.AB
|
| Damage
|
Guard
|
Cancel
|
Invul
|
Property
|
Level
|
| 25
|
High
|
-
|
-
|
Deflectable (Heavy)
|
Heavy
|
| Startup
|
Active
|
Recovery
|
Hit Adv
|
Backhit Adv
|
Block Adv
|
| 11
|
4
|
9
|
-
|
-
|
-
|
- Hits furthest of all his jumping attacks, covers a good area in front of him and below him later in the animation, comes out surprisingly fast, and the damage is high.
- This is a great all-purpose move but since it's not cancelable and loses clean to attacks with better hitboxes you have to have an idea what you're going to do if it doesn't work. Be cautious of faster air-to-airs stuffing this.
|
|
9C
j.C
|
| Damage
|
Guard
|
Cancel
|
Invul
|
Property
|
Level
|
| 6
|
High
|
12~20 (9)
|
-
|
-
|
Medium
|
| Startup
|
Active
|
Recovery
|
Hit Adv
|
Backhit Adv
|
Block Adv
|
| 12
|
9
|
2
|
-
|
-
|
-
|
- Hits about as far as j.A does at a lower angle, for slightly less damage. This is deceptively slow, but the lack of hitstop allows you to surprise the opponent with a quick followup or airdash cancel.
|
|
Dashing
66A
66A
|
| Damage
|
Guard
|
Cancel
|
Invul
|
Property
|
Level
|
| 8
|
Mid
|
1~5 (5)
|
-
|
Deflectable (Heavy),
Weapon Clash 6~8 (3) / 12~17 (6)
|
Weak
|
| Startup
|
Active
|
Recovery
|
Hit Adv
|
Backhit Adv
|
Block Adv
|
| 9
|
3
|
8
|
1
|
1
|
-28
|
- Short ranged mid-height poke that is ridiculously disadvantageous on block. Not recommended.
|
|
66B
66B
|
| Damage
|
Guard
|
Cancel
|
Invul
|
Property
|
Level
|
| 8
|
Low
|
-
|
-
|
-
|
Medium
|
| Startup
|
Active
|
Recovery
|
Hit Adv
|
Backhit Adv
|
Block Adv
|
| 7
|
3
|
10
|
+2
|
+10
|
-21
|
- Similar to 2A, a short ranged low poke. Surprisingly fast and plus on hit, but not at all safe on block.
|
|
66AB
66AB
|
| Damage
|
Guard
|
Cancel
|
Invul
|
Property
|
Level
|
| 14
|
Mid
|
1~3 (3)
|
-
|
Weapon Clash 4~6 (3)
|
Heavy
|
| Startup
|
Active
|
Recovery
|
Hit Adv
|
Backhit Adv
|
Block Adv
|
| 7
|
3
|
29
|
KD
|
KD
|
-27
|
- Good range knockdown slash.
- Your most reliable combo after landing a deep j.AB, but ridiculously unsafe on block.
- A decent punisher if you can't get anything else. This usually falls short on whiffs from really far away.
- Also good for cross-under anti-air because of the autocorrect.
|
|
66C
66C
|
| Damage
|
Guard
|
Cancel
|
Invul
|
Property
|
Level
|
| 8
|
Mid
|
4~24 (21)
|
-
|
-
|
Weak
|
| Startup
|
Active
|
Recovery
|
Hit Adv
|
Backhit Adv
|
Block Adv
|
| 13
|
10
|
13
|
-19
|
-13
|
-18
|
- A flying kick that sends Yunfei airborne. This is cancelable so you can do any air move off of it, and since there's almost no hitstop you can setup all kind of mixups off of it.
- Hella useful, but also unsafe if you don't already have a plan in mind or forget to cancel it.
|
|
Unarmed
u.5S
u.5S
|
| Damage
|
Guard
|
Cancel
|
Invul
|
Property
|
Level
|
| 4
|
Mid
|
1~2 (2)
|
-
|
-
|
Medium
|
| Startup
|
Active
|
Recovery
|
Hit Adv
|
Backhit Adv
|
Block Adv
|
| 5
|
14
|
6
|
-2
|
+6
|
-15
|
- Finger of lameness. Low damage, hilariously bad range. At least it has a lot of active frames, in case they run into it or something.
|
|
u.2S
u.2S
|
| Damage
|
Guard
|
Cancel
|
Invul
|
Property
|
Level
|
| 4
|
Low
|
1~4 (4)
|
-
|
-
|
Weak
|
| Startup
|
Active
|
Recovery
|
Hit Adv
|
Backhit Adv
|
Block Adv
|
| 5
|
4
|
3
|
+3
|
+3
|
-2
|
- Now this is the true finger of death.
- The entire animation is 12 frames, so he can do this five times a second. It's safe on block and advantageous on hit, so spam away!
|
|
ju.5S
ju.S
|
| Damage
|
Guard
|
Cancel
|
Invul
|
Property
|
Level
|
| 4
|
High
|
9~14 (6)
|
-
|
-
|
Medium
|
| Startup
|
Active
|
Recovery
|
Hit Adv
|
Backhit Adv
|
Block Adv
|
| 9
|
6
|
5
|
-
|
-
|
-
|
- Flying finger of lameness. Does less damage and has less range than j.C but has way more hitstop. Why would you ever use this?
|
|
u.66S
u.66S
|
| Damage
|
Guard
|
Cancel
|
Invul
|
Property
|
Level
|
| 4
|
Mid
|
1~25 (25)
|
-
|
-
|
Medium
|
| Startup
|
Active
|
Recovery
|
Hit Adv
|
Backhit Adv
|
Block Adv
|
| 5
|
14
|
6
|
KD
|
KD
|
-15
|
- This is like u.5S, only good. Comes out fast, Yunfei keeps sliding for a bit, and all frames are cancelable, so if it doesn't work you're free to try something else!
|
|
Pursuits
2BC
2BC
|
| Damage
|
Guard
|
Cancel
|
Invul
|
Property
|
Level
|
| 8
|
Mid
|
1~4 (4)
|
-
|
-
|
-
|
| Startup
|
Active
|
Recovery
|
Hit Adv
|
Backhit Adv
|
Block Adv
|
| 13
|
4
|
17
|
-
|
-
|
-
|
- Pursuit that's above average in almost every respect, with great range and damage and plenty of ways to combo into it.
- It is one of the few ground pursuits that also works from a 4CD throw in the corner, not limited only to 6CD corner throws.
|
|
8BC
8BC
|
| Damage
|
Guard
|
Cancel
|
Invul
|
Property
|
Level
|
| 19
|
Mid
|
59~84 (26)
|
-
|
-
|
-
|
| Startup
|
Active
|
Recovery
|
Hit Adv
|
Backhit Adv
|
Block Adv
|
| 39
|
10
|
45
|
-
|
-
|
-
|
- The proper combo finish when j.236AB will not connect from 2AB, and after hitting the charged wave.
|
|
System
2146D
Deflect
|
| Damage
|
Guard
|
Cancel
|
Invul
|
Property
|
Level
|
| -
|
-
|
-
|
-
|
-
|
-
|
| Startup
|
Active
|
Recovery
|
Hit Adv
|
Backhit Adv
|
Block Adv
|
| -
|
-
|
-
|
-
|
-
|
-
|
|
Ordinary average range deflect.
|
|
Weapon Pick
Weapon Pickup
|
| Damage
|
Guard
|
Cancel
|
Invul
|
Property
|
Level
|
| -
|
-
|
-
|
-
|
-
|
-
|
| Startup
|
Active
|
Recovery
|
Hit Adv
|
Backhit Adv
|
Block Adv
|
| -
|
-
|
-
|
-
|
-
|
-
|
|
Slightly above average speed here.
|
|
Taunt
Taunt
|
| Damage
|
Guard
|
Cancel
|
Invul
|
Property
|
Level
|
| -
|
-
|
All Frames
|
-
|
-
|
-
|
| Startup
|
Active
|
Recovery
|
Hit Adv
|
Backhit Adv
|
Block Adv
|
| -
|
-
|
-
|
-
|
-
|
-
|
|
All frames of this taunt are cancelable, which is kind of cool. This includes before the weapon is put down, so you can put flourishes on your specials if you feel like being silly.
|
|
Special Moves
Specials
236A/B
Ten'i Daihou
236A/B
|
| Damage
|
Guard
|
Cancel
|
Invul
|
Property
|
Level
|
| 6*3
|
Mid
|
-
|
-
|
-
|
-
|
| Startup
|
Active
|
Recovery
|
Hit Adv
|
Backhit Adv
|
Block Adv
|
| 19
|
16
|
22
|
KD
|
KD
|
-12
|
- Short range wave that knocks down. The startup is slow and it doesn't do much damage but the knockdown is nice and you can pursuit afterwards in the corner. You can combo this off of the first hit of 5AB for a knockdown if you need time to meditate or reposition.
- Eats projectiles whole, which sometimes can buy you time if you're having trouble getting into the air.
- It's supposed to hit three times, but against most characters it'll only hit twice because of how the attacks are spaced. More or less safe on block at -12, at least, and it does three hits of chip damage. Be warned this can be whiff punished fairly easily if you're reckless.
|
|
236AB
Tensatsu Daisai
236AB
|
| Damage
|
Guard
|
Cancel
|
Invul
|
Property
|
Level
|
| 1*7, 35
|
Mid
|
-
|
-
|
-
|
-
|
| Startup
|
Active
|
Recovery
|
Hit Adv
|
Backhit Adv
|
Block Adv
|
| 19
|
32
|
6
|
KD
|
KD
|
-7
|
- A long-range wave that does absolutely ridiculous damage, hits/chips 8 times, and is very safe on block. However, if anyone part of it connects against an airborne enemy they'll just get knocked down and not take any more hits. This is a problem because only the last hit does actual damage.
- This move needs to be charged by landing 623C. You can only do it one time before you have to charge it again. The charge is only lost when the projectile itself comes out, if you're hit during the startup for whatever reason you'll keep it.
- The startup is the same as the uncharged version, so it combos from the first hit of 5AB easily enough. Another use is to confirm it off of the opponent's whiffed attacks or predictable timings since you can cancel into it from a backroll. The threat of being hit by this is huge, so as long as it's charged up you're at an advantage.
- Always remember, if you get the big knockdown you can run forward and combo into 8BC for even more damage at pretty much any spacing.
|
|
623C
Tenkoku Houra
623C
|
| Damage
|
Guard
|
Cancel
|
Invul
|
Property
|
Level
|
| -
|
Mid
|
-
|
1-11f throw invuln
|
-
|
-
|
| Startup
|
Active
|
Recovery
|
Hit Adv
|
Backhit Adv
|
Block Adv
|
| 10
|
2
|
25
|
KD
|
KD
|
-
|
- The startup is kind of slow at 10 frames, but it's invincible to being thrown, so you can use it pretty much freely on anyone that likes to mash out throw.
- This drains all of the opponent's rage meter and charges up 236AB for use. As a side effect, it will drain away Rage Explosion completely. It will NOT drain time slow, but if you somehow hit with it they've basically lost it anyway.
- Very useful move for grabbing momentum and canceling from various grounded movement options, even if you don't need the charge.
|
|
Air Grab
Tensui Choukan
j.[1/2/3/4/6]C
|
| Damage
|
Guard
|
Cancel
|
Invul
|
Property
|
Level
|
| 19
|
-
|
-
|
-
|
-
|
-
|
| Startup
|
Active
|
Recovery
|
Hit Adv
|
Backhit Adv
|
Block Adv
|
| -
|
-
|
-
|
-
|
-
|
-
|
- Airthrow. While it's not listed on the frame data, it does a fixed 19 damage.
- As with all air throws, you have to do it from slightly below the opponent. Note that you cannot use this if you've already airdashed during your jump.
|
|
J.236AB
Tenmou Konji
|
| Damage
|
Guard
|
Cancel
|
Invul
|
Property
|
Level
|
| 19
|
High
|
-
|
-
|
-
|
Medium
|
| Startup
|
Active
|
Recovery
|
Hit Adv
|
Backhit Adv
|
Block Adv
|
| 17
|
-
|
-
|
KD
|
KD
|
-21
|
- Diving sword attack. Hits overhead, good damage, knocks down, goes really far really quickly, but it's very leaves you wide open on block and Yunfei stops in place briefly before diving down.
- Tenmou Konji: Zenpo - j.236AB / j.214AB
- Dives forward at a diagonal angle. Good in combination with jumps and feints to bait the opponent's movement and anti-airs out with, but don't throw it out carelessly.
- Tenmou Konji: Konji - j.236CD / j.214CD
- Dives backward at a diagonal angle. Despite it looking like Yunfei has changed direction, he hasn't, so any hit the opponent does on you after blocking this will count as a backhit.
- This has two uses. One is getting the hell out of a possibly nasty situation, and the other is surprising an opponent after crossing up behind them.
- Since the startup is still not too quick, it's best to try and do this in a way that will bait the opponent out, but it's really not your best choice. Doing it off of a close-range tk.236A can work since you fly up behind them very quickly and can slap them in the back if they push any buttons or fail to react in time.
- Either way, exercise caution.
|
|
5B
Tenki Shichiyou: Tsuki
214A
|
| Damage
|
Guard
|
Cancel
|
Invul
|
Property
|
Level
|
| -
|
-
|
-
|
-
|
-
|
-
|
| Startup
|
Active
|
Recovery
|
Hit Adv
|
Backhit Adv
|
Block Adv
|
| -
|
31
|
-
|
-
|
-
|
-
|
- A forwards and up airdash from off the ground, that will cross through the opponent. Changes to normal fall at 31f.
- This recovers pretty slow for an airdash, and if the opponent recognizes it they'll likely punish you for it. If you need to use this angle, tk.236A or tk.236C is probably a better choice. However, it is a grounded option, so it can be canceled into from recoil animations, etc.
|
|
214B
Tenki Shichiyou: Hi
214B
|
| Damage
|
Guard
|
Cancel
|
Invul
|
Property
|
Level
|
| -
|
-
|
-
|
-
|
-
|
-
|
| Startup
|
Active
|
Recovery
|
Hit Adv
|
Backhit Adv
|
Block Adv
|
| -
|
19
|
-
|
-
|
-
|
-
|
- A quick hop back and up. Changes to normal fall at 19f.
- As the initial movement is really fast, you can use this as a dodge and punish on the way down if they fall for it. It becomes even more tricky once you start cancelling into it from movement options, recoils, etc.
- It doesn't set up a particularly good angle to attack from, though you can use it to quickly get above projectiles for other airdashes.
|
|
J.214A
Tenki Shichiyou: Mizu
j.214A/j.236A
|
| Damage
|
Guard
|
Cancel
|
Invul
|
Property
|
Level
|
| -
|
-
|
-
|
-
|
-
|
-
|
| Startup
|
Active
|
Recovery
|
Hit Adv
|
Backhit Adv
|
Block Adv
|
| -
|
46
|
-
|
-
|
-
|
-
|
- Flies up and forwards, passing through the opponent, pauses momentarily, and then falls back and down. Cancelable on the way up, but not during the pause. Normal fall from 46f onwards.
- The small cancel window before the pause means you can get out quickly if you realized you made a mistake. It also sets up a quick cross through for j.236CD.
- The actual angle on the movement is great for setting up cross-ups or baiting out forwards DPs since Yunfei moves forwards VERY quickly and then falls back more slowly.
|
|
J.214B
Tenki Shichiyou: Ki
j.214B/j.236B
|
| Damage
|
Guard
|
Cancel
|
Invul
|
Property
|
Level
|
| -
|
-
|
-
|
-
|
-
|
-
|
| Startup
|
Active
|
Recovery
|
Hit Adv
|
Backhit Adv
|
Block Adv
|
| -
|
33
|
-
|
-
|
-
|
-
|
- Flies up and backwards, then falls diagonally forwards. Cancelable on the way up. Changes to normal fall at 33f.
- Effectively a dodge, this can be used to bait out pretty much anything. The falling angle is great for setting up attacks on the way down.
- Not very useful when tk'd, unfortunately. Don't use carelessly because used low it puts you in a position to get smacked by any jumping attack.
|
|
J.214C
Tenki Shichiyou: Kon
j.214C/j.236C
|
| Damage
|
Guard
|
Cancel
|
Invul
|
Property
|
Level
|
| -
|
-
|
All frames
|
-
|
-
|
-
|
| Startup
|
Active
|
Recovery
|
Hit Adv
|
Backhit Adv
|
Block Adv
|
| -
|
20
|
-
|
-
|
-
|
-
|
- Vaults forwards quickly, going through your opponent. Cancelable all throughout. Changes to a normal fall at 20f.
- Learn the maximum range on this one, because you're going to be using it a lot to get in. When tk'd it will go over lows and send you at an ideal angle for landing deep hits or setting up more mixups, such as with nothing into throw or j.236A into footstomp.
- Vaulting from long distance and canceling into a footstomp from far can be used to bait out DPs and other annoying countermeasures.
- High in the air, it's not as useful since the angle is really obvious, but it can be used as a good getaway if they're underneath you.
|
|
J.214D
Tenki Shichiyou: Do
j.214D/j.236D
|
| Damage
|
Guard
|
Cancel
|
Invul
|
Property
|
Level
|
| -
|
-
|
1~40 (40)
|
-
|
-
|
-
|
| Startup
|
Active
|
Recovery
|
Hit Adv
|
Backhit Adv
|
Block Adv
|
| -
|
40f
|
-
|
-
|
-
|
-
|
- Goes backwards and then up slightly. Cancelable on the way up. Changes to a normal fall at 40f.
- Sloooooooow. Good escape, but not much of a bait. Cancel into footstomp if everything goes wrong.
|
|
J.AC
Tenki Shichiyou: Nichi
j.AC
|
| Damage
|
Guard
|
Cancel
|
Invul
|
Property
|
Level
|
| 9
|
High
|
-
|
10f~hit below knees
|
-
|
Medium
|
| Startup
|
Active
|
Recovery
|
Hit Adv
|
Backhit Adv
|
Block Adv
|
| 10
|
-
|
-
|
-
|
-
|
-
|
- Footstomp. While it doesn't hurt much, this is a great way of halting all air movement instantly. You can basically do this at any time during all airdashes, so abuse liberally. Just don't land in front of your opponent, because it has punishable landing recovery if he doesn't bounce off of them.
- While on the way down it has some lower body invulnerability, which means from sufficient height it will actually beat out most of the game's DPs. Genjuro's, in particular, can't win.
- Unfortunately, when you vault off from a block or hit you have no control temporarily. The direction you hold during it will determine which direction you bounce off to, meaning you can do things like 66C j.236C j.AC(crossup) [4] j.AB (uncrossup as you come back down. You can even bounce off of some projectiles like with Basara's puff stomp.
- Be creative with this one!
|
|
Weapon Flipping Technique
Tenkai Unri
236CD
|
| Damage
|
Guard
|
Cancel
|
Invul
|
Property
|
Level
|
| 37
|
Mid
|
-
|
1-14 above knees
|
-
|
-
|
| Startup
|
Active
|
Recovery
|
Hit Adv
|
Backhit Adv
|
Block Adv
|
| 16
|
38
|
33
|
KD
|
KD
|
-59
|
- Odds are good that you will not ever be raged as Yunfei, so you probably won't be using this much. Its most reliable use is comboing from 5AB but it has some niche anti-air usage.
- The first hit is a catch that does no damage, so you'll lose your rage before going to the hit that does actual damage.
- Startup before the hitbox comes out is invincible from the knees up, but you'll still get hit trying to use it on moves with long active frames, so be careful.
- Starts up pretty fast against grounded opponents but the hitbox takes a little while before moving high enough to catch airborne opponents. When it does, it does hit surprisingly high up.
- Yunfei himself is not invincible during the active frames, so it's not a fantastic anti-air, but you can do it off of a backroll to gain more distance before it comes out. It also catches behind him, for all those hard reads on crossups
- A decent threat against slow jumpers and anyone that doesn't have the good sense to block j.AB or stop dashing into Yunfei, but otherwise not too great. Looks really cool, though.
|
|
Combos
Normal
-
- Version that almost always works, regardless of where the other guy is. If done as a backhit, wait and do the 8BC after landing so it hits.
- More damaging variant, but can only be done on characters on or near the ground, and not on backhit. You can 2BC when it's into the corner only.
-
- This actually does LESS damage than just letting 5AB finish, but it knocks down. On backhit, they're launched upwards so you can land an 8BC for extra damage.
- While it does need charge, this is the only way to combo into 236AB and it REALLY HURTS. This is by far Yunfei's strongest combo, but unfortunately it's really easy to explode out of.
- The only way to combo into your WFT, this does about 55% damage. Really nice.
- If canceled immediately, the game will freeze for two seconds for no apparent reason.
- Hits low, high range, solid damage, great mixup with 5BC or just to catch people who like to dash forwards a lot.
- 5C(first hit only) j.236AB 2BC
- Only works at the specific range where the first kick connects and the second does not. Decent midscreen poke punish. Can only 2BC in the corner.
Time slow
- (vs air) j.AB j.AB j.AB ...
- The usual when you can't cram an Issen in when they fall. With Yunfei you're almost always going to have enough charge to wait their fall out for the Issen.
- Launches, can't be rage exploded. Timing on the followup can be a pain, but the range and speed is really nice. Great punish if you think they'll recover quickly.
- Launches, can't be rage exploded. Neutral jump after the 2AB and wait until you're coming down to hit with j.AB.
- Launches, can't be rage exploded. You can cram in a second 2AB if you meditated enough. Useful!
Strategy
Airdashes
- Once you're in the air, you can use any three airdashes, but not the same one twice, before landing. So you can do j.236A j.236B j.236C, but not j.236A j.236A, and not j.236A j.236B j.236C j.236D. Keep this in mind.
- To get into the air, you can do one of the following:
- 214A - This takes forever to cancel and puts you in a bad position. You probably don't want to use it.
- 214B - Good way of baiting the opponent's forward movement. Treat it like a backroll for airdashes.
- tk.236whatever (eg 2369C) - Lets you do an airdash directly off the ground. This is very useful for the C and A airdashes for advancing/mixing up the opponent. The D airdash is okay to escape with.
- 2AB - Very powerful upwards slash that is safely cancelable on whiff. Use it just out of range of the opponent to catch them throwing out attacks or trying to jump.
- 5C - Nice set of kicks that sends you a decent height into the air and launches nearby opponents. Great for setting up mixups with a j.236C followup. Note that landing from the airdash leaves you at frame disadvantage.
- 66C - Low hitstun kick that's cancelable with air moves. Once again useful for setting up mixups.
- 7 / 8 / 9 - Just jump. Neutral jump is as always a great way of confirming the opponent's movement.
- 5BC kara cancel - Similar to doing a TK motion really. Faking the overhead might see some use.
- Backdash - Cancel window is pretty tight, and you don't get to do much out of any airdashes from this.
- Aside from the airdashes, you have three additional ways of controlling your movement in the air:
- j.236AB - Diagonal dash slice forwards into the ground. In combination with other moves to confirm you can use this to hit people who carelessly use laggy moves around you. Optionally you can use this instead of landing from an airdash, if you're expecting them to mash on throw, because it will hit them out of it. Not safe on block and leaves you point blank, so be careful here.
- j.236CD - Diagonal dash slice backwards into the ground. Great for escaping or crossup mixups. And not much else. If blocked you are in for a world of hurt since it gives the opponent a free backhit. Use with caution.
- j.AC - Footstomp is the one you will probably want to be making the most use of, since it has the best opportunities for faking out the opponent and doing crossup shenanigans.
- Above all, be creative with your movement. Your goal is to not be predictable and to get the opponent to want to try to smack you when you're not there.
Rage
- Yunfei takes the longest time to rage, easily more than a round's worth of damage to get there. When he does finally rage, it lasts for a whopping 60 seconds, the longest in the game. This means you've got two basic routes for what you can do with the charge.
- Max the concentration gauge.
- This is your best bet for most matchups, since it allows you to get access to time slow very early. This forces the opponent into being defensive, since Yunfei has strong unburstable damage with his launcher normals, and if they've already exploded he has tricky airdash high/lows that cash out into Issen. Very useful in shutting down offensive or fidgety characters.
- Since the rage lasts a really long time it gives a substantial damage bonus to everything you do. You do have to be careful about the Kenki Gauge here, though, since it does still take time to recharge.
- The WFT itself is not boosted by rage damage, so it's not something you'll want to use unless you think it will cinch the win for you. Even if you have the opportunity to land it, the extra rage time is usually better for you. Stick to 236AB.
High/low mixup
- This is worth noting because of its sheer range. Yunfei can run this mixup on opponents at least a full character width away.
- 6C 8BC - Hits low. Simple combo that confirms for you. Long range, comes out surprisingly fast for its range, recovers quickly. Can be used to stuff forward dashes and other things, generally really safe to use.
- 5BC - Hits high. Long range overhead. Startup isn't so great, but it's difficult to see coming and beats out throw mash.
Damage and defense
- Punishers:
- 2AB xx j.236AB 2BC - If they're wide open for it, you know what to do.
- 5AB xx 236AB 8BC - When you're charged up and they're open for it, this is the most damage you can get. To get the pursuit midscreen you have to run and follow their knockdown.
- 5AB xx 236CD - This is actually not the best of ideas, because Yunfei is often better off just staying raged. Good finisher, though.
- 6C 8BC - Reasonably fast, forces knockdown, isn't explodable.
- 623C - Doesn't hurt, but draining rage and charging the big wave is always nice.
- Antiair:
- 2AB xx 8BC - Not good against characters with strong downwards swipes, but smacks them out of the air well.
- Neutral jump j.AB - Always a good option.
- 66AB - Cross under their jump and autocorrect to hit them from behind.
Frame Data
| Move
|
Damage
|
Startup
|
Active
|
Total
|
Cancel
|
Weapon
Clash
|
Hit
Adv.
|
Backhit
Adv.
|
Block
Adv.
|
Guard
|
Notes
|
| 5A |
5 |
12 |
3 |
29 |
1~11(11) |
- |
-7 |
-7 |
-3 |
Mid |
Weak attack, Deflectable(weak)
|
| 5B |
10 |
9 |
4 |
31 |
1~2(2) |
7~8(2) |
-4 |
+4 |
-9 |
Mid |
Medium attack, Deflectable(med)
|
| 5AB |
10, 19 |
17 |
3 |
69 |
17~22(6) |
15~16(2) / 19~22(3) |
-3 |
+7 |
-21 |
Mid |
Heavy attack, Deflectable(heavy)
|
| 2A |
5 |
13 |
3 |
25 |
1~4(4) |
- |
-2 |
-2 |
-3 |
Low |
Weak attack
|
| 2B |
11 |
10 |
4 |
31 |
1~9(9) |
6~9(4) |
-3 |
+5 |
-9 |
Mid |
Medium attack, Deflectable(med)
|
| 2AB |
25 |
17 |
11 |
50 |
26~39(14) |
- |
KD |
KD |
-21 |
Mid |
Knockdown attack
|
| 5C |
4, 4 |
9 |
4 |
42 |
18~26(9) |
- |
KD |
KD |
-19 |
Mid |
Weak attack Knockdown attack
|
| 6C |
6 |
13 |
4 |
28 |
1~4(4) |
- |
KD |
KD |
-10 |
Low |
Knockdown attack
|
| 2C |
2 |
6 |
8 |
19 |
1~5(5) / 14~19(6) |
- |
-3 |
-3 |
-8 |
Low |
Weak attack, 6-13f throw invuln
|
| 3C |
6 |
10 |
13 |
32 |
1~9(9) |
- |
KD |
KD |
-17 |
Low |
Knockdown attack
|
| j.A |
8 |
6 |
4 |
14 |
6~9(4) |
- |
-- |
-- |
-- |
High |
Weak attack, Deflectable(weak)
|
| j.B |
11 |
8 |
4 |
15 |
8~11(4) |
- |
-- |
-- |
-- |
High |
Medium attack, Deflectable(med)
|
| j.AB |
25 |
11 |
4 |
24 |
x |
- |
-- |
-- |
-- |
High |
Heavy attack, Deflectable(heavy)
|
| j.C |
6 |
12 |
9 |
23 |
12~20(9) |
- |
-- |
-- |
-- |
High |
Medium attack
|
| ju.C |
6 |
12 |
9 |
23 |
12~20(9) |
- |
-- |
-- |
-- |
High |
Medium attack
|
| 5BC |
16 |
20 |
4 |
41 |
4~19(16) |
- |
KD |
KD |
-15 |
High |
Medium attack Knockdown attack
|
| u.5BC |
8 |
21 |
4 |
45 |
5~20(16) |
- |
KD |
KD |
-18 |
High |
Medium attack Knockdown attack
|
| 66A |
8 |
9 |
3 |
20 |
1~5(5) |
6~8(3) / 12~17(6) |
-1 |
-1 |
-28 |
Mid |
Weak attack, Deflectable(heavy)
|
| 66B |
8 |
7 |
3 |
23 |
x |
- |
+2 |
+10 |
-21 |
Low |
Medium attack
|
| 66AB |
14 |
7 |
3 |
39 |
1~3(3) |
4~6(3) |
KD |
KD |
-27 |
Mid |
Knockdown attack
|
| 66C |
8 |
13 |
10 |
36 |
4~24(21) |
- |
-19 |
-13 |
-18 |
Mid |
Weak attack
|
| u.5S |
4 |
5 |
14 |
25 |
1~2(2) |
- |
-2 |
+6 |
-15 |
Mid |
Medium attack
|
| u.2S |
4 |
5 |
4 |
12 |
1~4(4) |
- |
+3 |
+3 |
-2 |
Low |
Weak attack
|
| ju.S |
4 |
9 |
6 |
20 |
9~14(6) |
- |
-- |
-- |
-- |
High |
Medium attack
|
| u.66S |
4 |
5 |
14 |
25 |
1~25(25) |
- |
KD |
KD |
-15 |
Mid |
Knockdown attack
|
| u.66C |
8 |
13 |
10 |
36 |
4~24(21) |
- |
-19 |
-13 |
-18 |
Mid |
Weak attack
|
| 2BC |
8 |
13 |
4 |
34 |
1~4(4) |
- |
-- |
-- |
-- |
Mid |
|
| u.2BC |
8 |
13 |
4 |
34 |
1~4(4) |
- |
-- |
-- |
-- |
Mid |
|
| 8BC |
13 |
39 |
10 |
84 |
59~84(26) |
- |
-- |
-- |
-- |
Mid |
|
| u.8BC |
13 |
39 |
10 |
84 |
59~84(26) |
- |
-- |
-- |
-- |
Mid |
|
| Tenkoku Houra - 623C |
0 |
10 |
2 |
37 |
x |
- |
-- |
-- |
-- |
Mid |
1-11f throw invincible
|
| Ten'i Daihou - 236A / 236B |
6x3 |
19 |
16 |
57 |
x |
- |
KD |
KD |
-12 |
Mid |
Knockdown attack
|
| Tensatsu Daisai - 236AB |
1x7, 35 |
19 |
32 |
57 |
x |
- |
KD |
KD |
-7 |
Mid |
Knockdown attack
|
| Tenki Shichiyou: Nichi - j.AC |
8 |
10 |
x |
x |
x |
- |
?? |
?? |
?? |
High |
Medium attack
10f-hit below knees invincible
|
| Tenmou Konji - j.236AB |
18 |
17 |
x |
x |
x |
- |
KD |
KD |
-21 |
High |
Medium attack Knockdown attack
|
| Tenkai Unri - 236CD |
37 |
16 |
38 |
87 |
x |
- |
KD |
KD |
-59 |
Mid |
1-14f above knees invincible
|


