Samurai Shodown V Special/Nakoruru
Jump to navigation
Jump to search


ナコルル, Nakoruru

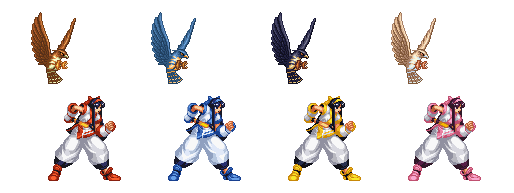
Colors
Introduction
Everyone's favorite Ainu environmentalist is paying dearly for S-Tier crimes committed in Samsho 3 and 4. Things got so bad her wolf-riding alter ego split off from her and started her own club.
While Nako has very fast movement and a pretty decent set of special moves, she suffers from overall low damage and crummy normals. Pretty much all of the factors that made her an absolute demon in the previous game were either nerfed or taken away entirely, and the newly added features don't help her out very much. Nakoruru has to work a lot harder to get her wins this time around.
| Strengths | Weaknesses |
|---|---|
|
|
Data
- Damage taken: 120%
- Rage duration: 7 seconds
- Amount to rage: 24
- Walk speed: 768
- Backwalk speed: 640
- Dash speed: 1856
- Jump duration: 45 frames
- Width: 20
- Throw range: 8
- Throw recovery: 46 frames
- Tier placing: C
Normals
Far Slashes
n.2AB
5A  |
|---|
5B
5B  |
|---|
5AB
5AB  |
|---|
2A
2A  |
|---|
2B
2B  |
|---|
2AB
2AB    |
|---|
Near Slashes
n.5A
n.5A  |
|---|
n.5B
n.5B  |
|---|
n.5AB
n.5AB  |
|---|
Overheads
5BC
5BC  |
|---|
u.5BC
u.5BC  |
|---|
Kicks
5C
5C  |
|---|
6C
6C    |
|---|
2C
2C  |
|---|
3C
3C  |
|---|
Jumping
j.A
j.A  |
|---|
j.B
j.B  |
|---|
j.AB
j.AB  |
|---|
j.C
j.C  |
|---|
Dashing
66A
66A  |
|---|
66B
66B  |
|---|
66AB
66AB  |
|---|
66C
66C  |
|---|
Unarmed
u.5S
u.5S  |
|---|
u.2S
u.2S  |
|---|
u.jS
u.jS  |
|---|
u.66S
u.66S  |
|---|
Pursuit
2BC
2BC  Small Pursuit Small Pursuit
|
|---|
u.2BC
u.2BC  Unarmed Small Pursuit Unarmed Small Pursuit
|
|---|
8BC
8BC Big Pursuit Big Pursuit
|
|---|
u.8BC
u.8BC Unarmed Big Pursuit Unarmed Big Pursuit
|
|---|
System
Deflect
Deflect  216D 216D
|
|---|
Weapon Pickup
Weapon Pickup  u.5A u.5A
|
|---|
Wall Jump
Wall Jump  j.9 or j.3 near wall j.9 or j.3 near wall
|
|---|
Taunt Disarm
Taunt Disarm  3 x Start 3 x Start
|
|---|
Specials
Kamui Fumukesupu
Kamui Fumukesupu  j.2C j.2C
|
|---|
Annu Mutsube
Annu Mutsube  412A 412A  412B 412B  412AB 412AB
|
|---|
Rera Mutsube
Rera Mutsube  236S 236S
|
|---|
Kamui Rimse
Kamui Rimse  421S 421S  ...S ...S
|
|---|
Amube Yatoro
Amube Yatoro  214S 214S
|
|---|
Taka Ni Tsukamaru
Taka Ni Tsukamaru  214C 214C  Taka Tsukamari Kougeki b.A / b.B Taka Tsukamari Kougeki b.A / b.B  b.AB b.AB  Kamui Mutsube b.BC Kamui Mutsube b.BC  Yatoro Pok b.236S Yatoro Pok
b.236S |
|---|
Apefuchi Kamui Rimse
Apefuchi Kamui Rimse  u.3214623BC u.3214623BC
|
|---|
Rera Kishima Tek
Rera Kishima Tek j.[1/2/3/4/6]C j.[1/2/3/4/6]C
|
|---|
Elerushi Kamui Rimse
Elerushi Kamui Rimse  236CD 236CD
|
|---|
Combos
Normal
- (n.5A or 2A or 5C) ...
- Nako's fastest pokes make for good combo starters, so you can punish a lot of stuff with it. 5C can cancel before it actually hits, so be careful about that.
- ... xx 236A
- More reliable option than others. More damage than 412A and don't put you in corner if you close to one.
- ... xx 412A 2BC
- Ground slide, forces knockdown, easy to do.
- ... xx 421A ... S 8BC
- Oddly, this is a very powerful combo. Wait until they almost land from the juggle before doing 8BC.
- For 2A, you probably want to input this something like 452A1A. Not recommended, either way.
- (5B or n.5B) ...
- All of her strongest combos start here.
- 5B can cancel before it actually hits, so be careful about that.
- ... xx 236A
- More reliable option than others. More damage than 412B and don't put you in corner if you close to one.
- ... xx 412B
- Easy to do, good damage.
- ... xx 421S ... S 8BC
- You have to be close to make this work. If you're sufficiently close, you can do 421AB for maximum hurtiness.
- As before, wait until they almost land from the juggle before doing 8BC.
- ... xx 236CD
- For 5B, must be somewhat close. Good punisher, especially when you can't normally combo into WFT.
- 214S 8BC
- If you hit them with a bird anywhere on screen you can follow up with dash 8BC for a good damage. If bird hit opponent mid air then you have more time to do follow up.
- 6C xx 8BC
- Corner only. This is actually really useful. 6C has 4 frame startup, making it a universal punish move, and 8BC does decent damage.
- 66AB 8BC
- Corner only. If you hit opponent with 66AB in corner, you can follow up with 8BC even on anti air.
- 66C 2BC
- Hits low, works anywhere. Doesn't hurt much.
- 3C 2BC
- Hits low. Corner only. Doesn't really hurt, 2AB is probably a better choice.
- u.3214623BC 8BC
- Why would you ever do this.
- b.S xx b.BC 2BC
- For those rare times you're actually in range to use the bird slash.
Backhit
- 2AB 412A 2BC
- If you block attack that puts opponent in air during recovery you can run under and punish with this combo.
- n.5AB 236A
- Same as combo above.
- (5B or n.5B) xx 214S 8BC
- If you don't know if backhit land or not you can use this combo. It's much more safer than other options and has decent damage.
Time slow
- (vs air) j.AB j.AB j.AB
- The usual for when you can't wait for them to come down and eat an Issen.
- j.C or 2.C
- Nako j.C is fast and has very downward hitbox and it can be mixed up with her empty jump 2C for Issen setup.
- 214C xx 236S
- Not very reliable since it depends on opponent height and width, your position and version used, but you can cross up hit opponent with Yatoro Pok for Issen setup.
Strategies
Frame Data
| Move | Damage | Startup | Active | Total | Cancel | Weapon Clash |
Hit Adv. |
Backhit Adv. |
Block Adv. |
Guard | Notes |
| 5A | 6 | 12 | 2 | 24 | 1~5(5) | 9~11(3) / 14~17(4) | -1 | -1 | -3 | Mid | Weak attack, Deflectable(weak) |
| 5B | 11 | 13 | 2 | 32 | 1~2(2) / 5~23(19) | 7~12(6) | -1 | +7 | -9 | Mid | Medium attack, Deflectable(med) |
| 5AB | 27 | 16 | 2 | 56 | 1~13(13) | 10~15(6) | -3 | +7 | -21 | Mid | Heavy attack, Deflectable(heavy) |
| 2A | 5 | 7 | 3 | 18 | 7~13(7) | - | -1 | -1 | -3 | Low | Weak attack, Deflectable(weak) |
| 2B | 5x3 | 15 | 11 | 60 | 1~14(14) | - | -1 | +9 | -9 | Mid | Heavy attack, Deflectable(med) |
| 2AB | 5, 25 | 13 | 2 | 48 | 1~12(12) | - | +6 | +16 | -21 | Low | Heavy attack, Deflectable(heavy) |
| n.5A | 4 | 5 | 4 | 17 | 1(1) / 5~12(8) | 1~2(2) | -1 | -1 | -3 | Mid | Weak attack, Deflectable(weak) |
| n.5B | 7 | 10 | 4 | 29 | 10~29(20) | 4~9(6) | -1 | +7 | -9 | Mid | Medium attack, Deflectable(med) |
| n.5AB | 5, 24 | 15 | 2 | 64 | 1~2(2) | 12~14(2) / 17~20(4) | +0 | +10 | -21 | Mid | Heavy attack, Deflectable(heavy) |
| n.2A | 5 | 7 | 3 | 18 | 7~13(7) | - | -1 | -1 | -3 | Low | Weak attack, Deflectable(weak) |
| n.2B | 5x3 | 15 | 11 | 60 | 1~14(14) | - | -1 | +9 | -9 | Mid | Heavy attack, Deflectable(med) |
| n.2AB | 5, 25 | 13 | 2 | 48 | 1~12(12) | - | +6 | +16 | -21 | Low | Heavy attack, Deflectable(heavy) |
| 5C | 5 | 13 | 6 | 22 | 1~22(22) | - | +1 | +1 | -4 | Mid | Weak attack |
| 6C | 3, 3, 2 | 4 | 1 | 46 | 4~6(3) | - | KD | KD | -32 | Mid | Medium attack Knockdown attack |
| 2C | 2 | 6 | 4 | 18 | 1~5(5) | - | -2 | -2 | -7 | Low | Weak attack |
| 3C | 5 | 14 | 6 | 37 | 1~6(6) | - | KD | KD | -18 | Low | Knockdown attack |
| j.A | 5 | 5 | 3 | 28 | x | - | -- | -- | -- | High | Weak attack, Deflectable(weak) |
| j.B | 10 | 6 | 2 | 27 | x | - | -- | -- | -- | High | Medium attack, Deflectable(med) |
| j.AB | 23 | 11 | 2 | 36 | x | - | -- | -- | -- | High | Heavy attack, Deflectable(heavy) |
| j.C | 4 | 8 | 24 | 36 | x | - | -- | -- | -- | High | Heavy attack |
| ju.C | 4 | 8 | 24 | 36 | x | - | -- | -- | -- | High | Heavy attack |
| 5BC | 14 | 20 | 2 | 40 | x | - | KD | KD | -14 | High | Medium attack Knockdown attack |
| u.5BC | 14 | 30 | 9 | 50 | x | - | KD | KD | -14 | High | Medium attack Knockdown attack |
| 66A | 5 | 5 | 4 | 19 | 1~4(4) | - | -4 | -4 | -21 | Mid | Weak attack, Deflectable(heavy) |
| 66B | 12 | 9 | 4 | 49 | 1~8(8) | - | -3 | +7 | -21 | Mid | Heavy attack, Deflectable(heavy) |
| 66AB | 5, 12 | 9 | 1 | 36 | 1~8(8) | - | KD | KD | -18 | Mid | Knockdown attack |
| 66C | 5 | 4 | 10 | 27 | 1~3(3) / 21~27(7) | - | KD | KD | -18 | Low | Knockdown attack |
| u.5S | 3 | 9 | 7 | 27 | 1~5(5) | - | +0 | +8 | -13 | Mid | Medium attack |
| u.2S | 3 | 6 | 5 | 17 | x | - | -1 | -1 | -6 | Mid | Weak attack |
| ju.S | 5 | 7 | 21 | 32 | x | - | -- | -- | -- | High | Weak attack |
| u.66S | 6 | 9 | 5 | 19 | 1~8(8) | - | KD | KD | -5 | Mid | Knockdown attack |
| u.66C | 6 | 4 | 10 | 27 | 1~3(3) / 21~27(7) | - | KD | KD | -18 | Low | Knockdown attack |
| 2BC | 5 | 17 | 17 | 69 | x | - | -- | -- | -- | Mid | |
| u.2BC | 8 | 15 | 10 | 63 | x | - | -- | -- | -- | Mid | |
| 8BC | 14 | 39 | 17 | 114 | 112~114(3) | - | -- | -- | -- | Mid | |
| u.8BC | 14 | 39 | 3 | 83 | x | - | -- | -- | -- | Mid | |
| Kamui Fumukesupu - j.2C | 8 | 14 | 12 | 35 | x | - | KD | KD | -- | High | Medium attack Knockdown attack |
| Kamui Fumukesupu - ju.2C | 8 | 14 | 23 | 46 | x | - | KD | KD | -- | High | Medium attack Knockdown attack |
| Annu Mutsube - 412A | 15 | 10 | 6 | 46 | x | - | KD | KD | -25 | Low | Knockdown attack |
| Annu Mutsube - 412B | 18 | 16 | 9 | 59 | x | - | KD | KD | -30 | Low | Knockdown attack 1-8f hit invincible 9-14f upper body invincible |
| Annu Mutsube - 412AB | 23 | 24 | 20 | 83 | x | - | ?? | ?? | -37 | Low | Knockdown attack 1-16f fully invincible 17-22f throw and upper body invincible |
| Rera Mustube - 236A | 22 | 9 | 8 | 61 | x | - | KD | KD | -57 | Mid | Knockdown attack 1-7f upper body invincible |
| Rera Mustube - 236B | 22 | 13 | 10 | 79 | x | - | KD | KD | -76 | Mid | Knockdown attack 1-10f upper body invincible |
| Rera Mustube - 236AB | 22 | 15 | 19 | 109 | x | - | KD | KD | -109 | Mid | Knockdown attack 1-13f upper body invincible |
| Kamui Rimse - 421A | 3 | 11 | 4 | 48 | x | - | +0 | -11 | -28 | Mid | |
| Kamui Rimse - 421B | 3x2 | 13 | 2 | 65 | x | - | +0 | -11 | -24 | Mid | |
| Kamui Rimse - 421AB | 3x3 | 18 | 1 | 82 | x | - | +1 | -10 | -31 | Mid | |
| Kamui Rimse Gaeshi - ... S | 3, 18 | 11 | 9 | 33 | x | - | KD | KD | -12 | Mid | Knockdown attack |
| Amube Yatoro - 214S | 10 | 18 | x | 50 | x | - | KD | KD | -14 | Mid | Knockdown attack |
| Yatoro Pok - b.236S | 3xn | 29 | 1 | x | x | - | -- | -- | -- | High | Weak attack |
| Yatoro Pok - b.u.236S | 1xn | 28 | 1 | x | x | - | -- | -- | -- | High | Weak attack |
| Taka Tsukamari Kougeki - b.A/B | 8 | 5 | 2 | 13 | 5~8(4) | - | -3 | +4 | -2 | High | Weak attack |
| Taka Tsukamari Kougeki - b.AB | 8 | 7 | 2 | 30 | 7~30(24) | - | -18 | +25 | -17 | High | Heavy attack |
| Taka Tsukamari Kougeki - b.u.S | 8 | 5 | 2 | 14 | 5~12(8) | - | -4 | +18 | -3 | High | Medium attack |
| Kamui Mutsube - b.BC | 20 | 1 | x | x | x | - | KD | KD | -28 | High | Medium attack Knockdown attack |
| Kamui Mutsube - b.u.BC | 12 | 1 | x | x | x | - | KD | KD | -28 | High | Medium attack Knockdown attack |
| Apefuchi Kamui Rimse - u.3214623BC | 2x4, 4x5, 12 | 10 | 2 | 220 | x | - | KD | KD | -25 | Mid | |
| Elerushi Kamui Rimse - 236CD | 30 | x | x | x | x | - | KD | KD | -76 | High | 18f earliest hit time |