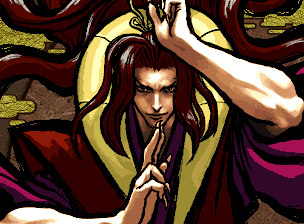
天草 四郎 時貞, Amakusa Shiro Tokisada

Colors
Introduction
Balls and slaps.
Amakusa is a decently rounded character with some interesting and unique tools. What he lacks in somewhat slow and restricted mobility he makes up for in range and versatility. He has quite a lot of solid zoning tools and unique mixups. He also can deal quite a lot of damage with some risky maneuvers, or constantly pester with small damage using safe and reliable antics. Though, using him too recklessly may lead to dismay against more seasoned players. Amakusa may seem straight forward, but he can prove to be rather counter-intuitive to beginners, as he actually requires a broad understanding of the game and a very specific understanding of how his moves work. The reason being that despite seeming to have all the right tools, he has trouble in specific matchups where he can't effectively keep the opponent at bay or hit them with anything meaningful.
| Strengths |
Weaknesses
|
- Good ranged and zoning game.
- Large variety of mixups and mixup options.
- Good teleport move, which benefits him by making some blocked pokes safe and giving him additional mobility.
- A variety of reliable anti-air options.
- Very strong punishment options.
- Fairly decent WFT (provided you don't spam it).
- Can build a lot of Concentration Gauge.
- Very strong mixups (and damage) during State of Nothingness.
|
- Slow movement, predictable mobility.
- Extremely slow and floaty jumps.
- Mixups are high risk with only moderate reward.
- Slow telegraphed moves are easy to react to and counter.
- Unsafe options on block.
- Unreliable midrange.
- Poor keep-away.
|
Data
- Damage taken: 115%
- Rage duration: 6 seconds
- Amount to rage:: 14
- Walk speed: 544
- Backwalk speed: 368
- Dash speed: 1280
- Jump duration: 64 frames
- Width: 24
- Throw range: 16
- Throw recovery: 50 frames
- Tier placing: B-
Normal Moves
Far Slashes
5A
5A
|
| Damage
|
Guard
|
Cancel
|
Invul
|
Property
|
Level
|
| 6
|
Low
|
1~2 (2)
|
-
|
Deflectable (weak),
Weapon Clash 11 (1)
|
Weak Attack
|
| Startup
|
Active
|
Recovery
|
Hit Adv
|
Backhit Adv
|
Block Adv
|
| 12
|
11
|
10
|
-10
|
-10
|
-15
|
|
Good range and speed for a low -- it reaches its max distance on frame 17. The standing pose also makes this ambiguous with his other high/low moves. Poor damage and no cancel/recoil cancel, use it to pester the opponent from a distance.
There is one frame of clash right before the attack starts, a large area in front of Amakusa. The first frame of this attack is when the ball leaves his hands, and is a hitbox that overlaps the glowing orb at around chest-height. There is thin hurtbox that extends horizontally between Amakusa and the ball, this follows the ball vertically and extends to "follow" the ball horizontally. Both the hitbox and hurtbox disappear on the ball's return.
|
|
5B
5B
|
| Damage
|
Guard
|
Cancel
|
Invul
|
Property
|
Level
|
| 12
|
High
|
1~2 (2)
|
-
|
Deflectable (Medium)
|
Medium Attack
|
| Startup
|
Active
|
Recovery
|
Hit Adv
|
Backhit Adv
|
Block Adv
|
| 21
|
14
|
15
|
-10
|
-2
|
-21
|
|
Good range for an overhead, but unsafe on block. Despite its appearance, it's not useful as an anti-air. Use sparingly.
While the ball is dropping, the first hurtbox appears on the main ball when it's at just-above Amakusa's head level (after it's already moving), however there is also a hurtbox that covers not only the main ball but also stretches upwards to cover it's after-shadows as well. The first two frames of the ball's return has a hitbox that covers both the main ball and it's after-shadows, which disappears on the same frame that Amakusa's hand stretches upwards vertically, during this time the hurtbox changes to a horizontal one that stretches out between Amakusa and the ball and remains for two frames after the hitbox becomes inactive.
|
|
5AB
5AB
|
| Damage
|
Guard
|
Cancel
|
Invul
|
Property
|
Level
|
| 31
|
Mid
|
1~3 (3)
|
-
|
Recoil Cancel,
Deflectable (Heavy)
|
Heavy Attack
|
| Startup
|
Active
|
Recovery
|
Hit Adv
|
Backhit Adv
|
Block Adv
|
| 17
|
11
|
31
|
-4
|
+6
|
-21
|
|
Large range heavy attack. The ball moves every two frames, reaching its max distance on the 25th frame. Very telegraphed and punishable on whiff, best used from a far distance. Can be used as an anti-air if spaced outside of the opponent's jump-in attack range (so that they land on the ball). Can hit hopping opponents but very susceptible to rolls (and in some cases also to ducks). The main drawback to this move is the laggy animation, since there's no cancel point on hit/whiff you're basically screwed if the opponent predicts it or reacts to it.
The hitbox is larger than his other attacks in that it covers both the main ball and also it's after-shadows (making it wide horizontally). The first attack frame's hurtbox only covers Amakusa and not the ball, however all subsequent attack frames have an additional hurtbox that covers Amakusa's outstretched arm plus a thin horizontal box that stretches between Amakusa and the ball. This hurtbox disappears when the move becomes inactive on the ball's return.
|
|
2A
2A
|
| Damage
|
Guard
|
Cancel
|
Invul
|
Property
|
Level
|
| 7
|
Low
|
1~5 (5)
|
-
|
-
|
Weak Attack
|
| Startup
|
Active
|
Recovery
|
Hit Adv
|
Backhit Adv
|
Block Adv
|
| 11
|
8
|
10
|
-7
|
-7
|
-12
|
|
Less range than 5A, but slightly faster and slightly less disadvantageous on block. Although it can't be deflected it doesn't cover much vertical area. Occasionally useful to hit rolls and the like.
The hitbox on this follows the orb faithfully, though a hurtbox also appears over Amakusa's outstretched arm, and only disappears when the hitbox disappears during the ball's return.
|
|
2B
2B
|
| Damage
|
Guard
|
Cancel
|
Invul
|
Property
|
Level
|
| 11
|
Mid
|
1~5 (5)
|
-
|
Deflectable (Medium)
|
Medium Attack
|
| Startup
|
Active
|
Recovery
|
Hit Adv
|
Backhit Adv
|
Block Adv
|
| 9
|
7
|
17
|
-5
|
+3
|
-18
|
|
Good range poke move that is negative on block from afar and unsafe on block closer up. It reaches its max distance on frame 15, right before it goes inactive. Like his other moves in this category, it has a tendency to whiff hoppers/rollers/duckers, but it has surprisingly good reach.
Both a hitbox and hurtbox appear over the ball and follow the ball faithfully. The hurtbox remains for a few frames after the hitbox disappears, though this hurtbox disappears during the ball's return.
|
|
2AB
2AB
|
| Damage
|
Guard
|
Cancel
|
Invul
|
Property
|
Level
|
| 27
|
Low
|
-
|
-
|
-
|
Heavy Attack
|
| Startup
|
Active
|
Recovery
|
Hit Adv
|
Backhit Adv
|
Block Adv
|
| 17
|
15
|
44
|
KD
|
KD
|
-55
|
|
Amakusa goes bowling. Extremely long range low sweep that's good for punishing stuff from a large distance. The attack hitbox moves forward every two frames until its max distance on frame 26. Highly punishable on block/whiff, startup somewhat telegraphed and therefore risky unless confirmed as a punish. While it may be tempting, never just randomly throw this out or you're asking to be killed.
There is a hurtbox on the ball for the first couple frames, but afterwards it disappears.
|
|
Near Slashes
n.5A
n.5A
|
| Damage
|
Guard
|
Cancel
|
Invul
|
Property
|
Level
|
| 4
|
Mid
|
1~3 (3)/5~14 (10)
|
-
|
-
|
Weak Attack
|
| Startup
|
Active
|
Recovery
|
Hit Adv
|
Backhit Adv
|
Block Adv
|
| 5
|
7
|
3
|
+1
|
+1
|
-4
|
|
Very close-range jab, but its speed and priority are above average.
|
|
n.5B
n.5B
|
| Damage
|
Guard
|
Cancel
|
Invul
|
Property
|
Level
|
| 9
|
Mid
|
12~24 (13)
|
-
|
Recoil Cancel,
Deflectable (Medium),
Weapon Clash 8~11(4)
|
Medium Attack
|
| Startup
|
Active
|
Recovery
|
Hit Adv
|
Backhit Adv
|
Block Adv
|
| 12
|
13
|
9
|
-3
|
+5
|
-18
|
|
A decent cancellable attack if you're right next to them. While safer than n.2AB, this move is not used much since far 5B is unsafe and n.2AB is otherwise the better choice for close punishes. It also has a strange tendency to push opponents out too far for any combos to work.
|
|
n.5AB
n.5AB
|
| Damage
|
Guard
|
Cancel
|
Invul
|
Property
|
Level
|
| 28
|
Mid
|
1~4 (4)
|
-
|
Recoil Cancel,
Deflectable (Heavy),
Weapon Clash 17 (1)
|
Heavy Attack
|
| Startup
|
Active
|
Recovery
|
Hit Adv
|
Backhit Adv
|
Block Adv
|
| 18
|
19
|
17
|
+2
|
+12
|
-21
|
|
Typically used as a lazy punish though n.2AB is superior for these situations. The tall hitbox for this move will sometimes catch an opponent in the air so you can use it below them while they're coming down from a jump.
|
|
n.2A
n.2A
|
| Damage
|
Guard
|
Cancel
|
Invul
|
Property
|
Level
|
| 4
|
Mid
|
1~3 (3)/5~16 (12)
|
-
|
-
|
Weak Attack
|
| Startup
|
Active
|
Recovery
|
Hit Adv
|
Backhit Adv
|
Block Adv
|
| 5
|
4
|
6
|
-1
|
-1
|
-6
|
|
Basically, the same properties as standing slap but a lower hitbox.
|
|
n.2B
n.2B
|
| Damage
|
Guard
|
Cancel
|
Invul
|
Property
|
Level
|
| 9
|
Mid
|
16~28 (13)
|
-
|
Recoil Cancel,
Deflectable (Medium)
|
Medium Attack
|
| Startup
|
Active
|
Recovery
|
Hit Adv
|
Backhit Adv
|
Block Adv
|
| 16
|
7
|
14
|
-2
|
+6
|
-13
|
|
Very similar to n.5B but slower. Slower than n.2AB for some reason. It doesn't push the opponent as far back as n.5B and has niche uses but otherwise it's underwhelming.
|
|
n.2AB
n.2AB
|
| Damage
|
Guard
|
Cancel
|
Invul
|
Property
|
Level
|
| 26
|
Mid
|
22~23 (2)
|
-
|
Recoil Cancel,
Deflectable (Heavy)
|
Heavy Attack
|
| Startup
|
Active
|
Recovery
|
Hit Adv
|
Backhit Adv
|
Block Adv
|
| 14
|
8
|
32
|
-2
|
+8
|
-19
|
|
A great punishing tool. Can be hit-confirmed into a super or 214+AB. It doesn't get much better than this for Amakusa. Just make sure you have enough time to get the first hit out, because it's rather dangerous if blocked.
|
|
Overheads
5BC
5BC
|
| Damage
|
Guard
|
Cancel
|
Invul
|
Property
|
Level
|
| 16
|
High
|
-
|
-
|
-
|
Medium Attack
|
| Startup
|
Active
|
Recovery
|
Hit Adv
|
Backhit Adv
|
Block Adv
|
| 20
|
3
|
19
|
KD
|
KD
|
-15
|
|
Pretty standard jumping overhead. This is mostly there for avoiding throws or lows rather than opening people up.
|
|
u.5BC
u.5BC
|
| Damage
|
Guard
|
Cancel
|
Invul
|
Property
|
Level
|
| 8
|
High
|
-
|
-
|
-
|
Medium Attack
|
| Startup
|
Active
|
Recovery
|
Hit Adv
|
Backhit Adv
|
Block Adv
|
| 22
|
11
|
15
|
KD
|
KD
|
-20
|
|
A worse version of his armed overhead. Slower and more punishable but it knocks the opponent far away so you can pick up your orb.
|
|
Kicks
5C
5C
|
| Damage
|
Guard
|
Cancel
|
Invul
|
Property
|
Level
|
| 6
|
Mid
|
1~6 (6)
|
-
|
5-21f Airborne
|
Medium Attack
|
| Startup
|
Active
|
Recovery
|
Hit Adv
|
Backhit Adv
|
Block Adv
|
| 9
|
13
|
8
|
-16 (-2)
|
+6
|
-15
|
|
A quick airborne knee that covers some forward distance. The second hit advantage number is if the attack connects on a crouching opponent. Decent filler move to interrupt the other person's tempo and quite safe when used with the correct spacing. Also works great to beat hops.
|
|
6C
6C
|
| Damage
|
Guard
|
Cancel
|
Invul
|
Property
|
Level
|
| 5
|
Low
|
13~32 (20)
|
-
|
-
|
Medium Attack
|
| Startup
|
Active
|
Recovery
|
Hit Adv
|
Backhit Adv
|
Block Adv
|
| 13
|
14
|
6
|
-1
|
+7
|
-14
|
|
Low poke that stays out for a good while. Its cancel window doesn't get any real combos going but affords Amakusa a few tricks.
|
|
2C
2C
|
| Damage
|
Guard
|
Cancel
|
Invul
|
Property
|
Level
|
| 2
|
Low
|
-
|
-
|
-
|
Weak Attack
|
| Startup
|
Active
|
Recovery
|
Hit Adv
|
Backhit Adv
|
Block Adv
|
| 6
|
6
|
7
|
-2
|
-2
|
-7
|
|
Low kick. Theoretically fills the role of a safe, quick low for last-hitting a single tick, as n.2A isn't low. But the close up jabs are better on block and can be cancelled, so this move is relegated to when you aren't in range for the jabs to come out, because it has no required distance for use.
|
|
3C
3C
|
| Damage
|
Guard
|
Cancel
|
Invul
|
Property
|
Level
|
| 7
|
Low
|
1~4 (4)
|
-
|
-
|
-
|
| Startup
|
Active
|
Recovery
|
Hit Adv
|
Backhit Adv
|
Block Adv
|
| 7
|
8
|
26
|
KD
|
KD
|
-28
|
|
Instant slide kick. While it does knock down, it's weak and very risky.
|
|
Jumping
j.A
j.A
|
| Damage
|
Guard
|
Cancel
|
Invul
|
Property
|
Level
|
| 7
|
High
|
-
|
-
|
Deep Deflectable (Weak)
|
Weak Attack
|
| Startup
|
Active
|
Recovery
|
Hit Adv
|
Backhit Adv
|
Block Adv
|
| 8
|
11
|
12
|
-
|
-
|
-
|
|
A close-range aerial attack that lacks in a lot of areas. There are few reasons to be using this over j.B unless you know you will need a quick hitbox that reaches lower in the air during a horizontal jump.
|
|
j.8B
j.8B
|
| Damage
|
Guard
|
Cancel
|
Invul
|
Property
|
Level
|
| 11
|
High
|
-
|
-
|
Deep Deflectable (Medium)
|
Medium Attack
|
| Startup
|
Active
|
Recovery
|
Hit Adv
|
Backhit Adv
|
Block Adv
|
| 4
|
21
|
14
|
-
|
-
|
-
|
|
Diagonal downwards ball attack. This starts incredibly fast up close to Amakusa and will frequently beat out other air-to-airs or trade at worst. If you don't have time to get out a j.AB or they make their way into its blind spot during a neutral jump you press this.
|
|
j.7/9B
j.B
|
| Damage
|
Guard
|
Cancel
|
Invul
|
Property
|
Level
|
| 11
|
High
|
-
|
-
|
Deep Deflectable (Medium)
|
Medium Attack
|
| Startup
|
Active
|
Recovery
|
Hit Adv
|
Backhit Adv
|
Block Adv
|
| 4
|
19
|
15
|
-
|
-
|
-
|
|
The 7/9B is a great long-range air-to-air poke that goes at an upward angle. It boasts the same lightning fast startup and great priority as his 8B. Although the damage is mediocre, it will effectively keep the opponent at a distance when used at the right times (i.e. reading their jumps).
|
|
j.AB
j.AB
|
| Damage
|
Guard
|
Cancel
|
Invul
|
Property
|
Level
|
| 24
|
High
|
-
|
-
|
Deep Deflectable (Heavy)
|
Heavy Attack
|
| Startup
|
Active
|
Recovery
|
Hit Adv
|
Backhit Adv
|
Block Adv
|
| 12
|
9
|
26
|
-
|
-
|
-
|
|
A downward-angled orb toss that reaches about two-thirds across the screen and does good damage, but is abnormally easy to block and even punish due to Amakusa's floaty jumps. There is also a blind spot between Amakusa and where the orb first starts moving from, so this will not help if they're right next to you. It fares somewhat better against the biggest opponents since he can overhead them on the ascent, even while jumping backward.
|
|
j.C
j.C
|
| Damage
|
Guard
|
Cancel
|
Invul
|
Property
|
Level
|
| 5
|
High
|
-
|
-
|
-
|
Heavy Attack
|
| Startup
|
Active
|
Recovery
|
Hit Adv
|
Backhit Adv
|
Block Adv
|
| 7
|
15
|
8
|
-
|
-
|
-
|
|
The Apollo kick. A weak aerial that is serves a dual purpose for close air to airs and when landing deep but it only does so much to keep them from out-mashing you. It can easily cross-up if you are landing behind them.
|
|
Dashing
66A
66A
|
| Damage
|
Guard
|
Cancel
|
Invul
|
Property
|
Level
|
| 7
|
Mid
|
1~5 (5)
|
-
|
-
|
Heavy Attack
|
| Startup
|
Active
|
Recovery
|
Hit Adv
|
Backhit Adv
|
Block Adv
|
| 6
|
8
|
20
|
+10
|
+20
|
-22
|
|
Dashing slap. This is a strong choice when crossing under their jumps, and affords good combo opportunities on front or back hit. Be wary of the long recovery -- you only want to use this if you're sure they can't block it.
|
|
66B
66B
|
| Damage
|
Guard
|
Cancel
|
Invul
|
Property
|
Level
|
| 13
|
High
|
1~4 (4)/9~11 (3)
|
-
|
-
|
Medium Attack
|
| Startup
|
Active
|
Recovery
|
Hit Adv
|
Backhit Adv
|
Block Adv
|
| 14
|
6
|
7
|
KD
|
KD
|
-7
|
|
Dashing overhead. Cancellable before the attack comes out, presumably into 214S mixups, teleport, or perhaps 623+S against routine jumpers. For an overhead, it has a quick startup and gives your dashing approach more threat. Somehow your safest running normal on block by a country mile.
|
|
66AB
66AB
|
| Damage
|
Guard
|
Cancel
|
Invul
|
Property
|
Level
|
| 20
|
Mid
|
-
|
1-14f above knee invuln
|
-
|
-
|
| Startup
|
Active
|
Recovery
|
Hit Adv
|
Backhit Adv
|
Block Adv
|
| 19
|
6
|
51
|
KD
|
KD
|
-52
|
|
Dashing crossup. The catch is that it has a very high recovery. Use sparingly, as a whiff or block will probably not go unpunished.
|
|
66C
66C
|
| Damage
|
Guard
|
Cancel
|
Invul
|
Property
|
Level
|
| 6
|
Low
|
1~4 (4)
|
-
|
-
|
-
|
| Startup
|
Active
|
Recovery
|
Hit Adv
|
Backhit Adv
|
Block Adv
|
| 10
|
12
|
15
|
KD
|
KD
|
-21
|
|
Slide. This kick gives you a mild high-low threat from your dash, but don't expect to rack up the damage with this.
|
|
Unarmed
u.5S
u.5S
|
| Damage
|
Guard
|
Cancel
|
Invul
|
Property
|
Level
|
| 4, 4
|
Mid
|
1~4 (4)
|
-
|
-
|
-
|
| Startup
|
Active
|
Recovery
|
Hit Adv
|
Backhit Adv
|
Block Adv
|
| 6, 12
|
3, 3
|
10
|
-2
|
-2
|
-6
|
|
Doubletap. Fairly useful as far as standard harrassment goes.
|
|
u.2S
u.2S
|
| Damage
|
Guard
|
Cancel
|
Invul
|
Property
|
Level
|
| 4, 4
|
Mid
|
1~4 (4)
|
-
|
-
|
-
|
| Startup
|
Active
|
Recovery
|
Hit Adv
|
Backhit Adv
|
Block Adv
|
| 7, 13
|
3, 6
|
6
|
-1
|
-1
|
-5
|
|
Crouching doubletap.
|
|
ju.S
ju.S
|
| Damage
|
Guard
|
Cancel
|
Invul
|
Property
|
Level
|
| 8
|
High
|
-
|
-
|
-
|
-
|
| Startup
|
Active
|
Recovery
|
Hit Adv
|
Backhit Adv
|
Block Adv
|
| 8
|
5
|
2
|
-
|
-
|
-
|
|
Jumping slap I guess. Why are you jumping without your orb.
|
|
u.66S
u.66S
|
| Damage
|
Guard
|
Cancel
|
Invul
|
Property
|
Level
|
| 7
|
Mid
|
1~5
|
-
|
-
|
-
|
| Startup
|
Active
|
Recovery
|
Hit Adv
|
Backhit Adv
|
Block Adv
|
| 5
|
19
|
10
|
KD
|
KD
|
-22
|
|
The dashslap has a good hitbox for getting a knockdown. This remains ludicrously unsafe to have blocked.
|
|
Pursuit
2BC
Pursuit
2BC
|
| Damage
|
Guard
|
Cancel
|
Invul
|
Property
|
Level
|
| 5
|
-
|
26~27 (2)
|
-
|
-
|
-
|
| Startup
|
Active
|
Recovery
|
Hit Adv
|
Backhit Adv
|
Block Adv
|
| 13
|
11
|
4
|
-
|
-
|
-
|
|
Usable after a successful 66C or 3C, and in most corner knockdowns.
|
|
8BC
Heavy Pursuit
8BC
|
| Damage
|
Guard
|
Cancel
|
Invul
|
Property
|
Level
|
| 14
|
-
|
45~67 (23)
|
-
|
-
|
-
|
| Startup
|
Active
|
Recovery
|
Hit Adv
|
Backhit Adv
|
Block Adv
|
| 39
|
3
|
30
|
-
|
-
|
-
|
|
Needs the correct timing in order not to whiff. Usable after a projectile knockdown or 214S. The cancel window during the recovery lets you go into teleports to reposition or maybe bail yourself out if the pursuit doesn't connect.
|
|
System
Deflect
Deflect
216D
|
| Damage
|
Guard
|
Cancel
|
Invul
|
Property
|
Level
|
| -
|
-
|
-
|
-
|
-
|
-
|
| Startup
|
Active
|
Recovery
|
Hit Adv
|
Backhit Adv
|
Block Adv
|
| -
|
-
|
-
|
-
|
-
|
-
|
|
His ball does a cool spinny orbit.
|
|
Taunt Disarm
Taunt Disarm
Start x 3
|
| Damage
|
Guard
|
Cancel
|
Invul
|
Property
|
Level
|
| -
|
-
|
-
|
-
|
-
|
-
|
| Startup
|
Active
|
Recovery
|
Hit Adv
|
Backhit Adv
|
Block Adv
|
| -
|
-
|
-
|
-
|
-
|
-
|
|
You can always disarm yourself after connecting any 214S and before the damage from it is dealt.
|
|
Weapon Pickup
Weapon Pickup
5A near weapon
|
| Damage
|
Guard
|
Cancel
|
Invul
|
Property
|
Level
|
| -
|
-
|
-
|
-
|
-
|
-
|
| Startup
|
Active
|
Recovery
|
Hit Adv
|
Backhit Adv
|
Block Adv
|
| -
|
-
|
-
|
-
|
-
|
-
|
|
Average-to-fast weapon pickup.
|
|
Special Moves
Specials
236S
Shiryouha
236S
|
| A
|
Damage
|
Guard
|
Cancel
|
Invul
|
Property
|
Level
|
| 11
|
Mid
|
-
|
-
|
-
|
-
|
| Startup
|
Active
|
Recovery
|
Hit Adv
|
Backhit Adv
|
Block Adv
|
| 28
|
-
|
32
|
KD
|
KD
|
-19
|
| B
|
Damage
|
Guard
|
Cancel
|
Invul
|
Property
|
Level
|
| 11
|
Mid
|
-
|
-
|
-
|
-
|
| Startup
|
Active
|
Recovery
|
Hit Adv
|
Backhit Adv
|
Block Adv
|
| 33
|
-
|
32
|
KD
|
KD
|
-19
|
- Flaming skull projectile (generic fireball move). Travels horizontally at mid-level and knocks down on hit.
- Both the A and B version deal the same damage and are single hit, though the B version has slower startup and the skull travels faster.
- Can hit hopping opponents, but will miss rolling or ducking opponents.
- Punishable on block from point blank, both A/B versions have the same recovery after throwing the skull.
- Decent zoning tool, knocks down and can combo into heavy pursuit, which can be confirmed if the opponent was hit while airborne.
- A strong option to hit predictable jumps with on the way down. Cancel from a backroll.
|
| AB
|
Damage
|
Guard
|
Cancel
|
Invul
|
Property
|
Level
|
| 2x7, 10
|
Mid
|
-
|
-
|
-
|
-
|
| Startup
|
Active
|
Recovery
|
Hit Adv
|
Backhit Adv
|
Block Adv
|
| 37
|
-
|
35
|
KD
|
KD
|
-4
|
- Slower startup than both A and B, but the skull hits up to 7 times and eats opposing projectiles.
- Because of its multi-hitting properties it does more chip damage and is safe on block.
- Only the last hit knocks down, so if the last hit whiffs the opponent may be left standing.
- Does much less damage against an airborne opponent, because only one hit out of 7 will connect.
- This version can not be reflected by the opponent (Gaira, Shizumaru, etc).
|
|
623S
Nanji, anten nyuumetsu seyo
623S
|
| A
|
Damage
|
Guard
|
Cancel
|
Invul
|
Property
|
Level
|
| 24
|
Mid
|
-
|
-
|
-
|
-
|
| Startup
|
Active
|
Recovery
|
Hit Adv
|
Backhit Adv
|
Block Adv
|
| 37
|
-
|
-
|
KD
|
KD
|
-18
|
- Levitate and dive attack.
- All versions put Amakusa at the top center of the screen and become active as soon as he reaches the top (when he stops moving).
- If no button is pushed, Amakusa will perform the Ankoku Otoshi followup after a specific amount of time. Good chipkill tool that is difficult to dodge or interrupt.
- At any time that Amakusa is levitating stationary, any S attack may be entered to perform the dive. If no button is pushed, Amakusa will dive after a set amount of time anyway.
- Autotargets the opponent's position, punishable on block.
- At any time that Amakusa is levitating stationary, the D button will cancel the attack and Amakusa will drop straight down without attacking. This can still be easily punished if the opponent waits for it.
|
|
214S
Tenshou Fuu'ou Jin
214S
|
| A/B
|
Damage
|
Guard
|
Cancel
|
Invul
|
Property
|
Level
|
| 26
|
High
|
-
|
-
|
Fixed damage
|
-
|
| Startup
|
Active
|
Recovery
|
Hit Adv
|
Backhit Adv
|
Block Adv
|
| 33
|
5
|
20
|
KD
|
KD
|
-21
|
- Ball-Drop.
- Amakusa's weapon falls vertically downwards from a set distance, the range depending on which strength is used.
- The A version creates the ball near Amakusa while the B version is almost at the same distance as 5B (though slightly closer to Amakusa than his 5B).
- This is an overhead (it cannot be blocked while crouching). Decent mixup tool with high risk but high reward, though difficult to space and highly risky against opponents who know their movement options well.
- The recovery can leave you open, but some characters can't meaningfully punish if you use the B version so it's spaced right in front of them (i.e. so they get hit if they approach).
- Punishable on block, with the same block disadvantage as the AB version and as his 5B.
|
| AB
|
Damage
|
Guard
|
Cancel
|
Invul
|
Property
|
Level
|
| 26
|
Low
|
-
|
-
|
Fixed damage
|
-
|
| Startup
|
Active
|
Recovery
|
Hit Adv
|
Backhit Adv
|
Block Adv
|
| 29
|
3
|
44
|
KD
|
KD
|
-21
|
- Portal Slam.
- This version creates a ground portal which hits low, though it has the same startup animation and voice line as A/B, which can make it useful as a mixup tool.
- The hit area of this is quite large, though it has very few active frames and is punishable on block.
- The recovery is significantly worse on this than it is on the A/B versions so whiffing this is extremely bad and liable to get you killed.
- It can be used as a risky poke at max range to catch the opponent out of their pokes/slides/runs/etc, though it is susceptible to hops and jumps.
- Has slightly faster startup than the A or B version, and because the hitbox is quite large, this can be comboed into from n.2AB for an extremely damaging combo.
|
|
236C
Oumagatoki
236C/214C (Unarmed OK)
|
| Damage
|
Guard
|
Cancel
|
Invul
|
Property
|
Level
|
| -
|
-
|
-
|
1-4f knees invincible,
While moving: hit invincible
|
-
|
-
|
| Startup
|
Active
|
Recovery
|
Hit Adv
|
Backhit Adv
|
Block Adv
|
| -
|
up to 37 frames total
|
-
|
-
|
-
|
-
|
- Sliding teleport (forwards/backwards).
- The direction of the input determines the direction of the teleport, with 236 teleporting forwards and 214 teleporting backwards.
- Amakusa will warp quickly along the ground a fixed distance or until he reaches a wall.
- He recovers instantly once he reaches his destination or touches a wall. This means the teleport cannot be punished by strikes or projectiles, though he can be forced to block upon recovering.
- Amakusa can be thrown (with either normal throws or command throws) during any part of this teleport.
- Has some partial lower body invulnerability on the first few frames, though it's only enough to avoid low kicks and the rare low-hitting slash.
- After the first few frames of startup he is invulnerable to physical attacks throughout the remainder of the teleport (but is still vulnerable to throws).
- This can be particularly useful to cancel a blocked attack into, though it does not guarantee safety.
|
|
623C
Kairetsu Shou
623C (Unarmed OK)
|
| Damage
|
Guard
|
Cancel
|
Invul
|
Property
|
Level
|
| -
|
Mid
|
-
|
-
|
-
|
-
|
| Startup
|
Active
|
Recovery
|
Hit Adv
|
Backhit Adv
|
Block Adv
|
| 8
|
42
|
???
|
KD
|
KD
|
???
|
- Bitch-slaps.
- The initial attack is a quick three-hit move that will catch the opponent on hit.
- The first part is mid at about waist level, the second is also mid at about head-level, and the third is a bit higher than head level.
- If any of the three attacks connect it will "catch" the opponent and reel them in slowly towards Amakusa for an auto-combo that does additional hits and damage.
- It should be noted that this vacuum affect will occur from anywhere on the screen and continue until the last hit of the auto-combo, regardless if the auto-combo is actually hitting the opponent or not.
- Can be used as an anti-air if timed so that the last slap is the one that is used to hit the opponent, mainly because the third slap is much higher than the other two (above Amakusa's head).
- Block disadvantage is relative to how many hits connect on block, since small characters can crouch under some parts of the move. Though generally speaking it's punishable on block, usually with an AB.
|
|
Weapon Flipping Technique
Kyoumei Jussatsu Jin
236CD
|
| Damage
|
Guard
|
Cancel
|
Invul
|
Property
|
Level
|
| 38
|
Mid
|
-
|
1-10f hit invincible,
20-33f above knees and throw invincible
|
-
|
-
|
| Startup
|
Active
|
Recovery
|
Hit Adv
|
Backhit Adv
|
Block Adv
|
| 20
|
14
|
11
|
KD
|
KD
|
-17
|
- Shoulder Check into Ball-Pop.
- The first 10 frames (during flash) are fully invulnerable, and the area above his knees is invincible from frames 20-33. As it doesn't hit until the 20th, between the 10th to 20th frame he is vulnerable.
- Can be used as an anti-air, plus the damage is quite nice.
- Novice players have a tendency to spam this, though meditating rage away tends to be more valuable for Amakusa.
- Punishable on block from closer distances, though the disadvantage can be reduced by connecting from a distance or meaty.
- It combos from your close medium slashes and n.2AB though connecting from too far will result in it being blocked. The mediums are especially finicky about spacing so if it's not at point blank it's not worth gambling on.
- Basically, try to combo this or use as anti-air or use from max distance, but don't try to blow through attacks with it and don't try it from point blank.
|
|
Combos
Normal
- (n.5A or n.2A or n.5B or n.2B or n.2AB) xx 623C
- Timing on n.5A and n.2A are tight, but it does work. n.5B version whiffs on some characters and n.2AB version works on wide characters only.
- Sometimes they get pushed out too far for the WFT to connect in time.
- ... xx 214AB 8BC
- ... xx 236CD/214CD
- WFT and Instant Kill can drop if n.2AB hits from its maximum distance, but that rarely happens.
- ... 623C
- ... (n.5A or n.2A) xx 623C
- 5 frame link.
Backhit
- Can link off of a backhit 66A into basically any normal attack. Especially handy when crossing under their jump.
- The Samsho 4 classic. Consistent link for good damage. Switches sides.
-
- Comboing into 214AB requires you cancel your normal ASAP, or it will get blocked. n.2B's slower startup works in its favor for this combo, because you have longer to input the 214AB before its cancel window occurs, in exchange for being a slightly tighter link.
- ... xx 236CD
- ... xx 214CD
Time slow
Strategies
Frame Data
| Move
|
Damage
|
Startup
|
Active
|
Total
|
Cancel
|
Weapon
Clash
|
Hit
Adv.
|
Backhit
Adv.
|
Block
Adv.
|
Guard
|
Notes
|
| 5A |
6 |
12 |
11 |
32 |
1~2(2) |
11(1) |
-10 |
-10 |
-15 |
Low |
Weak attack, Deflectable(weak)
|
| 5B |
12 |
21 |
14 |
49 |
1~2(2) |
- |
-10 |
-2 |
-21 |
High |
Medium attack, Deflectable(med)
|
| 5AB |
31 |
17 |
11 |
58 |
1~3(3) |
- |
-4 |
+6 |
-21 |
Mid |
Heavy attack, Deflectable(heavy)
|
| 2A |
7 |
11 |
8 |
28 |
1~5(5) |
- |
-7 |
-7 |
-12 |
Low |
Weak attack
|
| 2B |
11 |
9 |
7 |
32 |
1~5(5) |
- |
-5 |
+3 |
-18 |
Mid |
Medium attack, Deflectable(med)
|
| 2AB |
27 |
15 |
17 |
75 |
x |
- |
KD |
KD |
-55 |
Low |
Knockdown attack
|
| n.5A |
4 |
5 |
7 |
14 |
1~3(3 )/ 5~14(10) |
- |
+1 |
+1 |
-4 |
Mid |
Weak attack
|
| n.5B |
9 |
12 |
13 |
33 |
12~24(13) |
8~11(4) |
-3 |
+5 |
-18 |
Mid |
Medium attack, Deflectable(med)
|
| n.5AB |
28 |
18 |
19 |
53 |
1~4(4) |
17(1) |
+2 |
+12 |
-21 |
Mid |
Heavy attack, Deflectable(heavy)
|
| n.2A |
4 |
5 |
4 |
16 |
1~3(3) / 5~16(12) |
- |
-1 |
-1 |
-6 |
Mid |
Weak attack
|
| n.2B |
9 |
16 |
7 |
36 |
16~28(13) |
- |
-2 |
+6 |
-13 |
Mid |
Medium attack, Deflectable(med)
|
| n.2AB |
26 |
14 |
8 |
53 |
22~23(2) |
- |
-2 |
+8 |
-19 |
Mid |
Heavy attack, Deflectable(heavy)
|
| 5C |
6 |
9 |
13 |
29 |
1~6(6) |
- |
-16 (-2) |
+6 |
-15 |
Mid |
Medium attack
5-21f airborne
|
| 6C |
5 |
13 |
14 |
32 |
13~32(20) |
- |
-1 |
+7 |
-14 |
Low |
Medium attack
|
| 2C |
2 |
6 |
6 |
18 |
x |
- |
-2 |
-2 |
-7 |
Low |
Weak attack
|
| 3C |
7 |
7 |
8 |
40 |
1~4(4) |
- |
KD |
KD |
-28 |
Low |
Knockdown attack
|
| u.5C |
8 |
9 |
13 |
29 |
1~6(6) |
- |
-16 |
+6 |
-15 |
Mid |
Medium attack
|
| j.A |
7 |
8 |
11 |
30 |
x |
- |
-- |
-- |
-- |
High |
Weak attack, Deflectable(weak)
|
| j8.B |
11 |
4 |
21 |
38 |
x |
- |
-- |
-- |
-- |
High |
Medium attack, Deflectable(med)
|
| j7/9.B |
11 |
4 |
19 |
37 |
x |
- |
-- |
-- |
-- |
High |
Medium attack, Deflectable(med)
|
| j.AB |
24 |
12 |
9 |
47 |
x |
- |
-- |
-- |
-- |
High |
Heavy attack, Deflectable(heavy)
|
| j.C |
5 |
7 |
15 |
29 |
x |
- |
-- |
-- |
-- |
High |
Heavy attack
|
| ju.C |
5 |
7 |
15 |
29 |
x |
- |
-- |
-- |
-- |
High |
Heavy attack
|
| 5BC |
16 |
20 |
3 |
41 |
x |
- |
KD |
KD |
-15 |
High |
Medium attack Knockdown attack
|
| u.5BC |
8 |
22 |
11 |
48 |
x |
- |
KD |
KD |
-20 |
High |
Medium attack Knockdown attack
|
| 66A |
7 |
6 |
8 |
33 |
1~5(5) |
- |
+10 |
+20 |
-22 |
Mid |
Heavy attack
|
| 66B |
13 |
14 |
6 |
26 |
1~4(4) / 9~11(3) |
- |
KD |
KD |
-7 |
High |
Medium attack Knockdown attack
|
| 66AB |
20 |
19 |
6 |
76 |
x |
- |
KD |
KD |
-52 |
Mid |
Knockdown attack
1-14f above knees invincible
|
| 66C |
6 |
10 |
12 |
36 |
1~4(4) |
- |
KD |
KD |
-21 |
Low |
Knockdown attack
|
| u.5S |
4, 4 |
6, 12 |
3, 3 |
24 |
1~4(4) |
- |
-2 |
-2 |
-6 |
Mid |
Weak attack
|
| u.2S |
4, 4 |
7, 13 |
3, 6 |
24 |
1~4(4) |
- |
-1 |
-1 |
-5 |
Mid |
Weak attack
|
| ju.S |
8 |
8 |
5 |
14 |
x |
- |
-- |
-- |
-- |
High |
Medium attack
|
| u.66S |
7 |
5 |
19 |
33 |
1~5(5) |
- |
KD |
KD |
-22 |
Mid |
Knockdown attack
|
| u.66C |
6 |
10 |
12 |
36 |
1~4(4) |
- |
KD |
KD |
-21 |
Low |
Knockdown attack
|
| 2BC |
5 |
13 |
11 |
27 |
26~27(2) |
- |
-- |
-- |
-- |
Mid |
|
| u.2BC |
5 |
13 |
11 |
27 |
26~27(2) |
- |
-- |
-- |
-- |
Mid |
|
| 8BC |
14 |
39 |
3 |
71 |
45~67(23) |
- |
-- |
-- |
-- |
Mid |
|
| u.8BC |
8 |
24 |
18 |
79 |
x |
- |
-- |
-- |
-- |
Mid |
|
| Shiryouha - 236A |
11 |
28 |
x |
59 |
x |
- |
KD |
KD |
-19 |
Mid |
Knockdown attack
|
| Shiryouha - 236B |
11 |
33 |
x |
64 |
x |
- |
KD |
KD |
-19 |
Mid |
Knockdown attack
|
| Shiryouha - 236AB |
2x7, 10 |
37 |
x |
71 |
x |
- |
KD |
KD |
-4 |
Mid |
Knockdown attack
|
| Nanji ... - 623S |
24 |
37 |
x |
x |
x |
- |
KD |
KD |
-18 |
Mid |
Knockdown attack
maximum startup time 101f
|
| Tenshou Fuu'ou Jin - 214A/B |
26 |
33 |
5 |
58 |
x |
- |
KD |
KD |
-21 |
High |
Medium attack
|
| Tenshou Fuu'ou Jin - 214AB |
26 |
29 |
3 |
76 |
x |
- |
KD |
KD |
-21 |
Low |
|
| Oumagatori - 236C/214C |
x |
x |
x |
37 |
x |
- |
x |
x |
x |
x |
1-4f knees invincible
while moving: hit invincible
|
| Kairetsu Shou - 623C |
23 |
8 |
42 |
58 |
x |
- |
KD |
KD |
?? |
Mid |
|
| Kyoumei Jussatsu Jin - 236CD |
38 |
20 |
14 |
45 |
x |
- |
KD |
KD |
-17 |
Mid |
1-10f hit invincible
20-33f above knees and throw invincible
|


