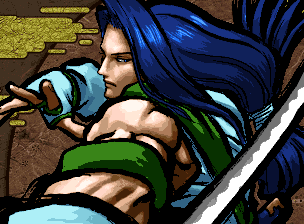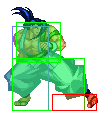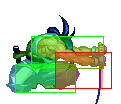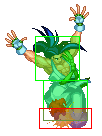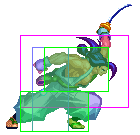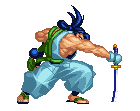
風間 蒼月, Kazama Sogetsu

Colors
Introduction
No time for you.
Good pokes and block recoil mixups, very long range slashes, and a surprisingly fast dash speed. His bubbles and spouts let him control space in unique ways. The problem is that he's a zoning character who's not extremely good at zoning since all of his special moves are heavily punishable, and a decent amount of characters have moves that allow them to just bypass his zoning tools. He's also pretty bad at forcing damage. If your opponent plays a very defensive or patient style, your special moves become a lot less dangerous and dash mixups with 66B, 66C and grabs are pretty much all you're left with (and even then they don't lead to a ton of damage). If your opponent takes the life lead, you'll have a hard time catching up.
| Strengths |
Weaknesses
|
- 2AB is an amazingly long range low hit.
- Bubble is one of the only static projectiles in the game and a great tool for controlling space.
- Pretty much everything has recoil cancel on block, so it's hard to know if he'll do anything.
- Good at turtling up and sitting on a lead.
|
- Bad at forcing damage, has a much more difficult fight when he's behind.
- His jump is painfully slow, easily run under, making it only really practical from a walljump.
- Literally all of his specials are punishable on reaction. Even bubble needs a setup to get out safely.
- Subpar antiair means he has to keep the opponent out in other ways.
- One of the worst WFTs in the game.
|
Data
- Damage taken: 110%
- Rage duration: 9 seconds
- Amount to rage: 27
- Walk speed: 416
- Backwalk speed: 336
- Dash speed: 1792
- Jump duration: 54 frames
- Width: 16
- Throw range: 8
- Throw recovery: 50 frames
- Tier placing: C
Normals
Far Slashes
5A
5A
|
| Damage
|
Guard
|
Cancel
|
Invul
|
Property
|
Level
|
| 4
|
Mid
|
1(1) / 5~15(11)
|
-
|
-
|
Weak
|
| Startup
|
Active
|
Recovery
|
Hit Adv
|
Backhit Adv
|
Block Adv
|
| 5
|
2
|
12
|
-4
|
-4
|
-9
|
|
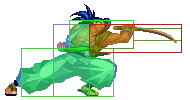
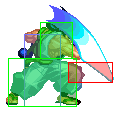
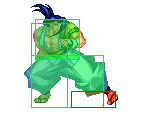
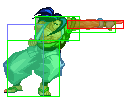
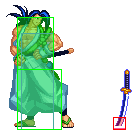
Awesome slap is awesome. Don't underestimate the hitbox on this thing, it's an all-purpose poke that functions as both a spacing tool and an antiair. It's not very good for pushback or ticking thanks to it being -9 on block, but its hitbox really helps. Strangely, this whiffs against a good number of the cast when they are crouching (Basara, Enja, Haohmaru, Kazuki, Mina, Nakoruru, Rera, Rimururu, Shizumaru, Sogetsu himself, and Yunfei, to be exact). Use 2A for that instead.
|
|
5B
5B
|
| Damage
|
Guard
|
Cancel
|
Invul
|
Property
|
Level
|
| 12
|
Mid
|
1~2(2) / 34(1)
|
-
|
Deflectable (Medium)
Recoil Cancel
Weapon Clash 9~10(2)
|
Medium
|
| Startup
|
Active
|
Recovery
|
Hit Adv
|
Backhit Adv
|
Block Adv
|
| 11
|
2
|
21
|
-5
|
+3
|
-13
|
|
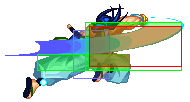
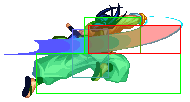
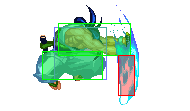
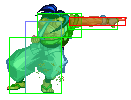
Sogetsu leans way forward and slices. This is an amazingly long range poke. However, unless you need the higher hitbox, you should be using 2B instead as it recovers quite a bit faster and doesn't have any confusion with n.5B.
|
|
5AB
5AB
|
| Damage
|
Guard
|
Cancel
|
Invul
|
Property
|
Level
|
| 28
|
Mid
|
1(1)
|
-
|
Knockdown
|
Heavy
|
| Startup
|
Active
|
Recovery
|
Hit Adv
|
Backhit Adv
|
Block Adv
|
| 19
|
4
|
27
|
KD
|
KD
|
-26
|
|
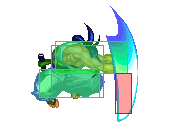
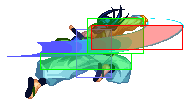
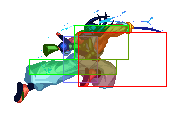
Very fast forward dash that ends with an upper body slash. Hits surprisingly far, does great damage, and comes out fast for what it is, but is ridiculously punishable on block. Because Sogetsu himself moves along with it, you tend to get smacked if you try to use it as antiair if they haven't used up their attack yet. You'd think it would be a good punisher, and it would be, if 2AB weren't better at it in every way. Use that instead. Wallslams on hit, so you have plenty of time to recover, though you can't do any pursuits.
|
|
2A
2A
|
| Damage
|
Guard
|
Cancel
|
Invul
|
Property
|
Level
|
| 4
|
Mid
|
1~2(2) / 5~14(10)
|
-
|
-
|
Weak
|
| Startup
|
Active
|
Recovery
|
Hit Adv
|
Backhit Adv
|
Block Adv
|
| 5
|
2
|
11
|
-3
|
-3
|
-8
|
|
Same as 5A, but with a lower hitbox. Recovers one frame faster so it's slightly better for spacing, and it will hit everybody crouching. Useless at catching jumps/hops though.
|
|
2B
2B
|
| Damage
|
Guard
|
Cancel
|
Invul
|
Property
|
Level
|
| 12
|
Mid
|
1~3(3)
|
-
|
Deflectable (Medium)
Recoil Cancel
|
Medium
|
| Startup
|
Active
|
Recovery
|
Hit Adv
|
Backhit Adv
|
Block Adv
|
| 12
|
2
|
14
|
+2
|
+10
|
-13
|
|
A good ranged mid-height slice, this one is your best midrange normal. Damage is nice, recovers faster than 5B on whiff, lets you cancel into 623 or deflect on block. Overall it's just a really good move for spacing and keeping the opponent off of you.
|
|
2AB
2AB
|
| Damage
|
Guard
|
Cancel
|
Invul
|
Property
|
Level
|
| 29
|
Low
|
1~4(4)
|
-
|
Knockdown
|
Heavy
|
| Startup
|
Active
|
Recovery
|
Hit Adv
|
Backhit Adv
|
Block Adv
|
| 14
|
2
|
36
|
KD
|
KD
|
-26
|
|
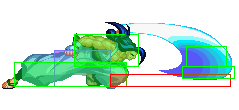
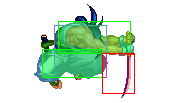
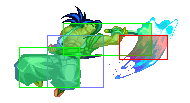
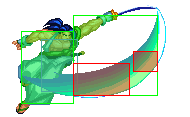
Extremely long range low sweep that comes out very quickly, does the most damage of any non-WFT attack Sogetsu has. It is very bad for you on whiff, can be hopped over, and any jump attack on you leads to a free deep hit. On block you can recoil cancel it, so tossing out a spout makes it difficult to punish at long range. Still, this is the best punisher Sogetsu has, so you should use it every time the opponent has left himself open for it. This is a great whiff punisher, if you see the opponent throw something out that misses don't hesitate to throw this out.
|
|
Near Slashes
n.5A
n.5A
|
| Damage
|
Guard
|
Cancel
|
Invul
|
Property
|
Level
|
| 4
|
Mid
|
1(1) / 5~15(11)
|
-
|
-
|
Weak
|
| Startup
|
Active
|
Recovery
|
Hit Adv
|
Backhit Adv
|
Block Adv
|
| 5
|
2
|
12
|
-4
|
-4
|
-9
|
|
Exactly the same as 5A. Godlike.
|
|
n.5B
n.5B
|
| Damage
|
Guard
|
Cancel
|
Invul
|
Property
|
Level
|
| 8
|
Mid
|
13~35(23)
|
-
|
Deflectable (Medium)
Recoil Cancel
Weapon Clash 11~12(2)
|
Medium
|
| Startup
|
Active
|
Recovery
|
Hit Adv
|
Backhit Adv
|
Block Adv
|
| 13
|
2
|
22
|
-6
|
+2
|
-13
|
|
Sogetsu's only comboable normal, going into either 623A or 236CD. Despite this, it's not advisable to use this for punishes, since 2AB does more damage than either. It is a good way of landing your WFT if you need to disarm the opponent, though, so if you get the chance and you don't need the damage instead, go for it. One use for it, since it has recoil cancel on block, is to Option Select it. If you input n.5B 623A fast enough, it will cancel on hit or whiff but not on block, so it will catch them if they get hit or jump. Then on block you can do whatever. However, if you're close enough to be in range for this, you should be worried about characters that can punish quickly since the recoil period is somewhat late.
|
|
n.5AB
n.5AB
|
| Damage
|
Guard
|
Cancel
|
Invul
|
Property
|
Level
|
| 28
|
Mid
|
1(1)
|
-
|
Deflectable (Heavy)
|
Heavy
|
| Startup
|
Active
|
Recovery
|
Hit Adv
|
Backhit Adv
|
Block Adv
|
| 17
|
3
|
34
|
0
|
+10
|
-32
|
|
Like a 5AB except you stand still. It comes out slow. This move has very few uses, since 2AB still comes out faster and still does more damage. Due to its range it's not even good as antiair. Avoid using this whenever possible.
|
|
n.2A
n.2A
|
| Damage
|
Guard
|
Cancel
|
Invul
|
Property
|
Level
|
| 4
|
Mid
|
1~2(2) / 5~14(10)
|
-
|
-
|
Weak
|
| Startup
|
Active
|
Recovery
|
Hit Adv
|
Backhit Adv
|
Block Adv
|
| 5
|
2
|
11
|
-3
|
-3
|
-8
|
|
Same as 2A.
|
|
n.2B
n.2B
|
| Damage
|
Guard
|
Cancel
|
Invul
|
Property
|
Level
|
| 12
|
Mid
|
1~3(3)
|
-
|
Deflectable (Medium)
Recoil Cancel
|
Medium
|
| Startup
|
Active
|
Recovery
|
Hit Adv
|
Backhit Adv
|
Block Adv
|
| 12
|
2
|
14
|
+2
|
+10
|
-13
|
|
Same as 2B. Godlike.
|
|
n.2AB
n.2AB
|
| Damage
|
Guard
|
Cancel
|
Invul
|
Property
|
Level
|
| 29
|
Low
|
1~4(4)
|
-
|
Knockdown
|
Heavy
|
| Startup
|
Active
|
Recovery
|
Hit Adv
|
Backhit Adv
|
Block Adv
|
| 14
|
2
|
36
|
KD
|
KD
|
-26
|
|
Same as regular 2AB.
|
|
Overheads
5BC
5BC
|
| Damage
|
Guard
|
Cancel
|
Invul
|
Property
|
Level
|
| 15
|
High
|
-
|
-
|
Knockdown
|
Medium
|
| Startup
|
Active
|
Recovery
|
Hit Adv
|
Backhit Adv
|
Block Adv
|
| 20
|
2
|
16
|
KD
|
KD
|
-12
|
|
Medium range overhead. Kind of slow, but recovers faster than most so it's harder to punish on block. Best used for its strangely high tech jump.
|
|
u.5BC
u.5BC
|
| Damage
|
Guard
|
Cancel
|
Invul
|
Property
|
Level
|
| 7
|
High
|
-
|
-
|
Knockdown
|
Medium
|
| Startup
|
Active
|
Recovery
|
Hit Adv
|
Backhit Adv
|
Block Adv
|
| 20
|
6
|
15
|
KD
|
KD
|
-15
|
|
An incredibly slow looking jump kick. Poor range and worse on block. Avoid using this.
|
|
Kicks
5C
5C
|
| Damage
|
Guard
|
Cancel
|
Invul
|
Property
|
Level
|
| 6
|
Mid
|
1~9(9)
|
1-13F throw invincible
|
-
|
-
|
| Startup
|
Active
|
Recovery
|
Hit Adv
|
Backhit Adv
|
Block Adv
|
| 14
|
4
|
12
|
+2
|
+10
|
-11
|
|
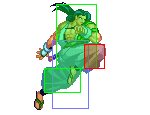
This kick is pretty awesome. It advances you slightly and evades all throws. On block it's not so great, but because of its throw protection and hitbox a great all purpose close range tool.
|
|
6C
6C
|
| Damage
|
Guard
|
Cancel
|
Invul
|
Property
|
Level
|
| 6
|
Low
|
1~4(4)
|
-
|
-
|
-
|
| Startup
|
Active
|
Recovery
|
Hit Adv
|
Backhit Adv
|
Block Adv
|
| 20
|
2
|
1
|
+15
|
+23
|
+2
|
|
Slow startup, but massive frame advantage on hit, so you can link off of it into n.5B, 623A, or 2AB. Difficult to confirm, though, so be careful.
|
|
2C
2C
|
| Damage
|
Guard
|
Cancel
|
Invul
|
Property
|
Level
|
| 2
|
Low
|
1~2(2) / 5~17(13)
|
-
|
-
|
-
|
| Startup
|
Active
|
Recovery
|
Hit Adv
|
Backhit Adv
|
Block Adv
|
| 5
|
2
|
14
|
-6
|
-6
|
-11
|
|
Comes out as fast as 5A/2A, but hits low and is worse on recovery.
|
|
3C
3C
|
| Damage
|
Guard
|
Cancel
|
Invul
|
Property
|
Level
|
| 7
|
Low
|
-
|
-
|
Knockdown
|
-
|
| Startup
|
Active
|
Recovery
|
Hit Adv
|
Backhit Adv
|
Block Adv
|
| 18
|
9
|
20
|
KD
|
KD
|
-24
|
|
Very long range low slide. Startup is long but hard to react to. At maximum range it's still not too great on block, but because there's basically no hitstop they might not be able to react in time to punish.
|
|
Jumping
8A
8A
|
| Damage
|
Guard
|
Cancel
|
Invul
|
Property
|
Level
|
| 7
|
High
|
-
|
-
|
Deflectable (Light)
|
Weak
|
| Startup
|
Active
|
Recovery
|
Hit Adv
|
Backhit Adv
|
Block Adv
|
| 4
|
18
|
7
|
-
|
-
|
-
|
|
Sogetsu holds his sword in front of him, pointing straight down. It doesn't do much damage, but it comes out almost instantly and has a ton of active frames. Air to air it stuffs a surprising amount of stuff, and during time slow or against tall characters you can use this as an instant overhead. Without time slow, it is punishable on hit if you use it on the way up, so be careful about that.
|
|
8B
8B
|
| Damage
|
Guard
|
Cancel
|
Invul
|
Property
|
Level
|
| 11
|
High
|
-
|
-
|
Deflectable (Medium)
|
Medium
|
| Startup
|
Active
|
Recovery
|
Hit Adv
|
Backhit Adv
|
Block Adv
|
| 14
|
4
|
5
|
-
|
-
|
-
|
|
The slower, more damaging and less active version of 8A. Pretty meh, there is not much reason to use this.
|
|
j.A
j.A
|
| Damage
|
Guard
|
Cancel
|
Invul
|
Property
|
Level
|
| 5
|
High
|
-
|
-
|
-
|
Weak
|
| Startup
|
Active
|
Recovery
|
Hit Adv
|
Backhit Adv
|
Block Adv
|
| 6
|
10
|
7
|
-
|
-
|
-
|
|
Air to air slap. Has a lot of active frames and it's good at beating things out, but Sogetsu's jump arc means you land at neutral. Has more hitstop than you'd expect, so use j.C for jumpins instead.
|
|
j.B
j.B
|
| Damage
|
Guard
|
Cancel
|
Invul
|
Property
|
Level
|
| 11
|
High
|
-
|
-
|
Deflectable (Medium)
|
Medium
|
| Startup
|
Active
|
Recovery
|
Hit Adv
|
Backhit Adv
|
Block Adv
|
| 7
|
2
|
23
|
-
|
-
|
-
|
|
Not many active frames, but good range and damage. Can be a good anti-air when used with a back jump.
|
|
j.AB
j.AB
|
| Damage
|
Guard
|
Cancel
|
Invul
|
Property
|
Level
|
| 25
|
High
|
-
|
-
|
Deflectable (Heavy)
|
Heavy
|
| Startup
|
Active
|
Recovery
|
Hit Adv
|
Backhit Adv
|
Block Adv
|
| 14
|
2
|
31
|
-
|
-
|
-
|
|
Look at the size of that thing! Hits in a wide arc in front of Sogetsu for large damage. This move is a great all-purpose jumpin when spaced out properly. Abuse liberally. Air to air it's best on neutral jumps, since doing it on anticipation in a forward jump tends to leave you unsafe.
|
|
j.C
j.C
|
| Damage
|
Guard
|
Cancel
|
Invul
|
Property
|
Level
|
| 6
|
High
|
-
|
-
|
-
|
Medium
|
| Startup
|
Active
|
Recovery
|
Hit Adv
|
Backhit Adv
|
Block Adv
|
| 6
|
8
|
5
|
-
|
-
|
-
|
|
Deceptively long range mid-height kick. Good active frames, almost no hitstop, making it a good reset and anti-throw jumpin.
|
|
Dashing
66A
66A
|
| Damage
|
Guard
|
Cancel
|
Invul
|
Property
|
Level
|
| 4
|
Mid
|
1~6(6)
|
-
|
-
|
Weak
|
| Startup
|
Active
|
Recovery
|
Hit Adv
|
Backhit Adv
|
Block Adv
|
| 15
|
7
|
5
|
-2
|
-2
|
-7
|
|
Dashing slap. Comes out real slow, but recovers pretty quick. Not useful for much, especially since it pushes you out of tick throw range.
|
|
66B
66B
|
| Damage
|
Guard
|
Cancel
|
Invul
|
Property
|
Level
|
| 12
|
High
|
-
|
-
|
Knockback (resets)
|
Medium
|
| Startup
|
Active
|
Recovery
|
Hit Adv
|
Backhit Adv
|
Block Adv
|
| 20
|
5
|
16
|
KD
|
KD
|
-16
|
|
This is an interesting move. Starts kind of slow, is easy to react to, and is punishable on block, but knocks back the opponent for a reset, which lets you setup another mixup. Try to space it out and vary the timing wildly so they can't react to the dash itself. In time slow, you can juggle from this into Issen (against most characters; see 'Combos' section) or j.AB loop for an un-burstable combo.
|
|
66AB
66AB
|
| Damage
|
Guard
|
Cancel
|
Invul
|
Property
|
Level
|
| 16
|
Mid
|
1~6(6)
|
-
|
Knockdown
|
Heavy
|
| Startup
|
Active
|
Recovery
|
Hit Adv
|
Backhit Adv
|
Block Adv
|
| 13
|
4
|
35
|
-
|
-
|
-34
|
|
Like n.5AB, only dashing and knocks down. This move is almost useless except as crossunder antiair. You do not want them blocking this as it is ridiculously punishable. Might be useful to bait out movement that reacts to Sogetsu's dash.
|
|
66C
66C
|
| Damage
|
Guard
|
Cancel
|
Invul
|
Property
|
Level
|
| 5
|
Low
|
1~4(4)/26~31(6)
|
-
|
Knockdown
|
-
|
| Startup
|
Active
|
Recovery
|
Hit Adv
|
Backhit Adv
|
Block Adv
|
| 8
|
14
|
9
|
-
|
-
|
-18
|
|
Fast low sweep that combos into 8BC. Useful, but not safe on block. Use with caution.
|
|
Unarmed
u.5S
u.5S
|
| Damage
|
Guard
|
Cancel
|
Invul
|
Property
|
Level
|
| 4
|
Mid
|
1(1)
|
-
|
-
|
Weak
|
| Startup
|
Active
|
Recovery
|
Hit Adv
|
Backhit Adv
|
Block Adv
|
| 5
|
2
|
12
|
-4
|
-4
|
-9
|
|
Same as 5A, without the cancel window.
|
|
u.2S
u.2S
|
| Damage
|
Guard
|
Cancel
|
Invul
|
Property
|
Level
|
| 4
|
Mid
|
1~2(2)
|
-
|
-
|
Weak
|
| Startup
|
Active
|
Recovery
|
Hit Adv
|
Backhit Adv
|
Block Adv
|
| 5
|
2
|
12
|
-4
|
-4
|
-9
|
|
Same as 2A, without the cancel window and one frame slower on recovery.
|
|
ju.S
ju.S
|
| Damage
|
Guard
|
Cancel
|
Invul
|
Property
|
Level
|
| 4
|
High
|
-
|
-
|
-
|
Weak
|
| Startup
|
Active
|
Recovery
|
Hit Adv
|
Backhit Adv
|
Block Adv
|
| 6
|
10
|
7
|
-
|
-
|
-
|
|
Same as jA.
|
|
u.66S
u.66S
|
| Damage
|
Guard
|
Cancel
|
Invul
|
Property
|
Level
|
| 4
|
Mid
|
1~6(6)
|
-
|
Knockdown
|
Weak
|
| Startup
|
Active
|
Recovery
|
Hit Adv
|
Backhit Adv
|
Block Adv
|
| 15
|
7
|
5
|
KD
|
KD
|
-7
|
|
Same move as 66A, only it knocks down now.
|
|
Pursuit
2BC
2BC
|
| Damage
|
Guard
|
Cancel
|
Invul
|
Property
|
Level
|
| 5
|
-
|
-
|
-
|
-
|
-
|
| Startup
|
Active
|
Recovery
|
Hit Adv
|
Backhit Adv
|
Block Adv
|
| 18
|
3
|
7
|
-
|
-
|
-
|
|
Small Pursuit.
|
|
u.2BC
u.2BC
|
| Damage
|
Guard
|
Cancel
|
Invul
|
Property
|
Level
|
| 5
|
-
|
-
|
-
|
-
|
-
|
| Startup
|
Active
|
Recovery
|
Hit Adv
|
Backhit Adv
|
Block Adv
|
| 18
|
3
|
7
|
-
|
-
|
-
|
|
Unarmed Small Pursuit, no difference to the armed version.
|
|
8BC
8BC
|
| Damage
|
Guard
|
Cancel
|
Invul
|
Property
|
Level
|
| 12
|
-
|
-
|
-
|
-
|
-
|
| Startup
|
Active
|
Recovery
|
Hit Adv
|
Backhit Adv
|
Block Adv
|
| 39
|
2
|
31
|
-
|
-
|
-
|
|
Big Pursuit. You can combo into this from 66C. Can also be used to get extra damage after a backhit 623A, or if your opponent jumps and lands on a bubble.
|
|
u.8BC
u.8BC
|
| Damage
|
Guard
|
Cancel
|
Invul
|
Property
|
Level
|
| 8
|
-
|
68~72(5)
|
-
|
-
|
-
|
| Startup
|
Active
|
Recovery
|
Hit Adv
|
Backhit Adv
|
Block Adv
|
| 39
|
2
|
31
|
-
|
-
|
-
|
|
Unarmed Big Pursuit. Same frames as the armed version, but lower damage.
|
|
System
Deflect
Deflect 216D 216D
|
| Damage
|
Guard
|
Cancel
|
Invul
|
Property
|
Level
|
| -
|
-
|
-
|
-
|
-
|
-
|
| Startup
|
Active
|
Recovery
|
Hit Adv
|
Backhit Adv
|
Block Adv
|
| -
|
-
|
-
|
-
|
-
|
-
|
|
Above average range deflect that covers a wide arc.
|
|
Weapon Pickup
Weapon Pickup u.5A u.5A
|
| Damage
|
Guard
|
Cancel
|
Invul
|
Property
|
Level
|
| -
|
-
|
-
|
-
|
-
|
-
|
| Startup
|
Active
|
Recovery
|
Hit Adv
|
Backhit Adv
|
Block Adv
|
| -
|
-
|
-
|
-
|
-
|
-
|
|
One of the fastest weapon pickups in the game.
|
|
Taunt Disarm
Taunt Disarm 3 x Start 3 x Start
|
| Damage
|
Guard
|
Cancel
|
Invul
|
Property
|
Level
|
| -
|
-
|
-
|
-
|
-
|
-
|
| Startup
|
Active
|
Recovery
|
Hit Adv
|
Backhit Adv
|
Block Adv
|
| -
|
-
|
-
|
-
|
-
|
-
|
|
Quickly disarms. Hilariously, this actually hits opponents who are knocked onto the ground. Won't combo from anything without time slow, though.
|
|
Specials
Gekkou
Gekkou 623S 623S
|
| Damage
|
Guard
|
Cancel
|
Invul
|
Property
|
Level
|
| 19
|
Mid
|
-
|
-
|
Knockdown
|
-
|
| Startup
|
Active
|
Recovery
|
Hit Adv
|
Backhit Adv
|
Block Adv
|
| 18
|
20
|
18
|
KD
|
KD
|
-25
|
|
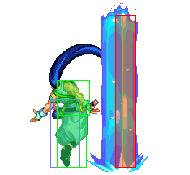
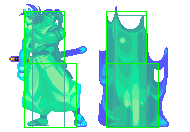
Water spout that pops up a fixed distance away from Sogetsu. Strength of the slash determines the range, everything else remains the same.
Speed is kind of slow, but it's solid antiair and good for placing walls in front of dashes. Recovery is slow, so if it whiffs or is blocked immediately you're getting punished.
If it whiffs, it's actually safer than if it's blocked, because it has a ton of active frames. Try to get the opponent to run into it rather than forcing them to block it.
|
|
Fuzuki
Fuzuki 236S 236S
|
| Damage
|
Guard
|
Cancel
|
Invul
|
Property
|
Level
|
| 5
|
Mid
|
-
|
-
|
-
|
-
|
| Startup
|
Active
|
Recovery
|
Hit Adv
|
Backhit Adv
|
Block Adv
|
| 60
|
112
|
5
|
+56
|
+56
|
+7
|
|
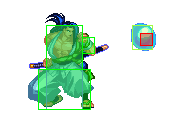
Bubble that appears a fixed distance away from Sogetsu. Strength of the slash determines the range. The animation for this is VERY slow, so you need a knockdown, be at maximum distance, or to have the opponent do something very carelessly slow in order to get it out. This is the main reason for doing 623S instead of 2AB as a punisher, since it will give you more time to get it out. If you hold the slash button, you can move the bubble around with the stick. This is sometimes useful for blocking annoying jumpins or lows.
The famous gimmick is placing a bubble behind the opponent, and then rage exploding to push them back into the bubble, opening them up for a free 2AB or WFT. This is an unblockable combo. If you knock the opponent down and do it against a forward roll, this is inescapable.
|
|
Tsuki-Gakure
Tsuki-Gakure 214S 214S
|
| Damage
|
Guard
|
Cancel
|
Invul
|
Property
|
Level
|
| -
|
-
|
-
|
-
|
-
|
-
|
| Startup
|
Active
|
Recovery
|
Hit Adv
|
Backhit Adv
|
Block Adv
|
| -
|
-
|
-
|
-
|
-
|
-
|
|
Teleport that comes in three variations. Not too useful overall, since neither startup nor recovery are completely safe, and all of these fail to get you away from your opponent when you're in the corner.
- 214A: Teleports you about 3/4 of a screen away from the opponent. Puts you at exactly 623AB range. This is the one you'll want to be using the most, especially since people tend to flinch against teleport in general, allowing you to setup a 623S. Note that this one always teleports you away from where the opponent is facing, which is why it does effectively nothing if you use it while cornered, and also why you switch sides if you ever use it while your opponent has your back turned on you, like after a successful 5AB.
- 214B: Teleports to right in front of them.
- 214AB: Teleports right behind them. The animation takes awhile and it's easily thrown, so this isn't a good idea to use without a read, but you can use it to get behind slow moves. If someone's literally mashing out throw you can 214A and 623AB them for it.
|
|
Shouha: Fuugetsu Zan
Shouha: Fuugetsu Zan 236CD 236CD
|
| Damage
|
Guard
|
Cancel
|
Invul
|
Property
|
Level
|
| 1x8+30
|
Mid
|
-
|
-
|
Knockdown, Disarm
|
-
|
| Startup
|
Active
|
Recovery
|
Hit Adv
|
Backhit Adv
|
Block Adv
|
| 20
|
-
|
-
|
KD
|
KD
|
-95
|
|
One of the worst WFTs in the game. Starts up slow, doesn't hit as far as you would expect, surprisingly long period between slashes, can be rage exploded, and since it's multihit the damage is weak. Because of its speed it is rarely useful as a punish, unless you can get it to combo from an n.5B.
If you really need that weapon disarm and they can't/won't rage explode, go for it. For the most part, it's junk.
Strangely, it can be deflected between blocked hits. Be careful of anyone who knows this.
|
|
Combos
Normal
- This does less damage than a 2AB and comes out only one frame faster, so most of the time you will not want to do this.
- The main benefit is that they take more time to land from 623S than from 2AB, so you have more time to do a wakeup setup. This is a good way to get a bubble out.
- The only way to combo into his WFT. If you're close enough to punish with it, you might as well, because you're not landing that any other way.
- 2BC followup only works in the corner.
- Bubble stun is nice, but how do you follow it up best?
- An obvious one. This is the highest damage you can get from the ground.
- One of the only ways to reliably land WFT,
- If someone jumps on a bubble, they can be juggled for a short time afterwards. 5AB is your best bet for hitting them.
- The infamous unblockable setup. The 236S is actually not the first hit: You put the bubble a short distance behind the opponent, and then rage explode in front of them. Rage explosion is unblockable and pushes them backwards into the bubble for further comboing. Since you've got the bonus explosion damage, the followup 2AB really, really hurts.
- Dashing low. Decent damage, good mixup with 66B or dash up throw.
- Standing low that links into Sogetsu's best combo starters. Difficult to land, though you might try it as okizeme.
Time slow
- 66B is an overhead, and sets up a combo that can't be rage exploded from. If you don't think Issen damage will be enough, or managed to land it on the mixup, this is a good combo to use.
- The timing on this can be tricky, spend some time in practice mode for it. The first j.AB has to be done instantly off the jump.
- Not burstable. This works on some of the cast. Many of them will just flop out, though, and you have to be fast.
- Confirmed invalid on: Charlotte, Haohmaru, Jubei, Tam Tam, Yoshitora, Yunfei
- Not burstable. This works on some of the cast.
- Confirmed invalid on: Galford, Hanzo, Haohmaru, Jubei, Kusaregedo, Tam Tam, Yoshitora, Yunfei
- The usual for when you can't wait for them to come down for an Issen.
Strategies
- Sogetsu has a speedy dash, but his dashing attacks have very poor range, so there is not as much benefit to the speed as you'd hope. His jumping movement is mindnumbingly slow and not suited to giving chase. These two can be a serious handicap in certain matchups.
- If you want to run a close up mixup, your goal here is to get into a range where they can't react to dash startup easily, so they're less willing to sit still against anything you could do. This is roughly about the range of 2B, which is good for you. Sogetsu's pokes are really strong, particularly 5A and 2B.
- 236S bubbles make great cover for closing the gap safely, if you can get them out. Don't use them unless you're far away or got a far knockdown. They take forever to come out and recover from, usually leaving you wide open.
- 2AB is an omnipresent threat, since it can quickly and efficiently punish any whiffed attacks nearly anywhere, but it shouldn't be used carelessly. It's low enough to the ground that it can be hopped over, and since it takes forever to recover from many characters can punish on block or pre-emptively jump it. It's a good tool to get the opponent to want to jump, which leaves him open to 623S, but unless you have a good read you shouldn't toss it out randomly.
- 3C range is enormous and deceptively fast. Learning the maximum range on this one is good, since you can use it to setup knockdowns or prevent the opponent from setting up his own pressure. It is not terribly safe on block, even at furthest range, but since there is almost no hitstop they might not react fast enough to punish.
- His rage balance is strongly balanced towards meditation, and it's highly recommended that you go that way because he is bad at forcing damage and his WFT is pretty much garbage.
Dash shenanigans
- Off of a dash, Sogetsu has a few options.
- 66B: Overhead. Comes out very slowly so people can react to the jump. When it hits, it sets up a reset instead of a knockdown, so you should immediately go into another mixup.
- 66C: Slide kick. Combos into 8BC easily, not safe on block, but comes out very quickly.
- 4/6CD: Throw. Sogetsu has one of the crappiest throw ranges in the game, so he needs to get literally right up in their face for this.
- 6D 4/6CD: Hop throw. This doesn't sound different, but it is. Since 66B sends Sogetsu into the air, most people will try reacting to that when blocking high. If you do this instead they'll block, which means your throw will land.
- 1D 623S: Backroll confirmed into spout. If you expect the opponent to react with a jump or other move this is a good option.
- Since Sogetsu has to literally get right up in their face to throw, you can do one of these attacks late in order to catch anti-throw actions.
- The weak point here is the slowness of the overhead. In online play it's more effective, but offline it's borderline useless except for setting up time slow combos, which limits the strength of this mixup.
Damage and Defense
- Punishers:
- 2AB - Use this to punish, well, everything. He has nothing faster that does good damage.
- n.5B 236CD - Only way to combo into the WFT, use it if you get the opportunity.
- 236CD - This is NOT as fast as it looks. Only punish near stuff with it.
- Antiair:
- 5A - This stupid looking poke actually has a godly hitbox for beating out attacks.
- 623S - The startup on this is really slow and takes time to hit up top, so it's not recommended to do on reaction against fast jumpers.
- 66AB - Crossunder dash into the AB makes a good forced knockdown.
Matchups
-
- Amakusa can outrange you and his teleport takes a huge dump all over your bubbles and water spouts. Even if you know to grab the teleport, with Sogetsu's pitiful grab range it's easier said than done. Get a life lead, park at Amakusa's maximum teleport range. If you get behind, you're going to have a hell of a time catching up again, as Amakusa's runaway is best at the same range Sogetsu's ability to pressure the opponent is.
-
- Basara can literally dash through your spouts. Keep this in mind if you intend on running any sort of block recoil, since he really has no reason to care. Should Basara decide to proceed carefully, he punishes even B water spout with a simple 5AB on block, so don't just throw it out like you always do, for heaven's sake, please.
Frame Data
| Move
|
Damage
|
Startup
|
Active
|
Total
|
Cancel
|
Weapon
Clash
|
Hit
Adv.
|
Backhit
Adv.
|
Block
Adv.
|
Guard
|
Notes
|
| 5A |
4 |
5 |
2 |
19 |
1(1) / 5~15(11) |
- |
-4 |
-4 |
-9 |
Mid |
Weak attack
|
| 5B |
12 |
11 |
2 |
34 |
1~2(2) / 34(1) |
9~10(2) |
-5 |
+3 |
-13 |
Mid |
Medium attack, Deflectable(med)
|
| 5AB |
28 |
19 |
4 |
50 |
1(1) |
- |
KD |
KD |
-26 |
Mid |
Knockdown attack
|
| 2A |
4 |
5 |
2 |
18 |
1~2(2) / 5~14(10) |
- |
-3 |
-3 |
-8 |
Mid |
Weak attack
|
| 2B |
12 |
12 |
2 |
28 |
1~3(3) |
- |
+2 |
+10 |
-13 |
Mid |
Medium attack, Deflectable(med)
|
| 2AB |
29 |
14 |
2 |
52 |
1~4(4) |
- |
KD |
KD |
-26 |
Low |
Knockdown attack
|
| n.5A |
4 |
5 |
2 |
19 |
1(1) / 5~15(11) |
- |
-4 |
-4 |
-9 |
Mid |
Weak attack
|
| n.5B |
8 |
13 |
2 |
37 |
13~35(23) |
11~12(2) |
-6 |
+2 |
-13 |
Mid |
Medium attack, Deflectable(med)
|
| n.5AB |
28 |
17 |
3 |
54 |
1(1) |
- |
+0 |
+10 |
-32 |
Mid |
Heavy attack, Deflectable(heavy)
|
| n.2A |
4 |
5 |
2 |
18 |
1~2(2) / 5~14(10) |
- |
-3 |
-3 |
-8 |
Mid |
Weak attack
|
| n.2B |
12 |
12 |
2 |
28 |
1~3(3) |
- |
+2 |
+10 |
-13 |
Mid |
Medium attack, Deflectable(med)
|
| n.2AB |
29 |
14 |
2 |
52 |
1~4(4) |
- |
KD |
KD |
-26 |
Low |
Knockdown attack
|
| 5C |
6 |
14 |
4 |
30 |
1~9(9) |
- |
+2 |
+10 |
-11 |
Mid |
Medium attack, 1-13f throw invincible
|
| 6C |
6 |
20 |
2 |
23 |
1~4(4) |
- |
+15 |
+23 |
+2 |
Low |
Medium attack
|
| 2C |
2 |
5 |
2 |
21 |
1~2(2) / 5~17(13) |
- |
-6 |
-6 |
-11 |
Low |
Weak attack
|
| 3C |
7 |
18 |
9 |
47 |
x |
- |
KD |
KD |
-24 |
Low |
Knockdown attack
|
| j8.A |
7 |
4 |
18 |
29 |
x |
- |
-- |
-- |
-- |
High |
Weak attack, Deflectable(weak)
|
| j8.B |
11 |
14 |
4 |
33 |
x |
- |
-- |
-- |
-- |
High |
Medium attack, Deflectable(med)
|
| j7/9.A |
5 |
6 |
10 |
23 |
x |
- |
-- |
-- |
-- |
High |
Weak attack
|
| j7/9.B |
11 |
7 |
2 |
32 |
x |
- |
-- |
-- |
-- |
High |
Medium attack, Deflectable(med)
|
| j.AB |
25 |
14 |
2 |
47 |
x |
- |
-- |
-- |
-- |
High |
Heavy attack, Deflectable(heavy)
|
| j.C |
6 |
6 |
8 |
19 |
x |
- |
-- |
-- |
-- |
High |
Medium attack
|
| ju.C |
6 |
6 |
8 |
19 |
x |
- |
-- |
-- |
-- |
High |
Medium attack
|
| 5BC |
15 |
20 |
2 |
38 |
x |
- |
KD |
KD |
-12 |
High |
Medium attack, Knockdown attack
|
| u.5BC |
7 |
20 |
6 |
41 |
x |
- |
KD |
KD |
-15 |
High |
Medium attack, Knockdown attack
|
| 66A |
4 |
15 |
7 |
27 |
1~6(6) |
- |
-2 |
-2 |
-7 |
Mid |
Weak attack
|
| 66B |
12 |
20 |
5 |
41 |
x |
- |
KD |
KD |
-16 |
High |
Medium attack, Knockback attack(resets)
|
| 66AB |
16 |
13 |
4 |
52 |
1~6(6) |
- |
KD |
KD |
-34 |
Mid |
Knockdown attack
|
| 66C |
5 |
8 |
14 |
31 |
1~4(4)/26~31(6) |
- |
KD |
KD |
-18 |
Mid |
Knockdown attack
|
| u.5S |
4 |
5 |
2 |
19 |
1(1) |
- |
-4 |
-4 |
-9 |
Mid |
Weak attack
|
| u.2S |
4 |
5 |
2 |
19 |
1~2(2) |
- |
-4 |
-4 |
-9 |
Mid |
Weak attack
|
| ju.S |
4 |
6 |
10 |
23 |
x |
- |
-- |
-- |
-- |
High |
Weak attack
|
| u.66S |
4 |
15 |
7 |
27 |
1~6(6) |
- |
KD |
KD |
-7 |
Mid |
Knockdown attack
|
| u.66C |
5 |
8 |
14 |
31 |
1~4(4) / 26~31(6) |
- |
KD |
KD |
-18 |
Mid |
Knockdown attack
|
| 2BC |
5 |
18 |
3 |
28 |
x |
- |
-- |
-- |
-- |
Mid |
Knockdown attack
|
| u.2BC |
5 |
18 |
3 |
28 |
x |
- |
-- |
-- |
-- |
Mid |
Knockdown attack
|
| 8BC |
12 |
39 |
2 |
72 |
x |
- |
-- |
-- |
-- |
Mid |
Knockdown attack
|
| u.8BC |
8 |
39 |
2 |
72 |
68~72(5) |
- |
-- |
-- |
-- |
Mid |
Knockdown attack
|
| Gekkou - 623S |
19 |
18 |
20 |
56 |
x |
- |
KD |
KD |
-25 |
Mid |
Knockdown attack
|
| Fuzuki - 236S |
5 |
60 |
112 |
65 |
x |
- |
+56 |
+56 |
+7 |
Mid |
|
| Tsuki-gakure - 214A |
x |
x |
x |
51 |
x |
- |
-- |
-- |
-- |
-- |
|
| Tsuki-gakure - 214B |
x |
x |
x |
49 |
x |
- |
-- |
-- |
-- |
-- |
|
| Tsuki-gakure - 214AB |
x |
x |
x |
49 |
x |
- |
-- |
-- |
-- |
-- |
|
| Shouha: Fuugetsu Zan - 236CD |
1x8+30 |
20 |
2 |
142 |
x |
- |
KD |
KD |
-34 |
Mid |
Knockdown attack, Deflectable(heavy)
|
