Story
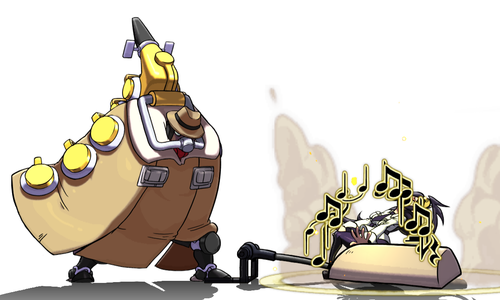
Big Band used to be a cop, now he walks a different beat.
Overview
Big Band has a variety of large moves that can control most of the screen, and has simple but effective mixup that leads to high damage. On the flip side, his large hurtbox leaves him vulnerable to instant overheads and stray hits. To mitigate this he has a few very strong, unique defensive options with parries and armored moves.
- Various specials cover different angles around Big Band, granting him space control, at the risk of leaving himself vulnerable if they whiff or are blocked.
- Has very good assists to benefit the entire cast and any team, whatever their need is.
- Can feint his armored rush punch moves for movement. ([4]6HK~P)
- Super Sonic Jazz, his grounded level 1 super, is one of the most feared reversals in the game
- Parrying allows him to deflect predictable pressure, gain meter, and punish his opponent afterwards. But over-zealousness will quickly put him in a bad position.
- Some of his moves apply sound stun, which gives him different combos, conversions, and setups than other characters.
Playstyle
 Big Band is an enormous defensive powerhouse that controls large amount of space with his big armored attacks. Big Band is an enormous defensive powerhouse that controls large amount of space with his big armored attacks. |
| Pros |
Cons |
- High damage: Big Band is arguably the highest damage character, which is only compounded by the use of assists.
- Great reversals: Air or ground, metered or meterless, Big Band's reversal options are very strong.
- Excellent assists: H Brass Knuckles, L/M Beat Extend and H A-Train are all useful assists in their own right, and at least one of them will have a place on any team.
- Excellent damage DHCs: When used midscreen, his Level 3 DHC does the most damage out of any Level 3. If you have the meter, Level 5 does a huge amount of damage and even converts into a combo with OTG.
- Parry: Big Band is the only character that can parry (Noise Cancel), which is a strong defensive option that can get him out of a lot of situations.
- Normal throws: Big Band's normal throw is the longest in the game and he can easily combo off it without consuming meter, OTG, or Sound Stun, leading to a very good low/throw game. His air throw has an excellent hitbox and grants easy meterless conversions.
|
- Large hurtbox: Band's enormous hurtbox makes him uniquely vulnerable against instant overheads and projectiles. Every character has instant overheads against him, and he is unable to crouch under things other characters can, like Robo-Fortune's H Beam. While it does prevent some combos and mixups from working on him, it also opens up lots of others that only work on him.
- Slow: Low mobility, which is only compounded by his large hurtboxes.
- Unsafe moves: Most of his specials are very unsafe without an assist to cover them.
- Simple mixups: Being large, slow, and having no airdash, Band finds it difficult to set up safe and hard-to-see left/right resets. He generally relies on simpler mixup options than other characters and tries to use his high damage to make up for it.
|
Video Overview
Stats
Chains
| Standing
|
4 Buttons:  → →  → →  or or  → →  or or 
|
| Crouching
|
4 Buttons: → → or → or
|
| Air
|
6 Buttons: → → → → →
|
Movement
| Weight
|
Dash
|
Double Jump
|
Airdash
|
IAD Lockout
|
| Heavy
|
Run
|
Yes
|
No
|
N/A
|
Wakeup Time
| Forward Tech
|
Backward Tech
|
Sliding KD
|
Hard KD
|
Crumple
|
| 39
|
40
|
87
|
35
|
36
|
Assists
Beat Extend (default assist)
H Brass Knuckles (default assist)
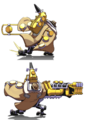
M / H Take the A Train ([4]6K)
Beat Extend (default assist)
A fast invulnerable DP assist that's very easy to combo after due to the way it pulls them in and drops the opponent on hit. It also pulls the opponent towards Big Band on block.
L is the default assist choice. It's the fastest and has a better anti air hitbox during the invulnerable frames, but doesn't have a hitbox behind Big Band.
M has bigger horizontal range which is useful for enabling certain combos, like after Cerebella's Diamond Dynamo super.
H has two hits on the ground which gives it some lockdown ability, and only has the standard 3 frames of vulnerable start up frames most DP assists have.
The L and M versions have 1 and 2 extra frames of vulnerability during their startup, respectively. This brings both L and M to 5 total frames of vulnerability as an assist. If the assist hits both characters, the assist will fall 12 frames before the point. The blockstun for each version is also decreased; 5f for L, 7f for M and H.
H Brass Knuckles (default assist)
An armored assist that has a lot of vertical coverage that deals a lot of damage on counterhit. Unlike the normal version of this move, the assist version does not cause a sliding knockdown on hit and has less blockstun.
M / H Take the A Train ([4]6K)
Anti-air grab (unblockable while rising) and setup assist. On hit, the lengthy animation allows time for the point character to build resources. The M version is faster and works as an anti air attack, while the H version travels further and has more time to build resources.
H Giant Step (214HK)
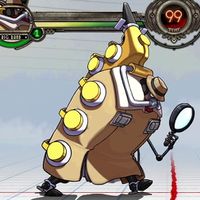
Up close, this is an overhead. From further away, it's an unblockable attack that has to be jumped over.
Taunt
To choose this assist, press START on the custom assist input select. Big Band taunts, powering up his next level 1 super (either Super Sonic Jazz or Tympany Drive).
Move List
Character Mechanic: Sound Stun
Big Band hits Filia with Giant Step, which inflicts Sound Stun. The added hitstop allows him to link a normal afterwards.
- Many of Big Band's attacks cause a unique "sound stun" on hit, which has a distinctive musical note hit spark and additional hit stop for the opponent (amount varies per move).
- In practice, this makes these moves much more easily comboable, since the opponent freezes in place and Band has more time to move or link other attacks.
- Sound Stun can only be used once per combo. Think of it like OTG where it's a once-per-combo resource you can spend.
- If Sound Stun has already been consumed, additional Sound Stun moves will still work, but it will be much more difficult or even impossible to combo afterwards.
- The Sound Stun-less versions of these moves are usually a lot less plus on hit, and/or cause a Soft KD (Invuln.) which makes follow-ups impossible.
Standing Normals
Honky Tonk Toggle Hitboxes Toggle Hitboxes
|
| 5LP
|
s.
|
|
| x1
|
Guard
|
Properties
|
Damage
|
Meter
|
On Hit
|
On Block
|
On Pushblock
|
| Mid
|
Chains Into Self
|
300
|
2.5%
|
+3
|
+2
|
|
| Startup
|
Active
|
Recovery
|
Hit Stun
|
Block Stun
|
Hit Stop
|
Super Hit Stop
|
| 6
|
2
|
16
|
20
|
19
|
7
|
N/A
|
|
|
|
| x2
|
Guard
|
Properties
|
Damage
|
Meter
|
On Hit
|
On Block
|
On Pushblock
|
| Mid
|
-
|
300
|
2.5%
|
+3
|
+2
|
|
| Startup
|
Active
|
Recovery
|
Hit Stun
|
Block Stun
|
Hit Stop
|
Super Hit Stop
|
| 5
|
2
|
16
|
20
|
19
|
7
|
N/A
|
|
|
|
|
- Big Band uses a bike horn for a jab which chains twice, hits in front of Big Band, and can function as an anti-air against low air-dashes.
|
|
|
Free Form Toggle Hitboxes Toggle Hitboxes
|
| 5MP
|
s.
|
|
| x1
|
Guard
|
Properties
|
Damage
|
Meter
|
On Hit
|
On Block
|
On Pushblock
|
| Mid
|
-
|
700
|
7.5%
|
-2
|
-6
|
|
| Startup
|
Active
|
Recovery
|
Hit Stun
|
Block Stun
|
Hit Stop
|
Super Hit Stop
|
| 10
|
2
|
25
|
24
|
20
|
9
|
N/A
|
|
|
|
| x2-5
|
Guard
|
Properties
|
Damage
|
Meter
|
On Hit
|
On Block
|
On Pushblock
|
| Mid
|
-
|
75
|
0%
|
-40
|
-44
|
|
| Startup
|
Active
|
Recovery
|
Hit Stun
|
Block Stun
|
Hit Stop
|
Super Hit Stop
|
| 11, 3, 3...
|
2
|
72
|
24
|
20
|
9
|
N/A
|
|
|
|
|
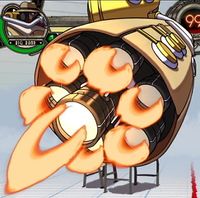
- Big Band pulls out a trumpet, which will act as any other single hit normal if chained into a stronger (HP or HK) attack. If chained into itself or a weaker attack (LP or LK), chaining with any additional button presses will play additional notes as long as Big Band holds the trumpet. Up to the first 6 notes can actually hit, with more hits becoming active with more levels of meter in stock. Additional hits will all contribute to undizzy as individual MP normals. Holding ← or → during Free Form will cause the next button input to put away the trumpet in favor of the button's actual attack, assuming that button can chain out of a 5MP. Mashing buttons and accidentally going Free Form will leave Big Band defenseless, while careful use can lead to his level 5 super.
|
|
|
Air Mail Special Toggle Hitboxes Toggle Hitboxes
|
| 5HP
|
s.
|
|
| Guard
|
Properties
|
Damage
|
Meter
|
On Hit
|
On Block
|
On Pushblock
|
| Mid
|
Launcher
|
950
|
10%
|
±0
|
-7
|
|
| Startup
|
Active
|
Recovery
|
Hit Stun
|
Block Stun
|
Hit Stop
|
Super Hit Stop
|
| 18
|
4
|
25
|
28
|
21
|
14
|
N/A
|
|
|
|
|
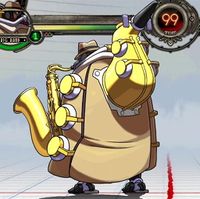
- Big Band uses a saxophone to launch his opponent. Has a good vertical hitbox in front of him.
|
|
|
Hot Socks Toggle Hitboxes Toggle Hitboxes
|
| 5LK
|
s.
|
|
| Guard
|
Properties
|
Damage
|
Meter
|
On Hit
|
On Block
|
On Pushblock
|
| Low
|
-
|
275, 325
|
2.5% x2
|
±0
|
-2
|
|
| Startup
|
Active
|
Recovery
|
Hit Stun
|
Block Stun
|
Hit Stop
|
Super Hit Stop
|
| 8
|
2, (5), 2
|
21
|
22 x2
|
20 x2
|
7 x2
|
N/A
|
|
|
|
|
- Big Band attacks with a 2-hit kick pedal for a standing normal that must be blocked low.
|
|
|
Pneumatic Slide Toggle Hitboxes Toggle Hitboxes
|
| 5MK
|
s.
|
|
| x1
|
Guard
|
Properties
|
Damage
|
Meter
|
On Hit
|
On Block
|
On Pushblock
|
| Mid
|
Launcher,
Chains Into Self
|
600
|
7.5%
|
-13
|
-14
|
|
| Startup
|
Active
|
Recovery
|
Hit Stun
|
Block Stun
|
Hit Stop
|
Super Hit Stop
|
| 15
|
2
|
34
|
22
|
21
|
10
|
N/A
|
|
|
|
| x2
|
Guard
|
Properties
|
Damage
|
Meter
|
On Hit
|
On Block
|
On Pushblock
|
| Mid
|
-
|
650
|
7.5%
|
-9
|
-13
|
|
| Startup
|
Active
|
Recovery
|
Hit Stun
|
Block Stun
|
Hit Stop
|
Super Hit Stop
|
| 11
|
2
|
33
|
25
|
21
|
10
|
N/A
|
|
|
|
|
- A 2 part trombone kick. Big Band can jump cancel after the second hit to use this as a standard launcher. Jump canceling after the first hit leaves the opponent at a lower height.
- Additionally, it is possible to jump cancel after the first hit and perform an air throw for a mix-up, and it works on every character (timing is somewhat strict).
- Moves Big Band forward on frame 7 (about 3/4 of a training mode grid square), but returns to his original position during recovery.
|
|
|
Kick Stand Toggle Hitboxes Toggle Hitboxes
|
| 5HK
|
s.
|
|
| Guard
|
Properties
|
Damage
|
Meter
|
On Hit
|
On Block
|
On Pushblock
|
| Mid
|
-
|
950
|
10%
|
Wall Bounce
|
-18
|
|
| Startup
|
Active
|
Recovery
|
Hit Stun
|
Block Stun
|
Hit Stop
|
Super Hit Stop
|
| 21
|
4
|
36
|
26
|
21
|
12
|
N/A
|
|
|
|
|
- Big Band's side kick brings him completely off the ground during the attack's active frames. With proper timing, the move can evade incoming low attacks.
|
|
|
Crouching Normals
Ring-a-Ding Toggle Hitboxes Toggle Hitboxes
|
| 2LP
|
c.
|
|
| x1
|
Guard
|
Properties
|
Damage
|
Meter
|
On Hit
|
On Block
|
On Pushblock
|
| Mid
|
Chains Into Self
|
250
|
2.5%
|
+5
|
+3
|
|
| Startup
|
Active
|
Recovery
|
Hit Stun
|
Block Stun
|
Hit Stop
|
Super Hit Stop
|
| 6
|
3
|
14
|
21
|
19
|
7
|
N/A
|
|
|
|
| x2
|
Guard
|
Properties
|
Damage
|
Meter
|
On Hit
|
On Block
|
On Pushblock
|
| Mid
|
-
|
100 x5
|
1.2857% x5
|
+5
|
+3
|
|
| Startup
|
Active
|
Recovery
|
Hit Stun
|
Block Stun
|
Hit Stop
|
Super Hit Stop
|
| 3
|
3 x5
|
14
|
21 x5
|
19 x5
|
3x4, 7
|
N/A
|
|
|
|
|
- A 2 part attack with a single hit on the first button press. The second part rings the triangle for 5 additional hits. This button is very useful for breaking armor, as well as for performing meaty setups that cover reversal options that have a few vulnerable frames at the start, have armor, or both.
|
|
|
Glissando Toggle Hitboxes Toggle Hitboxes
|
| 2MP
|
c.
|
|
| x1
|
Guard
|
Properties
|
Damage
|
Meter
|
On Hit
|
On Block
|
On Pushblock
|
| Mid
|
Chains Into Self
|
550
|
7.5%
|
+2
|
-2
|
|
| Startup
|
Active
|
Recovery
|
Hit Stun
|
Block Stun
|
Hit Stop
|
Super Hit Stop
|
| 11
|
4
|
20
|
25
|
21
|
10
|
N/A
|
|
|
|
| x2
|
Guard
|
Properties
|
Damage
|
Meter
|
On Hit
|
On Block
|
On Pushblock
|
| Mid
|
-
|
700
|
7.5%
|
+1
|
-5
|
|
| Startup
|
Active
|
Recovery
|
Hit Stun
|
Block Stun
|
Hit Stop
|
Super Hit Stop
|
| 6
|
4
|
24
|
28
|
22
|
10
|
N/A
|
|
|
|
|
- Big Band extends two trombone slides to hit the opponent. Good horizontal poke. If you confirm the second hit at max range, you can follow up with 2HP, then cancel into H Train, E-Break, then 5LP. The timing on characters with smaller hitboxes (like Filia, for instance) will be tighter.
|
|
|
Overblow Toggle Hitboxes Toggle Hitboxes
|
| 2HP
|
c.
|
|
| Guard
|
Properties
|
Damage
|
Meter
|
On Hit
|
On Block
|
On Pushblock
|
| Mid
|
Sound Stun
|
1000
|
10%
|
Soft KD (Sound Stun),
Soft KD (Invuln.)
|
-12
|
|
| Startup
|
Active
|
Recovery
|
Hit Stun
|
Block Stun
|
Hit Stop
|
Super Hit Stop
|
| 20
|
4
|
32
|
20
|
23
|
40, 12, (12 on block)
|
N/A
|
|
|
|
|
- A slow blast from a massive tuba. On hit, the Sound Stun causes an extended hit stop on the opponent. Hitting without a Sound Stun gives the opponent invulnerability and allows an immediate Ground Recovery, similar to a sweep. Like 5HK, it has some low-crush potential. It also has slight disjoint, making it a good poke at far ranges and its big hitbox allows for some anti-air potential. On block, it is possible to make yourself -5 if you immediately H Train into E-Break, which is safer than L Brass on block, being -6.
|
|
|
Sharp Note Toggle Hitboxes Toggle Hitboxes
|
| 2LK
|
c.
|
|
| Guard
|
Properties
|
Damage
|
Meter
|
On Hit
|
On Block
|
On Pushblock
|
| Low
|
-
|
325
|
2.5%
|
+7
|
+5
|
|
| Startup
|
Active
|
Recovery
|
Hit Stun
|
Block Stun
|
Hit Stop
|
Super Hit Stop
|
| 8
|
4
|
12
|
22
|
20
|
7
|
N/A
|
|
|
|
|
- Big Band extends a tiny oboe to hit his opponent as his main low attack. The fact that it is +7 on hit makes it easy to set up low/throw mixups mid-combo. It has a pretty large vertical hitbox for a low, so it works conveniently in optimized combos.
|
|
|
Bass Drop Toggle Hitboxes Toggle Hitboxes
|
| 2MK
|
c.
|
|
| Guard
|
Properties
|
Damage
|
Meter
|
On Hit
|
On Block
|
On Pushblock
|
| Mid
|
-
|
750
|
7.5%
|
+1
|
-3
|
|
| Startup
|
Active
|
Recovery
|
Hit Stun
|
Block Stun
|
Hit Stop
|
Super Hit Stop
|
| 12
|
4
|
21
|
25
|
21
|
10
|
N/A
|
|
|
|
|
- Big Band drops to the ground, attacking above and around himself with air blasts. The low profile hurt boxes and large hit box make the attack a useful anti-air and make the tall Big Band less susceptible to instant overheads. On hit, the blasts draw defending characters closer to Big Band instead of pushing them away. After a fully shook beat extend, this move can be used to drop the enemy on the opposite side.
|
|
|
Low Rank Toggle Hitboxes Toggle Hitboxes
|
| 2HK
|
c.
|
|
| Guard
|
Properties
|
Damage
|
Meter
|
On Hit
|
On Block
|
On Pushblock
|
| Low
|
Sweep
|
1200
|
10%
|
Soft KD (Invuln.)
|
-16
|
|
| Startup
|
Active
|
Recovery
|
Hit Stun
|
Block Stun
|
Hit Stop
|
Super Hit Stop
|
| 19
|
6
|
28
|
14
|
17
|
10
|
N/A
|
|
|
|
|
- A basic sweep with surprising vertical range and slightly disjointed, making it effective for stopping air dashes and other low height air attacks. This is Big Band's hardest hitting grounded normal. On block, it is possible to immediately cancel into L 'A' Train and have it confirm (the opponent conveniently exits blockstun at around the same time L Train becomes active).
|
|
|
Jumping Normals
Tenor Blast Toggle Hitboxes Toggle Hitboxes
|
| jLP
|
j.
|
|
| Guard
|
Properties
|
Damage
|
Meter
|
On Hit
|
On Block
|
On Pushblock
|
| High
|
Whiff Cancel
|
400
|
2.5%
|
-5
|
-3
|
|
| Startup
|
Active
|
Recovery
|
Hit Stun
|
Block Stun
|
Hit Stop
|
Super Hit Stop
|
| 10
|
2
|
26
|
22
|
18
|
8
|
N/A
|
|
|
|
|
- A single blast from Big Band's lowest side valve. j.MP and j.HP attack using the other valves and combine for a basic 3 hit air chain, which Big Band has a hard time doing with his jumping kicks. It is common to use a "plink throw" after j.LP. This can be done by inputting j.LP, then "rolling" your hand over the LP and LK inputs (do not touch them at the same time; you must input them separately in a very quick succession).
- Big Band can whiff cancel this move into j.MP then j.HP or just into j.HP.
|
|
|
Baritone Blast Toggle Hitboxes Toggle Hitboxes
|
| jMP
|
j.
|
|
| Guard
|
Properties
|
Damage
|
Meter
|
On Hit
|
On Block
|
On Pushblock
|
| High
|
Whiff Cancel
|
650
|
7.5%
|
-3
|
-1
|
|
| Startup
|
Active
|
Recovery
|
Hit Stun
|
Block Stun
|
Hit Stop
|
Super Hit Stop
|
| 12
|
2
|
26
|
24
|
20
|
10
|
N/A
|
|
|
|
|
- A single blast from Big Band's center side valve. Usually the go-to button when performing an air string after a launcher.
- Big Band can whiff cancel this move into j.HP.
|
|
|
Bass Blast Toggle Hitboxes Toggle Hitboxes
|
| jHP
|
j.
|
|
| Guard
|
Properties
|
Damage
|
Meter
|
On Hit
|
On Block
|
On Pushblock
|
| High
|
-
|
1000
|
10%
|
-3
|
-6
|
|
| Startup
|
Active
|
Recovery
|
Hit Stun
|
Block Stun
|
Hit Stop
|
Super Hit Stop
|
| 16
|
2
|
30
|
26
|
22
|
12
|
N/A
|
|
|
|
|
- A single blast from Big Band's highest side valve.
|
|
|
Jelly Roll Toggle Hitboxes Toggle Hitboxes
|
| jLK
|
j.
|
|
| Guard
|
Properties
|
Damage
|
Meter
|
On Hit
|
On Block
|
On Pushblock
|
| High (rising mid)
|
-
|
200 x3
|
0.9% x3
|
+3
|
+3
|
|
| Startup
|
Active
|
Recovery
|
Hit Stun
|
Block Stun
|
Hit Stop
|
Super Hit Stop
|
| 7
|
18 (3, 3, 3...)
|
11
|
22 x3
|
18 x3
|
6 x3
|
N/A
|
|
|
|
|
- Big Band extends a tambourine for a 3-hit attack the hits below him and has generous active frames.
- Doesn't hit overhead for a small period after jumping, even from an instant double jump after a jump. This makes it not useful as an instant overhead.
- However, it can hit overhead from a low-to-the-ground double jump performed while falling.
|
|
|
Sweet Clarinet Toggle Hitboxes Toggle Hitboxes
|
| jMK
|
j.
|
|
| x1
|
Guard
|
Properties
|
Damage
|
Meter
|
On Hit
|
On Block
|
On Pushblock
|
| High
|
Chains Into Self
|
400
|
7.5%
|
+4
|
±0
|
|
| Startup
|
Active
|
Recovery
|
Hit Stun
|
Block Stun
|
Hit Stop
|
Super Hit Stop
|
| 11
|
4
|
18
|
28 or 25 (vs air)
|
20
|
9
|
N/A
|
|
|
|
| x2
|
Guard
|
Properties
|
Damage
|
Meter
|
On Hit
|
On Block
|
On Pushblock
|
| Mid
|
-
|
220x3, 240
|
1.8% x4
|
+5
|
±0
|
|
| Startup
|
Active
|
Recovery
|
Hit Stun
|
Block Stun
|
Hit Stop
|
Super Hit Stop
|
| 16
|
5 x4
|
16
|
25 x4
|
20 x4
|
3, 3, 3, 7
|
N/A
|
|
|
|
|
- A 2 part attack with a low-angled clarinet, first hitting directly below Big Band and then spinning for additional hits after a second button press. The second attack's spinning hits cause a float effect and force Big Band to stay airbourne.
- He can't use this float if he's already used a double jump, but he can use the float to extend a super jump to a full screen's distance for a desperately needed movement option.
- Each use of j.MK follow up in a combo will cause Big Band to fall increasingly faster.
- The first hit can be used at the start of a jump for a quick overhead.
- This can be converted into a combo with Tympany Drive when close enough to the corner, or with j.HK and teching forward when far enough from the corner.
- Cymbal Clash can be used to combo after an instant overhead j.MK against Big Band, or against any other standing character (such as during a fuzzy setup)
- j.HP can be used to combo against a crouching Big Band and some standing characters, but the timing is very tight.
|
|
|
5000lb Slam Toggle Hitboxes Toggle Hitboxes
|
| jHK
|
j.
|
|
| Guard
|
Properties
|
Damage
|
Meter
|
On Hit
|
On Block
|
On Pushblock
|
| High
|
No Cancel *
|
1200
|
10%
|
Wall Bounce
|
N/A
|
|
| Startup
|
Active
|
Recovery
|
Hit Stun
|
Block Stun
|
Hit Stop
|
Super Hit Stop
|
| 16
|
(until ground)
|
16, KD or 19 **
|
37
|
18
|
14
|
N/A
|
|
|
|
|
- Big Band attacks with a clumsy drop kick, forcing himself to land on his back and use a Ground Recovery. When used air to air, the high wall bounce will leave the opponent flying across the screen while Big Band slowly gets himself together. The Ground Recovery is no different than any other, so careful placement will let Big Band use its invulnerable frames to get across the screen.
- * j.HK can't cancel into Cymbal Clash. j.HK can cancel into Tympany Drive up to and including the 2nd active frame (regardless of hit, block or whiff). If the 3rd active frame is reached, a super cancel is no longer possible.
- ** 16 frames of recovery, then the opportunity to ground tech. There are 3 additional frames of vulnerable recovery if no ground tech is performed, and some additional invulnerable recovery.
- The first frame data graph shows the move with a ground recovery. The second shows without.
|
|
|
Universal Mechanics
Heavy Toll Toggle Hitboxes Toggle Hitboxes
|
| Throw
|
+
|
|
| Guard
|
Properties
|
Damage
|
Meter
|
On Hit
|
On Block
|
On Pushblock
|
| Throw
|
50% Damage Scaling
|
0, 150 x8
|
5%, 1% x8
|
+27
|
N/A
|
|
| Startup
|
Active
|
Recovery
|
Hit Stun
|
Block Stun
|
Hit Stop
|
Super Hit Stop
|
| 7
|
1
|
28
|
N/A
|
N/A
|
N/A
|
N/A
|
|
|
|
|
- The throw with the longest range in the game by far. Big Band extends a bell, shakes the opponent around, and leaves them standing. The generous frame advantage after the throw gives Big Band time to convert into a combo.
- Use 2MK to convert into a combo in the corner.
- When out of the corner, the opponent will be too far away to reach with most normals for a combo, so you have to close the distance first.
- A good conversion is H 'A' Train, E-Break, 2LK/2MK. 2MK is a 6 frame link with the earliest possible E-Break (+18).
- L Giant Step, 2LK is a less optimal conversion that consumes Sound Stun, but is easy to execute.
|
|
|
High Toll Toggle Hitboxes Toggle Hitboxes
|
| Air Throw
|
+ (in air)
|
|
| Guard
|
Properties
|
Damage
|
Meter
|
On Hit
|
On Block
|
On Pushblock
|
| Air Throw
|
50% Damage Scaling
|
0, 350, 1000
|
5%, 2%, 6%
|
KD
|
N/A
|
|
| Startup
|
Active
|
Recovery
|
Hit Stun
|
Block Stun
|
Hit Stop
|
Super Hit Stop
|
| 7
|
3
|
18
|
N/A
|
N/A
|
N/A
|
N/A
|
|
|
|
|
- Big Band grabs at his opponent, creates a bell around them and strikes once, dropping the opponent afterwards.
- Big Band can convert after a successful air throw with either j.LK or j.MK, using OTG.
|
|
|
'A' Train Express Toggle Hitboxes Toggle Hitboxes
|
|
| Guard
|
Properties
|
Damage
|
Meter
|
On Hit
|
On Block
|
On Pushblock
|
| Mid
|
Armor (1 hit),
Tag
|
500
|
4.50%
|
KD
|
-18
|
|
| Startup
|
Active
|
Recovery
|
Hit Stun
|
Block Stun
|
Hit Stop
|
Super Hit Stop
|
| 29 to 49
|
7
|
41
|
26
|
29
|
15
|
N/A
|
|
|
|
|
- Big Band enters the screen with an armored rush punch.
- This move is slowest when the opponent is cornered, since Big Band has to travel further from the edge of the screen.
- Although the animation of Big Band's Tag In attack looks like Brass Knuckles it deals significantly less damage.
|
|
|
Take Five Toggle Hitboxes Toggle Hitboxes
|
|
| Guard
|
Properties
|
Damage
|
Meter
|
On Hit
|
On Block
|
On Pushblock
|
| Mid
|
Snapback
|
0
|
-100%
|
N/A
|
-22
|
|
| Startup
|
Active
|
Recovery
|
Hit Stun
|
Block Stun
|
Hit Stop
|
Super Hit Stop
|
| 12 + 3
|
3
|
37
|
14
|
17
|
13
|
9
|
|
|
|
|
- Big Band uses two saxophones for a unique outtake that hits in front and behind him.
|
|
|
Specials
Toggle Hitboxes Toggle Hitboxes
|
| Beat Extend
|
 + + 
→  , ,  , , ... , , ...
or → , , , ...
|
|
|
|
Guard
|
Properties
|
Damage
|
Meter
|
On Hit
|
On Block
|
On Pushblock
|
| Mid
|
Invuln. (Strike) (Frame 2),
Sound Stun
|
350, 350, 150 x9 (100, 100, 50 x9)
|
(2.5) 5.5%, 3%, 1.5% x9
|
KD
|
-24
|
|
| Startup
|
Active
|
Recovery
|
Hit Stun
|
Block Stun
|
Hit Stop
|
Super Hit Stop
|
| 8
|
1, (6), 1 [(2), 1, (2), 1...]
|
34
|
18 x2, (16 x9 Shake)
|
18, 13, (19 x9 Shake)
|
2, 60, 35 x9 or 2, 33, 12 x9 (4, 9, 35 x9 on block)
|
N/A
|
|
|
|
|
|
Guard
|
Properties
|
Damage
|
Meter
|
On Hit
|
On Block
|
On Pushblock
|
| Mid
|
Invuln. (Strike),
Sound Stun
|
350, 550, 150 x12 (100, 100, 50 x12)
|
(2.5%) 7%, 4.5%, 1.5% x12
|
KD
|
-29
|
|
| Startup
|
Active
|
Recovery
|
Hit Stun
|
Block Stun
|
Hit Stop
|
Super Hit Stop
|
| 10
|
3, (3), 3 [(4), 1, (2), 1...]
|
39
|
18 x2, (16 x12 Shake)
|
21, 15, (19 x12 Shake)
|
4, 60, 35 x12 or 4, 33, 12 x12 (8, 9, 35 x12 on block)
|
N/A
|
|
|
|
|
|
Guard
|
Properties
|
Damage
|
Meter
|
On Hit
|
On Block
|
On Pushblock
|
| Mid
|
Invuln. (Full),
Sound Stun
|
350 x2, 550, 150 x14 (100, 100, 100, 50 x14)
|
(2.5%) 7%, 4.5% x2, 1.5% x9
|
KD
|
-27
|
|
| Startup
|
Active
|
Recovery
|
Hit Stun
|
Block Stun
|
Hit Stop
|
Super Hit Stop
|
| 12
|
3, (6), 3, (3), 3 [(4), 1, (2), 1...]
|
36
|
18 x3, (16 x14 Shake)
|
18 x2, 15 (19 x14 Shake)
|
4, 2, 60, 35 x14 or 4, 2, 33, 12 x14 (4, 4, 8, 35 x14 on block)
|
N/A
|
|
|
|
|
- Big Band reaches out in an attempt to draw in and trap the opponent in his tambourine. On hit, the "shake" (mash , , ... or ←,→,←,→...) inputs give additional, rapid hits that are best used after a combo has reached maximum damage scaling. The Sound Stun causes extra hit stop for the opponent, giving Big Band enough time to recover and start a combo before the defending player falls to the ground.
-
- Strike invulnerable, but the first frame is vulnerable
- Has a taller initial hitbox which occurs during the strike invuln frames, making it better as an anti-air
- Fastest version
- Does the least damage
-
- Strike invulnerable on the first frame
- Trades vertical range for slightly more horizontal range
- Has a hitbox behind Big Band
- Anti air hitbox occurs during vulnerable frames
-
- Fully invulnerable on the first frame
- Has one additional hit before the shakes that hits near the ground, but the first hit is shorter than M
- Most damaging
- Anti air hitbox occurs during vulnerable frames
- Has a 5f buffer afterwards (the shake?).
- Assist properties
- L version has 1 additional frames of vulnerability (5f total)
- M version has 2 additional frames of vulnerability (5f total)
- H version has 0 additional frames of vulnerability - it only has the vulnerable 3f that every assist has.
- If it hits two characters, the assist will be released 12f before the point.
- Blockstun on L decreased by 5f, M and H by 7f.
|
|
|
"Gimme a hit!" Toggle Hitboxes Toggle Hitboxes
|
|
|
|
Guard
|
Properties
|
Damage
|
Meter
|
On Hit
|
On Block
|
On Pushblock
|
| Mid
|
-
|
900 (100)
|
(2.5%) 4.5%
|
+5 or KD (vs air)
|
-6
|
|
| Startup
|
Active
|
Recovery
|
Hit Stun
|
Block Stun
|
Hit Stop
|
Super Hit Stop
|
| 16
|
3
|
28
|
35 or 21 (vs air)
|
24
|
11
|
N/A
|
|
|
|
|
|
Guard
|
Properties
|
Damage
|
Meter
|
On Hit
|
On Block
|
On Pushblock
|
| Mid
|
Armor (2 hits)
|
1300 (175)
|
(2.5%) 4.5%
|
KD
|
-16
|
|
| Startup
|
Active
|
Recovery
|
Hit Stun
|
Block Stun
|
Hit Stop
|
Super Hit Stop
|
| 20
|
5
|
36
|
21
|
24
|
14 (12 on block)
|
N/A
|
|
|
|
|
|
Guard
|
Properties
|
Damage
|
Meter
|
On Hit
|
On Block
|
On Pushblock
|
| Mid
|
Armor (2 hits)
|
1750 (250)
|
(2.5%) 4.5%
|
Sliding KD
|
-25
|
|
| Startup
|
Active
|
Recovery
|
Hit Stun
|
Block Stun
|
Hit Stop
|
Super Hit Stop
|
| 24
|
7
|
48
|
25
|
29
|
17 (14 on block)
|
N/A
|
|
|
|
|
- Big Band's signature straight rush punch goes further, is slower, and hits harder with increasing button strength.
- While it is the safest version on block, LP Brass Knuckles is the only version that has no armor and can't cause a knockdown.
- At maximum range, it's completely safe on block (excepting alpha counters). Not many moves can even punish -6, not to mention close the distance in that time.
- Slightly inside maximum range, it can be punished by moves like SSJ, Band level 3, Band level 5, and Cerebella's 360.
- It's difficult to hitconfirm cancel into Super Sonic Jazz on reaction, but it's plus enough on hit to link into it afterwards (3 frame link). This may not be possible at maximum spacing, though.
- The MP and HP versions have armor, a knockdown and a slide on hit respectively, and appropriate block disadvantage.
- When close enough to the corner, the MP version can be comboed into an OTG normal, such as 2MP.
- Otherwise, you can only convert by canceling into super. Both M and H Brass Knuckles can be hitconfirm canceled into Super Sonic Jazz on reaction.
- If your super won't kill or lead to a combo, it may be preferable to take the HP version's untechable knockdown for okizeme.
- Assist properties
- M and H versions apply an extra 87.5% damage scaling.
- All versions' hitstun and blockstun are 25f.
|
|
|
"Hit me!" Toggle Hitboxes Toggle Hitboxes
|
| Take the 'A' Train
|
[ ], + 
|
|
|
|
Guard
|
Properties
|
Damage
|
Meter
|
On Hit
|
On Block
|
On Pushblock
|
| Command Grab
|
50% Damage Scaling
|
0, 350, 1000
|
(2.5%) 4%, 3%, 10%
|
Sliding KD
|
N/A
|
|
| Startup
|
Active
|
Recovery
|
Hit Stun
|
Block Stun
|
Hit Stop
|
Super Hit Stop
|
| 18
|
1
|
33
|
N/A
|
N/A
|
N/A
|
N/A
|
|
|
|
|
|
Guard
|
Properties
|
Damage
|
Meter
|
On Hit
|
On Block
|
On Pushblock
|
| Anti-Air Grab
|
Armor (2 hits),
50% Damage Scaling
|
0, 350, 450, 1000 (100)
|
(2.5%) 3%, 14% x2
|
Sliding KD
|
-14
|
|
| Startup
|
Active
|
Recovery
|
Hit Stun
|
Block Stun
|
Hit Stop
|
Super Hit Stop
|
| 11-17
|
2
|
34
|
N/A
|
21
|
11
|
N/A
|
|
|
|
|
|
Guard
|
Properties
|
Damage
|
Meter
|
On Hit
|
On Block
|
On Pushblock
|
| Anti-Air Grab
|
Armor (3 hits),
50% Damage Scaling
|
0, 350, 450, 500, 1000 (100)
|
(2.5%) 4%, 3% x3, 10%
|
Sliding KD
|
-14
|
|
| Startup
|
Active
|
Recovery
|
Hit Stun
|
Block Stun
|
Hit Stop
|
Super Hit Stop
|
| 21
|
2
|
34
|
N/A
|
21
|
11
|
N/A
|
|
|
|
|
- Instead of a simple punch, Big Band attempts to grab the opponent with this rushing attack, either directly in front of him or an upwards angle.
-
- A true command grab that moves forward very slightly and grabs directly in front of Big Band. Much slower than his normal throw, but has better range, is untechable, and can be performed as a cancel out of normals.
-
- Moves forward and grabs above Big Band at an upwards angle. Big Band will track where the opponent, doing a faster version if they are close by and a slower version based on how far they are further out.
-
- Moves the furthest and grabs at the same angle as the MK version. Has no tracking, which effectively creates a deadzone. If the opponent is too close, Big Band will travel underneath them and whiff.
- All versions have a 5f buffer afterwards.
- In the corner, the LK version can be converted into a combo with an OTG normal like 2MP. The MK and HK versions move Big Band too far back for this to be possible, so the only conversion option is to super cancel.
- The MK and HK versions are unblockable by a rising airborne opponent, but blockable on the way down.
- Often performed in neutral off of a read that Big Band's opponent is going to jump.
- 5HK, HK 'A' Train is a very common combo ender that allows for okizeme if OTG has not been spent, or a super cancel for more damage.
- Ending a block string with either an LK grab, an MK grab, or a Brass Knuckles can force the defending player to guess against Big Band as he winds up one of 3 visually similar attacks.
|
|
|
|
|
| Emergency Break
|
During Brass Knuckles: or
During M or H Take the 'A' Train:
|
|
| Guard
|
Properties
|
Damage
|
Meter
|
On Hit
|
On Block
|
On Pushblock
|
| N/A
|
-
|
N/A
|
0%
|
N/A
|
N/A
|
|
| Startup
|
Active
|
Recovery
|
Hit Stun
|
Block Stun
|
Hit Stop
|
Super Hit Stop
|
| N/A
|
N/A
|
19
|
N/A
|
N/A
|
N/A
|
N/A
|
|
|
|
|
- Any input during a Brass Knuckles or any input during an M or H Take the 'A' Train will cause Big Band to stop his charge with a brief recovery animation. This can be used to fake out the defending player or move an armored Big Band around without committing to the attack.
- Hold the respective P or K button while inputting Brass or A-Train to get the fastest possible E-Break. This trick doesn't work with holding the LK button, though.
- Big Band loses the armor from either Brass Knuckles' or Take the 'A' Train during the entire animation of this move.
- The 'A' Train version is faster than the Brass version, so it can be useful for making things safer on block (eg. 5HP) or converting from some moves (eg. ground throw).
- The H 'A' Train version travels the furthest, so it's the most useful for movement and conversions. Repeated H 'A' Train e-breaks are Band's fastest way of getting across the screen.
- The M version may be better for making things safe, since it keeps you slightly further away from the opponent.
- Commonly abbreviated as "E-Break", or "ebrake".
- The first frame data graph shows the move done from the earliest possible frame of Brass. The second is A-Train. They were executed via holding a button for E-Break, then executing the move.
|
|
|
"Riot!" Toggle Hitboxes Toggle Hitboxes
|
| Cymbal Clash
|
(Air Only)  + +
|
|
|
|
Guard
|
Properties
|
Damage
|
Meter
|
On Hit
|
On Block
|
On Pushblock
|
| Mid
|
Sound Stun
|
700 (100)
|
(2.5%) 7.5%
|
KD (Sound Stun),
Soft KD (Invuln.)
|
-4
|
|
| Startup
|
Active
|
Recovery
|
Hit Stun
|
Block Stun
|
Hit Stop
|
Super Hit Stop
|
| 20
|
2
|
24
|
18
|
21
|
40 (10 on block)
|
N/A
|
|
|
|
|
|
Guard
|
Properties
|
Damage
|
Meter
|
On Hit
|
On Block
|
On Pushblock
|
| Mid
|
Sound Stun
|
400, 500 (100, 100)
|
(2.5%) 4.5% x2
|
KD (Sound Stun),
Soft KD (Invuln.)
|
-1
|
|
| Startup
|
Active
|
Recovery
|
Hit Stun
|
Block Stun
|
Hit Stop
|
Super Hit Stop
|
| 22
|
2 x2
|
25
|
18, 19
|
21, 22
|
5, 40 (5, 10 on block)
|
N/A
|
|
|
|
|
|
Guard
|
Properties
|
Damage
|
Meter
|
On Hit
|
On Block
|
On Pushblock
|
| Mid
|
Sound Stun
|
350, 400, 450 (100, 100, 100)
|
(2.5%) 3% x3
|
KD (Sound Stun),
Soft KD (Invuln.)
|
-1
|
|
| Startup
|
Active
|
Recovery
|
Hit Stun
|
Block Stun
|
Hit Stop
|
Super Hit Stop
|
| 24
|
2 x3
|
28
|
18 x2, 19
|
21 x2, 22
|
5 x2, 42 (5 x2, 10 on block)
|
N/A
|
|
|
|
|
- Big Band extends long, thin arms to clap cymbals together. This attack's start up shifts his jump momentum so he floats slightly up and backwards. The large, disjointed hit box allows Big Band to space his opponent in the while in the air.
- On hit, the Sound Stun gives a full knockdown and relatively easy follow up combo to Take the 'A' Train once Big Band lands. Without Sound Stun, the opponent becomes invulnerable for the knockdown and can use an immediate Ground Recovery.
- The M and H versions have a significantly stronger knock-up than the L version, causing the opponent to touch the ground later.
|
|
|
"Uh-huh."
|
Noise Cancel
Parry
|
/  immediately before getting hit immediately before getting hit
|
|
| Guard
|
Properties
|
Damage
|
Meter
|
On Hit
|
On Block
|
On Pushblock
|
| N/A
|
-
|
N/A
|
N/A
|
N/A
|
N/A
|
|
| Startup
|
Active
|
Recovery
|
Hit Stun
|
Block Stun
|
Hit Stop
|
Super Hit Stop
|
| N/A
|
N/A
|
N/A
|
N/A
|
N/A
|
N/A
|
N/A
|
|
|
|
|
- Big Band uses a high hat cymbal to parry incoming attacks, allowing him to riposte with an attack afterwards.
- On the ground, a high (→) Noise Cancel input will parry any incoming high or mid attack and low (↓) will parry low attacks and all assists, regardless if they hit high or low.
- In the air, high (→) parries any attack.
- Also in the air, low (↓) parries projectiles.
- Throws and hitgrabs can never get parried.
- Big Band can never parry both directions at the same time, but assist attacks can be parried either direction.
- Upon a successful Noise Cancel, Big Band takes 75% of the incoming attack's block damage as recoverable damage, and cannot die from damage taken during parry.
- The parried attack's hit stop and stun get replaced with a standardized 27f parry stop animation (29f for supers).
- The parry stop can cancel to another Noise Cancel immediately or cancel to an attack, block, jump, or dash after 12f (14f for supers).
- Parrying a sequence of combo hits increases the active window for Noise Cancels by 2f and allows both high and low inputs to parry any incoming attack.
- Big Band gains 41.667% of parried move as meter and 1% flat for parrying multihitting moves and projectiles(with some exceptions).
- Parrying projectiles will move Big Band forward while carrying over forward momentum. This effect is lessened if the projectile was created from a super.
- The recovery of a successful parry is dash cancelable (after the hitstop)
- Technical details
- Tapping and holding the direction input gives a 13f window to Noise Cancel an incoming attack, while tapping the direction and returning to neutral increases the window to 17f.
- Any Noise Cancel input triggers a 30f cooldown for that parry input.
- Alternating high and low inputs will cancel the active window for the first input as the second input becomes active. Any other inputs simply close the window for a Noise Cancel.
- "Inputting a ↓ parry during the cooldown from an → parry, or a → parry during the cooldown of a ↓ parry, resets the cooldown of the opposite parry. In other words, → parry -> ↓ parry = both recover at the same time, instead of → recovering earlier. Fixes →,↓,→,↓,→,↓… against projectiles. "
- " Time before joystick must be released or parry is invalid 7f→12f. "
- "Pressing other directions during a successful parry animation will not invalidate any existing parry inputs. "
- See this page for option selects using parry.
- See this page for information regarding the training mode parry display.
|
|
|
Supers
"Ooohhh horn crush!" Toggle Hitboxes Toggle Hitboxes
|
Super-Sonic Jazz
Level 1
|
 + + + +
|
|
| Guard
|
Properties
|
Damage
|
Meter
|
On Hit
|
On Block
|
On Pushblock
|
| Mid
|
Armor (1 hit),
Invuln. (Throw) (Frames 1-2),
Invuln. (Full) (Frame 3 until active)
|
600 x3, 2300 (100 x3, 300)
|
-100%
|
KD
|
-27
|
|
| Startup
|
Active
|
Recovery
|
Hit Stun
|
Block Stun
|
Hit Stop
|
Super Hit Stop
|
| 2 + 6
|
7, 5, 6, 4
|
47
|
35 x3, 20
|
23 x4
|
8 x3, 13
|
7
|
|
|
|
|
- With 2 frames of armored and throw invulnerable pre-flash startup, and enough hitstop to cover the rest of the invulnerable startup, this is one of the hardest to counter reversals in the game (short of blocking and punishing). After the startup, this move is still covered with one hit of armor as Big Band charges forward. Use this move to get out of almost any mixup situation and to end combos.
- The final hit sends the opponent backwards, so a conversion is only possible with more meter (H Giant Step, Super Sonic Jazz/Strike Up The Band) or a specific assist like Painwheel's H Pinion Dash.
- Commonly abbreviated to "SSJ".
|
|
|
Toggle Hitboxes Toggle Hitboxes
|
TUBA TUBA!
Taunted Level 1
|
After Taunt,
+ +
|
|
| Guard
|
Properties
|
Damage
|
Meter
|
On Hit
|
On Block
|
On Pushblock
|
| Mid
|
Armor (15 hits),
Invuln. (Throw) (Frames 1-2),
Invuln. (Full) (Frame 3, startup only)
|
600 x4, 475 x12, 1600 (100 x3, 33x12, 200)
|
-100%
|
KD
|
-33
|
|
| Startup
|
Active
|
Recovery
|
Hit Stun
|
Block Stun
|
Hit Stop
|
Super Hit Stop
|
| 2 + 6
|
7, 5, 6, 4, (11), 4 x11, 4, (24), 5
|
52
|
35 x16, 25
|
23 x3, 20 x21, 23
|
8 x4, 5 x12, 28 (8 x3, 8 x4, 5 x12, 28 on block)
|
7
|
|
|
|
|
- After charging up a taunt, Big Band's Super Sonic Jazz charge has more hits of armor and adds the TUBA TUBA! attack after the 4th hit. Not only do these punches deal additional damage, they sends the opponent into a knockdown directly in front of Big Band for an easier DHC.
- No 4th hit on block.
- Immediately transitions to TUBA TUBA if Super Sonic Jazz whiffs.
- Holding a button will not consume the taunt, and will perform just Super-Sonic Jazz instead.
|
|
|
"You're gonna get beat!" Toggle Hitboxes Toggle Hitboxes
|
Tympany Drive
Level 1
|
(Air Only) + +
|
|
| Guard
|
Properties
|
Damage
|
Meter
|
On Hit
|
On Block
|
On Pushblock
|
| Mid
|
Invuln. (Full) (startup only)
|
275 x15, 1200 (50 x16)
|
-100%
|
KD
|
-10
|
|
| Startup
|
Active
|
Recovery
|
Hit Stun
|
Block Stun
|
Hit Stop
|
Super Hit Stop
|
| 8 + 7
|
8 x2, 4, (4), 8 x4, 4, (4), 8 x4, 4, (4), 8 x2, 4
|
30
|
27 x15, 35
|
30 x15, 23
|
2 x15, 8 (6 x15, 8 on block)
|
8
|
|
|
|
|
- Big Band beats a set of timpani drums, hitting below and around himself as he hovers. Holding a direction during the attack will control Big Band's hover, which lets him follow the opponent through the air and connect with all 16 hits. The opponent lands from the final hit's knockdown before Big Band lands, so he can continue a combo after the Tympany Drive if he's in range to OTG with an air normal on the way down.
- If any hit from this attacks is blocked, Big Band cannot block or perform any action on the way down.
- The first active frame is vulnerable. This will cause improperly spaced meaties to trade, often in Big Band's favor.
|
|
|
"You're in trouble now!" Toggle Hitboxes Toggle Hitboxes
|
Death Toll
Taunted Level 1
|
After Taunt,
(Air Only) + +
|
|
| Guard
|
Properties
|
Damage
|
Meter
|
On Hit
|
On Block
|
On Pushblock
|
| Mid
|
Invuln. (Full) (startup only),
No Scaling (last two hits),
Hit Grab (last hit),
Sound Stun
|
275 x15, 0, 250, 1400, 0 (50 x 16)
|
-100%
|
KD (Sound Stun),
Soft KD (Invuln.)
|
-10
|
|
| Startup
|
Active
|
Recovery
|
Hit Stun
|
Block Stun
|
Hit Stop
|
Super Hit Stop
|
| 8 + 7
|
8 x2, 4, (4), 8 x4, 4, (4), 8 x4, 4, (4), 8 x2, 4
|
30
|
27 x15, N/A
|
30 x15, 23
|
2 x15, N/A (6 x15, 8 on block)
|
8
|
|
|
|
|
- When powered up with a taunt, the 16th hit of Tympany Drive becomes a hit grab. The additional Death Toll resembles Big Band's regular air throw and deals damage free from any damage scaling effects.
- With Sound Stun, Big Band lands first and can continue the combo on the falling opponent.
- Without Sound Stun, the opponent becomes invulnerable for the knockdown and can use an immediate Ground Recovery.
- Holding a button at the end will not consume the taunt.
|
|
|
"Join the big band!" Toggle Hitboxes Toggle Hitboxes
|
Strike Up the Band
Level 3
|
+ +
|
|
| Guard
|
Properties
|
Damage
|
Meter
|
On Hit
|
On Block
|
On Pushblock
|
| Mid
|
Invuln. (Full),
45% Minimum Scaling,
Projectile
|
550 x7, 110 x84 (100 x7, 33x84)
|
-300%
|
KD
|
-76
|
|
| Startup
|
Active
|
Recovery
|
Hit Stun
|
Block Stun
|
Hit Stop
|
Super Hit Stop
|
| 4 + 3
|
5, (1), 5, (1), 5, (1), 5, (1), 5, (1), 5, (1), 5
|
87
|
35 x6, 20 x85
|
19 x6, 23, (23 x84)
|
2 x6, 20 (2 x6, 10, 8 x84 on block)
|
7
|
|
|
|
|
- Big Band sends a wave of podiums across the ground. Upon a 7th successful hit, the podiums knock the opponent upwards to get bombarded by trumpet mute missiles.
- Because the bulk of the damage is dealt by the missiles, it's best to use this away from the corner so that more podiums are spawned which spawns more missiles.
- Does much more damage to Big Band in any scenario, due to his large hurtbox.
- The full attack will only trigger after a successful 7th hit, damage shows complete attack, frame data shows attack on whiff or block.
- Can combo afterwards when close to the corner with OTG (eg. 2MP(1) 5HK H Beat), making this sometimes useful for converting off stray hits.
|
|
|
"TUBA TUBA TUBA TUBA TUBA TUBA TUBA TUBA" Toggle Hitboxes Toggle Hitboxes
|
Satchmo Solo /
Satchmo Death Blow
Level 5
|
, + , , + ,
+ +
|
|
| Guard
|
Properties
|
Damage
|
Meter
|
On Hit
|
On Block
|
On Pushblock
|
| Mid
|
Invuln. (Full),
Hyper Armor,
Sweep,
55% Minimum Scaling
|
400 x20, 4500 (33x20, 200)
|
-500%
|
Wall Bounce*
|
-21
|
|
| Startup
|
Active
|
Recovery
|
Hit Stun
|
Block Stun
|
Hit Stop
|
Super Hit Stop
|
| 1 or 2 + 0
|
4 x20, (24), 5
|
6 or 50
|
35 x20, 25
|
23 x21
|
2 x20, 30
|
1
|
|
|
|
|
- After hitting 5MP, Big Band can play the first notes of the Skullgirls title theme. This just so happens to be the command for a level 5 super, triggering an extended super freeze while Big Band's meter gauge drains from 5 full levels to 0. With the opponent fully frozen, Big Band can play additional trumpet notes with impunity. The notes do no additional damage.
- A faster button combination that still allows you to enter Satchmo Solo is 5LP 2LK 2LP 2MP.
- Inputting via 5MP decreases the startup from 2 to 1 frame.
- Choosing to not inputting + + during the extended super freeze will put Big Band in a brief and invulnerable recovery.
- Satchmo Deathblow ignores armor.
- If the opponent was blocking during the flash, an orange '!!' icon appears above Big Band (the same icon used when a player gets hit low).
- The final hit will only wall bounce assists if one of the punches successfully hits the enemy point character. Point characters are always wall bounced.
- Can always combo afterwards with OTG. On midscreen lights, it's possible to link 2LP without using OTG.
- Skullgirls Tuestorials 08 - Big Band's Level 5
- The second frame data graph shows the move when the 236PP follow up is not performed, leaving Big Band +1
|
|
|
Taunt
|
|
|
| Guard
|
Properties
|
Damage
|
Meter
|
On Hit
|
On Block
|
On Pushblock
|
| N/A
|
-
|
N/A
|
0%
|
N/A
|
N/A
|
|
| Startup
|
Active
|
Recovery
|
Hit Stun
|
Block Stun
|
Hit Stop
|
Super Hit Stop
|
| N/A
|
N/A
|
110
|
N/A
|
N/A
|
N/A
|
N/A
|
|
|
|
|
- Successfully taunting will trigger a visual effect over Big Band similar to the Sound Stun hit effect, signaling his next Super-Sonic Jazz or Tympany Drive super will use the stored taunt. The upgraded versions of these supers have a follow up attack and additional damage.
- Holding the respective button while inputting the super will not consume the charge.
- A charged super cannot be done in the same combo Big Band gains a taunt boost.
- Big Band doesn't get the boost if he is interrupted from his taunt before the visual effect.
- Holding the input will continue to play Bagpipe Blues for no additional benefits.
|
|
|
"Peace out."
|
| Assist Taunt
|
Automatically done after an assist move
|
|
| Guard
|
Properties
|
Damage
|
Meter
|
On Hit
|
On Block
|
On Pushblock
|
| Mid
|
-
|
N/A
|
0%
|
N/A
|
N/A
|
|
| Startup
|
Active
|
Recovery
|
Hit Stun
|
Block Stun
|
Hit Stop
|
Super Hit Stop
|
| N/A
|
N/A
|
58
|
N/A
|
N/A
|
N/A
|
N/A
|
|
|
|
- Amount of time it takes for the character to turn invulnerable after they finish performing their assist action.
- Longer recovery → more time to punish the assist.
|
|
|
Colors
Intro Poses
Big Band has 4 different intro poses that can be selected by holding a button or combination of buttons during the loading screen before a match.
|
Intro pose 1:
Hold OR
Big Band walks into the screen with a magnifying glass.
Eugh!
|
|
Intro pose 2:
Hold OR
Big Band enters the screen using rocket power.
One truth... prevails...
I'm all there is of the most real.
You will be prosecuted to the full extent of the jam.
When the word of law falls, pick it up and hold it higher.
|
|
Intro pose 3:
Hold OR
Big Band plays a tune on his saxophone before facing the opponent.
(Same voicelines as Pose 2.)
|
|
Intro pose 4:
Hold a combination of two strengths at the same time.
eg. +
Big Band drops from the ceiling and lands with a loud thunk sound.
HRRRNNH!
|
Win Poses
|
Winpose 1:
Hold
|
|
Winpose 2:
Hold
|
Trumpet
| Note
|
Input
|
| Play in higher octave |

|
| Play in lower octave |
|
| C |
|
| C# / D♭ |
+ +
|
| D |
+
|
| D# / E♭ |
+
|
| E |
+
|
| F |
|
| F# / G♭ |
|
| G |
|
| G# / A♭ |
+
|
| A |
+
|
| A# / B♭ |
|
| B |
|
Players to Watch
Disclaimer: This list is derived from community input and is in no way comprehensive or a form of ranking of any kind. Our community criteria can be found here.
| General
|
|
| Characters
|
|
|
|
|
| Mechanics
|
|
| Other
|
|


![M / H Take the A Train ([4]6K)](/images/thumb/2/23/SG_big_bfk_mh.png/88px-SG_big_bfk_mh.png)

![M / H Take the A Train ([4]6K)](/w/File:SG_big_bfk_mh.png)


