Skullgirls/Combo Mechanics
Combos
A combo is any series of attacks that are unblockable for the opponent after the first hit. The attacking player can create any number of elaborate combos with the creative use of a few, fundamental mechanics.
Cancels
- Normals and command normals cancel into any special move or super during all start up, active, and recovery frames. Normals that whiff can still cancel to a special move or super.
- Air normals and command normals all cancel to an air dash for characters that have an air dash. Air dash canceling works during start up, on whiff, block, or hit similar to canceling to a special move.
- Specials always cancel into supers on start up. They cancel during active frames and part of recovery frames on hit or block. Late recovery frames can never cancel. No active or recovery frames can cancel for a missed special move.
Chains
All characters can chain cancel their normal moves into other normals on hit or block. Any move from an attack button lower on the chain will cancel to an attack higher on the chain during any recovery frame after connecting. Different characters have different chain combo sequences for their ground and air chains. Chain cancels do not work on whiff.
- 6 button chain:
 →
→  →
→  →
→  →
→  →
→ 
- 5 button chain example:
 →
→  →
→  →
→  →
→  or
or 
- 4 button chain example:
 →
→  →
→  or
or  →
→  or
or 
- 3 button chain:
 or
or  →
→  or
or  →
→  or
or 
Self Chaining Normals
Some normal moves can chain into themsleves with additional button presses, usually many character's LP normals. Unlike normal chains, these attacks can chain into themselves on whiff. These attacks can also still chain into higher buttons in the chain on hit or block.
Links
A link allows a move to hit then completely animate and end without canceling, leaving the opponent in enough hit or block stun for another move to connect. Using links to combo normal moves often requires strict, frame specific timing and is more difficult than creating a combo using only cancels. The most important links appear in air combos that use unchained normals, which can be useful for getting a lander off of an otherwise simple launcher into air combo.
OTG Hits
The attacking player can hit the opponent off the ground once per combo. Anything can OTG if it hits low to the ground, even if it isn't a low move. During a typical knockdown any hit that lands on the opponent after a red impact effect but before the blue impact effect (and available ground recovery) consumes the one OTG. Hitting the opponent while the are on the ground from a sliding knockdown or late into the crumple stun also uses the one OTG for that combo.
Using Assists in Combos
- An assist can only be called once during a combo.
- Starting a combo off of an assist's attack gives the combo 66% damage scaling. If an assist counter hits and starts a combo, it causes only 90% damage scaling.
- Additionally, assists that start combos often build less meter. The exact penalty seems to vary from assist to assist. Throw, command grab and hitgrab assists don't seem to suffer this penalty.
More Details
Outside of assists being only usable once per combo, there are mechanics in place that can still consume your assist usage in a combo.
- Anything from a character hitting while it is not the point character will use up the assist usage that combo if one has not been used yet.
- Examples: DHCs that leave projectiles on the screen (argus to SSJ, Sniper Shot unscaling, Puddle to other DHC) will use up the assist call for that combo.
- Similarly, setups for tag combos that have something from the tagging-out character hit while the tagged in character is on the screen will use up the assist call. Examples include double's Puddle, Peacock bombs, Fortune headless setups, and others. Related, if the tag transition happens while the opponent is in hitstop of a projectile that was from the old point character, it will use up that combo's assist call even though it "technically" it still hit while the old point was on screen. This mostly affects Fukua but can also affect peacock, fortune, beo, and parasoul.
Restands
If the opponent hits the ground in hitstun from a non-knockdown move, they land on their feet steadily, continue their hitstun and even go through at most 2 extra frames of hitstun. Restands are independent from OTGs and nothing restricts multiple restands in the same combo. Both ground and air moves can cause an opponent to land during a combo.
- When Landing Recovery is in the middle of the hitstun, the hitstun will not change.
- When the opponents landing at the last frame of hitstun, they will get the other landing recovery frame as hitstun. This is equivalent to they should go through 1 extra frame of hitstun.
- When the opponents landing at the next frame of the last frame of hitstun, they will get the 2 frames landing recovery as hitstun. This is equivalent to they should go through 2 extra frame of hitstun.
Character Specifics
Weight
The game's engine considers character weight whenever the defending character gets hit, starts falling, or changes momentum for any reason. Launchers will generally send a lighter character further than the a heavier character. Certain air combos will not work against every character because of this subtle detail.
| Lights | Filia/Fukua, Peacock, Ms. Fortune, Painwheel, Valentine, Squigly, Annie, Umbrella |
|---|---|
| Mediums | Cerebella, Parasoul, Eliza *, Beowulf, Robo-Fortune, Black Dahlia |
| Heavies | Double, Big Band |
* Eliza behaves as a lightweight when she is not in hitstun
Hurtboxes
Every character has unique hurtboxes, some with differences that may cause a need for combo adjustments. This is a non-comprehensive list of some character's unique hurtbox traits.
- Big Band's hurtboxes are taller and wider than the rest of the cast by far. While he is the only other heavy character alongside Double, this trait makes him even more unique to combo on.
- Double and Eliza's standing hurtboxes are also significantly taller.
- Squigly's hurtboxes are thinner than average.
- Peacock and Beowulf's hurtboxes are a bit wider than average.
- Cerebella's hurtboxes sometimes make combos drop due to the unique shape.
Recovery Spark
If a defending character takes a 3 or more hit combo then recovers directly to a normal state without a knockdown, the defending character will show a recovery spark effect. This has no effect the defending character, but can signal the defending player after the abrupt end of an opponent's combo.
Assist Combos
The assist character can be hit with a combo until they return to a neutral state on the ground, at which point they will turn invulnerable and leave the screen. However in the air they are completely vulnerable.
A combo can't trigger a burst on an assist character, so normal undizzy and IPS rules don't apply.
Several mechanics that are normally only available once per combo, such as Big Band's soundstun and Filia's Hairball cancel, do not apply, allowing them to be used repeatedly.
If the point is killed while an assist is on the screen, and that assist character is the next in line character, they will stay on the screen. However, if there are two characters left, and the assist on screen is the third character, the second character will become enter the screen as the new point.
The point character's facing direction is still relative to the opponent's point character. This is still true even if the opponent's point is killed, your point will face their dead body until the next character comes in. This is the main challenge when comboing assists midscreen. The screen edges / camera are also not determined by assist characters, so wall bounce moves can be used midscreen to great effect when comboing an assist.
Hitstop Drop
Assist characters are not affected by super hitstop like point characters are. If setup correctly, you can uncombo the assist with a super for big damage, while the point is still stuck in the combo because of the super hitstop.
Double Snap
An assist character will not fly off screen like a point character when hit by a snapback, only travel to the edge of the screen and leave after falling to the ground. If a point character and an assist get hit by the same snapback at the same time and reach the corner within 10f (approximately half a screen), the point character will get forced off the screen and leave the assist character behind. Trapping the assist character turns a snapback into a devastating double snap, where the enemy point character can continue to combo the helpless assist. A double snap often results in a highly repetitive combo, monosyllabic shouting from any spectators, a dead character, and the unfortunate defending player picking up the pieces of a broken team.
While the assist character is trapped on screen after a double snap:
- The recently snapped point character regenerates health at a higher than normal rate.
- The defending team slowly auto-generates additional meter.
- All other meter gain is disabled during the double snap.
- The timer stops until the helpless assist character is killed or leaves the screen after touching the ground.
If a snap is performed on a point character but doesn't hit the assist character, the game will turn the assist into invulnerable soft knockdown to prevent the assist character from being combo'd any further, specifically avoiding what was known as "Midscreen double snaps". However, a couple of assist setups still exist that keep the opponent's assist in hitstun during and after the snap, allowing for a midscreen followup. (video)
Dead Body Combos
If a character is killed in the air, you can continue to combo the dead body. The next character won't enter the screen until the combo ends and/or the body fades out, so this tactic can be used to set up positioning closer to the corner, and/or to snap the dead body to force a different character for the next incoming. Hitting a dead body gives full meter to the defending team and nothing to the attacking team, though the attacker still gains the passive meter for using specials
- Once a body fades out, it can no longer be interacted with, the combo ends, and the next character on the team will come out.
- Dead bodies fall faster than normal characters and can behave differently when being hit, so keeping them in the air becomes more difficult, often limiting the number of times the body can be hit.
- If the character is KOed in the air, you can continue your combo as normal until they touch the ground, at which point the body will red bounce if you still have OTG or blue bounce and then fade out otherwise.
- If the dead body touches the corner wall, they will drop out of the combo and become un-hitable until they hit the ground. If you have OTG, then you can continue the combo as described above, otherwise they will fade out.
- If IPS or undizzy is triggered, they will become un-hitable and fall to the ground, then fade out.
- Otherwise, if the body touches the ground, it will fade out.
- Hitting the dead body with a snap will remove the corpse from the match, denying Valentine the ability to revive them.
Bursts
Combo length in Skullgirls is limited by two systems: undizzy and the infinite protection system (IPS). Both act as a set of rules for what you can do in a combo, and if the rules are broken, they both result in the opponent being able to burst. When the opportunity to burst is available, the hitsparks and hit sounds will change. Once that happens, the burst can be performed by pressing any face button.
- Bursts can be done until the character returns to a neutral state. If OTG is spent, then ground teching after a knockdown without bursting is allowed.
- Bursting puts the character into a burst state that lasts for 61f total.
- During the first 30f you are allowed to perform a Burst Alpha Counter.
| ||||||||||||||||||||||||||||
| ||||||||||||||||||||||||||||
| ||||||||||||||||||||||||||||
Combo Sections and Stages
Before learning how undizzy and IPS work, some information on how the game reads combos is necessary. Combos are made up of a series of chains. A chain is a series of attack cancels that follow the order of normals > specials > supers > DHCs. Each chain in a combo will advance the combo stage, which increasingly add more limitations to the combo. The early free stages will not have any limits. The watched stages will start accumulating undizzy, and keep track of which buttons you use for IPS. Finally, triggering a burst is only possible once the combo reaches the limited stage.
Order of combo stages:
- 1: Free: Optional section for a chain of jump-in attacks
- 2: Free: The next chain, usually the first ground section.
- 3: Watched: The next chain, usually after a jump canceled launcher or link.
- 4: Watched: Optional section, comes into play when stage 3 uses an airdash cancel.
- 5: Limited: Maximum stage, same as watched and can trigger a burst.
In order to gain a better understanding of how this combo system functions, set the 'attack data' training mode option to 'basic' or 'advanced' and the attack data will show what stage the combo is currently at.
Example Combo
This is a Filia combo with each chain notated with its stage. (video)
- Stage 1: IAD jLK jHK (jump ins are ignored) (not shown in the video)
- Stage 2: 2LK 5MK 5HP (the first ground chain is ignored)
- Stage 3: jHK (now the combo is building undizzy and watching what buttons are pressed for IPS)
- Stage 4: airdash cancel jLK jHP jHK
- Stage 5: 2MP 5MK 5HP ... and the rest of the combo (stage 5 is the final stage, and now can potentially trigger a burst if undizzy or IPS rules are broken)
More Details
- If the point recovers from their last move, and then an assists hits after that, the assist hits in stage 3.
- Cancelling to an air dash in stage 1 will end the chain and start Stage 2.
Undizzy
Undizzy is a combo length limiter represented by the green bar under the health bars. Once a combo reaches stage 3, hits in a combo begin to fill the opponent's undizzy gauge. If the combo begins a new chain at stage 5, and the defending character has 240 or more undizzy, the combo becomes burstable.
The undizzy value won't drain immediately after exiting a combo, it will instead drain slowly. This affects reset strategy, as doing a building up the undizzy bar before doing a reset will make the resulting combo less rewarding.
When the undizzy bar is full, other penalties are applied as well. The main idea behind undizzy is to keep it low, or at least under the maximum 240, so you can do more damage before maxing out for a KO.
Bursts from undizzy will result in green hitsparks. This does not affect the resulting burst, it's just to indicate how the burst happened.
Undizzy is also known as drama.
Accumulating Undizzy
Attacks add undizzy based on set values for the type of move:
- Light normals: 15 undizzy
- Medium normals: 20 undizzy
- Heavy normals: 30 undizzy
- Any special: 20 undizzy
- Normal throws and supers do not add undizzy.
- Assists add appropriate undizzy for the assist's attack type.
Characters can accumulate an undizzy value beyond 240, although it will not be reflected on the HUD.
An attack that chains into itself and attacks with multiple hits will add undizzy only on the first successful hit.
Depleting Undizzy
Undizzy decays over time when the opponent is not in hit or block stun, and if it accumulates over the 240 limit it will take even longer to clear. A full undizzy gauge will drain over a maximum of 60f for 350+ undizzy, scaling from a slightly slower decay rate at values over 150 to a faster rate as the bar empties.
At 240 undizzy or above, the bar will also wait for 4f after recovery from hitstun before starting to decrease.
Some other actions will also drain undizzy:
- A ground tech immediately clears 50% of current undizzy.
- Bursting will remove all undizzy.
- Counter hits subtract undizzy, which can put undizzy on the defending character to a negative value and allow for some impressive counter hit only combos.
Side Effects
- All damage when above 240 undizzy is scaled by 55%, with the same minimums as normal.
- When at or above 240 undizzy, the attacker always gets the minimum scaled meter gain and the opponent always gets the maximum.
- Once a combo becomes burstable via undizzy (green hitsparks), damage is scaled by an extra 50%, and can go below minimum damage scaling. This doesn't apply to bursts via IPS (red hitsparks).
- If a character performs a level 1 or 2 super while that character possesses any amount of undizzy, the super becomes blockable after the flash if the other character hasn't already committed to an action.
Infinite Prevention System (IPS)
The infinite protection system (IPS) will keep track of what buttons are used in a combo starting from stage 3. Once the combo reaches stage 5, if a new chain is started with a button that has been used, the combo becomes burstable.
- All standing, crouching, and command normals from the same button count as the same attack to IPS. Once one version of the normal gets watched, all versions are watched. IPS considers air normals separate attacks but are similarly tied to any air command normals on the same button.
- Different button strengths of same special move count as the same attack to IPS; once one strength of the special attack gets watched, all of them are watched. Similar to normal attacks, IPS watches the air version of specials separately and considers all strengths as one move.
- Supers are never watched and can't trigger IPS. Bursts can be performed while getting hit by a super if something else triggered IPS first.
While the undizzy system will technically prevent infinites on its own, IPS predates undizzy and was kept in the game. IPS largely dictates how combos are structured (it won't let you loop the same chains repeatedly for example) and in turn gives the player more options to intentionally trigger a burst for a bait.
Bursts from IPS will results in red hitsparks. This does not affect the resulting burst, it's just to indicate how the burst happened.
In order to gain a better understanding of how this combo system functions, set the 'attack data' training mode option to 'advanced' and see how the display changes as you perform combos. The center display will turn buttons red as they're being tracked. If a burst is triggered, the button that caused the burst will turn white. The bottom half of the circle indicates ground buttons, and the top half air buttons. The circles off to the side represent character specific specials.
More Details
- Assists count as their own section. IPS will watch assists and remember them if the assist character becomes the point character before the end of the same combo.
- A throw, if used in a combo after a stagger or crumple stun, counts as its own section. Starting a combo with a throw will start the combo at Stage 2. Throws and hit grab attacks cannot trigger IPS. Bursts can never be performed during a throw's scripted animation.
- Watched attacks will carry over to a teammate if the teammate takes point after a standard tag, but not after a DHC.
- Starting a combo with a super that allows a combo afterwards will treat the next chain as either Stage 2 or Stage 3, depending on the super.
- Continuing a combo with a DHC will instantly begin Stage 5. If the DHC starts a new combo, it's treated like a normal super.
- There is at least one niche exception to this: DHCing immediately after Countervenom connects will be Stage 2.
Character Specific Rules
- Cerebella's j.LP will infinitely chain into itself but can only trigger IPS on its first hit.
- Parasoul's j.MK and (air) ↓ + MK can chain into any of her other air normals. Chaining "down" will start a new combo section.
- The direct hit from Parasoul's Napalm Shot will get watched like any other special move. IPS ignores the exploding tears from this attack.
- The explosion from Parasoul's Napalm Toss will get watched like any other special move. Although placing the tear does not cause a direct hit, chaining into the special move means the tear will not trigger IPS when it eventually does explode.
- If Parasoul cancels the recovery of an (air) Napalm Toss to start a second air chain in the same jump, it is considered the same as an air dash cancel to IPS and can be used to get a Stage 4 chain.
- IPS completely ignores Ms. Fortune's head. Hit from the head can never trigger IPS, the head's attacks are never watched, and it can't start a new section or increase the combo stage for the body.
- Painwheel's Flight is considered the same as an air dash cancel to IPS and can be used to get a Stage 4 chain.
Burst Bait
Bursts are not a fail safe option, and can be baited to be whiff punished. Whether or not the burst's recovery is vulnerable or not is determined by the color of the burst. Depending on a few factors, bursts will either be gold (safe) or blue (punishable), shown by the effect surrounding the character when they perform a burst.
- If a burst hits or is blocked, it is always gold (safe).
- If the player bursts a projectile hit, it is always gold (safe).
- If the player waits 90f after a burst becomes available to burst, it will be gold (safe).
Otherwise,
- If the burst whiffs completely, it is blue (punishable)
Regardless of the burst's color, burst alpha counter is always available for one bar of meter.
Burst Untechable Knockdown
Health and Damage
Prominently displayed on the HUD, life is the most important thing to keep track of while playing Skullgirls. When you take too much damage you lose!
Team Size
The exact individual character life and damage differences between solo, duo, and trio teams scale differently depending on the match up. The values do not scale linearly, allowing the consistent timer for all match ups and team size combinations. To see how much damage is needed to kill different ratios with damage buffs taken into account, see here
| Team Size | vs Solo | vs Duo | vs Trio |
|---|---|---|---|
| Solo | 15500 HP x1.00 DMG |
31775 HP x1.45 DMG |
31775 HP x1.45 DMG |
| Duo | 17825 x2 HP x1.30 DMG |
15500 x2 HP x1.00 DMG |
17825 x2 HP x1.30 DMG |
| Trio | 15500 x3 HP x1.00 DMG |
15500 x3 HP x1.00 DMG |
17825 x3 HP x1.30 DMG |
Chip Damage
All special and super moves cause some amount of chip damage when they are blocked. The amount of chip damage per move is specific to the move, is subject to all normal damage modifiers and scaling, and deals a portion of recoverable damage. Everything that can do chip damage must do a minimum 1 point of damage. Pushblocking will make damage taken by chip turn into recoverable health.
Damage Scaling
Attack damage scales down at a compounding 87.5% per hit after the 3rd hit in a combo. Damage scales to a minimum 27.5% for attacks with base damage of 1000 and above and 20% of base damage for hits under 1000 base damage. Some moves have their own minimum scaling, in order to do more damage once the normal damage scaling is in effect. Minimum damage for any hit is always 1 point.
| Hit | Damage |
|---|---|
| 1 | 100% |
| 2 | 100% |
| 3 | 100% |
| 4 | 87.5% |
| 5 | 76.6% |
| 6 | 67% |
| 7 | 58.6% |
| 8 | 51.3% |
| 9 | 44.9% |
| 10 | 39.3% |
| 11 | 34.4% |
| 12 | 30.1% |
| 13 | 26.3% |
| 14 | 23% |
| 15 | 20.1% |
| 16+ | 20% |
Some moves will scale the entire combo, in addition to the normal damage scaling. For example, normal throws will scale the entire follow up combo by 50%. This forced damage scaling will only occur if the change will lower damage faster than the combo would by default.
All damage dealt to assist characters gets a 35% increase, but is dealt entire in red / recoverable health.
If an assist starts a combo, it sets damage scaling to 66% for the combo. Landing the assist as a counter hit reduces this penalty to 90%.
All damage when above 240 undizzy is scaled to 55%, with the same minimums as normal.
Once a combo becomes burstable via undizzy (green hitsparks), damage is scaled by an extra 50%, and can go below minimum damage scaling. This doesn't apply to bursts via IPS (red hitsparks).
Generally, level 3 supers have minimum damage scaling of 45% and level 5 supers scale to a 55% minimum, ensuring the attacks deal enough damage to justify their high cost in meter. There are some minor exceptions
DHCs reset damage scaling to 70% at the super flash. Projectiles have their scaled damage determined from when they hit, even if left on the screen during the additional super flash.
A throw will freeze scaling for the duration of the throw.
Counter Hits
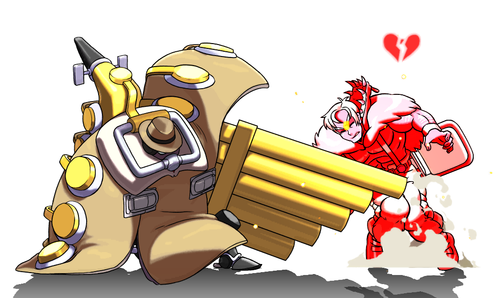
The start up, active, and recovery frames of an attack leave the attacking character vulnerable to a counter hit. When counter hit, the defending character flashes red and a broken heart effect appears over them.
Counter hits will:
- Subtract undizzy, and can make the undizzy value go below zero. Negative undizzy allows for special counter hit only combos, which makes punishment on risky moves hurt.
- Light normals: -25 undizzy
- Medium normals: -50 undizzy
- Heavy normals: -100 undizzy
- Normal throws: -50 undizzy (Counter hitting a normal throw or air throw during its startup frames does not grant a damage bonus, but still subtracts undizzy.)
- Specials: -50 undizzy
- Projectiles: All Projectiles have half of the undizzy bonus on counterhit that they would have from their base normal/special strengths. They retain the damage bonus.
- Assists: All assists have half of the undizzy bonus they would have from their base normal/special strengths. Projectile assists do not have their own specific undizzy reduction, so they only have the general assist undizzy reduction.
- Grab and hitgrab supers other than Squigly's Daisy Pusher: -50 undizzy
- Other supers: no effect
- Taunts and Taunt assists: no undizzy bonus, but still receive the damage bonus.
- Give a 1.5x damage boost to the attack that caused the counterhit.
- Make an assist starter scale damage to 90% instead of the usual 66%.
Recoverable Health (Red Health)
After characters take any damage, the red portion of their life bar represents the amount of recoverable damage dealt to that character. All attacks, including chip damage from blocked attacks, deal some portion of recoverable damage. All throw attacks deal 100% recoverable damage. Life recovery begins when a character tags out, or is otherwise off screen, starting at 90f after leaving. This recovery is always percentage based, at a rate of .5% per 30f. Team size and the remaining life totals do not affect life recovery in any way.
Assist characters take all damage as recoverable damage. During an assist lockout, which occurs after an assist character takes damage or the team gets hit by a snapback, the defending team loses the ability to heal recoverable damage for the 300f duration of assist lockout.
Solo character teams do not have the passive damage recovery of a larger team because a solo cannot tag out. In solo vs solo team matches, recoverable damage is not used in any way and does not display on the life bar. When a solo team faces a larger team, the solo team can retain up to 1/3 of total health as recoverable damage against a 3 character team and up to 1/2 total health against 2 characters. Snapbacks use the solo's team recoverable damage, which have additional properties in these matches; hitting the larger team with a snapback heals recoverable damage for the solo team while getting hit by a snapback will remove all recoverable damage from the solo team.
If a character takes non-recoverable damage for any reason, even if it's a single point of chip damage, the team cannot recover the health and still get a "perfect" message when winning the match.
Meter
Teams gain meter while attacking, blocking, and taking damage. The meter fills from 0% to 100%, stocking up to the maximum 5 full bars of meter. The meter gained per attack depends on a meter value specific to the attack. Team size will not change meter gain.
Point characters can spend the team's meter for supers, DHCs, alpha counters, and snapbacks. Attacks that use meter do not gain meter for the attacking team on hit or block, but can still give meter for the defending team. Both teams start with 1 free bar of meter.
This guide lists meter gain per attack as the meter generated for the attacking team with a successful hit, no damage scaling, and at least 1 meter already stocked for the team.
Meter Scaling
Meter scaling is based on the damage scaling but advanced on hit, so the first two hits will be 100% meter gained, then the third hit will gain 87.5% (as if you were on the 4th hit of you combo) assuming there was no forced scaling and then continue as normal. If damage scaling is low, the attacking team will gain more meter than the defending team. When damage scaling is high, the defending team will gain much more meter. This means doing short combos and quick resets are an option to prevent your opponent from gaining meter.
- Meter gain for attacking team on hit = (damage scaling)*(meter)
- Meter gain for defending team on hit = (1.25*(1-damage scaling)+.25)*(meter)
- When at or above 240 undizzy, the attacker always gets the minimum scaled meter gain and the opponent always gets the maximum.
Meter Gain on Block
On block, attacks give a fraction of their base meter with no scaling effects:
- Meter gain for attacking team on block = .75*(meter)
- Meter gain for defending team on block = .25*(meter)
Meter Gain on Whiff
Normal moves give a small amount of meter on whiff for the attacking team if the team has less than one full meter. When jumping away from the opponent, whiffed normal attacks will never gain meter. The whiff generates meter on the first startup frame of the attack, independent from the meter on hit or block. For a single hit normal move, whiffed meter is the same as the base meter value for the move.
Most specials always generate a small amount meter on whiff. This meter gain is independent from any form of scaling and is awarded on the first frame of the move.
External Links
- Undizzy and IPS Cheat Sheet by Norn
- Video: Midscreen Double-Snap All Characters
- Video: Skullgirls - Midscreen assist kills for every character
