Story
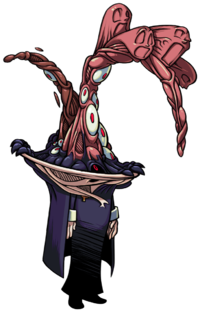
Double’s origins are a complete mystery. Seemingly without a will or motive of its own, this formless monster aids the Skullgirl.
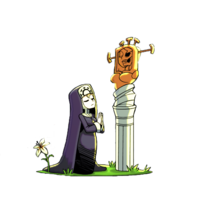
Double is capable of transforming its nightmarish form into that of any person, but often appears as a smiling nun. It can frequently be found in the Grand Cathedral of the Divine Trinity, listening to confessions and attending to the catacombs beneath.
Overview
Double is a jack of all trades character whose moves borrow animations from other characters in the cast. Many of them have different properties than their original, and their uses are re-contextualized by belonging to a different character with a different kit. She also has some choice assists and a safe DHC that actually puts the momentum in her favor.
- Playstyle: Double's toolkit is very versatile and suited for either rushdown or turtling. Her double jump paired with her varied air normals lets her play a slow paced game and out-maneuver opponents in the air, and jHP poses a threat as long as she's above her opponent. Her Lugers (236P) allow her to control a good amount of space from the ground, and is often able to convert into a combo. She has a great ground game as well: 2HP is both a ground poke and frame trap tool, 5HP is a slower long range poke that causes sliding knockdown, and her forward dash is quick and covers a large distance.
- Mixup: Double doesn't have a grounded or IAD overhead option like much of the cast. Instead, she leverages her long 2LK to keep opponents honest and create opportunities to open them up with her amazing throw range. Coupled with her quick forward dash, she has some of the best low/throw pressure in the game. After she lands a hit or throw, she has an extremely simple and flexible left/right air vortex that allows for air throws and burst baits while also being incredibly easy to loop back into. Last but not least, Flesh Step is a powerful crossup tool when combined with an assist.
- Team Synergy: While Double is a strong character on her own, she is unrivaled in terms of team support. Double has access to 2 different safe DHCs: Catheads (236KK) for immediate overwhelming pressure or Beast of Gehenna (214KK) for laying down a safe but strong trap. She also has a very versatile super with Bandwagon Rushdown (236PP), and very powerful damage output with Nightmare Legion (214PP). She has a DHC super for just about every situation, and no other character can match her versatility or effectiveness in that regard. Combined with her very strong assists in Hornet Bomber (623K) or Cilia Slide (4LKHK), Double can uniquely enable anyone that she is placed on a team with with her plethora of support options.
Playstyle
 Double is a well-rounded character that boasts a lot of strong options to synergize with teams, as well as a versatile kit when on her own. Double is a well-rounded character that boasts a lot of strong options to synergize with teams, as well as a versatile kit when on her own. |
| Pros |
Cons |
- Versatile Moveset: Double's toolset is incredibly intuitive and balanced, including a meterless DP, a fireball, and solid normals.
- Strong Assists: Cilia Slide and all three versions of Hornet Bomber are great assists that fill multiple roles well, meaning she has an assist that'll work for every team.
- Fantastic DHCs / Meter Usage: Double's supers and DHC synergy are absolutely tremendous. Car lets her switch sides if she wants and is fully invulnerable on start-up, Puddle is great for combo extensions or safely DHCing at a distance, and Level 3 is a high damage combo-ender DHC that gives hard knockdown. Furthermore, Catheads is notorious for the sheer amount of options it provides on DHC for just one bar, as it is a safe DHC that allows teammates to get out of unsafe on block situations and continue to pressure the opponent, it allows for a combo extension, and can even be used to chip out low health Characters.
- Vortex Ability: Double, even without an assist, has an abundance of ways to force her opponent which side she will be on when going for a reset. When backed with an assist, her options expand dramatically and is able to setup many cross-up situations when combined with her many different abilities to get behind her opponent or bluff that she will do so.
- Neutral Options/ Good Range: Double has numerous good options for getting a hit on her opponent, whether used defensively or offensively. She has several options for anti-airs, air-to-airs, and long range buttons that all can hitconfirm into a full combo.
|
- Tall Standing Hurtbox: When standing, Double is the tallest character in the game, allowing for opponents to do various fuzzy setups on her.
- Horizontal Reversals: While Double has multiple defensive options her disposal, they all share a lack of vertical reach.
- Linear Offense: Despite having no instant overhead or grounded overhead in a cast with characters full of them, double is generally able to make up for this when backed by an assist that gives her unreactable left/rights. When alone however, she is very reliant on her low/throw and fast-fall setups to get a hit on opponents, making her options straightforward and predictable.
|
Video Overview
Stats
Chains
| Standing
|
3 Buttons:  or or  → →  or or  → →  or or 
|
| Crouching
|
3 Buttons: or → or → or
|
| Air
|
5 Buttons: → → → → →
|
Movement
| Weight
|
Dash
|
Double Jump
|
Airdash
|
IAD Lockout
|
| Heavy
|
Step
|
Yes
|
No
|
N/A
|
Wakeup Time
| Forward Tech
|
Backward Tech
|
Sliding KD
|
Hard KD
|
Crumple
|
| 39
|
41
|
91
|
36
|
33
|
Assists
Hornet Bomber (default assist)
Hornet Bomber (default assist)
The L version is an invulnerable DP assist that travels horizontally across the ground and locks down with two hits. The assist version of this move has a 2 more additional vulnerable startup frames, on top of the standard 3 vulnerable frames on every assist.
The M version is the first default assist choice. It's a three hit lockdown / neutral assist that travels a fair distance across the screen in an arc. Some hits will whiff at certain ranges on crouching characters, but the upside to that is the space control the assist provides.
H version is like the M version, but travels all the way to full screen and in a taller arc.
L Luger Replica (default assist)
Horizontal projectile assist. Knocks down and away on airborne opponents.
Cilia Slide (4LK+HK)
Fast, forward moving low assist that is also a sweep and has generous active frames. Sends the opponent backwards on hit, making it easy to combo off of. Great as a low hitting meaty, opening up possibilities for hard to block high/lows. You can also call it in neutral to cover the ground, since it travels forward very quickly.
Move List
Standing Normals
Standing Jab Toggle Hitboxes Toggle Hitboxes
|
| 5LP
|
s.
|
|
| x1, x2
|
Guard
|
Properties
|
Damage
|
Meter
|
On Hit
|
On Block
|
On Pushblock
|
| Mid
|
Chains Into Self
|
300
|
2.5%
|
-3
|
±0
|
|
| Startup
|
Active
|
Recovery
|
Hit Stun
|
Block Stun
|
Hit Stop
|
Super Hit Stop
|
| 6
|
3
|
19
|
18
|
21
|
7
|
N/A
|
|
|
|
- Double's fastest normal
- Chains into itself once with the same frame data.
- Used in air crossup resets and to start the last chain of a combo.
|
|
|
Strong Pie Toggle Hitboxes Toggle Hitboxes
|
| 5MP
|
s.
|
|
| Guard
|
Properties
|
Damage
|
Meter
|
On Hit
|
On Block
|
On Pushblock
|
| Mid
|
-
|
550
|
7.5%
|
±0
|
-4
|
|
| Startup
|
Active
|
Recovery
|
Hit Stun
|
Block Stun
|
Hit Stop
|
Super Hit Stop
|
| 12
|
3
|
26 (25 on miss)
|
28
|
24
|
9
|
N/A
|
|
|
|
- High profile
- Used in combos to convert from H Luger.
|
|
|
Fugazi Knuckle Toggle Hitboxes Toggle Hitboxes
|
| 5HP
|
s.
|
|
| Guard
|
Properties
|
Damage
|
Meter
|
On Hit
|
On Block
|
On Pushblock
|
| Mid
|
-
|
1000
|
10%
|
Sliding KD
|
-5
|
|
| Startup
|
Active
|
Recovery
|
Hit Stun
|
Block Stun
|
Hit Stop
|
Super Hit Stop
|
| 21
|
3
|
22
|
26
|
19
|
14
|
N/A
|
|
|
|
- Slow, long range poke that causes sliding knockdown.
- Hurtbox lingers after active frames.
- Cancel into 236P for safey and to negate the lingering hurtbox.
- Easy to combo into from her magic series chains, so you can choose to end your combos in a sliding knockdown for oki as long as OTG wasn't spent in the combo. Canceling 5HP into two subsequent Flesh Steps and throwing out a jHK is a safejump that will put Double point blank with a meaty projectile for oki.
|
|
|
Substitute Short Toggle Hitboxes Toggle Hitboxes
|
| 5LK
|
s.
|
|
| Guard
|
Properties
|
Damage
|
Meter
|
On Hit
|
On Block
|
On Pushblock
|
| Mid
|
-
|
400
|
2.5%
|
+5
|
+3
|
|
| Startup
|
Active
|
Recovery
|
Hit Stun
|
Block Stun
|
Hit Stop
|
Super Hit Stop
|
| 8
|
2
|
16
|
22
|
20
|
7
|
N/A
|
|
|
|
- More damage than 2LK, so use this when you need to start a chain with a LK button in the middle of your combo.
|
|
|
Too Forward Toggle Hitboxes Toggle Hitboxes
|
| 5MK
|
s.
|
|
| x1
|
Guard
|
Properties
|
Damage
|
Meter
|
On Hit
|
On Block
|
On Pushblock
|
| Mid
|
Chains Into Self
|
400
|
3.75%
|
-4
|
-5
|
|
| Startup
|
Active
|
Recovery
|
Hit Stun
|
Block Stun
|
Hit Stop
|
Super Hit Stop
|
| 11
|
4
|
21
|
20
|
19
|
10
|
N/A
|
|
|
|
| x2
|
Guard
|
Properties
|
Damage
|
Meter
|
On Hit
|
On Block
|
On Pushblock
|
| Mid
|
-
|
500
|
7.5%
|
-1
|
-6
|
|
| Startup
|
Active
|
Recovery
|
Hit Stun
|
Block Stun
|
Hit Stop
|
Super Hit Stop
|
| 11
|
3
|
23
|
24
|
19
|
9
|
N/A
|
|
|
|
- Delaying this move in a combo can help restand airborne opponents
- Although 2LK 5MKx2 is a true blockstring, it's suspect to PBGC and has poor block advantage.
|
|
|
Impawster Toggle Hitboxes Toggle Hitboxes
|
| 5HK
|
s.
|
|
| Guard
|
Properties
|
Damage
|
Meter
|
On Hit
|
On Block
|
On Pushblock
|
| Mid
|
Launcher
|
975
|
10%
|
-5
|
-13
|
|
| Startup
|
Active
|
Recovery
|
Hit Stun
|
Block Stun
|
Hit Stop
|
Super Hit Stop
|
| 16
|
2
|
33
|
29
|
21
|
12
|
N/A
|
|
|
|
|
|
Crouching Normals
Crouching Jab Toggle Hitboxes Toggle Hitboxes
|
| 2LP
|
c.
|
|
| x1, x2
|
Guard
|
Properties
|
Damage
|
Meter
|
On Hit
|
On Block
|
On Pushblock
|
| Mid
|
Chains Into Self
|
200
|
2.5%
|
+4
|
+5
|
|
| Startup
|
Active
|
Recovery
|
Hit Stun
|
Block Stun
|
Hit Stop
|
Super Hit Stop
|
| 7
|
3
|
11
|
17
|
18
|
7
|
N/A
|
|
|
|
- Chains into itself once with the same frame data.
- Is one frame faster and more advantageous on hit than 2LK.
|
|
|
Elbow Emulator Toggle Hitboxes Toggle Hitboxes
|
| 2MP
|
c.
|
|
| Guard
|
Properties
|
Damage
|
Meter
|
On Hit
|
On Block
|
On Pushblock
|
| Mid
|
-
|
575
|
7.5%
|
-1
|
-9
|
|
| Startup
|
Active
|
Recovery
|
Hit Stun
|
Block Stun
|
Hit Stop
|
Super Hit Stop
|
| 14
|
6
|
21
|
25
|
17
|
10
|
N/A
|
|
|
|
- Moves Double forward.
- Solid amount of active frames, so it can be used to convert from Beast of Gehenna.
- Unable to crossup opponents not already in hitstun.
|
|
|
Double Drawn Weave Toggle Hitboxes Toggle Hitboxes
|
| 2HP
|
c.
|
|
| Guard
|
Properties
|
Damage
|
Meter
|
On Hit
|
On Block
|
On Pushblock
|
| Mid
|
-
|
900
|
10%
|
-2,
Ground Bounce (vs air)
|
-9
|
|
| Startup
|
Active
|
Recovery
|
Hit Stun
|
Block Stun
|
Hit Stop
|
Super Hit Stop
|
| 12
|
3
|
28
|
28
|
21
|
9
|
N/A
|
|
|
|
- Excellent poke and frame trap tool with low profile, and can even anti-air. Fast startup for a heavy button. Difficult to punish from max range.
- Combo: 2HP > 4LK+HK
- Use 2HP xx H Bomber at the end of chains to end combos. Although 5HP does more damage, 2HP is far more consistent.
|
|
|
Stamp Toggle Hitboxes Toggle Hitboxes
|
| 2LK
|
c.
|
|
| Guard
|
Properties
|
Damage
|
Meter
|
On Hit
|
On Block
|
On Pushblock
|
| Low
|
-
|
200
|
2.5%
|
+2
|
+5
|
|
| Startup
|
Active
|
Recovery
|
Hit Stun
|
Block Stun
|
Hit Stop
|
Super Hit Stop
|
| 8
|
4
|
12
|
17
|
20
|
8
|
N/A
|
|
|
|
- Fast, slightly disjointed low poke with plenty of range and frame advantage. Use this to establish Double's low / throw mixup. Chain into 2MP or 2MK to hit confirm.
|
|
|
Cliché Toggle Hitboxes Toggle Hitboxes
|
| 2MK
|
c.
|
|
| Guard
|
Properties
|
Damage
|
Meter
|
On Hit
|
On Block
|
On Pushblock
|
| Low
|
-
|
500
|
7.5%
|
±0
|
-4
|
|
| Startup
|
Active
|
Recovery
|
Hit Stun
|
Block Stun
|
Hit Stop
|
Super Hit Stop
|
| 15
|
4
|
19
|
22
|
18
|
9
|
N/A
|
|
|
|
- Lower damage and range than 2MP, but is much safer on block and acts as a second low in your chain.
|
|
|
Sweeping Generalization Toggle Hitboxes Toggle Hitboxes
|
| 2HK
|
c.
|
|
| Guard
|
Properties
|
Damage
|
Meter
|
On Hit
|
On Block
|
On Pushblock
|
| Low
|
Sweep
|
1000
|
10%
|
Soft KD (Invuln.)
|
-18
|
|
| Startup
|
Active
|
Recovery
|
Hit Stun
|
Block Stun
|
Hit Stop
|
Super Hit Stop
|
| 17
|
4
|
32
|
14
|
17
|
10
|
N/A
|
|
|
|
|
|
|
|
Jumping Normals
Clawpy Cat Toggle Hitboxes Toggle Hitboxes
|
| jLP
|
j.
|
|
| Guard
|
Properties
|
Damage
|
Meter
|
On Hit
|
On Block
|
On Pushblock
|
| High
|
-
|
250
|
2.5%
|
+1
|
±0
|
|
| Startup
|
Active
|
Recovery
|
Hit Stun
|
Block Stun
|
Hit Stop
|
Super Hit Stop
|
| 6
|
3
|
16
|
19
|
18
|
7
|
N/A
|
|
|
|
- Tied for fastest air normal in the game. Has a good crossup hitbox and shrinks Double's hurtbox, which can evade some attacks. Use this when you need your fastest air to air, or to disrespect air resets.
|
|
|
Cheap Haircut Toggle Hitboxes Toggle Hitboxes
|
| jMP
|
j.
|
|
| Guard
|
Properties
|
Damage
|
Meter
|
On Hit
|
On Block
|
On Pushblock
|
| High
|
-
|
150 x5, 250
|
1.0588% x6
|
+11
|
+8
|
|
| Startup
|
Active
|
Recovery
|
Hit Stun
|
Block Stun
|
Hit Stop
|
Super Hit Stop
|
| 11
|
2, 2, 2, 2, 2, 2
|
9
|
20 x5, 21
|
18 x6
|
4 x5, 9
|
N/A
|
|
|
|
- Multi-hitting move allowing it to be used to break armour.
- Easy to convert off of, but the multiple hits will scale the combo.
- Can be used for crossups.
|
|
|
Violet Tantrum Toggle Hitboxes Toggle Hitboxes
|
| jHP
|
j.
|
|
| Guard
|
Properties
|
Damage
|
Meter
|
On Hit
|
On Block
|
On Pushblock
|
| High
|
-
|
250, 225, 450
|
1.5% x3
|
+2
|
-6
|
|
| Startup
|
Active
|
Recovery
|
Hit Stun
|
Block Stun
|
Hit Stop
|
Super Hit Stop
|
| 17
|
11
|
14
|
22 x2, 24
|
17 x2, 15
|
7 x2, 12 (10 on block last hit)
|
N/A
|
|
|
|
- Versatile jump-in. Good hitbox, multi-hit, and can be converted from almost any range using dash 5LP.
- Can chain into jHK to fastfall and land before the 2nd/3rd hits connect.
|
|
|
Spiral Fraud Toggle Hitboxes Toggle Hitboxes
|
| jLK
|
j.
|
|
| Guard
|
Properties
|
Damage
|
Meter
|
On Hit
|
On Block
|
On Pushblock
|
| High
|
-
|
100 x3
|
1.5% x3
|
-12
|
2
|
|
| Startup
|
Active
|
Recovery
|
Hit Stun
|
Block Stun
|
Hit Stop
|
Super Hit Stop
|
| 10
|
18
|
16
|
19 x3
|
22 x3
|
7 x3 (6 x3 on block)
|
N/A
|
|
|
|
- Disjointed air-to-air.
- Vacuums the opponent towards Double.
- Used in burst bait setups since you can do 5HK jump backwards jLK and the burst will be out of range.
|
|
|
Patellar Repeat Toggle Hitboxes Toggle Hitboxes
|
| jMK
|
j.
|
|
| Guard
|
Properties
|
Damage
|
Meter
|
On Hit
|
On Block
|
On Pushblock
|
| High
|
-
|
300, 600
|
2.5%, 6%
|
+10
|
+3
|
|
| Startup
|
Active
|
Recovery
|
Hit Stun
|
Block Stun
|
Hit Stop
|
Super Hit Stop
|
| 12
|
3, (3), 3
|
15
|
24, 27
|
17, 20
|
7, 10
|
N/A
|
|
|
|
- Gives Double forward momentum after the first hit, can be used as a movement option to move forward in the air and delay your fall.
- Good air to air with disjointed hitbox on the first hit.
- Second hit pops a grounded opponent into the air.
|
|
|
Bogus Buzzard Toggle Hitboxes Toggle Hitboxes
|
| jHK
|
j.
|
|
| 1st hit
|
Guard
|
Properties
|
Damage
|
Meter
|
On Hit
|
On Block
|
On Pushblock
|
| High
|
-
|
900
|
7.50%
|
-9
|
-8
|
|
| Startup
|
Active
|
Recovery
|
Hit Stun
|
Block Stun
|
Hit Stop
|
Super Hit Stop
|
| 13
|
2
|
30
|
22
|
21
|
11 (9 on block)
|
N/A
|
|
|
|
| Avery
|
Guard
|
Properties
|
Damage
|
Meter
|
On Hit
|
On Block
|
On Pushblock
|
| Mid
|
Projectile
|
450 x2
|
2.25% x2
|
N/A
|
N/A
|
|
| Startup
|
Active
|
Recovery
|
Hit Stun
|
Block Stun
|
Hit Stop
|
Super Hit Stop
|
| 7
|
(Until ground)
|
N/A
|
19 x2
|
17 x2
|
5 x2
|
N/A
|
|
|
|
- Hits once, then summons a bird projectile, Avery, which has two additional hits and travels straight downward.
- The first hit will pop a grounded opponent into the air.
- In neutral, the projectile can allow Double to safely back up and create space. With Avery, the opponent won't be able to chase too closely.
- In combos and resets, this move is essential. If the opponent is at the right height, it will leave the them suspended in the air for a crossup reset. Example: jLKx3 > jMP(1) > jHK. Then, dash under 5LP.
- A great way to pressure a cornered opponent, especially on incoming as they have to respect Avery.
|
|
|
Universal Mechanics
Godhand Toggle Hitboxes Toggle Hitboxes
|
| Throw
|
+
|
|
| Guard
|
Properties
|
Damage
|
Meter
|
On Hit
|
On Block
|
On Pushblock
|
| Throw
|
50% Damage Scaling
|
0, 300, 900
|
4%, 0%, 7%
|
KD
|
N/A
|
|
| Startup
|
Active
|
Recovery
|
Hit Stun
|
Block Stun
|
Hit Stop
|
Super Hit Stop
|
| 7
|
1
|
28
|
N/A
|
N/A
|
N/A
|
N/A
|
|
|
|
- Double's throw is an essential part of her mixup game, and one of the bigger throws in the game.
- Combo: Throw > 214K > 2MP > etc
|
|
|
Kitten Blender Toggle Hitboxes Toggle Hitboxes
|
| Air Throw
|
+ (in air)
|
|
| Guard
|
Properties
|
Damage
|
Meter
|
On Hit
|
On Block
|
On Pushblock
|
| Air Throw
|
50% Damage Scaling
|
0 x2, 800
|
0% x2, 9%
|
Ground Bounce
|
N/A
|
|
| Startup
|
Active
|
Recovery
|
Hit Stun
|
Block Stun
|
Hit Stop
|
Super Hit Stop
|
| 7
|
3
|
19
|
N/A
|
N/A
|
N/A
|
N/A
|
|
|
|
- Used frequently as a mixup in her air vortex.
- Combo: Air throw > dash > OTG 2MP or 2LK. The latter saves OTG.
|
|
|
Second Impact Toggle Hitboxes Toggle Hitboxes
|
|
| Guard
|
Properties
|
Damage
|
Meter
|
On Hit
|
On Block
|
On Pushblock
|
| Mid
|
Tag
|
200, 300
|
10% x2
|
Ground Bounce,
or KD
|
-51
|
|
| Startup
|
Active
|
Recovery
|
Hit Stun
|
Block Stun
|
Hit Stop
|
Super Hit Stop
|
| 31
|
40, (Until Ground)
|
65
|
10 x2
|
13 x2
|
9, 12
|
N/A
|
|
|
|
- Double enters from the side of the screen, then re-appears from the top of the screen.
- Double will not perform the second hit if she does not get off the screen after the first hit. Trading with the first hit causes a regular knockdown instead of the full ground bounce.
- Combo: Tag > dash > OTG 2MP or 2LK. The latter saves OTG.
- Very risky outside of a combo, unless you can hit out of it
|
|
|
Chimeram Toggle Hitboxes Toggle Hitboxes
|
|
| Guard
|
Properties
|
Damage
|
Meter
|
On Hit
|
On Block
|
On Pushblock
|
| Mid
|
Snapback
|
0
|
-100%
|
N/A
|
-18
|
|
| Startup
|
Active
|
Recovery
|
Hit Stun
|
Block Stun
|
Hit Stop
|
Super Hit Stop
|
| 12 + 3
|
6
|
30
|
14
|
17
|
13
|
9
|
|
|
|
- Active for 6 frames instead of the normal 3 frames for snapbacks.
|
|
|
Specials
|
|
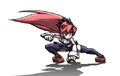
| Flesh Step
|
 + + 
|
|
| Guard
|
Properties
|
Damage
|
Meter
|
On Hit
|
On Block
|
On Pushblock
|
| N/A
|
Invuln. (Proj.) (Frame 12)
|
N/A
|
N/A
|
N/A
|
N/A
|
|
| Startup
|
Active
|
Recovery
|
Hit Stun
|
Block Stun
|
Hit Stop
|
Super Hit Stop
|
| 11
|
N/A
|
23
|
N/A
|
N/A
|
N/A
|
N/A
|
|
|
|
- A command dash that can pass through the opponent
- Projectile invuln frames 12-27
- There is only one version of this move. Which kick button is pressed doesn't change the move.
- Use for assist crossups
|
|
|
Toggle Hitboxes Toggle Hitboxes
|
| Luger Replica
|
 + + 
|
|
|
|
Guard
|
Properties
|
Damage
|
Meter
|
On Hit
|
On Block
|
On Pushblock
|
| Mid
|
Projectile,
75% Damage Scaling
|
650 (100)
|
(2.5%) 5.625%
|
±0,
KD (vs air)
|
-4
|
|
| Startup
|
Active
|
Recovery
|
Hit Stun
|
Block Stun
|
Hit Stop
|
Super Hit Stop
|
| 12
|
-
|
37
|
28
|
24
|
8
|
N/A
|
|
|
|
|
|
Guard
|
Properties
|
Damage
|
Meter
|
On Hit
|
On Block
|
On Pushblock
|
| Mid
|
Projectile,
75% Damage Scaling
|
650 (100)
|
(2.5%) 5.625%
|
±0,
KD (vs air)
|
-4
|
|
| Startup
|
Active
|
Recovery
|
Hit Stun
|
Block Stun
|
Hit Stop
|
Super Hit Stop
|
| 12
|
-
|
37
|
28
|
24
|
8
|
N/A
|
|
|
|
|
|
Guard
|
Properties
|
Damage
|
Meter
|
On Hit
|
On Block
|
On Pushblock
|
| Mid
|
Projectile,
75% Damage Scaling
|
650 (100)
|
(2.5%) 5.625%
|
Ground Bounce
|
±0
|
|
| Startup
|
Active
|
Recovery
|
Hit Stun
|
Block Stun
|
Hit Stop
|
Super Hit Stop
|
| 16
|
-
|
33
|
30
|
24
|
8
|
N/A
|
|
|
|
- Also a safe tool to end
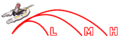
- Button pressed determines the trajectory.
- Each version knocks down on air hit, giving a followup combo possibility when used as an anti air.
- Each version moves Double backwards.
-
- Travels in a straight, horizontal line.
- It can be crouched under, but will catch moves that aren't low profile and air moves at IAD height. If it hits an air opponent, it knocks down and a conversion is usually possible by dashing and picking up OTG. Especially useful against characters with big hurtboxes, since it's harder for them to jump over.
-
- Travels diagonally towards the ground
-
- Ricochets off the floor and covers the area right above Double.
- Incredible anti air tool that can net you a combo
- Second use in a combo won't make the opponent go as high, limiting combo options.
- Best block advantage of all the Lugers
|
|
|
Toggle Hitboxes Toggle Hitboxes
|
| Hornet Bomber
|
 + +
|
|
|
|
Guard
|
Properties
|
Damage
|
Meter
|
On Hit
|
On Block
|
On Pushblock
|
| Mid
|
Invuln. (Full)
|
600, 800 (100, 100)
|
(2.5%) 4.5%, 3.6%
|
KD
|
-34
|
|
| Startup
|
Active
|
Recovery
|
Hit Stun
|
Block Stun
|
Hit Stop
|
Super Hit Stop
|
| 12
|
16, 6
|
42
|
22, 14
|
25, 13
|
8, 8
|
N/A
|
|
|
|
|
|
Guard
|
Properties
|
Damage
|
Meter
|
On Hit
|
On Block
|
On Pushblock
|
| Mid
|
-
|
400, 500, 900 (100, 100, 100)
|
(2.5%) 4.5%, 4.6% x2
|
KD
|
-43
|
|
| Startup
|
Active
|
Recovery
|
Hit Stun
|
Block Stun
|
Hit Stop
|
Super Hit Stop
|
| 14
|
11, 4, (10), 9
|
49
|
20 x2, 17
|
23, 23, 14
|
10, 8, 9
|
N/A
|
|
|
|
|
|
Guard
|
Properties
|
Damage
|
Meter
|
On Hit
|
On Block
|
On Pushblock
|
| Mid
|
-
|
500, 600, 1000 (100, 100, 100)
|
(2.5%) 4.5%, 4.6% x2
|
KD
|
-47
|
|
| Startup
|
Active
|
Recovery
|
Hit Stun
|
Block Stun
|
Hit Stop
|
Super Hit Stop
|
| 17
|
12, 4, (11), 13
|
50
|
20 x3
|
23, 23, 15
|
11, 9, 10
|
N/A
|
|
|
|
- Double flies across the screen in an arc. The button used determines the size of the arc. The L version has invulnerable startup. Hitboxes for each version are the same
-
- Double's main reversal tool
- Combo by super canceling into 214KK
- Super canceling with 214KK is -18 on block
- Super canceling into 236KK is ~-12 on block (considering when the heads can attack)
- The assist version has 2 more additional vulnerable frames, after the usual 3 vulnerable frames on every assist.
-
- Useful as a lockdown and space control assist.
-
- Combo ender for max damage. Useful as a lockdown and space control assist.
|
|
|
Toggle Hitboxes Toggle Hitboxes
|
| Item Crash (Teacup / Barrel / Fridge)
|
(Air Only) +
|
|
|
|
Guard
|
Properties
|
Damage
|
Meter
|
On Hit
|
On Block
|
On Pushblock
|
| High
|
-
|
500 (100)
|
(2.5%) 7.5%
|
Stagger
|
-23 (at best)
|
|
| Startup
|
Active
|
Recovery
|
Hit Stun
|
Block Stun
|
Hit Stop
|
Super Hit Stop
|
| 12
|
until landing
|
24 (40 on whiff)
|
24
|
17
|
8
|
N/A
|
|
|
|
|
|
Guard
|
Properties
|
Damage
|
Meter
|
On Hit
|
On Block
|
On Pushblock
|
| High, Mid
|
-
|
450, 475 (100, 100)
|
(2.5%) 4.5%, 7.5%
|
KD (2nd hit)
|
-14
|
|
| Startup
|
Active
|
Recovery
|
Hit Stun
|
Block Stun
|
Hit Stop
|
Super Hit Stop
|
| 12
|
until landing, 3
|
35
|
55, 34
|
23 x2
|
10 x2
|
N/A
|
|
|
|
|
|
Guard
|
Properties
|
Damage
|
Meter
|
On Hit
|
On Block
|
On Pushblock
|
| High, Mid
|
-
|
550, 650 (100, 200)
|
(2.5%) 6%, 7.5%
|
Ground Bounce (2nd hit)
|
-31
|
|
| Startup
|
Active
|
Recovery
|
Hit Stun
|
Block Stun
|
Hit Stop
|
Super Hit Stop
|
| 14
|
until landing, 3
|
55
|
55, 22
|
25, 26
|
10, 12
|
N/A
|
|
|
|
- Double transforms into an item and falls straight to the ground. Button pressed determines the item. Each version has crossup potential.
- Each version is a possible grounded overhead option, however unsafe without an assist or super canceling the HK version.
-
- Teacup
- Staggers grounded opponents.
- Shrinks Double's hurtbox dramatically
-
- Barrel
- Causes a short ground bounce. Combo: j214K > OTG 2LK
- Can also be a slow overhead option from the ground, if done alongside an assist to combo off of. If you really want an overhead option as Double, unfortunately this is it.
-
- Fridge
- Casuses a ground bounce that makes the opponent go high in the air
- Super canceling into 214KK is -5 on block.
|
|
|
Toggle Hitboxes Toggle Hitboxes
|
|
| Guard
|
Properties
|
Damage
|
Meter
|
On Hit
|
On Block
|
On Pushblock
|
| Low
|
Sweep
|
1000 (100)
|
(2.5%) 7.5%
|
KD
|
-16
|
|
| Startup
|
Active
|
Recovery
|
Hit Stun
|
Block Stun
|
Hit Stop
|
Super Hit Stop
|
| 15
|
10
|
36
|
18
|
21
|
12
|
N/A
|
|
|
|
- Moves Double forward quickly
- Has sweep properties (breaks armor)
- Used to confirm off of 2HP, and in more damaging combo routes that side swap. (... 2HP Clide, dash 5LK ...)
- Because of its forward movement and active frames, it can be used to trip guard people landing from a jump normal
- Unsafe on block, so don't throw it out in neutral unless you are certain it will hit or you have an assist to cover you.
- Super canceling into 214KK is ~-10 on block
- Super canceling into 236KK, the cathead attacks will be a true blockstring
|
|
|
Supers
"Be driven before us!" Toggle Hitboxes Toggle Hitboxes
|
Bandwagon Rushdown (Car)
Level 1
|
+ +
|
|
| Guard
|
Properties
|
Damage
|
Meter
|
On Hit
|
On Block
|
On Pushblock
|
| Mid
|
Invuln. (Full) ,
33% Minimum Scaling (except 1st hit)
|
500 x4, 1200 (100 x4. 200)
|
-100%
|
KD
|
-64 (at best)
|
|
| Startup
|
Active
|
Recovery
|
Hit Stun
|
Block Stun
|
Hit Stop
|
Super Hit Stop
|
| 6 + 2 or 6 + 11
|
--
|
32
|
26 x5
|
26 x5
|
5 x4, 24
|
8
|
|
|
|
- Double disappears from the screen as Peacock, returning as invulnerable car that travels across the screen. Double becomes vulnerable again as she transforms during recovery, always appearing directly in front of the opponent.
- The car will come from the side of the screen behind Double. If 4 is held, the car will come from the reverse side and 9 frames of startup are added.
- If done in the corner without reversing the direction, it could potentially be post flash unblockable.
- Before the screen zooms back out from the super flash, some dust will appear. The side the dust is on indicates what side the car will come from (Dust on left side means the car will come from the left and travel to the right, and vice versa).
- Used as a combo ender on point when it will kill, or to DHC into another character. Since you can choose the direction, you can get back the corner if you didn't have it already as long as you're close to either side of the screen.
- The recovery is long so it's not very advantageous even when it hits. If OTG has been used and the opponent is knocked back into the corner Car punishable on hit by a large proportion of the cast.
- This full invulnerability makes this one of the best supers in the game for winning a DHC war (where both players DHC to try and beat the opponent's supers).
- The only way to beat this attack aside from punishing its recovery is with Valentine's counter super.
- Since it can hit from either side of the screen, it can be used to punish from fullscreen away and then go into a DHC. For example, if Peacock is committing to two George bombs, this super can punish her.
- You can also DHC after the car passes through the opponent for a side switch.
- It will only work as a reversal if you are in the corner and the opponent is right in your face. Otherwise, there is travel time and the opponent can avoid it by cancelling into an invincible attack.
|
|
|
Toggle Hitboxes Toggle Hitboxes
|
Beast of Gehenna (Puddle / Monster)
Level 1
|
+ +
|
|
| Guard
|
Properties
|
Damage
|
Meter
|
On Hit
|
On Block
|
On Pushblock
|
| Mid
|
50% Damage Scaling,
Invuln. (Full) (1 frame before flash),
Hit Grab
|
0, 1500
|
-100%
|
KD
|
N/A
|
|
| Startup
|
Active
|
Recovery
|
Hit Stun
|
Block Stun
|
Hit Stop
|
Super Hit Stop
|
| 12 + 15 + 5
|
480, 2
|
20
|
N/A
|
19
|
N/A (9 on block)
|
2
|
|
|
|
- Double descends into the floor to set a puddle in front of her which has a lingering hitbox for 8 seconds, then disappears. The monster will attempt to attack if they go over the hitbox with 5f of startup.
- Combo: 214KK > 236HP > 5MP
- A better combo uses 2MP instead of 236HP, but it's more difficult to time.
- Used primarily to convert off of L Bomber, or as a DHC for conversions. Outside of combos, it's used to trap the opponent in the corner, or to set up tricky incoming mixups. Lastly, it can be used to make fridge safe on block.
- The opponent can whiff a move over the top of the puddle to trigger it without being grabbed, as long as the move retracts its hurtbox quickly enough.
- The countdown timer will go 1.5x as fast when Double is not the point character.
- The puddle will disappear if Double is hit, even if it has already been activated.
- The puddle won't grab enemies being thrown.
- The puddle isn't triggered by projectiles.
- The puddle will not expire during the last part of Cerebella's Ultimate Showstopper, or the last part of Valentine's level 3.
|
|
|
"Dinner time!" Toggle Hitboxes Toggle Hitboxes
|
Catellite Lives (Catheads)
Level 2
|
+ +
|
|
| Guard
|
Properties
|
Damage
|
Meter
|
On Hit
|
On Block
|
On Pushblock
|
| Mid
|
Projectile, Invuln. (Full) (1 frame before flash)
|
200 xN (33 xN)
|
-200%
|
N/A
|
N/A
|
|
| Startup
|
Active
|
Recovery
|
Hit Stun
|
Block Stun
|
Hit Stop
|
Super Hit Stop
|
| 7 + 10
|
N/A
|
32
|
28
|
25
|
8
|
2
|
|
|
|
- Upon activation, 6 Ms. Fortune heads follow Double for 375f. The heads attack as Double presses attack buttons.
- L buttons make the heads attack forward along the ground.
- M buttons attack upwards at an angle.
- H buttons will attack downwards at an angle if they're in the air, or behave like the L buttons if they're on the ground.
- The timer seems to include superflash, so there appears to effectively only be ~330f where you can actually control the heads.
- Duration is only 220f if used as a DHC.
- Used on point to extend pressure and keep your turn. As a DHC, it's amazing since it allows you to keep your turn as long as the super you're DHCing from is blocked.
- Although you get your turn, it can be hard to open up the opponent since Double has no quick overhead from the ground. However, jumping and mixing up between a low jLP and 2LK can be effective. Using Flesh Step will not work as a crossup if they're in continuous blockstun due to crossup protection from blockstun. However, if they pushblock, it's possible to crossup since they exit blockstun. In this case you can delay the cathead's attacks before attempting a Flesh Step crossup or low/throw mixup.
- Double gains 16.6% of her usual meter gain as long as the super remains active.
- The super ends early if Double leaves the screen.
- Use throw inputs to have the heads attack without hitting the opponent as Double, which may add unwanted undizzy / IPS tracking.
- Alpha counters can potentially punish this move as a DHC on block.
- Has a lot of recovery, so if the attack this is canceled from whiffs Double can be punished.
|
|
|
"Be praying..." Toggle Hitboxes Toggle Hitboxes
|
Nightmare Legion
Level 3
|
+ +
|
|
| Guard
|
Properties
|
Damage
|
Meter
|
On Hit
|
On Block
|
On Pushblock
|
| Mid
|
Invuln. (Full),
45% Minimum Scaling
|
0, 1500, 300x9, 0, 300x6, 2500 (200)
|
-300%
|
Sliding KD
|
-35
|
|
| Startup
|
Active
|
Recovery
|
Hit Stun
|
Block Stun
|
Hit Stop
|
Super Hit Stop
|
| 4 + 2
|
17
|
40
|
20
|
23
|
46 (10 on block)
|
6
|
|
|
|
- On hit, goes into a sequence of attacks as Double transforms into a variety of characters, ending in a sliding knockdown.
- A combo ender for lots of damage. Using this as a reversal works, but is extremely risky. It's very punishable, costs a lot of meter, and you can't convert into a full combo unless you spend even more meter to DHC.
- Combo: OTG Car (reverse)
- The full attack will only trigger after a successful first hit. If the point blocks but the move hits an assist, it will execute the attack but stop when the point blocks a hit. The follow up hits are all extremely advantageous on block, making this move safe if it hits an assist.
- Damage shows complete attack, frame data shows attack on whiff or block.
|
|
|
"Shoot the core!" Toggle Hitboxes Toggle Hitboxes
|
Megalith Array
Level 5
|
 , + + , + +
|
|
| Initial hit
|
Guard
|
Properties
|
Damage
|
Meter
|
On Hit
|
On Block
|
On Pushblock
|
| Mid
|
Invuln. (Full),
55% Minimum Scaling
|
2000 (200)
|
-500%
|
Ground Bounce
|
+25
|
|
| Startup
|
Active
|
Recovery
|
Hit Stun
|
Block Stun
|
Hit Stop
|
Super Hit Stop
|
| 4 + 1
|
3
|
0
|
22
|
25
|
12
|
5
|
|
|
|
| Initial hit (air)
|
Guard
|
Properties
|
Damage
|
Meter
|
On Hit
|
On Block
|
On Pushblock
|
| High
|
Invuln. (Full),
55% Minimum Scaling
|
100, 2000 (200, 200)
|
-500%
|
Ground Bounce
|
+23
|
|
| Startup
|
Active
|
Recovery
|
Hit Stun
|
Block Stun
|
Hit Stop
|
Super Hit Stop
|
| 4 + 1
|
(until ground), 3
|
0
|
55, 22
|
25 x2
|
10, 12
|
5
|
|
|
|
|
|
Guard
|
Properties
|
Damage
|
Meter
|
On Hit
|
On Block
|
On Pushblock
|
| Mid
|
45% Minimum Scaling,
Projectile
|
200 x3 (50 x3)
|
0%
|
N/A, KD (vs air)
|
N/A
|
|
| Startup
|
Active
|
Recovery
|
Hit Stun
|
Block Stun
|
Hit Stop
|
Super Hit Stop
|
| 8
|
--
|
35
|
30 x3
|
18 x3
|
8 x3
|
N/A
|
|
|
|
|
|
Guard
|
Properties
|
Damage
|
Meter
|
On Hit
|
On Block
|
On Pushblock
|
| Mid
|
45% Minimum Scaling,
Projectile
|
250 (100)
|
0%
|
KD
|
N/A
|
|
| Startup
|
Active
|
Recovery
|
Hit Stun
|
Block Stun
|
Hit Stop
|
Super Hit Stop
|
| 1
|
N/A
|
N/A
|
26
|
18
|
8
|
N/A
|
|
|
|
|
|
Guard
|
Properties
|
Damage
|
Meter
|
On Hit
|
On Block
|
On Pushblock
|
| Mid
|
45% Minimum Scaling,
Projectile
|
240 (100)
|
0%
|
N/A
|
N/A
|
|
| Startup
|
Active
|
Recovery
|
Hit Stun
|
Block Stun
|
Hit Stop
|
Super Hit Stop
|
| 1
|
N/A
|
N/A
|
26
|
18
|
8
|
N/A
|
|
|
|
|
|
Guard
|
Properties
|
Damage
|
Meter
|
On Hit
|
On Block
|
On Pushblock
|
| Mid
|
45% Minimum Scaling,
Projectile
|
265 x3 (100 x3)
|
0%
|
N/A, KD (vs air)
|
N/A
|
|
| Startup
|
Active
|
Recovery
|
Hit Stun
|
Block Stun
|
Hit Stop
|
Super Hit Stop
|
| 1
|
N/A
|
N/A
|
23 x3
|
18 x3
|
8 x3
|
N/A
|
|
|
|
| + /
|
Guard
|
Properties
|
Damage
|
Meter
|
On Hit
|
On Block
|
On Pushblock
|
| Mid
|
55% Minimum Scaling,
|
2250 (400)
|
0%
|
KD
|
-47
|
|
| Startup
|
Active
|
Recovery
|
Hit Stun
|
Block Stun
|
Hit Stop
|
Super Hit Stop
|
| 8
|
1
|
90
|
24
|
27
|
16
|
N/A
|
|
|
|
- Double transforms into a giant Easter Island statue which hits as an initial hit. For 600f, she can then shoot a variety of projectiles by pressing punches (rings) or kicks (bombs). All projectiles will go away once the super ends.
- summons three rings from the statue. The strength determines the pattern of the rings.
- summons one walking bomb from behind the statue.
- summons one go kart bomb from behind the statue.
- summons one plane bombs from behind the statue.
- Can end the super early by exploding with 214P or 214K
- Damages the opponent and inflicts 1500 recoverable damage to herself which cannot KO herself.
- The most damaging super in the game if you can hit them with a lot of projectiles and the explosion. Can ToD in 3v3 with a 2LK starter.
- Methods for comboing the projectiles together:
- Technically this is an air reversal option. Using this move in the air hits overhead and adds an initial hit and active frames as Double falls to the ground. This doesn't affect the number of invulnerable frames. It's easy to mash this super while being comboed, and your opponent can't mess up your input by crossing you up.
- Must be done in order to get the most damage out of this super.
- There is no recovery animation if she doesn't explode.
- If the timer runs out on its own, she will not explode.
- After the initial invulnerability period, Double becomes vulnerable. She can begin attacking immediately after the active frames, but this will end her invulnerability.
- Double will transform back to normal if she's hit.
- The meter gauge will drain during the super, so it can be used as a timer.
- None of Double's attacks during this super can trigger IPS or build undizzy.
|
|
|
Taunt
|
|
| Assist Taunt
|
Automatically done after an assist move
|
|
| Guard
|
Properties
|
Damage
|
Meter
|
On Hit
|
On Block
|
On Pushblock
|
| Mid
|
-
|
N/A
|
0%
|
N/A
|
N/A
|
|
| Startup
|
Active
|
Recovery
|
Hit Stun
|
Block Stun
|
Hit Stop
|
Super Hit Stop
|
| N/A
|
N/A
|
40
|
N/A
|
N/A
|
N/A
|
N/A
|
|
|
|
- Amount of time it takes for the character to turn invulnerable after they finish performing their assist action.
- Longer recovery → more time to punish the assist.
- Double teleports off screen instead of jumping off screen, which allows her to be called again sooner.
|
|
|
Colors
Intro Poses
Double has 3 different intro poses that can be selected by holding a light, medium or heavy button during the loading screen before a match.
|
Intro pose 1:
Hold OR
Double prays to a trinity bust.
To fight is futile. Aeon has foretold our victory.
Now they trespass upon Venus' domain.
Ignorant children... you would rebel against the Great Mother?
|

|
Intro pose 2:
Hold OR
Two angels fly across the stage as a hand comes out of the floor and squishes them.
Gnnn...raaaah.
|
|
Intro pose 3:
Hold OR
Double turns inside out.
Defiling maggots...you unknowingly consume our flesh.
I'll gladly accept your tithe...in blood.
|
Players to Watch
Disclaimer: This list is derived from community input and is in no way comprehensive or a form of ranking of any kind. Our community criteria can be found here.
| General
|
|
| Characters
|
|
|
|
|
| Mechanics
|
|
| Other
|
|


