Story
Once a normal schoolgirl named Carol, Painwheel was kidnapped by Valentine and delivered to the Anti-Skullgirls Labs' secretive Lab Zero. There she was implanted with the synthetic Buer Drive and Gae Bolga parasites and infused with experimental Skullgirl blood, transforming her into the monster she is today. Violent and unstable as a result of these experiments, as a precaution she's mentally controlled by Lab Zero's powerful psychic director, Brain Drain.
Fueled by rage, she draws her power from her pain and fury. Despite that, the soul of that scared young girl still lives on inside this monstrous body, desperately fighting off the onslaught of voices that would control her.
Overview
Painwheel has the ability to fly, which is used for mobility and its cancel abilities. She also has a special kind of armor on many of her normals called Hatred Guard, which deals back damage taken to the opponent.
- Flight (214K): She can use her Fly special move to move freely in the air and stay unpredictable, as well as giving her control over the pace of a match. It also allows her to cancel normals and even some specials for mixups, combos, and pressure.
- Hatred Guard: She has armor on many of her ground normals and on one of her air normals, giving her a strong defense option when applied in the right scenarios. You can also use it in staggers to catch abare or assist calls. Even during armor, she still has access to all her usual cancels. Confirm armor hits into Buer (236LK), supers, or quickly change your mind with flight to stay unpredictable.
- Hatred Install (214KK): This is a very strong DHC option for only 1 bar. Powered up combos in install do big damage, and on block it's very safe.
Playstyle
 Painwheel is a flight character that is able to maneuver around the screen with ease and demand respect with her unique armor mechanic. Painwheel is a flight character that is able to maneuver around the screen with ease and demand respect with her unique armor mechanic. |
| Pros |
Cons |
- Flight: 8 way flight allows Painwheel to have more manueverability in neutral, she can call assists while flying, and flight cancelling allows Painwheel some safety as well as unique strings and mix ups.
- Hatred Install: One of the best DHC supers in the game, and its incredible damage output allows her to quickly swing a round's momentum in her favor.
- High damage output: Even without Hatred Install, Painwheel is still a high-damaging character, and even tagging into Painwheel in the middle of combos lets you tack on a substantial amount of damage.
- Unique armor mechanics: Hatred Guard is a Painwheel-specific armor mechanic, allowing her to absorb some damage and return it later. Moreover, this also allows Painwheel to call out attacks by charging armor as well as unique Anti Airing capabilities.
- Armor breaker: Great at dealing with armor herself, thanks to Buer Reaper and Buer Thresher.
- Decent range: Painwheel has moderately sized buttons with her main pokes 2LK and jMP. Spacing these correctly can lead to great reward.
|
- Poor reversals: Painwheel must rely on 4f armor as her fastest meterless reversal against strikes, Deathcrawl leaves a lot to be desired, and Buer Overdrive is costly. Buer Thresher, arguably her best reversal, still has some flaws; most notably, the very first hit (the only one that is able to make use of super hitstop) is tiny, so a miss-spaced Thresher can be punished on reaction against knowledgeable players.
- Slow buttons: Her fastest, stubby normal being 8f startup, next fastest 10f startup, and fastest low being 11f startup, you have to be mindful about where and when you place your buttons. This also makes it uniquely hard to punish some attacks from blocking.
- Armor limitations: Can struggle vs multihitting moves on defense. Armor outside of Hatred Install has start up and does not function like regular armor.
- Meter gain: Doesn't build a lot of meter outside or inside of combos, and nearly none during install.
- Misinputs: She is prone to auto correct situations which result in facing the wrong way, this causes Painwheel to either face the wrong direction or cause misinputs such as getting Buer Reaper when inputting Flight and vice versa.
- Flight Limitations: Has a flight ceiling controlled by the opponent's height and has a limited amount of flights per jump which can limit her options against zoning. This also limits conversion options from using multiple flights to approach.
- Lacking at max range: While Painwheel does have fairly large buttons, she cannot always combo from them if you're far enough.
|
Video Overview
Stats
Chains
| Standing
|
4 Buttons:  → →  → →  or or  → →  or or 
|
| Crouching
|
4 Buttons: → → or → or
|
| Air
|
6 Buttons: → → → → →
|
Movement
| Weight
|
Dash
|
Double Jump
|
Airdash
|
IAD Lockout
|
| Light
|
Step
|
No
|
No
|
N/A
|
Wakeup Time
| Forward Tech
|
Backward Tech
|
Sliding KD
|
Hard KD
|
Crumple
|
| 40
|
40
|
90
|
34
|
32
|
Assists
H Pinion Dash (default assist)
M Gae Bolga Stinger (236MP)
H Pinion Dash (default assist)
A setup assist that charges at the opponent and sends them flying backwards on hit. This allows for very unique conversions that aren't normally possible. Most notably, it allows Big Band to convert off of SSJ. Can also be used from a burst alpha counter that hits the opponent for a free conversion. All versions of Pinion dash are assist-only moves.
2MP (default assist)
A multi-hit lockdown assists. Doesn't use Hatred Guard, but if called as an Alpha Counter, the button can be held for Hatred Guard.
L Pinion Dash (22LK)
Fast horizontal move with decent hitstun and blockstun, and restands the opponent, allowing for some unique conversions or crossup setups for certain characters.
M Pinion Dash (22MK)
Longer startup than L, but knocks opponents far away in a knockdown state, and has a sizeable hitbox.
M Gae Bolga Stinger (236MP)
Projectile assist. Painwheel cannot charge Gae Bolga Stinger in a custom action and will always attack with the minimum number of projectiles. Can charge (and fly cancel) upon an alpha counter.
5MK
Similar to 2MP, but hits a little higher up. Doesn't use Hatred Guard, but if called as an Alpha Counter, the button can be held for Hatred Guard.
Move List
Character Mechanic: Hatred Guard
Painwheel's 5HP has Hatred Guard. She can hold HP to get armored startup frames, and release HP to attack.
- Painwheel surrounds herself with a red lightning effect as she charges her Hatred Guard attacks. As armored attacks, the held start up frames of a Hatred Guard can absorb an incoming attack.
- Painwheel stores a portion of the damage from an armored attack in a total that accumulates over time, up to a maximum of 33% of the opponent's total team health.
- Painwheel can then redistribute this stored damage back to the opponent. Connecting with a move that can have armor will empty the stored damage into that combo.
- Light attacks will deal an extra 33% of her stored damage, 50% with medium attacks, and 66% with heavy attacks. These are all scaled with the current point in the combo.
- Painwheel's level 3 super, Buer Overdrive, will deal 120% of the stored damage on the final hit. This extra damage is not scaled by where she is in the combo.
- The stored damage will not be spent on whiff or on block.
- Multi-hitting moves such as j.hp or 2mp will add the stored damage onto the first hit that connects.
- Hitting an assist or Fortune's head will apply the damage to the assist/head. Hitting both assist and point will apply the damage to both.
- Hitting Peacock's Lenny will consume the Hatred Guard damage, as Lenny has an HP bar that we do not see.
- Hitting projectiles built to eat a physical hit and disappear (such as Parasoul's M Egret or Eliza's Throne) will not consume hatred guard.
- Hitting a dead body with a Hatred Guard attack will not spend the stored damage bonus.
- Hatred Guard never protects Painwheel on the first frame of start-up (except during Hatred Install), but will always protect her on the first active frame of her attacks (5MP and Buer Overdrive's Hatred Guard protect her during all of the active frames).
- Charging for at least 7 frames will keep Hatred Guard active up to the first active frame of the attack.
- Heavy Hatred Guard attacks, such as jHP, 5HP, 2HK etc gain additional properties when fully charged.
The startup for Hatred Guard normals is listed as
- Armor startup frames
- (Additional armored frames from holding the button)
- The rest of the startup, which is also armored if held
Add the 1st and 3rd numbers to get the unarmored startup.
Add all three to get the held button startup.
Standing Normals
Enmity Nail Toggle Hitboxes Toggle Hitboxes
|
| 5LP
|
s.
|
|
| Guard
|
Properties
|
Damage
|
Meter
|
On Hit
|
On Block
|
On Pushblock
|
| Mid
|
Hatred Guard (1 hit)
|
200
|
2.5%
|
+2
|
+5
|
|
| Startup
|
Active
|
Recovery
|
Hit Stun
|
Block Stun
|
Hit Stop
|
Super Hit Stop
|
| 3, (12), 5
|
3
|
12
|
16
|
19
|
8
|
N/A
|
|
|
|
- Painwheel's fastest Hatred Guard attack. The speed makes it her best choice to absorb an oncoming attack on reaction and chain into a full combo, making it a functional parry.
- Due to most of Painwheel’s other normals being very slow, 5LP is one of the main punish options she should use on opponent’s attacks
|
|
|
Revulsion Shank Toggle Hitboxes Toggle Hitboxes
|
| 5MP
|
s.
|
|
| Guard
|
Properties
|
Damage
|
Meter
|
On Hit
|
On Block
|
On Pushblock
|
| Mid
|
Hatred Guard (2 hits),
Launcher
|
675
|
7.5%
|
+10
|
-5
|
|
| Startup
|
Active
|
Recovery
|
Hit Stun
|
Block Stun
|
Hit Stop
|
Super Hit Stop
|
| 4, (12), 10
|
3
|
21
|
33
|
18
|
10
|
N/A
|
|
|
|
- A launcher with Hatred Guard. It can only chain from LP and LK attacks, but will not chain if charged. If Painwheel absorbs at least 1 hit with the Hatred Guard, she will always turn to face the opponent for the attack's active frames. This property makes 5MP the perfect choice to absorb an incoming cross up attack.
- A generally easier-to-use launcher than 5HK, making it preferable in most combo strings
- Slow but armored anti-air
|
|
|
Fury Sledge Toggle Hitboxes Toggle Hitboxes
|
| 5HP
|
s.
|
|
|
|
Guard
|
Properties
|
Damage
|
Meter
|
On Hit
|
On Block
|
On Pushblock
|
| Mid
|
Hatred Guard (3 hits)
|
900
|
10%
|
-1
|
-8
|
|
| Startup
|
Active
|
Recovery
|
Hit Stun
|
Block Stun
|
Hit Stop
|
Super Hit Stop
|
| 16
|
3
|
24
|
25
|
18
|
12
|
N/A
|
|
|
|
| [ ]
|
Guard
|
Properties
|
Damage
|
Meter
|
On Hit
|
On Block
|
On Pushblock
|
| Mid
|
Hatred Guard (3 hits)
|
1100
|
10%
|
Stagger (+38 / +53 CH),
KD (vs air)
|
-8
|
|
| Startup
|
Active
|
Recovery
|
Hit Stun
|
Block Stun
|
Hit Stop
|
Super Hit Stop
|
| 6, (27), 10
|
3
|
24
|
32
|
18
|
15
|
N/A
|
|
|
|
- A slow, Hatred Guard normal that staggers on hit when fully charged. A chain cancel into this move can force a reset while Painwheel charges and absorbs a reversal attack.
- Charging this move in blockstrings is useful to see what the opponent is doing and absorb assists calls. If they block, fly canceling is safe.
- Moves her center point forward, useful for long rang confirms and kara cancels into M-buer
|
|
|
Puncture Toggle Hitboxes Toggle Hitboxes
|
| 5LK
|
s.
|
|
| Guard
|
Properties
|
Damage
|
Meter
|
On Hit
|
On Block
|
On Pushblock
|
| Mid
|
-
|
375
|
2.5%
|
+1
|
+4
|
|
| Startup
|
Active
|
Recovery
|
Hit Stun
|
Block Stun
|
Hit Stop
|
Super Hit Stop
|
| 11
|
3
|
14
|
17
|
20
|
8
|
N/A
|
|
|
|
- Higher up hitbox over 2LK makes it useful for certain combo strings, especially near the corner
|
|
|
Warp Spasm Toggle Hitboxes Toggle Hitboxes
|
| 5MK
|
s.
|
|
| Guard
|
Properties
|
Damage
|
Meter
|
On Hit
|
On Block
|
On Pushblock
|
| Mid
|
Hatred Guard (2 hits)
|
200 x3, 500
|
1.875% x4
|
+3
|
-5
|
|
| Startup
|
Active
|
Recovery
|
Hit Stun
|
Block Stun
|
Hit Stop
|
Super Hit Stop
|
| 5, (20), 8
|
2, 4, 3, 3
|
18
|
22 x4
|
16 x4
|
6 x3, 10
|
N/A
|
|
|
|
- A 4-hit Hatred Guard attack that covers a large area in front of Painwheel.
- Usually confirms into m buer at lower heights or from the ground. If close enough, can convert into h buer as well. Can convert with even a 6HKx4 for a full combo conversion, but be wary that the more of hits of 5MK push the opponent further away, so cancel early for best chances.
- Does the most damage of the mediums in combo strings, but be wary that the timing of 5MK 5HP L buer will change depending on character weights.
- Launches opponents into the air for the hits, allowing for 5MK xx H buer strings which are very useful in corner combos to rack up damage.
|
|
|
Fracture Toggle Hitboxes Toggle Hitboxes
|
| 5HK
|
s.
|
|
| Guard
|
Properties
|
Damage
|
Meter
|
On Hit
|
On Block
|
On Pushblock
|
| Mid
|
Launcher
|
300, 400, 500
|
3.3% x3
|
-4
|
-18
|
|
| Startup
|
Active
|
Recovery
|
Hit Stun
|
Block Stun
|
Hit Stop
|
Super Hit Stop
|
| 16
|
3, (6), 3, (8), 3
|
35
|
24 x2, 33
|
13, 15, 19
|
7 x2, 10
|
N/A
|
|
|
|
- A 3 hit launcher, offering the the super jump cancel only on the third hit.
- Due to the small size of the hitbox, this launcher is awkward in a lot of combo strings compared to 5MP. Easiest results come from using 2MP.
- The first 2 hits pull the opponent towards painwheel, allowing for some tricky crossup resets when combined with h buer + assist like so (link of reset)
|
|
|
Crouching Normals
Lacerate Toggle Hitboxes Toggle Hitboxes
|
| 2LP
|
c.
|
|
| Guard
|
Properties
|
Damage
|
Meter
|
On Hit
|
On Block
|
On Pushblock
|
| Mid
|
Hatred Guard (1 hit)
|
325
|
2.5%
|
+2
|
+5
|
|
| Startup
|
Active
|
Recovery
|
Hit Stun
|
Block Stun
|
Hit Stop
|
Super Hit Stop
|
| 6, (12), 6
|
3
|
13
|
17
|
20
|
8
|
N/A
|
|
|
|
- Hatred guard starts up 1 frame later on this move compared to 5LP, but otherwise identical.
- Does 100 more base damage, so use this move in combos over 5LP.
|
|
|
Cruel Lily Toggle Hitboxes Toggle Hitboxes
|
| 2MP
|
c.
|
|
| Guard
|
Properties
|
Damage
|
Meter
|
On Hit
|
On Block
|
On Pushblock
|
| Mid
|
Hatred Guard (2 hits)
|
210 x3, 350
|
1.875 % x4
|
-8
|
-16
|
|
| Startup
|
Active
|
Recovery
|
Hit Stun
|
Block Stun
|
Hit Stop
|
Super Hit Stop
|
| 5, (20), 7
|
4, 4, 3, 5
|
28
|
23 x4
|
15 x4
|
8 x4
|
N/A
|
|
|
|
- Does less damage than 5MK, but is more consistent. In a combo, use this move if you want to then chain into 5HP > L Buer midscreen in a scaled combo.
- Due to lowering Painwheel’s hurtboxes low + the hitboxes that hit all around her makes this charged move useful for a surprisingly useful anti-air.
- Only the last hit applies pushback.
|
|
|
Animosity Barbs Toggle Hitboxes Toggle Hitboxes
|
| 2HP
|
c.
|
|
|
|
Guard
|
Properties
|
Damage
|
Meter
|
On Hit
|
On Block
|
On Pushblock
|
| Mid
|
Hatred Guard (3 hits)
|
950
|
10%
|
Ground Bounce
|
-19
|
|
| Startup
|
Active
|
Recovery
|
Hit Stun
|
Block Stun
|
Hit Stop
|
Super Hit Stop
|
| 22
|
4
|
38
|
25
|
22
|
12
|
N/A
|
|
|
|
| [ ]
|
Guard
|
Properties
|
Damage
|
Meter
|
On Hit
|
On Block
|
On Pushblock
|
| High
|
Hatred Guard (3 hits)
|
1150
|
10%
|
Crumple,
Ground Bounce (vs air)
|
-19
|
|
| Startup
|
Active
|
Recovery
|
Hit Stun
|
Block Stun
|
Hit Stop
|
Super Hit Stop
|
| 7, (18), 15
|
4
|
38
|
25
|
22
|
15
|
N/A
|
|
|
|
- A slow Hatred Guard attack that causes a crumple and hits overhead with a fully charged hit, which allows for a variety of possible follow ups. Without a full charge it causes a ground bounce, allowing Painwheel to combo with a cancel into flight and an OTG or simply using an L Buer.
- Useful in Hatred Install combos since it's very easy to land this move fully charged after an L Buer stagger, allowing for an easy high damage crumple.
|
|
|
Pierce Toggle Hitboxes Toggle Hitboxes
|
| 2LK
|
c.
|
|
| Guard
|
Properties
|
Damage
|
Meter
|
On Hit
|
On Block
|
On Pushblock
|
| Low
|
-
|
325
|
2.5%
|
+2
|
+5
|
|
| Startup
|
Active
|
Recovery
|
Hit Stun
|
Block Stun
|
Hit Stop
|
Super Hit Stop
|
| 11
|
4
|
12
|
17
|
20
|
8
|
N/A
|
|
|
|
- Far range disjointed poke. Note that this move is the slowest 2LK in the game and slower than a lot of other mediums, so be wary when using this move for punishes
|
|
|
Disfigure Toggle Hitboxes Toggle Hitboxes
|
| 2MK
|
c.
|
|
| Guard
|
Properties
|
Damage
|
Meter
|
On Hit
|
On Block
|
On Pushblock
|
| Low
|
-
|
650
|
7.5%
|
+3
|
-5
|
|
| Startup
|
Active
|
Recovery
|
Hit Stun
|
Block Stun
|
Hit Stop
|
Super Hit Stop
|
| 13
|
2
|
20
|
24
|
16
|
10
|
N/A
|
|
|
|
- Is always in range to confirm off of 2LK, is just fast enough for Buer Reaper fly links.
- A second chainable low gives Painwheel access to a decent mixup when going for staggered resets/pressure.
|
|
|
Malice Clover Toggle Hitboxes Toggle Hitboxes
|
| 2HK
|
c.
|
|
|
|
Guard
|
Properties
|
Damage
|
Meter
|
On Hit
|
On Block
|
On Pushblock
|
| Low
|
Hatred Guard (2 hits),
Sweep
|
900
|
10%
|
Soft KD (Invuln.)
|
-12
|
|
| Startup
|
Active
|
Recovery
|
Hit Stun
|
Block Stun
|
Hit Stop
|
Super Hit Stop
|
| 20
|
7
|
23
|
14
|
17
|
10
|
N/A
|
|
|
|
| [ ]
|
Guard
|
Properties
|
Damage
|
Meter
|
On Hit
|
On Block
|
On Pushblock
|
| Low
|
Hatred Guard (2 hits),
Sweep
|
1000
|
10%
|
KD
|
-15
|
|
| Startup
|
Active
|
Recovery
|
Hit Stun
|
Block Stun
|
Hit Stop
|
Super Hit Stop
|
| 5, (20), 15
|
10
|
23
|
14
|
17
|
14
|
N/A
|
|
|
|
- Painwheel's standard sweep causes a normal knockdown when fully charged. Unlike after a standard sweep, the knockdown sends the opponent towards Painwheel for an easy OTG and combo.
|
|
|
Jumping Normals
Skewer Toggle Hitboxes Toggle Hitboxes
|
| jLP
|
j.
|
|
| Guard
|
Properties
|
Damage
|
Meter
|
On Hit
|
On Block
|
On Pushblock
|
| High
|
-
|
325
|
2.5%
|
+5
|
±0
|
|
| Startup
|
Active
|
Recovery
|
Hit Stun
|
Block Stun
|
Hit Stop
|
Super Hit Stop
|
| 8
|
2
|
14
|
20
|
15
|
8
|
N/A
|
|
|
|
- Painwheel’s fastest air normal and useful as an air-to-air, but has low hitstun, so use mostly when you’re going to chain into other buttons or specials.
|
|
|
Violet Grudge Toggle Hitboxes Toggle Hitboxes
|
| jMP
|
j.
|
|
| Guard
|
Properties
|
Damage
|
Meter
|
On Hit
|
On Block
|
On Pushblock
|
| High
|
-
|
250 x3, 425
|
2% x4
|
+3
|
-9
|
|
| Startup
|
Active
|
Recovery
|
Hit Stun
|
Block Stun
|
Hit Stop
|
Super Hit Stop
|
| 22
|
15
|
25
|
18 x3, 16
|
16 x4
|
7 x3, 12
|
N/A
|
|
|
|
- A multi-hit attack with a slow start up, high hit stun, multiple hits for a long active period, and a large attack box. It's best to space this button at its most disjointed point, once active this button is hard to beat. This is Painwheel's main method of poking but be careful, you can't be too reckless with this button as it's slow and not fully disjointed.
- Even on block this move is strong, due to the long blockstun and Painwheel's ability to fly cancel. Use a j.MP fly canceled into air throw to catch opponents holding up-back.
|
|
|
Deadly Flail Toggle Hitboxes Toggle Hitboxes
|
| jHP
|
j.
|
|
|
|
Guard
|
Properties
|
Damage
|
Meter
|
On Hit
|
On Block
|
On Pushblock
|
| High
|
Hatred Guard (1 hit)
|
300 x3, 550
|
2% x4
|
+16
|
-2
|
|
| Startup
|
Active
|
Recovery
|
Hit Stun
|
Block Stun
|
Hit Stop
|
Super Hit Stop
|
| 21
|
15
|
35
|
22 x3, 27
|
16 x4
|
7 x3, 12
|
N/A
|
|
|
|
| [ ]
|
Guard
|
Properties
|
Damage
|
Meter
|
On Hit
|
On Block
|
On Pushblock
|
| High
|
Hatred Guard (1 hit)
|
300 x5, 550
|
2% x6
|
+16
|
+4
|
|
| Startup
|
Active
|
Recovery
|
Hit Stun
|
Block Stun
|
Hit Stop
|
Super Hit Stop
|
| 2, (16), 19
|
23
|
34
|
22 x5, 27
|
16 x6
|
7 x5, 12
|
N/A
|
|
|
|
- Painwheel dramatically changes her jump arc to a lunge forward for her only air Hatred Guard move. Charging increases the number of hits from 4 to a maximum of 6.
- Painwheel’s lunge forward can be somewhat useful to catch opponents air-to-air, however if so it’s best to confirm with an air Buer or a j.MK if low enough.
- Armoring through an attack, then canceling into Thresher is a very strong tactic. Doing this will lock the opponent out from using a DHC before or after the superflash, until the first hit of Thresher is active.
- Can be used for the occasional restands during combos
- Due to it gaining hits when fully charged, it is optimal damage to release jhp right after armoring a single hit, as to not scale your HCH combo immediately.
|
|
|
Prod Toggle Hitboxes Toggle Hitboxes
|
| jLK
|
j.
|
|
| Guard
|
Properties
|
Damage
|
Meter
|
On Hit
|
On Block
|
On Pushblock
|
| High
|
-
|
350
|
2.5%
|
+3
|
-3
|
|
| Startup
|
Active
|
Recovery
|
Hit Stun
|
Block Stun
|
Hit Stop
|
Super Hit Stop
|
| 9
|
5
|
15
|
22
|
16
|
8
|
N/A
|
|
|
|
- Painwheel’s second fastest air normal, hits at a relatively lower height than j.LP and has more hitstun, making it more ideal for single lights for fly loops and such.
|
|
|
Bludgeon Toggle Hitboxes Toggle Hitboxes
|
| jMK
|
j.
|
|
| Guard
|
Properties
|
Damage
|
Meter
|
On Hit
|
On Block
|
On Pushblock
|
| High
|
-
|
650
|
7.5%
|
+8
|
+1
|
|
| Startup
|
Active
|
Recovery
|
Hit Stun
|
Block Stun
|
Hit Stop
|
Super Hit Stop
|
| 14
|
4
|
15
|
26
|
19
|
10
|
N/A
|
|
|
|
- Decently sized and decently fast normal makes this move fairly good for pressure and coming down on opponents if j.MP is too low/slow.
- Very very useful move for combos and fly confirms due to the relatively high hitstun and bringing the opponent down to the ground.
- Using this move after a fly canceled ground L Buer just barely uncombos, making this a pretty good tool for overhead resets during fly loops.
- Can be used to fast fall for j.MP when j.MP is blocked to add another layer of pressure options.
|
|
|
Tortured Rose Toggle Hitboxes Toggle Hitboxes
|
| jHK
|
j.
|
|
| Guard
|
Properties
|
Damage
|
Meter
|
On Hit
|
On Block
|
On Pushblock
|
| High
|
-
|
225 x6
|
1.8% x6
|
+7
|
+4
|
|
| Startup
|
Active
|
Recovery
|
Hit Stun
|
Block Stun
|
Hit Stop
|
Super Hit Stop
|
| 17
|
24
|
14
|
22 x6
|
16 x6
|
2 x6
|
N/A
|
|
|
|
- A 6 hit attack with a faster start up than j.MP or j.HP. Its lengthy active period and attack box below Painwheel make it her best attack to hit opponents right below her or for fast crossups.
|
|
|
Command Normals
Ratchet Poppy Toggle Hitboxes Toggle Hitboxes
|
| 6HK
|
 + +
|
|
| x1
|
Guard
|
Properties
|
Damage
|
Meter
|
On Hit
|
On Block
|
On Pushblock
|
| Mid
|
Chains Into Self
|
300
|
2.5%
|
-23
|
-26
|
|
| Startup
|
Active
|
Recovery
|
Hit Stun
|
Block Stun
|
Hit Stop
|
Super Hit Stop
|
| 17
|
3
|
41
|
17
|
17
|
15 (12 on block)
|
N/A
|
|
|
|
| x2, x3
|
Guard
|
Properties
|
Damage
|
Meter
|
On Hit
|
On Block
|
On Pushblock
|
| Mid
|
Chains Into Self
|
250
|
2.5%, 3.3333%
|
-26
|
-18
|
|
| Startup
|
Active
|
Recovery
|
Hit Stun
|
Block Stun
|
Hit Stop
|
Super Hit Stop
|
| 5
|
3
|
41
|
17
|
17
|
15 (7 on block)
|
N/A
|
|
|
|
| x4
|
Guard
|
Properties
|
Damage
|
Meter
|
On Hit
|
On Block
|
On Pushblock
|
| Mid
|
-
|
700
|
3.3333%
|
Ground Bounce,
KD (vs air)
|
-20
|
|
| Startup
|
Active
|
Recovery
|
Hit Stun
|
Block Stun
|
Hit Stop
|
Super Hit Stop
|
| 5
|
3
|
35
|
21
|
17
|
15
|
N/A
|
|
|
|
- A self chaining, long range command normal that causes ground bounce on the fourth hit. It leaves the opponent at an ideal range for a HK Buer Reaper, or it can cancel into Flight for a more difficult combo.
- All hits cannot be cancelled during the last 11f of recovery.
|
|
|
Universal Mechanics
Vice Crush / Hatred Piston Toggle Hitboxes Toggle Hitboxes
|
| Throw
|
+
|
|
| Guard
|
Properties
|
Damage
|
Meter
|
On Hit
|
On Block
|
On Pushblock
|
| Throw
|
50% Damage Scaling
|
0, 1000 OR
0, 1000, 1300 (during HI)
|
0, 15.0% OR
0, 5.0%, 10.0% (during HI)
|
Ground Bounce
|
N/A
|
|
| Startup
|
Active
|
Recovery
|
Hit Stun
|
Block Stun
|
Hit Stop
|
Super Hit Stop
|
| 7
|
1
|
28
|
N/A
|
N/A
|
N/A
|
N/A
|
|
|
|
- Painwheel's normal throw and normal air throw have the same animation. Painwheel ends these attacks in the air where Flight can cancel the recovery and start a combo. Using a Flight Cancel on the recovery will only let Painwheel cancel to Flight once for that jump if it is her first Flight Cancel in that jump.
- Can fast fall using any buer input, allowing Painwheel to save otg in throw confirms using a ground button, special move, a microdash, or even with a rising jump button.
|
|
|
Rail Spike / Hatred Piston Toggle Hitboxes Toggle Hitboxes
|
| Air Throw
|
+ (in air)
|
|
| Guard
|
Properties
|
Damage
|
Meter
|
On Hit
|
On Block
|
On Pushblock
|
| Air Throw
|
50% Damage Scaling
|
0, 1000 OR
0, 1000, 1300 (during HI)
|
0, 15.0% OR
0, 5.0%, 10.0% (during HI)
|
Ground Bounce
|
N/A
|
|
| Startup
|
Active
|
Recovery
|
Hit Stun
|
Block Stun
|
Hit Stop
|
Super Hit Stop
|
| 7
|
3
|
18
|
N/A
|
N/A
|
N/A
|
N/A
|
|
|
|
- Virtually identical to her ground throw, but it can send opponents farther distances than her ground throw does (check this!). Can affect certain throw conversions on a case-by-case basis.
|
|
|
Rail Spike / Hatred Piston Toggle Hitboxes Toggle Hitboxes
|
|
| Guard
|
Properties
|
Damage
|
Meter
|
On Hit
|
On Block
|
On Pushblock
|
| Mid (also techable)
|
Tag,
Hit Grab,
50% Damage Scaling
|
0, 500 OR
0, 500, 650 (during HI)
|
0%, 15% OR
0%, 1.6667%, 3.3333% (during HI)
|
Ground Bounce
|
-53
|
|
| Startup
|
Active
|
Recovery
|
Hit Stun
|
Block Stun
|
Hit Stop
|
Super Hit Stop
|
| 20
|
19
|
60
|
N/A
|
13
|
9
|
N/A
|
|
|
|
- Painwheel appears from the side of the screen with a hit grab that transitions to a less damaging version of her air throw. Even though this attack is blockable, it has the same throw break window as any regular air throw. Opponent's have plenty of time to react to Painwheel by blocking or escaping the throw. Comboing into the attack or landing it as a counter hit prevents the opponent from using a throw break.
- This move builds the same amount of meter (15%) on hit regardless of what scaling it is at in the combo. This allows for Painwheel tag combos to build far more meter than most solo character combos.
- When viewing the frame data for this move in game, the recovery is not shown due to a bug.
|
|
|
Snapdragon Toggle Hitboxes Toggle Hitboxes
|
|
| Guard
|
Properties
|
Damage
|
Meter
|
On Hit
|
On Block
|
On Pushblock
|
| Mid
|
Snapback
|
0
|
-100%
|
N/A
|
-18
|
|
| Startup
|
Active
|
Recovery
|
Hit Stun
|
Block Stun
|
Hit Stop
|
Super Hit Stop
|
| 12 + 3
|
4
|
28
|
10
|
17
|
13
|
9
|
|
|
|
|
|
Specials
|
|
| Flight
|
 + +  (Air OK) (Air OK)
|
|
| Ground
|
Guard
|
Properties
|
Damage
|
Meter
|
On Hit
|
On Block
|
On Pushblock
|
| N/A
|
-
|
N/A
|
0%
|
N/A
|
N/A
|
|
| Startup
|
Active
|
Recovery
|
Hit Stun
|
Block Stun
|
Hit Stop
|
Super Hit Stop
|
| 12
|
N/A
|
N/A
|
N/A
|
N/A
|
N/A
|
N/A
|
|
|
|
| Air
|
Guard
|
Properties
|
Damage
|
Meter
|
On Hit
|
On Block
|
On Pushblock
|
| N/A
|
-
|
N/A
|
0%
|
N/A
|
N/A
|
|
| Startup
|
Active
|
Recovery
|
Hit Stun
|
Block Stun
|
Hit Stop
|
Super Hit Stop
|
| 10
|
N/A
|
N/A
|
N/A
|
N/A
|
N/A
|
N/A
|
|
|
|
- As a quick special move with no active or recovery frames, Flight is a powerful offensive tool for canceling the recovery of other moves and extending combos. Painwheel can fake Hatred Guard attacks by canceling to Flight during the charge.
- Going from flight directly into an attack has is a 9 frame buffer window for the normal during flight's startup.
- Attacks made from flight mode preserve Flight's momentum, which can subtly change the behavior of her air normals.
- For example, inputting any up direction allows for Painwheel's j.MP to hit the opponent from a grounded Flight activation.
- Starting Flight from the ground gives Painwheel enough height to use j.LP, j.LK, and j.MK as a fast overhead attack.
- Painwheel can call assists at any time while flying, even if Flight starts during a super jump.
- Painwheel gets 2 air flights per airtime, so if she starts her air time with a flight or with jumping, she has two flights to use.
- Buer Reaper on hit will consume one usage of flight.
|
|
|
|
|
| Flight Cancel
|
During Flight
 + +
|
|
- Painwheel can use this command to end Flight without an attack, preserving either half of her backward momentum or all of her forward momentum.
- The 5f "unfly" animation does not restrict Painwheel from any other action and allows her to block.
- Successfully blocking out of the animation gives Painwheel only 25% of the regular block stun from the incoming attack (signified by a visual blood effect).
- Has one frame of input leniency, i.e. the two punches can be pressed one frame apart.
|
|
|
Toggle Hitboxes Toggle Hitboxes
|
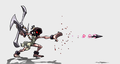
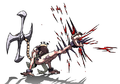
| Gae Bolga Stinger
|
 + +
|
|
|
|
Guard
|
Properties
|
Damage
|
Meter
|
On Hit
|
On Block
|
On Pushblock
|
| Mid
|
50% Damage Scaling (except in HI)
|
650 (90)
|
(2.5%) 4.5%
|
+38 or -4
|
-16
|
|
| Startup
|
Active
|
Recovery
|
Hit Stun
|
Block Stun
|
Hit Stop
|
Super Hit Stop
|
| 22
|
8
|
46
|
28
|
21
|
55 or 13 (8 on block)
|
N/A
|
|
|
|
| /
|
Guard
|
Properties
|
Damage
|
Meter
|
On Hit
|
On Block
|
On Pushblock
|
| Mid
|
Projectile,
Flight Cancel
|
350 x5 (100 x5)
|
(2.5%) 6% x5
|
+8 to +12
|
±0 to +4
|
|
| Startup
|
Active
|
Recovery
|
Hit Stun
|
Block Stun
|
Hit Stop
|
Super Hit Stop
|
| 13, (36), 16
|
-
|
30
|
25
|
17
|
12 (8 on block)
|
N/A
|
|
|
|
| / (Hatred Install)
|
Guard
|
Properties
|
Damage
|
Meter
|
On Hit
|
On Block
|
On Pushblock
|
| Mid
|
Projectile,
Flight Cancel
|
350 x5 (100 x5)
|
(2.5%) 6% x5
|
+13 to +17
|
+5 to +9
|
|
| Startup
|
Active
|
Recovery
|
Hit Stun
|
Block Stun
|
Hit Stop
|
Super Hit Stop
|
| 13, (13), 16
|
-
|
25
|
25
|
17
|
12 (8 on block)
|
N/A
|
|
|
|
- Painwheel ejects spikes from her arm, using them either as combo extensions or far-ranged pressure tools. Commonly referred to as "nails".
- : The spikes go a short distance before touching the ground, pinning the opponent down for a short while.
- First use in a combo has extra hitstop effect
- No forced damage scaling during Hatred Install.
- / : The spikes fly out, becoming projectiles with an area of attack that grows as you hold down the button.
- The MP version sends the spikes in a straight line, while the HP version has them fly in an arc. Painwheel can use both to figuratively pin down an opponent before she cancels to Flight and approaches from full screen. Holding the button increases the number of projectiles to a maximum of 5 for these versions and Hatred Install shortens the charge time.
- Can hitconfirm closer distances with a fly cancel into jMK.
- Partial charge M stinger travels at a faster rate than the charged versions
|
|
|
Toggle Hitboxes Toggle Hitboxes
|
| Buer Reaper
|
+ (Air OK)
|
|
|
|
Guard
|
Properties
|
Damage
|
Meter
|
On Hit
|
On Block
|
On Pushblock
|
| Mid
|
50% Damage Scaling,
Hit Grab,
Flight Cancel
|
0, 1400 (100)
|
(2.5%) 0%, 3.75%
|
+3 (+8*)
|
-18
|
|
| Startup
|
Active
|
Recovery
|
Hit Stun
|
Block Stun
|
Hit Stop
|
Super Hit Stop
|
| 13
|
4
|
32
|
N/A
|
17
|
11
|
N/A
|
|
|
|
and all air
|
Guard
|
Properties
|
Damage
|
Meter
|
On Hit
|
On Block
|
On Pushblock
|
| Mid
|
50% Damage Scaling,
Hit Grab,
Flight Cancel
|
0, 1400 (100)
|
(2.5%) 0%, 3.75%
|
KD
|
-18
|
|
| Startup
|
Active
|
Recovery
|
Hit Stun
|
Block Stun
|
Hit Stop
|
Super Hit Stop
|
| 13
|
4
|
32
|
N/A
|
17
|
11
|
N/A
|
|
|
|
|
|
Guard
|
Properties
|
Damage
|
Meter
|
On Hit
|
On Block
|
On Pushblock
|
| Anti-Air Grab
|
50% Damage Scaling,
Flight Cancel
|
0, 1400 (100)
|
(2.5%) 0%, 3.75%
|
KD
|
-18
|
|
| Startup
|
Active
|
Recovery
|
Hit Stun
|
Block Stun
|
Hit Stop
|
Super Hit Stop
|
| 13
|
2
|
34
|
N/A
|
17
|
11
|
N/A
|
|
|
|
- Painwheel catches an opponent with a Hit Grab. All versions can cancel their recovery to Flight and end with Painwheel in the air. Buer Reaper, along with Flight, is the core of her combo game.
- Ground: Shortest range of all, but restands the opponent on hit and allows Painwheel to combo with air normals using Flight.
- Air: Launches the opponent horizontally across for a KD. Useful for corner combos or corner carries from an air chain.
- Ground: Similar to L, but has a longer horizontal range that is useful for corner carry, and causes a KD on hit.
- Air: Launches the opponent diagonally downwards for a KD. Not very versatile, but most notably used with an assist call during combos.
- Ground: Grabs at an upward angle, and one of the few Anti-Air Grabs in this game; however, it is often used for corner combos or corner carry.
- Air: Launches the opponent straight down for a KD. Mostly used for resets or the odd conversion from certain situations at the cost of OTG.
- The air versions of Buer Reaper may potentially whiff at point-blank range.
- Performing Flight after Buer Reaper has Painwheel start lower to the ground than normally; you may need to adjust your vertical Flight momentum accordingly for combos.
To view how Buer Reaper changes during Hatred Install, go to Hatred Install in the Supers section.
|
|
|
Toggle Hitboxes Toggle Hitboxes
|
| Pinion Dash
|
 , + (Assist only) , + (Assist only)
|
|
|
|
Guard
|
Properties
|
Damage
|
Meter
|
On Hit
|
On Block
|
On Pushblock
|
| Mid
|
-
|
1050 (100)
|
(2.5%) 5%
|
+1
|
-16
|
|
| Startup
|
Active
|
Recovery
|
Hit Stun
|
Block Stun
|
Hit Stop
|
Super Hit Stop
|
| 10
|
25
|
32
|
33
|
16
|
12
|
N/A
|
|
|
|
|
|
Guard
|
Properties
|
Damage
|
Meter
|
On Hit
|
On Block
|
On Pushblock
|
| Mid
|
-
|
1150 (100)
|
(2.5%) 5.4546%
|
KD
|
-43
|
|
| Startup
|
Active
|
Recovery
|
Hit Stun
|
Block Stun
|
Hit Stop
|
Super Hit Stop
|
| 33 (11 as AC)
|
25
|
32
|
13
|
16
|
15 (12 on block)
|
N/A
|
|
|
|
|
|
Guard
|
Properties
|
Damage
|
Meter
|
On Hit
|
On Block
|
On Pushblock
|
| Mid
|
-
|
1250 (100)
|
(2.5%) 6%
|
KD
|
-50
|
|
| Startup
|
Active
|
Recovery
|
Hit Stun
|
Block Stun
|
Hit Stop
|
Super Hit Stop
|
| 42 (14 as AC)
|
25
|
32
|
13
|
16
|
18 (12 on block)
|
N/A
|
|
|
|
- Painwheel spins her blade, winding up to lunge forward with an attack. This move can only be performed as an assist, with increasing button strengths offering more damage and better hit effects in exchange for a longer wind up time. All versions are extremely active.
- : Fast startup, plenty of hitstun to confirm off of.
- : Long startup, sends the opponent flying away
- : Longest startup, sends the opponent in the opposite direction behind Painwheel. This allows for very unique conversions that aren't normally possible. Most notably, it allows Big Band to convert off of SSJ.
- Pinion Dash can still be used on point from an alpha counter, which will also omit the wind up portion of the animation from the startup found in the M and H version. In this way, H Pinion Can be very useful to escape certain situations, or to hit off of an alpha counter burst that hit the opponent and lead into a full combo confirm.
- The frame data graphs show the move as an alpha counter.
|
|
|
Supers
Toggle Hitboxes Toggle Hitboxes
|
|
| Guard
|
Properties
|
Damage
|
Meter
|
On Hit
|
On Block
|
On Pushblock
|
| Mid
|
Invuln. (Full),
45% Minimum Scaling (HI only)
|
220 x26 (15 x26) OR
200 x26 (15 x26) (during HI)
|
-100%
|
Ground Bounce
|
-32
|
|
| Startup
|
Active
|
Recovery
|
Hit Stun
|
Block Stun
|
Hit Stop
|
Super Hit Stop
|
| 6 + 8
|
2, 2, 2... / -- (On whiff)
|
53
|
19 x26
|
21 x26
|
0 x26 (1 x26 on block) (4 x26 on OTG)
|
9
|
|
|
|
- Painwheel's ground super will always connect for full damage against a standing or crouching opponent. Painwheel moves significantly faster if she switches sides with her opponent after missing the attack. She always crawls at this faster speed during Hatred install.
- Can always connect after a L buer. Can also connect from an M buer even from far distances, however this needs otg even when done in the corner.
- Does more damage than Buer Thresher at the end of combos, so always end combos in this super if you can.
|
|
|
"Feel... pain..." Toggle Hitboxes Toggle Hitboxes
|
Buer Thresher
Level 1
|
(Air Only) + +
|
|
| Guard
|
Properties
|
Damage
|
Meter
|
On Hit
|
On Block
|
On Pushblock
|
| Mid
|
Invuln. (Full),
Hit Grab,
Flight Cancel,
45% Minimum Scaling (Except first 3 hits, unless during HI)
|
150 x3, 70 x15, 500 (150 x3) OR
150 x3, 70 x30, 500 (150 x3) (during HI)
|
-100%
|
KD
|
-18
|
|
| Startup
|
Active
|
Recovery
|
Hit Stun
|
Block Stun
|
Hit Stop
|
Super Hit Stop
|
| 3 + 4
|
3, (11), 2, (12), 3
|
46
|
N/A
|
19 x2, 20
|
N/A (11 x2, 10 on block)
|
5
|
|
|
|
- Painwheel's air super begins with a series of stabs, then shifts to a throw for a series of faster hits. Painwheel gets a longer animation with more hits when performing this super during Hatred Install. Buer Thresher combos easily off of any Buer Reaper that leaves Painwheel in the air. Using a Flight Cancel to shorten the super's recovery will not let Painwheel cancel to Flight twice in a jump if it is her first Flight Cancel out of the air.
- Invulnerability for 19f total, covering all start up and some active frames
|
|
|
|
|
Hatred Install
Level 2
|
+ +
|
|
| Guard
|
Properties
|
Damage
|
Meter
|
On Hit
|
On Block
|
On Pushblock
|
| N/A
|
Invuln. (Full)
|
N/A
|
-200%
|
N/A
|
N/A
|
|
| Startup
|
Active
|
Recovery
|
Hit Stun
|
Block Stun
|
Hit Stop
|
Super Hit Stop
|
| 3 + 0
|
N/A
|
8
|
N/A
|
N/A
|
N/A
|
2
|
|
|
|
- An install which powers up Painwheel in a variety of different ways.
- Increases damage and alters animation of throw, air throw, and tag.
- Hatred Guard
- All Hatred Guard moves have one additional hit of armor.
- All Hatred Guard armor starts on the first frame of startup.
- Damage return from Hatred Guard increased to 50/66/75% for light/medium/heavy attacks.
- Damage return from Hatred Guard increased to 190% for Buer Overdrive.
- Damage absorbed by Hatred Guard cannot kill Painwheel.
- Gae Bolga Stinger
- LP version of Gae Bolga Stinger does not have any additional damage scaling.
- MP and HP versions of Gae Bolga Stinger get a reduced charge time, less recovery, and travel across the screen faster.
- Buer Reaper
- All versions of Buer Reaper are scaled to 70% and have an increased hit stop effect, allowing ground LK and MK version to combo into Death Crawl at midscreen.
- Once per combo:
- Ground LK version of Buer Reaper causes a Stagger or leaves Painwheel +8 (if stagger was used already in the combo).
- Ground MK, HK, and air LK version of Buer Reaper causes a Wall Splat.
- Air MK version of Buer Reaper causes a Sliding KD.
- Air HK version of Buer Reaper causes Ground Bounce.
- When used more than once in a single combo, all versions of Buer Reaper (besides ground LK) behave identically as they would outside of Hatred Install.
- Supers
- Level 1 supers have minimum 45% damage scaling (same as a regular Lv.3) and level 3 supers have minimum 55% damage scaling (same as a regular Lv.5).
- Death Crawl travels across the screen faster.
- Buer Thresher has more hits and increased total damage. Does less damage at full scaling than Death Crawl.
- The length of the install is determined by Painwheel's remaining life. Full health gives a 660f timer and 1 point of life left gives a 1300f timer. Painwheel keeps Hatred Install after tagging out and the timer will only count down when Painwheel is on screen. The timer drains at half speed when Painwheel is on screen as an assist. Timer does not expire during combos, allowing any full combo to be completed. When used from a DHC, the timer length is 1/3rd of the normal time.
- Install activation gives +4 frame advantage when the opponent is in hitstun, allowing for easier hitconfirms into install
- Useful as a safe DHC due to the few amount of total frames, making it mostly safe. It also only costs 1 bar when used as DHC, making it in many cases better to do short combo -> level 1 super -> hatred install DHC -> hatred install combo -> level 1 super than to do a full combo into painwheel level 3.
- Bug: If Painwheel tags in while under Hatred Install, then the timer will still expire during a combo and the install will run out midcombo. However, if Painwheel DHC's instead, then the timer retains the normal property and the install will only run out after a combo is over.
|
|
|
Toggle Hitboxes Toggle Hitboxes
|
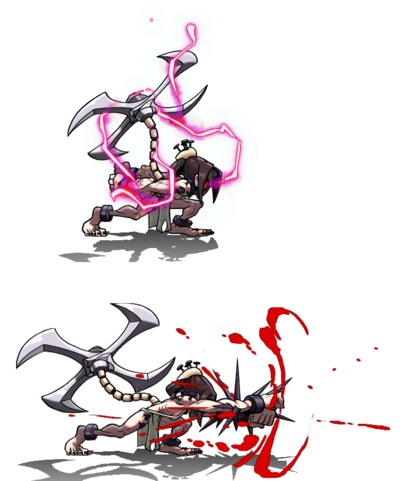
Buer Overdrive
Level 3
|
+ +
|
|
| Guard
|
Properties
|
Damage
|
Meter
|
On Hit
|
On Block
|
On Pushblock
|
| Mid
|
Invuln. (Full),
Hatred Guard (3 hits),
45% Minimum Scaling
|
2000, 175 x16, 1000 (300) OR
2000, 225 x16, 1500 (300) (during HI)
|
-300%
|
Wall Bounce
|
-36
|
|
| Startup
|
Active
|
Recovery
|
Hit Stun
|
Block Stun
|
Hit Stop
|
Super Hit Stop
|
| 7 + 2
|
25
|
39 (hit), 28 (block/whiff)
|
35, 19 x17
|
16
|
20, 2 x16, 35 (15 on block)
|
6
|
|
|
|
- Painwheel winds up and charges, cutting through the opponent with an extended animation with a successful first hit. On the last hit, Painwheel will use all of her stored Hatred Guard damage and return it to the opponent with a 120% multiplier. With Hatred Install active, Painwheel returns an especially brutal 190% of her stored damage.
- Invulnerability for 7f of start up (before super flash).
- The first hit is similar to a Hit Grab in that it ignores armor and teleports the opponent into position. However, unlike a hit grab, Big Band can parry the first hit (and all of the followup hits). Also, each hit applies its own scaling.
- Hatred Guard covers all post-super flash start up and active frames.
- If this whiffs the opponent, it has very short recovery frames, making this somewhat useful as an escape in many situations.
- Due to the fast speed of this move, it allows Painwheel to punish many things that other characters cannot, and is Painwheel's only method to punish certain moves especially from fullscreen.
- Has a buffer after it successfully connects, to link moves more easily.
- painwheel cannot die while armoring through attacks with this super.
|
|
|
Taunt
Toggle Hitboxes Toggle Hitboxes
|
|
| Guard
|
Properties
|
Damage
|
Meter
|
On Hit
|
On Block
|
On Pushblock
|
| Mid
|
-
|
5
|
0%
|
-42
|
-39
|
|
| Startup
|
Active
|
Recovery
|
Hit Stun
|
Block Stun
|
Hit Stop
|
Super Hit Stop
|
| 33
|
3
|
48
|
8
|
11
|
5
|
N/A
|
|
|
|
|
|
|
|
"You..."
|
| Assist Taunt
|
Automatically done after an assist move
|
|
| Guard
|
Properties
|
Damage
|
Meter
|
On Hit
|
On Block
|
On Pushblock
|
| Mid
|
-
|
N/A
|
0%
|
N/A
|
N/A
|
|
| Startup
|
Active
|
Recovery
|
Hit Stun
|
Block Stun
|
Hit Stop
|
Super Hit Stop
|
| N/A
|
N/A
|
38
|
N/A
|
N/A
|
N/A
|
N/A
|
|
|
|
- Amount of time it takes for the character to turn invulnerable after they finish performing their assist action.
- Longer recovery → more time to punish the assist.
|
|
|
Colors
Intro Poses
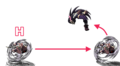
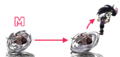
Painwheel has 3 different intro poses that can be selected by holding a light, medium or heavy button during the loading screen before a match.
|
Intro pose 1:
Hold OR
Painwheel's propeller appears on the stage and then Painwheel herself.
Rrrraaaarrrghh!
|
|
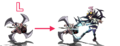
Intro pose 2:
Hold OR
Painwheel stands with her back turned and then leans forward with scream.
|
|
Intro pose 3:
Hold OR
Painwheel lies until BrainDain activates her.
Must... kill...
Uuuurrrghhhh...
|
Players to Watch
Disclaimer: This list is derived from community input and is in no way comprehensive or a form of ranking of any kind. Our community criteria can be found here.
| General
|
|
| Characters
|
|
|
|
|
| Mechanics
|
|
| Other
|
|