Story
Robo-Fortune is the creation of Brain Drain, the psychic director of ASG Lab Zero, and stands as a testament to her maniacal creator’s unmatched pride and petulance. Built to demonstrate loyalty and cunning, Robo-Fortune fails to deliver either to any measurable degree. Employing cutting-edge technology, she sets out to hunt down the Skullgirl, and to engage in easily avoidable conflicts.
Is the ASG Project’s latest creation the ultimate cybernetic soldier? Have Brain Drain’s mechanical machinations set the world on a treacherous path? Is Robo-Fortune’s faulty programming more of a feature than a bug? Has science gone too far?!
Overview
Robo-Fortune is a zoner/keepaway character who uses her amazing mobility, Headrone special moves, and beam projectiles to keep the opponent far away and frustrate them to no end. She also has one of the most powerful assists in the game, which makes her a useful teammate for any character in the game.
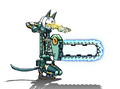
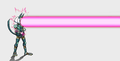
- Zoning: Theonite Beam (236P) is Robo's main projectile and the key to her gameplan. Theonite Beam shoots a horizontal beam of energy across the screen that can be used to check an opponent's approach and make them think more carefully when approaching you. Additionally, she can summon and use headdrones as special moves (214K, after using 2HK) to increase her zoning capabilities and coverage.
- Movement: Robo has the fastest forward dash in the game. While it's an obvious benefit towards rushdown gameplay, it still can be useful for zoning and defense as Robo can dash under airborne opponents quickly to escape dangerous situations. Robo has a standard double jump, but interestingly Robo can also move around during her jHK. Holding directions during jHK will steer Robo in the corresponding direction, letting her fly up and away to safely shoot even more lasers.
- Pressure: Despite being mostly zoning focused, Robo still has a good amount of pressure tools. She can chain into several lows, has a unique combo-able sliding sweep, and a standing overhead "Dust" for basic high/low pressure. She also has the unique ability to double jump cancel her air normals on block, allowing her quick left/right pressure with jMP and jHK.
Playstyle
 Robo-Fortune is a speedy zoner that excels at running away and controlling large chunks of the screen. Robo-Fortune is a speedy zoner that excels at running away and controlling large chunks of the screen. |
| Pros |
Cons |
- Beams: Robo-Fortune's beams provide nearly instant fullscreen lockdown and can limit movement through large parts of the screen.
- Head Drones: Her unique resource gives her a few strong options, including a very strong reversal using Mine and fullscreen tracking lockdown with Salvo.
- Catastrophe Cannon: A fullscreen post-flash unblockable super that does fantastic damage.
- Mobility: She has the fastest ground dash in the game, and combined with her small jumping hurtbox and double jump makes her a very slippery and hard to catch foe.
- Anti-Airs: She has a wide assortment of good anti-airs, including 5LP, 2LP, and L Danger!.
- H Beam Assist: Arguably one of the strongest assists in the game, as its fullscreen lockdown severely restricts the enemy's movement and allows the point character to basically get in for free.
|
- Back-loaded Damage: Robo-Fortune's combo damage tends to be on the lower side until she uses Catastrophe Cannon, though this can be somewhat mitigated with proper assists and team-building.
- Weak Reversals: Robo's defensive options are incredibly limited. While 5HP does have armor, it is susceptible to multihits or throws and the lack of an input buffer for normals makes it hard to use. Mine can trade favorably against many attacks, but requires a head drone and a large enough gap.
- Mix-ups: Her more reliable mix-ups using throw and 5HK require resources to combo off them.
- Range: Most of her normals are relatively small, meaning she can't poke or counter-poke as effectively.
|
Video Overview
Stats
Chains
| Standing
|
4 Buttons:  or or  → →  → →  → →  or or 
|
| Crouching
|
4 Buttons: or → → → or
|
| Air
|
5 Buttons: → → → → or
|
Movement
| Weight
|
Dash
|
Double Jump
|
Airdash
|
IAD Lockout
|
| Medium
|
Run
|
Yes
|
No
|
8 (Install)
|
Wakeup Time
| Forward Tech
|
Backward Tech
|
Sliding KD
|
Hard KD
|
Crumple
|
| 37
|
37
|
88
|
31
|
32
|
Assists
H Theonite Beam (default assist)
5HP (default assist)
An armored lockdown assist
H Theonite Beam (default assist)
Neutral assist that covers the horizontal portion of the screen in a multi-hitting beam hitbox, but not the lower portion, so it can be crouched under. Probably one of the strongest assists in the game, due to its potential to lock out enemy assists from full screen and force the opponent to either stop what they're doing to avoid the beam, or block it for a decent amount of chip, and fall prey to a potential mix-up. Just about every character in the game can benefit from this assist.
M Beam is another choice that's faster but doesn't lock down. Not often chosen over H, but it's an option.
Headrone Impact (214MK)
On the first assist call, Robo-Fortune will summon one head with 2HK. On the next call, or if she already has a head, she will spend it to do Headrone Impact. Plants a mine on the ground that stays on the screen for a while. Summoned heads not used will stay when Robo-Fortune becomes the point character.
Headrone Salvo (214HK)
Hidden moussiles. On the first assist call, or if she has only has less than three heads, Robo-Fortune will summon three heads with 2HK. On the next call, or if she already has three heads, she will spend them to do Headrone Salvo. Summons a bunch of missiles that track onto the opponent and forces a pressure situation for the point. Once created, the missiles don't go away, so it can also break the opponent's combos. Summoned heads not used will stay when Robo-Fortune becomes the point character.
Move List
Character Mechanic: Headrones
Robo's 2HK has her shoot out heads that follow Robo around. Each of her three 214K special moves will spend the heads. Headrone RAM (214LK) and and Headrone Impact (214MK) will use one head. Headrone Salvo (214HK) will use all the available heads, and powers up depending on the number of heads you have. Each of these moves cannot be done without at least one head. She can have up three Headrones out at once. Doing 2HK with three heads will still execute the move but replace a currently stored head.
While in Det Mode, Robo's heads can be spent on a new special called Warranty Extension (214P). This move allows her to use up 1-3 heads (depending on the button strength used) in order to add more time to her self-destruct timer, at the cost of permanent health damage that increases as she spends more heads.
Standing Normals
Catcher Tongue Toggle Hitboxes Toggle Hitboxes
|
| 5LP
|
s.
|
|
| x1
|
Guard
|
Properties
|
Damage
|
Meter
|
On Hit
|
On Block
|
On Pushblock
|
| Mid
|
Chains Into Self
|
175
|
2.5%
|
+2
|
+2
|
|
| Startup
|
Active
|
Recovery
|
Hit Stun
|
Block Stun
|
Hit Stop
|
Super Hit Stop
|
| 6
|
2
|
15
|
18
|
18
|
7
|
N/A
|
|
|
|
| x2
|
Guard
|
Properties
|
Damage
|
Meter
|
On Hit
|
On Block
|
On Pushblock
|
| Mid
|
-
|
175
|
2.5%
|
±0
|
±0
|
|
| Startup
|
Active
|
Recovery
|
Hit Stun
|
Block Stun
|
Hit Stop
|
Super Hit Stop
|
| 5
|
2
|
17
|
18
|
18
|
7
|
N/A
|
|
|
|
|
- Robo-Fortune sticks her tongue out and uses it as a short-range but standard jab. It can be used as anti air around instant air dash height which is pretty useful
|
|
|
Flex Capacitor Toggle Hitboxes Toggle Hitboxes
|
| 5MP
|
s.
|
|
|
|
Guard
|
Properties
|
Damage
|
Meter
|
On Hit
|
On Block
|
On Pushblock
|
| Mid
|
-
|
425
|
7.5%,
|
+4
|
+2
|
|
| Startup
|
Active
|
Recovery
|
Hit Stun
|
Block Stun
|
Hit Stop
|
Super Hit Stop
|
| 10
|
3
|
16
|
22
|
20
|
9
|
N/A
|
|
|
|
| [ ]
|
Guard
|
Properties
|
Damage
|
Meter
|
On Hit
|
On Block
|
On Pushblock
|
| Mid
|
-
|
425, 115x2, 175
|
7.5%, 2.5% x3
|
+10
|
±0
|
|
| Startup
|
Active
|
Recovery
|
Hit Stun
|
Block Stun
|
Hit Stop
|
Super Hit Stop
|
| 10
|
3, (3), 3, 3, 2
|
11
|
22x4
|
20, 12x3
|
9, 3x2, 8
|
N/A
|
|
|
|
|
- Robo-Fortune's double punch hits once. Holding the button adds a vacuum effect, giving the attack 3 additional hits, generous hit stun, and more than enough time to confirm into a chain combo. This move also links into 5LP and 5LK which is pretty useful
- Using held 5MP is very effective against pushblocks. If the opponent pushblocks the first 5[MP] hit, or the first two lightning hits, Robo-Fortune will remain beside her opponent and still be plus. The final lightning hit must be pushblocked in order to push her out, although she's still extremely plus. (+14)
|
|
|
Collimating Saw Toggle Hitboxes Toggle Hitboxes
|
| 5HP
|
s.
|
|
| Guard
|
Properties
|
Damage
|
Meter
|
On Hit
|
On Block
|
On Pushblock
|
| Mid
|
Armor (1 hit)
|
180x4, 400
|
2.4% x4, 3.6%
|
-2
|
-20
|
|
| Startup
|
Active
|
Recovery
|
Hit Stun
|
Block Stun
|
Hit Stop
|
Super Hit Stop
|
| 17
|
4, 4, 4, 4, 4
|
39
|
40x5
|
22x5
|
2x4, 7
|
N/A
|
|
|
|
|
- Robo-Fortune extends a laser chainsaw from her chest. This is move has one hit of armor and is Robo-Fortune's main reversal. It can also be somewhat used as anti-air since the armor can absorb single hit attacks and punish the opponent. This attack is unsafe on block and can rapidly scale damage for a combo with multiple hits, so it is best used late in a combo to cancel to a Danger! special move.
- Has a 3f reversal buffer like other heavy normals, so getting 5HP on wakeup, post blockstun, or post hitstun, is a 4f window.
|
|
|
HF Quartz Blade Toggle Hitboxes Toggle Hitboxes
|
| 5LK
|
s.
|
|
| Guard
|
Properties
|
Damage
|
Meter
|
On Hit
|
On Block
|
On Pushblock
|
| Mid
|
-
|
275
|
2.5%
|
+1
|
+2
|
|
| Startup
|
Active
|
Recovery
|
Hit Stun
|
Block Stun
|
Hit Stop
|
Super Hit Stop
|
| 7
|
2
|
17
|
19
|
20
|
7
|
N/A
|
|
|
|
|
- Robo sticks a out flame from her knee. This normal can be used to stop instant air dashes but 5LP is better for that. Mostly used for combos.
|
|
|
Overclawk Toggle Hitboxes Toggle Hitboxes
|
| 5MK
|
s.
|
|
| Guard
|
Properties
|
Damage
|
Meter
|
On Hit
|
On Block
|
On Pushblock
|
| Mid
|
-
|
475
|
7.5%
|
+7
|
±0
|
|
| Startup
|
Active
|
Recovery
|
Hit Stun
|
Block Stun
|
Hit Stop
|
Super Hit Stop
|
| 16
|
2
|
19
|
27
|
20
|
9
|
N/A
|
|
|
|
|
- This downward heel kick will force an airborne character into a standing state, making this normal great for landing the opponent in the middle of a combo.
- The generous hitstun allows you to link into 5LP. This move features a normal buffer once it ends so that it isn't a 1F link.
|
|
|
Device Driver Toggle Hitboxes Toggle Hitboxes
|
| 5HK
|
s.
|
|
| Guard
|
Properties
|
Damage
|
Meter
|
On Hit
|
On Block
|
On Pushblock
|
| High
|
No Cancel
|
1000
|
10%
|
Wall Splat or KD
|
-13
|
|
| Startup
|
Active
|
Recovery
|
Hit Stun
|
Block Stun
|
Hit Stop
|
Super Hit Stop
|
| 22
|
3
|
40 (hit), 34 (block/whiff)
|
16
|
23
|
16
|
N/A
|
|
|
|
|
- This easily chainable normal causes Wall Splat, the only normal in the game with this property, and is one of the few normal overheads in the game.
- * Unlike most normal moves, this move can not be canceled into specials moves and can only be canceled into 2HK and supers.
- Continuing a combo out of this attack always depends on distance from the corner, often ends up using the OTG for the combo, and sometimes needs a cancel to Magnetic Trap to get the opponent in position for a follow up.
- By holding up or up-forward after a successful sHK, Robo can spend one headrone to perform Homing Directory. This activates a special jump on wall splat that will make Robo track to the enemy's location, allowing for more consistent conversions at the cost of one head.
- If Robo-Fortune is under the effects of Systemic Circuit Breaker, she can dash to pick up after hitting 5HK against every character, even mid-screen.
- The Wall Splat only works once per combo. The second time it is used in a combo it will just be a regular knockdown that launches the opponent far away. Hitting an assist with this move will use the once per combo Wall Splat too.
- Late assist calls are your best chance at making this move safe on block. Try to call the assist so that there is no gap to reversal between 5HK and the assist hitting.
|
|
|
Crouching Normals
Hearing Blade Toggle Hitboxes Toggle Hitboxes
|
| 2LP
|
c.
|
|
| x1, x2
|
Guard
|
Properties
|
Damage
|
Meter
|
On Hit
|
On Block
|
On Pushblock
|
| Mid
|
Chains Into Self
|
175
|
2.5%
|
±0
|
±0
|
|
| Startup
|
Active
|
Recovery
|
Hit Stun
|
Block Stun
|
Hit Stop
|
Super Hit Stop
|
| 6
|
2
|
17
|
18
|
18
|
7
|
N/A
|
|
|
|
|
- Robo-Fortune sticks her ears upwards and attacks the opponent. The upward angle on this attack, and lack of hurtboxes on her ears makes it easier to use it as an anti-air than on grounded opponents.
|
|
|
Gain Medium Toggle Hitboxes Toggle Hitboxes
|
| 2MP
|
c.
|
|
| Guard
|
Properties
|
Damage
|
Meter
|
On Hit
|
On Block
|
On Pushblock
|
| Low
|
-
|
475
|
7.5%
|
+1
|
-3
|
|
| Startup
|
Active
|
Recovery
|
Hit Stun
|
Block Stun
|
Hit Stop
|
Super Hit Stop
|
| 10
|
4
|
22
|
21
|
17
|
9
|
N/A
|
|
|
|
|
- An ankle-zapping eye beam that must be blocked low. It's also disjointed, which allows it to be used for burst baits.
- Can destroy the ant from Peacock's cMK.
|
|
|
Grounding Pound Toggle Hitboxes Toggle Hitboxes
|
| 2HP
|
c.
|
|
| Guard
|
Properties
|
Damage
|
Meter
|
On Hit
|
On Block
|
On Pushblock
|
| Mid
|
Launcher
|
900
|
10%
|
+1
|
-12
|
|
| Startup
|
Active
|
Recovery
|
Hit Stun
|
Block Stun
|
Hit Stop
|
Super Hit Stop
|
| 20
|
4
|
28
|
32
|
19
|
12
|
N/A
|
|
|
|
|
- Robo slams her hand on the ground creating a huge spark on the ground. Standard launcher. It has a bigger hitbox than most but it's pretty much used exclusively in combos.
|
|
|
LF Quartz Blade Toggle Hitboxes Toggle Hitboxes
|
| 2LK
|
c.
|
|
| Guard
|
Properties
|
Damage
|
Meter
|
On Hit
|
On Block
|
On Pushblock
|
| Low
|
-
|
225
|
2.5%
|
+2
|
+1
|
|
| Startup
|
Active
|
Recovery
|
Hit Stun
|
Block Stun
|
Hit Stop
|
Super Hit Stop
|
| 8
|
2
|
16
|
19
|
18
|
7
|
N/A
|
|
|
|
|
- Robo-Fortune sticks a flame out from her leg. Robo Fortune's main low. The range is short but it serves its purpose.
|
|
|
Scroll Heel Toggle Hitboxes Toggle Hitboxes
|
| 2MK
|
c.
|
|
| Guard
|
Properties
|
Damage
|
Meter
|
On Hit
|
On Block
|
On Pushblock
|
| Low
|
Sweep
|
425
|
7.5%
|
Soft KD
|
-16
|
|
| Startup
|
Active
|
Recovery
|
Hit Stun
|
Block Stun
|
Hit Stop
|
Super Hit Stop
|
| 13
|
26
|
8
|
14
|
17
|
9
|
N/A
|
|
|
|
|
- Robo-Fortune slides forward with an attack that functions like a typical sweep, even if it is only an MK attack. Unlike most sweeps, it does not cause an invincible knockdown, and thus can combo into other attacks even on non-OTG hits. Can be made safe or extremely plus if spaced correctly. One of Robo's best normals and very important in stopping armored approaches since sweeps break armor.
|
|
|
Launch Headrone Toggle Hitboxes Toggle Hitboxes
|
| 2HK
|
c.
|
|
| Guard
|
Properties
|
Damage
|
Meter
|
On Hit
|
On Block
|
On Pushblock
|
| Mid
|
Projectile
|
700
|
10%
|
5
|
-4
|
|
| Startup
|
Active
|
Recovery
|
Hit Stun
|
Block Stun
|
Hit Stop
|
Super Hit Stop
|
| 20 (16 during lvl. 3)
|
40
|
32 (28 during lvl. 3)
|
30
|
21
|
6
|
N/A
|
|
|
|
|
- Robo-Fortune launches a Headrone (typically referred to as "Heads") that hits directly and stays active as it travels off of the top of the screen. It then returns and can be used in other attacks. The slow start up and complete inability to hit a close range grounded opponents means that the attack should not be used as a typical normal. You should typically use it when far away from the opponent or at the end of the combo so you can safely gain a Headrone.
- This is the only normal that be cancelled into after 5HK, which makes it a good time to spawn heads.
- Will pop grounded opponents into the air
- This move has a faster animation during her Systemic Circuit Breaker.
- Robo's heads remember the combo stage they were created in, and do not forget it after the combo is over. These combo stages impact how they behave with IPS and Undizzy in follow up head actions. This does not apply to heads created after canceling from 5HK.
- * Stage 2 heads do not add undizzy, and cannot set off undizzy bursts.
- * Stage 3 heads do add undizzy, and cannot set off undizzy bursts.
- * Stage 5 heads do add undizzy, and can set off undizzy bursts if they have full undizzy.
- * Each head tracks its combo stage separately, so you must remember which head has which combo stage if this is important to you.
- * Robo floats newly spawned heads up front, but uses them LAST. Old heads float at the back, but are used first.
|
|
|
Jumping Normals
Arrow Click Toggle Hitboxes Toggle Hitboxes
|
| jLP
|
j.
|
|
| Guard
|
Properties
|
Damage
|
Meter
|
On Hit
|
On Block
|
On Pushblock
|
| High
|
Jump Cancel
|
175
|
2.5%
|
+7
|
+6
|
|
| Startup
|
Active
|
Recovery
|
Hit Stun
|
Block Stun
|
Hit Stop
|
Super Hit Stop
|
| 7
|
2
|
11
|
19
|
18
|
9
|
N/A
|
|
|
|
|
- Robo sticks her hand downard to attack the opponent. Mostly used as combo fodder.
- An early as possible (or buffered during prejump) JLP will hit crouching Eliza, Cerebella, Beowulf, Black Dahlia, and obviously Big Band. This makes Robo more dangerous than usual for the first three, where she normally has trouble with fast overhead mix up options.
- Cannot be used for instant double jump overheads, as Robo-Fortune's normals become mids when performing a double jump within 2f after a jump.
|
|
|
Cyclone Waltz Toggle Hitboxes Toggle Hitboxes
|
| jMP
|
j.
|
|
| Guard
|
Properties
|
Damage
|
Meter
|
On Hit
|
On Block
|
On Pushblock
|
| High
|
Jump Cancel
|
100x5, 200
|
1.0588% x6
|
+10
|
+4
|
|
| Startup
|
Active
|
Recovery
|
Hit Stun
|
Block Stun
|
Hit Stop
|
Super Hit Stop
|
| 12
|
12
|
13
|
24x6
|
16 x5, 18
|
2 x5, 9
|
N/A
|
|
|
|
|
- Robo-Fortune spins in a tight somersault, hitting up to 6 times with her tail. Since it hits on both sides it's a great normal to fall on the opponent with since it'll be hard to tell what side it will hit on. Can be used as a crossup. This attack has a fairly small attack box and does not change Robo-Fortune's momentum in the air, making it less versatile than j.HK.
|
|
|
Variable Cutter Toggle Hitboxes Toggle Hitboxes
|
| jHP
|
j.
|
|
| Guard
|
Properties
|
Damage
|
Meter
|
On Hit
|
On Block
|
On Pushblock
|
| Mid
|
Projectile,
Jump Cancel
|
625
|
10%
|
+12
|
+2
|
|
| Startup
|
Active
|
Recovery
|
Hit Stun
|
Block Stun
|
Hit Stop
|
Super Hit Stop
|
| 18
|
20
|
22
|
25
|
15
|
8
|
N/A
|
|
|
|
|
- Robo-Fortune's double claw swipe stops her forward momentum and produces a slow, short range, downward angle laser blast. This normal is one of Robo-Fortune's best since it moves her backwards while putting a projectile on the screen.
- Super jumping backwards before using this move makes Robo-Fortune extremely difficult to intercept.
|
|
|
Alpha Cutoff Toggle Hitboxes Toggle Hitboxes
|
| jLK
|
j.
|
|
| Guard
|
Properties
|
Damage
|
Meter
|
On Hit
|
On Block
|
On Pushblock
|
| High
|
Jump Cancel
|
225
|
2.5%
|
+3
|
+1
|
|
| Startup
|
Active
|
Recovery
|
Hit Stun
|
Block Stun
|
Hit Stop
|
Super Hit Stop
|
| 8
|
2
|
16
|
20
|
18
|
7
|
N/A
|
|
|
|
|
- Robo-Fortune sticks her leg upwards. Mostly used as a combo tool but works great as an air to air due to it's fast startup.
|
|
|
Beta Cutoff Toggle Hitboxes Toggle Hitboxes
|
| jMK
|
j.
|
|
| Guard
|
Properties
|
Damage
|
Meter
|
On Hit
|
On Block
|
On Pushblock
|
| High
|
Jump Cancel
|
475
|
7.5%
|
+10
|
+3
|
|
| Startup
|
Active
|
Recovery
|
Hit Stun
|
Block Stun
|
Hit Stop
|
Super Hit Stop
|
| 10
|
3
|
14
|
26
|
19
|
9
|
N/A
|
|
|
|
|
- Robo-Fortune sticks her leg downwards. You usually use this move in combos but it also works well as a jump-in or as a high option in fuzzy guard setups.
|
|
|
Aerial Screw Toggle Hitboxes Toggle Hitboxes
|
| jHK
|
j.
|
|
| Guard
|
Properties
|
Damage
|
Meter
|
On Hit
|
On Block
|
On Pushblock
|
| Mid
|
Jump Cancel
|
100x6, 200
|
1.6364% x7
|
+10
|
+5
|
|
| Startup
|
Active
|
Recovery
|
Hit Stun
|
Block Stun
|
Hit Stop
|
Super Hit Stop
|
| 16
|
[1, (3)]x6, 1
|
14
|
26x6, 24
|
16x6, 19
|
2x6, 13
|
N/A
|
|
|
|
|
- Robo-Fortune spins her body like a helicopter blade, hitting up to 7 times. Holding any direction during this attack pushes her in that direction, giving more control in the air than some characters get with an air dash. During a combo, guiding Robo-Fortune can ensure she's in position for the next chain after connecting with as many hits as possible. At distance, Robo-Fortune can combine this with her double jump to cowardly hide at the top corner of the screen. Prehaps Robo's most important normal.
- Flying upwards from a regular jump using JHK allows her to reach super jump height without being in the super jump state. This makes her the only character who can call assists at super jump height.
- Super jump JHK flying upwards is one of the best ways to escape the corner. Mix up your descent with beams, double jumps, JHP, or even another JHK. Remember that normals will auto correct to face the opponent when you cross over only when using super jump JHK. Normal jump JHK will have you facing the wrong direction (if you cross over) when you input a normal to cover your landing.
|
|
|
Universal Mechanics
Blast Processor Toggle Hitboxes Toggle Hitboxes
|
| Throw
|
+
|
|
| Guard
|
Properties
|
Damage
|
Meter
|
On Hit
|
On Block
|
On Pushblock
|
| Throw
|
50% Damage Scaling
|
0, 1000
|
2%, 13%
|
KD
|
N/A
|
|
| Startup
|
Active
|
Recovery
|
Hit Stun
|
Block Stun
|
Hit Stop
|
Super Hit Stop
|
| 7
|
1
|
28
|
N/A
|
N/A
|
N/A
|
N/A
|
|
|
|
|
- Robo Fortune grabs the opponent like a cat playing with yarn before blasting them with a laser beam. Pretty average throw range-wise but requires an assist or meter to be converted from midscreen.
- In the corner, converting into OTG 5LP on Big Band and Double can be really tight - consider using H Danger! special cancels to make it easier.
|
|
|
Assault Battery Toggle Hitboxes Toggle Hitboxes
|
| Air Throw
|
+ (in air)
|
|
| Guard
|
Properties
|
Damage
|
Meter
|
On Hit
|
On Block
|
On Pushblock
|
| Air Throw
|
Jump Cancel,
50% Damage Scaling
|
75 x9, 325
|
1% x9, 6%
|
KD
|
N/A
|
|
| Startup
|
Active
|
Recovery
|
Hit Stun
|
Block Stun
|
Hit Stop
|
Super Hit Stop
|
| 7
|
3
|
18
|
N/A
|
N/A
|
N/A
|
N/A
|
|
|
|
|
- Robo-Fortune grabs the oppenent and sends shocks through them before letting them go. The recovery of this airthrow is double-jump cancelable on hit which allows you to combo after it. If you already used your double jump, comboing after this grab is height and assist dependent.
|
|
|
Purrminator Toggle Hitboxes Toggle Hitboxes
|
|
| Guard
|
Properties
|
Damage
|
Meter
|
On Hit
|
On Block
|
On Pushblock
|
| Mid
|
Tag
|
500
|
7.5%
|
KD
|
-52
|
|
| Startup
|
Active
|
Recovery
|
Hit Stun
|
Block Stun
|
Hit Stop
|
Super Hit Stop
|
| 40
|
16
|
61
|
10
|
13
|
20 (11 on block)
|
N/A
|
|
|
|
|
- Robo-Fortune appears from a cat shaped capsule from the ground. It's slow with long recovery. can only be combo'd off of midscreen if it hits the opponent airborne and you spend a bar for magnet pickup OTG. Corner tag combo routes are more lenient. Not a reversal like other tags but can low profile some moves. Better to get Robo in via DHC, unless you can tag combo into her.
|
|
|
Connection Sever Toggle Hitboxes Toggle Hitboxes
|
|
| Guard
|
Properties
|
Damage
|
Meter
|
On Hit
|
On Block
|
On Pushblock
|
| Mid
|
Snapback
|
0
|
-100%
|
N/A
|
-25
|
|
| Startup
|
Active
|
Recovery
|
Hit Stun
|
Block Stun
|
Hit Stop
|
Super Hit Stop
|
| 12 + 3
|
1
|
42
|
14
|
17
|
13
|
9
|
|
|
|
|
- Robo-Fortunes takes off her tail and swings it like a golf club. One of the biggest snapbacks in the game.
|
|
|
Specials
"Excitement" Toggle Hitboxes Toggle Hitboxes
|
| Theonite Beam
|
 + +  (Air OK) (Air OK)
|
|
|
|
Guard
|
Properties
|
Damage
|
Meter
|
On Hit
|
On Block
|
On Pushblock
|
| Mid
|
Projectile,
Beam
|
650 (375), 1000 (400)
|
(2.5%) 4.5%
|
-4, Ground Bounce
|
-11, -3
|
|
| Startup
|
Active
|
Recovery
|
Hit Stun
|
Block Stun
|
Hit Stop
|
Super Hit Stop
|
| 18
|
10
|
23, 20
|
24
|
17
|
4, 9
|
N/A
|
|
|
|
|
|
Guard
|
Properties
|
Damage
|
Meter
|
On Hit
|
On Block
|
On Pushblock
|
| Mid
|
Projectile,
Beam
|
650 (375), 1000 (400)
|
(2.5%) 7.5%
|
-4, Ground Bounce
|
-11, -2
|
|
| Startup
|
Active
|
Recovery
|
Hit Stun
|
Block Stun
|
Hit Stop
|
Super Hit Stop
|
| 18
|
6
|
27, 24
|
24
|
17
|
4, 10
|
N/A
|
|
|
|
|
|
Guard
|
Properties
|
Damage
|
Meter
|
On Hit
|
On Block
|
On Pushblock
|
| Mid
|
Projectile,
Beam
|
250x6 (125 x6)
|
(2.5%) 1.8% x6
|
-1
|
-11
|
|
| Startup
|
Active
|
Recovery
|
Hit Stun
|
Block Stun
|
Hit Stop
|
Super Hit Stop
|
| 25
|
31
|
22
|
22x6
|
13x6
|
4x6 (3 x6 on block)
|
N/A
|
|
|
|
| Air
|
Guard
|
Properties
|
Damage
|
Meter
|
On Hit
|
On Block
|
On Pushblock
|
| Mid
|
Projectile,
Beam
|
650 (375), 1000 (400)
|
(2.5%) 7.5%
|
+4, Ground Bounce
|
+2, +6
|
|
| Startup
|
Active
|
Recovery
|
Hit Stun
|
Block Stun
|
Hit Stop
|
Super Hit Stop
|
| 15
|
5
|
22, 14
|
26
|
19, 14
|
4
|
N/A
|
|
|
|
| Air
|
Guard
|
Properties
|
Damage
|
Meter
|
On Hit
|
On Block
|
On Pushblock
|
| Mid
|
Projectile,
Beam
|
650 (375), 1000 (400)
|
(2.5%) 7.5%
|
+4, Ground Bounce
|
+1, +2
|
|
| Startup
|
Active
|
Recovery
|
Hit Stun
|
Block Stun
|
Hit Stop
|
Super Hit Stop
|
| 15
|
6
|
19, 14
|
24
|
17, 13
|
4
|
N/A
|
|
|
|
| Air
|
Guard
|
Properties
|
Damage
|
Meter
|
On Hit
|
On Block
|
On Pushblock
|
| Mid
|
Projectile,
Beam
|
250 x6 (125 x6)
|
(2.5%) 1.8% x6
|
+12
|
+2
|
|
| Startup
|
Active
|
Recovery
|
Hit Stun
|
Block Stun
|
Hit Stop
|
Super Hit Stop
|
| 15
|
31
|
12
|
22 x6
|
13 x6
|
4 x6 (3 x6 on block)
|
N/A
|
|
|
|
|
The second value refers to when Robo-Fortune is in det mode.
- Robo-Fortune fires a laser beam that travels across the screen almost instantly and can only be used once per jump. Useful for catching opponents pushing buttons and for zoning them from a certain area of the screen.
- Using the tiger knee motion will get the air beams the lowest to the ground as possible, allowing much quicker recovery than ground beams. You usually want to hold down for a little bit before doing the TK so that you get a normal jump instead of a super jump.
- While in det mode, all LP and MP beams do increased damage, have shorter recovery that can be canceled, inflict increased hitstop, and will ground bounce once per combo.
- Skullgirls Tuestorials 09 - Robo Fortune's Beams
-
- Fires a beam very close to the ground, can be avoided by jumping.
-
- Fires a beam around standing height and can be crouched under by most characters.
-
- Fires a thicker, multi-hitting version of M beam.
- Has a longer travel time and when used at long distances, will not get all of its hits in.
- Air
- Fires a beam diagonally downward. After a super jump and using j.HK to float upwards, this move becomes difficult to avoid.
- Air
- Fires a beam horizontally, good when used after a tiger knee to get it as low to the ground as possible.
- Air
- Fires a beam that has all the properties of it's ground counterpart.
|
|
|
Toggle Hitboxes Toggle Hitboxes
|
| Headrone RAM
|
 + +
|
|
| Guard
|
Properties
|
Damage
|
Meter
|
On Hit
|
On Block
|
On Pushblock
|
| Mid
|
Projectile
|
850 (300)
|
7.5%
|
N/A
|
N/A
|
|
| Startup
|
Active
|
Recovery
|
Hit Stun
|
Block Stun
|
Hit Stop
|
Super Hit Stop
|
| 7, 29
|
--
|
17
|
30
|
25
|
8
|
N/A
|
|
|
|
|
- Robo-Fortune commands a headrone, if one exists, to home in on her opponent and detonate on contact. Trades with other projectiles and does not go away on hit.
- The headrone will turn around to face the opponent if they cross up before the drone starts moving.
- Robo-Fortune's head commands activate on the 6th frame. Once they are activated they cannot be interrupted. If Robo-Fortune is hit within the first 5 startup frames, the move will be interrupted and the heads will not be used up.
|
|
|
"Bing bing bing" Toggle Hitboxes Toggle Hitboxes
|
| Headrone Impact
|
+
|
|
| Guard
|
Properties
|
Damage
|
Meter
|
On Hit
|
On Block
|
On Pushblock
|
| Mid
|
50% Damage Scaling,
Projectile, Sweep
|
200, 750 (100, 150)
|
4.5%, 3.75%
|
Soft KD
|
N/A
|
|
| Startup
|
Active
|
Recovery
|
Hit Stun
|
Block Stun
|
Hit Stop
|
Super Hit Stop
|
| 7, 26
|
12, (15), -
|
17
|
30, 10
|
27, 13
|
9, 8 (9, 4 on block)
|
N/A
|
|
|
|
|
- Robo-Fortune commands a headrone, if one exists, to bury itself in the ground in front of her and act as a landmine. Hits once on the way down and once on explosion. Disappears if Robo-Fortune is hit after deployment.
- If the mine hits on the way down during deployment, it will always explode, even if Robo-Fortune is in hitstun. This makes it an AMAZING move on trade, and it's one of Robo-Fortunes only effective reversals.
- Robo-Fortune's head commands activate on the 6th frame. Once they are activated they cannot be interrupted. If Robo-Fortune is hit within the first 5 startup frames, the move will be interrupted and the heads will not be used up.
- Using 5HP just to absorb a hit and cancel into Mine is a pretty effective reversal against non multihitting normals.
- The mine lives for 540 frames. Which is 7.5 seconds since at SGs effective 72 FPS.
- Mines deployed on the ground don't count towards Robo-Fortune's 3 head limit, so she can have several mines on the ground and still three floating beside her.
- The mine explosion doesn't give Robo-Fortune a chance to OTG the opponent, you must be quick and pick up into a combo before they touch the ground.
|
|
|
"Beep beep blarp" Toggle Hitboxes Toggle Hitboxes
|
| Headrone Salvo
|
+
|
|
| Guard
|
Properties
|
Damage
|
Meter
|
On Hit
|
On Block
|
On Pushblock
|
| Mid
|
Projectile
|
250 x4 (per head) (75 x4 per head)
|
4.5% x4 (per head)
|
N/A
|
N/A
|
|
| Startup
|
Active
|
Recovery
|
Hit Stun
|
Block Stun
|
Hit Stop
|
Super Hit Stop
|
| 14, 38
|
(Until ground)
|
24 or 34 or 44
|
30x4
|
17x4
|
8x4 (6 x4 on block)
|
N/A
|
|
|
|
|
- Robo-Fortune spends all existing headrones, commanding them to fire a barrage of mouse missiles, or "moussiles," into the air. The moussiles track her opponent's horizontal position and rain down on them from above after a short period of time. Some mechanics of this attack depend on how many headrones are spent on the salvo. With one headrone, the moussiles will land where the opponent was when you originally did the move. With two, moussiles will track the opponent until they start falling down. Lastly, with three headrones, the moussiles will completely track the opponent.
- Robo-Fortune's head commands activate on the 6th frame. Once they are activated they cannot be interrupted. If Robo-Fortune is hit within the first 5 startup frames, the move will be interrupted and the heads will not be used up.
- Odd behavior: missiles can only be pushblocked during a certain period?
- Missiles have a hitbox on the way up and can anti-air and explode on opponents directly above you.
- The recovery is extremely long, and many characters have ways to punish Robo-Fortune for using this, even at fullscreen. Careful!
|
|
|
"Head swap" Toggle Hitboxes Toggle Hitboxes
|
| Danger! Head Swap Action!
|
+
|
|
| Guard
|
Properties
|
Damage
|
Meter
|
On Hit
|
On Block
|
On Pushblock
|
| Mid
|
-
|
150x4, 400 (50 x4, 200)
|
(2.5%) 2.5%x 4, 3.6%
|
KD
|
-20
|
|
| Startup
|
Active
|
Recovery
|
Hit Stun
|
Block Stun
|
Hit Stop
|
Super Hit Stop
|
| 9
|
11
|
37
|
16x5
|
19x5
|
1x4, 10
|
N/A
|
|
|
|
|
- Robo-Fortune spins her head around incredibly fast. Her upper body loses hurt boxes during startup and active frames, which makes this move a good anti-air.
- Pulls the opponent down and in front of her on hit, even when hitting an extended hurtbox like Squigly's JHP.
- All hits will cause knockdown.
|
|
|
"Flailing" Toggle Hitboxes Toggle Hitboxes
|
| Danger! Flailing Arm Hazard!
|
+
|
|
| Guard
|
Properties
|
Damage
|
Meter
|
On Hit
|
On Block
|
On Pushblock
|
| Mid
|
Invuln. (Throw)
|
175x4, 500 (50 x4, 200)
|
(2.5%) 2.5% x4, 3.6%
|
Stagger (+32/+47 CH), OR +4
|
-17
|
|
| Startup
|
Active
|
Recovery
|
Hit Stun
|
Block Stun
|
Hit Stop
|
Super Hit Stop
|
| 10
|
28
|
29
|
39x4, 36
|
20x4, 15
|
2x4, 12
|
N/A
|
|
|
|
|
- Robo-Fortune flails her arms around. This move is throw invulnerable.
- Staggers the opponent if done without being cancelled into from a normal.
- Assists take extra hitstun from this move (even without the stagger), allowing Robo to consistently combo assists into Catastrophe Cannon during happy birthday combos using it.
- Useful if used as a frame trap after blocked 5HP. If the opponent tries to throw punish expecting a cancel into mine, this will catch them.
|
|
|
"Rotation hazard" Toggle Hitboxes Toggle Hitboxes
|
| Danger! Rotating Component Hazard!
|
+
|
|
| Guard
|
Properties
|
Damage
|
Meter
|
On Hit
|
On Block
|
On Pushblock
|
| Mid
|
Invuln. (Throw) (first 2 frames)
|
200x6, 500 (20 x6, 200)
|
(2.5%) 2.5% x6, 3.6%
|
Ground Bounce
|
-18
|
|
| Startup
|
Active
|
Recovery
|
Hit Stun
|
Block Stun
|
Hit Stop
|
Super Hit Stop
|
| 29
|
33
|
35
|
38x6, 16
|
19x7
|
2x6, 8
|
N/A
|
|
|
|
|
- Robo-Fortune rotates her entire body as a powerful attack. Robo's most damaging special move. No real purpose outside of a combo ender but it can be used as an assist.
- Always launches the opponent at the perfect height to get hit by Catastrophe Cannon without using OTG. The launch height and hitstop is adjusted per weight to ensure this.
|
|
|
"Dizzy."
|
| Warranty Extension
|
In Systemic Circuit Breaker +
|
|
| Guard
|
Properties
|
Damage
|
Meter
|
On Hit
|
On Block
|
On Pushblock
|
| N/A
|
-
|
N/A
|
0%
|
N/A
|
N/A
|
|
| Startup
|
Active
|
Recovery
|
Hit Stun
|
Block Stun
|
Hit Stop
|
Super Hit Stop
|
| N/A
|
N/A
|
55 / 59 / 63
|
N/A
|
N/A
|
N/A
|
N/A
|
|
|
|
|
- Robo-Fortune destroys a headrone, if one exists, in order to extend her self-destruct timer by 5 seconds at the cost of permanent health damage.
- Unlike most special moves, Warranty Extension CANNOT be cancelled into.
- Inputting it with LP will use one head, inputting it with MP will use two heads at once, and inputting it with HP will use all three if available. Using a version that would consume more heads than Robo currently has stocked will simply use as many as it can for no extra cost or benefit (e.g. Using 214HP with 2 heads will add 10 seconds and deal 2 heads' worth of self-damage, as if 214MP was used instead).
- The self-damage from each head increases with each timer extension, starting at 300 damage for the first headrone and increasing by 100 each time up to a maximum of 1000 damage per headrone used.
- Each headrone also reduces the 66% meter gain penalty from being in det mode by 15%. After 5 headrones have been spent, Robo's meter gain will be the same is it is outside of det mode.
|
|
|
Supers
"Canonical form" Toggle Hitboxes Toggle Hitboxes
|
Catastrophe Cannon Alpha
Level 1
|
+ +
|
|
| Guard
|
Properties
|
Damage
|
Meter
|
On Hit
|
On Block
|
On Pushblock
|
| Mid
|
Invuln. (Full) (post flash),
Projectile,
Beam
|
275 x30 (33 x30)
|
-100%
|
KD
|
-56
|
|
| Startup
|
Active
|
Recovery
|
Hit Stun
|
Block Stun
|
Hit Stop
|
Super Hit Stop
|
| 33 + 7
|
120
|
70
|
18 x30
|
15 x30
|
13 x29,12 (2 x30 on block)
|
8
|
|
|
|
|
- A 30-hit beam super with very slow start-up. One of the most damaging level one supers in the game. You also can't block the super if you weren't already blocking when the super flash happened.
- To help with timing the follow up DHC after exactly 30 hits, add 30 to the combo counter during start up, and use it as a count down timer to when you need to input the next super.
- Has a pretty high chance of hitting one more time after DHCing before the final hit, which will lock out your assist action for the follow up combo.
- When used as a DHC, the long start-up is completely skipped, making it incredible for whiff punishing from fullscreen.
|
|
|
"Purr-manent magnet" Toggle Hitboxes Toggle Hitboxes
|
|
|
|
|
- Robo-Fortune turns her hand into a magnet and pulls to opponent closer, grabbing them if they're in range of her hand and slamming them into the ground. Hold to attract, release to grab. Ends after a set maximum duration. Useful for conversions from knockdowns/assists since you can let the grab whiff and recover quick enough to get a combo.
- The hit is post-flash unblockable if the opponent is rising, as long as the button isn't held to alter their velocity.
- Has enough super hitstop to cover the first active frame if KK is not held, so it cannot be post-flash counter-supered.
- If the grab attempt is blocked, the opponent can punish with a falling light normal unless their velocity has been messed with enough for them to whiff. You can use a very fast cancel from Headrone RAM to have the RAM hit and make the grab safe on block.
- The slam hit is a hard knockdown, and allows Robo-Fortune to run away or do left-right mix-up as they stand up afterwards.
- Gains additional properties while in det mode:
- Ground bounces and allows for follow-ups once per combo.
- If any K button is held during the leap portion of the move, then Robo will automatically end det mode and trigger the explosion. The forced explosion can combo opponents and allow for conversions, but it requires OTG to prevent it from whiffing.
|
|
|
"Why can't I die? BEEP, BOOP, MEOW" Toggle Hitboxes Toggle Hitboxes
|
Systemic Circuit Breaker
Level 3
|
+ +
|
|
| Activation
|
Guard
|
Properties
|
Damage
|
Meter
|
On Hit
|
On Block
|
On Pushblock
|
| N/A
|
Invuln. (Full)
|
N/A
|
-300%
|
N/A
|
N/A
|
|
| Startup
|
Active
|
Recovery
|
Hit Stun
|
Block Stun
|
Hit Stop
|
Super Hit Stop
|
| 4 + 0
|
N/A
|
8 (20)
|
N/A
|
N/A
|
N/A
|
9
|
|
|
|
| Explosion
|
Guard
|
Properties
|
Damage
|
Meter
|
On Hit
|
On Block
|
On Pushblock
|
| Mid
|
Invuln. (Full),
Projectile
|
360 x30 (33 x30)
|
0%
|
KD
|
+34
|
|
| Startup
|
Active
|
Recovery
|
Hit Stun
|
Block Stun
|
Hit Stop
|
Super Hit Stop
|
| N/A
|
60
|
96
|
22 x30
|
25 x30
|
12 x30
|
N/A
|
|
|
|
|
- Activates detonation mode. A 10-second timer appears above Robo-Fortune's head, with each second lasting 90 in-game frames, during which she receives various buffs:
- Her walking, dashing, and headrone deployment speed are all increased.
- She loses her double jump in exchange for an airdash (8f lockout).
- Her LP and MP Theonite Beams have less recovery, deal more damage, have increased hitstop, and each ground bounce once per combo.
- Magnetic Trap will now ground bounce once per combo.
- She can also use a new special move called Warranty Extension, which allows her to spend headrones to increase the detonation timer by 5 seconds (up to a maximum of 20 seconds) and reduce her meter gain penalty at the cost of increasing non-recoverable self-damage.
- Once the timer reaches zero (or by holding any K button during the leap animation of Magnetic Trap) she will explode (unless she is in a scripted animation, like a successful grab), damaging both herself and the opponent if they are nearby while her body is replaced with a back-up unit.
- The explosion inflicts 2000 recoverable self-damage.
- The explosion will reset both IPS tracking and damage scaling on hit, but undizzy is not affected.
- The explosion cannot be pushblocked, but due to a bug, you can still pushblock if you mash PP a few times during it.
- Robo receives an additional 20F of invulnerability if she doesn't perform any moves after the activation. While it looks like she is idling, this idle is invincible. Any input will cancel this invulnerable period.
- If you are away from the opponent and about to explode, you can use heads like mine or level 2/3 missiles to keep Robo mostly safe from any punish attempts.
- On using Magnet to trigger the explosion: the explosion will only combo if OTG has not already been used.
- There is a 10 frame buffer on attacks after the explosion. This allows for a follow up beam super on every character.
- With the 10 frame buffer, you can also convert with some normals when the opponent is at a normal height (such as after Magnet -> explosion). 5MK is recommended due to it's overall consistency for the follow-up combo, however keep in mind that that follow-up timing will vary per character if you miss the buffer. Links are shown here
- Commonly referred to as "det mode".
- Beam Hit x Det Mode x Beam Hit (Ground Bounce) x Magnet (Ground Bounce or Explosion), can be used to convert from any fullscreen beam hit, though it costs 4 bars.
- While using palette 18 or 19, this super has additional visual effects.
|
|
|
"Fire the breaker." Toggle Hitboxes Toggle Hitboxes
|
Catastrophe Cannon Gamma
Level 3
|
+ + , [ ]
|
|
| Guard
|
Properties
|
Damage
|
Meter
|
On Hit
|
On Block
|
On Pushblock
|
| Mid
|
Invuln. (Full) (post flash),
45% Minimum Scaling,
Projectile,
Beam
|
190 x45 (33 x45)
|
-300%
|
KD
|
-64
|
|
| Startup
|
Active
|
Recovery
|
Hit Stun
|
Block Stun
|
Hit Stop
|
Super Hit Stop
|
| 33 + 7
|
133
|
80
|
18 x45
|
15 x45
|
13 x44, 12 (1 x45 on block)
|
8
|
|
|
|
|
- A more powerful version of Robo's level 1 beam super. If you hold MP after inputing Robo's level 1 beam super you get this version as long as you have the meter.
|
|
|
"Combinatoric explosion" Toggle Hitboxes Toggle Hitboxes
|
Catastrophe Cannon Omega
Level 5
|
+ + , [ ]
|
|
| Guard
|
Properties
|
Damage
|
Meter
|
On Hit
|
On Block
|
On Pushblock
|
| Mid
|
Invuln. (Full) (post flash),
55% Minimum Scaling,
Projectile,
Beam
|
200 x60 (33 x60)
|
-500%
|
KD
|
-66
|
|
| Startup
|
Active
|
Recovery
|
Hit Stun
|
Block Stun
|
Hit Stop
|
Super Hit Stop
|
| 33 + 7
|
120
|
80
|
18 x60
|
15 x60
|
13 x59 12 (1 x60 on block)
|
8
|
|
|
|
|
- The most powerful version of Robo's beam supers. If you hold HP after inputing Robo's level 1 beam super, you get the level 5 version, as long as you have the meter.
|
|
|
Taunt
"Pathetic creatures of meat and bone"
|
|
| Guard
|
Properties
|
Damage
|
Meter
|
On Hit
|
On Block
|
On Pushblock
|
| N/A
|
-
|
N/A
|
0%
|
N/A
|
N/A
|
|
| Startup
|
Active
|
Recovery
|
Hit Stun
|
Block Stun
|
Hit Stop
|
Super Hit Stop
|
| N/A
|
N/A
|
114
|
N/A
|
N/A
|
N/A
|
N/A
|
|
|
|
|
- Increases the amount of moussiles launched during Headrone Salvo from 4 to 7.
|
|
|
"Standby mode."
|
| Assist Taunt
|
Automatically done after an assist move
|
|
| Guard
|
Properties
|
Damage
|
Meter
|
On Hit
|
On Block
|
On Pushblock
|
| Mid
|
-
|
N/A
|
0%
|
N/A
|
N/A
|
|
| Startup
|
Active
|
Recovery
|
Hit Stun
|
Block Stun
|
Hit Stop
|
Super Hit Stop
|
| N/A
|
N/A
|
60
|
N/A
|
N/A
|
N/A
|
N/A
|
|
|
|
- Amount of time it takes for the character to turn invulnerable after they finish performing their assist action.
- Longer recovery → more time to punish the assist.
|
|
|
Colors
Intro Poses
Robo-Fortune has 3 different intro poses that can be selected by holding a light, medium or heavy button during the loading screen before a match.

|
Intro pose 1:
Hold OR
Robo-Fortune gather her pieces of body together.
|
|
Intro pose 2:
Hold OR
Robo-Fortune appears on the stage and does pandiculation.
|

|
Intro pose 3:
Hold OR
Robo-Fortune flies on the stage and then lands.
|
Players to Watch
Disclaimer: This list is derived from community input and is in no way comprehensive or a form of ranking of any kind. Our community criteria can be found here.
| General
|
|
| Characters
|
|
|
|
|
| Mechanics
|
|
| Other
|
|