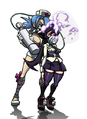
Story
Valentine is the only survivor of the Last Hope, a group of special Anti-Skullgirl Lab operatives. Before meeting their end at the hands of the Skullgirl, the Last Hope worked for the mysterious Lab Zero and performed duties ranging from reconnaissance and sabotage to advanced research.
Now Valentine dutifully serves the Skullgirl, carrying out her will from the shadows. She keeps to herself, so much of her true nature and personality are unknown.
Overview
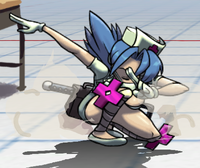
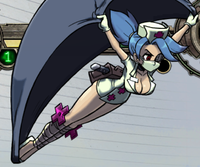
Valentine is an evasive character with good control over the air game. She has both a double jump and an airdash that moves upwards slightly. She also has air shurikens (j236P) which control the air to ground angle and stalls her air momentum. On the ground, she can backdash which puts her airborne, then cancel the backdash into an airdash by simply tapping forward. This is a strong tool both for evasion and offense, since you can shift your movement forward if they whiff. Doing the fastest possible backdash > airdash > jMP or jHP is a strong way to attack with an airdash up close since it's faster than her IAD. jMP is multi hit with many active frames, and jHP has a good crossup hitbox. It's also worth noting her air hurtbox is very small which passively aids in her evasion ability and makes her feel difficult to catch against a Valentine with good movement.
She has a special mechanic where she loads a vial of poison, then can apply one of three status effects to the opponent on hit: damage over time, increased hitstun, or extra input delay. With the aid of an assist she can load and apply poison in the same combo. Because of that and her limited assist options, she's often played on point.
Playstyle
 Valentine is a mobile all-rounder that specializes in whiff punishing bad approaches. Valentine is a mobile all-rounder that specializes in whiff punishing bad approaches. |
| Pros |
Cons |
- Mobility: Valentine is arguably the most mobile character in the game. She has access to a wide array of useful movement options, especially when in the air.
- Mixups: Valentine has some very strong resets, and also has access to Orange Vial which inflicts input delay and makes mixups even harder to see.
- Air Normals: All of her air normals are great for a variety of purposes - rushdown, mobility, mix-ups, pokes in neutral, and defensive utility.
- Vial Damage: Valentine's damage rockets when her Purple Vial is used, especially at Level 3.
- Unique Backdash: Her grounded backdash is airborne and airdash cancellable allowing for quick overheads, as well as sometimes high profiling lows. Her airborne backdash can be used to quickly retreat and make herself safe after whiffing air normals.
|
- Poor Assists: Outside of one decent horizontal assist in H Bypass, Valentine's assist selection is lacking in variety and options.
- Lackluster DHCs: No safe DHC, and needs a vial (or 5 bars) to gain access to a combo DHC. Her damage DHCs are decent, but not exceptional.
- Reversals: No meterless reversal. Metered reversals have notable weaknesses (Scalpels loses to meaties, EKG needs DHC to convert, Counter explodes to throws). Does have a postflash-unactable air super, though (air EKG).
- Stablity: Some of her strongest combos and mixups can be gatekept by a high degree of jank that is often character-specific in nature. This is true for every character to some degree, but it feels particularly so with Valentine.
|
Video Overview
Stats
Chains
| Standing
|
5 Buttons:  → →  → →  → →  → →  or or 
|
| Crouching
|
5 Buttons: → → → → or
|
| Air
|
6 Buttons: → → → → →
|
Movement
| Weight
|
Dash
|
Double Jump
|
Airdash
|
IAD Lockout
|
| Light
|
Run
|
Yes
|
Yes
|
8
|
Wakeup Time
| Forward Tech
|
Backward Tech
|
Sliding KD
|
Hard KD
|
Crumple
|
| 37
|
37
|
90
|
35
|
32
|
Assists
2MK (default assist)
Two hit low assist.
Throw (default assist)
Valentine's normal throw causes crumple state making it easy to combo from.
H Savage Bypass (236K)
Valentine rushes forward to nearly fullscreen distance. Pushes the opponent very far back on block, and on hit knocks them backwards for a conversion. This is generally Valentine's best assist.
Vial Hazard (214P)
A setup assist. If Val doesn't already have a vial loaded, she will load up a poison and leave the screen. If called a second time, or whenever she still has a vial loaded, she will perform Flew Shot to throw the loaded vial at the opponent. Between the 3 variations of poisons, this assist has a variety of utility between pure damage, combo setups, or stronger resets.
Mortuary Drop (214LP+LK)
A long range throw assist that gives the point character time to set up resources.
5MK
5 hit short ranged lockdown assist
Move List
Standing Normals
Check-up Toggle Hitboxes Toggle Hitboxes
|
| 5LP
|
s.
|
|
| x1
|
Guard
|
Properties
|
Damage
|
Meter
|
On Hit
|
On Block
|
On Pushblock
|
| Mid
|
Chains Into Self
|
200
|
2.5%
|
+1
|
+4
|
|
| Startup
|
Active
|
Recovery
|
Hit Stun
|
Block Stun
|
Hit Stop
|
Super Hit Stop
|
| 6
|
3
|
13
|
16
|
19
|
7
|
N/A
|
|
|
|
| x2
|
Guard
|
Properties
|
Damage
|
Meter
|
On Hit
|
On Block
|
On Pushblock
|
| Mid
|
Chains Into Self
|
200
|
2.5%
|
-4
|
-1
|
|
| Startup
|
Active
|
Recovery
|
Hit Stun
|
Block Stun
|
Hit Stop
|
Super Hit Stop
|
| 7
|
3
|
18
|
16
|
19
|
7
|
N/A
|
|
|
|
| x3
|
Guard
|
Properties
|
Damage
|
Meter
|
On Hit
|
On Block
|
On Pushblock
|
| Mid
|
-
|
200
|
2.5%
|
-1
|
+2
|
|
| Startup
|
Active
|
Recovery
|
Hit Stun
|
Block Stun
|
Hit Stop
|
Super Hit Stop
|
| 8
|
2
|
16
|
16
|
19
|
7
|
N/A
|
|
|
|
- Far disjointed range with 3 chainable hits.
- Valentine's jabs with a randomly chosen scalpel, tongue depressor, or lollipop. All items have the same properties.
- Used for confirms into 2hp when her other normals are unable to hit.
|
|
|
Transfemoral Amputation Toggle Hitboxes Toggle Hitboxes
|
| 5MP
|
s.
|
|
| x1
|
Guard
|
Properties
|
Damage
|
Meter
|
On Hit
|
On Block
|
On Pushblock
|
| Mid
|
Chains Into Self
|
140 x3, 325
|
2.25% x47.5%, 1.8% x4
|
-1
|
-2
|
|
| Startup
|
Active
|
Recovery
|
Hit Stun
|
Block Stun
|
Hit Stop
|
Super Hit Stop
|
| 13
|
1, 1, 1, 1
|
23
|
22 x4, 22
|
21 x4, 21
|
1 x3, 10
|
N/A
|
|
|
|
| x2
|
Guard
|
Properties
|
Damage
|
Meter
|
On Hit
|
On Block
|
On Pushblock
|
| Mid
|
-
|
300, 100 x4
|
2.25% x5
|
+4
|
+3
|
|
| Startup
|
Active
|
Recovery
|
Hit Stun
|
Block Stun
|
Hit Stop
|
Super Hit Stop
|
| 14
|
3, (7), 3, (3), 3, (3), 3, (3), 3
|
16
|
22 x5
|
17, 21 x4
|
9, 1 x4
|
N/A
|
|
|
|
- The first attack's 4 hit, single bonesaw swipe ends with more hit stun than the second's faster cuts. Valentine can't chain into 5HP off parts of the second attack.
- Avoid using the second part of 5MP in hit confirms; the multihits don't add much at the start of a combo, while also ruining your damage scaling for the rest of the combo.
|
|
|
Thoracotomy Toggle Hitboxes Toggle Hitboxes
|
| 5HP
|
s.
|
|
| Guard
|
Properties
|
Damage
|
Meter
|
On Hit
|
On Block
|
On Pushblock
|
| Mid
|
-
|
950
|
10%
|
+2
|
-3
|
|
| Startup
|
Active
|
Recovery
|
Hit Stun
|
Block Stun
|
Hit Stop
|
Super Hit Stop
|
| 21
|
2
|
26
|
29
|
24
|
14
|
N/A
|
|
|
|
- Valentine leans backward during the startup of this move, allowing her to dodge attacks if done with the right spacing. She can also move backwards by kara-canceling into a special. This combined with it's large disjointed hitbox makes it a very strong midrange poke, especially when combined with an assist call.
|
|
|
Shin Splint Toggle Hitboxes Toggle Hitboxes
|
| 5LK
|
s.
|
|
| Guard
|
Properties
|
Damage
|
Meter
|
On Hit
|
On Block
|
On Pushblock
|
| Mid
|
-
|
275
|
2.5%
|
+5
|
+3
|
|
| Startup
|
Active
|
Recovery
|
Hit Stun
|
Block Stun
|
Hit Stop
|
Super Hit Stop
|
| 11
|
2
|
16
|
22
|
20
|
7
|
N/A
|
|
|
|
- Combo filler.
- Does more damage than the first hit of 2lk, making it better for combo enders.
|
|
|
Chishibuki Juuji Toggle Hitboxes Toggle Hitboxes
|
| 5MK
|
s.
|
|
| Guard
|
Properties
|
Damage
|
Meter
|
On Hit
|
On Block
|
On Pushblock
|
| Mid
|
-
|
400, 75 x4
|
7.5%, 1.8% x4
|
-3
|
±0
|
|
| Startup
|
Active
|
Recovery
|
Hit Stun
|
Block Stun
|
Hit Stop
|
Super Hit Stop
|
| 14
|
2, (4), 3, 3, 3, 5
|
22
|
22, 20 x4
|
25, 23 x4
|
9, 2 x4
|
N/A
|
|
|
|
- Valentine performs a single hit kick followed by a 4 hit spinning cross attack that only requires a single button press. The kick causes the most hit stun, allowing you to chain into 5HP.
- The long range of this move combined with it's several active frames make it useful as a long range poke, especially when combined with assists to hitconfirm.
|
|
|
IV Naginata Toggle Hitboxes Toggle Hitboxes
|
| 5HK
|
s.
|
|
| x1
|
Guard
|
Properties
|
Damage
|
Meter
|
On Hit
|
On Block
|
On Pushblock
|
| Mid
|
Chains Into Self
|
400
|
10%
|
-11
|
-16
|
|
| Startup
|
Active
|
Recovery
|
Hit Stun
|
Block Stun
|
Hit Stop
|
Super Hit Stop
|
| 16
|
4
|
33
|
25
|
20
|
10
|
N/A
|
|
|
|
| x2
|
Guard
|
Properties
|
Damage
|
Meter
|
On Hit
|
On Block
|
On Pushblock
|
| Mid
|
Chains Into Self
|
450
|
4.5%
|
-12
|
-17
|
|
| Startup
|
Active
|
Recovery
|
Hit Stun
|
Block Stun
|
Hit Stop
|
Super Hit Stop
|
| 16
|
4
|
34
|
25
|
20
|
10
|
N/A
|
|
|
|
| x3
|
Guard
|
Properties
|
Damage
|
Meter
|
On Hit
|
On Block
|
On Pushblock
|
| Mid
|
-
|
600
|
4.5%
|
Sliding KD
|
-21
|
|
| Startup
|
Active
|
Recovery
|
Hit Stun
|
Block Stun
|
Hit Stop
|
Super Hit Stop
|
| 13
|
4
|
37
|
27
|
19
|
13
|
N/A
|
|
|
|
- Valentine swings an IV pole like an axe, ending a ground chain with 3 damaging hits. All of the attacks are unsafe on block, but with so many other multi-hit moves Valentine has no reason to chain into HK without a hit confirm.
- Due to the sliding knockdown of this move, canceling the third hit into a Vial Load lets Valentine load a poison while the opponent slides away. She can also use the time to dash in on the opponent for okizeme.
- The first hit's large disjointed vertical reach makes this a decent long range anti-air but keep in mind the move's slow startup.
- Be careful to not use this move as an ender in combos when otg has already been used, as typically the opponent will be forced to the ground and can immediately ground tech. If otg has been used and you want a full combo string, use 5HP instead.
|
|
|
Crouching Normals
Knee-jerk Hammer Toggle Hitboxes Toggle Hitboxes
|
| 2LP
|
c.
|
|
| Guard
|
Properties
|
Damage
|
Meter
|
On Hit
|
On Block
|
On Pushblock
|
| Mid
|
-
|
200
|
2.5%
|
+4
|
+6
|
|
| Startup
|
Active
|
Recovery
|
Hit Stun
|
Block Stun
|
Hit Stop
|
Super Hit Stop
|
| 6
|
2
|
15
|
20
|
22
|
8
|
N/A
|
|
|
|
- This move is fast and is very plus on block making it great for tick throws.
- This disjointed vertical hitbox of this move makes it an alright anti-IAD tool.
|
|
|
Venesection Toggle Hitboxes Toggle Hitboxes
|
| 2MP
|
c.
|
|
| Guard
|
Properties
|
Damage
|
Meter
|
On Hit
|
On Block
|
On Pushblock
|
| Mid
|
-
|
160 x2, 300
|
2.25% x3
|
+2
|
-1
|
|
| Startup
|
Active
|
Recovery
|
Hit Stun
|
Block Stun
|
Hit Stop
|
Super Hit Stop
|
| 14
|
1, 1, 2
|
21
|
16 x2, 24
|
17 x2, 21
|
2 x2, 10 (1 x2, 10 on block)
|
N/A
|
|
|
|
- Valentine leans back and throws a disjointed hitbox in front and above her, making this move her best anti-air.
|
|
|
Skyward Strike Toggle Hitboxes Toggle Hitboxes
|
| 2HP
|
c.
|
|
| Guard
|
Properties
|
Damage
|
Meter
|
On Hit
|
On Block
|
On Pushblock
|
| Mid
|
Launcher
|
950
|
10%
|
-6
|
-19
|
|
| Startup
|
Active
|
Recovery
|
Hit Stun
|
Block Stun
|
Hit Stop
|
Super Hit Stop
|
| 14
|
4
|
34
|
31
|
18
|
14
|
N/A
|
|
|
|
- Valentine's only launcher has deceptive horizontal reach, allowing it to chain combo after many of her other ground normals at maximum range.
|
|
|
Gedan Juuji Toggle Hitboxes Toggle Hitboxes
|
| 2LK
|
c.
|
|
| x1
|
Guard
|
Properties
|
Damage
|
Meter
|
On Hit
|
On Block
|
On Pushblock
|
| Low
|
Chains Into Self
|
225
|
2.5%
|
+4
|
+1
|
|
| Startup
|
Active
|
Recovery
|
Hit Stun
|
Block Stun
|
Hit Stop
|
Super Hit Stop
|
| 9
|
3
|
14
|
20
|
17
|
8
|
N/A
|
|
|
|
| x2
|
Guard
|
Properties
|
Damage
|
Meter
|
On Hit
|
On Block
|
On Pushblock
|
| Mid
|
-
|
85 x3
|
2% x3
|
+3
|
±0
|
|
| Startup
|
Active
|
Recovery
|
Hit Stun
|
Block Stun
|
Hit Stop
|
Super Hit Stop
|
| 10
|
2, (2), 2, (2), 2
|
16
|
20 x3
|
17 x3
|
1 x3
|
N/A
|
|
|
|
- Only the first attack hits low, causing more hitstun than the additional spinning cross hits from the second attack.
- As 2LKx2 is ±0 on block, it can be used as an alternative hitconfirm to 2LK 2MK to allow for continued pressure. Just beware that the second part of the attack will come out on whiff, unlike 2LK 2MK leaving you vulnerable.
- Due to being a multihit move, this move can end up doing more damage than 5LK during later combo strings. However, using the second portion of this move on otg can act strangely on some characters, so use at your own discretion.
|
|
|
Kakushi Caliper Toggle Hitboxes Toggle Hitboxes
|
| 2MK
|
c.
|
|
| Guard
|
Properties
|
Damage
|
Meter
|
On Hit
|
On Block
|
On Pushblock
|
| Low
|
-
|
350 x2
|
3.75% x2
|
+2
|
-2
|
|
| Startup
|
Active
|
Recovery
|
Hit Stun
|
Block Stun
|
Hit Stop
|
Super Hit Stop
|
| 14
|
3, (3), 2
|
20
|
23 x2
|
19 x2
|
6, 10
|
N/A
|
|
|
|
- Having 2 hits and being only -2 on block, this attack offers Valentine plenty of time to hit-confirm before continuing to a less safe move.
|
|
|
Kiri Barai Toggle Hitboxes Toggle Hitboxes
|
| 2HK
|
c.
|
|
| Guard
|
Properties
|
Damage
|
Meter
|
On Hit
|
On Block
|
On Pushblock
|
| Low
|
Sweep
|
975
|
10%
|
Soft KD (Invuln.)
|
-18
|
|
| Startup
|
Active
|
Recovery
|
Hit Stun
|
Block Stun
|
Hit Stop
|
Super Hit Stop
|
| 17
|
4
|
32
|
14
|
17
|
10
|
N/A
|
|
|
|
|
|
|
|
Jumping Normals
Stethoscope Toggle Hitboxes Toggle Hitboxes
|
| jLP
|
j.
|
|
| Guard
|
Properties
|
Damage
|
Meter
|
On Hit
|
On Block
|
On Pushblock
|
| High
|
-
|
200
|
2.5%
|
+6
|
+2
|
|
| Startup
|
Active
|
Recovery
|
Hit Stun
|
Block Stun
|
Hit Stop
|
Super Hit Stop
|
| 7
|
4
|
12
|
21
|
17
|
7
|
N/A
|
|
|
|
- Due to fast startup and decently sized disjointed hitbox, this move is very good when coming down after an air Dead Cross when the opponent is below you. This also makes it a decent rising air-to-air.
- Fast enough to hit standing opponents if done immediately after a jump, making this move useful for fuzzy-guard setups.
|
|
|
Forequarter Amputation Toggle Hitboxes Toggle Hitboxes
|
| jMP
|
j.
|
|
| Guard
|
Properties
|
Damage
|
Meter
|
On Hit
|
On Block
|
On Pushblock
|
| High
|
-
|
250, 175 x4
|
1.8% x5
|
+7
|
+3
|
|
| Startup
|
Active
|
Recovery
|
Hit Stun
|
Block Stun
|
Hit Stop
|
Super Hit Stop
|
| 10
|
3, 3, 3, 3, 3
|
13
|
22 x5
|
16 x5
|
6 x5
|
N/A
|
|
|
|
- This disjointed bonesaw attack stays active at a downward angle for a relatively long time, allowing Valentine to pressure opponents as she ADs on top of them. Damage scaling after multiple hits means this may not be the best move to start a combo if it can be avoided.
- Think of this move like a divekick; it's very active for almost all the way down on the opponent and is moderately difficult to contest due to the disjointed hitboxes and downward angle. It should be one of your main ways of establishing pressure.
|
|
|
Craniotomy Toggle Hitboxes Toggle Hitboxes
|
| jHP
|
j.
|
|
| Guard
|
Properties
|
Damage
|
Meter
|
On Hit
|
On Block
|
On Pushblock
|
| High
|
-
|
875
|
10%
|
+4
|
+2
|
|
| Startup
|
Active
|
Recovery
|
Hit Stun
|
Block Stun
|
Hit Stop
|
Super Hit Stop
|
| 18
|
2
|
19
|
25
|
22
|
12
|
N/A
|
|
|
|
- A sweeping single-hit disjointed bonesaw swipe that, while not being as large as it looks, still hits in front of, below, and behind Valentine. The arc makes for an easy cross up when combined with Valentine's air dash.
|
|
|
Tobi Juuji Toggle Hitboxes Toggle Hitboxes
|
| jLK
|
j.
|
|
| Guard
|
Properties
|
Damage
|
Meter
|
On Hit
|
On Block
|
On Pushblock
|
| High
|
-
|
325, 100 x3 or 200, 100 x2
|
2%, 1.8% x3 or 1.8% x3
|
+2
|
-2
|
|
| Startup
|
Active
|
Recovery
|
Hit Stun
|
Block Stun
|
Hit Stop
|
Super Hit Stop
|
| 9
|
3, (1), 10
|
10
|
21 x4 or 21 x3
|
17 x4 or 17 x3
|
7, 2x3 or 2 x3
|
N/A
|
|
|
|
- This knee drop's multiple hits, low hit stun, and ability to pull enemies forward on hit make it more useful in resets and throw set ups than for an air chain.
- This move's downward angle hitting both in front of and slightly behind Valentine makes it a good falling button when the opponent is below you after a missed Dead Cross.
- Due to the differences in blockstun between jLK and jMP, the two can be mixed up in BDAD pressure to mess with the opponent's timing.
|
|
|
Patellar Reflex Toggle Hitboxes Toggle Hitboxes
|
| jMK
|
j.
|
|
| Guard
|
Properties
|
Damage
|
Meter
|
On Hit
|
On Block
|
On Pushblock
|
| High
|
-
|
300, 550
|
2.5%, 6%
|
+4
|
-3
|
|
| Startup
|
Active
|
Recovery
|
Hit Stun
|
Block Stun
|
Hit Stop
|
Super Hit Stop
|
| 12
|
3, (3), 3
|
21
|
24, 27
|
17, 20
|
7, 10
|
N/A
|
|
|
|
- The first hit from the hammer knocks the defending character slightly upward even if they are on the ground. The second hit bounces Valentine up-forward, and will pop grounded opponents into the air.
- One of valentine's better air-to-airs, due to the first hit's disjointed hitbox and her increased hovering movement during the move.
- The added hover this move gives Val in the air can be used sometimes for an extra pinch of air mobility when needed.
- When used in a combo, you can fast fall the first hit with jHP, allowing for some tricky fast fall resets.
|
|
|
Cadaver Clone Toggle Hitboxes Toggle Hitboxes
|
| jHK
|
j.
|
|
| Guard
|
Properties
|
Damage
|
Meter
|
On Hit
|
On Block
|
On Pushblock
|
| High
|
-
|
500, 600
|
2.5%, 6%
|
-13
|
-18
|
|
| Startup
|
Active
|
Recovery
|
Hit Stun
|
Block Stun
|
Hit Stop
|
Super Hit Stop
|
| 17
|
3, (3), 3
|
36
|
13, 25
|
16, 20
|
12 x2
|
N/A
|
|
|
|
- A disjointed 2-hit zombie attack out of Valentine's body bag. Easily one of the best air-to-air moves in the game.
- The slow startup of this move means you want to make sure you are a reasonable distance away from your opponent or you risk being hit out of the startup of jHK.
- A misplaced jHK can be cancelled into into Dead Cross or back airdash, double jump to make it safe.
|
|
|
Universal Mechanics
Anesthesia Toggle Hitboxes Toggle Hitboxes
|
| Throw
|
+
|
|
| Guard
|
Properties
|
Damage
|
Meter
|
On Hit
|
On Block
|
On Pushblock
|
| Throw
|
50% Damage Scaling
|
800
|
5%, 8%
|
Crumple
|
N/A
|
|
| Startup
|
Active
|
Recovery
|
Hit Stun
|
Block Stun
|
Hit Stop
|
Super Hit Stop
|
| 7
|
1
|
28
|
N/A
|
N/A
|
N/A
|
N/A
|
|
|
|
- The lengthy crumple stun gives plenty of time for an easy conversion straight into 2HP (or 5HP in the corner).
|
|
|
Larengectomy Toggle Hitboxes Toggle Hitboxes
|
| Air Throw
|
+ (in air)
|
|
| Guard
|
Properties
|
Damage
|
Meter
|
On Hit
|
On Block
|
On Pushblock
|
| Air Throw
|
50% Damage Scaling
|
0, 75 x4, 800
|
5%, 1% x4, 0
|
KD
|
N/A
|
|
| Startup
|
Active
|
Recovery
|
Hit Stun
|
Block Stun
|
Hit Stop
|
Super Hit Stop
|
| 7
|
3
|
15
|
N/A
|
N/A
|
N/A
|
N/A
|
|
|
|
- Can be converted from without meter by using jL Dead Cross in the Corner or jL Vial Toss midscreen. When very low to the ground jL Bypass can be used to convert. Otherwise, you can use Air Scalpels to convert from most everywhere.
- Video demonstration of jL Vial Toss confirms without Green Vial. (video)
|
|
|
Cloak and Sever Toggle Hitboxes Toggle Hitboxes
|
|
| Guard
|
Properties
|
Damage
|
Meter
|
On Hit
|
On Block
|
On Pushblock
|
| Mid
|
Tag
|
500
|
10%
|
Wall Bounce
|
-23
|
|
| Startup
|
Active
|
Recovery
|
Hit Stun
|
Block Stun
|
Hit Stop
|
Super Hit Stop
|
| 38 to 58
|
3
|
34
|
10
|
13
|
12
|
N/A
|
|
|
|
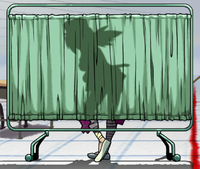
- Valentine enters the screen behind a curtain as she tags in, attacking as she appears near the opponent. She can get hit from behind the curtain on the way in. Although identical to her standard 5HP's animation, the tag in attack has different damage, hit properties, and will not cancel into any other move.
|
|
|
AED Shockwave Toggle Hitboxes Toggle Hitboxes
|
|
| Guard
|
Properties
|
Damage
|
Meter
|
On Hit
|
On Block
|
On Pushblock
|
| Mid
|
Snapback
|
0
|
-100%
|
N/A
|
-21
|
|
| Startup
|
Active
|
Recovery
|
Hit Stun
|
Block Stun
|
Hit Stop
|
Super Hit Stop
|
| 12 + 3
|
3
|
36
|
14
|
17
|
13
|
9
|
|
|
|
|
|
|
|
Specials
Toggle Hitboxes Toggle Hitboxes
|
| Dead Cross
|
 + +  (Air OK) (Air OK)
|
|
| Ground
|
Guard
|
Properties
|
Damage
|
Meter
|
On Hit
|
On Block
|
On Pushblock
|
| Mid
|
Projectile
|
300 (100)
|
(2.5%) 6%
|
+6
|
-9
|
|
| Startup
|
Active
|
Recovery
|
Hit Stun
|
Block Stun
|
Hit Stop
|
Super Hit Stop
|
| 17
|
29
|
31
|
28
|
13
|
8
|
N/A
|
|
|
|
| Air
|
Guard
|
Properties
|
Damage
|
Meter
|
On Hit
|
On Block
|
On Pushblock
|
| Mid
|
Projectile
|
300 (100)
|
(2.5%) 6%
|
+13
|
-2
|
|
| Startup
|
Active
|
Recovery
|
Hit Stun
|
Block Stun
|
Hit Stop
|
Super Hit Stop
|
| 17
|
(Until ground)
|
24
|
28
|
13
|
8
|
N/A
|
|
|
|
- Valentine throws a fixed range, single hit shuriken. LP, MP, and HP versions all travel between half and full screen before hitting the ground. The air versions travel at a wider angles with increasing button strength.
- 24f cooldown once it hits the floor, hits the opponent, or goes off-screen.
- For the air dead crosses, when combined with superjumps and her doublejump, these projectiles can cover a wide area of the screen, allowing val to play safe and defensive when she wants to. This helps establish some of her strong space control. If opponents try to get in closer, then Val coming down with a jLP is good to either pressure the opponent attempting to anti-air or to convert off of a light air shuriken if it hit.
- Air dead crosses slow down Val's air momentum, very handy when trying to pick just the right air angle to approach from.
|
|
|
Toggle Hitboxes Toggle Hitboxes
|
| Savage Bypass
|
+  (Air OK) (Air OK)
|
|
|
|
Guard
|
Properties
|
Damage
|
Meter
|
On Hit
|
On Block
|
On Pushblock
|
| Mid
|
-
|
975 (100)
|
(2.5%) 10%
|
KD
|
-4
|
|
| Startup
|
Active
|
Recovery
|
Hit Stun
|
Block Stun
|
Hit Stop
|
Super Hit Stop
|
| 17
|
2
|
34
|
18
|
21
|
15 (10 on block)
|
N/A
|
|
|
|
|
|
Guard
|
Properties
|
Damage
|
Meter
|
On Hit
|
On Block
|
On Pushblock
|
| Mid
|
-
|
1100 (150)
|
(2.5%) 10%
|
KD
|
-7
|
|
| Startup
|
Active
|
Recovery
|
Hit Stun
|
Block Stun
|
Hit Stop
|
Super Hit Stop
|
| 21
|
4
|
39 (37 on block)
|
18
|
21
|
15 (10 on block)
|
N/A
|
|
|
|
|
|
Guard
|
Properties
|
Damage
|
Meter
|
On Hit
|
On Block
|
On Pushblock
|
| Mid
|
-
|
1275 (200)
|
(2.5%) 10%
|
KD
|
-10
|
|
| Startup
|
Active
|
Recovery
|
Hit Stun
|
Block Stun
|
Hit Stop
|
Super Hit Stop
|
| 27
|
8
|
44 (40 on block)
|
18
|
21
|
15 (10 on block)
|
N/A
|
|
|
|
| Air
|
Guard
|
Properties
|
Damage
|
Meter
|
On Hit
|
On Block
|
On Pushblock
|
| Mid
|
75% Damage Scaling
|
750 (100)
|
(2.5%) 7.5%
|
KD
|
-23
|
|
| Startup
|
Active
|
Recovery
|
Hit Stun
|
Block Stun
|
Hit Stop
|
Super Hit Stop
|
| 15
|
2
|
(until ground)
|
18
|
21
|
15 (10 on block)
|
N/A
|
|
|
|
| Air
|
Guard
|
Properties
|
Damage
|
Meter
|
On Hit
|
On Block
|
On Pushblock
|
| Mid
|
75% Damage Scaling
|
825 (150)
|
(2.5%) 7.5%
|
KD
|
-23
|
|
| Startup
|
Active
|
Recovery
|
Hit Stun
|
Block Stun
|
Hit Stop
|
Super Hit Stop
|
| 18
|
4
|
(until ground)
|
18
|
21
|
15 (10 on block)
|
N/A
|
|
|
|
| Air
|
Guard
|
Properties
|
Damage
|
Meter
|
On Hit
|
On Block
|
On Pushblock
|
| Mid
|
75% Damage Scaling
|
900 (200)
|
(2.5%) 7.5%
|
KD
|
-22
|
|
| Startup
|
Active
|
Recovery
|
Hit Stun
|
Block Stun
|
Hit Stop
|
Super Hit Stop
|
| 23
|
8
|
(until ground)
|
18
|
21
|
15 (10 on block)
|
N/A
|
|
|
|
- Valentine dashes forward, attacking with a single bonesaw cut as she appears behind the opponent.
- Although she appears to disappear or teleport during the attack, Valentine has no invulnerably; she can get hit out any frame of this move. Active frames end as soon as Valentine touches the opponent.
- Valentine will not cross through the opponent on block, or if the opponent is in the corner.
- The hit stop effect from this attack affects only the opponent, effectively adding to hit and block stun.
- On ground hit, Valentine's recovery varies slightly based on when she crosses sides with the opponent. It is always as long or longer than the recovery on whiff. Oh whiff, Valentine will end the move as soon as she switches sides with the opponent.
- The air version of Savage Bypass leaves Valentine in recovery until she reaches the ground if it whiffs, but on hit (even if it hits an assist and misses the point character) Valentine will recover in the air letting her perform follow-ups.
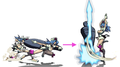
- As a neutral tool, the HK version covers most of the screen, allowing for a good fullscreen attack especially on other characters trying to stay away from Val. However, if blocked or on whiff, the bypass will leave you helpless in a counterhit state until you land, so cancel into air scalpels if you want a safe-ish approach.
- If the air version hits, there is a 10f buffer to input a double jump or air dash.
|
|
|
"Ready for your shots?" (Lv 1)
"Let's up the dose." (Lv 2)
"This might pinch!" (Lv 3)
|
| Vial Hazard
|
 + +
|
|
| Guard
|
Properties
|
Damage
|
Meter
|
On Hit
|
On Block
|
On Pushblock
|
| N/A
|
-
|
N/A
|
(2.5%)
|
N/A
|
N/A
|
|
| Startup
|
Active
|
Recovery
|
Hit Stun
|
Block Stun
|
Hit Stop
|
Super Hit Stop
|
| N/A
|
N/A
|
67 (Lv.1) / 72 (Lv.2) / 77 (Lv.3) / 88 (Assist)
|
N/A
|
N/A
|
N/A
|
N/A
|
|
|
|
- As a stand-alone special move, Valentine loads a syringe with poison. This gives her access to the move Flew Shot (commonly referred to as Vial Toss), which is a modified version of Dead Cross and applies the poison loaded on hit.
- Executing this move an additional time while a poison is already loaded will increase the level of the poison, up to level 3, making the effect of the respective poison more effective. Doing so will increase the recovery of Vial Hazard.
- Valentine must complete the full animation to load the poison. She will not keep the syringe if she cancels into a super too early or gets interrupted by the opponent.
- For level 3 poisons, and all orange poisons, the opponent must hit Valentine with a super or snapback to remove the effect early. Level 1 and 2 purple and green poisons can be removed by simply hitting Valentine.
- Type A: Damage Over Time
- The purple poison deals damage over time for the poison's 480f duration in even 1f increments. The damage done scales along with Valentine's ratio, and deals no damage if the defending character has low health (10% for level 1 and 2, 1% for level 3).
- Level 1: 1343 total damage
- Level 2: 2008 total damage
- Level 3: 2782 total damage
- Type B: Increased Hitstun
- The green poison increases hit and block stuns for the defending character and removes undizzy, enabling new combos. Enables Val to convert off of her Air throw midscreen without using meter, among other conversions.
- Level 1: Adds 20f to all hit stuns, block stuns and OTG hitstops; ~360f duration.
- Level 2: Adds 30f to all hit stuns, block stuns and OTG hitstops; ~420f duration; subtracts 50 undizzy.
- Level 3: Adds 40f to all hit stuns, block stuns and OTG hitstops; ~480f duration; subtracts 100 undizzy.
- Type C: Input Lag
- The orange poison causes an input lag effect for the defending character.
- Level 1: 4f input lag effect; ~180f duration.
- Level 2: 6f input lag effect; ~270f duration.
- Level 3: 9f input lag effect; ~360f duration.
- Assist version behavior
- If there is poison loaded, she will throw a syringe.
- Loading poison counts for using an assist during a combo.
- The animation is a fixed length, 11f longer than a point level 3 load.
|
|
|
Toggle Hitboxes Toggle Hitboxes
|
| Flew Shot
|
After Vial Hazard:
+ [ ] (Air OK)
|
|
| Ground
|
Guard
|
Properties
|
Damage
|
Meter
|
On Hit
|
On Block
|
On Pushblock
|
| Mid
|
Projectile
|
400 (100)
|
(5%) 6%
|
+10
|
-3
|
|
| Startup
|
Active
|
Recovery
|
Hit Stun
|
Block Stun
|
Hit Stop
|
Super Hit Stop
|
| 17
|
--
|
31
|
28
|
15
|
12
|
N/A
|
|
|
|
| Air
|
Guard
|
Properties
|
Damage
|
Meter
|
On Hit
|
On Block
|
On Pushblock
|
| Mid
|
Projectile
|
400 (100)
|
(5%) 6%
|
+17
|
+4
|
|
| Startup
|
Active
|
Recovery
|
Hit Stun
|
Block Stun
|
Hit Stop
|
Super Hit Stop
|
| 17
|
(Until ground)
|
24
|
28
|
15
|
12
|
N/A
|
|
|
|
- The syringe projectile deals more damage than a shuriken, travels the full length of the screen in a straight line, and causes a poison effect on hit. Missing Flew Shot wastes the poison.
- The speed of the ground versions varies with the button strength (L is slowest, H is fastest), but the different strengths of the air version have similar angles to Dead Cross.
- If the button input is tapped (held less than 7f), Valentine will throw a Dead Cross and save the poison.
- Ground version can also be used for ground links into 5LP.
- Air version slows down Val's air momentum, very handy when trying to pick just the right air angle to approach from.
|
|
|
Going down? Toggle Hitboxes Toggle Hitboxes
|
|
|
|
- Valentine lunges forward with a body bag for a slow starting command throw.
- Valentine can cancel the recovery animation to a super while she's in the air to convert. EKG will work anywhere while Scalpels works midscreen but is a bit harder than in the corner.
- Use this move sparingly. The slow startup and very long recovery make this move reactable and incredibly risky. You are better off going for more standard offense 99.99% of the time.
|
|
|
Supers
"Making the incision!" Toggle Hitboxes Toggle Hitboxes
|
Checkmate Incision
Level 1
|
+ + (Air OK)
|
|
| Ground
|
Guard
|
Properties
|
Damage
|
Meter
|
On Hit
|
On Block
|
On Pushblock
|
| Mid
|
Invuln. (Full) (Frame 3)
|
450 x8 (125 x8)
|
-100%
|
KD
|
-33
|
|
| Startup
|
Active
|
Recovery
|
Hit Stun
|
Block Stun
|
Hit Stop
|
Super Hit Stop
|
| 5 + 0, 2
|
--
|
64
|
16 x8
|
19 x8
|
30 x8 (8 x8 on block)
|
3
|
|
|
|
| Air
|
Guard
|
Properties
|
Damage
|
Meter
|
On Hit
|
On Block
|
On Pushblock
|
| Mid
|
Invuln. (Full) (Frame 3),
Airdash Cancel
|
450 x8 (125 x8)
|
-100%
|
KD
|
-2 (at best)
|
|
| Startup
|
Active
|
Recovery
|
Hit Stun
|
Block Stun
|
Hit Stop
|
Super Hit Stop
|
| 5 + 2, 2
|
(Until ground)
|
44
|
16 x8
|
19 x8
|
30 x8 (8 x8 on block)
|
4
|
|
|
|
- Valentine throws a volley of 8 scalpels. The ground version can be converted into EKG midscreen and in the corner with 5LK. The air version recovers much faster, offering a better opportunity to combo after the lengthy hit stun effect.
- Closing distance with an air Savage Bypass and canceling to an air Checkmate Incision on block gives Valentine a powerful countermeasure against a keep away strategy.
- While this move does have some invincible startup, the invinciblity does not cover the active frames of the air version. Combining this with the low post-flash hitstop makes this move reactable and counterable by many characters. So be wary when using this move on defense.
- Does decent chip damage, and can rack up damage on opponent's assists especially
- Also known as "Scalpels".
|
|
|
"Major surgery!" Toggle Hitboxes Toggle Hitboxes
|
EKG Flatliner
Level 1
|
+ + (Air OK)
|
|
| Ground
|
Guard
|
Properties
|
Damage
|
Meter
|
On Hit
|
On Block
|
On Pushblock
|
| Mid
|
Invuln. (Full)
|
275 x12, 1850 (75)
|
-100%
|
KD
|
-28
|
|
| Startup
|
Active
|
Recovery
|
Hit Stun
|
Block Stun
|
Hit Stop
|
Super Hit Stop
|
| 4 + 4
|
13
|
58
|
30 x13
|
21
|
30 x12, 30, (10 on block)
|
5
|
|
|
|
| Air
|
Guard
|
Properties
|
Damage
|
Meter
|
On Hit
|
On Block
|
On Pushblock
|
| Mid
|
Invuln. (Full)
|
240 x12, 1750 (75)
|
-100%
|
KD
|
-30 (at best)
|
|
| Startup
|
Active
|
Recovery
|
Hit Stun
|
Block Stun
|
Hit Stop
|
Super Hit Stop
|
| 4 + 4
|
13
|
(Until ground)
|
30 x13
|
21
|
38 x12, 30 (10 on block)
|
5
|
|
|
|
- Valentine performs a beefed up version of Savage Bypass, transitioning into the rest of the move only if she hits the enemy point character. Damage shows complete attack, frame data shows attack on whiff or block.
- After the first hit EKG Flatliner ignores assists, Egrets, Ms. Fortune's head, Lennys (can still be hit by Lenny), and anything else that may get in the way.
- The extended hit stop effect on the last hit gives Valentine a way to DHC into some of the slower starting supers of her teammates. Like Savage Bypass, the hitstop from this attack only affects the opponent.
- This should be your primary reversal due to its fast, fully invincible startup and good horizontal range.
|
|
|
"Did you miss me?"
|
Acquisitive Prescription
Level 2
|
 + + + +
|
|
| Guard
|
Properties
|
Damage
|
Meter
|
On Hit
|
On Block
|
On Pushblock
|
| N/A
|
-
|
N/A
|
-200%
|
N/A
|
N/A
|
|
| Startup
|
Active
|
Recovery
|
Hit Stun
|
Block Stun
|
Hit Stop
|
Super Hit Stop
|
| 0
|
25
|
25
|
N/A
|
N/A
|
130
|
0
|
|
|
|
- A counter attack that freezes the opponent, allowing Valentine to start a combo. If Acquisitive Prescription connects, you have time to load a vial and still get a heavy counterhit punish with 2HP.
- Acquisitive Prescription deals no damage on its own and doesn't count as a hit for damage scaling.
- Valentine's counters both start in 0f and only cause a super flash if successful.
- When successful, the counter will remove any invulnerable frames and armor (except for Sekhmet) the opponent has in the incoming attack making it the only move in the game that can beat Double's Car super.
- The attack will always consume meter, either at the super flash or at the end of the active frames for the counter.
- Countering a burst will apply 50% damage scaling to the next attack.
- Cannot be used as a DHC, unlike the poison enhanced Countervenom version.
- The first frame data graph shows the move on whiff. The second shows it countering on the first possible frame.
|
|
|
"Don't make me laugh." Toggle Hitboxes Toggle Hitboxes
|
Countervenom
Level 2
|
After Vial Hazard:
+ +
|
|
| Point
|
Guard
|
Properties
|
Damage
|
Meter
|
On Hit
|
On Block
|
On Pushblock
|
| N/A
|
-
|
2250 (300)
|
-200%
|
KD
|
+45
|
|
| Startup
|
Active
|
Recovery
|
Hit Stun
|
Block Stun
|
Hit Stop
|
Super Hit Stop
|
| 0
|
25
|
25
|
30
|
N/A
|
7, 51
|
0
|
|
|
|
| DHC
|
Guard
|
Properties
|
Damage
|
Meter
|
On Hit
|
On Block
|
On Pushblock
|
| All
|
-
|
1000 (300)
|
-200%
|
KD
|
-14
|
|
| Startup
|
Active
|
Recovery
|
Hit Stun
|
Block Stun
|
Hit Stop
|
Super Hit Stop
|
| 0
|
4
|
44
|
30
|
33
|
51
|
0
|
|
|
|
- After loading up a Vial Hazard, Valentine's counter stabs the opponent with a syringe. This deals direct damage, always applies the level 3 vial effect, and hits the defending character with enough hit stop to allow Valentine to combo out of it mid screen.
- Negates armor and invincibility on successful counter like Acquisitive Prescription.
- Whiffing the counter does not consume the vial, but it does consume the meter.
- On successful counter, Val will teleport right next to the opponent before performing the stab.
- She only moves horizontally, so it's possible in rare situations for the stab to whiff if the opponent is high enough and using a disjointed move.
- If the stab whiffs, she loses both the vial and the meter.
- As Valentine is invincible throughout the entire recovery Countervenom, this move is very effective anti-assist tool as Valentine will still be safe against any attempted punishes from the opponent, even if the point character is not forced to block.
- If Vial Hazard is prepared, Valentine can use Countervenom as a DHC. This version has reduced damage, is unsafe on block, and always applies the level 1 version of a given Vial Hazard status effect.
- Strangely, if a successful Countervenom is immediately DHCed from right after the stab, it will still be Stage 2.
- For supers that don't hit such as installs, this can allow for very high damage followups.
- The first frame data graph shows the move on whiff. The second shows it countering on the first possible frame.
|
|
|
"Tell me where it hurts..." Toggle Hitboxes Toggle Hitboxes
|
Dead On Arrival
Level 3
|
+ +
|
|
| Guard
|
Properties
|
Damage
|
Meter
|
On Hit
|
On Block
|
On Pushblock
|
| Mid
|
Invuln. (Full),
55% Minimum Scaling,
Hit Grab
|
0 x2, 1000, 4000 (250)
|
-300%
|
KD
|
-42
|
|
| Startup
|
Active
|
Recovery
|
Hit Stun
|
Block Stun
|
Hit Stop
|
Super Hit Stop
|
| 4 + 10
|
2
|
64
|
N/A
|
23
|
N/A (8 on block)
|
8
|
|
|
|
- A hit grab with the same animation as Mortuary Drop, which transitions to cinematic sequence as Valentine and the defending character appear from the top of the screen. DHCs are not possible during the cinematic portion of this attack.
- Valentine can take mercy on the opponent and shorten the animation by holding any punch button as the screen fades out.
- Holding a punch button will load one level of Vial Hazard poison for that button. If no button is held, Type A poison is loaded.
- Curiously, this move has 55% minimum damage scaling, rather than the normal 45% for Lv3s.
- This move travels very far, is very fast, and has lots of post flash hitstop, making it very useful in neutral to punish the opponent whiffing anything.
- 2E+ patch notes: "Lv3 startup is no longer super-able after the flash if you were within half a screen of her and committed to an attack/dash/etc. It is still blockable at any distance, if you were not doing anything."
|
|
|
Taunt
"Cheat day!"
|
|
| Guard
|
Properties
|
Damage
|
Meter
|
On Hit
|
On Block
|
On Pushblock
|
| N/A
|
-
|
N/A
|
0%
|
N/A
|
N/A
|
|
| Startup
|
Active
|
Recovery
|
Hit Stun
|
Block Stun
|
Hit Stop
|
Super Hit Stop
|
| N/A
|
N/A
|
101
|
N/A
|
N/A
|
N/A
|
N/A
|
|
|
|
|
|
|
|
"Can't catch me."
|
| Assist Taunt
|
Automatically done after an assist move
|
|
| Guard
|
Properties
|
Damage
|
Meter
|
On Hit
|
On Block
|
On Pushblock
|
| Mid
|
-
|
N/A
|
0%
|
N/A
|
N/A
|
|
| Startup
|
Active
|
Recovery
|
Hit Stun
|
Block Stun
|
Hit Stop
|
Super Hit Stop
|
| N/A
|
N/A
|
44
|
N/A
|
N/A
|
N/A
|
N/A
|
|
|
|
- Amount of time it takes for the character to turn invulnerable after they finish performing their assist action.
- Longer recovery → more time to punish the assist.
|
|
|
Colors
Intro Poses
Valentine has 3 different intro poses that can be selected by holding a light, medium or heavy button during the loading screen before a match.
|
Intro pose 1:
Hold OR
Valentine does a ninja flip.
Hiyah!
|
|
Intro pose 2:
Hold OR
Valentine glides with a body bag.
This may sting...a bit.
Time for your physical.
|
|
Intro pose 3:
Hold OR
Valentine hides behind a curtain and then cuts it in half.
I'll cut you down to size.
Side effects may include nausea, headaches... and death!
|
Players to Watch
Disclaimer: This list is derived from community input and is in no way comprehensive or a form of ranking of any kind. Our community criteria can be found here.
| General
|
|
| Characters
|
|
|
|
|
| Mechanics
|
|
| Other
|
|