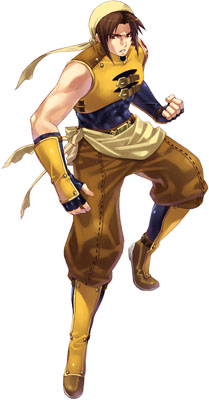
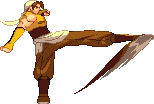
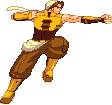
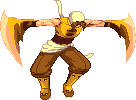
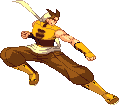
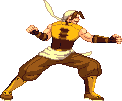
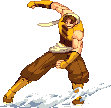
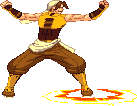
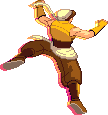
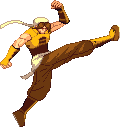
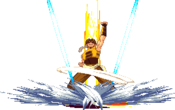
| Ryuken
|
|
|
| Health |
500
|
| Pre-Jump Frames |
3
|
| Play Style |
Rushdown, Mixup
|
| Dash Type |
Step
|
Character Background
Race: Human
Motivation: Restore order to the world
Weapon: Fenrir Knuckle
Likes: Martial Arts
Dislikes: Evil
Gameplay Overview
Playstyle
|
Ryuken is a strong and fast rushdown character with a balanced toolkit. He possesses a great fireball, excellent mobility, and potent pressure that can either be used to mix-ups or guard breaks. Ryuken's combos deal very high damage, often allowing him to three-touch opponents. His stubby normals means he has to work to get in, something he excels at with his very fast speed, his teleport dash and useful special moves. Ryuken also has access to great damage combos in the corner, a position he gets very easily with his insane corner carry potential. Should that not satisfy you, his Wolf Stance (214D) is enough to frustrate your opponent because of the properties it has.
Ryuken is a speedy combo-monster who has a multitude of ways to open you up while having an incredibly opressive stance at the same time. |
| Pros |
Cons |
- "This Is The Stance": Ryuken's Wolf Stance (214D) is tremendously powerful because of many things. It low-profiles, it has 50/50 openers, it has combo fillers, it has instant guard break setups, and it is a walking conditioning machine. The best part is that he is COMPLETELY IMMUNE to any type of throw in the game while in this stance.
- Nigh-Superior Mobility: Having access to a teleport dash for side-switch mix-ups, a powerful instant air dash, and a far reaching hyper hop, Ryuken can effortlessly get in your face and nullify any type of zoning.
- Strong Corner Carry: Thanks to his j.236236D, Ryuken has powerful corner carry potential, though it will most of the time cost 2 bars to perform.
- Jumping C: A button so powerful it deserves to be a pro by itself. Incredibly fast, high priority, easy to cross up with. It's his best air-to-air and jump-in. And because of his strong instant air dash, he can easily condition opponents to attempt to parry his jump-in.
- Projectiles Are Nothing: Ryuken is one of the few characters who does not have to worry about projectiles. He can outmaneuver them in the air, he can use his wolf stance to low-profile under them or he can use is 623C special to roll through them and get a full combo.
|
- Needs to go in: While being incredibly opressive, Ryuken still suffers from very stubby buttons and his only non-super projectile is a air fireball with a very shallow angle, meaning that he has to be in his opponent's face to do anything.
- Awful Burst Potential: Ryuken is one of the characters who benefit the least from burst in terms of kill potential. He does have quite some scaling and his combos are too long to properly loop in burst. Burst is mostly used for survival and pressure for a character like Ryuken.
- Only One Good Super: Air Wolf Howl (j.236236D) is your only good super, due to both the utility it offers and the damage it deals in combos. His other supers and even his LVL 3 suffers from very harsh scaling and rarely see any use outside of very rare situations.
|
Normals
Far Standing Normals
5A
|
| Damage
|
Guard
|
Cancel
|
Startup
|
Adv Hit
|
Adv Block
|
Chain Adv Block
|
| 15
|
Mid
|
Specials
|
-
|
-
|
-
|
-
|
Ryuken does a quick jab.
Your fastest normal. Not much else.
|
|
5B
|
| Damage
|
Guard
|
Cancel
|
Startup
|
Adv Hit
|
Adv Block
|
Chain Adv Block
|
| 30
|
Mid
|
Specials
|
-
|
-
|
-
|
-
|
Ryuken performs a straight. longer range and damage than 5A.
|
|
5C
|
| Damage
|
Guard
|
Cancel
|
Startup
|
Adv Hit
|
Adv Block
|
Chain Adv Block
|
| 50
|
Mid
|
-
|
-
|
-
|
-
|
-
|
Ryuken does a double palm strike.
Has two hitboxes, one that covers his arms, and another that covers the end of his hands. The latter hitbox launches, making max range pokes inconsistent. However, it's still his best poke confirm compared to all of his buttons.
|
|
5D
|
| Damage
|
Guard
|
Cancel
|
Startup
|
Adv Hit
|
Adv Block
|
Chain Adv Block
|
| 20
|
Mid
|
Specials
|
-
|
-
|
-
|
-
|
Ryuken does a kick to the midsection.
A good poke.
|
|
Close Standing Normals
cl.5A
|
| Damage
|
Guard
|
Cancel
|
Startup
|
Adv Hit
|
Adv Block
|
Chain Adv Block
|
| 15
|
Mid
|
Specials
|
-
|
-
|
-
|
-
|
A quick elbow.
fastest of all your close normals, but not used much due to its low damage.
|
|
cl.5B
|
| Damage
|
Guard
|
Cancel
|
Startup
|
Adv Hit
|
Adv Block
|
Chain Adv Block
|
| 30
|
Mid
|
Specials
|
-
|
-
|
-
|
-
|
Ryuken does a punch to their gut.
Used more than cl.A due to it dealing more damage and scales less in bnbs.
|
|
cl.5C
|
| Damage
|
Guard
|
Cancel
|
Startup
|
Adv Hit
|
Adv Block
|
Chain Adv Block
|
| 50
|
Mid
|
Specials
|
-
|
-
|
-
|
-
|
A shoulder tackle.
An amazing combo filler and is special cancellable. Used in your bnb starters.
|
|
cl.5D
|
| Damage
|
Guard
|
Cancel
|
Startup
|
Adv Hit
|
Adv Block
|
Chain Adv Block
|
| 20
|
Mid
|
Specials
|
-
|
-
|
-
|
-
|
Ryuken does a low kick that doesn't hit low. Not that useful, sadly.
|
|
Crouching Normals
2A
|
| Damage
|
Guard
|
Cancel
|
Startup
|
Adv Hit
|
Adv Block
|
Chain Adv Block
|
| 15
|
Mid
|
-
|
-
|
-
|
-
|
-
|
A crouching slap.
Not a low, but is decent either way.
|
|
2B
|
| Damage
|
Guard
|
Cancel
|
Startup
|
Adv Hit
|
Adv Block
|
Chain Adv Block
|
| 30
|
Mid
|
Specials
|
-
|
-
|
-
|
-
|
Looks identical to 2A, but has more startup and does more damage.
|
|
2C
|
| Damage
|
Guard
|
Cancel
|
Startup
|
Adv Hit
|
Adv Block
|
Chain Adv Block
|
| 50
|
Low
|
Specials
|
-
|
-
|
-
|
-
|
Ryuken throws his fists up in the air.
Strong normal that launches opponents, and always present in your bnbs.
|
|
2D
|
| Damage
|
Guard
|
Cancel
|
Startup
|
Adv Hit
|
Adv Block
|
Chain Adv Block
|
| 20
|
Low
|
Specials
|
-
|
-
|
-
|
-
|
A short kick.
A very good low poke, since it can be cancelled into 2C into your bnb. Used mostly when conditioning your opponent to parry highs.
|
|
Jumping Normals
j.A
|
| Damage
|
Guard
|
Cancel
|
Startup
|
Adv Hit
|
Adv Block
|
Chain Adv Block
|
| 15
|
High
|
-
|
-
|
-
|
-
|
-
|
Ryuken does a jab in the air. I don't even know how he gets that momentum, but ok.
Not a good jump-in due to it's hitbox, but works okay as an air-to-air. Is very active as well.
|
|
j.B
|
| Damage
|
Guard
|
Cancel
|
Startup
|
Adv Hit
|
Adv Block
|
Chain Adv Block
|
| 30
|
High
|
-
|
-
|
-
|
-
|
-
|
Visually similar to j.A but is slower and is not nearly as active. Still not much use.
|
|
j.C
|
| Damage
|
Guard
|
Cancel
|
Startup
|
Adv Hit
|
Adv Block
|
Chain Adv Block
|
| 50
|
High
|
-
|
-
|
-
|
-
|
-
|
Ryuken swipes the air at both directions.
Every Ryuken player's favorite button. It has very high priority and is extremely fast, winning most air-to-air interactions and is your best jump-in
|
|
j.D
|
| Damage
|
Guard
|
Cancel
|
Startup
|
Adv Hit
|
Adv Block
|
Chain Adv Block
|
| 20
|
High
|
-
|
-
|
-
|
-
|
-
|
Ryuken does a divekick without the dive.
Your second best jump-in normal, but not nearly as used as j.C.
|
|
Command Normals
4C
|
| Damage
|
Guard
|
Cancel
|
Startup
|
Adv Hit
|
Adv Block
|
Chain Adv Block
|
| 20
|
Mid
|
-
|
-
|
-
|
-
|
-
|
Ryuken does a hammer blow fist.
While it hits overhead, it can't be comboed off from and is not special or super cancellable.
|
|
3D
|
| Damage
|
Guard
|
Cancel
|
Startup
|
Adv Hit
|
Adv Block
|
Chain Adv Block
|
| 45
|
Mid
|
-
|
-
|
-
|
-
|
-
|
A very fast sweep that causes a hard knockdown.
Hits OTG.
|
|
Chain Specific Normals
2A/2B/2D -> 2C
|
| Damage
|
Guard
|
Cancel
|
Startup
|
Adv Hit
|
Adv Block
|
Chain Adv Block
|
| 22
|
High
|
-
|
-
|
-
|
-
|
-
|
Ryuken does a palm strike with the other hand, in comparison to 2A or 2B.
Your go to low confirm chain into bnb, since it doesn't launch in comparison to raw 2C.
|
|
Throws
A+D
Forward Throw
|
| Damage
|
Guard
|
Cancel
|
Startup
|
Adv Hit
|
Adv Block
|
Chain Adv Block
|
| 60
|
Throw
|
N/A
|
-
|
-
|
-
|
-
|
Ryuken grabs his opponent and uppercuts them
|
|
B+D
Back Throw
|
| Damage
|
Guard
|
Cancel
|
Startup
|
Adv Hit
|
Adv Block
|
Chain Adv Block
|
| 70
|
Throw
|
N/A
|
-
|
-
|
-
|
-
|
Ryuken dashes behind the opponent and punches them
|
|
Sword Series Slash (Dust)
5B+C
Standing SSS
|
| Damage
|
Guard
|
Cancel
|
Startup
|
Adv Hit
|
Adv Block
|
Chain Adv Block
|
| 150
|
High
|
N/A
|
-
|
-
|
-
|
-
|
Triggers an air chase when you press A. To complete the air chase you must do AAABBBCCCD > 236D.
|
|
2B+C
Low SSS
|
| Damage
|
Guard
|
Cancel
|
Startup
|
Adv Hit
|
Adv Block
|
Chain Adv Block
|
| 150
|
Low
|
N/A
|
-
|
-
|
-
|
-
|
Same as standing SSS but hits low. Triggers an air chase when you press A. To complete the air chase you must do AAABBBCCCD > 236D.
|
|
Chaos Breaking (Parry)
A+B Standing Parry Standing Parry Crouching Parry Crouching Parry Jumping Parry Jumping Parry
|
| Damage
|
Guard
|
Cancel
|
Startup
|
Adv Hit
|
Adv Block
|
Chain Adv Block
|
| -
|
-
|
-
|
-
|
-
|
-
|
-
|
Dodges projectiles and counters any physical, non-grab attacks.
The Standing and Jumping versions parry anything that can be blocked High, but is vulnerable to grabs. The Crouching version only parries lows and cannot be grabbed.
|
|
Special Moves
Over King Shot
236A/B/C
|
| Version
|
Damage
|
Guard
|
Cancel
|
Startup
|
Adv Hit
|
Adv Block
|
Chain Adv Block
|
| A
|
30
|
Mid
|
-
|
-
|
-
|
-
|
-
|
Ryuken does a palm fist while moving forward.
The A version is the fastest, but doesn't go far. Also used in your bnb combos.
|
| Version
|
Damage
|
Guard
|
Cancel
|
Startup
|
Adv Hit
|
Adv Block
|
Chain Adv Block
|
| B
|
33
|
Mid
|
-
|
-
|
-
|
-
|
-
|
The B version takes a bit longer to start up but goes further than the A version. Not used much.
|
| Version
|
Damage
|
Guard
|
Cancel
|
Startup
|
Adv Hit
|
Adv Block
|
Chain Adv Block
|
| C
|
35
|
Mid
|
-
|
-
|
-
|
-
|
-
|
C version has the longest startup, but goes the furthest of them all. Hard to use in neutral due to startup and can't combo into without SoT.
|
|
Giant Axe Crush
Over King Shot > 66A/B/C
|
| Damage
|
Guard
|
Cancel
|
Startup
|
Adv Hit
|
Adv Block
|
Chain Adv Block
|
| 39 (13 per hit)
|
Mid
|
-
|
-
|
-
|
-
|
-
|
Followup that is SOT cancellable.
Convenient to use as a combo extender or 1/3 of the screen punish. Hits 3 times, deals 13 per hit raw.
|
|
Beat Open
214C
|
| Damage
|
Guard
|
Cancel
|
Startup
|
Adv Hit
|
Adv Block
|
Chain Adv Block
|
| 55
|
Mid
|
-
|
-
|
-
|
-
|
-
|
Ryuken does a stomp into his 214D stance. Has quite some startup and does not hit low, sadly. Not much use of this.
|
|
Waiting Wolf
214D This is the stance This is the stance
|
| Damage
|
Guard
|
Cancel
|
Startup
|
Adv Hit
|
Adv Block
|
Chain Adv Block
|
| -
|
Mid
|
-
|
-
|
-
|
-
|
-
|
Ryuken enters a stance that low profiles ALL NON-LOW HITTING MOVES (even supers!) and evades ALL GRABS AND COMMAND GRABS(only exception being Jadou's super command grab). Extremely paramount to your mixup and combo game, since some bnbs require you to go into stance.
He has many options after stance.
|
|
WW: Blur Bullet
Waiting Wolf ~> AAA
|
| Damage
|
Guard
|
Cancel
|
Startup
|
Adv Hit
|
Adv Block
|
Chain Adv Block
|
| 72 (20, 25, 27)
|
Mid
|
-
|
-
|
-
|
-
|
-
|
Ryuken does a quick series of punches depending on how many times you press A (up to three times).
Pressing A once will do one punch and end the stance. Not useful.
Pressing A twice will do to punches and launch them. Ryuken will also do a follow up command jump (236D).
Pressing A three times will knock down on hit and return to stance. Also SoT cancellable and used for combos.
|
|
Over King Shot
Waiting Wolf ~> B
|
| Damage
|
Guard
|
Cancel
|
Startup
|
Adv Hit
|
Adv Block
|
Chain Adv Block
|
| 70
|
Mid
|
-
|
-
|
-
|
-
|
-
|
Ryuken takes a big step and does a palm fist, instantly destroying the enemy's guard.
Extremely useful for opening the opponent up if you get a SoT blockstring, but not useful in combos.
|
|
Claw Slice
Waiting Wolf ~> C
|
| Damage
|
Guard
|
Cancel
|
Startup
|
Adv Hit
|
Adv Block
|
Chain Adv Block
|
| 50
|
Mid
|
-
|
-
|
-
|
-
|
-
|
Ryuken performs a shoulder tackle, launching the opponent. Great combo filler for 2C into 236D bnbs.
Also has armor properties that will beat all high and mid moves, but not lows, throws or supers. It will also exit his stance.
|
|
Spinning Kick
Waiting Wolf ~> 5D
|
| Damage
|
Guard
|
Cancel
|
Startup
|
Adv Hit
|
Adv Block
|
Chain Adv Block
|
| 45
|
Mid
|
-
|
-
|
-
|
-
|
-
|
Ryuken hops and does a roundhouse kick. Hits overhead and has enough hitstun for you to follow up with any of your bnb starters.
|
|
WW: Raging Kick
Waiting Wolf ~> 2D
|
| Damage
|
Guard
|
Cancel
|
Startup
|
Adv Hit
|
Adv Block
|
Chain Adv Block
|
| 20
|
Mid
|
-
|
-
|
-
|
-
|
-
|
Extremely oppressive button. Hits low, low profiles, and doesn't exit stance.
When used along with D from stance, he gets a really good 50/50 mixup that will frustrate his opponents.
|
|
Roll into Kicks (No official Movelist Name) 214D ~> 66 214D ~> 66 214D ~> 66 ~> D 214D ~> 66 ~> D
|
| Damage
|
Guard
|
Cancel
|
Startup
|
Adv Hit
|
Adv Block
|
Chain Adv Block
|
| -
|
Mid
|
-
|
-
|
-
|
-
|
-
|
Ryuken rolls forward, making it's hurtbox really small.
|
| Damage
|
Guard
|
Cancel
|
Startup
|
Adv Hit
|
Adv Block
|
Chain Adv Block
|
| 60 (30, 30)
|
Mid
|
-
|
-
|
-
|
-
|
-
|
Ryuken follows up the roll with two jumping kicks.
Unsafe on block, but does give skd if it hits an aerial opponent, so it’s useless in pressure but isn’t the worst combo ender if you accidentally get this after a roll
|
|
Wild Shadow
236D Demon Flip Demon Flip
|
| Damage
|
Guard
|
Cancel
|
Startup
|
Adv Hit
|
Adv Block
|
Chain Adv Block
|
| -
|
Mid
|
-
|
-
|
-
|
-
|
-
|
Ryuken does a demon flip. Used in neutral or in combos depending on what followup you choose.
|
|
Energy Cannon
Wild Shadow ~> A
|
| Damage
|
Guard
|
Cancel
|
Startup
|
Adv Hit
|
Adv Block
|
Chain Adv Block
|
| 60
|
Mid
|
-
|
-
|
-
|
-
|
-
|
Ryuken's only non-super projectile, and it's not even a traditional one.
Good for pressure in neutral and knocks down on hit.
|
|
WS: Cloud Kick
Wild Shadow ~> BBBC
|
| Damage
|
Guard
|
Cancel
|
Startup
|
Adv Hit
|
Adv Block
|
Chain Adv Block
|
| 80 (20x4)
|
Mid
|
Super
|
-
|
-
|
-
|
-
|
Ryuken does 3 air kicks before perfoming a swipe that knocks down.
Your go to meterless bnb ender and bnbs with meter. Don't use this in neutral.
|
|
WS: Control
Wild Shadow ~> C
|
| Damage
|
Guard
|
Cancel
|
Startup
|
Adv Hit
|
Adv Block
|
Chain Adv Block
|
| 45
|
Mid
|
-
|
-
|
-
|
-
|
-
|
Ryuken does a divekick.
Mostly used in corner combos due to the angle of the kick being very small. Not much use in neutral because of that.
|
|
WS: WS
Wild Shadow ~> D
|
| Damage
|
Guard
|
Cancel
|
Startup
|
Adv Hit
|
Adv Block
|
Chain Adv Block
|
| -
|
Mid
|
-
|
-
|
-
|
-
|
-
|
Ryuken does a parry in the air, which stuns the opponent even after they land, leading to a full combo.
Immediately enters the 214D stance regardless if it hits or misses.
|
|
Mountain Crusher
623A/B/C
|
| Version
|
Damage
|
Guard
|
Cancel
|
Startup
|
Adv Hit
|
Adv Block
|
Chain Adv Block
|
| A
|
24
|
Mid
|
-
|
-
|
-
|
-
|
-
|
Ryuken does a short roll and then a shoulder tackle.
Your main bnb special but also very good in neutral as it can punish projectiles or moves with long recovery.
A version doesn't go far, so there's no real use of this one.
|
| Version
|
Damage
|
Guard
|
Cancel
|
Startup
|
Adv Hit
|
Adv Block
|
Chain Adv Block
|
| B
|
27
|
Mid
|
-
|
-
|
-
|
-
|
-
|
B version goes further, but not as good as the C version.
Not much use, either.
|
| Version
|
Damage
|
Guard
|
Cancel
|
Startup
|
Adv Hit
|
Adv Block
|
Chain Adv Block
|
| C
|
29
|
Mid
|
-
|
-
|
-
|
-
|
-
|
C version goes the furthest, and since all of the versions has the same startup, the C version will always leave you point blank on your opponent.
|
|
MC Falling Tiger Strike
Mountain Crusher ~> A/B/C ~> A/B/C
|
| Damage
|
Guard
|
Cancel
|
Startup
|
Adv Hit
|
Adv Block
|
Chain Adv Block
|
| 32 (16x2)
|
Mid
|
-
|
-
|
-
|
-
|
-
|
Ryuken's rekka followups after 623A/B/C. Unsafe on block.
|
|
MC Falling Tiger Strike ~> D
|
| Damage
|
Guard
|
Cancel
|
Startup
|
Adv Hit
|
Adv Block
|
Chain Adv Block
|
| 28 (13, 15)
|
Mid
|
-
|
-
|
-
|
-
|
-
|
Ryuken's final rekka followup, which launches his opponents to the air.
SoT cancellable, but will completely whiff against opponents who are crouch blocking.
Delay SoT for maximum fall time.
|
|
Super Moves
Level 1 Supers
Explosive Over
236236A/B/C A/B version A/B version C version C version
|
| Version
|
Damage
|
Guard
|
Cancel
|
Startup
|
Adv Hit
|
Adv Block
|
Chain Adv Block
|
| A/B
|
140 (30, 20, 20, 70)
|
High/Low
|
-
|
-
|
-
|
-
|
-
|
Ryuken strikes forward.
If it hits, he will do a few more strikes before shooting a giant fireball.
Good burst combo ender if you want to keep your burst.
|
| Version
|
Damage
|
Guard
|
Cancel
|
Startup
|
Adv Hit
|
Adv Block
|
Chain Adv Block
|
| C
|
120
|
High/Low
|
-
|
-
|
-
|
-
|
-
|
Instead of striking forward, Ryuken shoots the fireball straight away, ignoring projectiles with less priority.
Can easily be dodged on reaction and never good to use outside of punishing projectiles.
|
|
Wolf Howl
236236D/j.236236D The Bruce Lee Kick The Bruce Lee Kick
|
| Version
|
Damage
|
Guard
|
Cancel
|
Startup
|
Adv Hit
|
Adv Block
|
Chain Adv Block
|
| Ground
|
150 (40, 40, 70)
|
High/Low
|
-
|
-
|
-
|
-
|
-
|
Ryuken jumps in the air diagonally and does a high damaging kick
Fully invincible before the kick.
|
| Version
|
Damage
|
Guard
|
Cancel
|
Startup
|
Adv Hit
|
Adv Block
|
Chain Adv Block
|
| Air
|
160 (50, 110)
|
High
|
-
|
-
|
-
|
-
|
-
|
Ryuken dives downward from the air, transitioning into a leaping kick
Your metered bnb ender.
Depending on the height the opponent was if you hit them out of the air, you can combo off of this in the corner
|
|
Level 3 Super
Wolf Fang Comet Splash
214214C Serve this LVL 3 raw, not well-done. Serve this LVL 3 raw, not well-done.
|
| Damage
|
Guard
|
Cancel
|
Startup
|
Adv Hit
|
Adv Block
|
Chain Adv Block
|
| 316 (72, 22, 22, 21, 21, 19, 18, 18, 103)
|
High/Low
|
-
|
-
|
-
|
-
|
-
|
Ryuken does an uppercut that goes into a cinematic sequence.
While it boasts incredible damage for a level 3, this move scales the most of all moves in the game. It's short range and low damage in combos means it's usually used in burst or as a risky tech punish.
|
|
Strategy
Neutral
Offence (On Hit)
HKD OKI
Offence (On Block)
Defense
Combos
- Need help reading the combos? Check out the Glossary for explanations on notation and game specific terms! All damage values tested against Hiro.
WW stands for Waiting Wolf, his 214D stance. WS stands for Wild Shadow, his 236D jump.
Chain Combos
Basic Combos
| Combo
|
Total Damage
|
Notes
|
| Meterless BnB
|
| 2D -> 5B -> 5C >> 236A ~> 66A
|
109
|
Basic BnB, give sliding skd
|
| 2D -> 2B -> 2C >> 623C ~> C ~> C ~> D
|
132
|
Basic bnb for damage
|
| 9C >> cl.B -> C >> 623C ~> C ~> C ~> D
|
161
|
Basic jump in BnB
|
| 214D ~> 5D >> 6 cl.B -> 5C > 623C ~> A/B/C ~> A/B/C ~> D
|
142
|
Midscreen variant off of the overhead. Requires a microwalk for the cl.B -> 5C to connect, but you can do 2A -> 2C instead for a bit less dmg
|
| 214D ~> WW 5D >> cl.B -> 5C > 236D ~> WS C >> WW A ~> A ~> WS B ~> B ~> B ~> C
|
178
|
Corner Only.
|
| One Bar BnB
|
| 2D -> 5B -> 5C >> 236A ~> 66A (SOT) >> 66 214D ~> WW C >> 2C > 236D ~> B ~> B ~> B ~> C
|
209
|
If you aren't close enough to the corner after the 236A portion you have to cut out the 66 214D ~> WW C to make the combo work
|
| 9C >> cl.B -> 5C > 623C ~> A/B/C ~> A/B/C ~> D SoT >> 214D ~> WW C >> 2C 236D ~> WS B ~> B ~> B ~> C
|
236
|
If you aren't close enough to the corner after the 623C portion you have to cut out the 214D ~> WW C to make the combo work
|
| 2D -> 5B -> 5C >> 236A ~> 66A (SOT) >> B+C (AAABBBCCCDD > 236D)
|
188
|
Walk or Dash up to land B+C, you want to hit the B+C
|
| Two Bar BnB
|
| 9C >> cl.B -> 5C > 623C ~> A/B/C ~> A/B/C ~> D SoT >> 214D ~> WW C >> 2C > 236D ~> WS B ~> B ~> B ~> C > j.236236D >> 2A -> 2C > 236A ~> 66A
|
310
|
IF you are not close enough to the corner after the 623C portion then you will have to omit the 214D ~> WW C for the combo to work
|
| (Corner Only) 9C >> cl.B -> 5C >> 236D ~> WS C ~> WW A ~> A ~> A (SOT) ~> WW 66 >> 214D ~> WW C >> 214C ~> WW A ~> A ~> A Sot >> WW 66 >> 214D ~> WW C >> 2C > 236D ~> B ~> B ~> B ~> C > j.236236D >> 2A -> 2C > 236A ~> 66A
|
383
|
236D ~> WS C ~> WW A must be done QUICKLY to link, plink it
|
| (Corner Only) 9C >> 5A -> 5B -> 5C >> 236A ~> 66A (SOT) >> 214D ~> WW C >> 214D ~> WW C >> 214C > WW A ~> A ~> A Sot >> WW 66 >> 214D ~> WW C >> 214D ~> WW C >> 2C > 236D ~> WS B ~> B ~> B ~> C
|
312
|
Corner loop. The first 214C will need to be delayed depending on character. Can be looped again witt another 214D ~> WW C instead of the 2C > 236D but at that point the damage isnt worth the extra bar, and instead its better to just stick with the HKD. Depending on the opponents height after the 214C > WW A ~> A ~> A Sot part of the combo you may have to drop the second 214D >> WW C, you can tell as they need to be a bit above your head for the second 214D >> WW C to work. Can start with a WW 4D overhead for 286 dmg. VS Oro and Earth you need to use 236B. VS Ryuken, Mayura, and Krayce you need to use 236C. Very hard to do vs Jadou2, requires a micro walk backwards for the first 214D >> WW C
|
| (Corner Only) 9C >> 5A -> 5B -> 5C >> 236A ~> 66A (SOT) >> 214D ~> WW C >> 214D ~> WW C >> 214C > WW A ~> A ~> A Sot >> WW 66 >> Burst >> 214D ~> WW C >> 2C > 236D ~> WS B ~> B ~> B ~> C > j.236236D >> 214214C
|
366
|
Corner Burst Combo, you can also do a 214C ~> WW A ~> A ~> A Sot >> 214D ~> WW C route right after the burst as an alt route but it does the exact same damage and is purely for the variety.
|
| Three Bar BnB
|
| [combo starter] >> 623C ~> C ~> C ~> D SOT > burst > 236A ~> 66A SOT > 214D ~> C >> 2C > 236D ~> B ~> B ~> B ~> C > j.236-236D >> 214214C
|
|
level 3 super can be substituted with 236236A if you want to conserve burst
|
| [combo starter] >> 623C ~> C ~> C ~> D SOT > burst > 236A ~> 66A SOT > 214D ~> C >> 2C > 236D ~> B ~> B ~> B ~> C > j.236-236D >> 2A -> 2C > 236A ~> 66A SOT > [combo ender]
|
|
despite being a true loop, this combo is too long to be used twice in burst. so choose any combo or super you want to end it with
|
