Super Dodge Ball/System
Basics
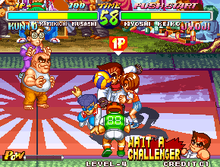
The core objective of this game is to throw dodge balls to deplete all three health bars of your opponent's characters. Each character has their own health bar, which determines how many more hits from dodge balls they can endure. Each team comes with one captain and two sidekicks, with the captain generally being the strongest in the team.
Players holding the ball can perform multiple different throws to attack their opponent. Each character has their own set of moves. Generally, running and jumping add more power to your shots, with running air throws doing the most damage out of all the regular throws. Team captains have access to two special moves and a super move, while sidekicks have access to only one special move. Players on defense must catch the ball, or they will take damage. Chip damage is received if the catch button is pressed too early or too late in most cases. Players can also reflect the ball back to the opponent by performing a DP motion.
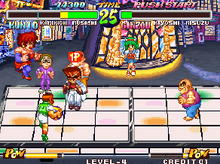
Once a character's health bar is depleted, they are removed from the inner court and sent to the outer court. The round is over once all team members on a side are removed from the inner court. At the end of the game, you will be offered to take your opponent's team captain into your team. Keep in mind that in most tournaments, you are not allowed to take your opponent's team captain to replace your sidekicks and that you must stick with the teams you can only select through the character select screen.
The Middle Line
If a player is holding a ball and they pass the middle line, the ball will be dropped. However, that does not mean that passing the middle line is disadvantageous, as the game will allow you to take one free action before the ball gets dropped. This means that you can still throw the ball after you step over the line. If you jump while running past the line, you can travel a further distance within the opponent's side. This can provide good mixup opportunities if you go over your opponent, as players cannot catch balls from behind. Players can take up to a second to automatically fully turn to where the ball is, but turning around can be done immediately by running towards the opposite direction.
Jumping over the line can provide a good payoff, but it comes with risks. If your offensive plan fails, you're potentially left open to attacks, as the game forces your character to slowly walk back to your side. This slow process can be avoided by performing backdashes. Not only does backdashing help bring you back to your side quicker, but it also lets you perform a catch, allowing you to defend yourself as you try to make it back to your side. Once you make it back to your side, you regain full control of your character again.
The Outer Field
When a character's health gets depleted, they are sent to the opposing side's outer court. This may sound stressful at first since one of your characters is eliminated, but having a character on your opponent's outer field opens up new opportunities. You can pass the ball to a teammate on the outer field and have them attack your opponent from behind. Keep in mind that players cannot catch the ball while facing the opposite direction, which means that this can leave them open.
You can also move around the perimeter of the field to further cause confusion on which side you'll be attacking. Try to strategize your shot so that it hits teammates your opponent isn't currently controlling, as those teammates cannot catch while they aren't being directly controlled by a player.
You can still defend yourself from outer field mix up situations. By standing in front of their teammate and performing a jumping catch, you can intercept the ball before it reaches their teammate. If you are too far away from the receiving opponent, you can dash towards the receiving opponent so that you are facing the correct direction. Don't depend too much on the game's auto turning when the opponent passes to their teammates on your side's outer field, as it is slower and can leave you open if you're facing the wrong direction.
It is generally a good idea to have your team captain be the first person sent to the outer field, as they generally have more moves that let them do cross-ups and moves that can hit multiple teammates. You can also still perform your captain's team super move even if they are on the outer field, but you must pass the ball to them.
Power Gauge
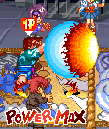
The power gauge builds up as you take damage. You can also build meter by pressing A and B together while not holding the ball. You can also reduce your opponent's meter by performing a taunt while you are not holding the ball. Having a full meter gives you access to your super move, but only team captains can perform this move. If a sidekick is holding the ball, you must pass the ball to the captain to perform the super move. You can choose to hold on to the full meter, as this allows you perform moves in sync with your teammates. This means that if you perform a DP, your teammates will also perform the DP, which allows them to defend themselves. Your full meter disappears after a short time though, so you may want to perform your super move before it's gone.
It's generally good to throw out your super for most characters, even if it's predictable. This is because it still deals huge chip damage to your opponent if they catch it, and the chip damage itself is equivalent to landing a running air throw. Opponents too can get eliminated from chip damage, so you can use super moves to take out an opponent with low health.


