Background
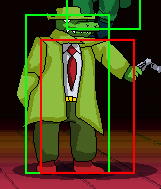
Azuma has been a crime scene investigator (get it?) in the police force for over 15 years.
His tough attitude and tall stature may give him a commanding presence that intimidates both criminals and colleagues alike, but he is a caring and kind gator at heart.
He rarely ever shoots his gun outside of the shooting range, but is well known among the police for his speed and accuracy. Whenever the police are investigating anything that may be only a little dangerous, they are always sure to bring Azuma along. Ever since he lost his best friend and sidekick in an incident with the mafia, stress has taken its toll on him. To make matters worse, his wife has fallen ill with something doctors can’t quite identify. For the sake of his wife and his mental health, Azuma has taken leave from detective work for a while, but he knows he can’t relax completely. If he’s truly needed for an investigation, he won’t be able to say no.
Overview
Playstyle
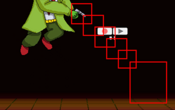
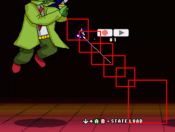
 Investigator Azuma, or just Azuma, has a GUN. Azuma can invalidate one of three lanes with his X buttons, creating oppressive zoning. Investigator Azuma, or just Azuma, has a GUN. Azuma can invalidate one of three lanes with his X buttons, creating oppressive zoning.
|
| Pros |
Cons |
- Great Buttons: Deka's 5X is a fullscreen poke, not a projectile. Deka's j.X is a 3/4ths-screen overhead. 5B is an insanely fast and advantageous scramble button. 5A is a unique jab with no start-up and an anti-air hitbox. --...and j.B is a ridiculously good instant overhead, with the option to j.A if Deka doesn't want to change his momentum.
- Top-5 Ultra: Ultra 1, Deka's GUN, is a fullscreen hyper-viper beam poke that deals 120 damage and invalidates match-ups. One slip-up, shots will be fired.
- Zoner's Paradise: All of Deka's X buttons invalidate an option. 2X stops walking, 5X stops jumping, j.X stops a slow crouching approach. It can be a one-player game if Deka has any sort of meter/life lead, which is easy to get thanks to his extra health. Even his bad match-ups are suffocating.
- Extra Bulk: Deka has a +20 HP and +5 Boko boost for being a big-body, making him extra survivable and more willing to take trades.
|
- Tall & Exploitable: Characters can have infinites and instant overhead setups exclusive to the Gators just for their height and width, making it hard for them to get out of bad situations.
- Must Take Risks: Deka has great zoning, but poor meter-gain and bad damage without being in the opponent's face or spending meter. His buttons trade very often up close and spending meter can make the next character in the team an uphill battle. Not to mention that Deka cannot mix without being in the opponent's face, which can be used to force Deka to approach if the opponent is on-point with parries.
- No Meter Taunt: Meter taunts are free economy and help immensely. Not having one, especially with Deka's zoning complimenting it, makes him a harder character to play than he already is.
- Absolutely NO REVERSALS: Deka cannot get out of bad situations and his buttons trade very often, if he loses his zoning or meter/life lead, the opponent can just hold him down for the rest of the game.
|
Movelist
5A
|
| Damage
|
Guard
|
Startup
|
Active
|
Recovery
|
Invuln
|
Adv. Hit
|
Adv. Block
|
Adv. Parry
|
Effect
|
| 3 (Hi-hit)/5 (Low-hit.)
|
Mid
|
0
|
2
|
5
|
0
|
?
|
?
|
?
|
N/A
|
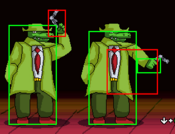
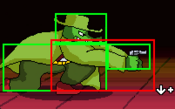
A quick multi-hit jab that can anti-air in rare cases or multi-hit on very tall opponents or in juggles.
Applies well in corner combos, doesn't reversal despite being 0f due to poor hitboxes, essentially giving it 1f of start-up.
In juggles and for confirming U1, you may want to opt for 2A instead since 5A has very long recovery.
|
|
2A Deka's ONLY low Deka's ONLY low
|
| Damage
|
Guard
|
Startup
|
Active
|
Recovery
|
Invuln
|
Adv. Hit
|
Adv. Block
|
Adv. Parry
|
Effect
|
| 5
|
Low
|
1
|
2
|
3
|
0
|
?
|
?
|
?
|
N/A
|
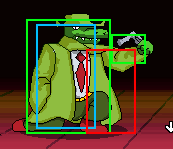
Okay low-jab, your only low as Deka and the only way to "mix-up" after j.A/B.
The only way to confirm U1 off a jump-in.
Middle-of-the-line, nothing special.
|
|
J.A
|
| Damage
|
Guard
|
Startup
|
Active
|
Recovery
|
Invuln
|
Effect
|
| 15
|
High
|
9
|
Until Ground
|
Until Ground
|
0
|
N/A
|
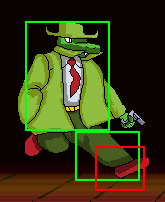
Looks bad, seems bad, very safe jump-in with a reliable hitbox to catch things.
Although not as good as other character's j.As, it's versatile for how limited Deka is.
|
|
5B
|
| Damage
|
Guard
|
Startup
|
Active
|
Recovery
|
Invuln
|
Adv. Hit
|
Adv. Block
|
Adv. Parry
|
Effect
|
| 25
|
Mid
|
6
|
6
|
7
|
0
|
Knockdown
|
?
|
?
|
KD, KB
|
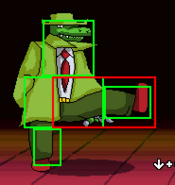
A fast kick that launches, combined with 5A it can juggle in the corner.
Has extra knockback, after hit it'll launch players to the other side of the screen, useful for establishing space
5B's movement is also faster than normal walking, you can spam it repeatedly to quickly reach corner. Cancels into U1 so can be used as pseudo dash in between U1 to corner carry.
|
|
2B Still Azuma's worst move Still Azuma's worst move
|
| Damage
|
Guard
|
Startup
|
Active
|
Recovery
|
Invuln
|
Adv. Hit
|
Adv. Block
|
Adv. Parry
|
Effect
|
| 15, 30 (43)
|
High
|
?
|
?
|
?
|
?
|
?
|
?
|
?
|
N/A
|
this text is a placeholder until I redo the move's info
apparently tho, harama caught wind of the goofin on this move, since it's terrible, so it got sped up.
it's *faster* now but the damage was reduced and split into two hits so you're minus, so you can't use it in combos anymore
ironically enough, j.B/j.EX are still faster and both lead into full combo while you can't get a combo after 2B, even using the old Grab > KC > 2B setup
so yet again, bad moves have cases where they're useful despite being bad, this just doesn't, avoid this move at all costs.
|
|
J.B THE PEOPLE'S ELBOW THE PEOPLE'S ELBOW
|
| Damage
|
Guard
|
Startup
|
Active
|
Recovery
|
Invuln
|
Effect
|
| 20
|
High
|
11
|
Until Ground
|
Until Ground
|
0
|
N/A
|
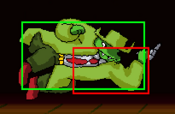
It's a blazing fast move with no recovery, odd movement that makes it surprisingly evasive, and a great hitbox.
Not to mention the move is an unreactable overhead, that you can combo off of.
Use it.
|
|
5X GUN GUN
|
| Damage
|
Guard
|
Startup
|
Active
|
Recovery
|
Invuln
|
Adv. Hit
|
Adv. Block
|
Adv. Parry
|
Effect
|
| 18
|
Mid
|
11
|
3
|
16
|
0
|
?
|
?
|
?
|
N/A
|
It's a fullscreen GUN. It's not a projectile.
The reason anyone plays this character, not very spammable, you have to treat it as a fullscreen poke rather than a screen-polluting projectile as players can just walk forward even on hit.
You're banking on air-hits to "zone" with this move, as it launches players far, most of the time a ground-hit will be punished.
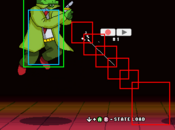
During 5X, Deka's hitboxes randomly shake, which can lead to Deka being "airborne" during 5X or getting hits he shouldn't.
Can cancel into U1, so its very viable to 5X confirm U1.
It's very slight RNG, but every once in awhile it can result in Deka being knocked down on 5X counter-hit, or getting out of something by accident.
Here's a video: 5X Oddity
|
|
2X Deka's saving grace Deka's saving grace
|
| Damage
|
Guard
|
Startup
|
Active
|
Recovery
|
Invuln
|
Adv. Hit
|
Adv. Block
|
Adv. Parry
|
Effect
|
| 10
|
Mid
|
12
|
177
|
7
|
0
|
?
|
?
|
?
|
N/A
|
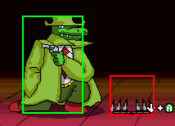
A small little trap you can place down to make your stage control more oppressive, always keep one out if you can afford it, only one can be out at time.
This single-handedly makes 5X safe and commands players to jump-in, which is how 5X is able to "zone".
|
|
J.X 3/4ths screen overhead 3/4ths screen overhead
|
| Damage
|
Guard
|
Startup
|
Active
|
Recovery
|
Invuln
|
Effect
|
| 18
|
High
|
7
|
3
|
Until Ground
|
0
|
N/A
|
Air gun, serves the same purpose as 5X, however this isn't fullscreen.
It does travel very very far though and is useful for punishing people who block-low (or low-profile) against 5X or U1.
Has a natural flash bonus on a full-jump j.X, which makes this move especially good at building meter.
|
|
5EX
|
| Damage
|
Guard
|
Startup
|
Active
|
Recovery
|
Invuln
|
Adv. Hit
|
Adv. Block
|
Adv. Parry
|
Effect
|
| 15*2(28)
|
Mid
|
5
|
6
|
18
|
1-5
|
Knockdown
|
?
|
?
|
KD
|
A beefier 5X, nothing much really.
It can knockdown, so it may be smart to mix this in every once in awhile if you have your opponent backed up against a wall and they're parrying 5X or shooting projectiles in-between 5Xs.
More often than not, the second hit won't connect, so don't rely on it for the extra damage, just rely on it for the knockdown.
|
|
2EX get used to parrying on wake-up get used to parrying on wake-up
|
| Damage
|
Guard
|
Startup
|
Active
|
Recovery
|
Invuln
|
Adv. Hit
|
Adv. Block
|
Adv. Parry
|
Effect
|
| 20*2(38)
|
High
|
7
|
5
|
9
|
1-16
|
Knockdown
|
?
|
?
|
KD
|
Despite seeming better, shares a lot of the same problems that 2B has.
It's much faster and much more invulnerable, but it builds off of a very bad move.
Since the hitbox is so low, you can only reversal with this after doing a parry.
Deka basically has no reversal.
|
|
J.EX 1f overhead 1f overhead
|
| Damage
|
Guard
|
Startup
|
Active
|
Recovery
|
Invuln
|
Effect
|
| 15*2(28)
|
High
|
1
|
4
|
Until Ground
|
1-5
|
KD
|
Just a ridiculously broken version of j.X, insanely fast and unlike 5EX both hits will consistently connect.
An instant overhead with proper timing, can be applied in juggles and can act as a pseudo-reversal.
Unreactable.
|
|
Ultra 1 (Y) YOUR LIFEBLOOD YOUR LIFEBLOOD
|
| Damage
|
Guard
|
Startup
|
Active
|
Recovery
|
Invuln
|
Adv. Hit
|
Adv. Block
|
Adv. Parry
|
Effect
|
| 20*5(120)
|
Mid
|
0
|
1(18)1(18)1(18)1(18)1
|
16
|
1-53
|
Knockdown
|
?
|
?
|
KD, KB
|
Instantaneous full-screen gun that invalidates match-ups.
It's the best ultra in the game. It absolutely carries Deka.
Still, there's some caveats:
- The scaling makes it ineffective after 2 U1s, U1'ing more than twice is a waste of meter unless it kills.
- Requires a delay to properly get all hits after most knockdowns or off another U1. Delay it for full damage.
- Super-flash is reactable technically making it 1f, the opponent can block on reaction or hold KC which lets them block if they were in a move.
- U1 whiffs entirely on Masao and Kyanta when they are crouching, even on hit. This does not apply to Jakor however, although she can still crouch it to avoid it.
|
|
Ultra 2 (j.Y) Use U1 instead Use U1 instead
|
| Damage
|
Guard
|
Startup
|
Active
|
Recovery
|
Invuln
|
Effect
|
| 20*5(120)
|
High
|
7
|
2(6)2(6)2(6)2(6)2(6)
|
Until Ground
|
1-31
|
KD, KB
|
A very very mediocre ultra. It's not useless but it's not good either as compared to U1.
You'll almost never see this ran seriously.
|
|
Grab (AB)
|
| Damage
|
Guard
|
Startup
|
Active
|
Recovery
|
Invuln
|
Adv. Hit
|
Adv. Block
|
Adv. Parry
|
Effect
|
| 15*3(45)
|
Grab
|
3
|
4
|
5
|
0
|
Knockdown
|
Knockdown
|
N/A
|
KD
|
A standard run-of-the-mill grab that can't be combo'd out of without the use of KC.
Very big hitbox too, which is much easier to connect than other grabs due to Deka's big hurtbox.
|
|
Taunt (Select) "Reloading like this... it's a revolution!" "Reloading like this... it's a revolution!"
|
| Damage
|
Guard
|
Startup
|
Active
|
Recovery
|
Invuln
|
Adv. Hit
|
Adv. Block
|
Adv. Parry
|
Effect
|
| +20 to next attack
|
N/A
|
N/A
|
N/A
|
52
|
N/A
|
N/A
|
N/A
|
N/A
|
N/A
|
Deka pulls his best Revolver Ocelot impression and spins his gun.
It's actually pretty good, it's not meter, but +20 dmg on zoning is very applicable since you can confirm the taunt off of every AA 5X.
Goes away on hit, block, or parry like most damage buffs.
|
|
Combos
| Notation Help
|
Disclaimer:
Combos are written by various writers, so notation may differ slightly from this notation.
For more information, see Controls.
Character-specific notation, will be on the character's page.
|
| FB
|
Refers to the act of gaining a "Flash Bonus", which grants you extra meter, on the hit of a move.
|
| KC
|
Refers to pressing B+Y on the same frame, or the macro-button for B+Y. This is known as a Kyanta-Cancel, this game's Roman-Cancel.
|
| DC
|
Refers to cancelling a move by activating Demon type's buff, similar to KC.
|
| XEX
|
Refers to pressing X+Y on the same frame, or the macro-button for X+Y.
This is known as an EX move, for example: j.EX>5EX>2EX.
|
| {X/Y/Z}
|
Move X or Y or Z can be used.
|
| #X
|
Indicates that any of A, B and C may be used with #. Example: 3A (Down-right, Light.)
If you have trouble with this notation, you may want to google for "Numpad Notation" elsewhere.
|
| (X)xN or (X)xN-N
|
Loop the inputs in the square brackets or parenthesis as many times as N, sometimes doesn't include brackets or parenthesis but still means the same thing.
Also occasionally includes a dash to indicate that a varying amount of hits can be performed.
|
| j.X
|
Button X is input while you are in the air jump.
|
| X(whiff)
|
Indicates that X is intended to whiff.
|
| (Delay) or (Wait)
|
Indicates a short delay on the hit.
|
| (X)
|
X move is omittable from the combo, this will be mentioned in the hover text.
|
| tk.X
|
Indicates the motion "X" is input immediately after leaving the ground. Stands for tiger knee.
|
| AA
|
Indicates the move hits an opponent in the air, referred to as an Anti-air. Hence AA.
|
| [X]
|
Indicates if a move should be held down.
|
| ]X[
|
Indicates if a held move should be released, for example: 5[B] > 5]B[.
|
Midscreen
| Condition
|
Notation
|
Damage
|
Notes
|
|
Midscreen
2 Bar
Works On: All
|
*j.B > 5B > U1 > (delay)U1
|
207
|
|
| Meter Gained: .20 Bar (Depends on starter) |
Meter Spent: 2 Bar |
(Video) |
The premier Deka combo, his BnB more or less.
Takes 2 Bars and has a bit of an annoying starter, this starter is only listed since it does max damage.
Here's all the KC-less starters for U1:
- j.B > 5A > U1
- 5B > U1
- 2/5Ax3 > U1
- 2EX > U1
- j.EX > U1
- 2X > U1
- j.B > 2B > U1 (Taro-only)
Any one of these starters work, the best starter j.B > 5B only works midscreen, so use a different one in the corner.
If you confirm it in any way that uses more than 2 hits, do not delay the second U1.
Then use the optimal follow-up.
If you hit U1 at midscreen, the optimal follow-up is:
(U1 >) 5X > Taunt (yes, taunt is unironically the best ender)
If you hit U1 in the corner, the optimal follow-up is:
(U1 >) 5B > 5Ax3 > 2X
|
|
|
Midscreen
0 Bar
Works On: All
|
|
21
|
|
| Meter Gained: .25 Bar |
Meter Spent: 0 Bar |
(Video) |
Annoying jump-in, only listed for the fact it's a high/low.
Has to be done kind of deep into the opponent's hitbox to get more than one 2A, just do one 2A if you're uncomfortable with it.
Only really useful for when they wise-up to j.B > 5B, or just 5B raw, which are your only ways of getting people off you.
j.A > 2A also is a good confirm for U1, if you're in the corner you can get 3 2As but you have to omit the second U1. |
|
|
Midscreen
0 Bar
Works On: All
|
|
43
|
|
| Meter Gained: .20 Bar |
Meter Spent: 0 Bar |
Preferred jump-in when you're not just doing 5B raw.
Knockdown fullscreen with a good chunk of damage that confirms into your BnB, assuming you're not in the corner.
If you're in the corner, swap this opening out with something like j.A > 2A to confirm into U1. |
|
|
Close-To-Corner
| Condition
|
Notation
|
Damage
|
Notes
|
|
Close-To-Corner
2 Bar
Works On: All
|
- j.B > 5B > U1 > 5B > U1 > 5B > 5Ax3 > 2X
|
231
|
|
| Meter Gained: .20 Bar (Depends on starter) |
Meter Spent: 2 Bar |
(Video) |
Double U1 version of the BnB when close to corner that gets the ender.
Listed again but as a full combo, just for simplicity's sake. |
|
|
Corner
| Condition
|
Notation
|
Damage
|
Notes
|
|
Corner
0 Bar
Works On: All
|
- 5B > 5A > j.B > 5Bx2 > 5/2Ax3 > 2X
|
89
|
|
| Meter Gained: .75 Bar |
Meter Spent: 0 Bar |
(Video) |
The optimal meterless corner combo.
5B > 5A has ridiculous spacing requirements, not very practical but kudos if you can land it. |
|
|
Corner
1.5 Bar
Works On: All
|
- 5B > 5A(1-hit) > KC > 4 > 5B(FB) > U1 (All hits must connect) > 5B > (5A)x2 > 2X
|
184
|
|
| Meter Gained: .75 Bar |
Meter Spent: 2 Bar |
(Video) |
FB-bonus combo that reduces the cost of a TOD down from 2 Bar to 1.5 Bar.
Still, very difficult 5B > 5A spacing requirements. Kudos if you hit this. |
|
|
Corner
0 Bar
Works On: Taro-only
|
|
72
|
|
| Meter Gained: .40 Bar |
Meter Spent: 0 Bar |
(Video) |
| Another Taro-only 2B meme combo, really good damage and a knockdown, use this in place of the normal combo when fighting Taro. |
|
|
Corner, Taro-only
1 Bar
Works On: All
|
- j.B > 2B > U1 > 5B > (5A)x3 > 2X
|
176
|
|
| Meter Gained: .5 Bar |
Meter Spent: 1 Bar |
(Video) |
Taro-only meme combo that TODs Taro before it's even done.
Cuts the price of a TOD down to a bar and gives you .5 after completion. |
|
|
Other Resources/Notable Players
Other Guides/Showcases
2nd Impact combos
Azuma-Deka Rad Lad Guide by Durdge-o
Investigator Azuma: Outsmarted By YFDHippo
Investigator Azuma - Hardboiled By YFDHippo
IBBE UPDATE
Investigator Azuma - Bayou Gator Blues By YFDHippo
Notable Players
Disclaimer: This list is derived from community input and is in no way comprehensive or a form of ranking of any kind. Our community criteria can be found here.
| Usual Color |
Handles/Links |
Region |
Status |
Notes
|
| Color 02
|
Durdge-o
|

United States
West Coast
|
Active
|
 Robo-Azuma / Robo-Azuma /  ZackyWild / ZackyWild /  Rogue Rogue
|
|
|
YFDHippo
|

United States
West Coast
|
|
|
| General
|
|
| Advanced
|
|
| Characters
|
|

