Cocorn Blood type: Type O
Pronoun: He/Him
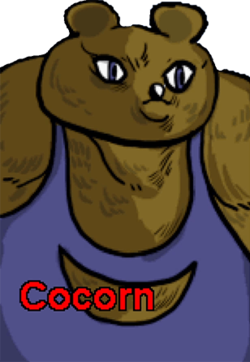
Race: Bear
Birthday: June 14th (Gemini)
Background
Cocorn was raised in poverty by hard-working parents that did all they could to provide for him.
He understood from an early age that he would have to work hard to escape the debt of his family.
Through struggle, sacrifice, and barley he became an amateur professional wrestler that is well known for his aerial techniques.
It earns him money, but the contracts are short-term, so his funds still aren’t stable.
Cocorn woke one morning to find that an entire village had sprang up overnight outside his doorstep.
Travelers from a distant land, escaping a war had come to the forest to seek refuge.
Cocorn was also taught by his parents to help those in need, so he did his best to help these people but what he needed most was food.
With winter fast approaching, he was running out of time. So he turned his sights on gaining the World Championship's Grand Prize.
Likes:
- Wrestling
- Honey
- Gazing at nature with his best friend, Nanatsu
- Barley
- Training
- Che Guevara (Deep In-joke)
Dislikes:
- The wanton treatment of the poor by the rich elite
- Chairs
Win Quotes:
- "Through hardship, I become stronger."
- "You need more training, and barley."
- "Through barley, I become stronger..."
Overview
Playstyle
|
Recommended Types: Stamina
 Cocorn is bearly (hehe) a grappler. He's Super Turbo Vega (Claw) with command grabs, not Zangief with vega-claw sadly. Cocorn is bearly (hehe) a grappler. He's Super Turbo Vega (Claw) with command grabs, not Zangief with vega-claw sadly.
|
| Pros |
Cons |
- Amazing Ultras: Cocorn's U1 is a Raging Demon similar to Gyanta's, with heftier damage. While Cocorn's U2 is a 160-dmg jump-in that has to be red parried to be punished, which helps him force approaches and pump out high damage combos.
- Unique Grabs: Command grabs are insanely powerful in Kyanta 2, despite being rare. It gives him the ability to completely OS wake-ups and force your way in on parrying opponents. Not to mention Cocorn's normal grab, being the only one to have a fullscreen carry and do 60 DMG. It's amazing, especially against zoners or neutral characters who don't want you having the corner.
- Great Air Options: j.X is just vega-claw, scary in the right hands, useless in most. It has predictable timing and a very disadvantageous hurtbox, but it's insanely valuable as a big-body and leads to easy cross-ups. j.A can be done to mix-up j.X or to approach from a lower faster angle and U2 compliments these two options completely.
- Easy Pick-ups: Some characters have to fish for a specific combo starter, but Cocorn can get the same starter off of several of his moves. With his command grab even being a common and useful combo starter.
- Extra Bulk: Cocorn has a +20 HP and +5 Boko boost for being a big-body, making him extra survivable and more willing to take trades.
|
- Tall & Exploitable: Characters can have infinites and instant overhead setups exclusive to Cocorn just for their height and width, making it hard for them to get out of bad situations.
- Linear Approach: Cocorn's tools, while good, are insanely linear and his huge hurtbox doesn't do him any favors. j.X is insanely easy to swat out of the air, even for characters who can't anti-air. His EXs halt his momentum, making it harder to get in on smart opponents.
|
Movelist
Tech
Command Grab Control (5X/U1)
Unlike most command grabs, after either 5X or U1 you can choose which side you want for Oki by holding that direction.
After the leap on 5X, you can immediately hold a button, since you're technically grounded.
This kills some recovery frames and can potentially setup Oki, other than that it's mainly a visual glitch.
Moves
5A
|
| Damage
|
Guard
|
Startup
|
Active
|
Recovery
|
Invuln
|
Adv. Hit
|
Adv. Block
|
Adv. Parry
|
Effect
|
| 5
|
Mid
|
2
|
1
|
2
|
0
|
?
|
?
|
?
|
N/A
|
Decent 2f 5A.
2f so it'll trade more often, better to do 2A if given the opportunity.
|
|
2A
|
| Damage
|
Guard
|
Startup
|
Active
|
Recovery
|
Invuln
|
Adv. Hit
|
Adv. Block
|
Adv. Parry
|
Effect
|
| 5
|
Low
|
1
|
2
|
2
|
0
|
?
|
?
|
?
|
N/A
|
A nice 1f 2A.
A pretty good poke with a slight disjoint.
|
|
J.A Air Dash Air Dash
|
| Damage
|
Guard
|
Startup
|
Active
|
Recovery
|
Invuln
|
Effect
|
| 10
|
High
|
11
|
4
|
4
|
0
|
N/A
|
Cocorn moves forward horizontally in a slow-moving arc, ends in the air.
Great for movement and combos, since it ends in the air you're able to parry and attack afterwards.
|
|
5B
|
| Damage
|
Guard
|
Startup
|
Active
|
Recovery
|
Invuln
|
Adv. Hit
|
Adv. Block
|
Adv. Parry
|
Effect
|
| 20
|
Mid
|
6
|
10
|
8
|
0
|
?
|
?
|
?
|
KB
|
A 1-hit forward moving heavy knee attack.
Hitting with the end active frames makes it safe. Good for movement.
|
|
2B
|
| Damage
|
Guard
|
Startup
|
Active
|
Recovery
|
Invuln
|
Adv. Hit
|
Adv. Block
|
Adv. Parry
|
Effect
|
| 20
|
Low
|
12
|
4
|
3
|
0
|
?
|
?
|
?
|
KD, KB
|
Low Moving sweep.
Pretty good for catching people off-guard since it's a commanding low.
2B is also a very good combo starter at the corner.
|
|
J.B
|
| Damage
|
Guard
|
Startup
|
Active
|
Recovery
|
Invuln
|
Effect
|
| 25
|
High
|
8
|
Until Ground
|
Until Ground
|
0
|
N/A
|
Cocorn drops down with a leg drop.
The usual active until landing jump-in.
|
|
5X Light SPD Light SPD
|
| Damage
|
Guard
|
Startup
|
Active
|
Recovery
|
Invuln
|
Adv. Hit
|
Adv. Block
|
Adv. Parry
|
Effect
|
| 40
|
Grab
|
13
|
7
|
11
|
0
|
Knockdown
|
Knockdown
|
N/A
|
KD
|
Very fast command grab, the hitbox extends far in front of Cocorn, fast but easy to react to.
Once the grab hits, he's completely invulnerable, but he gets bad okizeme.
This is the "LIGHT SPD"-variant of Cocorn's grabs, his normal grab is "HEAVY SPD".
Although it's far more advantageous to KC 5X as opposed to normal grab, since you get a natural FB and a chunkier combo.
|
|
2X
|
| Damage
|
Guard
|
Startup
|
Active
|
Recovery
|
Invuln
|
Adv. Hit
|
Adv. Block
|
Adv. Parry
|
Effect
|
| 15*2,11(35)
|
Mid
|
2
|
15
|
29
|
1-11
|
Knockdown
|
?
|
?
|
KD, KB
|
A very okay DP, it does it's job as an anti-air, but using it as a reversal is sure to get you punished.
Most of the cast has special ToDs and punishes for a whiffed 2X, much like Kyanta's 2X, although this is far easier to bait and punish.
You could opt for 2EX to alleviate this, but that doesn't beat free, so you'll be relying on this no matter what.
|
|
J.X Claw Claw
|
| Damage
|
Guard
|
Startup
|
Active
|
Recovery
|
Invuln
|
Effect
|
| 20
|
High
|
26
|
Until Ground
|
Until Ground
|
0
|
KD
|
Literally ST Vega's Claw.
Cocorn flips and comes down, independent of a wall-dive.
Good for adjusting movement, avoiding incoming mix-ups, and approaching.
You have a certain degree of control after the flip too, although the timing is always consistent.
|
|
5EX High Speed Barrage High Speed Barrage
|
| Damage
|
Guard
|
Startup
|
Active
|
Recovery
|
Invuln
|
Adv. Hit
|
Adv. Block
|
Adv. Parry
|
Effect
|
| 20*4(54)
|
Mid
|
3
|
2(6)2(6)2(6)2
|
7
|
1-29
|
Knockdown
|
?
|
?
|
KD
|
Forward moving multi-hit Q hand-slaps.
Very invulnerable but you essentially return to neutral on hit or block.
|
|
2EX
|
| Damage
|
Guard
|
Startup
|
Active
|
Recovery
|
Invuln
|
Adv. Hit
|
Adv. Block
|
Adv. Parry
|
Effect
|
| 15*2,30(54)
|
Mid
|
0
|
12
|
12
|
1-17
|
Knockdown
|
?
|
?
|
KD
|
2X but slightly better, almost impossible to punish on reaction.
In most cases it's better to just use 2X since it's free and has the same invulnerability.
|
|
J.EX
|
| Damage
|
Guard
|
Startup
|
Active
|
Recovery
|
Invuln
|
Effect
|
| 30*2(58)
|
Mid
|
2
|
12
|
Until Ground
|
1-14
|
KD
|
This is your main approach tool when the chips are down in a bad match-up.
It's lightning fast with proper tk.j.EX timing and a great falling jump-in if timed late.
|
|
Ultra 1 (Y) Running Bear Grab
(Flying Power Bomb?) Running Bear Grab
(Flying Power Bomb?)
|
| Damage
|
Guard
|
Startup
|
Active
|
Recovery
|
Invuln
|
Adv. Hit
|
Adv. Block
|
Adv. Parry
|
Effect
|
| 125
|
Grab
|
?
|
?
|
?
|
?
|
Knockdown
|
Knockdown
|
N/A
|
KD
|
Cocorn moves forward and grabs the opponent delivering a punishing piledriver.
This is just a Raging Demon, even better than Gyanta's Raging Demon.
Unlike Gyanta, this command grab does 125 DMG, has better movement, and has a better hitbox.
|
|
Ultra 2 (J.Y)
|
| Damage
|
Guard
|
Startup
|
Active
|
Recovery
|
Invuln
|
Effect
|
| 25*10(160)
|
High
|
?
|
?
|
?
|
?
|
KD
|
Nasty Ultra, does practically anything it wants, all for one bar!
Completely plus on block, parry, and hit.
Can only be red-parried on the last hit to escape, playing against Cocorn means you must learn this parry.
|
|
Grab (AB) Heavy SPD Heavy SPD
|
| Damage
|
Guard
|
Startup
|
Active
|
Recovery
|
Invuln
|
Adv. Hit
|
Adv. Block
|
Adv. Parry
|
Effect
|
| 15*4(60)
|
Grab
|
3
|
4
|
5
|
0
|
Knockdown
|
Knockdown
|
N/A
|
KD
|
Cocorn repeatedly suplexes the opponent.
Does great damage and is a fullscreen corner-carry to boot.
You use 5X to condition, you use normal grab when you're IN.
|
|
Taunt (Select)
|
| Damage
|
Guard
|
Startup
|
Active
|
Recovery
|
Invuln
|
Adv. Hit
|
Adv. Block
|
Adv. Parry
|
Effect
|
| +1 bar to EX gauge
|
N/A
|
?
|
N/A
|
?
|
N/A
|
N/A
|
N/A
|
N/A
|
N/A
|
Grants 1 full bar of EX gauge, it's worth going for even though he can't reliably hide behind any projectile.
|
|
Combos
| Notation Help
|
Disclaimer:
Combos are written by various writers, so notation may differ slightly from this notation.
For more information, see Controls.
Character-specific notation, will be on the character's page.
|
| FB
|
Refers to the act of gaining a "Flash Bonus", which grants you extra meter, on the hit of a move.
|
| KC
|
Refers to pressing B+Y on the same frame, or the macro-button for B+Y. This is known as a Kyanta-Cancel, this game's Roman-Cancel.
|
| DC
|
Refers to cancelling a move by activating Demon type's buff, similar to KC.
|
| XEX
|
Refers to pressing X+Y on the same frame, or the macro-button for X+Y.
This is known as an EX move, for example: j.EX>5EX>2EX.
|
| {X/Y/Z}
|
Move X or Y or Z can be used.
|
| #X
|
Indicates that any of A, B and C may be used with #. Example: 3A (Down-right, Light.)
If you have trouble with this notation, you may want to google for "Numpad Notation" elsewhere.
|
| (X)xN or (X)xN-N
|
Loop the inputs in the square brackets or parenthesis as many times as N, sometimes doesn't include brackets or parenthesis but still means the same thing.
Also occasionally includes a dash to indicate that a varying amount of hits can be performed.
|
| j.X
|
Button X is input while you are in the air jump.
|
| X(whiff)
|
Indicates that X is intended to whiff.
|
| (Delay) or (Wait)
|
Indicates a short delay on the hit.
|
| (X)
|
X move is omittable from the combo, this will be mentioned in the hover text.
|
| tk.X
|
Indicates the motion "X" is input immediately after leaving the ground. Stands for tiger knee.
|
| AA
|
Indicates the move hits an opponent in the air, referred to as an Anti-air. Hence AA.
|
| [X]
|
Indicates if a move should be held down.
|
| ]X[
|
Indicates if a held move should be released, for example: 5[B] > 5]B[.
|
Universal
Midscreen
0 BAR
j.X > 5A (23)
Close-To-Corner
0 BAR
j.X > 5A > j.B > 2X (61)
Corner
1 BAR
j.A > j.EX > 5EX > 2X (91)
j.A > (tk.j.EX)x2 (88)
2+ BAR
2B > 5A > 5B > 5A > (2X > KC)x4 > j.B > 2X (174)
j.X > 5A > j.B > (2X >KC )x4 > j.B > 2X (180)
Ultra 1
Midscreen
1 BAR
j.B > 5Y 150DMG
2A > 5A > U1 (133)
j.B > 5A > U1 (153)
2 BAR
M2B-j.X > KC > j.A > j.B > U1 (170)
Corner
.75 Bar
j.B > (5A)x3>U1-(159)
2 BAR
j.B > (5A)x2 > KC > (5A)x2 > U1 (182)
Ultra 2
Midscreen
1 BAR
j.B > 5A > U2 > 2X (153)
1.5 BAR
U2 > 2EX (172)
j.EX > U2 > 2X (189)
2 BAR
2B > 5A > U2 > 2X > KC > 2X (180)
2X > KC > U2 > (5A)x2 > 2X (183)
5B > KC > U2 > 2X (183)
M2B-5X > KC > U2 > 2X (186)
M2B-j.X > 5A > U2 > 2X > KC > 2X (180)
EX U2
Midscreen
1 BAR
5X > KC > j.B(FB) > 5B > 5A > U2 > 2X (181)
5X > KC > j.A > j.B > j.A(FB) > U2 > 2X (174)
(AA)5B > KC > 5B(FB) > U2 > 2X (186)
AA(j.A)x2 > U2 > 2X (146)
Other Resources/Notable Players
Other Guides/Showcases
For the Barley by YFDHippo
Notable Players
Disclaimer: This list is derived from community input and is in no way comprehensive or a form of ranking of any kind. Our community criteria can be found here.
| Usual Color |
Handles/Links |
Region |
Status |
Notes
|
|
|
Dantarion
|

United States
|
|
|
| Color 03
|
Lem
|
United States
East Coast
|
|
 K. Kyanta / K. Kyanta /  Cocorn Cocorn
|
| General
|
|
| Advanced
|
|
| Characters
|
|


