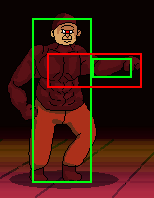
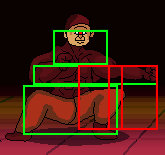
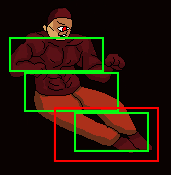
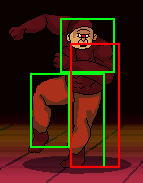
Ultra Fight Da! Kyanta 2/Well Done
Background
Well Done is an alien from a far away galaxy that exists only to spread destruction and misery.
He has both incredible physical strength and mastery of an incomprehensible cosmic energy.
He has the power to destroy entire planets, but simply destroying a planet is boring to him.
He much prefers to go to a planet with intelligent life and create chaos, toying with people and killing them one by one until there’s no one left.
He has selected Earth as his current target, and he is taking things even more slowly than usual.
He seems to have some goals in common with Michelle, and is working together with him to cause all kinds of mayhem.
Likes:
- Destruction
- Murder
- Suffering
- Chaos
Dislikes:
- Peace
- Happiness
- Order
Win Quotes:
- "Crush Murder Destroy"
- "Over Already? I'm dissapointed!"
- "I won't be done till your nothing but dust!"
Overview
Movelist
Tech
Option Selects / Neutral
- 2B Spam
2B hits low and is great for stopping slides, and standing parry attempts.
- Last Frame 5B
Hard to punish outside of a parry 5A, on block leaves you plus
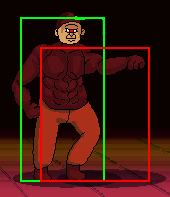
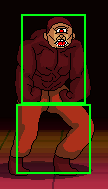
Low-profile Whiffs
5A, 5X prone to whiffing on some of the cast.
Here's the list of the characters who have an advantage
5A whiffs against Crouching: Kyanta, Buttobi, Anna, Jakor, Rogue, Garasha, Hisomi, Nanatsu, Gyanta, Kitana Kyanta, Masao, Hatoyan, Masako, Kinoko, Dr. K
5A whiffs against Standing: Taro
5X hits standing: Buttobi, Anna, Blues, Michelle, Inv. Azuma, Rare, Hisomi, Welldone, Cocorn, M.Michelle, Zacky, Natanee
5X hits crouching: Razuma
Slide under 2X: Kyanta 2B, Anna 2X, Chihiro 2X, Rare 2B, Nanatsu 2B, Kitana 2B, Masao 2B, Zacky 2X, Masako 2B, Kinoko 2B, Natanee 5X
Movelist
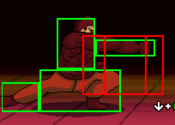
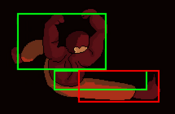
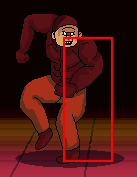
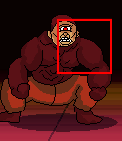
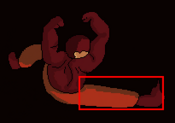
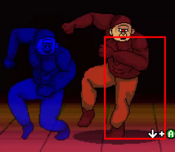
5A
|
|---|
2A
|
|---|
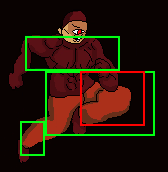
J.A
|
|---|
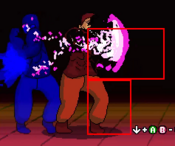
5B
|
|---|
2B
|
|---|
J.B Here comes the pain Here comes the pain
|
|---|
5X
|
|---|
2X
|
|---|
J.X
|
|---|
5EX Main Reversal Main Reversal
|
|---|
2EX
|
|---|
J.EX
|
|---|
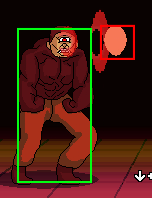
Ultra 1 (5Y)
|
|---|
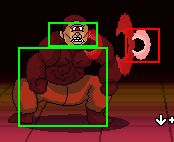
Ultra 2 (Y) Welldone Stun Punch Welldone Stun Punch
|
|---|
Grab (AB)
|
|---|
Taunt (Select)
|
|---|
Combos
| Notation Help | |
|---|---|
| Disclaimer: Combos are written by various writers, so notation may differ slightly from this notation. | |
| FB | Refers to the act of gaining a "Flash Bonus", which grants you extra meter, on the hit of a move. |
| KC | Refers to pressing B+Y on the same frame, or the macro-button for B+Y. This is known as a Kyanta-Cancel, this game's Roman-Cancel. |
| DC | Refers to cancelling a move by activating Demon type's buff, similar to KC. |
| XEX | Refers to pressing X+Y on the same frame, or the macro-button for X+Y. This is known as an EX move, for example: j.EX>5EX>2EX. |
| {X/Y/Z} | Move X or Y or Z can be used. |
| #X | Indicates that any of A, B and C may be used with #. Example: 3A (Down-right, Light.) If you have trouble with this notation, you may want to google for "Numpad Notation" elsewhere. |
| (X)xN or (X)xN-N | Loop the inputs in the square brackets or parenthesis as many times as N, sometimes doesn't include brackets or parenthesis but still means the same thing. Also occasionally includes a dash to indicate that a varying amount of hits can be performed. |
| j.X | Button X is input while you are in the air jump. |
| X(whiff) | Indicates that X is intended to whiff. |
| (Delay) or (Wait) | Indicates a short delay on the hit. |
| (X) | X move is omittable from the combo, this will be mentioned in the hover text. |
| tk.X | Indicates the motion "X" is input immediately after leaving the ground. Stands for tiger knee. |
| AA | Indicates the move hits an opponent in the air, referred to as an Anti-air. Hence AA. |
| [X] | Indicates if a move should be held down. |
| ]X[ | Indicates if a held move should be released, for example: 5[B] > 5]B[. |
MID
AA 5A, Taunt
5Ax2(Close),5B 29 DMG
5A(Close), 2A, 2B 29 DMG
AA 2B, j.Bx2,5Ax5,2B 88 DMG
.5Bar 2A, 5A, 5EX 38 DNG
.5Bar 5A, 2A, 2EX 38 DMG
.5 Bar 2EX, Taunt 43 DMG
.5 Bar OH j.EX, 2B, j.B, 5B 85 DMG
1 Bar 5X, KC, J.X(FB), j.B, 5Ax4, 5B 82 DMG
1 Bar Grab(1HIT), KC, j.Bx2, 5Ax4, 5B 92 DMG
1 Bar 5A, U1 98 DMG
1 Bar 2A, U1 98 DMG
1 Bar j.X, 2A, U1
1 Bar j.X, 5A, U1
1 Bar 5Ax3, U1, 5Ax2 106 DMG
1 Bar 5B, KC, 2B, j.B, 5Ax5, 2B 108 DMG
1 Bar 2A, U1, 5Ax4 121 DMG
1 Bar AA5A, 5B, U1, 5Ax4, 5B
1 Bar AA 5Xx3, 5B (Whiff), U1, 5Ax4 122 DMG
1 Bar j.A, KC, j.X (FB), j.B, 5Ax5, 5B 147 DMG
1.5 Bar Grab, 5Ax3, 5B, U1, 5Ax3, 5B
1.5 Bar 2EX, U1 100 DMG
1.5 Bar 2B, 5A, 2EX, 5A, 5B, U2 144 DMG
1.5 Bar AA 5A, 5B, U1, 5Ax3, 5B, U1, 5Ax5 211
1.5 Bar AA 5Xx2, j.X, 5Ax3, 5B, U1, 5Ax3, 5B, U1, 5Ax3, 2B 212 DMG
1.5 Bar 5B, U1, 5Ax4, 5B, U1, 5Ax2, 2B 214 DMG
1.5 Bar AA j.Bx3,5Ax4, 5B, U1, 5Ax2, 5B, U1, 5A, 5B 217 DMG
1.5 Bar AA j.Bx3, 5B, U2, 5A, 5B, U2 227 DMG
1.5 Bar AA j.B, 2B, 5B,5Ax4 , 5B, U1, 5Ax2, 5B, U1, 5A, 5B 227 DMGz
1.5 Bar AA 2B, jBx2, 5Ax4, 5B, U1, 5A, U1, 5Ax4 228 DMG
1.5 Bar AA2B, j.B, 5B, 5Ax4, 5B, U1, 5Ax2, 5B, U1, 5Ax4 236 DMG
1.5 Bar AAj.Bx3, 5B, U1, 5Ax2, 5B, U1, 5Ax3, 5B 236 DMG
1.5 Bar AA 5A, 2B, j.B, 5B, U2, 5A, 5B, U2, Taunt, Grab 317 DMG
1.5 Taro only 2Bx2, 5B, U1, 5Ax3, 5B, U1, 5Ax2, 5B 225 DMG
2.5 Bar 5A, U1(LHIT), KC, j.B(FB), 5Ax3, 5B, U1, 5Ax2, 5B
2 Bars EX Type Grab (1HIT), KC, j.B, 5B, 5Ax4, 5B, U1, 5Ax2, 5B, U1, 5A, 5B 232 DMG
2.5 Bars U1(2HIT), KC, j.B (FB), 5Ax3, 5B, U1, 5Ax2, 2B 171 DMG
3 Bar U1(3HIT), j.B (FB), 5Ax3, 5B, U1, 5Ax2, 5EX 210 DMG
3 Bars, U1, 5A, U1, 5A, 5B, U1x2, 5Ax4 311 DMG
Corner
Grab, 5x3, 5B 67 DMG
5B(Far), 5A, j.B, 5Ax5, 2B 98 Dmg
1 Bar AA 5Xx3, U1
1.5 Bar 2Ax4, U1, 5A, U1
2 Bars, AA U2, 5A, U2 159 DMG 22Boko
Full Bars, AA2B, KC, 2B(FB), j.B, 5Ax3, 5B, (U1, 5Ax2, 5B)x5 457 DMG
DEMON
Corner 1 Bar 5B, DC, 2B, j.B, 2EXx6 141 DMG
Guides/Showcases
2nd Impact
INTERGALACTIC CHAOS
MR.WellDone
POST IBBE
MR. Well Done Vol.2
Notable Players
YFDHippo

