Background
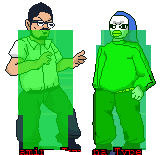
ZackyWild is a famous Japanese fighting game player.
He talks a lot of trash, but he has the quick reflexes, careful strategy, and precise execution to back it up.
His top level gameplay in both popular and niche titles has earned him many fans in Japan and all over the world. His official fanclub recently surpassed 10,000 members.
"It was a 7-3 match-up and you still lost."
The community refers to him as "ZW", for simplicity's sake.
This resource refers to him as ZW, although others may vary.
Overview
Playstyle
|
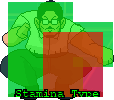
Recommended Types: Stamina
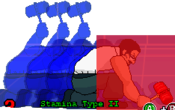
 ZackyWild is a niche toolbox character with very little cohesion, yet still having the best rushdown tools in the game. Kind of like Chipp? Good luck! ZackyWild is a niche toolbox character with very little cohesion, yet still having the best rushdown tools in the game. Kind of like Chipp? Good luck!
|
| Pros |
Cons |
- Best-in-Class Buttons: ZW surprisingly has some of the best buttons in the game, j.A is an amazing jump-in, 5B/2B are amazing pokes (with 2B having the added benefit of the mole), j.B and j.EX are some of the best jump-ins in the game, and 5X is an all-around ridiculous button. He also gets 2X to force a low-profile/approach anywhere on the screen!
- Always IN: ZW, unlike most other characters, never has to struggle to approach the opponent. Having 2X, j.EX, j.B, 2B, and 5X, he can comfortably challenge almost anything.
- Excellent Meter-Gain: Due to ZW being able to rep 5[X] out at the end of almost every combo, he effectively regenerates his meter after every opening, making it hard to pin him down if he continues to run his offense.
- Great Conversions: ZW gets to convert off of almost every knockdown he gets, given the right situation. While he may not deal the highest damage, he gets to get in a lot, when backed up with proper execution these openings only deal more!
|
- Questionable EXs: 5EX is a huge donkey kick that grants ZW the time to setup almost anything, the problem is it's insanely stubby and hard to hit. 2[EX] is better, but it's a gimmicky armored move that usually means risking everything. Because of this, he can't comfortably Iframe out of pressure.
- j.X: Very rarely do characters have buttons that are completely and utterly useless, ZackyWild's j.X is completely unusable and a common beginner trap, even worse than Azuma-Deka's 2B, which at least has some use.
- Char-Specific Everything: All of ZW's combos can have different timing from character to character and most of his more rare damaging pick-ups can be completely character-specific. Not to mention, having a character-specific infinite and the illusive reverse 5[X] combo.
- Execution: ZW's combos weirdly enough require a lot of delay timing for the optimal damage, while he at least doesn't require tons of parrying to be effective, he's still more demanding than most characters.
- No Meter Taunt (Effectively): Meter taunts are free economy and help immensely, while ZW does have one, it's impossible to hit in a game realisitically. He can build meter well, but this still is a major downside to his very solid neutral.
|
Movelist
Tech
ZackyWild doesn't have "tech" more-so just very very weird buttons.
His j.EX only combos when full-jumping with an 8 input, his j.X and other buttons (j.B/j.X/j.EX/5X/5EX/5B) move more with super/speed type for no good reason
Outside of that, it's the usual air recovery cancels, j.A/B are often used to cancel air-recovery for their instantaneous start-up and for j.B's changing air speed.
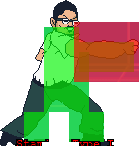
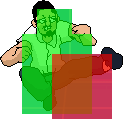
Also, he has a very deceptive hurtbox, only going up to the very bottom of his glasses, similar to Buttobi's hurtbox.

Moves
5A Hit me! Hit me!
|
| Damage
|
Guard
|
Startup
|
Active
|
Recovery
|
Invuln
|
Adv. Hit
|
Adv. Block
|
Adv. Parry
|
Effect
|
| 5
|
Mid
|
2
|
1
|
1
|
0
|
?
|
?
|
?
|
N/A
|
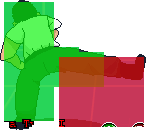
A good far reaching jab.
Still, middle-of-the-line.
|
|
2A Worse range than Kinoko's 2A Worse range than Kinoko's 2A
|
| Damage
|
Guard
|
Startup
|
Active
|
Recovery
|
Invuln
|
Adv. Hit
|
Adv. Block
|
Adv. Parry
|
Effect
|
| 5
|
Low
|
1
|
2
|
2
|
0
|
?
|
?
|
?
|
N/A
|
Would be great if it weren't for it's absurdly bad hitbox, stick to 5A if you're not trying to scare someone with a low.
Best used after a blocked j.A since j.B will push them back too early and 5A is Mid.
|
|
J.A
|
| Damage
|
Guard
|
Startup
|
Active
|
Recovery
|
Invuln
|
Effect
|
| 10
|
High
|
4
|
2
|
3
|
0
|
KD
|
Air jab with a launching hitbox.
Really good jump-in that confirms into most of his combos.
Used for jump-in combos, tall-character bullying, and cancelling landing recovery.
|
|
5B
|
| Damage
|
Guard
|
Startup
|
Active
|
Recovery
|
Invuln
|
Adv. Hit
|
Adv. Block
|
Adv. Parry
|
Effect
|
| 20
|
Mid
|
7
|
5
|
6
|
0
|
?
|
?
|
?
|
KB
|
A really long-reaching button with some hearty knockback, everything Well-Done's 5B wishes they could be.
Completely safe if fully spaced against most characters, is the main combo option since it's considerably faster than 2B, although is practically the same.
|
|
2B Mole isn't a low, it's a Mid. Mole isn't a low, it's a Mid.
|
| Version
|
Damage
|
Guard
|
Startup
|
Active
|
Recovery
|
Invuln
|
Adv. Hit
|
Adv. Block
|
Adv. Parry
|
Effect
|
| Hammer
|
20
|
Mid
|
8
|
2
|
7
|
0
|
?
|
?
|
?
|
N/A
|
Pretty slow move on it's own but the real charm comes from the Mole, which the hammer hit doesn't combo into.
Has a pretty bad hitbox and poor advantage without the Mole, if the Mole is already out stick to using 5B.
Doing 5A>2B is an infinite blockstring after the initial Mole hit.
Easily confirms into 5X after to completely snap someone's Bokoboko.
|
| Mole
|
10
|
Mid
|
17
|
160
|
14
|
0
|
?
|
?
|
?
|
N/A
|
A projectile that sits in place, similar to Azuma-Deka's trap.
Based off of ZackyWild's love for Wack-a-mole.
Mole can be moved when pressing 2B with 1/2/3.
1 places the Mole in front of you.
2 places the Mole midscreen.
3 places the Mole fullscreen-ish, usually behind the opponent.
|
|
J.B
|
| Damage
|
Guard
|
Startup
|
Active
|
Recovery
|
Invuln
|
Effect
|
| 25
|
High
|
16
|
Until Ground
|
Until Ground
|
0
|
N/A
|
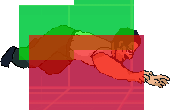
Slow start-up divebomb that boosts your momentum on the way up and kills your horizontal speed.
Can also be used on the way down to kill your horizontal speed while canceling landing, it also extends your hurtbox for some weird grab situations.
|
|
5X Legs was the correct answer! Legs was the correct answer!
|
| Version
|
Damage
|
Guard
|
Startup
|
Active
|
Recovery
|
Invuln
|
Adv. Hit
|
Adv. Block
|
Adv. Parry
|
Effect
|
| 5X
|
15*4 (48)
|
Mid
|
4
|
24
|
3
|
0
|
Knockdown
|
?
|
?
|
KD, KB
|
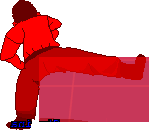
A quick multi-kick that loops if you hold it, ridiculously good button with an absurd hitbox and combo-ability.
When you first press 5X you get a short burst of speed forward, insanely useful for combos and you can intentionally drop 5X to get that boost again, although the timing is hard.
Doesn't deal good damage though, but it doesn't really matter. However when you hold it...
|
| 5[X]
|
15*N
|
Mid
|
N/A
|
As long as X is held
|
3
|
0
|
Knockdown
|
N/A
|
N/A
|
KD, KB
|
Holding down X after hitting the inital 5X turns this button into an everything button, huge bokoboko damage that's insanely safe.
Extra hits are good for ending your combo to get tons of meter or just as a general extension, everything goes into this move eventually in ZW's kit.
The hitbox is absurd, most characters can't punish it at all, the looping nature and near instant recovery makes it more unpunishable than moves like Kyanta's 2X.
Only truly beaten by projectiles and disjoints, but that hardly matters for most of them.
Briefly mentioned before, but delaying 5X again after 5[X] is important for combos, although tricky.
Mastering this will let you get pick-ups from ridiculous positions, even better when paired with KCs.
|
|
2X
|
| Damage
|
Guard
|
Startup
|
Active
|
Recovery
|
Invuln
|
Adv. Hit
|
Adv. Block
|
Adv. Parry
|
Effect
|
| 20
|
Low
|
16
|
18
|
7
|
0
|
Knockdown
|
?
|
?
|
KD
|
A fullscreen insanely low profile move that combos with a 3B Mole.
Usually used to go under projectiles such as Anna 5EX or K. Kyanta's U1, it's a ridiculous button with a good reward on hit.
If done raw fullscreen without a mole, it can still combo since you stop just short of the edge of the screen, really good button.
Death on parry though.
|
|
J.X Avoid this move Avoid this move
|
| Version
|
Damage
|
Guard
|
Startup
|
Active
|
Recovery
|
Invuln
|
Effect
|
| j.X (Low)
|
15*4 (48)
|
High
|
12
|
60
|
Until Ground
|
0
|
KD
|
The worse version of j.X, an already bad move.
Low j.X makes ZW repeatedly bounces in a low arc across the bottom of the screen, this version will ALWAYS drop in combos letting them recover faster than you.
Also keep in mind that it has to be started from a bit back before your opponent or else you'll only get 1 or 2 hits before it drops, as oppose to dropping after 3 or 4.
|
| j.X (High)
|
15*3 (39)
|
High
|
12
|
34
|
N/A
|
0
|
KD
|
While cool looking and good on paper, certainly better than the low version, this almost exclusively puts ZW is a bad position.
High j.X makes ZW do one large bounce in a high arc, which is highly combo-able, still it's not very good and going for it raw almost ensures a punish.
Also, similar to its low counter-part, you have to start the move early or else you'll only get one hit. Leaving you unsafe.
|
|
5EX
|
| Damage
|
Guard
|
Startup
|
Active
|
Recovery
|
Invuln
|
Adv. Hit
|
Adv. Block
|
Adv. Parry
|
Effect
|
| 30
|
Mid
|
12
|
4
|
7
|
1-16
|
Knockdown
|
?
|
?
|
KD, KB, WB
|
A huge donkey kick that grants a wall-bounce on it.
Doesn't deal great damage and it's surprisingly difficult to follow-up after, the slightly slower start-up hinders 5EX from being used where you'd 5B for an extension.
So usually it's reserved for trying to get 2EX or used as an okay-ish reversal.
In demon mode it can be looped but the timing is strict, character-specific, and you'd be playing demon mode.
Although it does have absurd knockback on block, letting you do a full blockstring from full-screen.
|
|
2[EX] Instills fear, anger, and anguish. Instills fear, anger, and anguish.
|
| Version
|
Damage
|
Guard
|
Startup
|
Active
|
Recovery
|
Invuln
|
Adv. Hit
|
Adv. Block
|
Adv. Parry
|
Effect
|
| Level 1
|
30
|
Mid
|
9
|
1
|
7
|
10-16
|
Knockdown
|
?
|
?
|
AR, KD
|
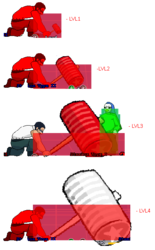
Instant EX hammer with a knockdown, not horrible speed-wise or damage-wise but still isn't really worth the .5 bar.
Can be used to start combos in the corner without a jump-in I guess? Armor is always good so it's a great call-out to deny a reversal at times.
|
| Level 2
|
50
|
Mid
|
?
|
1
|
7
|
?
|
Knockdown
|
?
|
?
|
AR, KD
|
Only really gets seen as a panic release when the opponent walks up for a grab.
|
| Level 3
|
70
|
Mid
|
?
|
1
|
7
|
?
|
Knockdown
|
?
|
?
|
AR, KD
|
This one appears usually as an accidental input trying to input Level 4 quickly.
Pretty solid damage and can actually be setup during Boko/5EX so this is probably the most viable level, real risky plays for Level 4.
|
| Level 4
|
100*2(200) (Normal)/100 (Blocked)
|
Mid
|
108
|
1
|
7
|
109-115
|
Knockdown
|
Knockdown
|
?
|
AR, KD, UB
|
The reason why you charge up the hammer, grants an unblockable and a huge chunk of damage for .5 bar.
Despite seeming like it would work, this can't be guaranteed from boko, knockdown, or even 5EX.
More or less, you have to rely on psyching out the opponent with this button rather than actually setting it up.
Even then, it can still be blocked to reduce the damage by half which also makes it impossible to combo out of.
Big gimmick.
|
|
J.EX Dolphin Dolphin
|
| Damage
|
Guard
|
Startup
|
Active
|
Recovery
|
Invuln
|
Effect
|
| 40
|
High
|
16
|
Until Ground
|
Until Ground
|
1-12
|
KD
|
Fullscreen jump-in with a good hearty chunk of damage and combo-potential.
Has some weird issues following up, only being fully combo-able from full-jump j.8EX, while j.9EX doesn't work.
Still a ridiculously good move, basically a better version of Masako's j.EX.
|
|
Ultra 1 (Y) astral project yourself some neutral astral project yourself some neutral
|
| Damage
|
Guard
|
Startup
|
Active
|
Recovery
|
Invuln
|
Effect
|
| 20*6(120)
|
Mid
|
4
|
Until Off-Screen
|
Until Landing
|
0-40
|
KD
|
Aerial GUN, but it's 6 projectiles that don't really combo well and tends to drop.
Not horrible and it's a very versatile call-out but far too easy to parry, better off in combos or elsewhere.
The real application is using it to lockdown players on wake-up, it has 40f of invuln and ends in the air, leaving you ridiculously plus if you call-out an EX wake-up.
|
|
Ultra 2 (2Y) Not a High Not a High
|
| Damage
|
Guard
|
Startup
|
Active
|
Recovery
|
Invuln
|
Adv. Hit
|
Adv. Block
|
Adv. Parry
|
Effect
|
| 20*10(119)
|
Mid
|
1
|
2(2)2(2)2(2)2(2)2(2)2(2)2(2)2(2)2(2)2(2)2(2)2(2)2(2)2(2)2
|
1
|
0-19
|
Knockdown
|
?
|
?
|
KD
|
Deals loads of damage, works as his only real reversal, and has some good carry application.
Problem is it costs a bar for okay-ish damage assuming they're not crouching, leaving you very minus on block/parry otherwise.
Meter is better saved for EXs and KCs.
|
|
Grab (AB) A hug? A hug?
|
| Damage
|
Guard
|
Startup
|
Active
|
Recovery
|
Invuln
|
Adv. Hit
|
Adv. Block
|
Adv. Parry
|
Effect
|
| 15*3(45)
|
Grab
|
3
|
4
|
5
|
0
|
Knockdown
|
Knockdown
|
N/A
|
KD
|
About as bad as Gyanta's grab.
Can combo out of it with KC at least but it's not a knockdown so you can't get anything worthwhile out of it.
Doesn't confirm a kill for U2 sadly.
|
|
Taunt (Select) FACE ME WHEN I'M TALKING TO YOU FACE ME WHEN I'M TALKING TO YOU
|
| Damage
|
Guard
|
Startup
|
Active
|
Recovery
|
Invuln
|
Adv. Hit
|
Adv. Block
|
Adv. Parry
|
Effect
|
| +1 bar to EX gauge
|
N/A
|
268
|
N/A
|
276
|
N/A
|
N/A
|
N/A
|
N/A
|
N/A
|
ZW turns his back to the camera and does some assumedly Japanese shit-talk?
Not sure, it's a meter taunt but the longest in the game, it's impossible to confirm and 5X confirms usually give him the meter he needs anyways.
Effectively a suicide button, or to have a laugh when someone goes AFK.
|
|
Combos
| Notation Help
|
Disclaimer:
Combos are written by various writers, so notation may differ slightly from this notation.
For more information, see Controls.
Character-specific notation, will be on the character's page.
|
| FB
|
Refers to the act of gaining a "Flash Bonus", which grants you extra meter, on the hit of a move.
|
| KC
|
Refers to pressing B+Y on the same frame, or the macro-button for B+Y. This is known as a Kyanta-Cancel, this game's Roman-Cancel.
|
| DC
|
Refers to cancelling a move by activating Demon type's buff, similar to KC.
|
| XEX
|
Refers to pressing X+Y on the same frame, or the macro-button for X+Y.
This is known as an EX move, for example: j.EX>5EX>2EX.
|
| {X/Y/Z}
|
Move X or Y or Z can be used.
|
| #X
|
Indicates that any of A, B and C may be used with #. Example: 3A (Down-right, Light.)
If you have trouble with this notation, you may want to google for "Numpad Notation" elsewhere.
|
| (X)xN or (X)xN-N
|
Loop the inputs in the square brackets or parenthesis as many times as N, sometimes doesn't include brackets or parenthesis but still means the same thing.
Also occasionally includes a dash to indicate that a varying amount of hits can be performed.
|
| j.X
|
Button X is input while you are in the air jump.
|
| X(whiff)
|
Indicates that X is intended to whiff.
|
| (Delay) or (Wait)
|
Indicates a short delay on the hit.
|
| (X)
|
X move is omittable from the combo, this will be mentioned in the hover text.
|
| tk.X
|
Indicates the motion "X" is input immediately after leaving the ground. Stands for tiger knee.
|
| AA
|
Indicates the move hits an opponent in the air, referred to as an Anti-air. Hence AA.
|
| [X]
|
Indicates if a move should be held down.
|
| ]X[
|
Indicates if a held move should be released, for example: 5[B] > 5]B[.
|
Fullscreen
j.9EX > 5A > j.EX > 5A > 5X > (delay) 5X (118)
- Fullscreen j.EX will not link into 2B or 5B due to height, here's an alternate combo for fullscreen.
j.8EX > 2B > (delay) 5B > 5X > (delay) 5X (113)
- For whatever reason only works the higher you do j.EX, so it's best to do full-jump j.8EX.
Corner
j.A > 5B > (delay) 5B > 5X > (delay) 5X (81)
- Works close to corner, requires you to land cancel j.A.
(5A > 2B > 2A > tk.j.A > 2B (mole hit) > j.A (hit))xN
- Tall character infinite that only works on Gators & Cocorn, not WD for some strange reason.
Reverse 5[X] Combo
Since 5[X] is an infinitely active button, if you do it facing away from the corner and get a hit you'll juggle until gravity takes over.
Here's the ways to set it up, assuming ZackyWild's back is to the wall:
- 5X (overlap) > 5[X]
- tk.j.7EX > 5[X]
- j.A (overlap) > 5[X]
- Opponent Jump-in > 5[X]
Works on:
- Hisomi
- Michelle
- Sendou
- Spike
- Buttobi
- Hatoyan
- Mask
- Gyanta
It does about 119~ish raw, depending on which character you do it to.
Confirmed out of tk.j.7EX it does about 130~ish depending on what character you do it to.
Here's a video showing it in action: ZackyWild 5X Jank By Durdge-o
Other Resources/Notable Players
Other Guides/Showcases
ZackyWild Boppin Guide by Durdge-o
Notable Players
Disclaimer: This list is derived from community input and is in no way comprehensive or a form of ranking of any kind. Our community criteria can be found here.
| Usual Color |
Handles/Links |
Region |
Status |
Notes
|
|
|
|
unknown
unknown
|
|
|
| General
|
|
| Advanced
|
|
| Characters
|
|
