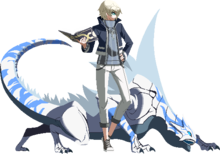
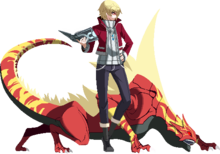
 |
Outdated Version
- This page is for an outdated version of the game (UNIEL). To see Chaos's character page for the latest version (UNICLR), click here.
|
Introduction
"He plots. Staring at the truth with his clear eyes over the glasses. The beast within him, Chaos Code. Hiding and waiting for the chance to release the chain. His dearest friend's wish. His delightful colleague had a conflicting ambition. Which to choose is too obvious. The obedient beast bares the fangs. They will equally bite off everyone who stands in his way."
Story
According to Gordeau, Chaos was once a violent youngster, earning him the name "Bloody Chaos" at some point. Gordeau told to Hilda that he has never beaten Chaos in a fight, but Chaos says that's a lie - meaning Chaos has at least once fought and lost to Gordeau. Chaos changed his style and started to fight using intelligence instead of brute force.
Even after Gordeau left Amnesia, Chaos and he have been in contact and working together to track down the Licht Kreis and find the Red Knight. Chaos personally is aiming to beat the Aion and the Licht Kreis with the allies he has
Unique Trait/Health
Health: 9,800
EXS of ILLUSIONS [UMBRAL]
Chaos's special ability is to control the Lizard Beast Azhi-Dahaka using the book "The Codex of Disorder: Chaos Code". Chaos has no special moves of his own, and all of his special inputs are used to control Azhi. Chaos's ability allows him to passing link off of Azhi Dahaka's moves back to his own. This allows you to chain long sequence of strikes between Azhi and Chaos. It should be noted that you can only use each Azhi special once while Azhi is active until both Azhi and Chaos return to neutral.
Chaos Guage
Chaos has a special guage under his health bar that indicates the status of Azhi-Dahaka.
Green: Indicates that Azhi is available for use. If Azhi is on screen while the guage is green, he does not have an active hurtbox on screen. After being active, returning to green also restores Azhi's used special moves.
Red: Indicates that Azhi is currently active performing or recovering from a move. During the duration in which the gauge is red, Azhi has a hurtbox and can be killed by any non-A attacks with an active hitbox (this includes special moves and even command grabs).
Grey: Indicates that Azhi has been killed and cannot be called again until the gauge returns to green.
Gameplay
Neutral
- General Theory
- Chaos' neutral changes drastically depending on the matchup being played. The main goal is the control Azhi in order to accomplish two things. One is to keep the opponent out with Azhi acting as a wall keeping them full screen, and the other is to use Azhi to force them to block so Chaos' can go in somewhat safely and start pressure.
- Approaching via the Ground
- Chaos lacks effective ways to get in via the ground on his own due to his lack of accessible pokes. Ground approach is mostly going to take place once you've conditioned the opponent enough for you to dash in after 214[A/B] or 22[A/B]
- Approaching via the Air
- This is more doable than the ground approach in most matchups. j.2C is a nice high active jump in and is one of his best starters. He has the ability to bait standing anti airs by summoning Azhi using 214A or 236A to slow his air momentum.
- Stopping Rushdown
- Probably one of the things Chaos is most effective at. 6C is a large projectile reflector that will stop mindless dash in rushdown and rushdown assisted by slow projectiles (e.g Vatista's 46A or Akatsuki's 236A). Azhi also acts as a block to impede their movement while he's active and can be used to punish fireballs, allowing you to slow their approach and swat them away with 623A. Roll also acts as a last resort once they're past your 6C range as you can roll through them and retreat safely back to neutral if they committed to fully going in.
- Anti Airing
- Chaos has the weakest anti air capabilities in the game, not only lacking a reversal, but lacking a one button move that even has an upwards hitting hitbox like Hyde's 3C. At far ranges, 236B/623B can deal with far jump in approaches (e.g. jump assault). If you predict fast enough, you can snipe them out of their jump in with rising j.C for a full confirm. 66B is chaos's main anti-air at closer distances as it has a good hitbox and head invun. On counterhit you get a full combo, but on normal hit the best you can get is 236B which is unreliable as it wont connect if the opponent was too high. 5BB/5CC are also possible anti-airs but very unlikely since they require a whiffed normal before use. That being said, they're jump cancelable so you can get a conversion even on normal hit. If in doubt, Roll (B+C) acts as an okay choice as you'll roll under their jump in, likely placing you in a better position. You can also always stand shield to get some frame advantage and maybe a punish, but it's very risky as all the opponent has to do is empty jump to GRD break you.
Offense
If given the chance, Chaos can mount some very strong pressure using his ability to chain his normals and Azhi attacks in tandem to create long and varied blockstrings. However his actual mixups are rather poor since he lacks a standing overhead and his jump ins are very reactable. Despite this, he can still setup some cross up setups using 22X and go for easy double overheads with j.2C > j.A. His normal throw is also a bit scarier than normal as it can lead to a combo if azhi is set up with 22x. Even if azhi isn't set chaos can still pick up for a combo if the opponent doesn't tech right away, letting him punish opponents for late teching.
Defense
Unfortunately, Chaos' defensive options are rather poor. Lacking invincible moves (aside from IW or IWEXS) he must rely on system mechanics in order to get his opponent's off of him. Use shielding to gain advantage over your opponent and Veil-Off when you spot a gap in your opponent's offense.
Move List
L = Low, H = High, UNB = Unblockable, CS = Chain Shift
Startup includes the first active frame.
Normal Moves
| 5A
|
| Damage
|
Startup
|
Active
|
Recovery
|
Frame Adv
|
Cancels
|
Guard/Shield
|
Hitbox
|
| 180
|
7
|
2
|
12
|
-2
|
Sp,EX,CS
|
HL
|
-
|
Chaos does a quick swipe with his hand. Hits crouchers and has decent range. Can be used to stuff close range assaults on reaction. Use for stagger pressure and tick throws.
Other Properties:
|
|
| 2A
|
| Damage
|
Startup
|
Active
|
Recovery
|
Frame Adv
|
Cancels
|
Guard/Shield
|
Hitbox
|
| 140
|
6
|
2
|
11
|
-1
|
Se,Sp,EX,CS
|
HL
|
-
|
2A with a pretty big hitbox, only -1. Does not hit low. Best normal to reverse beat with. Also your fastest normal and therefore your mash to get out of pressure tool. Use for stagger pressure and tick throws.
Other Properties:
|
|
| 5C
|
| Damage
|
Startup
|
Active
|
Recovery
|
Frame Adv
|
Cancels
|
Guard/Shield
|
Hitbox
|
| 510
|
11
|
3
|
22
|
-7
|
Sp,EX,CS
|
HL
|
-
|
Backhanded swipe that moves Chaos forward. Hits quite high so can miss some low profile animations. Somewhat slow but its range makes it useful in the mid-far footsie range. Combine with reverse beats to make a strong pressure tool.
Other Properties:
|
|
| 2C
|
| Damage
|
Startup
|
Active
|
Recovery
|
Frame Adv
|
Cancels
|
Guard/Shield
|
Hitbox
|
| 580
|
12
|
3
|
26
|
-11
|
Sp,EX,CS
|
L
|
-
|
Low hand swipe that can low profile some moves. Your farthest reaching normal and great tool to use in footsies. Will cause a short otg-able state to hard knockdown on hit.
Other Properties:
|
|
| j.B
|
| Damage
|
Startup
|
Active
|
Recovery
|
Frame Adv
|
Cancels
|
Guard/Shield
|
Hitbox
|
| 400
|
10
|
4
|
X+3
|
Varies
|
Sp,EX,CS
|
H/AS
|
-
|
Chaos kicks outward with his leg parallel to the ground. Works as a great air to air and useful for fake crossups (UNIEL won't let this move cross up even though it can hit on both sides). Also sees usage in safejump setups.
|
|
| j.C
|
| Damage
|
Startup
|
Active
|
Recovery
|
Frame Adv
|
Cancels
|
Guard/Shield
|
Hitbox
|
| 520
|
12
|
2
|
X+4
|
Varies
|
Sp,EX,CS
|
H/AS
|
-
|
Chaos does a kick pointed upwards while jumping. Its upward hitbox makes it a decent rising air-to-air. As a jump-in, j.2C is better in every way so you wont use this too much.
|
|
Command Normals
| 5BB
|
| Damage
|
Startup
|
Active
|
Recovery
|
Frame Adv
|
Cancels
|
Guard/Shield
|
Hitbox
|
| 450
|
12
|
2
|
20
|
-6
|
Sp,EX,CS
|
HL
|
-
|
Follow up to 5B. Chaos does a reverse kick with a high vertical hitbox. Useful in pressure strings since it moves Chaos forward. Also useful in combos since it launches on hit. Can occasionally be used as a situational anti-air after whiff 5B > 5BB.
Other Properties:
- Air unblockable.
- Launches on hit.
- Chaos is considered air-borne during the kick animation.
- Throw invul during airborne frames.
- Will high profile some low attacks.
|
|
| 5CC
|
| Damage
|
Startup
|
Active
|
Recovery
|
Frame Adv
|
Cancels
|
Guard/Shield
|
Hitbox
|
| 427
|
6
|
5
|
26
|
-13
|
Sp,EX,CS
|
HL
|
-
|
Follow up to 5C. Chaos does a diagonal kick. Mainly used in combos but can be used to extend some pressure strings. It CANNOT be reverse beated however and therefore you must always have Azhi if you intend to use this move on block. Otherwise its a free punish for your opponent.
Other Properties:
- Air unblockable.
- Launches on hit.
|
|
| 6C
|
| Damage
|
Startup
|
Active
|
Recovery
|
Frame Adv
|
Cancels
|
Guard/Shield
|
Hitbox
|
| 640
|
17
|
12
|
28
|
-11 to -13
|
Sp,EX,CS
|
HLA
|
-
|
Code Reflect. Chaos throws the Chaos Code forward at his opponent. Will absorb ONE projectile and upon absorption Code Reflect's hitbox will expand from where it absorbed the projectile. This move is great for combating your opponent's zoning. 6C is also a very useful mid-range anti-air and can stuff assaults easily. Will wallbounce on hit and you can follow up with a combo on hit by using Chaos' force function roll.
Unfortunately this move is incredibly unsafe on whiff/block and you may have to cancel into Azhi EX moves to keep yourself safe.
Other Properties:
- Projectile move.
- Absorbs ONE other projectile.
- Absorbed projectile will cause Code Reflect's hitbox to expand forward from where it absorbed the projectile.
- Causes wallbounce on hit.
- Can only be special-cancelled on hit.
- Can be Chain-shifted on WHIFF
|
|
| j.2C
|
| Damage
|
Startup
|
Active
|
Recovery
|
Frame Adv
|
Cancels
|
Guard/Shield
|
Hitbox
|
| 620
|
12
|
4
|
X+4
|
Varies
|
Sp,EX,CS
|
H/AS
|
-
|
YOU LIKE THAT? Chaos performs Nova's kick from UMVC3. Great downward hitbox and Chaos' staple jump in move.
Other Properties:
- Causes a ground bounce to knockdown on airborne opponents.
- Air unblockable.
|
|
Dash Normals
| 66B
|
| Damage
|
Startup
|
Active
|
Recovery
|
Frame Adv
|
Cancels
|
Guard/Shield
|
Hitbox
|
| 400
|
10
|
2
|
20
|
-4
|
Sp,EX,CS
|
HA
|
-
|
Same animation as Chaos 5BB but not jump-cancellable or reverse beat-able. This is your best anti-air in most situations but must be used with precision and care. Its easy to accidentally go under your opponent while inputting a dashing normal.
Other Properties:
- Air unblockable.
- Launches on hit.
- Chaos is considered air-borne during the kick animation.
- Throw invul during airborne frames.
- Will high profile some low attacks.
|
|
| 66C
|
| Damage
|
Startup
|
Active
|
Recovery
|
Frame Adv
|
Cancels
|
Guard/Shield
|
Hitbox
|
| 780
|
12
|
3
|
22
|
-7
|
Sp,EX,CS
|
HL
|
-
|
Chaos does a downward hand swipe. Not an overhead. Is actually Chaos' most damaging combo starter but not a move you will use often outside of combos sadly. Useful for extending combos and leading into Veil Off routes.
Other Properties:
- Causes a ground bounce to knockdown on airborne opponents.
- Causes a stagger animation on standing/crouching opponents.
- Air-unblockable.
|
|
Universal Mechanics
Force Function
B+C
|
| Damage
|
Startup
|
Active
|
Recovery
|
Frame Adv
|
Cancels
|
Guard/Shield
|
Hitbox
|
| -
|
1
|
-
|
24
|
-
|
-
|
-
|
-
|
Command roll. Can be used to go behind the opponent. Is projectile invincible around frame 3, strike invincible until at least 8-9 frames into the roll. Best to use this move wisely as you can't just mash it out and get a free escape out of pressure. Even upon succesful roll through your opponent's attacks, you still have 24 frames of recovery until you can do something.
|
|
Veil Off
A+B+C
|
| Damage
|
Startup
|
Active
|
Recovery
|
Frame Adv
|
Cancels
|
Guard/Shield
|
Hitbox
|
| 0
|
21 (min)
69 (max)
|
2
|
37
|
Blocked: -13
Hit: +36
|
-
|
HLA
|
-
|
Universal reversal. Invincible from start-up until the first active frame. Not throw invincible. You can delay the start-up until the 69th frame, but there's no real incentive to do so outside of thwarting meaty attacks.
|
|
Special Moves
Are ga Emono da
「あれが獲物だ」
236X
Air O.K.
|
| Version
|
Damage
|
Startup
|
Active
|
Recovery
|
Frame Adv
|
Cancels
|
Guard/Shield
|
Hitbox
|
| A
|
650
|
Ground: 15
Air: 18
|
5
|
Ground: 32
Air: X+12
|
Ground: -8
Air: +10 to -25*
|
Sp,EX,CS
|
HL
|
-
|
Chaos calls Azhi to do a claw swipe in front of him. Amazing range and probably one of Azhi's best moves. Hits air unblockable. Closer to the ground you are before doing the attack, the more frame advantage you have. If Azhi is in the air when he does this, then he will do the attack while falling to the ground.
Other Properties:
- Air unblockable.
- Reverse beat-cancellable.
|
| Version
|
Damage
|
Startup
|
Active
|
Recovery
|
Frame Adv
|
Cancels
|
Guard/Shield
|
Hitbox
|
| B
|
710
|
Ground: 16
Air: 19
|
4
|
Ground: 32
Air: X+12
|
Ground:
Air: +14 to -24
|
Sp,EX,CS
|
HL
|
-
|
Chaos calls Azhi to do a jumping claw swipe. Good for catching jump outs and can be used as an anti-air. Be careful though, the hitbox is not as high as the animation suggests.
Other Properties:
- Air unblockable.
- Reverse beat-cancellable.
|
| Version
|
Damage
|
Startup
|
Active
|
Recovery
|
Frame Adv
|
Cancels
|
Guard/Shield
|
Hitbox
|
| EX
|
1672
|
Ground: 9
Air: 12
|
5*2
|
Ground: 38
Air: X+12
|
First hit: -2 to -8
Second hit: +24 or less
|
CS
|
HL
|
-
|
Chaos does a claw swipe similar to the A version. Great move for punishing whiffs. Can be used to cross up if Azhi is behind them by rolling before the last hit.
Other Properties:
- Air unblockable.
- Reverse beat-cancellable.
|
|
Fukitsukero
「噴き付けろ」
214X
Air O.K.
|
| Version
|
Damage
|
Startup
|
Active
|
Recovery
|
Frame Adv
|
Cancels
|
Guard/Shield
|
Hitbox
|
| A
|
550
|
Ground: 19
Air: 22
|
17
|
28
Air: X+12
|
+9* to -23
|
-
|
HLA
|
-
|
Azhi will breathe one fireball. A decent move for zoning but must be space correctly for any kind of decent frame advantage.
Other Properties:
- Airborne Counterhit: Causes an OTG-able knockdown.
|
| Version
|
Damage
|
Startup
|
Active
|
Recovery
|
Frame Adv
|
Cancels
|
Guard/Shield
|
Hitbox
|
| [A]
|
550, 550
|
Ground: 33
Air: 36
|
17
|
16
Air: X+12
|
+12 to -9
|
Sp,EX
|
HLA
|
-
|
Azhi will breathe two fireballs. You want to try to use this version more if you can since it gives you excellent frame advantage. This is also your go to meaty move after a j.2C knockdown.
Other Properties:
- Projectile.
- You can follow-up with 236X/623X even on whiff.
|
| Version
|
Damage
|
Startup
|
Active
|
Recovery
|
Frame Adv
|
Cancels
|
Guard/Shield
|
Hitbox
|
| B
|
550
|
Ground: 19
Air: 22
|
21
|
28
Air: X+12
|
+12 to -9
|
-
|
HLA
|
-
|
Same as 214A but Azhi hops further up. You can get better advantage with this then the A version since it gives the fireball more time to travel.
Other Properties:
- Projectile.
- Airborne Counterhit: Causes an OTG-able knockdown.
|
| Version
|
Damage
|
Startup
|
Active
|
Recovery
|
Frame Adv
|
Cancels
|
Guard/Shield
|
Hitbox
|
| [B]
|
550, 550
|
Ground: 33
Air: 36
|
17
|
16
Air: X+12
|
+12 to -9
|
Sp,EX
|
HLA
|
-
|
Azhi breathes two fireballs like the [A] version but the fireballs move at a slightly different angle.
Other Properties:
- Projectile.
- You can follow-up with 236X/623X even on whiff.
|
| Version
|
Damage
|
Startup
|
Active
|
Recovery
|
Frame Adv
|
Cancels
|
Guard/Shield
|
Hitbox
|
| EX
|
1722
|
Ground: 19
Air: 22
|
69
|
12
Air: X+12
|
+14 to -7
|
-
|
HLA
|
-
|
Three fireballs, the last one causes a ground bounce to hard knockdown. Good combo ender for meter combos.
Other Properties:
|
|
Uchiharae
「打ち払え」
623X
Air O.K.
|
| Version
|
Damage
|
Startup
|
Active
|
Recovery
|
Frame Adv
|
Cancels
|
Guard/Shield
|
Hitbox
|
| A
|
570
|
Ground: 23
Air: 26
|
5
|
16
Air: X+12
|
Ground: +6
Air: +13 to -25
|
Sp,EX,CS
|
HL
|
-
|
Azhi performs a tail whip. Good for starting Azhi pressure or ending in + frames during blockstrings.
Other Properties:
- Causes wallbounce on hit.
- Air-unblockable.
- Reverse-beat cancellable.
|
| Version
|
Damage
|
Startup
|
Active
|
Recovery
|
Frame Adv
|
Cancels
|
Guard/Shield
|
Hitbox
|
| B
|
690
|
Ground: 27
Air: 30
|
5
|
12
Air: X+12
|
Ground: +10
Air: +20 to -15
|
Sp,EX,CS
|
HL
|
-
|
Slower version of the A tail whip but Azhi jumps higher and you get more frame advantage. Similar uses as the A version.
Other Properties:
- Causes wallbounce on hit.
- Air-unblockable.
- Reverse-beat cancellable.
|
| Version
|
Damage
|
Startup
|
Active
|
Recovery
|
Frame Adv
|
Cancels
|
Guard/Shield
|
Hitbox
|
| EX
|
1278
|
Ground: 16
Air: 19
|
5
|
23
Air: X+12
|
Ground: +19
Air: +29 to -6
|
CS
|
HL
|
-
|
Azhi does two tail whips that sends your opponent to the other end of the screen.
Other Properties:
- Causes wallbounce on hit.
- Air-unblockable.
- Reverse-beat cancellable.
|
|
Hisome
「潜め」
22X
|
| Version
|
Damage
|
Startup
|
Active
|
Recovery
|
Frame Adv
|
Cancels
|
Guard/Shield
|
Hitbox
|
| A
|
765
|
37 to 96*
|
2
|
25 (Azhi)
|
+
|
Sp,EX
|
HL
|
-
|
A "teleport." You can cancel this at any point during his disappearance to one of Azhi's specials. Otherwise, this move has its own data.
Other Properties:
- Frame data note: The further away Azhi is from the opponent, the longer the start-up.
- If Azhi does not hit the opponent (i.e. whiff or block), he will growl instead. This growl is not a hitbox.
- If Azhi does hit the opponent, Azhi will jerk them into the air.
Useful for frame trap setups. You can cancel into another special move just before the growl on block.
|
| Version
|
Damage
|
Startup
|
Active
|
Recovery
|
Frame Adv
|
Cancels
|
Guard/Shield
|
Hitbox
|
| B
|
765
|
64 to 123*
|
5
|
37 (Azhi)
|
+
|
Sp,EX
|
HL
|
-
|
Almost the same as 22A but it is slower. Azhi can teleport before or behind the opponent to attack depending on your spacing.
Other Properties:
- Frame data note: The further away Azhi is from the opponent, the longer the start-up.
- If Azhi does not hit the opponent (i.e. whiff or block), he will growl instead.
- If Azhi does hit the opponent, Azhi will jerk them into the air.
Useful for cross up setups and frame traps. You can cancel into another special move just before the growl on block.
|
| Version
|
Damage
|
Startup
|
Active
|
Recovery
|
Frame Adv
|
Cancels
|
Guard/Shield
|
Hitbox
|
| EX
|
765
|
54
|
2
|
25 (Azhi)
|
+
|
-
|
HL
|
-
|
Similar to 22B, but Azhi will always teleport behind the opponent, regardless of spacing. Furthermore, the start-up is always the same.
Other Properties:
- If Azhi does not hit the opponent (i.e. whiff or block), he will growl instead.
- If Azhi does hit the opponent, Azhi will jerk them into the air.
Useful for getting Azhi into a threatening position (behind your opponent) even at full screen. You can cancel into another special move just before the growl on block.
|
|
Nijiri Yore
「にじれ寄れ」
[X]
Air O.K.
|
| Version
|
Damage
|
Startup
|
Active
|
Recovery
|
Frame Adv
|
Cancels
|
Guard/Shield
|
Hitbox
|
| A/B/C
|
-
|
1
|
-
|
-
|
-
|
-
|
-
|
-
|
Hold any button to make Azhi move forward toward the opponent. Can be done during block stun or during combos. Can be done with the A, B, or C buttons. A useful way to hold down a button without having to whiff a move is to shield and then hold a button during the shield animation.
|
|
Infinite Worth
Dissect Barrage
「ダイセクトバラージ」
41236D
|
|
Infinite Words EXS
Deep Revenance
「ディープ・レヴァナンス」
A+B+C+D
|
|
Combos
| Combo Notation Guide:
|
- ( ) = optional, typically the combo will be easier if omitted
- [ ] = Input is held
- / = Option to choose between multiple actions
- + = Multiple buttons are pressed simultaneously
- (x N) = Attack can be repeated N number of times, range provided
- (#) = Next action is taken after a certain number of hits
- -> = Special is cancelled to add on special
- CH = Counter Hit
- HC = High Counter
- CS = Chain Shift, or 5D 5D
|
Chaos' combos follow a pretty straightforward theory that you can adapt and modify depending on what you want.
Combo Theory
Part 1: The Confirm
- The main goal here is to launch them into the air with either 5BB/5CC.
- j.A/j.B/j.C/j.2C/5A/2A/5B/2B/5C/22x
- 6C
- > Chain Shift/Force Function > 5CC
Part 2: Air String
- Here, after you've launched them with 5CC or 5BB you juggle them in the air towards into a knockdown
OR
The first allows for easier OTGs, while the second allows for easier juggles from awkward angles. Use the first unless the launch looks awkward, then go for the second. Always use j.C>j.B>j.2C on Linne.
Part 2.5: Early Oki Ender
- For certain reasons, you might/want to end the combo after the j.2C. There's two main reasons.
- 1)If it's a bad starter like 2A>2A, or you simply want to end with stronger oki, you can do Charged j.214[B] after the j.2C just before you touch the ground. For example, the combo will look like this.
(2A>2A>2B>2C>5CC>j.B>j.C>j.2C>j.214[B])
- 2)The other reason is if you've already OTG'd them. This means when you've already picked them off the ground once already. Example starters of this are;
Air-to-Air J.2C/236C/214C
Part 3: Off the Ground
- If you decided to not go for the close j.214B oki, then at this point you will need to pick them up.
That's it. Very simple. You can do stuff like Dash C>2C and 2C>6C, but it makes the combos unstable and sometimes even optimal. Don't bother. If you need to finish with IW, then you can do;
- Dash C > 2C > 6C > 236A > IW for optimal damage. Otherwise, simply do 2C into the next part.
Part 4: Azhi Finishers
- Now that you've OTG'd them with 2C, you want to finish them with Lizard.
- 236A>236B>(Very slight delay)623B
- >623A>214[A] (Meterless Damage into Light Oki.
- >236C/214C > Dash C (Metered Option. Gives corner carry and strong oki. Always use 214C vs Eltnum. Do not do from bad starters.
- 236A>236B>214C (Use this is you had a bad starter like assault j.2C and you need a little extra damage to kill.
- 236B>623B>623A>(236C) (Use this if you used 236A at some point earlier in the combo.)
This all applies to the corner as well. More options are available there however that will be listed later. Please visit the Dustloop Thread on Chaos for more combos at the moment.
Colors
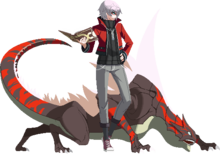
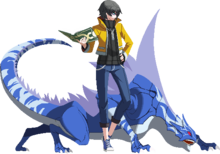
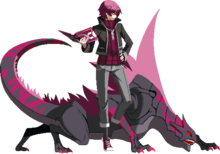
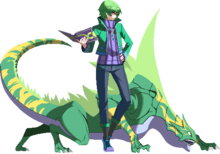
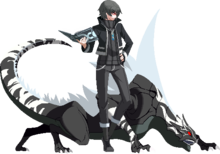
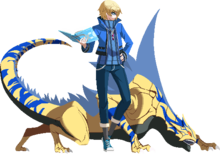
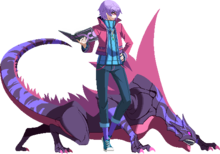
| Prateria Lupo
|
Iceberg Lince
|
Vulcano Squalo
|
Mare Leone
|
Landa Vipera
|
|
|
|
|
|
|
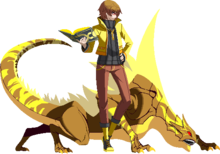
| Altopiano Serpente
|
Giallo Gatto
|
Verde Bestia
|
Aldebaran
|
Grazia Fuoco
|
|
|
|
|
|
|
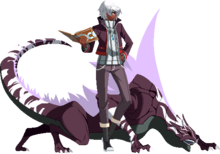
| Jellyfish
|
Cremation Heretic
|
Moos Licht
|
Eclipse Day
|
Lapis Lazuli
|
|
|
|
|
|
|
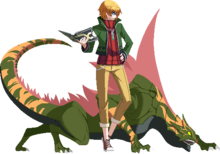
| Orquidea Submundo
|
Heat Haza
|
Nuit Tonnerre
|
Ground Horizon
|
Uninhabited Island
|
|
|
|
|
|
|


