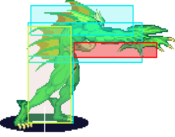
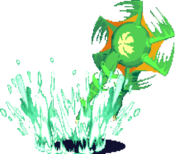
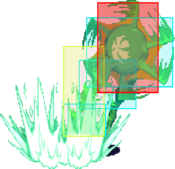
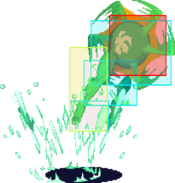
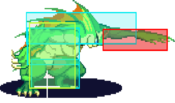
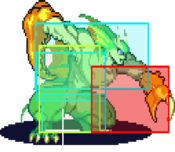
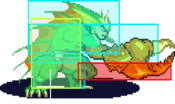
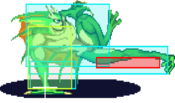
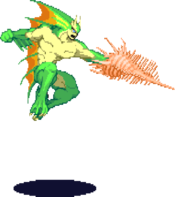
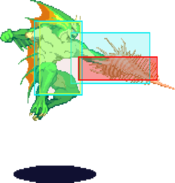
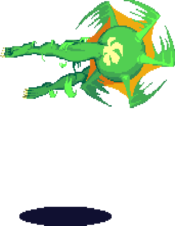
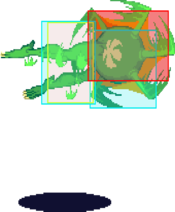
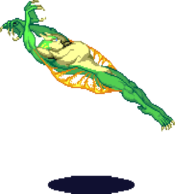
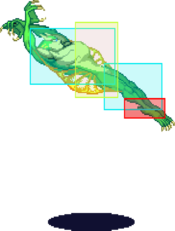
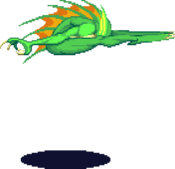
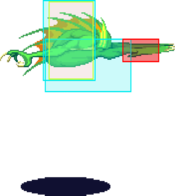
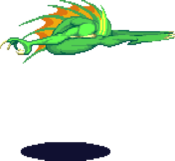
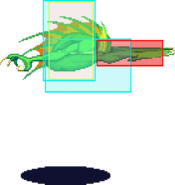
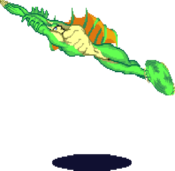
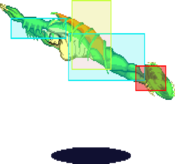
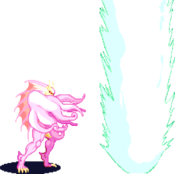
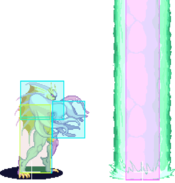
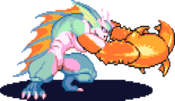
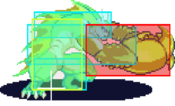
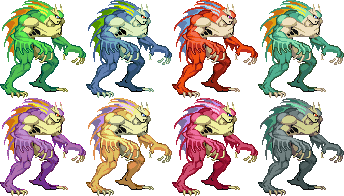
Vampire Savior/Aulbath
Introduction
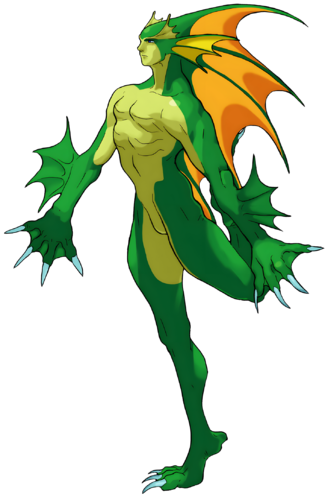
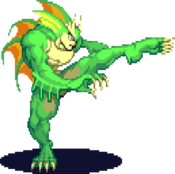
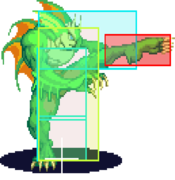
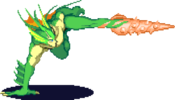
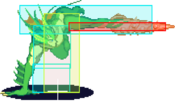
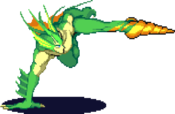
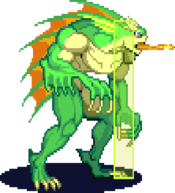
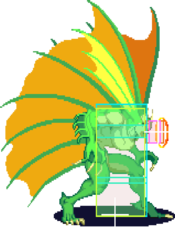
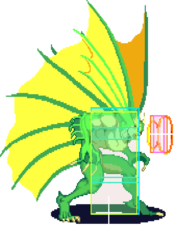
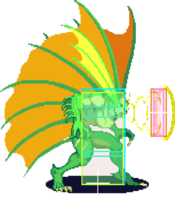
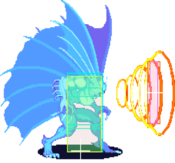
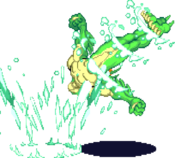
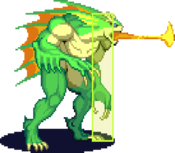
Aulbath (オルバス), the Merman
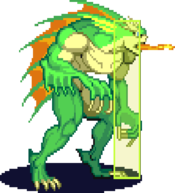
Residing underneath the Amazon, the peaceful kingdom of merfolk would abruptly come to an end with a tremendous volcanic eruption and earthquake. The hero of the kingdom, Emperor Aulbath was thought to be the sole survivor. After uncovering the responsibility of Pyron for the destruction of his home, Aulbath vowed to stop him. Happening upon another survivor, Aqueria, he decided to start a family and sought to rebuild his empire. This newfound peace would not last forever, however, as Aulbath would venture into Jedah's Majigen in search of his and Aqueria's missing son.
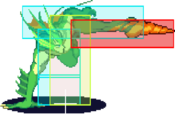
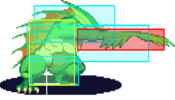
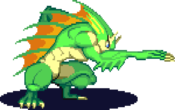
Aulbath is a strong character with a very effective corner game. He is simple to pick up, yet has the depth to keep players interested in his play style.
Gameplay
Primary Objectives:
- Control space & gain meter with his amazing normals
- Start offense with dashing attacks
- Use regular throw, OS-command throw, frame-traps, & instant overhead 9LK to open up the opponent
- Anti-air with Sonic Wave or Poison Cloud for big damage
- Utilize Water Jail loops for big wins in the corner.
- Use defensive Dark Force to escape the corner and gain the corner advantage
| Strengths | Weaknesses |
|---|---|
|
|
Movement
Walk: Aulbath has the 3rd fastest walk speed in the game.
Dash: Aulbath is a ground dash character and his dash allows him to dash under fireballs if he doesn't press a button while he's dashing. You can also use this dash to get under certain badly placed jump-ins because of the speed of the dash.
Back Dash: Aulbath's back dash is unique because he hops backwards up to three times. Not terribly useful, but something to note.
Jump: Aulbath's jump arc is about average as well. He can cover most of the screen in front of and below him with his air-normals. However certain high jumping characters (Felicia, Gallon) might give you a bit of trouble.
Normal Moves
Standing Normals
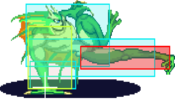
5LP
| Startup | Active | Recovery | Hit Adv. | Block Adv. | Renda Bonus |
|---|---|---|---|---|---|
| 5 | 3 | 8 | 8 | 7 | H: 11 G: 10 |
| Guard | Cancel | Invuln | Red Damage | White Damage | Gauge |
| mid | yes | - | 7 | 3 | H: 6 G: 3 W: 0 |
5MP
| Startup | Active | Recovery | Hit Adv. | Block Adv. | Renda Bonus |
|---|---|---|---|---|---|
| 6 | 6x3 | 21 | 0 | -1 | N/A |
| Guard | Cancel | Invuln | Red Damage | White Damage | Gauge |
| mid | no | - | 10+8 | 4+3 | H: 9+6 G: 6+3 W: 3 |
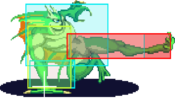
5HP
| Startup | Active | Recovery | Hit Adv. | Block Adv. | Renda Bonus |
|---|---|---|---|---|---|
| 11 | 17 | 26 | - | -19 | N/A |
| Guard | Cancel | Invuln | Red Damage | White Damage | Gauge |
| mid | no | - | 21 | 7 | H: 24 G: 15 W: 6 |
5LK
| Startup | Active | Recovery | Hit Adv. | Block Adv. | Renda Bonus |
|---|---|---|---|---|---|
| 5 | 3 | 7 | 6 | 5 | H: 9 G: 8 |
| Guard | Cancel | Invuln | Red Damage | White Damage | Gauge |
| mid | yes | - | - | 4 | H: 6 G: 3 W: 0 |
5MK
| Startup | Active | Recovery | Hit Adv. | Block Adv. | Renda Bonus |
|---|---|---|---|---|---|
| 6 | 3 | 23 | -2 | -3 | N/A |
| Guard | Cancel | Invuln | Red Damage | White Damage | Gauge |
| mid | yes | - | 16 | 6 | H: 15 G: 9 W: 3 |
5HK
| Startup | Active | Recovery | Hit Adv. | Block Adv. | Renda Bonus |
|---|---|---|---|---|---|
| 8 | 4 | 32 | -7 | -8 | N/A |
| Guard | Cancel | Invuln | Red Damage | White Damage | Gauge |
| mid | no | - | 20 | 7 | H: 24 G: 15 W: 6 |
Close Normals
CL.5HK
| Startup | Active | Recovery | Hit Adv. | Block Adv. | Renda Bonus |
|---|---|---|---|---|---|
| 7 | 4 | 21 | 4 | 3 | N/A |
| Guard | Cancel | Invuln | Red Damage | White Damage | Gauge |
| mid | no | - | 22 | 8 | H: 24 G: 15 W: 6 |
Crouching Normals
2LP
| Startup | Active | Recovery | Hit Adv. | Block Adv. | Renda Bonus |
|---|---|---|---|---|---|
| 5 | 3 | 7 | 9 | 8 | H: 12 G: 11 |
| Guard | Cancel | Invuln | Red Damage | White Damage | Gauge |
| mid | yes | - | 7 | 3 | H: 6 G: 3 W: 0 |
2MP
| Startup | Active | Recovery | Hit Adv. | Block Adv. | Renda Bonus |
|---|---|---|---|---|---|
| 6 | 3(5)3 | 12 | 6 | 5 | N/A |
| Guard | Cancel | Invuln | Red Damage | White Damage | Gauge |
| mid | first | - | 10+7 | 4+3 | H: 9+6 G: 6+3 W: 3 |
2HP
| Startup | Active | Recovery | Hit Adv. | Block Adv. | Renda Bonus |
|---|---|---|---|---|---|
| 7 | 3(3)3 | 25 | - | -1 | N/A |
| Guard | Cancel | Invuln | Red Damage | White Damage | Gauge |
| mid | no | - | 8+13 | 3+5 | H: 15+9 G: 10+4 W: 6 |
2LK
| Startup | Active | Recovery | Hit Adv. | Block Adv. | Renda Bonus |
|---|---|---|---|---|---|
| 5 | 3 | 9 | 7 | 6 | H: 10 G: 9 |
| Guard | Cancel | Invuln | Red Damage | White Damage | Gauge |
| low | yes | - | 7 | 3 | H: 6 G: 3 W: 0 |
2MK
| Startup | Active | Recovery | Hit Adv. | Block Adv. | Renda Bonus |
|---|---|---|---|---|---|
| 7 | 3(3)3 | 17 | 1 | 0 | N/A |
| Guard | Cancel | Invuln | Red Damage | White Damage | Gauge |
| low | no | - | 10+5 | 4+2 | H: 9+6 G: 6+3 W: 3 |
2HK
| Startup | Active | Recovery | Hit Adv. | Block Adv. | Renda Bonus |
|---|---|---|---|---|---|
| 8 | 4 | 25 | - | -1 | N/A |
| Guard | Cancel | Invuln | Red Damage | White Damage | Gauge |
| low | no | - | 19 | 8 | H: 24 G: 15 W: 6 |
Dashing Normals
66LP
| Startup | Active | Recovery | Hit Adv. | Block Adv. | Renda Bonus |
|---|---|---|---|---|---|
| 4 | 3 | 12 | 4 | 3 | N/A |
| Guard | Cancel | Invuln | Red Damage | White Damage | Gauge |
| mid | no | - | 7 | 3 | H: 6 G: 3 W: 0 |
66MP
| Startup | Active | Recovery | Hit Adv. | Block Adv. | Renda Bonus |
|---|---|---|---|---|---|
| 5 | 3(5)3 | 12 | 6 | 5 | N/A |
| Guard | Cancel | Invuln | Red Damage | White Damage | Gauge |
| mid | no | - | 10+7 | 4+3 | H: 9+6 G: 6+3 W: 3 |
66HP
| Startup | Active | Recovery | Hit Adv. | Block Adv. | Renda Bonus |
|---|---|---|---|---|---|
| 8 | 6x3 | 18 | -8 | -9 | N/A |
| Guard | Cancel | Invuln | Red Damage | White Damage | Gauge |
| mid | no | - | 8x3 | 3x3 | H: 12+6x2 G: 9+3x2 W: 6 |
66LK
| Startup | Active | Recovery | Hit Adv. | Block Adv. | Renda Bonus |
|---|---|---|---|---|---|
| 4 | 3 | 12 | 4 | 3 | N/A |
| Guard | Cancel | Invuln | Red Damage | White Damage | Gauge |
| low | no | - | 7 | 3 | H: 6 G: 3 W: 0 |
66MK
| Startup | Active | Recovery | Hit Adv. | Block Adv. | Renda Bonus |
|---|---|---|---|---|---|
| 5 | 3(3)3 | 17 | 1 | 0 | N/A |
| Guard | Cancel | Invuln | Red Damage | White Damage | Gauge |
| low | no | - | 10+5 | 4+2 | H: 9+6 G: 6+3 W: 3 |
66HK
| Startup | Active | Recovery | Hit Adv. | Block Adv. | Renda Bonus |
|---|---|---|---|---|---|
| 7 | 4 | 25 | - | -1 | N/A |
| Guard | Cancel | Invuln | Red Damage | White Damage | Gauge |
| low | no | - | 19 | 8 | H: 24 G: 15 W: 6 |
Air Normals
J.LP
| Startup | Active | Recovery | Hit Adv. | Block Adv. | Renda Bonus |
|---|---|---|---|---|---|
| 5 | 6 | 4 | - | - | N/A |
| Guard | Cancel | Invuln | Red Damage | White Damage | Gauge |
| overhead | no | - | 7 | 3 | H: 6 G: 3 W: 0 |
J.MP
| Startup | Active | Recovery | Hit Adv. | Block Adv. | Renda Bonus |
|---|---|---|---|---|---|
| 6 | 5 | 4 | - | - | N/A |
| Guard | Cancel | Invuln | Red Damage | White Damage | Gauge |
| overhead | no | - | 16 | 6 | H: 15 G: 9 W: 3 |
J.HP
| Startup | Active | Recovery | Hit Adv. | Block Adv. | Renda Bonus |
|---|---|---|---|---|---|
| 8 | 6 | 18 | - | - | N/A |
| Guard | Cancel | Invuln | Red Damage | White Damage | Gauge |
| overhead | no | - | 21 | 8 | H: 24 G: 15 W: 6 |
J.LK
| Startup | Active | Recovery | Hit Adv. | Block Adv. | Renda Bonus |
|---|---|---|---|---|---|
| 5 | 6 | 10 | - | - | N/A |
| Guard | Cancel | Invuln | Red Damage | White Damage | Gauge |
| overhead | no | - | 8 | 4 | H: 6 G: 3 W: 0 |
J.MK
| Startup | Active | Recovery | Hit Adv. | Block Adv. | Renda Bonus |
|---|---|---|---|---|---|
| 7 | 6 | 9 | - | - | N/A |
| Guard | Cancel | Invuln | Red Damage | White Damage | Gauge |
| overhead | no | - | 16 | 6 | H: 15 G: 9 W: 3 |
J.HK
| Startup | Active | Recovery | Hit Adv. | Block Adv. | Renda Bonus |
|---|---|---|---|---|---|
| 9 | 6 | 9 | - | - | N/A |
| Guard | Cancel | Invuln | Red Damage | White Damage | Gauge |
| overhead | no | - | 19 | 7 | H: 24 G: 15 W: 6 |
J.2HK
| Startup | Active | Recovery | Hit Adv. | Block Adv. | Renda Bonus |
|---|---|---|---|---|---|
| 10 | until landing | 4 | - | - | N/A |
| Guard | Cancel | Invuln | Red Damage | White Damage | Gauge |
| mid | no | - | 19 | 7 | H: 24 G: 15 W: 6 |
Normal Throws
4 or 6 MP/HP
Throw button?: As for what button to throw with, 5MP tends to be the better option here, since 5HP is air blockable. However, if your timing is poor, you do 5MP late, or it gets crouched, letting it whiff, may get you killed if the opponent punishes your recovery when you attempt throwing. Most players will know this weakness and try to find opportunities to exploit it.
In practice, throwing with 5HP could be better, because if they air block it getting a strong punish isn't very practical, though it is possible to get an incredibly strong punish there. The bigger problem with 5HP is if they block it while on the ground. In that situation, letting an opponent ground blocking 5HP is exceptionally more dangerous than a blocked 5MP, since 5HP is -19 on block — at best. Landing recovery on 5.HP is only 1 frame though, making for certain punishes hard, but at minimum you have to expect a sweep coming.
In the end, what button you use is heavily based on the character you are fighting against, since certain ones rise into the air slower than others when jumping, making them more likely to be tagged with 5MP. Reading the habits of your opponent, whether they tend to jump or stand grounded is also important. Choose wisely.
Full damage even when teched: It doesn't matter if the throw is teched or not, the opponent will always take full damage. This normal throw is essentially a techable command throw. Even if they happen to tech it, Aulbath is at +21 frames afterwards, making it very easy for him, on reaction, to dash forward and lay on meaty pressure. Against some opponents with good rolls, it may be actually better for Aulbath if they tech the throw midscreen, since it places them in an easy to pressure situation.
Follow-up hit: This throw actually has a follow-up to it, something uncommon to all other characters besides Victor. 28 frames in, about when the opponent's body slams into the floor, if you press the opposite direction from the throw, Aulbath will flip them over, slamming them down a second time. There is only a 3 frame window available to input the follow-up, making it very tight input. The follow-up will place them in the opposite direction the opponent was thrown originally, so keep that in mind when using it.
| Startup | Active | Recovery | Hit Adv. | Block Adv. | Renda Bonus |
|---|---|---|---|---|---|
| 1 | - | 54 | - | - | N/A |
| Guard | Cancel | Invuln | Red Damage | White Damage | Gauge |
| throw | no | 1-53 whole body | 17 (17) | 6 (6) | H: 9 G: 0 W: 0 |
| Startup | Active | Recovery | Hit Adv. | Block Adv. | Renda Bonus |
|---|---|---|---|---|---|
| 1 | - | 78 | - | - | N/A |
| Guard | Cancel | Invuln | Red Damage | White Damage | Gauge |
| throw | no | 1-77 whole body | 10+17 (10+17) | 4+6 (4+6) | H: 9 G: 0 W: 0 |
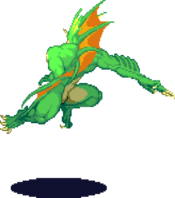
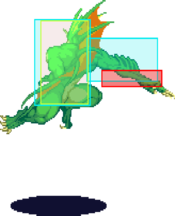
J.6P or J.4P
| Startup | Active | Recovery | Hit Adv. | Block Adv. | Renda Bonus |
|---|---|---|---|---|---|
| 1 | - | 54 + landing 1 | - | - | N/A |
| Guard | Cancel | Invuln | Red Damage | White Damage | Gauge |
| throw | no | 1-54 whole body | 20 (9) | 7 (3) | H: 9 G: 0 W: 0 |
A relatively easy to land air throw. From his jump height, position of the air throw grab line, and the fact you're probably mashing MP every time you jump — you'll probably be tossing them constantly.
If this is teched, Aulbath is usually in an slightly iffy situation due to extremely poor frame advantage. Some characters can actually punish him if they tech his air throw, however the timing for that is extremely tight and difficult to do on reaction.
- Frame advantage when teched varies based on the character:
- -26f: Felicia, Victor
- -25f: Aulbath, Lilith, Morrigan, Sasquatch, Zabel
- -24f: Anakaris, Bishamon, Bulleta, Demitri, Jedah, Q-Bee
- -23f: Lei-Lei, Gallon
Special Moves
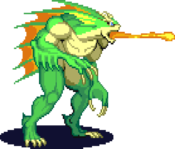
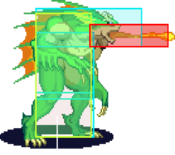
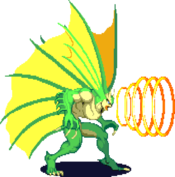
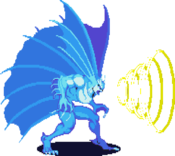
Sonic Wave
[4],6P
| Startup | Active | Recovery | Hit Adv. | Block Adv. | Renda Bonus |
|---|---|---|---|---|---|
| 15 | 17 | 23 | 63 | 2 | N/A |
| Guard | Cancel | Invuln | Red Damage | White Damage | Gauge |
| mid | no | - | 13 | 5 | H: 21 G: 18 W: 15 |
Fastest, shortest range. Good anti air; builds good meter.
| Startup | Active | Recovery | Hit Adv. | Block Adv. | Renda Bonus |
|---|---|---|---|---|---|
| 16 | 23 | 27 | 59 | 2 | N/A |
| Guard | Cancel | Invuln | Red Damage | White Damage | Gauge |
| mid | no | - | 13 | 5 | H: 21 G: 18 W: 15 |
Slower than L version but travels about 50% more distance.
| Startup | Active | Recovery | Hit Adv. | Block Adv. | Renda Bonus |
|---|---|---|---|---|---|
| 18 | 29 | 31 | 55 | -6 | N/A |
| Guard | Cancel | Invuln | Red Damage | White Damage | Gauge |
| mid | no | - | 13 | 5 | H: 21 G: 18 W: 15 |
Slowest. Max distance is about 1/2 screen.
| Startup | Active | Recovery | Hit Adv. | Block Adv. | Renda Bonus |
|---|---|---|---|---|---|
| 15 | 63 | 23 | 63 | 2 | N/A |
| Guard | Cancel | Invuln | Red Damage | White Damage | Gauge |
| mid | no | - | 13,18 | 5,6 | H: 0 G: 0 W: 0 |
Poison Cloud
[4],6K
| Startup | Active | Recovery | Hit Adv. | Block Adv. | Renda Bonus |
|---|---|---|---|---|---|
| 28 | 25 | 25 | 61 | 0 | N/A |
| Guard | Cancel | Invuln | Red Damage | White Damage | Gauge |
| mid | no | - | 9 | 4 | H: 21 G: 18 W: 15 |
Fastest. Cloud appears at about 30% a screen away from Aulbath.
| Startup | Active | Recovery | Hit Adv. | Block Adv. | Renda Bonus |
|---|---|---|---|---|---|
| 30 | 25 | 29 | 57 | -4 | N/A |
| Guard | Cancel | Invuln | Red Damage | White Damage | Gauge |
| mid | no | - | 9 | 4 | H: 21 G: 18 W: 15 |
Cloud appears at about 50% a screen away from Aulbath.
| Startup | Active | Recovery | Hit Adv. | Block Adv. | Renda Bonus |
|---|---|---|---|---|---|
| 34 | 25 | 34 | 52 | -9 | N/A |
| Guard | Cancel | Invuln | Red Damage | White Damage | Gauge |
| mid | no | - | 9 | 4 | H: 21 G: 18 W: 15 |
Slowest. 70% screen distance away from Aulbath.
| Startup | Active | Recovery | Hit Adv. | Block Adv. | Renda Bonus |
|---|---|---|---|---|---|
| 28 | 25 | 25 | 61 | 0 | N/A |
| Guard | Cancel | Invuln | Red Damage | White Damage | Gauge |
| mid | no | - | 15 | 5 | H: 0 G: 0 W: 0 |
Trick Fish
623K
| Startup | Active | Recovery | Hit Adv. | Block Adv. | Renda Bonus |
|---|---|---|---|---|---|
| 25 | 15 | 14 + landing 8 | - | -9 | N/A |
| Guard | Cancel | Invuln | Red Damage | White Damage | Gauge |
| mid | no | 4-6 feet | 22 | 5 | H: 24 G: 21 W: 18 |
Shortest range
| Startup | Active | Recovery | Hit Adv. | Block Adv. | Renda Bonus |
|---|---|---|---|---|---|
| 25 | 18 | 18 + landing 8 | - | -9 | N/A |
| Guard | Cancel | Invuln | Red Damage | White Damage | Gauge |
| mid | no | 4-6 feet | 24 | 6 | H: 24 G: 21 W: 18 |
Medium range
| Startup | Active | Recovery | Hit Adv. | Block Adv. | Renda Bonus |
|---|---|---|---|---|---|
| 26 | 22 | 22 + landing 8 | - | -10 | N/A |
| Guard | Cancel | Invuln | Red Damage | White Damage | Gauge |
| mid | no | 4-6 feet | 26 | 7 | H: 24 G: 21 W: 18 |
Longest range
| Startup | Active | Recovery | Hit Adv. | Block Adv. | Renda Bonus |
|---|---|---|---|---|---|
| 25 | 3x7,2 | 22 + landing 8 | - | -14 | N/A |
| Guard | Cancel | Invuln | Red Damage | White Damage | Gauge |
| mid | no | 4-6 feet | 15x3 | 5x3 | H: 0 G: 0 W: 0 |
Trick Fish GC
623LK
| Startup | Active | Recovery | Hit Adv. | Block Adv. | Renda Bonus |
|---|---|---|---|---|---|
| 25 | 15 | 14 + landing 8 | - | -9 | N/A |
| Guard | Cancel | Invuln | Red Damage | White Damage | Gauge |
| mid | no | 1-23 whole body | 10 | 2 | H: 24 G: 21 W: 18 |
| Startup | Active | Recovery | Hit Adv. | Block Adv. | Renda Bonus |
|---|---|---|---|---|---|
| 25 | 18 | 18 + landing 8 | - | -9 | N/A |
| Guard | Cancel | Invuln | Red Damage | White Damage | Gauge |
| mid | no | 1-23 whole body | 12 | 3 | H: 24 G: 21 W: 18 |
| Startup | Active | Recovery | Hit Adv. | Block Adv. | Renda Bonus |
|---|---|---|---|---|---|
| 26 | 22 | 22 + landing 8 | - | -10 | N/A |
| Guard | Cancel | Invuln | Red Damage | White Damage | Gauge |
| mid | no | 1-23 whole body | 12 | 3 | H: 24 G: 21 W: 18 |
| Startup | Active | Recovery | Hit Adv. | Block Adv. | Renda Bonus |
|---|---|---|---|---|---|
| 25 | 3x7,2 | 22 + landing 8 | - | -14 | N/A |
| Guard | Cancel | Invuln | Red Damage | White Damage | Gauge |
| mid | no | 1-23 whole body | 7x3 | 2x3 | H: 0 G: 0 W: 0 |
Command Throws
6324P
Input Priority: If you press LP with either MP or HP at the same time, the LP will always come out over the other two attacks. This can be utilized with Aulbath's command throw by simply inputting 6324LP+MP, making it so a whiffed command grab will result in the safer and faster 5.LP instead of an MP or HP. The downside to using this method with Crystal Lancer is that if you have meter, on a successful grab it will be the ES version. While the damage on the ES version is nice, sometimes you want to save that meter for a bubble or Aulbath's other great meter options. Utilize this application at your own discretion.
Negative Edge: Utilizing Negative Edge with command grabs is something very strong. Negative edge is where you release a button to activate a special move, instead of pressing the button. This means you must already be holding down MP or HP, input 6324, and then release MP or HP. If done correctly, when you're in range you'll grab the opponent, and if you're out of range nothing will happen. For Aulbath, it allows you to completely sidestep having to risk a 5MP or 5HP whiffing. Use of this is situationally dependent, sometimes you may want to press the button and sometimes you may not.
| Startup | Active | Recovery | Hit Adv. | Block Adv. | Renda Bonus |
|---|---|---|---|---|---|
| 2 | 1 | 31 | - | - | N/A |
| Guard | Cancel | Invuln | Red Damage | White Damage | Gauge |
| throw | no | 1 whole body | 4+4+19 | 2+2+4 | H: 21 G: 0 W: 12 |
| Startup | Active | Recovery | Hit Adv. | Block Adv. | Renda Bonus |
|---|---|---|---|---|---|
| 2 | 1 | 31 | - | - | N/A |
| Guard | Cancel | Invuln | Red Damage | White Damage | Gauge |
| throw | no | 1 whole body | 4x6+13 | 2x7 | H: 0 G: 0 W: 0 |
6324K
Since this is a kick throw, it opens up 5MK and 5HK as throw buttons. Input priority tricks, as mentioned under Crystal Lancer, also allow for 5LK and 5LP as throw buttons. Using 5.LK will result in the ES Version of Gem's Anger if you have meter, however an input such as 6324MK+LP will result an ES version not coming out on success and an LP coming out on whiff.
This is a bit of odd command throw, it has a pretty slow start up — but with a massive amount of invincibility frames to insure that it will grab as long as they don't jump. You'll often see a normal going right through Aulbath's body just before he grabs them. It looks somewhat strange at first tends to catch people by surprise until they get used to it. Another thing to note in regards to the start up time, there is a much larger chance of getting the somewhat rare throw-whiff animation if the opponent jumps after the throw has already been input. The total frames of this throw on whiff are 38 frames.
Gem's Anger actually gives better much better okizeme than Crystal Lancer, since it leaves the opponent right next to Aulbath and gives him plenty of time to move around. You can take a few steps backwards and then set up a bubble to cover their roll options.
| Startup | Active | Recovery | Hit Adv. | Block Adv. | Renda Bonus |
|---|---|---|---|---|---|
| 7 | 1 | 31 | - | - | N/A |
| Guard | Cancel | Invuln | Red Damage | White Damage | Gauge |
| throw | no | 1-6 whole body | 6x8 | 2x8 | H: 21 G: 0 W: 12 |
| Startup | Active | Recovery | Hit Adv. | Block Adv. | Renda Bonus |
|---|---|---|---|---|---|
| 7 | 1 | 31 | - | - | N/A |
| Guard | Cancel | Invuln | Red Damage | White Damage | Gauge |
| throw | no | 1-6 whole body | 5x8+12 | 2x8+2 | H: 0 G: 0 W: 0 |
Pursuits
8P/K or 8KK/PP
| Startup | Active | Recovery | Hit Adv. | Block Adv. | Renda Bonus |
|---|---|---|---|---|---|
| 18 | 21 | landing 8 | - | - | N/A |
| Guard | Cancel | Invuln | Red Damage | White Damage | Gauge |
| mid | no | - | 6 | 6 | H: 24 G: 0 W: 6 |
| Startup | Active | Recovery | Hit Adv. | Block Adv. | Renda Bonus |
|---|---|---|---|---|---|
| 15 | 21 | landing 8 | - | - | N/A |
| Guard | Cancel | Invuln | Red Damage | White Damage | Gauge |
| mid | no | - | 5x3 | 5x3 | H: 0 G: 0 W: 0 |
Ex Moves =
632PP or 632KK
| Startup | Active | Recovery | Hit Adv. | Block Adv. | Renda Bonus |
|---|---|---|---|---|---|
| 42-124 | 52 | 61-101 | - | -4 | N/A |
| Guard | Cancel | Invuln | Red Damage | White Damage | Gauge |
| mid | no | - | 40,22 | 10,8 | H: 0 G: 0 W: 0 |
| Startup | Active | Recovery | Hit Adv. | Block Adv. | Renda Bonus |
|---|---|---|---|---|---|
| 42-101 | 52 | 61 | - | -4 | N/A |
| Guard | Cancel | Invuln | Red Damage | White Damage | Gauge |
| mid | no | - | 40,22 | 10,8 | H: 0 G: 0 W: 0 |
623PP
| Startup | Active | Recovery | Hit Adv. | Block Adv. | Renda Bonus |
|---|---|---|---|---|---|
| 37 | 78 | 50 | - | - | N/A |
| Guard | Cancel | Invuln | Red Damage | White Damage | Gauge |
| unblockable | no | - | 12+0/14f | 4+1/14f | H: 0 G: 0 W: 0 |
412[6]PP
| Startup | Active | Recovery | Hit Adv. | Block Adv. | Renda Bonus |
|---|---|---|---|---|---|
| 28 | 110 | 123 | 7 | -11 | N/A |
| Guard | Cancel | Invuln | Red Damage | White Damage | Gauge |
| mid | no | - | (14,10,8)x8 | (5,4,3)x8 | H: 0 G: 0 W: 0 |
22PPP
| Startup | Active | Recovery | Hit Adv. | Block Adv. | Renda Bonus |
|---|---|---|---|---|---|
| 25 | 3 | 38 | - | -23 | N/A |
| Guard | Cancel | Invuln | Red Damage | White Damage | Gauge |
| mid | no | - | 21 | 5 | H: 0 G: 0 W: 0 |
Dark Force
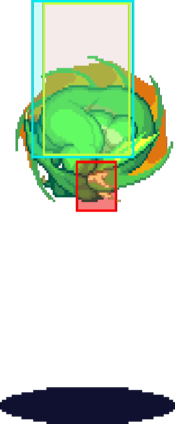
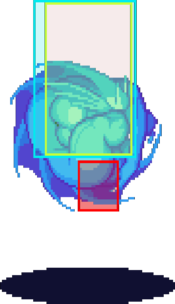
Wave Surfing: Ocean Rage - Same strength P + K (32f Start Up; 34f of Invincibility; 8f Recovery after touching the ground when DF ends)
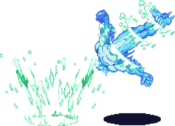
- Aulbath activates one of the best Dark-Forces in the game and hops on the Mach Crab! While surfing on the Mach Crab Aulbath enters a limited flight mode and gains and loses several abilities: He gets hyper armor but is unable to block, he cannot throw the opponent or be thrown by the opponent, and all of his attacks are the crouching versions though the opponent can block while standing, crouching or jumping.
- When surfing on the Mach Crab, Aulbath can move in all 8 directions freely, to a maximum height of a little above the middle of the screen. His forward movement while surfing is speedy, but surfing backwards is pretty slow. He can dash forward and backwards with 66 and 44, which covers the screen almost instantly.
- He has access to most of his special moves while riding on the Mach Crab, however he cannot use Trick Fish, Sea Rage, or either of his Command Throws. Direct Scissors also loses the overhead property and can be blocked while crouching. He can also special and ex cancel any normal, including during a chain combo on hit or block!
- LK+MK+HK (While in Dark-Force):
- Press all three Kick buttons to manually jump off the Mach Crab. By holding specific directions you can change how you hop off. While you're still in the air you're free to do jumping attacks and chains, these attacks must be blocked standing.
- 4, 5 or 6 + KKK will have Aulbath dismount the Mach Crab by hopping off with his normal jump height.
- 7, 8 or 9 + KKK will have Aulbath dismount the Mach Crab with a super jump!
- 1, 2 or 3 + KKK will have Aulbath dismount the Mach Crab with a short hop.
- Holding these directions while the Dark-Force timer naturally ends, or by pressing "Same Strength P+K" to forcibly end the Dark-Force will still allow you to control your dismount direction and attack on the way down. However, when ending the Dark-Force in the manner, Aulbath has a brief moment of recovery time as soon as he touches the ground which makes comboing incredibly difficult. Manually dismounting the Mach Crab with KKK doesn't end the Dark-Force, so the recovery is delayed and comboing from the air to the ground is much easier. Be aware that even if you are off of the Mach Crab, you will still have the 8 frame recovery time as soon as the Dark-Force ends.
- When manually dismounted from the crab, Aulbath regains his standard attributes. He has access to all of his special moves once again besides Sea Rage, which he still cannot use until the Dark-Force ends.
- LK+MK+HK (While still in Dark-Force, but you have manually jumped off of the Mach Crab):
- You saddle back up on the Mach Crab! Wherever the Mach Crab is on the screen, Aulbath leaps directly towards it and gets back on. The opponent can interrupt Aulbath's remount by attacking him. When back on the Mach Crab he regains all of his Dark-Force attributes.
- You can special cancel into the remount. It's even possible cancel Aulbath's backdash into remount, just like you can cancel it into a Trick Fish. Oddly enough you can simply hold down all three kick buttons to repeatedly get on and off the crab, which looks very silly. None of this has any practical use, because in a normal match the Dark-Force timer just doesn't last long enough to constantly dismount and remount.
How to properly use Aulbath's Dark Force:
- When using it as a purely defensive tool, due to the Hyper Armor it can get him out of some very dangerous situations. Most notably, is that he can use it to escape his own Bubble setups. Otherwise it is useful to try an escape grab attempts or to just escape the corner during typical corner pressure, as it automatically takes Aulbath away from the corner.
- While one of the strongest Dark-Force's in the game, if Aulbath doesn't get the initial hit at the start, opening up the opponent afterwards can be difficult since he can't throw or hit high or low. You want to get them jump on them right after activating, otherwise they'll just block until the Dark-Force ends. First thing to realize with his Dark-Force is that every time it is activated, Aulbath moves to the same part of the screen, which is essentially 1/4th across the total screen distance. It doesn't matter if he is in front of that spot or behind it, he'll leap forwards or backwards to get on that Mach Crab. If you have your opponent pushed towards the far end of the screen, you may need to instantly dash forward after recovering from your Dark-Force activation to get in range to attack.
- The best part about Aulbath moving to a specific position on the screen after activating Dark-Force is that if he is cornered with his opponent next to him, upon activation he will jump over them to that 1/4th screen position and onto the Mach Crab almost instantly; at the same time placing the opponent in the corner. If the opponent had Aulbath in the corner and misplaces an attack or a poor throw attempt right when Aulbath activates, there is a good chance for Aulbath to punish. Even if the opponent is able to block, the quick cross up may confuse them into not blocking correctly. From this position, if you get the hit you can chain them into a knockdown and then set up an unblockable bubble.
- If you fail to get that initial hit, you can try hopping off of the Mach Crab with KKK and go for a quick overhead, but most players should be expecting at least that much. Faking the overhead isn't a bad idea, and if you surf to the lowest point on the screen and do a short jump off of the Mach Crab with 3.KKK you can land surprisingly quickly and go right into a low attack. From that height it can become difficult to see if a high or low attack is coming.
- The last way to open someone up while in Dark-Force mode is to realize that even if Dark-Force'd Aulbath is hit while the Bubble is out, it will not cause it to pop. You can just try to brute force someone into the Bubble while not worrying about taking hits. Due to Aulbath being able to control his vertical positioning on the screen while surfing you have the ability to set Bubbles out a bit higher up, making it difficult (and maybe even impossible) for taller crouching opponents to duck under AND jump over.
Colors
Notable Players
Japan
Japanese Player Index: http://www21.atwiki.jp/vsplayer/pages/24.html
| Name (English) | Name (Japanese) | Color | Location | Contact | Notes |
|---|---|---|---|---|---|
| Uminoko | 海の子 | MK |
Kanto region | http://twitter.com/uminoko_ashino http://blog.livedoor.jp/uminoko_ashino/ https://www.youtube.com/channel/UCDzuHmgPAP8WqkrTW_pID3g |
East Japan's strongest Fish |
| Bow | MK |
Okayama | http://twitter.com/bow_Aulbath | West Japan's strongest Fish | |
| MaguMogu | マグモグ | HP |
North | https://twitter.com/_magumogu | North Japan's strongest Fish |
| Haiiro | 灰色 | KK |
Kanto region | http://twitter.com/haiiroaulbath | Name means "grey" in Japanese, hence his color. |
| Shou | しょう | LP |
Kanto region |
North America
| Name (English) | Name (Japanese) | Color | Location | Contact | Notes |
|---|---|---|---|---|---|
| Xanoz | ザノス | KK |
Colorado, USA | https://twitter.com/XanozIchimonji | Long time community organizer. Nicknamed VSAV Mama, and she's a big time Streets of Rage fan and player. |
| DaiAndOh | ダイアンドオー | PP |
New York, USA | https://twitter.com/DaiAndOh1 | Community Organizer. He's a huge basketball fan that will see you in NBA Jam always. Requires 2 chairs to play. |
| OMGWTFLOL | OMGWTFLOL | MK |
Pennsylvania, USA | https://twitter.com/BattousaiCV | Long time player and tech monster for VSAV. Known for playing with a custom built keyboard. She is also a legendary COTA player who may or not be a real life Terminator. |
| Miller2B | ミラー2B | MP |
Midwest, USA | https://www.fightcade.com/id/Miller2b | Strong Midwest Aulbath player that also plays Gallon. |
| ActionHank | アクションハンク | KK |
Ohio, USA | https://www.fightcade.com/id/ActionHank | VMP Fish player that has consistently been strong and very technical. |
| Lou Minaudi | ルーミナウディ | MK |
USA | https://www.fightcade.com/id/Lou_Minaudi | Originally an online Fish player that has done well at recent tournaments |
| GrooveDiva | グルーヴディーバ | KK |
Philadelphia, USA | https://www.twitter.com/GrooveDiva | Originally online fish player that went to his first major in 2022 and did incredibly well |
| Sonicspear | ソニックスピア | MP |
Ohio, USA | https://twitter.com/sonicspear64 | Very strong VMP Aulbath player |
Europe
| Name (English) | Name (Japanese) | Color | Location | Contact | Notes |
|---|---|---|---|---|---|
| Baldadidi | KK |
France | https://twitter.com/Baldadidi | Always fails the bubble, but wins the match |
South America
| Name (English) | Name (Japanese) | Color | Location | Contact | Notes |
|---|---|---|---|---|---|
| Ellecito | エレシト チェ | PP |
Concepcion, Chile | https://twitter.com/Ellecito | Fresh Fish from Chile! Very consistent defense and lethal offense con sus burbujas! |
