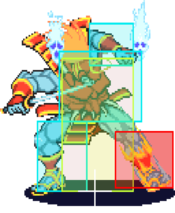
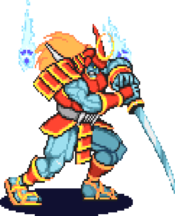
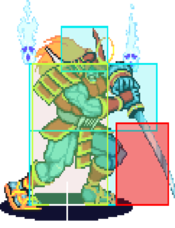
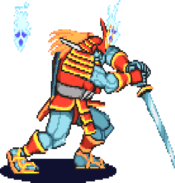
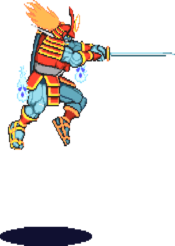
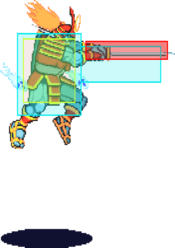
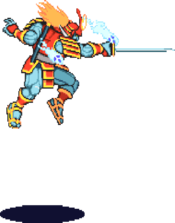
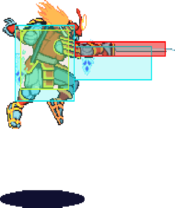
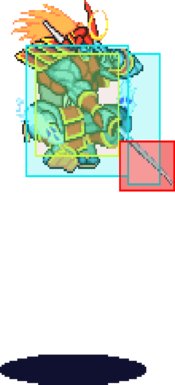
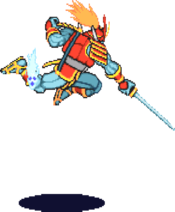
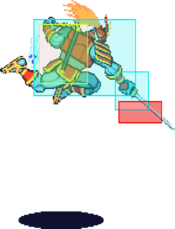
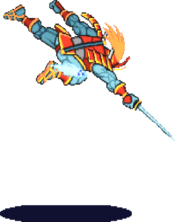
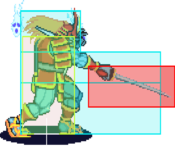
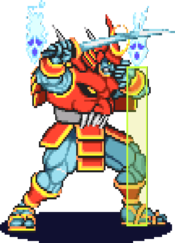
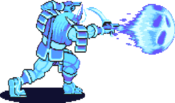
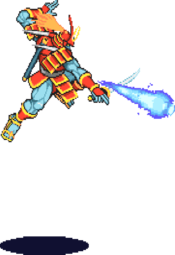
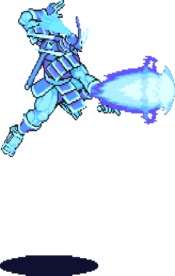
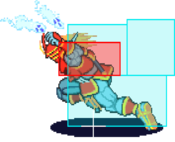
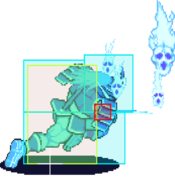
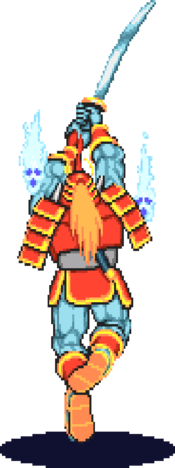
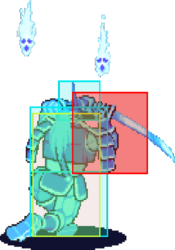
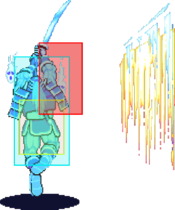
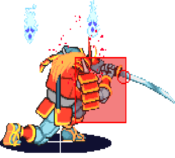
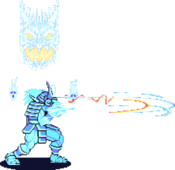
Vampire Savior/Bishamon
Introduction
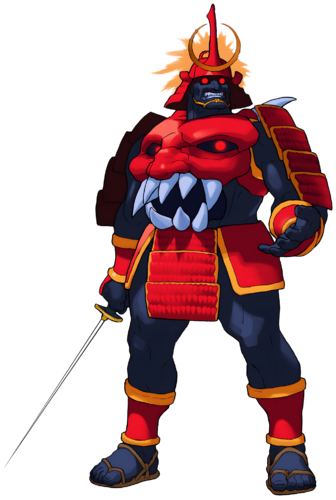
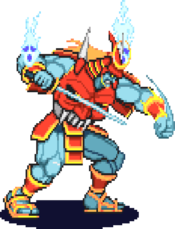
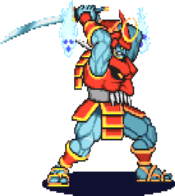
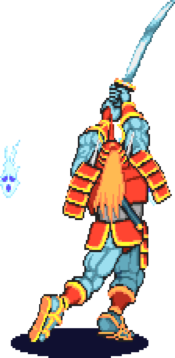
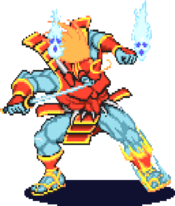
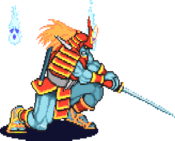
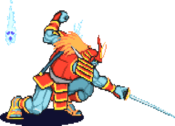
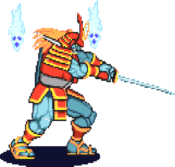
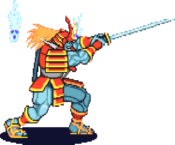
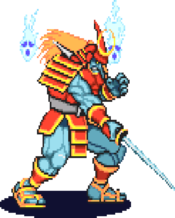
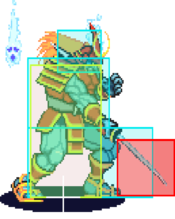
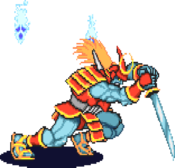
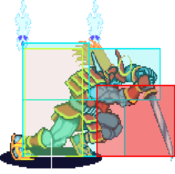
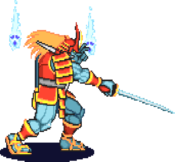
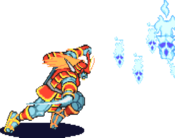
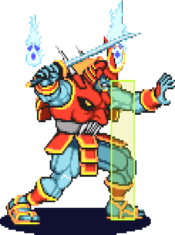
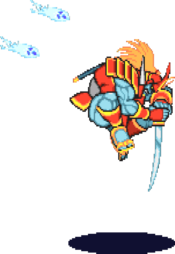
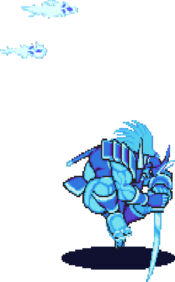
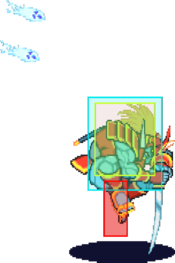
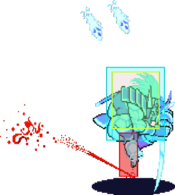
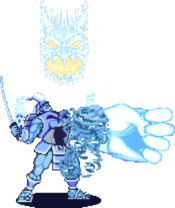
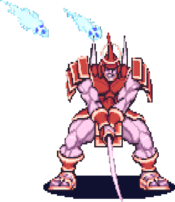
Bishamon (ビシャモン), the Cursed Armor
When browsing a shop selling antiquities, Bishamon uncovered a curious sword and armor that appeared to call to him. He was then surprised to find himself back in his home with the sword and armor beside him and with no recollection of forcing the shop keeper to give them to him. Letting his intrigue get the better of him, Bishamon donned the armor and immediately became lost to the bloodthirsty magic of the sword, Kien, and the armor, Hannya. After the arrival of Pyron, Bishamon overcame the grasp of the objects. After learning the origins of Hannya and Kien, Bishamon dedicated himself to preventing the items from ever taking another soul. In order to finally stop the malevolent objects, Bishamon confronted them in Jedah's Majigen.
Bishamon has link combos, Renda combos, unblockables, effective bugs, and big damage. Bishamon is recommended for players with great execution & who enjoy training - lab monsters excel with Bish! He can compete with the entire roster.
Gameplay
Primary objectives:
- Defensively control space leveraging Iai Giri, Karame Dama, jump attacks & 66MP
- Gain meter with defensive normal attacks
- Start offense with dashing light attacks
- Confirm dashing light attacks into big combos for damage & meter gain
- Once inside use regular throws, frame-traps, low attacks, & instant overheads to open up your opponent
- Anti-air with Iai Giri > Togakubi Sarashi for big damage
- Use the proper input/strings/spacing to set UBs/UB loop & maximize damage
| Strengths | Weaknesses |
|---|---|
|
|
Normal Moves
Standing Normals
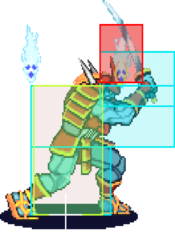
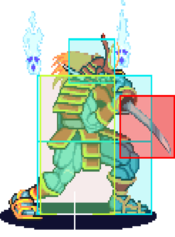
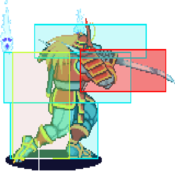
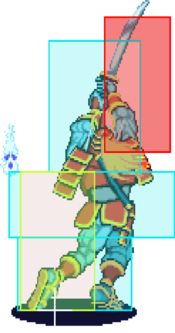
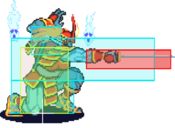
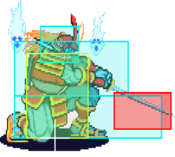
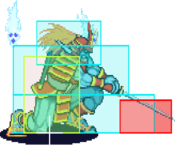
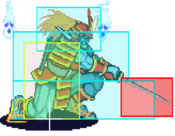
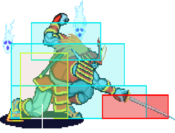
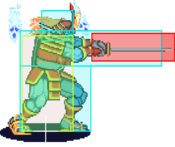
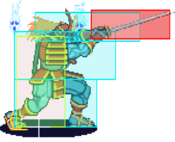
5LP
| Startup | Active | Recovery | Hit Adv. | Block Adv. | Renda Bonus |
|---|---|---|---|---|---|
| 5 | 3 | 7 | 6 | 5 | H: 9 G: 8 |
| Guard | Cancel | Invuln | Red Damage | White Damage | Gauge |
| mid | yes | - | 8 | 4 | H: 6 G: 3 W: 0 |
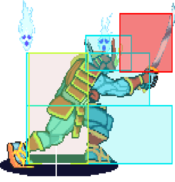
5MP
| Startup | Active | Recovery | Hit Adv. | Block Adv. | Renda Bonus |
|---|---|---|---|---|---|
| 10 | 2,2,8 | 11 | 2 | 1 | N/A |
| Guard | Cancel | Invuln | Red Damage | White Damage | Gauge |
| mid | no | - | 7+6+4 | 4+3+2 | H: 7+4+4 G: 5+2+2 W: 3 |
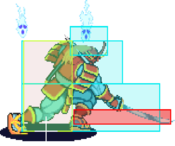
5HP
| Startup | Active | Recovery | Hit Adv. | Block Adv. | Renda Bonus |
|---|---|---|---|---|---|
| 8 | 3,3,3 | 29 | -7 | -8 | N/A |
| Guard | Cancel | Invuln | Red Damage | White Damage | Gauge |
| mid | no | - | 9+7+6 | 5+4+3 | H: 12+6+6 G: 9+3+3 W: 6 |
5LK
| Startup | Active | Recovery | Hit Adv. | Block Adv. | Renda Bonus |
|---|---|---|---|---|---|
| 5 | 3 | 9 | 7 | 6 | N/A |
| Guard | Cancel | Invuln | Red Damage | White Damage | Gauge |
| mid | yes | - | 8 | 4 | H: 6 G: 3 W: 0 |
5MK
| Startup | Active | Recovery | Hit Adv. | Block Adv. | Renda Bonus |
|---|---|---|---|---|---|
| 5 | 1 | 14 | 6 | 5 | N/A |
| Guard | Cancel | Invuln | Red Damage | White Damage | Gauge |
| mid | yes | - | 15 | 7 | H: 15 G: 9 W: 3 |
5HK
| Startup | Active | Recovery | Hit Adv. | Block Adv. | Renda Bonus |
|---|---|---|---|---|---|
| 7 | 3 | 16 | 6 | 5 | N/A |
| Guard | Cancel | Invuln | Red Damage | White Damage | Gauge |
| mid | no | - | 19 | 8 | H: 24 G: 15 W: 6 |
Crouching Normals
2LP
| Startup | Active | Recovery | Hit Adv. | Block Adv. | Renda Bonus |
|---|---|---|---|---|---|
| 5 | 3 | 5 | 8 | 7 | H: 11 G: 10 |
| Guard | Cancel | Invuln | Red Damage | White Damage | Gauge |
| mid | yes | - | 6 | 3 | H: 6 G: 3 W: 0 |
2MP
| Startup | Active | Recovery | Hit Adv. | Block Adv. | Renda Bonus |
|---|---|---|---|---|---|
| 6 | 3 | 14 | 4 | 3 | N/A |
| Guard | Cancel | Invuln | Red Damage | White Damage | Gauge |
| mid | yes | - | 15 | 7 | H: 15 G: 9 W: 3 |
2HP
| Startup | Active | Recovery | Hit Adv. | Block Adv. | Renda Bonus |
|---|---|---|---|---|---|
| 9 | 4 | 25 | -4 | -5 | N/A |
| Guard | Cancel | Invuln | Red Damage | White Damage | Gauge |
| mid | no | - | 19 | 8 | H: 24 G: 15 W: 6 |
2LK
| Startup | Active | Recovery | Hit Adv. | Block Adv. | Renda Bonus |
|---|---|---|---|---|---|
| 5 | 3 | 5 | 8 | 7 | N/A |
| Guard | Cancel | Invuln | Red Damage | White Damage | Gauge |
| low | yes | - | 6 | 3 | H: 6 G: 3 W: 0 |
2MK
| Startup | Active | Recovery | Hit Adv. | Block Adv. | Renda Bonus |
|---|---|---|---|---|---|
| 6 | 3(8)3 | 12 | 6 | 5 | N/A |
| Guard | Cancel | Invuln | Red Damage | White Damage | Gauge |
| low | first | - | 8+7 | 4+4 | H: 9+6 G: 6+3 W: 3 |
2HK
| Startup | Active | Recovery | Hit Adv. | Block Adv. | Renda Bonus |
|---|---|---|---|---|---|
| 11 | 4(12)4 | 15 | - | 5 | N/A |
| Guard | Cancel | Invuln | Red Damage | White Damage | Gauge |
| low | no | - | 18,16 | 8,7 | H: 24(24) G: 15+9 W: 6 |
Air Normals
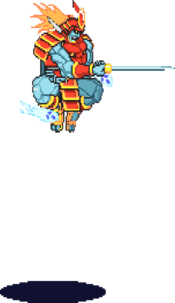
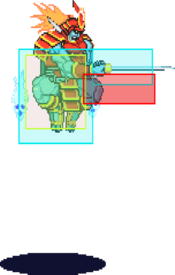
8J.LP
| Startup | Active | Recovery | Hit Adv. | Block Adv. | Renda Bonus |
|---|---|---|---|---|---|
| 6 | {3(3)3(7)}x2・2 | - | - | - | N/A |
| Guard | Cancel | Invuln | Red Damage | White Damage | Gauge |
| overhead | no | - | 8+7+8+7+8 | 4x5 | H: 6x5 G: 3x5 W: 0 |
9J.LP
| Startup | Active | Recovery | Hit Adv. | Block Adv. | Renda Bonus |
|---|---|---|---|---|---|
| 7 | 3 | 7 | - | - | N/A |
| Guard | Cancel | Invuln | Red Damage | White Damage | Gauge |
| overhead | no | - | 8 | 4 | H: 6 G: 3 W: 0 |
8J.MP
| Startup | Active | Recovery | Hit Adv. | Block Adv. | Renda Bonus |
|---|---|---|---|---|---|
| 6 | 3(6)3 | 7 | - | - | N/A |
| Guard | Cancel | Invuln | Red Damage | White Damage | Gauge |
| overhead | no | - | 17+14 | 7+6 | H: 15+12 G: 9+6 W: 3 |
9J.MP
| Startup | Active | Recovery | Hit Adv. | Block Adv. | Renda Bonus |
|---|---|---|---|---|---|
| - | - | - | - | - | N/A |
| Guard | Cancel | Invuln | Red Damage | White Damage | Gauge |
| - | - | - | - | - | H: - G: - W: - |
J.HP8
| Startup | Active | Recovery | Hit Adv. | Block Adv. | Renda Bonus |
|---|---|---|---|---|---|
| 7 | 3(9)3 | 4 | - | - | N/A |
| Guard | Cancel | Invuln | Red Damage | White Damage | Gauge |
| overhead | no | - | 23+18 | 10+8 | H: 24+18 G: 15+9 W: 6 |
9J.HP
| Startup | Active | Recovery | Hit Adv. | Block Adv. | Renda Bonus |
|---|---|---|---|---|---|
| 11 | 3 | 7 | - | - | N/A |
| Guard | Cancel | Invuln | Red Damage | White Damage | Gauge |
| overhead | no | - | 23 | 10 | H: 24 G: 15 W: 6 |
J.LK
| Startup | Active | Recovery | Hit Adv. | Block Adv. | Renda Bonus |
|---|---|---|---|---|---|
| 5 | 6 | 1 | - | - | N/A |
| Guard | Cancel | Invuln | Red Damage | White Damage | Gauge |
| overhead | no | - | 8 | 4 | H: 6 G: 3 W: 0 |
J.MK
| Startup | Active | Recovery | Hit Adv. | Block Adv. | Renda Bonus |
|---|---|---|---|---|---|
| 6 | 6 | 4 | - | - | N/A |
| Guard | Cancel | Invuln | Red Damage | White Damage | Gauge |
| overhead | no | - | 16 | 7 | H: 15 G: 9 W: 3 |
J.HK
| Startup | Active | Recovery | Hit Adv. | Block Adv. | Renda Bonus |
|---|---|---|---|---|---|
| 8 | 5 | 10 | - | - | N/A |
| Guard | Cancel | Invuln | Red Damage | White Damage | Gauge |
| overhead | no | - | - | 9 | H: 24 G: 15 W: 6 |
Command Normals
6LP
| Startup | Active | Recovery | Hit Adv. | Block Adv. | Renda Bonus |
|---|---|---|---|---|---|
| 6 | 3 | 15 | -2 | -3 | H: 1 G: 0 |
| Guard | Cancel | Invuln | Red Damage | White Damage | Gauge |
| mid | no | - | 7 | 3 | H: 3 G: 1 W: 0 |
| Startup | Active | Recovery | Hit Adv. | Block Adv. | Renda Bonus |
|---|---|---|---|---|---|
| - | 3 | 6 | 7 | 6 | N/A |
| Guard | Cancel | Invuln | Red Damage | White Damage | Gauge |
| mid | no | - | 6 | 3 | H: 3 G: 1 W: 0 |
6MP
| Startup | Active | Recovery | Hit Adv. | Block Adv. | Renda Bonus |
|---|---|---|---|---|---|
| 7 | 3 | 18 | 0 | -1 | N/A |
| Guard | Cancel | Invuln | Red Damage | White Damage | Gauge |
| mid | no | - | 16 | 7 | H: 9 G: 6 W: 3 |
| Startup | Active | Recovery | Hit Adv. | Block Adv. | Renda Bonus |
|---|---|---|---|---|---|
| - | 3 | 6 | 12 | 11 | N/A |
| Guard | Cancel | Invuln | Red Damage | White Damage | Gauge |
| mid | no | - | 13 | 6 | H: 9 G: 6 W: 3 |
6HP
| Startup | Active | Recovery | Hit Adv. | Block Adv. | Renda Bonus |
|---|---|---|---|---|---|
| 8 | 3 | 25 | -3 | -4 | N/A |
| Guard | Cancel | Invuln | Red Damage | White Damage | Gauge |
| mid | no | - | 20 | 8 | H: 15 G: 10 W: 6 |
| Startup | Active | Recovery | Hit Adv. | Block Adv. | Renda Bonus |
|---|---|---|---|---|---|
| - | 3 | 14 | 8 | 7 | N/A |
| Guard | Cancel | Invuln | Red Damage | White Damage | Gauge |
| mid | no | - | 16 | 7 | H: 15 G: 10 W: 6 |
6LK
| Startup | Active | Recovery | Hit Adv. | Block Adv. | Renda Bonus |
|---|---|---|---|---|---|
| 5 | 3 | 9 | 4 | 3 | N/A |
| Guard | Cancel | Invuln | Red Damage | White Damage | Gauge |
| mid | no | - | 7 | 3 | H: 6 G: 3 W: 0 |
6MK
| Startup | Active | Recovery | Hit Adv. | Block Adv. | Renda Bonus |
|---|---|---|---|---|---|
| 6 | 3 | 15 | 3 | 2 | N/A |
| Guard | Cancel | Invuln | Red Damage | White Damage | Gauge |
| mid | no | - | 16 | 7 | H: 15 G: 9 W: 3 |
6HK
| Startup | Active | Recovery | Hit Adv. | Block Adv. | Renda Bonus |
|---|---|---|---|---|---|
| 7 | 3 | 20 | -7 | -8 | N/A |
| Guard | Cancel | Invuln | Red Damage | White Damage | Gauge |
| mid | no | - | 20 | 8 | H: 24 G: 15 W: 6 |
Normal Throws
6MP or 6HP
| Startup | Active | Recovery | Hit Adv. | Block Adv. | Renda Bonus |
|---|---|---|---|---|---|
| 1 | - | 42 | - | - | N/A |
| Guard | Cancel | Invuln | Red Damage | White Damage | Gauge |
| throw | no | 1-41 whole body | 22 (11) | 8 (4) | H: 9 G: 0 W: 0 |
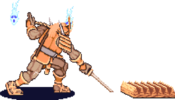
An important tool of Bishamon's mixup game. Good setup for Slap-Chop or whiffed pursuits. If the opponent Tech's the throw, you can setup UB ES KD spacing.
- Frame advantage when teched varies based on the character:
- +16: Aulbath, Felicia
- +17: Lei-Lei, Morrigan
- +18: Bishamon, Bulleta, Demitri, Jedah, Lilith, Sasquatch, Victor
- +19: Anakaris, Gallon, Q-Bee
- +20: Zabel
J.6P or J.4P
| Startup | Active | Recovery | Hit Adv. | Block Adv. | Renda Bonus |
|---|---|---|---|---|---|
| 1 | - | 37+12+landing 1 | - | - | N/A |
| Guard | Cancel | Invuln | Red Damage | White Damage | Gauge |
| throw | no | 1-37 whole body | 21 (10) | 8 (4) | H: 9 G: 0 W: 0 |
Special Moves
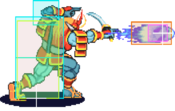
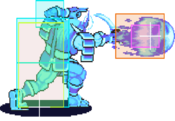
Karame Dama
4123P
| Startup | Active | Recovery | Hit Adv. | Block Adv. | Renda Bonus |
|---|---|---|---|---|---|
| 12 | 78 | 2~86 | - | -9 | N/A |
| Guard | Cancel | Invuln | Red Damage | White Damage | Gauge |
| mid | no | - | 11 | 4 | H: 18 G: 15 W: 12 |
Slowest version, only used for frame-traps
| Startup | Active | Recovery | Hit Adv. | Block Adv. | Renda Bonus |
|---|---|---|---|---|---|
| 12 | 65 | 2~73 | - | -4 | N/A |
| Guard | Cancel | Invuln | Red Damage | White Damage | Gauge |
| mid | no | - | 11 | 4 | H: 18 G: 15 W: 12 |
Average speed, used for frame-traps
| Startup | Active | Recovery | Hit Adv. | Block Adv. | Renda Bonus |
|---|---|---|---|---|---|
| 12 | 56 | 2~63 | - | 0 | N/A |
| Guard | Cancel | Invuln | Red Damage | White Damage | Gauge |
| mid | no | - | 11 | 4 | H: 18 G: 15 W: 12 |
Used for standing combos without meter
| Startup | Active | Recovery | Hit Adv. | Block Adv. | Renda Bonus |
|---|---|---|---|---|---|
| 12 | 41 | 2~47 | - | 0 | N/A |
| Guard | Cancel | Invuln | Red Damage | White Damage | Gauge |
| mid | no | - | 14 | 7 | H: 0 G: 0 W: 0 |
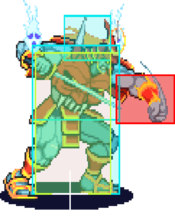
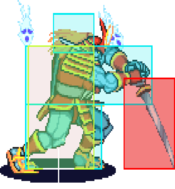
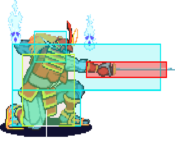
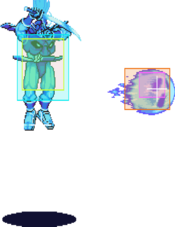
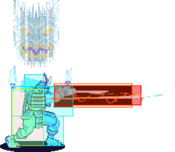
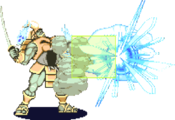
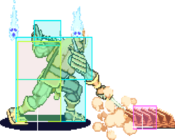
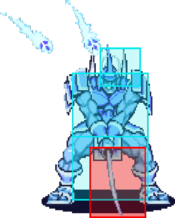
ES KD is an effective mid-range poke due to it's high damage potential, disjointed box & overall speed. It also has some unblockable frames when standing set distances away from your opponent's hurtbox. There are numerous character specific setups to enable it. After an unblockable fireball, quickly followup with 236P (untechable) , then dash back to the unblockable distance again and do a meaty ES fireball. This can be looped.
| Startup | Active | Recovery | Hit Adv. | Block Adv. | Renda Bonus |
|---|---|---|---|---|---|
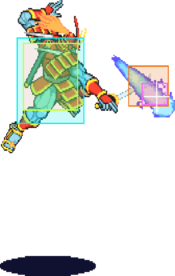
| 28 | - | variable + landing 8 | - | - | N/A |
| Guard | Cancel | Invuln | Red Damage | White Damage | Gauge |
| mid | no | - | 11 | 4 | H: 18 G: 15 W: 12 |
It's an ineffective move not used in competitive play.
| Startup | Active | Recovery | Hit Adv. | Block Adv. | Renda Bonus |
|---|---|---|---|---|---|
| 28 | - | variable + landing 8 | - | - | N/A |
| Guard | Cancel | Invuln | Red Damage | White Damage | Gauge |
| mid | no | - | 11 | 4 | H: 18 G: 15 W: 12 |
Decent poke in select match-ups like Victor or Bishamon
| Startup | Active | Recovery | Hit Adv. | Block Adv. | Renda Bonus |
|---|---|---|---|---|---|
| 28 | - | variable + landing 8 | - | - | N/A |
| Guard | Cancel | Invuln | Red Damage | White Damage | Gauge |
| mid | no | - | 14 | 7 | H: 0 G: 0 W: 0 |
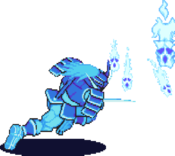
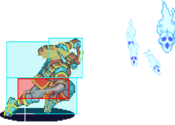
Tsuji Hayate
236P
| Startup | Active | Recovery | Hit Adv. | Block Adv. | Renda Bonus |
|---|---|---|---|---|---|
| 7 | variable (27) variable | 42 | - | - | N/A |
| Guard | Cancel | Invuln | Red Damage | White Damage | Gauge |
| mid | no | - | 10+10 | 4+4 | H: 16+4 G: 14+2 W: 12 |
Bishmon travels at different speed depending if the opponent is standing or crouching.
| Startup | Active | Recovery | Hit Adv. | Block Adv. | Renda Bonus |
|---|---|---|---|---|---|
| 1 | variable | 1 | - | -45 | N/A |
| Guard | Cancel | Invuln | Red Damage | White Damage | Gauge |
| mid | no | - | 10+22 | 4+6 | H: 0 G: 0 W: 0 |
Kienzen
623P
| Startup | Active | Recovery | Hit Adv. | Block Adv. | Renda Bonus |
|---|---|---|---|---|---|
| 6 | 18 | 19 + landing 8 | - | -21 | N/A |
| Guard | Cancel | Invuln | Red Damage | White Damage | Gauge |
| mid | no | - | 23,16 | 7,6 | H: 31 G: 26 W: 22 |
Terrible move not utilized in competitive play
| Startup | Active | Recovery | Hit Adv. | Block Adv. | Renda Bonus |
|---|---|---|---|---|---|
| 6 | 18 | 26 + landing 8 | - | -28 | N/A |
| Guard | Cancel | Invuln | Red Damage | White Damage | Gauge |
| mid | no | - | 25,17 | 8,6 | H: 31 G: 26 W: 22 |
Terrible move not utilized in competitive play
| Startup | Active | Recovery | Hit Adv. | Block Adv. | Renda Bonus |
|---|---|---|---|---|---|
| 6 | 18 | 31 + landing 8 | - | -33 | N/A |
| Guard | Cancel | Invuln | Red Damage | White Damage | Gauge |
| mid | no | - | 24,18 | 6,6 | H: 31 G: 26 W: 22 |
Terrible move not utilized in competitive play
| Startup | Active | Recovery | Hit Adv. | Block Adv. | Renda Bonus |
|---|---|---|---|---|---|
| 4 | 3,1,2,12 | 31 + landing 8 | - | -29 | N/A |
| Guard | Cancel | Invuln | Red Damage | White Damage | Gauge |
| mid | no | - | 19+9x3 | 8+4x3 | H: 0 G: 0 W: 0 |
Guard Cancel
623P
| Startup | Active | Recovery | Hit Adv. | Block Adv. | Renda Bonus |
|---|---|---|---|---|---|
| 6 | 18 | 19 + landing 8 | - | -21 | N/A |
| Guard | Cancel | Invuln | Red Damage | White Damage | Gauge |
| mid | no | 1-10 whole body | 11,8 | 3,3 | H: 31 G: 26 W: 22 |
Go-to choice without meter
| Startup | Active | Recovery | Hit Adv. | Block Adv. | Renda Bonus |
|---|---|---|---|---|---|
| 6 | 18 | 26 + landing 8 | - | -28 | N/A |
| Guard | Cancel | Invuln | Red Damage | White Damage | Gauge |
| mid | no | 1-10 whole body | 12,8 | 4,3 | H: 31 G: 26 W: 22 |
Terrible move not utilized in competitive play
| Startup | Active | Recovery | Hit Adv. | Block Adv. | Renda Bonus |
|---|---|---|---|---|---|
| 6 | 18 | 31 + landing 8 | - | -33 | N/A |
| Guard | Cancel | Invuln | Red Damage | White Damage | Gauge |
| mid | no | 1-10 whole body | 12,9 | 3,3 | H: 31 G: 26 W: 22 |
Terrible move not utilized in competitive play
| Startup | Active | Recovery | Hit Adv. | Block Adv. | Renda Bonus |
|---|---|---|---|---|---|
| 4 | 3,1,2,12 | 31 + landing 8 | - | - | N/A |
| Guard | Cancel | Invuln | Red Damage | White Damage | Gauge |
| mid | no | 1-10 whole body | 9+4x3 | 4+2x3 | H: 0 G: 0 W: 0 |
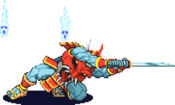
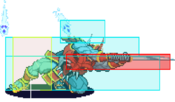
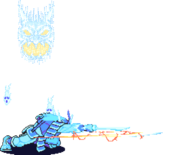
Iai Giri High
[4],6P
| Startup | Active | Recovery | Hit Adv. | Block Adv. | Renda Bonus |
|---|---|---|---|---|---|
| 12 | 2 | 15 | 8 | 7 | N/A |
| Guard | Cancel | Invuln | Red Damage | White Damage | Gauge |
| mid | no | - | 22 | 10 | H: 21 G: 19 W: 18 |
Charge for 45 frames.
| Startup | Active | Recovery | Hit Adv. | Block Adv. | Renda Bonus |
|---|---|---|---|---|---|
| 12 | 2,2 | 13 | 10 | 9 | N/A |
| Guard | Cancel | Invuln | Red Damage | White Damage | Gauge |
| mid | no | - | 22+8 | 10+3 | H: 21+3 G: 19+1 W: 18 |
Charge for 52 frames.
| Startup | Active | Recovery | Hit Adv. | Block Adv. | Renda Bonus |
|---|---|---|---|---|---|
| 12 | 2,2,2 | 11 | 12 | 11 | N/A |
| Guard | Cancel | Invuln | Red Damage | White Damage | Gauge |
| mid | no | - | 22+8+5 | 10+3+2 | H: 21+3x2 G: 19+1x2 W: 18 |
Charge for 82 frames.
| Startup | Active | Recovery | Hit Adv. | Block Adv. | Renda Bonus |
|---|---|---|---|---|---|
| 12 | 2,2,2(8),2,2,2(8),2,2,2 | 11 | 12 | 11 | N/A |
| Guard | Cancel | Invuln | Red Damage | White Damage | Gauge |
| mid | no | - | 6x9 | 1x9 | H: 0 G: 0 W: 0 |
Iai Giri Low
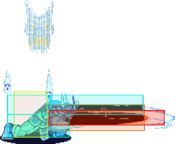
[4],6K
| Startup | Active | Recovery | Hit Adv. | Block Adv. | Renda Bonus |
|---|---|---|---|---|---|
| 10 | 2 | 13 | 10 | 9 | N/A |
| Guard | Cancel | Invuln | Red Damage | White Damage | Gauge |
| mid | no | - | 18 | 8 | H: 21 G: 19 W: 18 |
Charge for 45 frames.
| Startup | Active | Recovery | Hit Adv. | Block Adv. | Renda Bonus |
|---|---|---|---|---|---|
| 10 | 2,2 | 11 | 12 | 11 | N/A |
| Guard | Cancel | Invuln | Red Damage | White Damage | Gauge |
| mid | no | - | 18+8 | 8+3 | H: 21+3 G: 19+1 W: 18 |
Charge for 52 frames.
| Startup | Active | Recovery | Hit Adv. | Block Adv. | Renda Bonus |
|---|---|---|---|---|---|
| 10 | 2,2,2 | 9 | 14 | 13 | N/A |
| Guard | Cancel | Invuln | Red Damage | White Damage | Gauge |
| mid | no | - | 18+8+5 | 8+3+2 | H: 21+3x2 G: 19+1x2 W: 18 |
Charge for 82 frames.
| Startup | Active | Recovery | Hit Adv. | Block Adv. | Renda Bonus |
|---|---|---|---|---|---|
| 10 | 2,2,2(4),2,2,2(4),2,2,2 | 9 | 14 | 13 | N/A |
| Guard | Cancel | Invuln | Red Damage | White Damage | Gauge |
| mid | no | - | 6x9 | 1x9 | H: 0 G: 0 W: 0 |
Command Throws
360+P
| Startup | Active | Recovery | Hit Adv. | Block Adv. | Renda Bonus |
|---|---|---|---|---|---|
| 8 | 5 | 50 | - | - | N/A |
| Guard | Cancel | Invuln | Red Damage | White Damage | Gauge |
| throw | no | 1-13 whole body | 21+2 | 5+1 | H: 14+2 G: 0 W: 12 |
Perform by pressing LP+MP or LP+HP with no meter.
| Startup | Active | Recovery | Hit Adv. | Block Adv. | Renda Bonus |
|---|---|---|---|---|---|
| 8 | 5 | 50 | - | - | N/A |
| Guard | Cancel | Invuln | Red Damage | White Damage | Gauge |
| throw | no | 1-13 whole body | 21+2x2 | 5+1x2 | H: 14+2x2 G: 0 W: 12 |
| Startup | Active | Recovery | Hit Adv. | Block Adv. | Renda Bonus |
|---|---|---|---|---|---|
| 8 | 5 | 50 | - | - | N/A |
| Guard | Cancel | Invuln | Red Damage | White Damage | Gauge |
| throw | no | 1-13 whole body | 21+2x3 | 5+1x3 | H: 14+2x3 G: 0 W: 12 |
| Startup | Active | Recovery | Hit Adv. | Block Adv. | Renda Bonus |
|---|---|---|---|---|---|
| 8 | 5 | 50 | - | - | N/A |
| Guard | Cancel | Invuln | Red Damage | White Damage | Gauge |
| throw | no | 1-13 whole body | 23+3x5 | 5+1x5 | H: 0 G: 0 W: 0 |
Pursuits
8P or 8K
| Startup | Active | Recovery | Hit Adv. | Block Adv. | Renda Bonus |
|---|---|---|---|---|---|
| 27 | 5 | landing 1 | - | - | N/A |
| Guard | Cancel | Invuln | Red Damage | White Damage | Gauge |
| mid | no | - | 6 | 6 | H: 30 G: 0 W: 6 |
Rarely used as your Oki options diminish & you get more OTG damage with Slap-Chop. I only see it used against Anakaris as you can buffer a backdash & punish the Portal of Blame
| Startup | Active | Recovery | Hit Adv. | Block Adv. | Renda Bonus |
|---|---|---|---|---|---|
| 27 | 5 | landing 1 | - | - | N/A |
| Guard | Cancel | Invuln | Red Damage | White Damage | Gauge |
| mid | no | - | 6+2x5 | 6+2x5 | H: 0 G: 0 W: 0 |
Ex Moves
63214PP
| Startup | Active | Recovery | Hit Adv. | Block Adv. | Renda Bonus |
|---|---|---|---|---|---|
| 17 | 1 | 39 | - | - | N/A |
| Guard | Cancel | Invuln | Red Damage | White Damage | Gauge |
| throw | no | - | 15+3x(3~13) | 5+1x(1~13) | H: 0 G: 0 W: 0 |
4123KK
| Startup | Active | Recovery | Hit Adv. | Block Adv. | Renda Bonus |
|---|---|---|---|---|---|
| 18 | off screen | 40-107 | - | -5 | N/A |
| Guard | Cancel | Invuln | Red Damage | White Damage | Gauge |
| low | no | - | 5+10+3x1 | 2+3x3 | H: 0 G: 0 W: 0 |
22PP
| Startup | Active | Recovery | Hit Adv. | Block Adv. | Renda Bonus |
|---|---|---|---|---|---|
| 34 | 2 | 26 | - | - | N/A |
| Guard | Cancel | Invuln | Red Damage | White Damage | Gauge |
| mid | no | - | 22 | 4 | H: 0 G: 0 W: 0 |
Dark Force
Kyouka Yoroi: Kogane Katabira - Same strength P + K
- (Any Version) Gains super armor. Particularly slow deactivation time, use with caution.
- Bishamon avoids Chip-Damage while in Dark Force
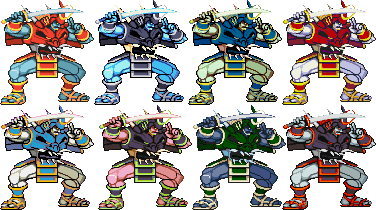
Colors
Notable Players
Japan
Japanese Player Index: http://www21.atwiki.jp/vsplayer/pages/17.html
| Name (English) | Name (Japanese) | Color | Location | Contact | Notes |
|---|---|---|---|---|---|
| Nakanishi | ナカニシ | KK |
Kanto region | http://twitter.com/sonic883b | Bishi-GOD : NAKANISHAMON RASTO SAMURAI |
| Shuu | 修 | LK |
Kanto region | http://twitter.com/shu180sx | |
| Natsu | ナツ | PP |
Kanto Region | https://twitter.com/natsu_bishamon | |
| Norio | のりお | KK |
Kanto region | ||
| Rantii | らんてぃ | MK |
Kyushu region | http://twitter.com/Ran__T | |
| Nuki | ヌキ | KK |
Kanto region | http://twitter.com/nuki2 | Retired. |
| Umehara | ウメハラ | LK |
Kanto region | http://twitter.com/daigothebeast | Retired. |
North America
| Name (English) | Name (Japanese) | Color | Location | Contact | Notes |
|---|---|---|---|---|---|
| Kyokuji | キョクジ | PP |
Canada | https://twitter.com/KyokujiFGC | Longtime Fightcade player. Super technical player that also has a history with Street Fighter Alpha 3. |
South America
| Name (English) | Name (Japanese) | Color | Location | Contact | Notes |
|---|---|---|---|---|---|
| So Hai | ソーハイ | HP |
Brazil | https://twitter.com/LNycholas2000 - https://www.fightcade.com/id/So%20Hai | Seasoned NekoPunchi member, incredibly understanding of the game and always available to help beginners. So Hai Seu Pai. |
| Hikardo | ヒッキー | HK |
Brazil | https://www.fightcade.com/id/hikardo | Aggressive Bishamon, known for his consistency with very long and precise grounded links. Also a very skilled Vampire Hunter player. |
