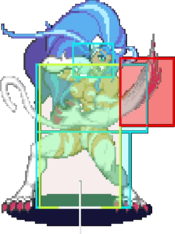
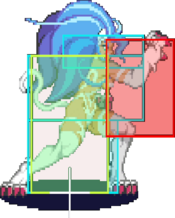
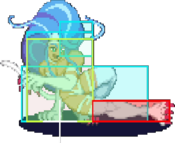
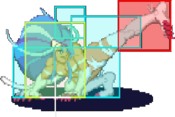
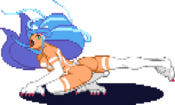
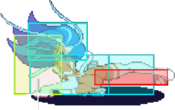
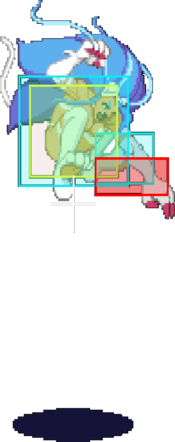
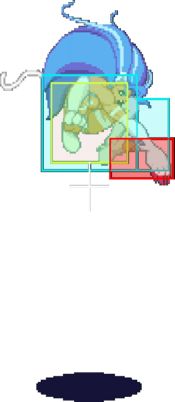
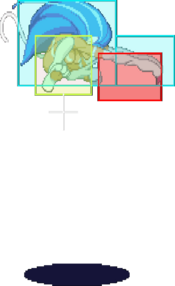
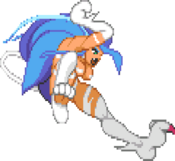
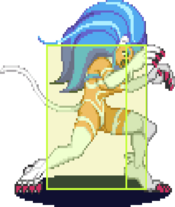
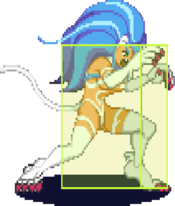
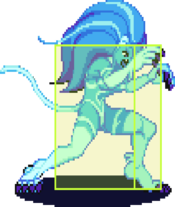
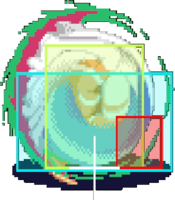
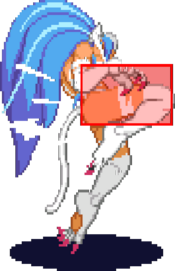
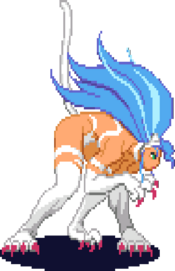
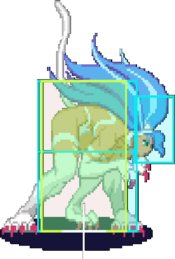
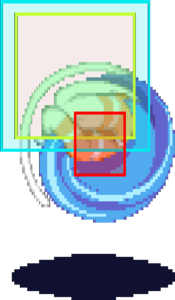
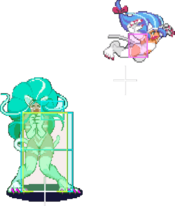
Vampire Savior/Felicia
Introduction
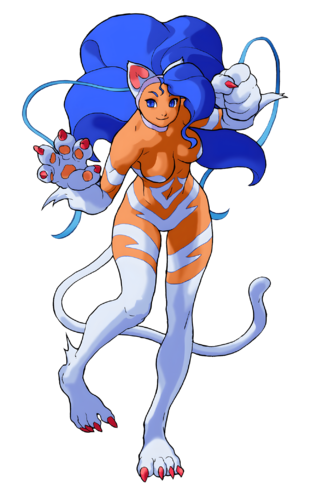
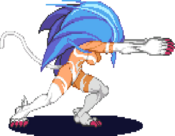
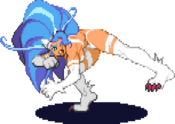
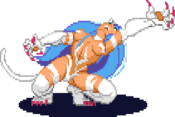
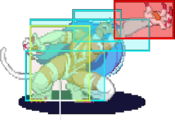
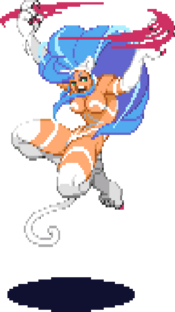
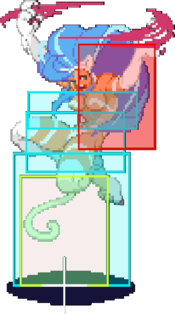
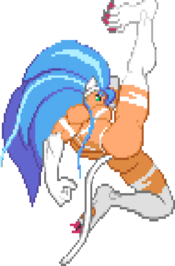
Felicia (フェリシア), Catwoman - Nekomata
Abandoned at a very young age due to being a Darkstalker, she was taken in by Sister Rose and raised in a Catholic Orphanage. When Sister Rose passed away many years later, Felicia decided to set off to make the world a better and happier place, as well as achieve her greatest dream of being a famous dancer in Las Vegas. She got that fame, but decided that her fame and fortune would be better used to give back to the less fortunate, and used it to set up an orphanage for unfortunate children. However, before she could accomplish this, she was brought into the Majigen as one of the chosen souls - so for the time being, her plans will have to wait - as Jedah threatens the human world she cherishes so greatly.
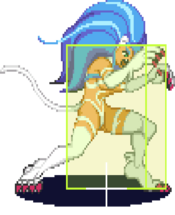
Felicia is considered a "Jack of all trades" character who is effective on offense and defense in neutral while having great mobility. She is able to handle most of the cast well while also being competitive against the top tiers. If you like characters that are mobile like Blanka or Chun-Li as well as being practically a Swiss Army Knife for most situations, Felicia is a great choice.
Gameplay
Primary Objectives:
- Use your mobility to perfectly space your opportunities; AA's, oki, footsies, etc.
- Anti-air using her numerous exceptional tools
- Control the air with OS 9HP
- Approach and or pressure the opponent with Cat Spike
- Abuse her OS command throw
- Use your mobility to chase the opponent after knockdowns
- Utilize your dash to setup overhead or landing low attacks
- Jump off the wall to avoid being cornered
| Strengths | Weaknesses |
|---|---|
|
|
Movement
Walk: Good walk speed and average height.
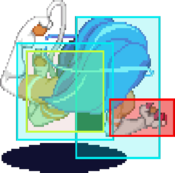
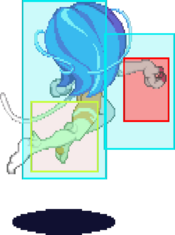
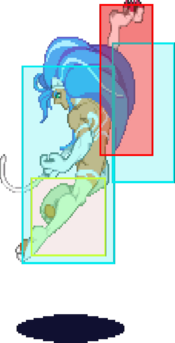
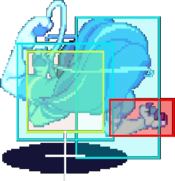
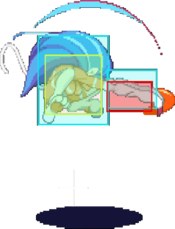
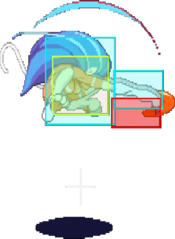
Dash: Hop. Good for high/low mixups. Her mids are more useful than her heavies when using this dash. At the end of the dash Felicia has a 7F recovery window, but the latter 6 frames are special cancelable. Therefor it's possible (albeit difficult) to do things like deep d.MK 236LP. This dash is also short-stoppable. Tapping or holding back during the forward dash will end the dash sooner and maker her drop faster. This also makes links/cancels off of it much easier, though it's rather difficult to time a dashing attack after quickstoping the dash because she falls so quickly after the quickstop, but it is possible.
- Frame Data inquiry
- JP-Frame data link
- Basic Summary is - The fastest case when you issue an attack 1F after the establishment of the short dash. (11F when counting from the dash)
Jump: Great jump arc. Very fast and highly obnoxious.
Headsit: Jumping on a standing opponent will cause this move to activate, there's no real input for it. The headsit is cancelable into anything, a jump or air attack. While headsitting the opponent can also cancel it by doing anything, which will cause Felicia to rejump. However, the headsit activation will also cancel an opponent's attack regardless of what kind of attack it was, so long as it was considered standing at the time. For example, if the opponent tries an anti-air MP and you activate the headsit it will cancel their MP entirely.
- Head-Ride corner offense
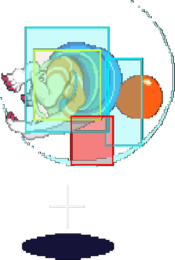
Wall Cling: Pressing towards the wall when near the wall makes Felicia cling to it momentarily. If the direction is held she will eventually start to gradually slide down the wall, and at a certain height from the ground she will automatically dismount. Releasing the button dismounts her. Felicia can perform any normal jumping action after the dismount and can attack/airblock/headsit just like a normal jump. However, the dismount causes her to jump much further and faster than a normal jump, making it quite good for getting in on the opponent when alternated between normal jump and wall jump.
Special Moves and Throws
Throws
Normal Moves
Standing Normals
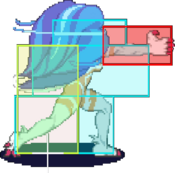
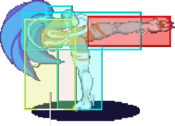
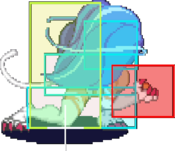
5LP
| Startup | Active | Recovery | Hit Adv. | Block Adv. | Renda Bonus |
|---|---|---|---|---|---|
| 5 | 3 | 8 | 5 | 4 | H: 8 G: 7 |
| Guard | Cancel | Invuln | Red Damage | White Damage | Gauge |
| mid | yes | - | - | 3 | H: 6 G: 3 W: 0 |
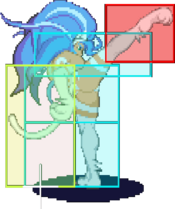
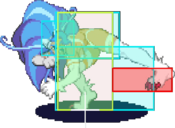
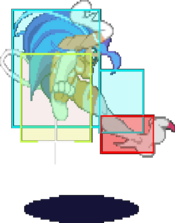
Solid multi-purpose jab. Pretty decent range for a light attack, and has uses for AA'ing and stuffing dashes with a quick and dirty button. Can be used also to confirm into Catspike. You can use this for walking jab pressure as well, but while it has good frame data its not good enough to completely abuse this move like that.
This move will not hit crouching on Gallon, Lilith, Morrigan, Q-Bee.5MP
| Startup | Active | Recovery | Hit Adv. | Block Adv. | Renda Bonus |
|---|---|---|---|---|---|
| 6 | 3 | 18 | 0 | 1 | N/A |
| Guard | Cancel | Invuln | Red Damage | White Damage | Gauge |
| mid | yes | - | 15 | 6 | H: 5 G: 9 W: 3 |
Useful in a pressure strings to catch jumpers. It is very effective as both a general AA and guard break after the opponent blocks an air-to-air chain. Aim to hit this at max range, or as early as possible (dependent on the context of what you are striking for). This can be used to frame trap opponents, and it works well for that purpose. Be careful on using this against opponents who can crouch under it.
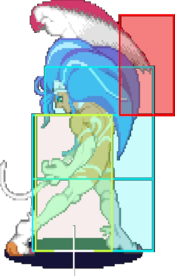
5HP
| Startup | Active | Recovery | Hit Adv. | Block Adv. | Renda Bonus |
|---|---|---|---|---|---|
| 7 | 2(4)3,2 | 22 | 3 | 2 | N/A |
| Guard | Cancel | Invuln | Red Damage | White Damage | Gauge |
| mid | no | - | 7+7+11 | 3+3+4 | H: 12+6+6 G: 9+3+3 W: 6 |
Hits three times. Not a very useful button when compared to the rest of Felicia's normals. In some chains, it has surprisingly high damage output, but outside of that, it is not very good as a move. It is also easy to guard cancel. This button is mostly a waste of time.
The second hit of this move will whiff on crouching Q-Bee.5LK
| Startup | Active | Recovery | Hit Adv. | Block Adv. | Renda Bonus |
|---|---|---|---|---|---|
| 5 | 4 | 7 | 5 | 4 | H: 8 G: 7 |
| Guard | Cancel | Invuln | Red Damage | White Damage | Gauge |
| mid | yes | - | 7 | 3 | H: 6 G: 3 W: 0 |
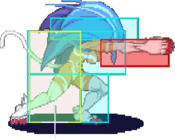
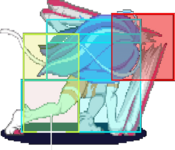
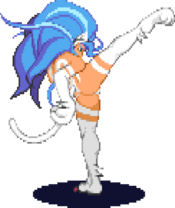
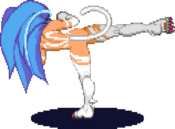
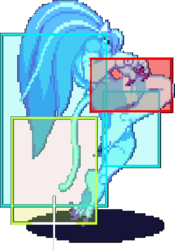
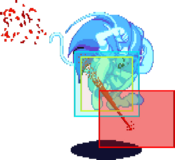
This attack is by far, one of the most powerful normals she has at her disposal, and argued to be one of the best AAs in the game. This will crush most mid to far range jump in attacks, and there are very few normals it will outright lose to. Great as a guard break after getting your opponent in an air-to-air block string.
On hit, recovery from Far 5LK is so fast you have more than enough time to set up a high/low with a dash overhead or a 2LK/2HK low attack. Depending how close they were when you hit them you can even walk forward and go for it. Since it's also a light attack, you can rapid fire it on whiff to put up a bit of a wall. Be wary about abusing this though, since you will not really be moving, and you may find yourself in a bad predicament if you mess up your AA attempt.
The dangerous aspect of using this normal is when the opponent is so close that this turns into a Close 5LK, which has no anti-air properties what-so-ever. Get accustomed to the range that this turns into a Close 5LK so you don't get it on accident and eat a huge jump in combo.
This move will only hit crouching: Bishamon, Victor.5MK
| Startup | Active | Recovery | Hit Adv. | Block Adv. | Renda Bonus |
|---|---|---|---|---|---|
| 7 | 3 | 19 | 2 | 1 | N/A |
| Guard | Cancel | Invuln | Red Damage | White Damage | Gauge |
| mid | no | - | 16 | 7 | H: 15 G: 9 W: 3 |
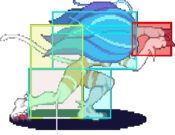
Another incredibly powerful normal. Amazing long poke that dominates the mid range game. After training your opponent to stay grounded with a strong anti-air defense, you can control their approach on the ground with this alone, if you choose.
Great for catching characters out of their jump start up as well. Inserting this at the end of a pressure string or when you have a bit of frame advantage is a great way to catch jumpers. Space it out so you'll hit them with the tip. This attack also has great frame trap properties as well, which can be used with either your MP or another MK.
This move will not hit crouching Q-Bee.5HK
| Startup | Active | Recovery | Hit Adv. | Block Adv. | Renda Bonus |
|---|---|---|---|---|---|
| 8 | 3(4)3 | 24 | -2 | -3 | N/A |
| Guard | Cancel | Invuln | Red Damage | White Damage | Gauge |
| mid | no | 5-14 lowerbody 15-17 feet | 10+12 | 4+5 | H: 15+9 G: 10+4 W: 6 |
Hits twice.
- Lower Body Invincible for 13 frames
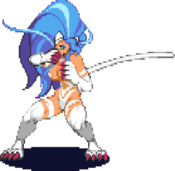
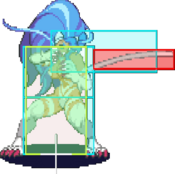
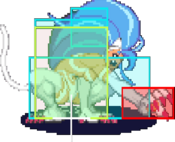
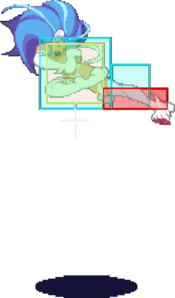
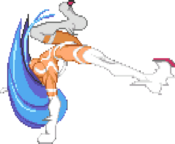
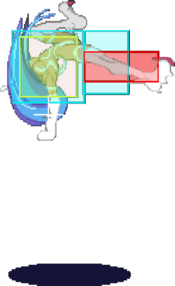
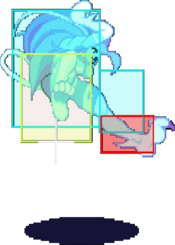
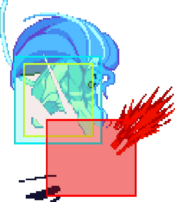
This has the most range out of any of Felicia's attacks by far. Mostly used as a long range poke by utilizing the second hit or as an ender for your chains to move you back farther. There is lower body invincibility starting on the 5th frame may come in handy in some cases, but that often will not come into play. The only major weakness of this attack is that it is really slow. It is the slowest attack she has in her kit. Additionally, it can be potentially guard cancelled, especially if both hits of the attack connect while the opponent is blocking.
The first hit of this move will whiff on crouching Q-Bee.Close Normals
CL.5LK
| Startup | Active | Recovery | Hit Adv. | Block Adv. | Renda Bonus |
|---|---|---|---|---|---|
| 5 | 3 | 7 | 9 | 8 | H: 12 G: 11 |
| Guard | Cancel | Invuln | Red Damage | White Damage | Gauge |
| mid | yes | - | 7 | 3 | H: 6 G: 3 W: 0 |
Best frame advantage out of all of Felicia's normals. The Renda Bonus value is incredible, to the point where it can even be used in Buckler combos if you desire.
Good for guard breaking opponents that are low to the ground in the corner.
At 36 pixels away from the opponent this turns into a Far 5LP.CL.5MP
| Startup | Active | Recovery | Hit Adv. | Block Adv. | Renda Bonus |
|---|---|---|---|---|---|
| 7 | 3 | 15 | 3 | 2 | N/A |
| Guard | Cancel | Invuln | Red Damage | White Damage | Gauge |
| mid | yes | - | 16 | 6 | H: 15 G: 9 W: 3 |
This is basically a slower, but stronger version of Close LP, with less frame advantage. Good move overall, but otherwise unremarkable.
At 36 pixels away from the opponent this turns into a Far 5MP.CL.5HP
| Startup | Active | Recovery | Hit Adv. | Block Adv. | Renda Bonus |
|---|---|---|---|---|---|
| 9 | 3,6 | 24 | -5 | -6 | N/A |
| Guard | Cancel | Invuln | Red Damage | White Damage | Gauge |
| mid | no | - | 13+10 | 5+4 | H: 15+9 G: 10+4 W: 6 |
Hits two times.
This is a move that is best used to hit low crouchers (i.e. Q.Bee, Morrigan, Lilith) in order to prevent them from jumping out. It is unsafe on hit and guard, so be sure to cancel it into a 2HK on block or when it hits a grounded opponent.
At 32 pixels away from the opponent this turns into a Far 5HP.CL.LK
| Startup | Active | Recovery | Hit Adv. | Block Adv. | Renda Bonus |
|---|---|---|---|---|---|
| 5 | 3 | 8 | 5 | 4 | H: 8 G: 7 |
| Guard | Cancel | Invuln | Red Damage | White Damage | Gauge |
| mid | yes | - | 6 | 3 | H: 6 G: 3 W: 0 |
This move often comes out as a result of a botched stand LK. This move has no AA properties whatsoever. That said, it could be a good indicator to tell you to stop pressing buttons if you see it come out during an AA attempt.
This move however, is pretty much outclassed by crouch LK, in almost every regard.
There may be more use to the move than what it lets off, but that is to be explored. This move otherwise is a waste of time.
At 36 pixels away from the opponent this turns into a Far 5LK.CL.5MK
| Startup | Active | Recovery | Hit Adv. | Block Adv. | Renda Bonus |
|---|---|---|---|---|---|
| 6 | 3 | 16 | 2 | 1 | N/A |
| Guard | Cancel | Invuln | Red Damage | White Damage | Gauge |
| mid | yes | - | 17 | 7 | H: 15 G: 9 W: 3 |
Felicia's highest damage special cancelable normal. If you want to combo into this off of a jump in attack, you must jump in very deep.
An option select button for her kick throw, as well as her command throw. This will hit every crouching character, unlike her Close 5HK, so if you don't think a short opponent is going to jump this may be a safer option incase you mistime your throw attempt.
At 36 pixels away from the opponent this turns into a Far 5MK.CL.5HK
| Startup | Active | Recovery | Hit Adv. | Block Adv. | Renda Bonus |
|---|---|---|---|---|---|
| 7 | 5 | 12 | 25 | 12 | N/A |
| Guard | Cancel | Invuln | Red Damage | White Damage | Gauge |
| mid | no | - | 21 | 8 | H: 24 G: 15 W: 6 |
Amazing option select button for Felicia's Kick Throw and Command Throw, and great AA for opponents that are on top of you jumping. By far her best option when you have an opponent cornered. If you guess correctly, she can either grab the opponent with a throw/command throw, or hit an opponent with Close 5HK while they are attempting to jump out. If they are hit at all by Close 5HK, Felicia recovers so fast she can set up a dash overhead/low mix-up, or even cross under the opponent for a left/right mix-up while in the corner. Due to the massive frame advantage that applies even to grounded opponents. The only major weakness to this button is against opponents that can crouch it, or opponents that jump higher than the move reaches.
Also works as a guard break after an air chain against cornered opponents who are high in the air.
This move will only hit crouching: Anakaris, Aulbath, Bishamon, Demitri, Jedah and Victor.
These characters can jump higher than this move can reach: Anakaris, Felicia, Gallon, Jedah, Victor, Zabel
At 36 pixels away from the opponent this turns into a Far 5HK.Crouching Normals
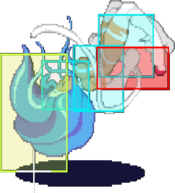
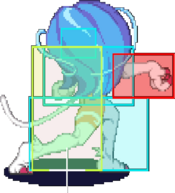
2LP
| Startup | Active | Recovery | Hit Adv. | Block Adv. | Renda Bonus |
|---|---|---|---|---|---|
| 5 | 3 | 6 | 7 | 6 | H: 10 G: 9 |
| Guard | Cancel | Invuln | Red Damage | White Damage | Gauge |
| low | yes | - | 5 | 3 | H: 6 G: 3 W: 0 |
2MP
| Startup | Active | Recovery | Hit Adv. | Block Adv. | Renda Bonus |
|---|---|---|---|---|---|
| 5 | 4 | 14 | 3 | 2 | N/A |
| Guard | Cancel | Invuln | Red Damage | White Damage | Gauge |
| mid | yes | - | 16 | 7 | H: 15 G: 9 W: 3 |
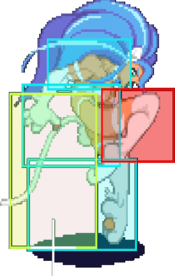
A very good button. Useful as a poke, an anti-air and it's your go-to button when it comes to special cancels.
When anti-airing, you want to hit them with the tip of her paw so it works best from a long distance jump in. After an air reset, you can immediately do a dash hop overhead attack, or walk forward slightly and do a 2HK low.
Some characters have a ridiculously difficult time just getting around this normal to start an offense.2HP
| Startup | Active | Recovery | Hit Adv. | Block Adv. | Renda Bonus |
|---|---|---|---|---|---|
| 8 | 6 | 12 | 19 | 6 | N/A |
| Guard | Cancel | Invuln | Red Damage | White Damage | Gauge |
| mid | no | - | 20 | 8 | H: 24 G: 15 W: 6 |
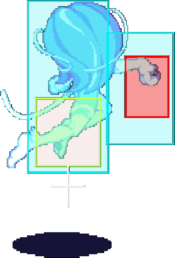
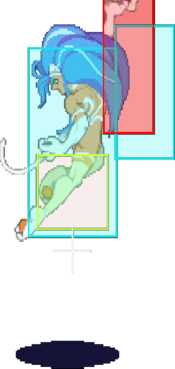
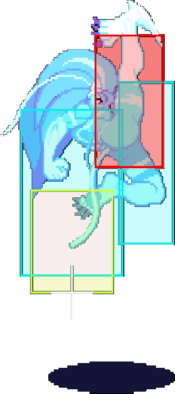
Though an incredible anti-air in both hitbox and active frames, the fact Felicia is considered airborne (15f) during it gives 2HP a few interesting properties.
- Since 2HP puts Felicia in an airborne state, it is possible for the opponent to just air block this normal like they could any air-to-air attack. It's hard for many characters to really punish this, but be careful when using it on those with air dashes and on a cornered opponent.
- If Felicia is hit during the airborne state of this move, she is air reset rather than just taking the hit on the ground which limits the opponents combo potential if this move is mistimed.
- Being airborne means that Felicia cannot be thrown, which makes it potentially useful against things like Demitri's EX Throw moves. However, due to it being 6 frames before she becomes airborne it's not a guaranteed escape.
- It is not possible to chain out of this move into either hard kick attack.
Out of all her anti-airs, 2HP is the most useful when the opponent is doing a deep jump in or making a cross up attempt. If this hits the opponent, you have enough time after the air reset to do a high/low mix-up like with her other anti-airs. Since the opponent is usually air reset close enough to you that you can actually walk forward and do a 2LK instead of relying solely on her 2HK for the low mix-up.
This move will not hit crouching: Bulleta, Felicia, Gallon, Lei-Lei, Lilith, Morrigan, Q-Bee, Sasquatch or Zabel.2LK
| Startup | Active | Recovery | Hit Adv. | Block Adv. | Renda Bonus |
|---|---|---|---|---|---|
| 5 | 3 | 7 | 6 | 5 | H: 9 G: 8 |
| Guard | Cancel | Invuln | Red Damage | White Damage | Gauge |
| low | yes | - | 5 | 2 | H: 6 G: 3 W: 0 |
2MK
| Startup | Active | Recovery | Hit Adv. | Block Adv. | Renda Bonus |
|---|---|---|---|---|---|
| 6 | 3 | 18 | 0 | 1 | N/A |
| Guard | Cancel | Invuln | Red Damage | White Damage | Gauge |
| mid | yes | - | 15 | 6 | H: 15 G: 9 W: 3 |
2HK
| Startup | Active | Recovery | Hit Adv. | Block Adv. | Renda Bonus |
|---|---|---|---|---|---|
| 8 | 2 | 21 | - | 3 | N/A |
| Guard | Cancel | Invuln | Red Damage | White Damage | Gauge |
| low | no | - | 17 | 7 | H: 24 G: 15 W: 6 |
A pretty amazing sweep. Great range and hits low. Use this in conjunction the rest of her amazing footsie game. Mixing this in when your opponent thinks you'll go for a dash hop overhead is vital.
The guard advantage is surprisingly good for this kind of attack.Jumping Normals
J.LP
| Startup | Active | Recovery | Hit Adv. | Block Adv. | Renda Bonus |
|---|---|---|---|---|---|
| 5 | 6 | 4 | - | - | N/A |
| Guard | Cancel | Invuln | Red Damage | White Damage | Gauge |
| overhead | no | - | 8 | 4 | H: 6 G: 3 W: 0 |
Not the most useful button but it can do a couple things. Depending on your opponents jump height it may work decently as an air-to-air block string starter.
Out of all her air normals j.LP has the best potential for a cross up. As a cross up attack it's not great, works well on the especially fat characters(Gallon, Lei-Lei, Q-Bee), but it generally requires very precise aiming to hit and even then it won't work on most of the cast properly. It can be difficult to incorporate this properly into your game plan, and empty cross ups in Savior can be dangerous so use this with caution.J.MP
| Startup | Active | Recovery | Hit Adv. | Block Adv. | Renda Bonus |
|---|---|---|---|---|---|
| 7 | 4(2)4 | 6 | - | - | N/A |
| Guard | Cancel | Invuln | Red Damage | White Damage | Gauge |
| overhead | no | - | 9+8 | 3+3 | H: 9+6 G: 6+3 W: 3 |
Hits two times.
A multi-hit jump in attack. Its primary use is during her dash hop; being the easiest out of her jump normals to link from. Refer to the combo section for more information on this.
Option selects into an air throw. When attempting an air throw, this is a little bit of a better option than her j.HP air throw option select.
The second hit of j.MP has the same cross up potential as j.LP (refer to that for more info). You can actually hit the button early, whiff the first hit and have the second hit as a cross up.
Useful during air-to-air block-strings.J.HP
| Startup | Active | Recovery | Hit Adv. | Block Adv. | Renda Bonus |
|---|---|---|---|---|---|
| 8 | 6 | 8 | - | - | N/A |
| Guard | Cancel | Invuln | Red Damage | White Damage | Gauge |
| overhead | no | - | 20 | 8 | H: 24 G: 15 W: 6 |
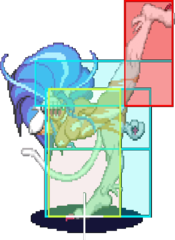
One of the single best jump in attacks in the game. Covers a wide range and the hitbox extends far past the hurt box. Using this from a neutral jump or well spaced forward jump can be extremely difficult to deal with, especially with Felicia's fast jump speed.
Option selects into an air throw, though j.MP is a better option if you are explicitly aiming for an air throw.8J.LK
| Startup | Active | Recovery | Hit Adv. | Block Adv. | Renda Bonus |
|---|---|---|---|---|---|
| 5 | 5 | 7 | - | - | N/A |
| Guard | Cancel | Invuln | Red Damage | White Damage | Gauge |
| overhead | no | - | 8 | 4 | H: 6 G: 3 W: 0 |
Felicia's second best jump in attack to be used on grounded opponents. This actually extends further down than her j.HP, but has a much smaller hitbox and doesn't have as favorable of a hurtbox. Used mostly if you want to do a 2 hit air chain when jumping in on shorter opponents. A great button to press after chicken guarding an opponents air attack.
From a neutral jump j.LK can be used as an instant overhead on: Anakaris, Aulbath(Hardest), Bishamon, Demitri, Jedah and Victor.
| Startup | Active | Recovery | Hit Adv. | Block Adv. | Renda Bonus |
|---|---|---|---|---|---|
| 5 | 4 | 6 | - | - | N/A |
| Guard | Cancel | Invuln | Red Damage | White Damage | Gauge |
| overhead | no | - | 8 | 4 | H: 6 G: 3 W: 0 |
8J.MK
| Startup | Active | Recovery | Hit Adv. | Block Adv. | Renda Bonus |
|---|---|---|---|---|---|
| 6 | 6 | 8 | - | - | N/A |
| Guard | Cancel | Invuln | Red Damage | White Damage | Gauge |
| overhead | no | - | 15 | 6 | H: 15 G: 9 W: 3 |
Has a bit of use out of a dash hop, but you need to delay attacking with j.MK out of it if you want to link into a ground combo.
| Startup | Active | Recovery | Hit Adv. | Block Adv. | Renda Bonus |
|---|---|---|---|---|---|
| 6 | 6 | 8 | - | - | N/A |
| Guard | Cancel | Invuln | Red Damage | White Damage | Gauge |
| overhead | no | - | 15 | 6 | H: 15 G: 9 W: 3 |
8J.HK
| Startup | Active | Recovery | Hit Adv. | Block Adv. | Renda Bonus |
|---|---|---|---|---|---|
| 8 | 4 | 12 | - | - | N/A |
| Guard | Cancel | Invuln | Red Damage | White Damage | Gauge |
| overhead | no | - | 18 | 7 | H: 24 G: 15 W: 6 |
Felicia's furthest extending jump attack. When used from a forward jump it can be more susceptible to anti-air than her other normals because the hitbox doesn't extend very far downward, but j.HK still has its uses.
From a long distance hop this can be a quick overhead or poke. Good as an air-to-air poke from a neutral jump, not so much from a forward jump though since you can't chain out of it. It also works excellently in blockstrings in the air.
| Startup | Active | Recovery | Hit Adv. | Block Adv. | Renda Bonus |
|---|---|---|---|---|---|
| 8 | 6 | 10 | - | - | N/A |
| Guard | Cancel | Invuln | Red Damage | White Damage | Gauge |
| overhead | no | - | 18 | 7 | H: 24 G: 15 W: 6 |
Normal Throws
6MP or 6HP
| Startup | Active | Recovery | Hit Adv. | Block Adv. | Renda Bonus |
|---|---|---|---|---|---|
| 1 | - | 222 | 5 | - | N/A |
| Guard | Cancel | Invuln | Red Damage | White Damage | Gauge |
| throw | no | 1-190 whole body | 2x(4~16) (1x(4~16)) | 2+2 (1+1) | H: 9 G: 0 W: 0 |
Felicia's punch throw. It is a hold, meaning that it can be mashed for more damage, and it can be counter-mashed by the opponent to reduce the damage. This is not a very good throw for Felicia to use, as she has access to better ones (literally any of her other throws) that are far more useful, and stable in damage. You may get this on accident, but that's about the only reason that you would use this throw. This throw is a waste of time.
Frame advantage on hit and tech varies depending on the character:
- +2f: Anakaris
- +3f: Jedah, Victor
- +4f: Bishamon, Bulleta, Demitri, Gallon, Lilith, Morrigan, Sasquatch, Zabel
- +5f: Aulbath, Felicia, Lei-Lei, Q-Bee
6MK or 6HK
| Startup | Active | Recovery | Hit Adv. | Block Adv. | Renda Bonus |
|---|---|---|---|---|---|
| 1 | - | 97 + landing 1 | - | - | N/A |
| Guard | Cancel | Invuln | Red Damage | White Damage | Gauge |
| throw | no | 1-77 whole body | 21 (10) | 8 (4) | H: 9 G: 0 W: 0 |
J.6P or J.4P
| Startup | Active | Recovery | Hit Adv. | Block Adv. | Renda Bonus |
|---|---|---|---|---|---|
| 1 | - | 40 + 23 + landing 1 | - | - | N/A |
| Guard | Cancel | Invuln | Red Damage | White Damage | Gauge |
| throw | no | 1-40 whole body | 21 (10) | 8 (4) | H: 9 G: 0 W: 0 |
Special Moves
Hell Cat
632[4]K
| Startup | Active | Recovery | Hit Adv. | Block Adv. | Renda Bonus |
|---|---|---|---|---|---|
| 2 | 1(5)1 | 41 | - | - | N/A |
| Guard | Cancel | Invuln | Red Damage | White Damage | Gauge |
| throw | no | - | 3x3+18 | 1x3+6 | H: 21 G: 0 W: 12 |
Felicia's command throw. This is a good tool for her to be able to open people up if you catch them in a situation to do so. This can also be option selected by Close HK if the opponent attempts to neutral jump you. This is especially useful and dangerous if she has you cornered.
2F startup makes this pretty useful off a dash-in, jump-in, or whatever other tick setup. It does pretty good damage so use it plenty.
It is noteworthy that this command throw actually makes two throw attempts in one attack. (active on frame 3 for one frame, disappears for 5 frames, and active on frame 9 for one frame again.)
| Startup | Active | Recovery | Hit Adv. | Block Adv. | Renda Bonus |
|---|---|---|---|---|---|
| 2 | 1(5)1 | 41 | - | - | N/A |
| Guard | Cancel | Invuln | Red Damage | White Damage | Gauge |
| throw | no | - | 3x6+18 | 1x6+6 | H: 0 G: 0 W: 0 |
Hits a little harder than the M and H Hellcat. This is one of the few times Felicia gets to really use her meter. If you get the opportunity to use this, opt for this command throw.
It is noteworthy that this command throw actually makes two throw attempts in one attack. (active on frame 3 for one frame, disappears for 5 frames, and active on frame 9 for one frame again.)
It seems like some characters get thrown away further than others. Some you can follow up with a Toy Touch afterwards and others not. Make a proper listBuckler
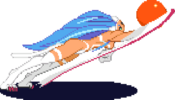
236LP
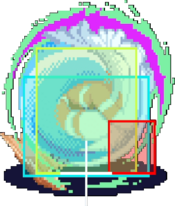
This move also sees use as a way to chase the opponent after a throw, or to use the followup as an AA (even though it is airblockable, this attack has a very good hitbox that beats a lot of jumpins. Requires you to have aim for it, and for the opponent to be constantly pressing buttons in the air.)
| Startup | Active | Recovery | Hit Adv. | Block Adv. | Renda Bonus |
|---|---|---|---|---|---|
| 5 | 30 | 14 | -19 | -20 | N/A |
| Guard | Cancel | Invuln | Red Damage | White Damage | Gauge |
| mid | yes | - | 15 | 5 | H: 18 G: 15 W: 12 |
| Startup | Active | Recovery | Hit Adv. | Block Adv. | Renda Bonus |
|---|---|---|---|---|---|
| 4 | 6,4 | 16 + landing 15 | - | -17 | N/A |
| Guard | Cancel | Invuln | Red Damage | White Damage | Gauge |
| mid | no | - | 6+8 | 2+3 | H: 12+4 G: 10+2 W: 8 |
Short slow roll, very low and fast uppercut.
| Startup | Active | Recovery | Hit Adv. | Block Adv. | Renda Bonus |
|---|---|---|---|---|---|
| 6 | 30 | 15 | -20 | -21 | N/A |
| Guard | Cancel | Invuln | Red Damage | White Damage | Gauge |
| mid | yes | - | 15 | 5 | H: 18 G: 15 W: 12 |
| Startup | Active | Recovery | Hit Adv. | Block Adv. | Renda Bonus |
|---|---|---|---|---|---|
| 4 | 6,9 | 19 + landing 16 | - | -26 | N/A |
| Guard | Cancel | Invuln | Red Damage | White Damage | Gauge |
| mid | no | - | 6+8 | 2+3 | H: 12+4 G: 10+2 W: 8 |
Medium range and speed, medium uppercut height.
| Startup | Active | Recovery | Hit Adv. | Block Adv. | Renda Bonus |
|---|---|---|---|---|---|
| 7 | 30 | 16 | -21 | -22 | N/A |
| Guard | Cancel | Invuln | Red Damage | White Damage | Gauge |
| mid | yes | - | 15 | 5 | H: 18 G: 15 W: 12 |
| Startup | Active | Recovery | Hit Adv. | Block Adv. | Renda Bonus |
|---|---|---|---|---|---|
| 4 | 6,13 | 23 + landing 17 | - | -35 | N/A |
| Guard | Cancel | Invuln | Red Damage | White Damage | Gauge |
| mid | no | - | 6+8 | 2+3 | H: 12+4 G: 10+2 W: 8 |
Long range and fast speed, high uppercut height.
| Startup | Active | Recovery | Hit Adv. | Block Adv. | Renda Bonus |
|---|---|---|---|---|---|
| 7 | 30 | 18 | -23 | -24 | N/A |
| Guard | Cancel | Invuln | Red Damage | White Damage | Gauge |
| mid | yes | - | 9x4 | 3x4 | H: 0 G: 0 W: 0 |
| Startup | Active | Recovery | Hit Adv. | Block Adv. | Renda Bonus |
|---|---|---|---|---|---|
| 4 | 3,3,16 | 28 + landing 19 | - | -45 | N/A |
| Guard | Cancel | Invuln | Red Damage | White Damage | Gauge |
| mid | no | - | 7+7+10 | 2+2+3 | H: 0 G: 0 W: 0 |
Cat Spike
623LP
Note that even though the MP and HP versions are airborne, THEY ARE NOT OVERHEADS, AND CAN BE BLOCKED CROUCHING.
| Startup | Active | Recovery | Hit Adv. | Block Adv. | Renda Bonus |
|---|---|---|---|---|---|
| 13 | 4 | 13 + landing 8 | 2 | 1 | N/A |
| Guard | Cancel | Invuln | Red Damage | White Damage | Gauge |
| mid | no | - | 23 | 6 | H: 26 G: 22 W: 18 |
Short quick scratch. Combos off her mids. Good for tick throwing or pressure.
| Startup | Active | Recovery | Hit Adv. | Block Adv. | Renda Bonus |
|---|---|---|---|---|---|
| 25 | 4 | 7 + landing 9 | 5 | 4 | N/A |
| Guard | Cancel | Invuln | Red Damage | White Damage | Gauge |
| mid | no | - | 24 | 6 | H: 26 G: 22 W: 18 |
Jumping scratch. Unable to combo into it, but works well for throwing off the opponents tech attempt. When the MP version hits crouching opponents, it is possible link combo off of it.
| Startup | Active | Recovery | Hit Adv. | Block Adv. | Renda Bonus |
|---|---|---|---|---|---|
| 34 | 4 | 6 + landing 10 | 5 | 4 | N/A |
| Guard | Cancel | Invuln | Red Damage | White Damage | Gauge |
| mid | no | - | 26 | 7 | H: 26 G: 22 W: 18 |
Similar to the MP version, but Felicia goes much further. Needs to be performed from long range, otherwise you'll just go sailing over your opponent.
| Startup | Active | Recovery | Hit Adv. | Block Adv. | Renda Bonus |
|---|---|---|---|---|---|
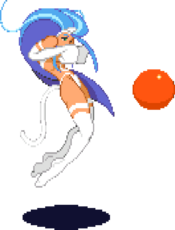
| 40 | (2)3 | 22 + landing 18 | - | - | N/A |
| Guard | Cancel | Invuln | Red Damage | White Damage | Gauge |
| mid | no | - | 21 hit,27 projectile | 7 hit, 8 projectile | H: 0 G: 0 W: 0 |
Delta Kick
623K
| Startup | Active | Recovery | Hit Adv. | Block Adv. | Renda Bonus |
|---|---|---|---|---|---|
| 7 | 16(4)16 | landing 14 | - | -3 | N/A |
| Guard | Cancel | Invuln | Red Damage | White Damage | Gauge |
| mid | no | - | 14+8+6 | 5+3+2 | H: 22+4+4 G: 20+2+2 W: 18 |
Low upperkick. The knee will combo with the dive if point blank, but can sometimes also fail.
| Startup | Active | Recovery | Hit Adv. | Block Adv. | Renda Bonus |
|---|---|---|---|---|---|
| 7 | 18(4)18 | landing 15 | - | -5 | N/A |
| Guard | Cancel | Invuln | Red Damage | White Damage | Gauge |
| mid | no | - | 16+8+6 | 6+3+2 | H: 22+4+5 G: 20+2+3 W: 18 |
Medium upperkick. This version can sometimes combo with the dive against cornered opponents at point blank, but will sometimes fail.
| Startup | Active | Recovery | Hit Adv. | Block Adv. | Renda Bonus |
|---|---|---|---|---|---|
| 7 | 18(4)22 | landing 16 | - | -10 | N/A |
| Guard | Cancel | Invuln | Red Damage | White Damage | Gauge |
| mid | no | - | 18+8+6 | 7+3+2 | H: 22+4+6 G: 20+2+4 W: 18 |
High upperkick. The dive-kick almost never combos with the knee. This version is not particularly used.
| Startup | Active | Recovery | Hit Adv. | Block Adv. | Renda Bonus |
|---|---|---|---|---|---|
| 7 | 16(4)27 | landing 18 | -5 | -6 | N/A |
| Guard | Cancel | Invuln | Red Damage | White Damage | Gauge |
| mid | no | - | 21+4x6 | 8+1x6 | H: 0 G: 0 W: 0 |
Guard Cancel
623LK
| Startup | Active | Recovery | Hit Adv. | Block Adv. | Renda Bonus |
|---|---|---|---|---|---|
| 7 | 16(4)16 | landing 14 | - | -3 | N/A |
| Guard | Cancel | Invuln | Red Damage | White Damage | Gauge |
| mid | no | 1-13 whole body | 8,3+3 | 3,1+1 | H: 22+4+4 G: 20+2+2 W: 18 |
| Startup | Active | Recovery | Hit Adv. | Block Adv. | Renda Bonus |
|---|---|---|---|---|---|
| 7 | 18(4)18 | landing 15 | - | -5 | N/A |
| Guard | Cancel | Invuln | Red Damage | White Damage | Gauge |
| mid | no | 1-13 whole body | 8,3+3 | 3,1+1 | H: 22+4+5 G: 20+2+3 W: 18 |
| Startup | Active | Recovery | Hit Adv. | Block Adv. | Renda Bonus |
|---|---|---|---|---|---|
| 7 | 18(4)22 | landing 16 | - | -10 | N/A |
| Guard | Cancel | Invuln | Red Damage | White Damage | Gauge |
| mid | no | 1-13 whole body | 8,3+3 | 3,1+1 | H: 22+4+6 G: 20+2+4 W: 18 |
| Startup | Active | Recovery | Hit Adv. | Block Adv. | Renda Bonus |
|---|---|---|---|---|---|
| 7 | 18(4)22 | landing 16 | - | -10 | N/A |
| Guard | Cancel | Invuln | Red Damage | White Damage | Gauge |
| mid | no | 1-13 whole body | 8,3+3 | 3,1+1 | H: 22+4+6 G: 20+2+4 W: 18 |
Taunt
22KKK
| Startup | Active | Recovery | Hit Adv. | Block Adv. | Renda Bonus |
|---|---|---|---|---|---|
| - | - | 1 + variable + 23 | - | 3 | N/A |
| Guard | Cancel | Invuln | Red Damage | White Damage | Gauge |
| N/A | no | - | 0 | 0 | W: 1 every 4f |
Pursuits
8P or 8K
| Startup | Active | Recovery | Hit Adv. | Block Adv. | Renda Bonus |
|---|---|---|---|---|---|
| 16 | 27 | landing 1 | - | - | N/A |
| Guard | Cancel | Invuln | Red Damage | White Damage | Gauge |
| mid | no | - | 6 | 6 | H: 24 G: 0 W: 6 |
| Startup | Active | Recovery | Hit Adv. | Block Adv. | Renda Bonus |
|---|---|---|---|---|---|
| 16 | 27 | landing 1 | - | - | N/A |
| Guard | Cancel | Invuln | Red Damage | White Damage | Gauge |
| mid | no | - | 5+1x6 | 4+1x6 | H: 0 G: 0 W: 0 |
22P
| Startup | Active | Recovery | Hit Adv. | Block Adv. | Renda Bonus |
|---|---|---|---|---|---|
| 9 | 3 | 26 | - | - | N/A |
| Guard | Cancel | Invuln | Red Damage | White Damage | Gauge |
| mid | no | - | 7 | 7 | H: 24 G: 0 W: 6 |
| Startup | Active | Recovery | Hit Adv. | Block Adv. | Renda Bonus |
|---|---|---|---|---|---|
| 21 | 6(8)6(8)6(8)6 | 30 | - | - | N/A |
| Guard | Cancel | Invuln | Red Damage | White Damage | Gauge |
| mid | no | - | 3x4 | 2x4 | H: 0 G: 0 W: 0 |
Ex Moves
412[6]PP
| Startup | Active | Recovery | Hit Adv. | Block Adv. | Renda Bonus |
|---|---|---|---|---|---|
| 13 | 40 | 18 | - | -33 | N/A |
| Guard | Cancel | Invuln | Red Damage | White Damage | Gauge |
| mid | no | 1-8 whole body | 5+3x8+9+9 | 2+1x10 | H: 0 G: 0 W: 0 |
An EX move similar to her Rolling Buckler. On hit it goes into an auto-combo animation.
- Compared to her ES Rolling Buckler, this travels much further, but has a longer startup time. The most stand out difference however is that this has some frames of startup invincibility. If used well this can be considered a reversal attack, however it is not without risk as the invincibility does not last until her first active frame. There is more than enough time to interrupt Dancing Flash by a stray hit or late throw. Watch out for moves that have an extremely active hitbox as well. This is a good move, just don't use it without thought or care. On block it is extremely punishable.
- Usable in combos the same way Rolling Buckler is, though generally getting all the hits from an ES Rolling Buckler will do more damage in most combos.
- It's possible to use this as a corner escape if you read a jump in from your opponent.
- 8f Invincibility applications
412[6]LK+MK
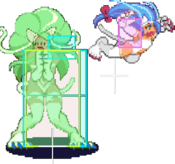
One of the riskiest moves in the game, for not much payoff. Though it seems to be a favorite of many new players, it is very ill advisable to use outside of a few very specific punishes. On whiff or block, Felicia remains immobile until the kitten exits the screen, giving this the worst recovery out of any move in the game.
The "safest" of the three versions if used as a gamble would probably be the LK+HK one since the kitten leaves the screen quickest on both block and whiff. It isn't very effective outside of Felicia being in the corner with the opponent close to her though.
| Startup | Active | Recovery | Hit Adv. | Block Adv. | Renda Bonus |
|---|---|---|---|---|---|
| 2 | - | 77 | - | - | N/A |
| Guard | Cancel | Invuln | Red Damage | White Damage | Gauge |
| mid | no | - | 2+1x29+2x4 | 1+1x12 | H: 0 G: 0 W: 0 |
The kitten runs across the ground. On block the kitten will backflip her way back towards Felicia's corner and off the screen. On whiff the kitten will keep running until she exit's the opposite end of the screen.
| Startup | Active | Recovery | Hit Adv. | Block Adv. | Renda Bonus |
|---|---|---|---|---|---|
| 2 | - | 156 | - | - | N/A |
| Guard | Cancel | Invuln | Red Damage | White Damage | Gauge |
| mid | no | - | 2+1x29+2x4 | 1+1x12 | H: 0 G: 0 W: 0 |
The kitten drops forward from the upper corner of the side of the screen Felicia is on and lands a bit before midscreen. On block she will bounce off the opponent then run back towards Felicia's corner. On whiff the kitten will land and start running for Felicia's corner.
| Startup | Active | Recovery | Hit Adv. | Block Adv. | Renda Bonus |
|---|---|---|---|---|---|
| 2 | - | 86 | - | - | N/A |
| Guard | Cancel | Invuln | Red Damage | White Damage | Gauge |
| mid | no | - | 2+1x29+2x4 | 1+1x12 | H: 0 G: 0 W: 0 |
Dark Force
Kitty Helper
Same strength P + K |
|---|
Colors
Notable Players
Japan
Japanese Player Index: http://www21.atwiki.jp/vsplayer/pages/27.html
| Name (English) | Name (Japanese) | Color | Location | Contact | Notes |
|---|---|---|---|---|---|
| Lyne | リネ | HK |
Kanto region | https://twitter.com/Lyne226 | Current #01 Felicia |
| Zero-One | ゼロ•ONE | KK |
Kanto | https://twitter.com/one8_zero | Makai-2018 guest of Honor |
| Orecon | 俺こん | LK |
Kansai region | http://www.youtube.com/user/orecomchan https://twitter.com/orecomchan https://www.youtube.com/user/GoldFelicia |
Now plays Sasquatch |
| Guratan | グラタン | LP |
Kanto region | http://twitter.com/guratan_felicia http://blog.livedoor.jp/guratan_felicia/ |
Now plays Gallon |
| P | — | KK |
Sendai | Retired | |
| Cat-K | cat-k@アライ | LP |
Kansai region | http://twitter.com/araidon | Retired |
| Nekohashi | ねこはし | HK |
Kansai region | http://twitter.com/u1yutty http://twitter.com/YOUDEAL_INC |
Retired. |
| Teruchika | てるちか | MP |
Kansai region | http://twitter.com/tel1999 | Retired. |
North America
| Name (English) | Name (Japanese) | Color | Location | Contact | Notes |
|---|---|---|---|---|---|
| Ailerus | エィレラス | HK |
Cincinnati | https://twitter.com/ailerusvmp | VMP Big Boss. Winning tournaments, running events, streaming, he does it all! |
| Typhas | タイファス | LP |
Chicago | https://twitter.com/KaT_Typhas | Midwest TO/Community Organizer who has great results overall. Loves cats, and has an arcade world record for "Legendary Wings". |
| 040 (Day) | 040 デイ | MK |
Los Angeles | https://twitter.com/SGNLlost | California organizer and veteran with very good results. Owner of NoSignal. |
South America
| Name (English) | Name (Japanese) | Color | Location | Contact | Notes |
|---|---|---|---|---|---|
| Redarts | レッドアーツ | HP |
Brazil | Stood as the undisputed top 1 player in Brazil/South America for a really long time, now retired. [J] |
Europe
| Name (English) | Name (Japanese) | Color | Location | Contact | Notes |
|---|---|---|---|---|---|
| Likiminaj | MK |
France | https://twitter.com/LikimiGautier | Simple combos, deadly cat #J.HP | |
| Ciccioimberlicchio | チチオインベルリチオ | KK |
Italy | https://twitter.com/Imberlicchio | Resident Mad Scientist for Dark Force usage. |
