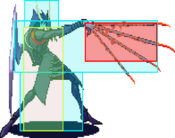
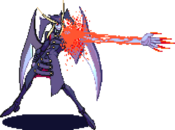
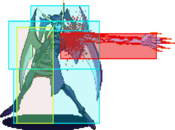
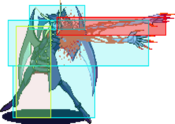
Vampire Savior/Jedah
Introduction
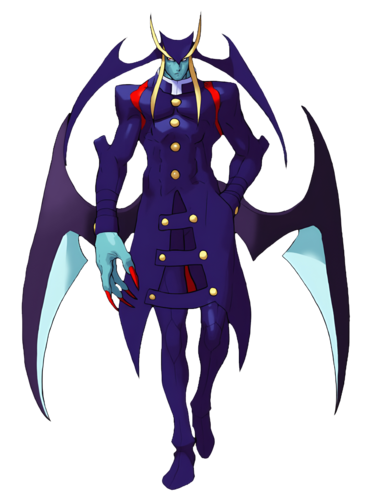
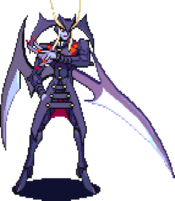
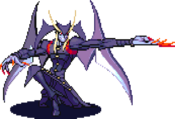
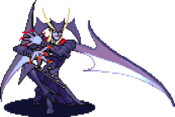
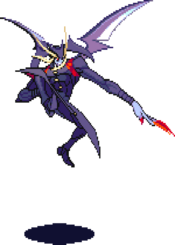
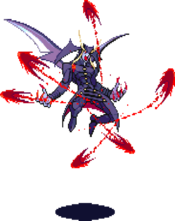
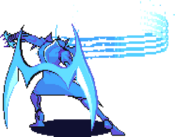
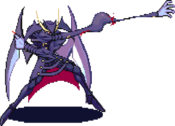
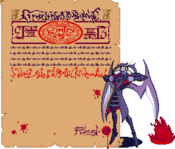
Jedah Dohma (ジェダ・ドーマ), The Demon Savior.
He is the final boss character that serves as the main antagonist & title character of Vampire Savior. One of the three nobles of Makai. Reviving after 100 years due to Ozomu's treachery, Jedah was appalled at the state of the realm. Taking it upon himself to fix the world, Jedah enacted a plan to purify & fuse all souls into one being, The Fetus of God, in an attempt to recreate all life in both Makai and the human realms. To achieve this, he used the soul of Ozomu to create the Majigen, the demon dimension to house the Fetus of God, and to lure all worthy souls to be the final sacrifices needed to bring The Fetus of God to life.
Jedah is a low-tier contender who uses air mobility for hit & run tactics while occasionally having explosive damage on the inside. Jedah is recommended for players who thrive with footsies, player reads, & enjoy a challenge.
Gameplay
Primary Objectives:
- Play evasive & unpredictable utilizing his incredible air mobility
- Play footsies/zoning with Dio Sega, ranged normal attacks, air dash, & reactive anti-airs
- Confirm Dio Sega interactions for anti-air or unblockable setups
- Use air-resets as opportunities to advance & start high/low/frame-trap offense
- Once the opponent is conditioned to not jump, abuse his ground dash for high/low burst damage
- Use his OS command throw x Nero Fatica to punish jumps on the inside
- Use Dark Force to escape situations & turn them into your offensive advantage
| Strengths | Weaknesses |
|---|---|
|
|
General Characteristics
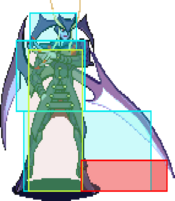
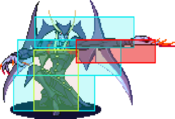
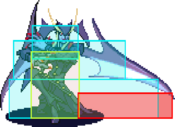
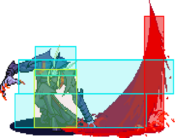
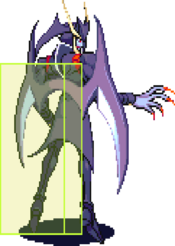
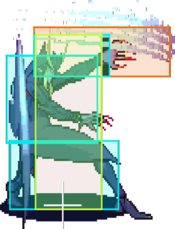
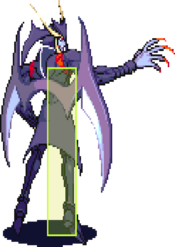
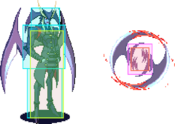
Stand: Incredibly tall as second tallest standing character in the game. His height opens him up to some extra pressure that's difficult to deal with; particularly from characters that don't jump very high and can spam air normals during the jump's ascent and descent. Three hit air chains on the way down are not uncommon.
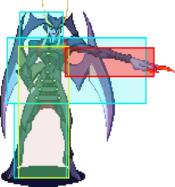
His height gives him two benefits. One is that, like the other two tallest standing characters, while in standing hitstun Jedah's hurtbox becomes much shorter, causing certain jumping chain combos to miss that otherwise wouldn't (this actually makes several potential infinites not work, thankfully). The other is that not only is he tall, he's thin, making it difficult to not only hit a cross-up, but to combo on the ground afterwards if one does happen to hit.
Walk: Average walk speed. Typically, Jedah will not walk long distances and will mostly do it for slight positional adjustments to anti-air or while pressuring. He doesn't really feel like he's walking through mud though, and sometimes it's better to keep your feet on the ground so don't be afraid of taking a stroll.
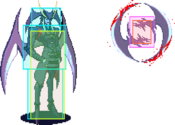
Crouch: The fourth tallest crouching character in the game. Jedah is forced to block a few extra attacks that shorter characters wouldn't, but the situation isn't nearly as bad as it is for the tallest two crouchers, Bishamon and Victor. He's a bit fat in the rear while crouching, making it easier to get hit with a cross-up while crouching, so be careful.
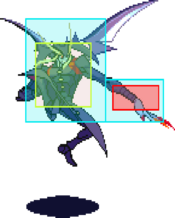
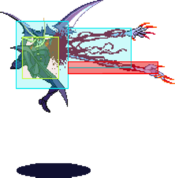
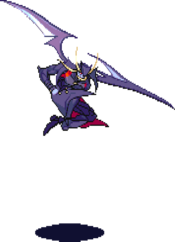
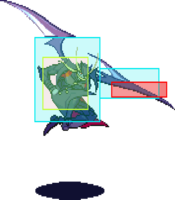
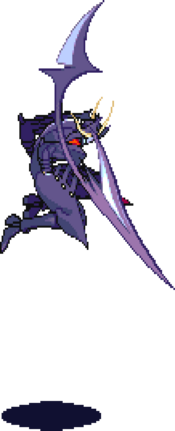
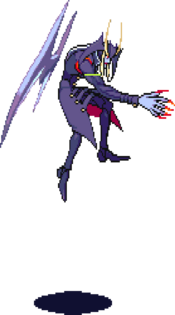
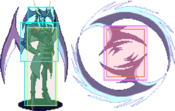
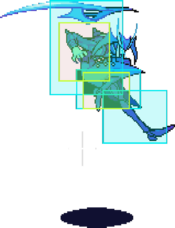
Jump: Jedah's jump is one of the two highest reaching in the game, which is both good and bad, but mostly good. His jump normals are well positioned to deal with his jump height, and once he is in the air, it can be very difficult to bring him down. In addition, to make such a huge jump less predictable, he has several options for changing his aerial momentum, including an air-dash. The main downside to his jump is that his hurtbox becomes very fat.
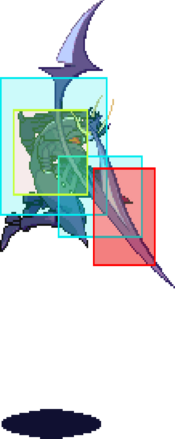
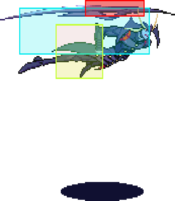
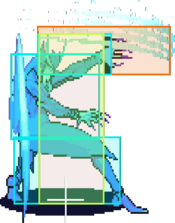
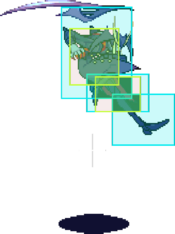
- Jump Start Up — The image above is when Jedah's feet initially leave the ground 6 frames after pressing up. His jump start-up is extremely good, as he is already well into the air soon after pressing up. If the opponent's low attack meaties are off, Jedah may become very hard to pin down.
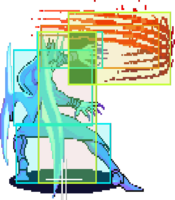
- Jump Back — The highest reaching of his jumps, but it travels less distance than his forward jump; which is probably a good thing or else he'd corner himself even faster. This can be seen as a quick escape, but the potential to corner yourself is still serious.
- Jump Up — Just a tiny bit shorter than his jump back. A well spaced neutral jump can position Jedah above most opponents that are jumping at him, potentially avoiding their attack while coming down on them with a j. MK.
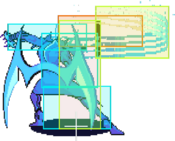
- Jump Forward — The shortest of his jumps, but the distance on it is outrageous. Jumping forward launches Jedah by about 3/4ths of the screen, and combined with his huge jumping normals lets him attack from nearly a full screen distance away. The danger here is that as that such a huge jump is easily telegraphed, potentially making it an easy anti-air.
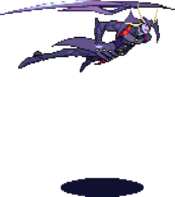
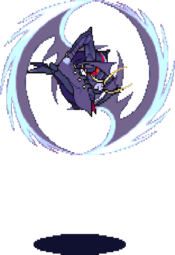
Dash: jet-like dash, similar to Morrigan's. This is a ground-to-air dash, and what makes Jedah's high/low game possible. Dashing is a commitment, as Jedah is unable to block until he lands. It is possible to cancel the ground dash into the-air dash, granted you don't attack first. The rules regarding jump attacks completely change when ground dashing or air dashing, so be sure to take in the following:
- Air chain combos are not possible when dashing.
- Linking air normals is possible, however the links are difficult and limited.
- The speed of Jedah's descent after dashing is much slower than his jump's descent, which lets him (or should I say "forces") him to do pressure strings with his jump normals as he falls.
- All air normals become special cancelable at any point, even if they completely whiff.
- The meter gained from medium and hard normals attacks that hit or are blocked is reduced, and whiffing them results in no meter gain.
- Air throws are not possible when dashing.
Normal Moves
Standing Normals
5LP
| Startup | Active | Recovery | Hit Adv. | Block Adv. | Renda Bonus |
|---|---|---|---|---|---|
| 4 | 3 | 10 | 6 | 5 | H: 9 G: 8 |
| Guard | Cancel | Invuln | Red Damage | White Damage | Gauge |
| mid | yes | - | 8 | 3 | H: 6 G: 3 W: 0 |
5MP
| Startup | Active | Recovery | Hit Adv. | Block Adv. | Renda Bonus |
|---|---|---|---|---|---|
| 10 | 3 | 19 | -1 | -2 | N/A |
| Guard | Cancel | Invuln | Red Damage | White Damage | Gauge |
| mid | no | - | 16 | 7 | H: 15 G: 9 W: 3 |
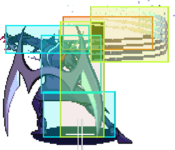
Between 5.MP and 5.HP, this is Jedah's superior throw button. It recovers much faster, is safe on hit and block, and there is a chance of hitting certain characters trying to jump away when attempting a throw.
It has some decent potential as a poke, but mostly against the six characters who cannot crouch it. Against those who cannot duck it, it has an excellent hitbox that covers a large part of the screen, and will most likely hit them if they try to jump out. The problem is the awful hurtbox before the the attack is active, so to make it safe you may want to mix it in while staggering 2.LK so you have some frame advantage going into it.
If you happen to air reset an opponent with this, your ability to apply meaty pressure afterwards is somewhat limited. If you hit them high up in the air you can probably go for a dash j.LP/LK or j.MK, but otherwise you'll have to settle for inching forward and hitting with a 2.LK.
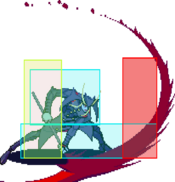
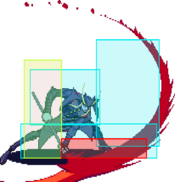
This move will only hit crouching: Anakaris, Aulbath, Bishamon, Demitri, Jedah, Victor5HP
| Startup | Active | Recovery | Hit Adv. | Block Adv. | Renda Bonus |
|---|---|---|---|---|---|
| 9 | 2(5)2(5)2 | 38 | -13 | -14 | N/A |
| Guard | Cancel | Invuln | Red Damage | White Damage | Gauge |
| mid | no | - | 8x3 | 3x3 | H: 12+6x2 G: 9+3x2 W: 6 |
Though this button is an option for when attempting Jedah's Punch Throw, it is an extremely bad choice since from up close it's unsafe on whiff, block, and hit. This attack does not have much use outside of an ender for certain chain combos — and even then it's typically not the best option.
- • The first hit of this move will only hit crouching: Aulbath, Bishamon, Demitri, Jedah, Victor
- • The second hit whiffs on all crouching characters.
- • The second hit of this move will not hit standing: Aulbath, Felicia, Gallon Lei-Lei
- • This move will not hit crouching: Q-Bee
- Variable Frame Advantage
- • If only the first hit connects: H:-27/G:-28
- • If it does not hit past the second hit: H:-20/G:-21
- • If the third hit connects: H:-13/G:-14
5LK
| Startup | Active | Recovery | Hit Adv. | Block Adv. | Renda Bonus |
|---|---|---|---|---|---|
| 5 | 3 | 7 | 6 | 5 | H: 9 G: 8 |
| Guard | Cancel | Invuln | Red Damage | White Damage | Gauge |
| mid | no | - | 8 | 3 | H: 6 G: 3 W: 0 |
This isn't a bad attack, but it just doesn't end up seeing much play typically. Primarly used in chains to get a specific spacing, with 5LK being canceled into a Dio Sega.
This attack has the shortest total frame count out of all of Jedah's normals, and the quickest recovery — meaning there may be some potential use in using it to bait out guard cancels, but this would need to be tested.5MK
| Startup | Active | Recovery | Hit Adv. | Block Adv. | Renda Bonus |
|---|---|---|---|---|---|
| 7 | 5 | 26 | 1 | 0 | N/A |
| Guard | Cancel | Invuln | Red Damage | White Damage | Gauge |
| mid | no | - | 17 | 6 | H: 15 G: 9 W: 3 |
An excellent normal, and the typical ender for most of Jedah's chain combos. Jedah's frame advantage on his Hard Attacks is poor, and he can't chain into a knockdown, resulting in many of his chains simply ending on Standing Medium Kick. With a Hit Advantage of +1, you can attempt to pressure after ending your chain on one of these.
In the neutral game, this attack looks really strong. It has a great hitbox (reaches even further than 2LK), and a fast start-up with a lot of active frames — the only problem is that on whiff this move just hangs out there, leaving Jedah stuck with a fat and tall recovery hurtbox. If you whiff this attack and the opponent is already jumping at you, expect to eat a beefy combo. You should primarily use 5MK to poke when your opponent is already at some sort of frame disadvantage, making it less likely to get jumped in on.5HK
| Startup | Active | Recovery | Hit Adv. | Block Adv. | Renda Bonus |
|---|---|---|---|---|---|
| 35 | 6 | 36 | - | -7 | N/A |
| Guard | Cancel | Invuln | Red Damage | White Damage | Gauge |
| overhead | no | - | 20,16 | 7,6 | H: 24 G: 15 W: 6 |
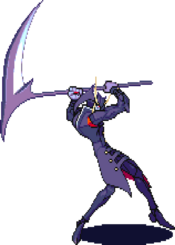
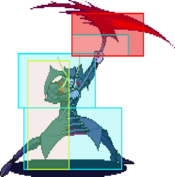
A scythe attack that must be blocked standing. It's primary use is getting you killed by coming out on accident when you're attempting a Dash j.HK.
This is Jedah's only normal attack that can knock the opponent down, however it is far to slow to combo into. It's so slow that it is incredibly easy to block high on reaction after seeing it just a few times.
That said, this does get some specialized use in the corner, where it's a bit better since the opponents movement is limited. From this position it's primarily useful for opponents who keep jumping up-back, since this has excellent anti-air capabilities and great range. You want to hit 5HK's max range, so with proper spacing do either a 2MK or 2.HP and then chain cancel it into a 5HK, if the opponent attempts to jump or presses a button after recovering from the initial attack they'll get hit with the scythe and be knockdown.Crouching Normals
2LP
| Startup | Active | Recovery | Hit Adv. | Block Adv. | Renda Bonus |
|---|---|---|---|---|---|
| 5 | 2 | 10 | 7 | 6 | H: 10 G: 9 |
| Guard | Cancel | Invuln | Red Damage | White Damage | Gauge |
| mid | yes | - | 8 | 3 | H: 6 G: 3 W: 0 |
Crouch jab. Pretty standard for a crouching jab, hits mid, good speed, rewards the most frame advantage out of any of his light attacks, chains into it self. Useful
for ticking and keeping people off of you.2MP
| Startup | Active | Recovery | Hit Adv. | Block Adv. | Renda Bonus |
|---|---|---|---|---|---|
| 12 | 5 | 16 | 1 | 0 | N/A |
| Guard | Cancel | Invuln | Red Damage | White Damage | Gauge |
| mid | yes | - | 16 | 7 | H: 15 G: 9 W: 3 |
2HP
| Startup | Active | Recovery | Hit Adv. | Block Adv. | Renda Bonus |
|---|---|---|---|---|---|
| 10 | 2(5)2(5)2 | 44 | -18 | -19 | N/A |
| Guard | Cancel | Invuln | Red Damage | White Damage | Gauge |
| mid | yes | - | 8x3 | 3x3 | H: 12+6x2 G: 9+3x2 W: 6 |
An extremely unsafe normal, even more so than 5.HP since 2.HP has even worse frame advantage. This is only to be used as the ender to chain combos when you're too far away for 2.HK to hit, but even then it's inadvisable unless it will kill.
- • The second hit of this move will not hit crouching: Gallon, Lei-Lei, Lilith, Morrigan, Q-Bee
- Variable Frame Advantage
- • If only the first hit connects: H:-32/G:-33
- • If it does not hit past the second hit: H:-25/G:-26
- • If the third hit connects: H:-18/G:-19
2LK
| Startup | Active | Recovery | Hit Adv. | Block Adv. | Renda Bonus |
|---|---|---|---|---|---|
| 6 | 3 | 8 | 6 | 5 | H: 9 G: 8 |
| Guard | Cancel | Invuln | Red Damage | White Damage | Gauge |
| low | yes | - | 8 | 4 | H: 6 G: 3 W: 0 |
One of the longest reaching light attacks in the game, this is an incredible normal and a core part of Jedah's game. Because of the length, it can be difficult for many characters to counter poke Jedah when he's abusing this from max range.
2.LK has a lot of uses. Virtually all of his chain combos will start with this normal, since it's his only light attack that must be blocked low. Because of it's range and ability to rapid cancel, this is what you'll be typically special canceling with. When used at max distance it can bait out certain guard cancels.
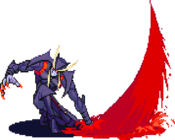
In Jedah's high/low game, 2.LK is very important since it hits low and has excellent frame advantage. You want to be able to hit a quick 2.LK low and immediately dash the frame after recovering into an overhead attack.2MK
| Startup | Active | Recovery | Hit Adv. | Block Adv. | Renda Bonus |
|---|---|---|---|---|---|
| 12 | 7 | 14 | 1 | 0 | N/A |
| Guard | Cancel | Invuln | Red Damage | White Damage | Gauge |
| low | no | - | 17 | 7 | H: 15 G: 9 W: 3 |
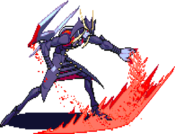
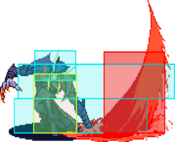
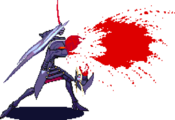
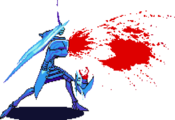
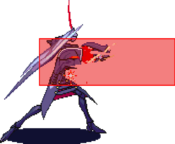
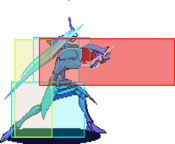
Blood spout. Arguably Jedah's best anti-air. This move also hits low, despite not looking like it should. It's also deceptively safe on block/hit. The only down
side is the startup speed, but in general this is one of Jedah's most valuable moves.2HK
| Startup | Active | Recovery | Hit Adv. | Block Adv. | Renda Bonus |
|---|---|---|---|---|---|
| 18 | 9 | 34 | -6 | -7 | N/A |
| Guard | Cancel | Invuln | Red Damage | White Damage | Gauge |
| low | no | - | 21 | 8 | H: 24 G: 15 W: 6 |
Blood pool. This also hits low, but does not cause a knockdown on hit. It's disadvantageous on hit/block but not nearly as bad as HP/c.HP, thus when hitting with a
chain this is the ideal ender. On block you may want to forgo the c.HK in order to maintain neutral/advantage.Air Normals
J.LP
| Startup | Active | Recovery | Hit Adv. | Block Adv. | Renda Bonus |
|---|---|---|---|---|---|
| 6 | 4 | 8 | - | - | N/A |
| Guard | Cancel | Invuln | Red Damage | White Damage | Gauge |
| overhead | yes | - | 9 | 4 | H: 6 G: 3 W: 0 |
Jumping jab. Useful in air strings and rushdown pressure.
- • From a normal jump, this move will not hit crouching: Q-Bee
J.MP
| Startup | Active | Recovery | Hit Adv. | Block Adv. | Renda Bonus |
|---|---|---|---|---|---|
| 9 | 3 | 11 | - | - | N/A |
| Guard | Cancel | Invuln | Red Damage | White Damage | Gauge |
| overhead | no | - | 16 | 7 | H: 15 G: 9 W: 3 |
J.HP
| Startup | Active | Recovery | Hit Adv. | Block Adv. | Renda Bonus |
|---|---|---|---|---|---|
| 9 | 2(3)2(3)2 | 27 | - | - | N/A |
| Guard | Cancel | Invuln | Red Damage | White Damage | Gauge |
| overhead | no | - | 8x3 | 3x3 | H: 12+6x2 G: 9+3x2 W: 6 |
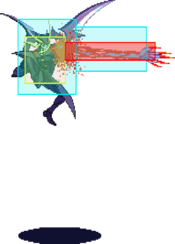
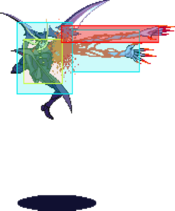
Jumping hands. This is significantly more useful than the standing or crouching versions because while it retains the range, the recovery is neutralized by landing.
Thus, backdash j.HP and backdash airdash j.HP and whiff j.HK j.HP become a lot more useful than the standing or crouching version.J.LK
| Startup | Active | Recovery | Hit Adv. | Block Adv. | Renda Bonus |
|---|---|---|---|---|---|
| 5 | 6 | 3 | - | - | N/A |
| Guard | Cancel | Invuln | Red Damage | White Damage | Gauge |
| overhead | yes | - | 9 | 4 | H: 6 G: 3 W: 0 |
High wing. The hitbox on this is quite high, making it whiff air to ground a lot. But, the recovery is also good so it's still useful for rushdown and mix-up sequences, perhaps more so simply because it whiffs.
- • From a normal jump, this move will only hit crouching: Anakaris, Aulbath, Bishamon, Demitri, Jedah, Victor
J.MK
| Startup | Active | Recovery | Hit Adv. | Block Adv. | Renda Bonus |
|---|---|---|---|---|---|
| 7 | 4 | 9 | - | - | N/A |
| Guard | Cancel | Invuln | Red Damage | White Damage | Gauge |
| overhead | yes | - | 17 | 7 | H: 15 G: 9 W: 3 |
J.HK
| Startup | Active | Recovery | Hit Adv. | Block Adv. | Renda Bonus |
|---|---|---|---|---|---|
| 11 | 2,4 | 9 | - | - | N/A |
| Guard | Cancel | Invuln | Red Damage | White Damage | Gauge |
| overhead | no | - | 13+10 | 5+4 | H: 15+9 G: 10+4 W: 6 |
Command Air Normals
J.66
| Startup | Active | Recovery | Hit Adv. | Block Adv. | Renda Bonus |
|---|---|---|---|---|---|
| 13 | 21 | landing + 1 | - | 2 | N/A |
| Guard | Cancel | Invuln | Red Damage | White Damage | Gauge |
| overhead | yes | - | 14 | 6 | H: 12 G: 6 W: 0 |
Throws
6MP or 6HP
| Startup | Active | Recovery | Hit Adv. | Block Adv. | Renda Bonus |
|---|---|---|---|---|---|
| 1 | - | 98 | - | - | N/A |
| Guard | Cancel | Invuln | Red Damage | White Damage | Gauge |
| throw | no | 1-96 whole body | 23 (11) | 8 (4) | H: 9 G: 0 W: 0 |
An alright normal throw. Your button options for throwing are MP and HP, and you'll want to exclusively use MP. HP is extremely unsafe if the throw doesn't connect, and MP has a decent chance of catching an opponent attempting to jump away.
If if connects, the opponent is thrown nearly full screen away. On knockdown, it can be hard to get a decent follow up from this position, especially if you guess the roll incorrectly, but you can try doing some dash attack strings. It may be worth considering just doing pursuit attack here, and setting up okizeme from that.
If the opponent techs the throw, in the corner Jedah is potentially punishable since he's at negative frame advantage on most characters; consider the "risk vs. reward" when throwing to cornered opponents, though you can always just toss them away from the corner.
- Frame advantage when teched varies based on the character:
- -3f: Jedah
- -2f: Anakaris, Aulbath, Demitri, Victor
- -1f: Bishamon, Lei-Lei, Lilith, Morrigan, Q-Bee, Sasquatch, Zabel
- 0f: Felicia, Gallon
- +1f: Bulleta
J.6P or J.4P
| Startup | Active | Recovery | Hit Adv. | Block Adv. | Renda Bonus |
|---|---|---|---|---|---|
| 1 | - | 103 +38 + landing 2 | - | - | N/A |
| Guard | Cancel | Invuln | Red Damage | White Damage | Gauge |
| throw | no | 1-96 whole body | 23 (11) | 8 (4) | H: 9 G: 0 W: 0 |
Due to Jedah's jump height, this is an extremely hard throw to connect with. Purposefully air throwing is difficult, and this will hit as an accident most of the time. Against the few characters that share Jedah's jump height it may be a bit more practical to land this throw with intention.
Despite having negative frames when it is teched, the opponent is knocked far enough away so that Jedah isn't in any particular danger.
- Frame advantage when teched varies based on the character:
- -10f: Anakaris
- -7f: Sasquatch
- -6f: Demitri, Bishamon
- -4f: Bulleta, Felicia, Victor
- -3f: Aulbath, Gallon, Jedah, Lei-Lei, Lilith, Morrigan, Zabel
- -2f: Q-Bee
Special Moves
Nero Fatica
214P
| Startup | Active | Recovery | Hit Adv. | Block Adv. | Renda Bonus |
|---|---|---|---|---|---|
| 11 | 15 | 36 | - | - | N/A |
| Guard | Cancel | Invuln | Red Damage | White Damage | Gauge |
| throw | no | - | 12+17 | 4+6 | H: 29 G: 0 W: 14 |
| Startup | Active | Recovery | Hit Adv. | Block Adv. | Renda Bonus |
|---|---|---|---|---|---|
| 11 | 15 | 36 | - | - | N/A |
| Guard | Cancel | Invuln | Red Damage | White Damage | Gauge |
| throw | no | - | 12+5+5+4+4+16 | 4+2+2+1+1+3 | H: 0 G: 0 W: 0 |
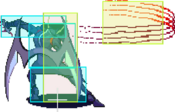
Nero Fatica. There is always some confusion on what to call this attack, with "claw" or "swipe" being the most common, but it's probably easiest to call it by it's actual name.
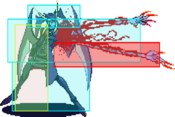
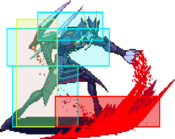
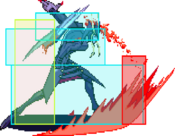
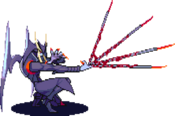
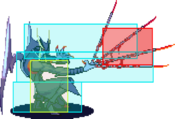
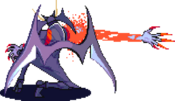
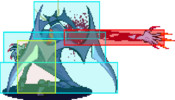
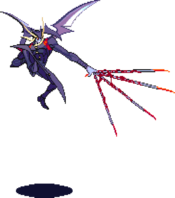
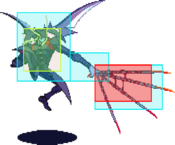
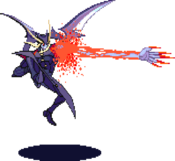
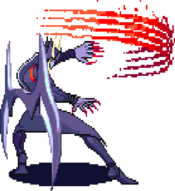
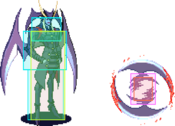
An unblockable attack that is typically used as an anti-air, but it can also hit standing opponents. When preformed, Jedah slices the air with a clawed hand while sliding backward — if the opponent enters the sliced space they'll be caught by the move and be knocked down. By design it will never hit a crouching opponent, as the throw-box is disabled as long as they're crouching. During the active frames it also has the ability to absorb projectiles, but this is more of a bonus safety feature rather than something you can use against the opponent.
Nero Fatica technically counts as a throw, so it must touch the opponents throwable-box to hit. Because of this, it may have trouble when used as an anti-air against certain jump-in attacks. Take Lilith's j.HK for example, even as an attack that would normally be easily anti-aired with Jedah's 2.MK, it's extremely long range could potentially hit Jedah out of his Nero Fatica attempt even with the backwards momentum. On the other hand, Nero Fatica may have an easier time catching jumping attacks that aim downward, which 2.MK may have a harder time anti-airing.
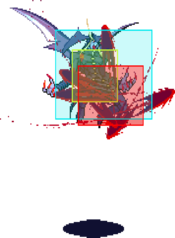
You should only use the HP and ES versions of Nero Fatica. All versions of it have the same start-up, recovery, and throw-box, with the only difference being how far Jedah moves back when performing the move. The HP and ES versions move Jedah back significantly further and at a faster speed, making it less likely that he'll be hit before the attack grabs the opponent. In regards to how far the HP and ES versions actually move you, frame 25 shows how far Jedah will slide backward by the last active frame, while frame 29 shows the full distance he'll slide backward.
Off-screen Glitch
San Bassale
632[4]K
| Startup | Active | Recovery | Hit Adv. | Block Adv. | Renda Bonus |
|---|---|---|---|---|---|
| 6 | 1 | 24 | - | - | N/A |
| Guard | Cancel | Invuln | Red Damage | White Damage | Gauge |
| throw | no | - | 5+5+24 | 2+2+8 | H: 21 G: 0 W: 12 |
Command throw, but not a very good one. It has a delayed start-up with no invincibility.
Delayed command throws work like this — the first throw-box does not actually grab, and is just there to detect if the opponent is in range to initiate the rest of the throw; if they are not in range the opponent will not be thrown and Jedah will not have a throw-whiff animation. If they are in range of the first throw-box, then the throw will initiate, and assuming they're still in range and on the ground by the frame 6 throw-box they will be thrown; if they are out of range or jump between frames 2-6, Jedah will suffer a whiff animation.
So while the range is slightly better than his normal throw and this cannot be throw teched, the long start up is a big liability. More so than the throw-whiff being a problem, no throw invincibility means that you'll often get hit by the opponent mashing when attempting this. Most players consider using this command throw as something of a taunt.
There is no difference between the MK and HK versions.Dio Sega
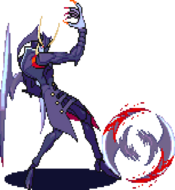
236P
| Startup | Active | Recovery | Hit Adv. | Block Adv. | Renda Bonus |
|---|---|---|---|---|---|
| 46 | 65 | 1 | - | - | N/A |
| Guard | Cancel | Invuln | Red Damage | White Damage | Gauge |
| mid | no | - | 8x3 | 4x3 | H: 15+3x2 G: 13+1x2 W: 12 |
| Startup | Active | Recovery | Hit Adv. | Block Adv. | Renda Bonus |
|---|---|---|---|---|---|
| 46 | 65 | 1 | - | - | N/A |
| Guard | Cancel | Invuln | Red Damage | White Damage | Gauge |
| mid | no | - | 8x5 | 4x5 | H: 0 G: 0 W: 0 |
Grounded:
- (L Version) Low to the ground.
- (M Version) Mid level.
- (H Version) High.
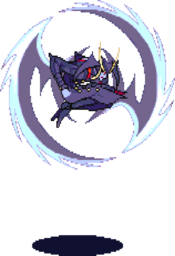
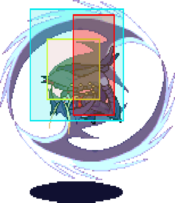
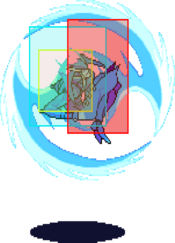
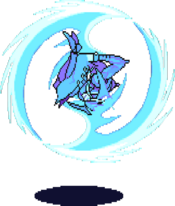
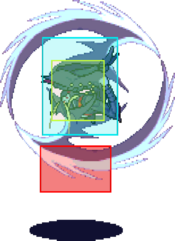
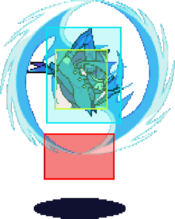
- (ES Version) Hits more times, persists once it leaves Jedah's hands and forms the wheel. Somewhat useful for rushdown strings.
Air:
- (L Version) High in the air.
- (M Version) Mid level.
- (H Version) Low to the ground.
- (ES Version) Highs more times, persists once it leaves Jedah's hands and forms the wheel.
Ira Spinta
J.632[4]K
| Startup | Active | Recovery | Hit Adv. | Block Adv. | Renda Bonus |
|---|---|---|---|---|---|
| 47 | until landing | 2 | - | - | N/A |
| Guard | Cancel | Invuln | Red Damage | White Damage | Gauge |
| throw | no | - | 6x5 | 2x5 | H: 22 G: 0 W: 12 |
| Startup | Active | Recovery | Hit Adv. | Block Adv. | Renda Bonus |
|---|---|---|---|---|---|
| 47 | until landing | 2 | - | - | N/A |
| Guard | Cancel | Invuln | Red Damage | White Damage | Gauge |
| throw | no | - | 7x6 | 2x6 | H: 0 G: 0 W: 0 |
Dive/Scythe Dive. An aerial command grab type of move if left uncancelled. It has large startup, but once it begins it can grab grounded or airborne opponents. This move is also marginally controllable by holding back or forwards before and during the dive. Alternately you can cancel this move into a scythe-wheel dive rather than the grab dive by pushing punch during the startup.
- (L Version) Short range.
- (M Version) Medium range.
- (H Version) Far range.
- (ES Version) Far range, adds additional damage.
Ira Piano
J.632[4]K~P
| Startup | Active | Recovery | Hit Adv. | Block Adv. | Renda Bonus |
|---|---|---|---|---|---|
| 62 | until landing + 10 | 8 + landing 1 | - | - | N/A |
| Guard | Cancel | Invuln | Red Damage | White Damage | Gauge |
| overhead | no | - | 27 | 10 | H: 30 G: 21 W: 12 |
| Startup | Active | Recovery | Hit Adv. | Block Adv. | Renda Bonus |
|---|---|---|---|---|---|
| 62 | until landing + 10 | 8 + landing 1 | - | - | N/A |
| Guard | Cancel | Invuln | Red Damage | White Damage | Gauge |
| overhead | no | - | 10x5 | 4x5 | H: 0 G: 0 W: 0 |
Ira Piano (Scythe-wheel):
- (L Version) Short range.
- (M Version) Medium range.
- (H Version) Far range.
- (ES Version) Far range, adds additional hits and damage.
Guard Cancel
623P
| Startup | Active | Recovery | Hit Adv. | Block Adv. | Renda Bonus |
|---|---|---|---|---|---|
| 13 | 3 | 54 | - | -30 | N/A |
| Guard | Cancel | Invuln | Red Damage | White Damage | Gauge |
| mid | no | 1-13 whole body | 13 | 5 | H: 21 G: 16 W: 12 |
| Startup | Active | Recovery | Hit Adv. | Block Adv. | Renda Bonus |
|---|---|---|---|---|---|
| 13 | 3x3 | 72 | - | -42 | N/A |
| Guard | Cancel | Invuln | Red Damage | White Damage | Gauge |
| mid | no | 1-13 whole body | 8x3 | 3x3 | H: 0 G: 0 W: 0 |
Jedah's guard cancel, that can only be used as a guard cancel. If you input it outside of block stun nothing will happen. It has both it's good and bad points and overall its a usable guard cancel that is essential to his defense, but there are a few things to watch out for.
- Good:
- Invincibility lasts for 13 frames, overlapping with the first active frame. It will usually cleanly hit without trading.
- The range on this thing is ridiculous. There are a lot of things Jedah can guard cancel to punish that most other characters cannot. This is it's best aspect.
- Bad:
- The input somewhat overlaps with Dio Sega, resulting in an accidental Dio Sega if your input is sloppy with a mistimed the guard cancel attempt. This is an issue because the startup time for Dio Sega is long, and even if you successfully toss it out the opponent will probably be too close to you for it to even hit. Make your 623 inputs as clean as possible to avoid this issue.
- It's slow. Talented players will be able to bait it on the ground with light attacks or with a late jump-in attack.
- The recovery is long, so on a successful bait it is possible to get a full punish from an IAD, short hop, or dash link.
- It whiff's on crouching Q-Bee, making it mostly useless when she's in your face.
Pursuits
8P or 8K
| Startup | Active | Recovery | Hit Adv. | Block Adv. | Renda Bonus |
|---|---|---|---|---|---|
| 30 | 9 | landing 1 | - | - | N/A |
| Guard | Cancel | Invuln | Red Damage | White Damage | Gauge |
| mid | no | 1-6 lower body | 7 | 7 | H: 24 G: 0 W: 6 |
An alright pursuit attack. When it hits, Jedah will be placed on the opposite side of the opponent a fixed distance away — so be weary of accidentally cornering yourself. There is some time to attempt dash attack okizeme after hitting with the pursuit, though the options from this position aren't the best.
| Startup | Active | Recovery | Hit Adv. | Block Adv. | Renda Bonus |
|---|---|---|---|---|---|
| 30 | 9 | landing 1 | - | - | N/A |
| Guard | Cancel | Invuln | Red Damage | White Damage | Gauge |
| mid | no | 1-6 lower body | 4x5 | 4x5 | H: 0 G: 0 W: 0 |
Ex Moves
412[6]KK
| Startup | Active | Recovery | Hit Adv. | Block Adv. | Renda Bonus |
|---|---|---|---|---|---|
| 7 | 6 | 67 | - | - | N/A |
| Guard | Cancel | Invuln | Red Damage | White Damage | Gauge |
| throw | no | - | 5x6+18 | 2x6+4 | H: 0 G: 0 W: 0 |
22PP
| Startup | Active | Recovery | Hit Adv. | Block Adv. | Renda Bonus |
|---|---|---|---|---|---|
| 42 | 19 | 57 | - | - | N/A |
| Guard | Cancel | Invuln | Red Damage | White Damage | Gauge |
| unblockable | no | - | 3x13+5 | 1x14 | H: 0 G: 0 W: 0 |
Dark Force
Santo Ario - Same strength P + K
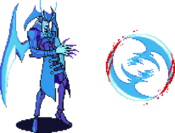
- (Any Version) Enables Jedah free-action flying. During this mode he can move around in the air freely and chain his air attacks. His landing has no recovery and there is no recovery on deactivation while standing or crouching. Deactivating from forces a falling state & deactivating from wake-up is a 2f window which can be blocked on frame 1. the idea is to knock him down then do a normal which only hits standing to guarantee the punish.
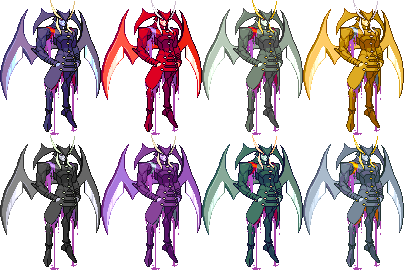
Colors
Notable Players
Japan
Japanese Player Index: http://www21.atwiki.jp/vsplayer/pages/18.html
| Name (English) | Name (Japanese) | Color | Location | Contact | Notes |
|---|---|---|---|---|---|
| Oouchi (aka SaviorMeister) | 大内 | MK 
|
Yamagata | His color is purple - You must train for 10,000 years | |
| Shimatsuya | 始末屋 | HK 
|
Sendai | http://twitter.com/shimatuya https://www.youtube.com/channel/UCo394MFI-W0i9J5uXPO43aw |
|
| Teitoku | 提督 (Kanji) ていとく (Hiragana) |
LK 
|
Kanto region | http://twitter.com/teitoku_jedah | |
| Hoe | ほえ | HK 
|
Kanto region | ||
| Citrus | シトラス | KK File:Jedah color kk small.png | |||
| Benzou | べん造 | HP 
|
Fukuoka | http://twitter.com/benzou0952 | |
| Futana | フタナ | LK 
|
|||
| Olive Oil | MK 
|
Rookie Champ & Artist | |||
| JB | HP 
|
North America
| Name (English) | Name (Japanese) | Color | Location | Contact | Notes |
|---|---|---|---|---|---|
| Kenpachi | ケンパチ | HK 
|
Ohio, USA | https://twitter.com/Kauses | Relatively recent player that has found success. Plays with the Ohio guys regularly. |
South America
| Name (English) | Name (Japanese) | Color | Location | Contact | Notes |
|---|---|---|---|---|---|
| Re-l Mayer | マヤェー | MP 
|
Brazil | ??? | Regular on NekoPunchi, he's a fantastic Jedah player that is also very knowledgeable on the game and always helps beginners. |
| MendyPHX | メンディPHX | MK 
|
São Paulo, Brazil | https://twitter.com/MendyPHX | Recent player that attends offline events with the NekoPunchi guys. Also plays Bulleta. |
| Kurayami1 | くらやみ | HP 
|
São Paulo, Brazil | Oldschool master from Brazil, one of the founding members of NekoPunchi. |
