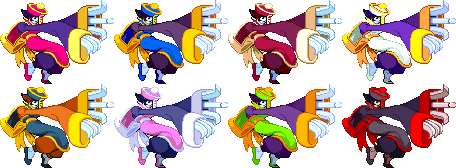
Vampire Savior/Lei-Lei
Introduction
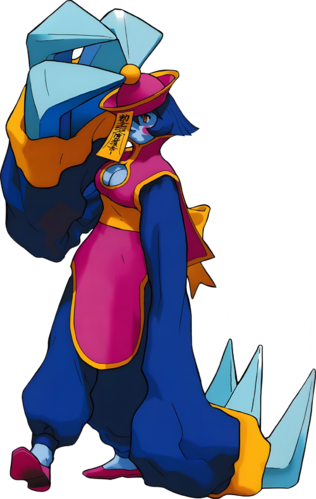
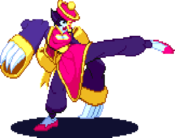
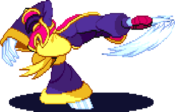
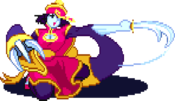
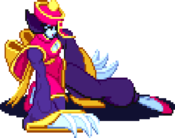
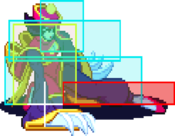
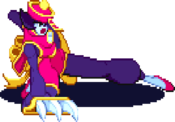
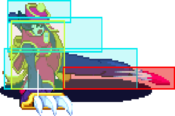
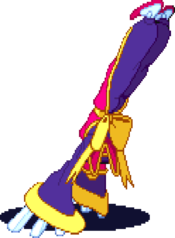
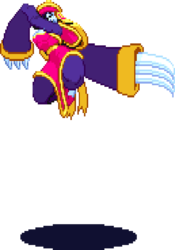
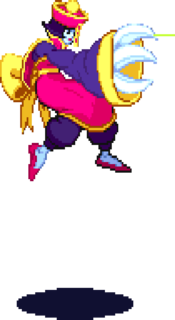
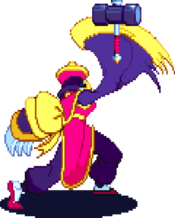
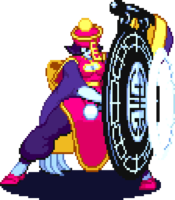
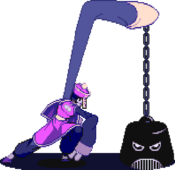
Lei-Lei (レイレイ), also known as Hsien-Ko, the Jiang Shi (Chinese hopping vampire). Lin-Lin (リンリン), also known as Mei-Ling, is her older twin sister.
Upon the night of their 16th birthday, twin human sisters fell into a deep slumber, plagued by a nightmare inadvertently caused by one known as Jedah Dohma. Recent observations of the twins saw them deemed worthy for his plans. Using his powers, their souls were taken from their bodies and brought to the realm of the Majigen. Upon arrival, a hidden power awakened in the twins. While confused at first with their new forms, the twin sisters were drawn by an unknown desire to venture further into the mysterious land. Discovering their bodies can fight with mysterious powers and skills with ease, they braved this dangerous realm with one goal in mind: return home to their family.
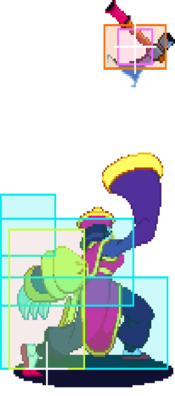
Lei-Lei is a unique mid-tier contender with effective but committed attacks. She has diverse movement options & leverages a command super to score big damage. Lei-Lei is recommended for players who embrace heavy execution & enjoy extremely active play at neutral.
Gameplay
Primary Objectives:
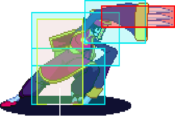
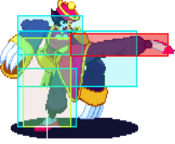
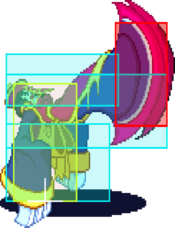
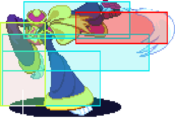
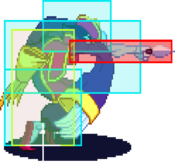
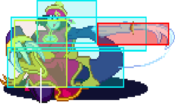
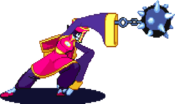
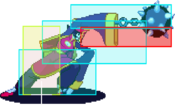
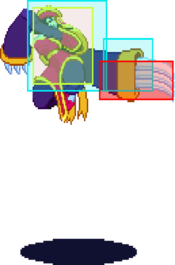
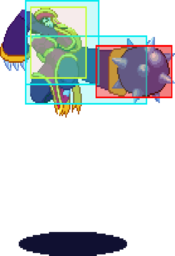
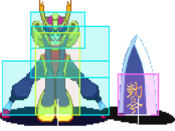
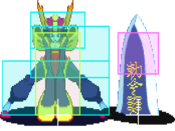
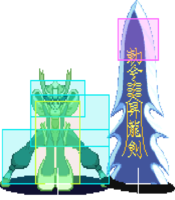
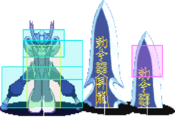
- Control the field with your amazing range & disjointed hitboxes on moves like 236MP, 2HK, 6HP, 6MP, 9MP, 9HP, etc.
- Approach at unique angles using Pendulum cancels & air-dashes
- While inside, use IADs & Tenraiha as effective high/low offense
- Chase ground rolls to keep your offensive momentum going
- Run a high/low + left/right okizeme game
- Use kara specials in neutral to quickly build meter
| Strengths | Weaknesses |
|---|---|
|
|
Movement
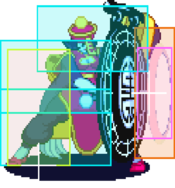
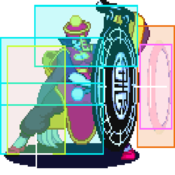
Walk: Extremely slow walk speed and high hitbox. If you're walking around with Lei-Lei chances are you're doing something wrong.
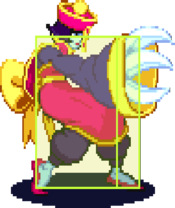
Dash: Her forward dash is unique in that she disappears during the forward dash, which is reserved only for her and Demitri. While she is invisible she is also invulnerable. Unlike most characters, Lei-Lei can perform standing and crouching attacks during either her forwards or backwards dash. Her backdash maintains momentum during a while-dashing attack and loses her ability to chain cancel, it can also be quick-stopped by pressing 6. Her forward dash does not maintain momentum, nor does it lose the ability to chain-cancel if she performs a while-dashing attack. Because her forward dash can not be quick stopped, it's most ideal to whiff a c.LK since that's her fastest move. Due to having invulnerability while invisible during the dash, it makes it ideal for tick throws or to go through fireballs and such. Typically c.LK c.LK dash 624P is a good tick throw setup, also far j.HP dash 624P, or dash c.LK walk throw.
Jump: A standard jump. Average arc width, average arc height.
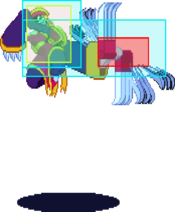
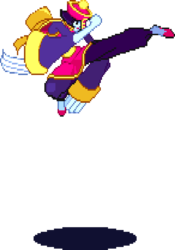
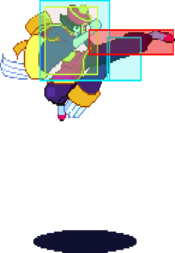
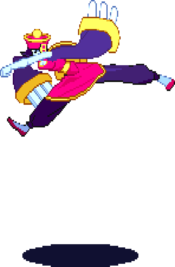
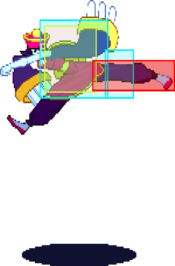
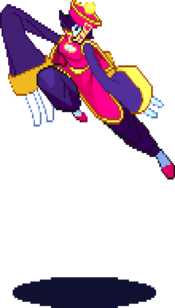
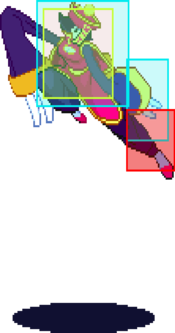
Air Dash: Lei-Lei loses the ability to airchain and special cancel during her airdash, but despite that it's still a rather good movement tool. There is a very brief startup window where she can not attack, and an extremely brief window at the end of the airdash where she enters a recovery pose. However, she can attack after the recovery pose while she is falling. Lei-Lei's airdash is unique in that her backdash will turn her to face that direction. This may seem useless, although because it turns her around it is useful for situations where you jump over the opponent or they cross under you. Since Lei-Lei doesn't have a true crossup, she needs her air backdash in order to turn around and face the opponent when they are behind her.
/Data This links to the source of the Data represented below
Normal Moves
Standing Normals
5LP
| Startup | Active | Recovery | Hit Adv. | Block Adv. | Renda Bonus |
|---|---|---|---|---|---|
| 5 | 3 | 9 | 4 | 3 | H: 7 G: 6 |
| Guard | Cancel | Invuln | Red Damage | White Damage | Gauge |
| mid | yes | - | 7 | 3 | H: 6 G: 3 W: 0 |
5MP
| Startup | Active | Recovery | Hit Adv. | Block Adv. | Renda Bonus |
|---|---|---|---|---|---|
| 6 | 3 | 18 | 3 | 2 | N/A |
| Guard | Cancel | Invuln | Red Damage | White Damage | Gauge |
| mid | yes | - | 16 | 6 | H: 15 G: 9 W: 3 |
5HP
| Startup | Active | Recovery | Hit Adv. | Block Adv. | Renda Bonus |
|---|---|---|---|---|---|
| 11 | 4,4,4 | 24 | -3 | -4 | N/A |
| Guard | Cancel | Invuln | Red Damage | White Damage | Gauge |
| mid | yes | - | 6x3 | 2x3 | H: 12+6+6 G: 9+3+3 W: 6 |
5LK
| Startup | Active | Recovery | Hit Adv. | Block Adv. | Renda Bonus |
|---|---|---|---|---|---|
| 5 | 3 | 11 | 5 | 4 | H: 8 G: 7 |
| Guard | Cancel | Invuln | Red Damage | White Damage | Gauge |
| mid | yes | - | 7 | 3 | H: 6 G: 3 W: 0 |
5MK
| Startup | Active | Recovery | Hit Adv. | Block Adv. | Renda Bonus |
|---|---|---|---|---|---|
| 11 | 8 | 31 | -14 | -15 | N/A |
| Guard | Cancel | Invuln | Red Damage | White Damage | Gauge |
| mid | no | - | 17 | 6 | H: 15 G: 9 W: 3 |
5HK
| Startup | Active | Recovery | Hit Adv. | Block Adv. | Renda Bonus |
|---|---|---|---|---|---|
| 8 | 4 | 26 | -5 | -6 | N/A |
| Guard | Cancel | Invuln | Red Damage | White Damage | Gauge |
| mid | no | - | 20 | 7 | H: 24 G: 15 W: 6 |
Close Normals
CL.5LP
| Startup | Active | Recovery | Hit Adv. | Block Adv. | Renda Bonus |
|---|---|---|---|---|---|
| 5 | 3 | 8 | 5 | 4 | H: 8 G: 7 |
| Guard | Cancel | Invuln | Red Damage | White Damage | Gauge |
| mid | yes | - | 8 | 4 | H: 6 G: 3 W: 0 |
CL.5HP
| Startup | Active | Recovery | Hit Adv. | Block Adv. | Renda Bonus |
|---|---|---|---|---|---|
| 7 | 3 | 23 | 2 | 1 | N/A |
| Guard | Cancel | Invuln | Red Damage | White Damage | Gauge |
| mid | no | - | 22 | 8 | H: 24 G: 15 W: 6 |
Crouching Normals
2LP
| Startup | Active | Recovery | Hit Adv. | Block Adv. | Renda Bonus |
|---|---|---|---|---|---|
| 5 | 3 | 9 | 4 | 3 | H: 7 G: 6 |
| Guard | Cancel | Invuln | Red Damage | White Damage | Gauge |
| mid | yes | - | 7 | 3 | H: 6 G: 3 W: 0 |
2MP
| Startup | Active | Recovery | Hit Adv. | Block Adv. | Renda Bonus |
|---|---|---|---|---|---|
| 7 | 6 | 22 | -7 | -8 | N/A |
| Guard | Cancel | Invuln | Red Damage | White Damage | Gauge |
| mid | no | - | 16 | 6 | H: 15 G: 9 W: 3 |
2HP
| Startup | Active | Recovery | Hit Adv. | Block Adv. | Renda Bonus |
|---|---|---|---|---|---|
| 9 | 14 | 21 | - | -11 | N/A |
| Guard | Cancel | Invuln | Red Damage | White Damage | Gauge |
| low | no | - | 18 | 7 | H: 24 G: 15 W: 6 |
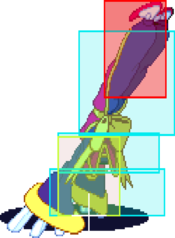
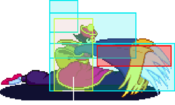
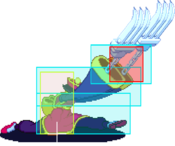
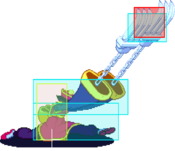
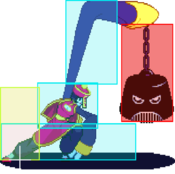
A sweep that slides you forward. Standard chain combo knock down ender. This move is very unsafe on block or whiff. As her furthest reaching low hitting normal, it is used sparingly as an unsafe poke.
Chaining into 5HK: 5HK will whiff if 2HP hits, this can be beneficial for positioning or timing purposes, as 5HK will stop the forward movement, but will not recover faster than 2HP on its own. On block, 5HK puts you at less minus frames and in position that is harder to punish as optimally.
2HP is not special cancelable outside of kara-canceling and command super TRH canceling. There isn't any useful kara cancels with this move as even though it moves her forward it's not enough during the kara window to be useful. Cancelling into TRH is high utility at the cost of meter, this can OTG combo on hit, cover the block string, or even be done during startup for an overhead mix. TRH OTG combo's are character and roll specific.2LK
| Startup | Active | Recovery | Hit Adv. | Block Adv. | Renda Bonus |
|---|---|---|---|---|---|
| 5 | 3 | 7 | 6 | 5 | H: 9 G: 8 |
| Guard | Cancel | Invuln | Red Damage | White Damage | Gauge |
| low | yes | - | 7 | 4 | H: 6 G: 3 W: 0 |
2MK
| Startup | Active | Recovery | Hit Adv. | Block Adv. | Renda Bonus |
|---|---|---|---|---|---|
| 6 | 3 | 17 | 1 | 0 | N/A |
| Guard | Cancel | Invuln | Red Damage | White Damage | Gauge |
| low | yes | - | 15 | 7 | H: 15 G: 9 W: 3 |
2HK
| Startup | Active | Recovery | Hit Adv. | Block Adv. | Renda Bonus |
|---|---|---|---|---|---|
| 11 | 6 | 38 | - | - | H: -20 G: - |
| Guard | Cancel | Invuln | Red Damage | White Damage | Gauge |
| mid | no | - | 20 | 8 | H: 24 G: 15 W: 6 |
Command Normals
6MP
| Startup | Active | Recovery | Hit Adv. | Block Adv. | Renda Bonus |
|---|---|---|---|---|---|
| 7 | 4 | 25 | -8 | -9 | N/A |
| Guard | Cancel | Invuln | Red Damage | White Damage | Gauge |
| mid | no | - | 16 | 7 | H: 15 G: 9 W: 3 |
6HP
| Startup | Active | Recovery | Hit Adv. | Block Adv. | Renda Bonus |
|---|---|---|---|---|---|
| 11 | 15 | 25 | -15 | -16 | N/A |
| Guard | Cancel | Invuln | Red Damage | White Damage | Gauge |
| mid | no | - | 22,17,10 | 8,6,3 | H: 24 G: 15 W: 6 |
Air Normals
J.LP
| Startup | Active | Recovery | Hit Adv. | Block Adv. | Renda Bonus |
|---|---|---|---|---|---|
| 5 | 6 | 3 | - | - | N/A |
| Guard | Cancel | Invuln | Red Damage | White Damage | Gauge |
| overhead | yes | - | 8 | 4 | H: 6 G: 3 W: 0 |
J.MP
| Startup | Active | Recovery | Hit Adv. | Block Adv. | Renda Bonus |
|---|---|---|---|---|---|
| 7 | 10 | 7 | - | - | N/A |
| Guard | Cancel | Invuln | Red Damage | White Damage | Gauge |
| overhead | no | - | 16 | 6 | H: 15 G: 9 W: 3 |
J.HP
| Startup | Active | Recovery | Hit Adv. | Block Adv. | Renda Bonus |
|---|---|---|---|---|---|
| 10 | 2,2,2,2,2,1 | 11 | - | - | N/A |
| Guard | Cancel | Invuln | Red Damage | White Damage | Gauge |
| overhead | no | - | 7x3 | 3x3 | H: 12+6+6 G: 9+3+3 W: 6 |
J.LK
| Startup | Active | Recovery | Hit Adv. | Block Adv. | Renda Bonus |
|---|---|---|---|---|---|
| 5 | 6 | 4 | - | - | N/A |
| Guard | Cancel | Invuln | Red Damage | White Damage | Gauge |
| overhead | yes | - | 8 | 4 | H: 6 G: 3 W: 0 |
J.MK
| Startup | Active | Recovery | Hit Adv. | Block Adv. | Renda Bonus |
|---|---|---|---|---|---|
| 9 | 6 | 11 | - | - | N/A |
| Guard | Cancel | Invuln | Red Damage | White Damage | Gauge |
| overhead | no | - | 17 | 7 | H: 15 G: 9 W: 3 |
J.HK
| Startup | Active | Recovery | Hit Adv. | Block Adv. | Renda Bonus |
|---|---|---|---|---|---|
| 8 | 5 | 13 | - | - | N/A |
| Guard | Cancel | Invuln | Red Damage | White Damage | Gauge |
| overhead | no | - | 20 | 8 | H: 24 G: 15 W: 6 |
Normal Throws
6 or 4 + MP/HP/MK/HK
| Startup | Active | Recovery | Hit Adv. | Block Adv. | Renda Bonus |
|---|---|---|---|---|---|
| 1 | - | 54 | - | - | N/A |
| Guard | Cancel | Invuln | Red Damage | White Damage | Gauge |
| throw | no | 1-30 whole body | 20 (7) | 9 (3) | H: 9 G: 0 W: 0 |
There are four types of throw buttons (PK medium/heavy) and two directions for throwing (forward/back) combined to give a total of eight types of throws. However, the backward K-throws can be combined with the forward K-throws, so there are actually only six different combinations to consider.
6MP throw: The most orthodox option. 6MP has a 6-frame startup, 4-frame duration, 9-frame guard disadvantage, a good hitbox, and many follow up options. It has a fast attack and a long reach, but it cannot be used for anti-air and is not suitable for traditional throw OS.
The best use for it is in okizeme. It is not suitable for anti-air, but will beat jump startup if timed correctly. It's reach isn't taken advantage of when going for throws, but it's a medium P, so it can be used in a chain combinations. It is very effective to use in combination with 2MK chain 2HP to bring the opponent down and loop it again. The problem is that it's weak to the opponent's reversals such as shadow blade and dancing flash.
As tick throw, if you walk and fail to throw (mainly when the opponent jumps out), you will not be able to follow up very well. You can use TRH to cover, but you are likely to be interrupted and loose health and meter.
6HP throw: Not used much, looks like it would anti air OS but in practice it only covers the upback angle. If it's 8 jumped you will take a lot of damage. Never use it at the edge of the screen as throw OS since the opponent can't jump backwards. If you do go for this, cancel in to TRH.
6MK throw: Pros: Long duration normal, better anti jump hitbox than 6MP, hits crouching opponents. Cons: Slow startup, short reach, very disadvantageous on block, less chain options than MP
MK throw can be used as anti-air OS but it's slow startup means you have to input it early. Can be awkward to use, when blocked you must chain 2HP or cancel into TRH to try and cover.
6HK throw: Better anti air OS capability than P throws similar to MK throw but no chain options means your only option is to TRH on hit/block. 4MP Throw: You often get this when teching opponent's throw attempts or in scramble situations. 5MP is good anti-air, but can be crouched by many characters. Back throw means it's hard to tick throw with but it is LeiLei's only standing mid attack that is plus on block. Useful on characters that 5mp can hit crouching, otherwise avoid it. 4HP Throw:
Not used much in practice but potentially has a strong use case. LeiLei's proximity normal with the largest differences between near and far. Near 5HP is plus on block and good damage. Theoretically, n.5HP x TRH aimed at someone waking up and attacking would be very strong damage, but short duration makes it hard to use.J.6P or J.4P
| Startup | Active | Recovery | Hit Adv. | Block Adv. | Renda Bonus |
|---|---|---|---|---|---|
| 1 | - | 47 + 28 + landing 1 | - | - | N/A |
| Guard | Cancel | Invuln | Red Damage | White Damage | Gauge |
| throw | no | 1-47 whole body | 20 | 7 | H: 9 G: 0 W: 0 |
Special Moves
Ankihou
236LP
| Startup | Active | Recovery | Hit Adv. | Block Adv. | Renda Bonus |
|---|---|---|---|---|---|
| 17 | 1 | 35 | -9 | -10 | N/A |
| Guard | Cancel | Invuln | Red Damage | White Damage | Gauge |
| mid | no | - | 13 | 4 | H: 21 G: 16 W: 12 |
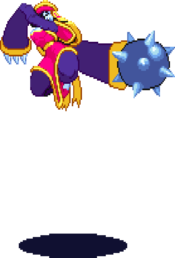
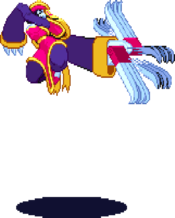
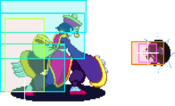
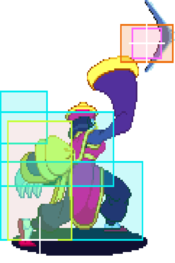
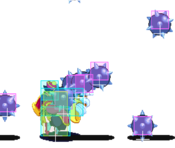
Lei-Lei tosses a pseudo-random item. The items aren't chosen entirely at random, but rather by a set order. However, the MP and HP versions can throw different items than the LP version, which can disrupt the order of the items thrown. As a general rule of thumb, the first item thrown after a Gouki (Akuma) doll will be a dizzy item. Dizzy items can also randomly follow a shuriken (ninja star) or kunai (dagger). Dizzy items include: huge boulder, 3D star, mallet.
(LP Version) Low item arc, covers the ground.
| Startup | Active | Recovery | Hit Adv. | Block Adv. | Renda Bonus |
|---|---|---|---|---|---|
| 17 | 1 | 36 | -5 | -6 | N/A |
| Guard | Cancel | Invuln | Red Damage | White Damage | Gauge |
| mid | no | - | 13 | 4 | H: 21 G: 16 W: 12 |
(MP Version) High arc, covers the air. This version can combo from 2MK, but it's character and standing dependant:
Combos: Demitri, Anakiris, Q-Bee, Bishamon, Jedab, Zabel
Combos from IAD Overhead: Q-Bee
Doesn't combo: Victor, Bulleta, Lilith, Morrigan, Sasquatch
Doesn't hit: Felicia, Lei-Lei, Gallon, Aulbath
| Startup | Active | Recovery | Hit Adv. | Block Adv. | Renda Bonus |
|---|---|---|---|---|---|
| 17 | 1 | 36 | -1 | -2 | N/A |
| Guard | Cancel | Invuln | Red Damage | White Damage | Gauge |
| high | no | - | 13 | 4 | H: 21 G: 16 W: 12 |
(HP Version) Tosses item vertically. This will hit high as an over-head, and therefor can be used in conjunction with simultaneous lows during the item's decent to create an unblockable (since you can't block high and low at the same time).
| Startup | Active | Recovery | Hit Adv. | Block Adv. | Renda Bonus |
|---|---|---|---|---|---|
| 17 | 1(38)1(39)1 | 39 | -4 | -5 | N/A |
| Guard | Cancel | Invuln | Red Damage | White Damage | Gauge |
| low | no | - | 18x3 | 6x3 | H: 0 G: 0 W: 0 |
| Item | Light | Medium | Hard |
|---|---|---|---|
| 01 | Axe | Axe | Axe |
| 02 | Sword | Sword | Sword |
| 03 | Shuriken | Shuriken | Shuriken |
| 04 | Statue | Statue | Statue |
| 05 | Boomerang | Hammer | Hammer |
| 06 | Boomerang | Boomerang | Boomerang |
| 07 | Kunai | Kunai | Kunai |
| 08 | Random (Boomerang/Dagger ~57%, Spiked Ball ~16%, Vega Claw ~16%, Star ~7%, Barrel ~4%*) | ||
| 09 | Boomerang | Boomerang | Boomerang |
| 10 | Axe | Axe | Axe |
| 11 | Random (Boomerang/Dagger ~57%, Spiked Ball ~16%, Vega Claw ~16%, Star ~7%, Barrel ~4%*) | ||
| 12 | Sword | Sword | Sword |
| 13 | Shuriken | Shuriken | Shuriken |
| 14 | Statue | Statue | Statue |
| 15 | Kunai | Boulder | Boulder |
| 16 | Kunai | Kunai | Kunai |
| 17 | Shuriken | Shuriken | Shuriken |
| 18 | Statue | Statue | Statue |
| 19 | Kunai | Hammer | Hammer |
| 20 | Kunai | Kunai | Kunai |
| 21 | Boomerang | Boomerang | Boomerang |
| 22 | Random (Boomerang/Dagger ~57%, Spiked Ball ~16%, Vega Claw ~16%, Star ~7%, Barrel ~4%*) | ||
| 23 | Sword | Sword | Sword |
| 24 | Axe | Axe | Axe |
| 25 | Kunai | Kunai | Kunai |
| 26 | Random (Boomerang/Dagger ~57%, Spiked Ball ~16%, Vega Claw ~16%, Star ~7%, Barrel ~4%*) | ||
| 27 | Boomerang | Boomerang | Boomerang |
| 28 | Axe | Axe | Axe |
| 29 | Sword | Sword | Sword |
| 30 | Shuriken | Shuriken | Shuriken |
| 31 | Shuriken | Shuriken | Shuriken |
| 32 | Axe | Boulder | Boulder |
| - Return to start - | |||
Ankihou Item Toss Order Notes
- Stun Items are colored RED.
- Random 1's Barrel seems incredibly rare.
- Random 3 may or may not have a 4th item.
- Oddly, #31 is not a statue even though the following item stuns.
- Bracelet, Claw, Star and Barrel are only on random slots.
- Stun items on Random slots can come out with an LP Ankihou.
- You can't throw two of the same item in a row, it will instead skip the repeating item. For example, say if on #08 Random Item you get a Boomerang, then it will skip #09 Boomerang and go straight to #10 Axe.
Stun Item Punishment Timings
The frame data for how long it takes a character to stand up after being knocked down with one of Lei-Lei's stun items is completely different from the characters standard Neutral Recovery on a regular knockdown. If you're used to meatying a character's typical recovery you may have to adjust your timing to get a clean follow up after hitting them with a stun item. Notably, Q-Bee's wake up time is not only significantly longer than her usual Neutral Recovery, its longer than every other character. Make sure to practice the follow up on her. The chart below shows how many frames it takes after a character hits the floor, to when they stand up and are vulnerable to attack.
| Character | Stand Up Frames |
|---|---|
| Zabel | 38 |
| Bishamon | 39 |
| Sasquatch | 39 |
| Bulleta | 40 |
| Felicia | 40 |
| Jedah | 40 |
| Anakaris | 43 |
| Lilith | 43 |
| Morrigan | 43 |
| Aulbath | 44 |
| Gallon | 45 |
| Lei-Lei | 46 |
| Victor | 46 |
| Demitri | 49 |
| Q-Bee | 69 |
Henkyouki
214LP
| Startup | Active | Recovery | Hit Adv. | Block Adv. | Renda Bonus |
|---|---|---|---|---|---|
| 10 | 15 | 32 | -6 | - | H: -7 G: - |
| Guard | Cancel | Invuln | Red Damage | White Damage | Gauge |
| mid | no | - | 17 | 7 | H: 27 G: 19 W: 12 |
This move will reflect an opponent's projectile back at them. However, it will change the projectile's trajectory to a horizontal one regardless of the projectile's original trajectory. A single gong may reflect numerous projectiles. Reflectable projectiles: Anakaris: Curse, Aulbath: Soundwaves, Bulleta: Missiles/Mines (all), Demitri: Fireballs, Jedah: Scythes, Lei-Lei: Items, Lilith: Fireballs, Morrigan: Fireballs.
(LP Version) Fast startup, short range, short duration, slow reflected projectiles. Minimal use.
| Startup | Active | Recovery | Hit Adv. | Block Adv. | Renda Bonus |
|---|---|---|---|---|---|
| 12 | 23 | 37 | -6 | - | H: -7 G: - |
| Guard | Cancel | Invuln | Red Damage | White Damage | Gauge |
| mid | no | - | 17 | 7 | H: 27 G: 19 W: 12 |
(MP Version) Fast startup, medium range, medium duration, medium speed on reflected projectiles. Good for combos off cancelable normals or general purpose.
| Startup | Active | Recovery | Hit Adv. | Block Adv. | Renda Bonus |
|---|---|---|---|---|---|
| 14 | 31 | 42 | -7 | - | H: -8 G: - |
| Guard | Cancel | Invuln | Red Damage | White Damage | Gauge |
| mid | no | - | 17 | 7 | H: 27 G: 19 W: 12 |
(HP Version) Slow startup, bigger range, long duration, fast speed on reflected projectiles. Good for a stagger off cancelable normals since the gong-wave takes some time to reach the opponent, but will beat any counter-poke attempts or flat-out stuff mashing attempts.
| Startup | Active | Recovery | Hit Adv. | Block Adv. | Renda Bonus |
|---|---|---|---|---|---|
| 17 | 91 | 50 | 7 | - | H: 6 G: - |
| Guard | Cancel | Invuln | Red Damage | White Damage | Gauge |
| mid | no | - | 9x3 | 3x3 | H: 0 G: 0 W: 0 |
(ES Version) Slow startup, very long range, very long duration, fast speed on reflected projectiles, can reflect multiple projectiles. This is the only version that is good on block from point blank range, and it's also advantageous on hit. This makes it good for pressure or even combos. At max spacing it makes for good oki off TRH OTG, specially in the corner where it can set unblockables.
| Startup | Active | Recovery | Hit Adv. | Block Adv. | Renda Bonus |
|---|---|---|---|---|---|
| 10 | 15 | 20 + variable + landing 1 | - | - | N/A |
| Guard | Cancel | Invuln | Red Damage | White Damage | Gauge |
| mid | no | - | 17 | 7 | H: 27 G: 19 W: 12 |
LP Air Version
| Startup | Active | Recovery | Hit Adv. | Block Adv. | Renda Bonus |
|---|---|---|---|---|---|
| 12 | 23 | 25 + variable + landing 1 | - | - | N/A |
| Guard | Cancel | Invuln | Red Damage | White Damage | Gauge |
| mid | no | - | 17 | 7 | H: 27 G: 19 W: 12 |
MP Air Version
| Startup | Active | Recovery | Hit Adv. | Block Adv. | Renda Bonus |
|---|---|---|---|---|---|
| 14 | 31 | 30 + variable + landing 1 | - | - | N/A |
| Guard | Cancel | Invuln | Red Damage | White Damage | Gauge |
| mid | no | - | 17 | 7 | H: 27 G: 19 W: 12 |
HP Air Version
| Startup | Active | Recovery | Hit Adv. | Block Adv. | Renda Bonus |
|---|---|---|---|---|---|
| 17 | 91 | 38 + variable + landing 1 | - | - | N/A |
| Guard | Cancel | Invuln | Red Damage | White Damage | Gauge |
| mid | no | - | 9x3 | 3x3 | H: 0 G: 0 W: 0 |
Senpuubu
623LP
| Startup | Active | Recovery | Hit Adv. | Block Adv. | Renda Bonus |
|---|---|---|---|---|---|
| 30 | 75 | 1 | - | - | N/A |
| Guard | Cancel | Invuln | Red Damage | White Damage | Gauge |
| mid | yes | - | 5xn | 2xn | H: 18+6xn G: 18+3xn W: 18 |
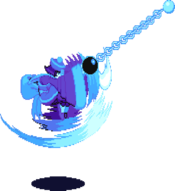
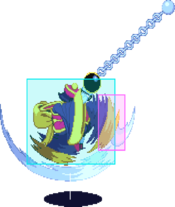
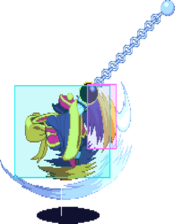
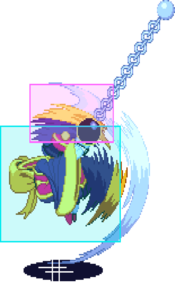
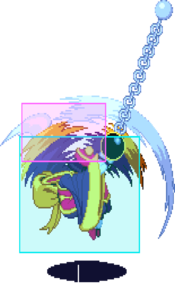
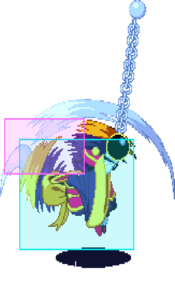
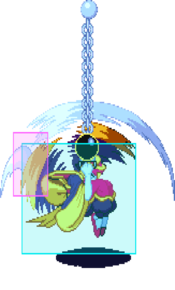
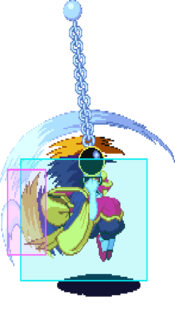
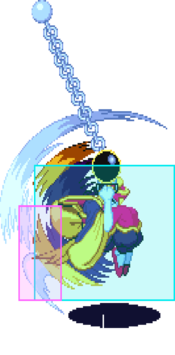
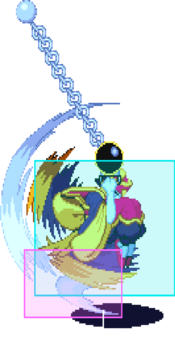
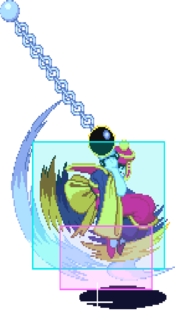
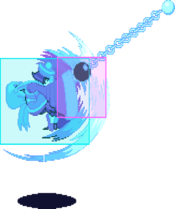
Lei-Lei swings on a chain. During the swing, Lei-Lei can pass through opponents (midscren/corner). This move will automatically cancel itself if she touches a wall. It can also be canceled at any time during the swing by pressing any K. Lei-Lei has free-action after the swing is canceled and maintains the swing's trajectory and momentum when canceled. Because she has free-action she is even able to perform another Senpuubu, or attack/airdash, though she is limited to two Senpuubu's per jump. To do two swings in a row quickly you would typically kara/slide input it, such as: 623P (swing) 623K~P, where you cancel with K then immediately enter another swing. Mashing punch makes the hitbox rotate faster around Lei; good for more damage or to chip-kill someone. All pendulum strengths build the same amount of meter. 6k6 or 4k4 for fastest airdash out of 623p, k button cancels the pendulum.
(LP Version) Low swing. It's a good way to quickly get through the screen.
| Startup | Active | Recovery | Hit Adv. | Block Adv. | Renda Bonus |
|---|---|---|---|---|---|
| 32 | 83 | 1 | - | - | N/A |
| Guard | Cancel | Invuln | Red Damage | White Damage | Gauge |
| mid | yes | - | 5xn | 2xn | H: 18+6xn G: 18+3xn W: 18 |
(MP Version) Mid swing. When cancelled immediately from the ground (TK it) it pops you up enough to a quick overhead or IAD.
| Startup | Active | Recovery | Hit Adv. | Block Adv. | Renda Bonus |
|---|---|---|---|---|---|
| 34 | 91 | 1 | - | - | N/A |
| Guard | Cancel | Invuln | Red Damage | White Damage | Gauge |
| mid | yes | - | 5xn | 2xn | H: 18+6xn G: 18+3xn W: 18 |
(HP Version) High swing. Cancelled at the top effectively gives Lei double and triple jumps.
| Startup | Active | Recovery | Hit Adv. | Block Adv. | Renda Bonus |
|---|---|---|---|---|---|
| 32 | 171 | 1 | - | - | N/A |
| Guard | Cancel | Invuln | Red Damage | White Damage | Gauge |
| mid | yes | - | 5xn | 2xn | H: 0 G: 0 W: 0 |
Guard Cancel
623LP
| Startup | Active | Recovery | Hit Adv. | Block Adv. | Renda Bonus |
|---|---|---|---|---|---|
| 30 | 75 | 1 | - | - | N/A |
| Guard | Cancel | Invuln | Red Damage | White Damage | Gauge |
| mid | yes | - | 5xn | 2xn | H: 18+6xn G: 18+3xn W: 18 |
Lei-Lei swings on a chain. During the swing, Lei-Lei can pass through opponents (midscren/corner). This move will automatically cancel itself if she touches a wall. It can also be canceled at any time during the swing by pressing any K. Lei-Lei has free-action after the swing is canceled and maintains the swing's trajectory and momentum when canceled. Because she has free-action she is even able to perform another Senpuubu, or attack/airdash, though she is limited to two Senpuubu's per jump. To do two swings in a row quickly you would typically kara/slide input it, such as: 623P (swing) 623K~P, where you cancel with K then immediately enter another swing.
(GC Version) This version acts similarly, however it gains startup invulnerability until a few frames after leaving the ground (roughly 20F startup inv) on all versions, while the normal versions have zero invulnerability. However it becomes vulnerable before the first active hitframes and before it becomes cancelable. So, as an escape move it is only moderately useful. Very sparingly/rarely used.
| Startup | Active | Recovery | Hit Adv. | Block Adv. | Renda Bonus |
|---|---|---|---|---|---|
| 32 | 83 | 1 | - | - | N/A |
| Guard | Cancel | Invuln | Red Damage | White Damage | Gauge |
| mid | yes | - | 5xn | 2xn | H: 18+6xn G: 18+3xn W: 18 |
MP Version
| Startup | Active | Recovery | Hit Adv. | Block Adv. | Renda Bonus |
|---|---|---|---|---|---|
| 34 | 91 | 1 | - | - | N/A |
| Guard | Cancel | Invuln | Red Damage | White Damage | Gauge |
| mid | yes | - | 5xn | 2xn | H: 18+6xn G: 18+3xn W: 18 |
HP Version
| Startup | Active | Recovery | Hit Adv. | Block Adv. | Renda Bonus |
|---|---|---|---|---|---|
| 32 | 171 | 1 | - | - | N/A |
| Guard | Cancel | Invuln | Red Damage | White Damage | Gauge |
| mid | yes | - | 5xn | 2xn | H: 0 G: 0 W: 0 |
Command Throws
632[4]P
| Startup | Active | Recovery | Hit Adv. | Block Adv. | Renda Bonus |
|---|---|---|---|---|---|
| 2 | 1(5)1 | 46 | - | - | N/A |
| Guard | Cancel | Invuln | Red Damage | White Damage | Gauge |
| throw | no | - | 4x8 | 2x8 | H: 21 G: 0 W: 12 |
Command grab. Great move to use during dashes or off whatever other tick throw setup you feel like.
When used with forward dashes: It's important to make sure you do not dash through your opponent because Lei-Lei will not turn around to grab the opponent if she dashes through them.
Input Overlap with Gong: When first using this move, you may see that on whiff it results in a Henkyouki (gong). While this command grab is typically seen as a "Half Circle Back" input of 63214, you can actually skip hitting 1 (down-back) when executing it. This is useful since the Gong input of 214 overlaps with the traditional 63214 input. By skipping the 1 directional, if the command grab whiffs you will not automatically get a Gong. Keep in mind, some players like getting Gong on whiff, though it's best to say it may be a situational sort of thing.
Negative Edge: Utilizing Negative Edge with command grabs is potentially something very strong. Negative edge is where you release a button to activate a special move, instead of pressing the button. This means you must already be holding down MP or HP, input 6324, and then release MP or HP. If done correctly, when you're in range you'll grab the opponent, and if you're out of range nothing will happen. Meaning not even a normal will come out. You can also input 6324~1 when using Negative Edge which lets you: avoid gong, a normal coming out, and assume a crouch block position - allowing you to be safe against reversals and mashers. This also works well when aiming for a command throw from a forward dash, because if they jump or reversal you'll just teleport right through them. Once again, you should keep in mind that you may want a normal to come out after a command grab attempt, this is just an option.
Input Priority: If you press LP and either MP or HP at the same time, the LP will always come out over the other two attacks. This can be utilized with Lei-Lei's command throw by simply inputting 6324.LP+MP, so if the command grab whiffs the result will be the safer and faster LP instead of an MP or HP. This is a little more useful for Lei-Lei than other characters since she doesn't have an ES version of her command grab that would result from this input.Pursuits
8P/K or 8KK/PP
| Startup | Active | Recovery | Hit Adv. | Block Adv. | Renda Bonus |
|---|---|---|---|---|---|
| 29 | 7 | landing 1 | - | - | N/A |
| Guard | Cancel | Invuln | Red Damage | White Damage | Gauge |
| mid | no | - | 2x4 | 2x4 | H: 11+5x3 G: 0 W: 6 |
A multi-hit pursuit. Good for meter building or intentionally whiffing to cover ground. Only does recoverable damage though so Tenraiha is the preferred OTG when applicable. However, it's also possible to pursuit after a Tenraiha OTG, so they aren't necessarily exclusive of one another.
| Startup | Active | Recovery | Hit Adv. | Block Adv. | Renda Bonus |
|---|---|---|---|---|---|
| 29 | 7 | landing 1 | - | - | N/A |
| Guard | Cancel | Invuln | Red Damage | White Damage | Gauge |
| mid | no | - | - | 2x8 | H: 0 G: 0 W: 0 |
Ex Moves
LK,HK,MP,MP,8
| Startup | Active | Recovery | Hit Adv. | Block Adv. | Renda Bonus |
|---|---|---|---|---|---|
| 19 | 2 | 81 | - | - | N/A |
| Guard | Cancel | Invuln | Red Damage | White Damage | Gauge |
| overhead | no | - | 23 | 8 | H: 0 G: 0 W: 0 |
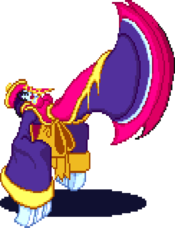
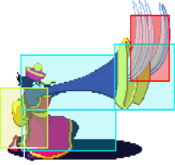
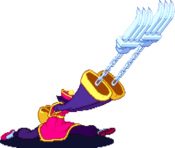
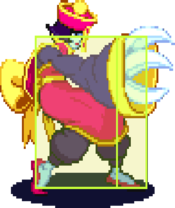
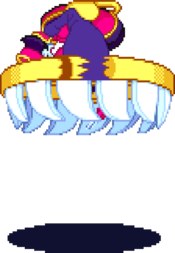
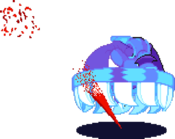
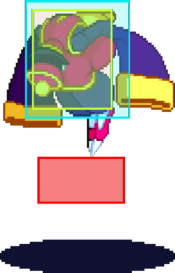
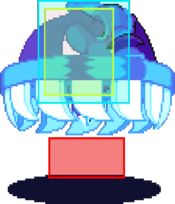
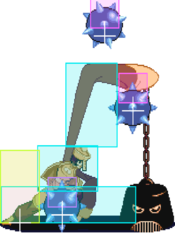
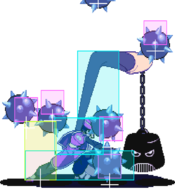
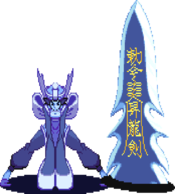
One of the best supers in the game. The anvil hits high for an overhead, one of the few ground-based overheads in the game. The anvil also hits the ground which causes a screen-wide slam that hits mid. The spikeballs that drop after the slam can also be blocked mid, and can OTG the opponent for actual and recoverable damage. If the anvil hits it will slam the opponent to the ground for an instant knockdown (except Anakaris who gets juggled), if the shockwave hits it will sweep the opponent vertically into the air for a knockdown, and any of the spikeballs themselves will also knock down a grounded or airborne opponent. The beauty of this move is that it's a command super, so it can cancel any of Lei-Lei's normals and command normals, and since it's an overhead this gives her a lot of high/low mixup options. For example, c.LK c.MP Tenraiha // c.LK c.MP c.MK c.HP, where the Tenraiha hits high but the c.MK and c.HP both hit low, forcing the opponent to react and block correctly after the c.MP. Even if the opponent successfully blocks though, this does a substantial amount of chip damage and causes a very long block duration in which Lei-Lei is free to do mixups and tick throw attempts. This move will also combo off any of her mids and heavies, making it excellent and damaging combo material. If timed correctly, the spike balls will also "combo" into OTG off a c.HP or c.HK on hit for some nice OTG damage. The one and possibly only downside to this move is that there are a number of characters you can GC off either the anvil or the first spike ball and hit Lei-Lei before her Tenraiha pose finishes (such as Jedah's GC), and that the spike balls will not persist after Lei-Lei is hit. An odd but amusing property to this move is that the spike balls also do not persist after round-end, but they will still cause proxy guard. In other words after the round is over if the opponent pushes back they will assume a blocking pose, despite the spike balls being merely inactive "ghosts".
| Startup | Active | Recovery | Hit Adv. | Block Adv. | Renda Bonus |
|---|---|---|---|---|---|
| 23 | 10 | - | - | -54 | N/A |
| Guard | Cancel | Invuln | Red Damage | White Damage | Gauge |
| mid | no | - | 4 | 2 | H: 0 G: 0 W: 0 |
Earthquake Attack
| Startup | Active | Recovery | Hit Adv. | Block Adv. | Renda Bonus |
|---|---|---|---|---|---|
| 24 | 35(3)45(3)24 | - | - | - | N/A |
| Guard | Cancel | Invuln | Red Damage | White Damage | Gauge |
| mid | no | - | 5 | 2 | H: - G: - W: - |
412[6]PP
| Startup | Active | Recovery | Hit Adv. | Block Adv. | Renda Bonus |
|---|---|---|---|---|---|
| 17 | - | 53 | - | - | N/A |
| Guard | Cancel | Invuln | Red Damage | White Damage | Gauge |
| mid | no | - | 38 | 16 | H: 0 G: 0 W: 0 |
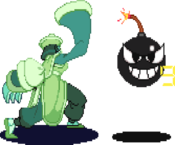
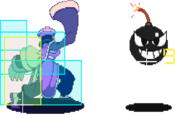
Lei-Lei tosses out a bomb with a timer, that counts down from 9 to 0 and then explodes (these "seconds" are faster than in-game or real seconds). There is a ~12.11% chance or a 31/256 probability that it will be a red-colored short fuse bomb, which counts from 6 rather than 9. When the timer runs out the bomb will explode — with the exception if the bomb is on the screen during a round transition, at which point it turns into a dud. The bomb's explosion can hit both the opponent and Lei-Lei, making it a huge liability to throw the bomb out in the first place.
While the bomb is active on the screen it can be hit by attacks from either player to bounce the bomb back and forth, like hot-potato. It will bounce off the edge of the screen if struck into it, but it won't drag along if players simply walk away from it placing it offscreen.
To Lei-Lei's slight benefit, he bomb's timer will stop while Lei-Lei is in hitstun or knocked down, and as such she cannot be combo'd into her own bomb. Interestingly, if she wakes up from knockdown into a meaty attack and takes another hit, the timer will be delayed even longer before resuming a countdown. The timer does not stop while Lei-Lei is in blockstun.
Ultimately, this is not a recommended move to use in a serious setting, as the potential for backfire is just too large, and Lei-Lei has much better attacks to spend her meter on. You may find the bomb effective on players who are inexperienced with it, causing them to be overly aware of it, but honestly both players can almost entirely ignore the bomb's existence with how easily it finds itself exploding somewhere offscreen.412[6]KK
| Startup | Active | Recovery | Hit Adv. | Block Adv. | Renda Bonus |
|---|---|---|---|---|---|
| 33 | 16 | 86 | - | 4 | N/A |
| Guard | Cancel | Invuln | Red Damage | White Damage | Gauge |
| mid | no | 8-23 startup | 8x6 | 2x6 | H: 0 G: 0 W: 0 |
Dark Force
Daibousou: Rimoukon - Same strength P + K
![]()
As far as Dark Forces go Lei-Lei's is one that changes the character a great deal. The primary differences are granting her complete Hyper Armor, disabling block, disabling special moves, and changing her movement and normals. Because of the inability to block you can expect to take some damage while in Dark Force, making this not recommended to use outside of escaping certain things such as Aulbath's bubble unblockable or some throws. If you do happen to activate it as an escape or even just by accident, it's important to know how to make the most of it and not let it set you back too much.
Activation & Deactivation
Upon activation Lin-Lin transforms back to a human and appears a set distance either in front or behind Lei-Lei, depending on screen position, where she'll remain until the Dark Force ends. When deactivated Lin-Lin turns back into a paper charm and floats back to Lei-Lei, the problem with that being the further away she is the longer it takes for Lei-Lei to recover. Your main goal after you've activated Dark Force is to either knock the opponent down and immediately deactivate, or maneuver to where Lin-Lin is and end Dark Force on top of her for minimal recovery time.
Changes and Effects
As Mentioned, this Dark Force significantly changes the character, so much so it's necessary to list change individually.
- Hyper Armor
- Gains Hyper Armor. Lei-Lei will not enter hitstun when hit. Hitstop still has a very slight effect and may potentially eat your input if you attack too soon after being hit.
- Cannot Block.
- Cannot Throw or be Thrown.
- Cannot be knocked down by anything, even while in the air.
- Hyper Armor is still active during the deactivation while she is frozen, however there are 5 frames at the end that are fully vulnerable where she can be hit with a combo.
- Movement
- Cannot Air Dash.
- Cannot Ground Dash.
- Ground movement becomes a permanent run using her air dash animation. She walks faster than Felicia but slower than Gallon, giving her the second fastest ground movement speed in the game.
- Special and EX Moves
- Cannot use any Special or EX Moves.
- Cannot Pursuit Attack.
- Normal Moves
- All damage done is permanent damage, none if it is recoverable.
- Damage on attacks is very high, most notably 5.LP.
- All air normals become her j.HP and are non-chainable.
- All ground normals become her 2.HP, with some frame data changes, and are non-chainable.
- All standing normals animations have been shuffled around besides 5.HK, and 5.LK has a new attack animation.
- Cannot chain combo out of light attacks if they've been rapid canceled, however it is possible to link.
- Other
- No idle animation when standing or crouching.
- Lin-Lin's pose changes as you make directional inputs.
Dark Force Combos
Check the Dark Force Combos section below for your options. There are only a few combos available while in Dark Force, but they do good damage and can score a knockdown.
Colors
Notable Players
Japan
Japanese Player Index: http://www21.atwiki.jp/vsplayer/pages/14.html
| Name (English) | Name (Japanese) | Color | Location | Contact |
|---|---|---|---|---|
| Ego | えご | HP |
Tokyo, Japan | http://twitter.com/egooolei https://www.youtube.com/channel/UC4vCKl7Ht_WCFIytTy4pSCA |
| Atsuta | あつた | KK |
West Japan | http://twitter.com/LittleJanneROKA |
| Hisashi | ヒサシ | MK |
http://twitter.com/HisashiHsienKo | |
| Sasazuka | 笹塚 (Kanji) ささずか(Hiragana) ササズカ(Katakana) |
HK |
Tokyo, Japan | http://twitter.com/Sasazuka00 |
| Tsukumo | 九十九 | PP |
Tokyo, Japan | http://twitter.com/Inatsuku https://www.youtube.com/channel/UClQkdT7d4J2SDMIHAJXtxPw |
North America
| Name (English) | Name (Japanese) | Color | Location | Contact | Notes |
|---|---|---|---|---|---|
| Kajoq | ケイジョック | KK |
Georgia, USA | https://twitter.com/Kajoq | Long time player with outstanding results, and one of the original driving forces for the game. Very technical Cyberbots and Marvel nut with an awesome beard. |
| Snuggleguns | スナグルガンズ | MP |
Texas, USA | https://twitter.com/snuggleguns | Has the most hours of any Fightcade player with 2300+ vsav hours. In 2020, he played for 10 hours in a single set with VickiViper. Enjoys playing on random select. |
| Viper Snake | バイパースネーク | PP |
USA | https://twitter.com/ViperSnakeX | Has the third most Fightcade hours with 1000+ vsav hours. Known for playing with a cursed Sega Saturn controller layout. A master of 2mk xx TRH. |
South America
| Name (English) | Name (Japanese) | Color | Location | Contact | Notes |
|---|---|---|---|---|---|
| Alejo | アレホ | KK |
Unknown, Colombia | https://twitter.com/Alejo5599 | Trying to build a larger community for Vsav in South America. Also an amazing artist, check out his twitter! |
