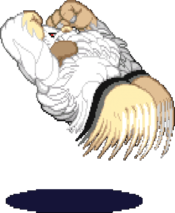
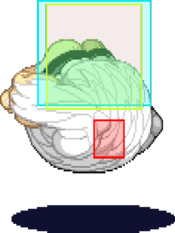
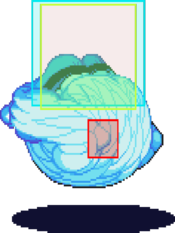
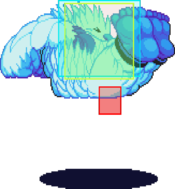
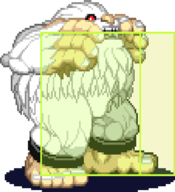
Vampire Savior/Sasquatch
Introduction
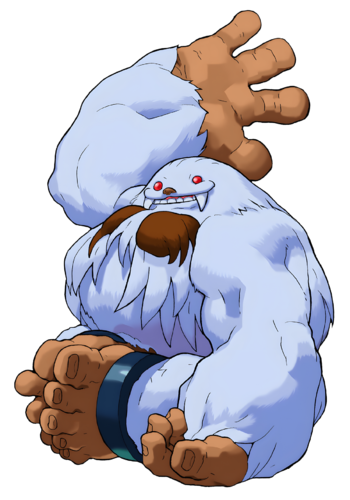
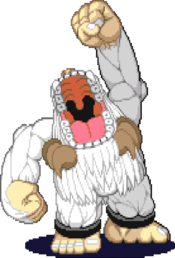
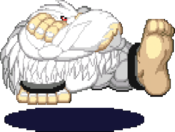
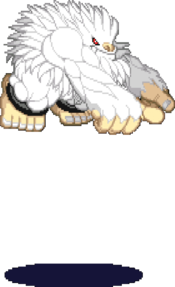
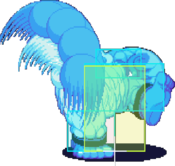
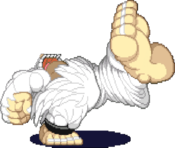
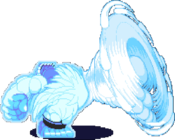
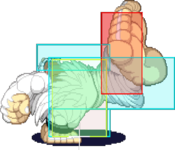
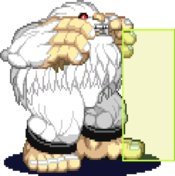
Sasquatch (サスカッチ), the Abominal Snowman
The most noble warrior of the Bigfoot tribe, residing in the Rocky Mountains of Canada. Upon sensing the energy of the invading Pyron, Sasquatch journeyed to uncover the source of this power. After coming home to his village, he discovers that his peers had vanished. In the center of the village, Sasquatch found a cavernous hole. Believing that his fellow villagers had been trapped inside, he jumped inside to rescue them. Ultimately, Sasquatch found that his kinsmen had willingly entered the hole, because Jedah had tricked them with bananas.
Sasquatch is a simple to use & not too difficult to master character. Sasquatch is a top-tier contender recommended for anyone who is first learning the game & also to players who enjoy winning
Gameplay
Primary Objectives:
- Abuse your amazing normals to approach
- Confirm air-hits into high/low offense
- Abuse 5MP to maintain your advantage
- Steamroll your opponent with a combination of short hop high/lows & long dash pressure
- When you make a read on their defensive technique, use Big Brunch for massive damage
| Strengths | Weaknesses |
|---|---|
|
|
Normal Moves
Standing Normals
5LP
| Startup | Active | Recovery | Hit Adv. | Block Adv. | Renda Bonus |
|---|---|---|---|---|---|
| 5 | 3 | 8 | 5 | 4 | H: 8 G: 7 |
| Guard | Cancel | Invuln | Red Damage | White Damage | Gauge |
| mid | yes | - | 9 | 5 | H: 6 G: 3 W: 0 |
5MP
| Startup | Active | Recovery | Hit Adv. | Block Adv. | Renda Bonus |
|---|---|---|---|---|---|
| 6 | 3 | 16 | 5 | 4 | N/A |
| Guard | Cancel | Invuln | Red Damage | White Damage | Gauge |
| mid | yes | - | 17 | 7 | H: 15 G: 9 W: 3 |
5HP
| Startup | Active | Recovery | Hit Adv. | Block Adv. | Renda Bonus |
|---|---|---|---|---|---|
| 8 | 5 | 26 | 6 | -7 | N/A |
| Guard | Cancel | Invuln | Red Damage | White Damage | Gauge |
| mid | no | - | 24,20 | 9,8 | H: 24 G: 15 W: 6 |
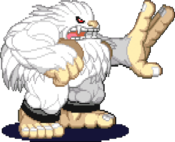
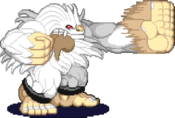
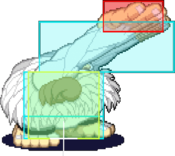
Pretty good uppercut. This serves as your anti-air normal, but admittedly there won't be many usage of it as a proper anti-air as there are just generally more safe options. This button on-hit will always air reset the opponent, which will lead into one of Sasquatch's mixups afterwards.
Along with st.MP, this is one of your two option select buttons for anti-air. The angle of it is so great that it will catch MOST upbacks in the corner. This button will not catch Felicia in the corner, however; use st.HK instead.5LK
| Startup | Active | Recovery | Hit Adv. | Block Adv. | Renda Bonus |
|---|---|---|---|---|---|
| 5 | 3 | 11 | 5 | 4 | N/A |
| Guard | Cancel | Invuln | Red Damage | White Damage | Gauge |
| mid | yes | - | 9 | 4 | H: 6 G: 3 W: 0 |
High-hitting light kick. This move can be used as anti-hop, and if anything, is better than st.LP in that regard. The difference between st.LP and st.LK however is that this will not benefit from the renda bonus. Use this to tell pesky animals to sit down before hitting them with another mixup.
Apparently this has near and far frame data. Maybe someone will fill in that part one day.5MK
| Startup | Active | Recovery | Hit Adv. | Block Adv. | Renda Bonus |
|---|---|---|---|---|---|
| 7 | 3 | 21 | 0 | -1 | N/A |
| Guard | Cancel | Invuln | Red Damage | White Damage | Gauge |
| mid | no | - | 18 | 8 | H: 15 G: 9 W: 3 |
5HK
| Startup | Active | Recovery | Hit Adv. | Block Adv. | Renda Bonus |
|---|---|---|---|---|---|
| 8 | 2(2)3 | 21 | 11 | -2 | N/A |
| Guard | Cancel | Invuln | Red Damage | White Damage | Gauge |
| mid | no | 8-25 lowerbody | 22,22 | 8,8 | H: 24 G: 15+9 W: 6 |
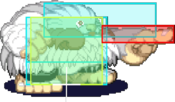
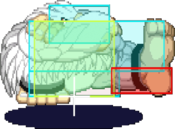
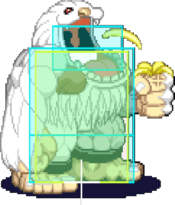
The anti-air hitbox is active on the 12th frame.
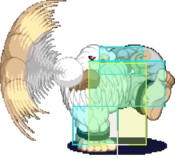
This move has a couple interesting properties. On the 8th frame it will go over lows, and even though Sasquatch is in the air, he is still considered grounded which means opponents cannot air block the anti-air.
This his lower body invulnerability, so you can cause some low attacks to whiff.Close Normals
CL.5LP
| Startup | Active | Recovery | Hit Adv. | Block Adv. | Renda Bonus |
|---|---|---|---|---|---|
| 5 | 3 | 8 | 8 | 7 | H: 11 G: 10 |
| Guard | Cancel | Invuln | Red Damage | White Damage | Gauge |
| mid | yes | - | 9 | 5 | H: 6 G: 3 W: 0 |
CL.5LK
| Startup | Active | Recovery | Hit Adv. | Block Adv. | Renda Bonus |
|---|---|---|---|---|---|
| 5 | 3 | 9 | 7 | 6 | N/A |
| Guard | Cancel | Invuln | Red Damage | White Damage | Gauge |
| mid | yes | - | 9 | 4 | H: 6 G: 3 W: 0 |
Crouching Normals
2LP
| Startup | Active | Recovery | Hit Adv. | Block Adv. | Renda Bonus |
|---|---|---|---|---|---|
| 5 | 3 | 7 | 6 | 5 | H: 9 G: 8 |
| Guard | Cancel | Invuln | Red Damage | White Damage | Gauge |
| mid | yes | - | 8 | 4 | H: 6 G: 3 W: 0 |
2MP
| Startup | Active | Recovery | Hit Adv. | Block Adv. | Renda Bonus |
|---|---|---|---|---|---|
| 6 | 3 | 14 | 4 | 3 | N/A |
| Guard | Cancel | Invuln | Red Damage | White Damage | Gauge |
| mid | yes | - | 17 | 7 | H: 15 G: 9 W: 3 |
2HP
| Startup | Active | Recovery | Hit Adv. | Block Adv. | Renda Bonus |
|---|---|---|---|---|---|
| 7 | 2(2)3 | 27 | 3 | -10 | N/A |
| Guard | Cancel | Invuln | Red Damage | White Damage | Gauge |
| mid | no | - | 23,20 | 9,8 | H: 24 G: 15+9 W: 6 |
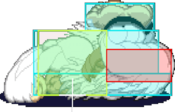
This move is definitively an anti-air, and if anything, slightly better than st.HP in the regard. If the opponent jumps bad, you can use this to swat them out of the sky and air reset them, leading to a 50/50 that the opponent obviously doesn't want.
Has utility in the corner for combos. You can use this as an ender instead of cr.HK to air reset them and lead into a quick and dirty mixup.2LK
| Startup | Active | Recovery | Hit Adv. | Block Adv. | Renda Bonus |
|---|---|---|---|---|---|
| 5 | 3 | 11 | 5 | 4 | N/A |
| Guard | Cancel | Invuln | Red Damage | White Damage | Gauge |
| low | no | 4-13 feet | 7 | 4 | H: 6 G: 3 W: 0 |
An amazing crouching low. Use this normal a lot, as it is the low you should be using at most given times. This move also has the benefit of moving Sasquatch slightly forward as he uses this, and has great plus frames. Good for staggering and keeping close to the opponent.
Foot invincible frames 4F-13F. Must block low.2MK
| Startup | Active | Recovery | Hit Adv. | Block Adv. | Renda Bonus |
|---|---|---|---|---|---|
| 6 | 3 | 16 | 5 | 4 | N/A |
| Guard | Cancel | Invuln | Red Damage | White Damage | Gauge |
| low | yes | - | 17 | 8 | H: 15 G: 9 W: 3 |
2HK
| Startup | Active | Recovery | Hit Adv. | Block Adv. | Renda Bonus |
|---|---|---|---|---|---|
| 10 | 4 | 30 | - | -6 | N/A |
| Guard | Cancel | Invuln | Red Damage | White Damage | Gauge |
| low | no | - | 18 | 8 | H: 24 G: 15 W: 6 |
Air Normals
J.LP
| Startup | Active | Recovery | Hit Adv. | Block Adv. | Renda Bonus |
|---|---|---|---|---|---|
| 5 | 6 | 4 | - | - | N/A |
| Guard | Cancel | Invuln | Red Damage | White Damage | Gauge |
| overhead | no | - | 9 | 5 | H: 6 G: 3 W: 0 |
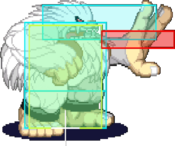
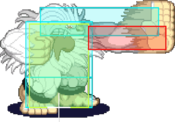
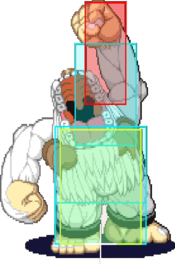
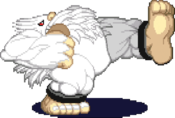
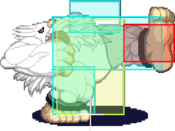
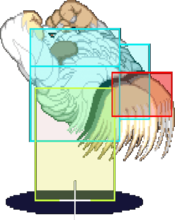
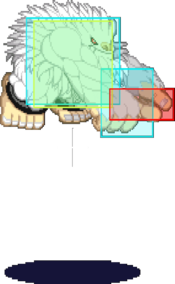
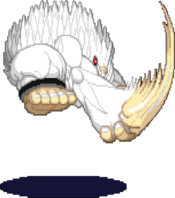
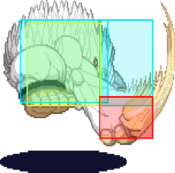
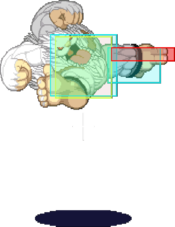
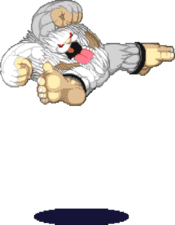
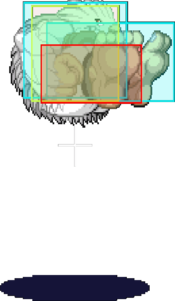
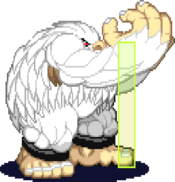
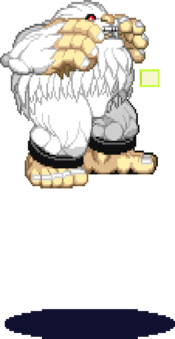
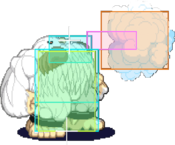
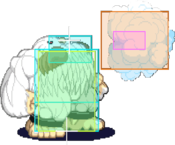
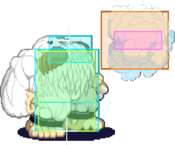
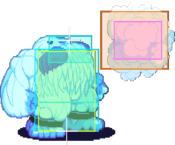
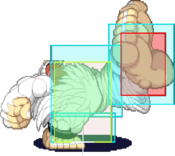
Hitbox is positionally the same as neutral jump LP, but the hurtbox on the arm is positioned a bit further forward and higher.
Decent range, and downward trajectory on the hitbox. This is extremely useful for both jump ins, air chains and air whiffing.
One of Sasquatch's main short hop normals on grounded opponents.8J.MP
| Startup | Active | Recovery | Hit Adv. | Block Adv. | Renda Bonus |
|---|---|---|---|---|---|
| 5 | 6 | 15 | - | - | N/A |
| Guard | Cancel | Invuln | Red Damage | White Damage | Gauge |
| overhead | no | - | 18 | 8 | H: 15 G: 9 W: 3 |
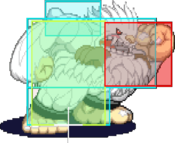
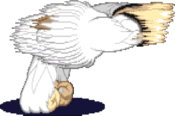
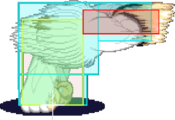
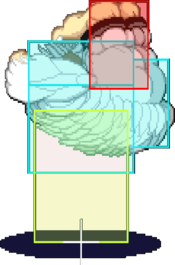
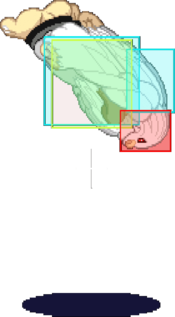
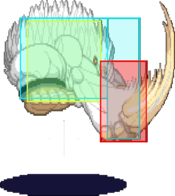
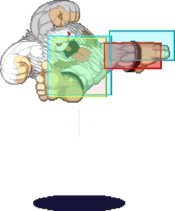
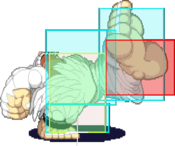
Hitbox is positionally the same as neutral jump MP, but the hurtbox on the neck is positioned much further back and a bit lower. Due to how much further back it is I'd say it's superior to the neutral jump version.
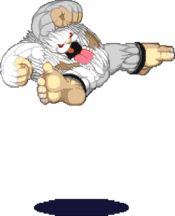
Great air normal, use often. It works extremely well for option select air throws as well.
One of Sasquatch's main short hop normals on grounded opponents.9J.MP
| Startup | Active | Recovery | Hit Adv. | Block Adv. | Renda Bonus |
|---|---|---|---|---|---|
| 5 | 6 | 15 | - | - | N/A |
| Guard | Cancel | Invuln | Red Damage | White Damage | Gauge |
| overhead | no | - | 18 | 8 | H: 15 G: 9 W: 3 |
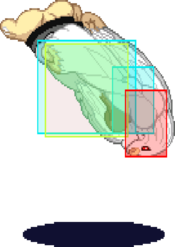
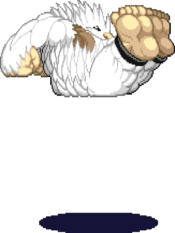
Hitbox is positionally the same as neutral jump MP, but the hurtbox on the neck is positioned much further back and a bit lower. Due to how much further back it is I'd say it's superior to the neutral jump version.
Great air normal, use often. It works extremely well for option select air throws as well.
One of Sasquatch's main short hop normals on grounded opponents.
This version is the one used when performing a hop.8J.HP
| Startup | Active | Recovery | Hit Adv. | Block Adv. | Renda Bonus |
|---|---|---|---|---|---|
| 10 | 4 | 17 | - | - | N/A |
| Guard | Cancel | Invuln | Red Damage | White Damage | Gauge |
| overhead | no | - | 21 | 9 | H: 24 G: 15 W: 6 |
9J.HP
| Startup | Active | Recovery | Hit Adv. | Block Adv. | Renda Bonus |
|---|---|---|---|---|---|
| 10 | 4 | 17 | - | - | N/A |
| Guard | Cancel | Invuln | Red Damage | White Damage | Gauge |
| overhead | no | - | 21 | 9 | H: 24 G: 15 W: 6 |
Hard knockdown on contact, no matter if the opponent is grounded or in the air. Good usage on long hops as either your first or second option, as this move does sport some great range.
This version is the one used when performing a hop.J.LK
| Startup | Active | Recovery | Hit Adv. | Block Adv. | Renda Bonus |
|---|---|---|---|---|---|
| 5 | 6 | 5 | - | - | N/A |
| Guard | Cancel | Invuln | Red Damage | White Damage | Gauge |
| overhead | no | - | 9 | 5 | H: 6 G: 3 W: 0 |
J.MK
| Startup | Active | Recovery | Hit Adv. | Block Adv. | Renda Bonus |
|---|---|---|---|---|---|
| 6 | 6 | 7 | - | - | N/A |
| Guard | Cancel | Invuln | Red Damage | White Damage | Gauge |
| overhead | no | - | 17 | 7 | H: 15 G: 9 W: 3 |
J.HK
| Startup | Active | Recovery | Hit Adv. | Block Adv. | Renda Bonus |
|---|---|---|---|---|---|
| 8 | 3,3 | 13 | - | - | N/A |
| Guard | Cancel | Invuln | Red Damage | White Damage | Gauge |
| overhead | no | - | 11,11 | 4,4 | H: 15+9 G: 10+4 W: 6 |
Normal Throws
6MP or 6HP
| Startup | Active | Recovery | Hit Adv. | Block Adv. | Renda Bonus |
|---|---|---|---|---|---|
| 1 | - | 48 | - | - | N/A |
| Guard | Cancel | Invuln | Red Damage | White Damage | Gauge |
| throw | no | 1-47 whole body | 23 (11) | 8 (4) | H: 9 G: 0 W: 0 |
One of the best normal throws in the game. Both MP and HP excellent option select into anti-air normals if the opponent jumps, and if they tech they are left close to Sasquatch and he has a good advantage. In the corner, Sasquatch is left right next to the opponent and can throw loop them as long as they keep throw teching.
Sasquatch actually gets +12 on a throw tech from Jedah, Bulleta and Q-Bee.J.6P or J.4P
| Startup | Active | Recovery | Hit Adv. | Block Adv. | Renda Bonus |
|---|---|---|---|---|---|
| 1 | - | 23 + 38 + landing 12 | - | - | N/A |
| Guard | Cancel | Invuln | Red Damage | White Damage | Gauge |
| throw | no | 1-23 whole body | 23 (11) | 8 (4) | H: 9 G: 0 W: 0 |
Special Moves
Big Breath
236LP
| Startup | Active | Recovery | Hit Adv. | Block Adv. | Renda Bonus |
|---|---|---|---|---|---|
| 28 | - | 10 | 60 | 24 | N/A |
| Guard | Cancel | Invuln | Red Damage | White Damage | Gauge |
| mid | - | - | 18 | 6 | H: 12 G: 12 W: 12 |
| Startup | Active | Recovery | Hit Adv. | Block Adv. | Renda Bonus |
|---|---|---|---|---|---|
| 28 | - | 10 | 60 | 24 | N/A |
| Guard | Cancel | Invuln | Red Damage | White Damage | Gauge |
| mid | - | - | 18 | 6 | H: 12 G: 12 W: 12 |
| Startup | Active | Recovery | Hit Adv. | Block Adv. | Renda Bonus |
|---|---|---|---|---|---|
| 30 | - | 8 | 62 | 26 | N/A |
| Guard | Cancel | Invuln | Red Damage | White Damage | Gauge |
| mid | - | - | 18 | 6 | H: 12 G: 12 W: 12 |
| Startup | Active | Recovery | Hit Adv. | Block Adv. | Renda Bonus |
|---|---|---|---|---|---|
| 30 | - | 8 | 110 | 26 | N/A |
| Guard | Cancel | Invuln | Red Damage | White Damage | Gauge |
| mid | - | - | 23 | 8 | H: 0 G: 0 W: 0 |
Big Blow
623P
Really useless move. Takes too long to start up, and the unsafeness of it makes it worthless.
| Startup | Active | Recovery | Hit Adv. | Block Adv. | Renda Bonus |
|---|---|---|---|---|---|
| 18,33 | 4,8 | 31 | - | -19 | N/A |
| Guard | Cancel | Invuln | Red Damage | White Damage | Gauge |
| mid | - | - | 23,18 | 6,5 | H: 26 G: 22 W: 18 |
| Startup | Active | Recovery | Hit Adv. | Block Adv. | Renda Bonus |
|---|---|---|---|---|---|
| 37,68 | 4,12 | 39 | - | -31 | N/A |
| Guard | Cancel | Invuln | Red Damage | White Damage | Gauge |
| mid | - | - | 25,19 | 7,5 | H: 0 G: 0 W: 0 |
| Startup | Active | Recovery | Hit Adv. | Block Adv. | Renda Bonus |
|---|---|---|---|---|---|
| 69,100 | 16,16 | 39 | - | -47 | N/A |
| Guard | Cancel | Invuln | Red Damage | White Damage | Gauge |
| mid | - | - | 27,20 | 8,5 | H: 0 G: 0 W: 0 |
| Startup | Active | Recovery | Hit Adv. | Block Adv. | Renda Bonus |
|---|---|---|---|---|---|
| 22,53 | 4(2),8,10 | 55 | - | -45 | N/A |
| Guard | Cancel | Invuln | Red Damage | White Damage | Gauge |
| mid | - | - | 14x3 | 4x3 | H: 0 G: 0 W: 0 |
Big Typhoon
623LK
| Startup | Active | Recovery | Hit Adv. | Block Adv. | Renda Bonus |
|---|---|---|---|---|---|
| 8 | 3,8 | 23 | -5 | -6 | N/A |
| Guard | Cancel | Invuln | Red Damage | White Damage | Gauge |
| mid | - | - | 14x2 | 4x2 | H: 21+3 G: 19+1 W: 18 |
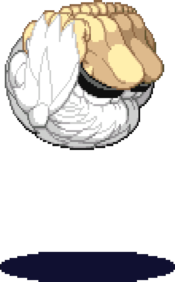
One of Sasquatch's two useful versions of this move. Its useful as an anti-air, though it is air blockable. Most character's won't be able to punish it on block unless they have a way of altering their air movement, and even then it can tend to be a bit of a tight punish. Still, it hits a nice part on the screen, comes out fast, and recovers surprisingly quickly. Useful in certain situations and matchups.
| Startup | Active | Recovery | Hit Adv. | Block Adv. | Renda Bonus |
|---|---|---|---|---|---|
| 11 | 3,5,14 | 25 | 2 | -15 | N/A |
| Guard | Cancel | Invuln | Red Damage | White Damage | Gauge |
| mid | - | - | 10x3 | 3x3 | H: 21+3+3 G: 19+1+1 W: 18 |
Not much to say about this version. It is plus on hit unlike his other two Typhoons, which may actually be punished.
(I'm not sure if the game will select the weaker or stronger version of a special if you don't have meter for ES, but I am considering using LK+MK or MK+HK on the basis on which button combination will give you MK Typhoon if you have no meter. With the idea that the game will select the version that gives you a decent frame advantage if you do not have meter for ES Big Typhoon. This is only if you somehow have issues paying attention to how much meter you currently have.)
| Startup | Active | Recovery | Hit Adv. | Block Adv. | Renda Bonus |
|---|---|---|---|---|---|
| 10 | 3,4,4,22 | 26 | -5 | -22 | N/A |
| Guard | Cancel | Invuln | Red Damage | White Damage | Gauge |
| mid | - | - | 9x4 | 3x4 | H: 21+3+3+3 G: 19+1+1+1 W: 19 |
Not much to say about this one either. Does the most hits and damage of any of the normal versions, but you're better off comboing into a knockdown or resetting to keep your momentum going.
| Startup | Active | Recovery | Hit Adv. | Block Adv. | Renda Bonus |
|---|---|---|---|---|---|
| 9 | 48 | 28 | - | -52 | N/A |
| Guard | Cancel | Invuln | Red Damage | White Damage | Gauge |
| mid | - | - | 18 | 5 | H: 0 G: 0 W: 0 |
The most useful version of Big Typhoon. Does massive damage and is great as a finishing move. While you are advantageous on hit, recovery is long, and you have a very good chance of losing pressure after knocking down with this move. Its generally best used when finishing an opponent off.
While it looks like it may have a decent anti-air hitbox, do not use it as such since it is still air blockable and the recovery is long.Guard Cancel
623LK
| Startup | Active | Recovery | Hit Adv. | Block Adv. | Renda Bonus |
|---|---|---|---|---|---|
| 8 | 3,8 | 23 | -5 | -6 | N/A |
| Guard | Cancel | Invuln | Red Damage | White Damage | Gauge |
| mid | - | - | 7x2 | 2x2 | H: 21+3 G: 19+1 W: 18 |
As a guard cancel this move has 9 frames of invincibility, which makes it invincible past start up. This means will not lose or trade unlike the other two normal version guard cancels. Also, it is the safest version on block at -6, which is potentially punishable but not quite easily. Besides those advantages, the problems are numerous. You'll still be at -5 on hit afterwards, which is potentially punishable. You'll have to watch out for this completely whiffing on small crouching opponents due to the high hitbox. And even as the fastest version of Big Typhoon, it is still slow for a guard cancel and easily baited. In the end, the guard cancel LK Big Typhoon has a little bit of use, but you may as well push block instead.
| Startup | Active | Recovery | Hit Adv. | Block Adv. | Renda Bonus |
|---|---|---|---|---|---|
| 11 | 3,5,14 | 25 | 2 | -15 | N/A |
| Guard | Cancel | Invuln | Red Damage | White Damage | Gauge |
| mid | - | - | 4x3 | 1x3 | H: 21+3+3 G: 19+1+1 W: 18 |
As a guard cancel, this move has 9 frames of invincibility, and with an 11 frame startup, there is a chance it may be stuffed. Not only that, the startup is so slow it is very easy to bait out. Out of the 3 normal versions of this move, it is plus on hit which is nice, you just just won't get the chance to make use of it.
| Startup | Active | Recovery | Hit Adv. | Block Adv. | Renda Bonus |
|---|---|---|---|---|---|
| 10 | 3,4,4,22 | 26 | -5 | -22 | N/A |
| Guard | Cancel | Invuln | Red Damage | White Damage | Gauge |
| mid | - | - | 4x4 | 1x4 | H: 21+3+3+3 G: 19+1+1+1 W: 19 |
As a guard cancel, this move has 9 frames of invincibility, and with a 10 frame start up, this has a high chance of trading. Plus the start up is so long it will be easy to bait out, at which point you're dealing with -22F on block. Not a good guard cancel.
| Startup | Active | Recovery | Hit Adv. | Block Adv. | Renda Bonus |
|---|---|---|---|---|---|
| 9 | 48 | 28 | - | -52 | N/A |
| Guard | Cancel | Invuln | Red Damage | White Damage | Gauge |
| mid | - | - | 37 | 11 | H: 0 G: 0 W: 0 |
Ice Towers
22LP
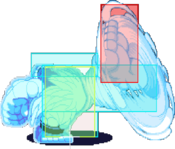
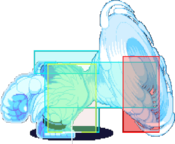
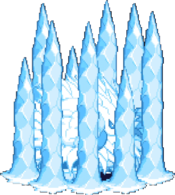
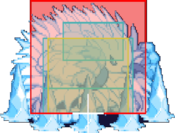
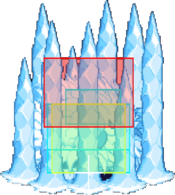
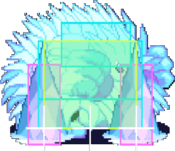
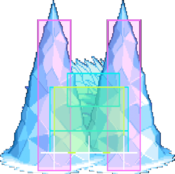
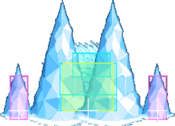
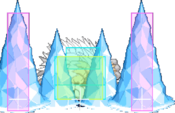
Its use as an anti-air is a bit matchup dependant. Generally it is extremely strong against Jedah, Morrigan, and a few other characters who have to end up committing to their air movement. Tossing out the super active HK Big Towers means you don't even really have to time it either. I've seen it work consistently on Demitri as well since none of his normals can get below the hitbox down to the hurtbox.
The plus and block frames on hit and guard listed up above don't really tell the full story, since that is on grounded opponents, and this does not have much utility outside of anti-airs.
On an air hit, this move does a knockdown.
| Startup | Active | Recovery | Hit Adv. | Block Adv. | Renda Bonus |
|---|---|---|---|---|---|
| 7 | 12 | 24 | 24 | -8 | N/A |
| Guard | Cancel | Invuln | Red Damage | White Damage | Gauge |
| mid | - | - | 23 | 5 | H: 24 G: 21 W: 18 |
| Startup | Active | Recovery | Hit Adv. | Block Adv. | Renda Bonus |
|---|---|---|---|---|---|
| 7 | 22 | 24 | 14 | -18 | N/A |
| Guard | Cancel | Invuln | Red Damage | White Damage | Gauge |
| mid | - | - | 23 | 5 | H: 24 G: 21 W: 18 |
| Startup | Active | Recovery | Hit Adv. | Block Adv. | Renda Bonus |
|---|---|---|---|---|---|
| 10 | 32 | 24 | 4 | -28 | N/A |
| Guard | Cancel | Invuln | Red Damage | White Damage | Gauge |
| mid | - | - | 23 | 5 | H: 24 G: 21 W: 18 |
| Startup | Active | Recovery | Hit Adv. | Block Adv. | Renda Bonus |
|---|---|---|---|---|---|
| 9 | - | 52 | - | -18 | N/A |
| Guard | Cancel | Invuln | Red Damage | White Damage | Gauge |
| mid | - | - | 28 | 9 | H: 0 G: 0 W: 0 |
This is the move. Usually referred to as 'Ice Tower', it is one of the most frustrating things to deal with when fighting Sasquatch. It is multi-functional, since it works as: An anti-air(but still air blockable), a full screen punish, and a combo tool. Hell, I even just mash it as a reversal sometimes when I see my opponents timing is slightly off.
It travels full screen extremely fast, both in front of and behind Sasquatch. This can be used to punish people throwing bad fireballs, or just jumping around pressing buttons at any position on the screen.
Advantage from a knockdown on hit is huge. You get plenty of time to dash in from full screen and start applying pressure. Plus it does tons of damage to boot. This is not something you want to be hit by.
As a combo tool, I've seen it used occasionally to get a knockdown after a Big Brunch, but when they don't want to deal with the poor advantage on knockdown that ES Big Typhoon gives. Though this is at a price of less damage.Pursuits
8P or 8K
| Startup | Active | Recovery | Hit Adv. | Block Adv. | Renda Bonus |
|---|---|---|---|---|---|
| 17 | 18 | landing 1 | - | - | N/A |
| Guard | Cancel | Invuln | Red Damage | White Damage | Gauge |
| mid | no | 1-2 feet | 6 | 6 | H: 24 G: 0 W: 6 |
| Startup | Active | Recovery | Hit Adv. | Block Adv. | Renda Bonus |
|---|---|---|---|---|---|
| 17 | 18 | landing 1 | - | - | N/A |
| Guard | Cancel | Invuln | Red Damage | White Damage | Gauge |
| mid | no | 1-2 feet | 5+7 | 4+6 | H: 0 G: 0 W: 0 |
Command Throws
632[4]P
| Startup | Active | Recovery | Hit Adv. | Block Adv. | Renda Bonus |
|---|---|---|---|---|---|
| 2 | 1 | 63 | - | - | N/A |
| Guard | Cancel | Invuln | Red Damage | White Damage | Gauge |
| - | - | - | 19 | 6 | H: 22 G: 0 W: 12 |
| Startup | Active | Recovery | Hit Adv. | Block Adv. | Renda Bonus |
|---|---|---|---|---|---|
| 2 | 1 | 63 | - | - | N/A |
| Guard | Cancel | Invuln | Red Damage | White Damage | Gauge |
| - | - | - | 23 | 9 | H: 0 G: 0 W: 0 |
An absolutely amazing command grab. When it connects, the opponent will be frozen and Sasquatch can hop in to get a free combo. This move is incredibly fast, and easily lets you confirm into an ES Big Typhoon for big damage. The only downside is that it is one of the few throws that always gives a whiff animation. The whiff animation is long enough that if someone neutral jumps they will have time to land on Sasquatch's head and punish.
There is not any difference between the normal versions, and the ES Big Brunch does slightly more damage and freezes the opponent for longer.
The main thing to keep in mind with this move is every character has a different freeze timing, and distance Sasquatch spits them out at. It is not at all consistent between characters.360+K
| Startup | Active | Recovery | Hit Adv. | Block Adv. | Renda Bonus |
|---|---|---|---|---|---|
| 2 | 1 | 63 | - | - | N/A |
| Guard | Cancel | Invuln | Red Damage | White Damage | Gauge |
| - | - | - | 31 | 10 | H: 42 G: 0 W: 12 |
| Startup | Active | Recovery | Hit Adv. | Block Adv. | Renda Bonus |
|---|---|---|---|---|---|
| 2 | 1 | 63 | - | - | N/A |
| Guard | Cancel | Invuln | Red Damage | White Damage | Gauge |
| - | - | - | 37 | 12 | H: 0 G: 0 W: 0 |
Ex Moves
412[6]PP
| Startup | Active | Recovery | Hit Adv. | Block Adv. | Renda Bonus |
|---|---|---|---|---|---|
| 38 | 49 | 11 | - | -25 | N/A |
| Guard | Cancel | Invuln | Red Damage | White Damage | Gauge |
| mid | - | - | 31 | 8 | H: 0 G: 0 W: 0 |
Ice Beam. Generally ES Big Towers is favored over this by most players as it initially comes out much faster and is generally safer against opponents jumping in on you randomly. At full screen, I'm not quite sure which would reach the other end first, but I am inclined to say ES Big Towers would or it would be about even as Big Freezer doesn't travel quite as fast as it may seem.
There are a few characters I'll occasionally use this on from full screen, such as Lei-Lei, Demitri, Morrigan or Jedah. Usually its just if they are jumping around doing dumb stuff. This move does slightly more damage than ES Big Towers, but its hard to say if you get any REAL benefit out of using it.
Not sure of the comparative advantage on hit you get from this fullscreen compared to ES Big Towers either.412[6]KK
| Startup | Active | Recovery | Hit Adv. | Block Adv. | Renda Bonus |
|---|---|---|---|---|---|
| 45 | 67 | 8 | - | - | N/A |
| Guard | Cancel | Invuln | Red Damage | White Damage | Gauge |
| unblockable | - | 112-118 whole body | 39 | 10 | H: 0 G: 0 W: 0 |
720+KK
| Startup | Active | Recovery | Hit Adv. | Block Adv. | Renda Bonus |
|---|---|---|---|---|---|
| 2 | 1 | 63 | - | - | N/A |
| Guard | Cancel | Invuln | Red Damage | White Damage | Gauge |
| - | - | - | 36+16 | 8+6 | H: 0 G: 0 W: 0 |
412[6]START
| Startup | Active | Recovery | Hit Adv. | Block Adv. | Renda Bonus |
|---|---|---|---|---|---|
| 70 | 179 | 4 | - | - | N/A |
| Guard | Cancel | Invuln | Red Damage | White Damage | Gauge |
| unblockable | - | - | 2 | 1 | H: 0 G: 0 W: 0 |
Dark Force
Super Armor: Big Resistor / M.A.P.S. - Same strength P + K
- Big Resistor (Light or Medium Version/LP+LK or MP+MK: Super Armor: Big Resistor. Adds super armor (not hyper armor). Useful for getting out of traps. A decent option to use when being pressured, but only works on the ground. It also allows you to chain more attacks when dashing.
- M.A.P.S. (Heavy Version/HP+HK): Magical Avalanche Penguin Super-units. Summons an army of penguins to throw at your opponent. Toss penguins by hitting any punch. Penguins chip on block, and the distance depends on the strength of the punch button. Can be used on the ground and in the air
Movement
Walk: The forward walk speed is fairly average, but his backwards walk is a little slower.
Dash: Sasquatch takes a big leap at his opponent. Very easy to hit him out of a regular dash, but Sasquatch also has a shorthop. (Forward, Forward, Back). It shortens the total distance of the hop, but increases the speed greatly. A good portion of where his pressure game comes from.
Jump:
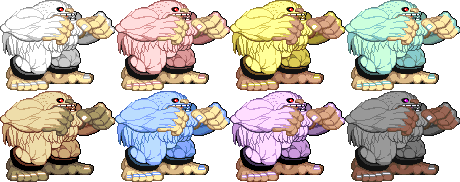
Colors
Notable Players
Japan
Japanese Player Index: http://www21.atwiki.jp/vsplayer/pages/16.html
| Name (English) | Name (Japanese) | Color | Location | Contact | Notes |
|---|---|---|---|---|---|
| DD | DD or 山岡士郎 | LP |
Kanto Region | http://twitter.com/DDsas http://blog.livedoor.jp/iamddsas23/ https://www.youtube.com/channel/UCX93eVj3PS-r2yqLR32ZATA |
#01 Sassy GO,GO,GO,GO! |
| Kowappa | こわっぱ | LP |
Kanto Region | http://twitter.com/kowappa0530 | #02 Sasquatch Also goes by "Kowahara" Very Active Comedian |
| Haitani | ハイタニ | HK |
Osaka, Japan | http://twitter.com/hai090 | Inactive, but a GOD |
| TKO | — | KK |
Kanto Region | http://twitter.com/tkocombo http://www.youtube.com/channel/UCr_qlYFz9KjvwZxMJf5dZ-g |
Japanese Vampire Hunter Community leader #01 Hunter Sasquatch |
| Sasunii | さす兄 | MP |
Tokyo, Japan | http://twitter.com/sasquatch21chan https://www.youtube.com/channel/UCr_qlYFz9KjvwZxMJf5dZ-g/about |
Big Brother Sasquatch |
| Nasu | ナス | LK |
Kanto Region | http://twitter.com/nasu_stupid | |
| Hosokawa | ホソカワ | MP |
Nagoya, Japan | http://www.youtube.com/channel/UCY6ruY39OZ6J7jb4fpEk9AQ https://twitter.com/hosoquatch |
uses st.hk as corner resets |
| Okekebi | おけけび | MP |
Saitama, Japan | http://twitter.com/okkb_tt | |
| Orecom | 俺こん | LP |
http://www.youtube.com/user/orecomchan/ | Used to be Felicia. | |
| Kuma | クマ | HP |
Yamagata, Japan | http://twitter.com/kumamk | |
| Tsune | ツネ | KK |
Kanto Region |
North America
| Name (English) | Name (Japanese) | Color | Location | Contact | Notes |
|---|---|---|---|---|---|
| JayOneTheSk8 | ジェイワン ザ スケート | PP |
New York, USA | https://twitter.com/JayOneTheSk8 | Long time player that has been greatly successful. He's a musician that managed to implement those techniques in how he plays. |
| YetiGhettoSlang | イェティー ゲットー スラング | HP |
Ohio, USA | https://twitter.com/yetighettoslang | One of the Nasty Boys. Legendary commentator that has no other equal. |
| Mr. Igloo | ミスターイグルー | MK |
Nevada, USA | https://twitter.com/Mr_igloo | Semi-Retired. Formerly a California player that has won tournaments. Now an igloo caught in a desert. |
| yoJohnson | ショージューケン | HK |
Unknown, USA | https://twitter.com/shorjewken | Longtime player that has had great results. Also known for playing Lei-Lei. Previously went by Shorjewken. Often confused for a mid level sasquatch, he is actually decent. |
