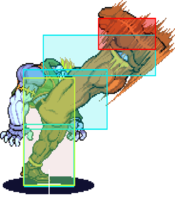
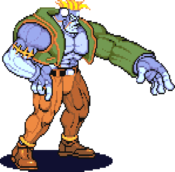
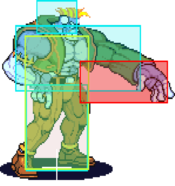
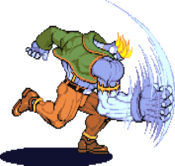
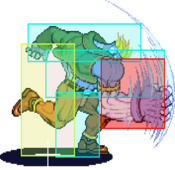
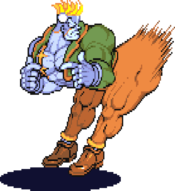
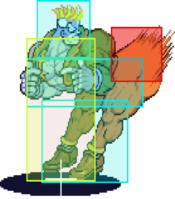
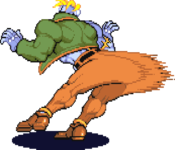
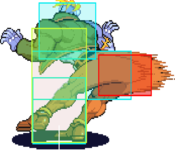
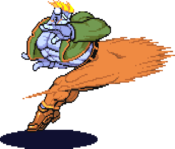
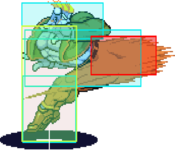
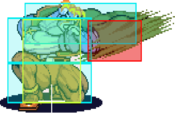
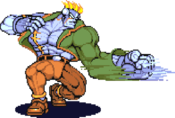
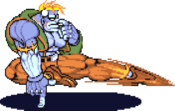
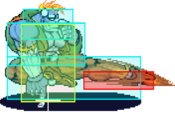
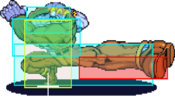
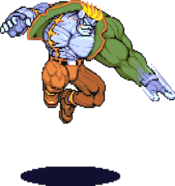
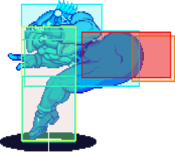
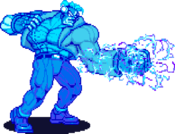
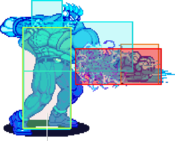
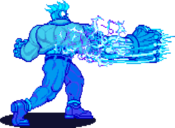
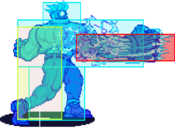
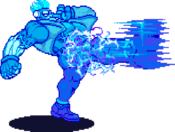
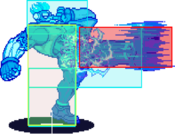
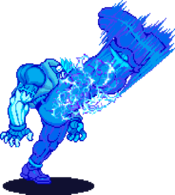
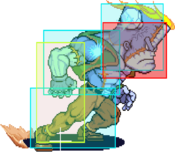
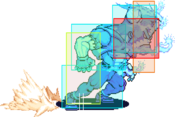
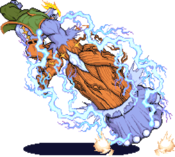
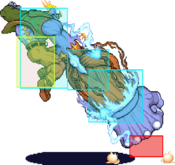
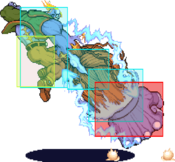
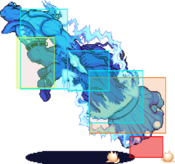
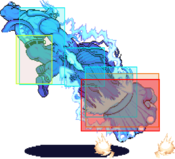
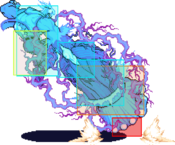
Vampire Savior/Victor
Introduction
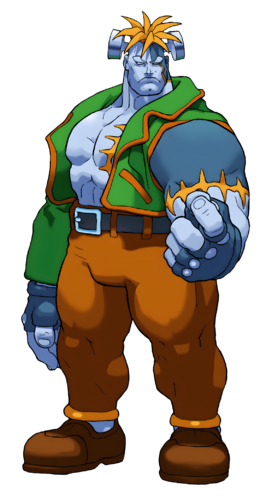
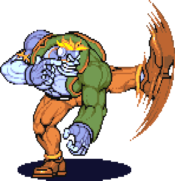
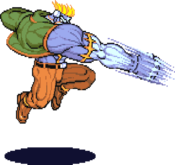
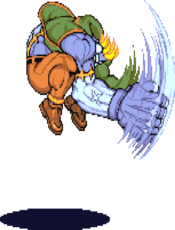
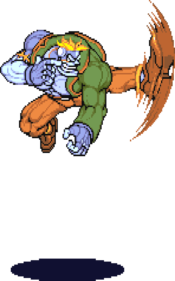
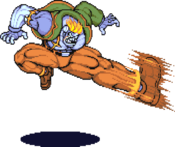
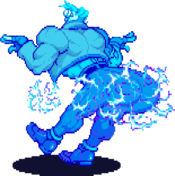
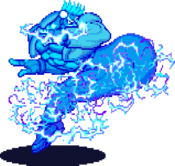
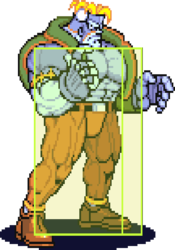
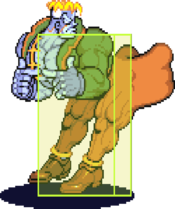
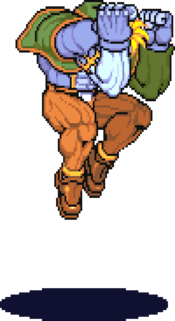
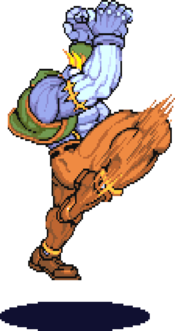
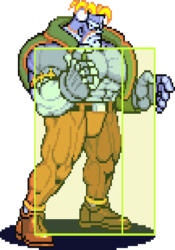
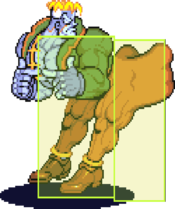
Victor von Gerdenheim (ビクトル), Frankenstein's Monster
The creation of ill scientist, Prof. Victor Von Gerdenheim, who passed away shortly after giving him life. Lacking an understanding of life and death, Victor believed that his deceased creator's unresponsiveness was disappointment in him. Thinking that his strength would be able to win the approval of his "father," Victor left his castle in search of opponents. Victor returned home after defeating many Darkstalkers, only to find the dead professor unresponsive still. In his stead, another of his creations, Emily, welcomed Victor. The two lived joyously for years until Emily suddenly stopped functioning. Believing that if he collected several souls, he would be able to revive Emily, Victor entered Jedah's Majigen. In the end, Victor sacrificed his own body in order to restore life to Emily.
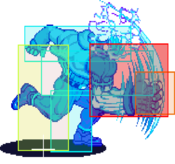
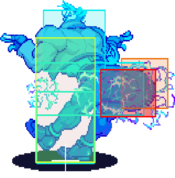
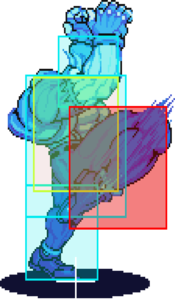
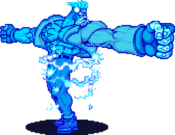
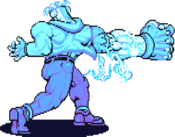
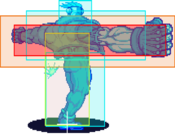
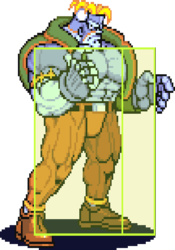
Victor is a straight forward grappler with effective normals who is very strong at beginner to mid-level play. Victor is recomended for beginners or players who enjoy making large reads/risks at high-level play. He is low-tier.
Gameplay
Primary Objectives:
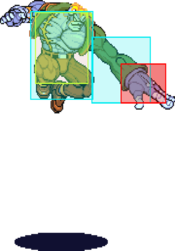
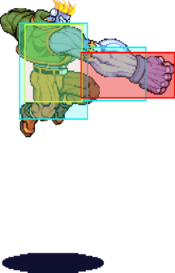
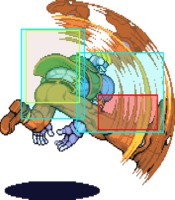
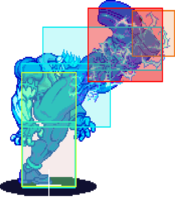
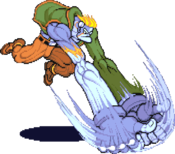
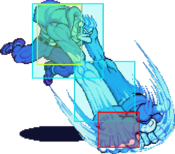
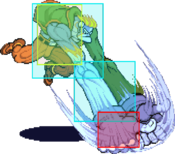
- Abuse 9J.HP to approach
- Nullify projectiles at neutral
- Abuse command throws when the opponent is conditioned to block or Tech-Hit
- Utilize electric attacks in combos to gain damage & a resets
- Run a blender/vortex on electric resets to stay on top of the opponent
- Confirm standing opponents to connect ES Lariat combos for big damage + corner advantage
- Gain meter with kara-Gyro Crush
| Strengths | Weaknesses |
|---|---|
|
|
/Data This links to the source of the Data represented below
Normal Moves
Standing Normals
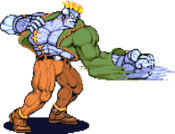
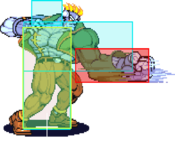
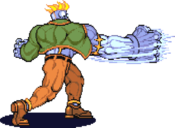
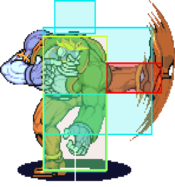
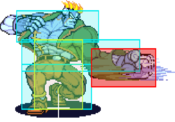
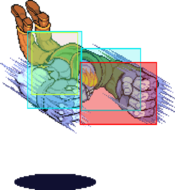
5LP
| Startup | Active | Recovery | Hit Adv. | Block Adv. | Renda Bonus |
|---|---|---|---|---|---|
| 5 | 2 | 15 | 4 | 3 | H: 7 G: 6 |
| Guard | Cancel | Invuln | Red Damage | White Damage | Gauge |
| mid | yes | - | 9 | 4 | H: 6 G: 3 W: 0 |
5MP
| Startup | Active | Recovery | Hit Adv. | Block Adv. | Renda Bonus |
|---|---|---|---|---|---|
| 9 | 3 | 21 | 0 | -1 | N/A |
| Guard | Cancel | Invuln | Red Damage | White Damage | Gauge |
| mid | no | - | 18 | 6 | H: 15 G: 9 W: 3 |
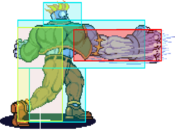
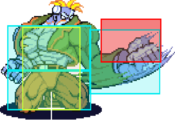
5HP
| Startup | Active | Recovery | Hit Adv. | Block Adv. | Renda Bonus |
|---|---|---|---|---|---|
| 13 | 3 | 27 | 10 | -3 | N/A |
| Guard | Cancel | Invuln | Red Damage | White Damage | Gauge |
| mid | no | - | 23 | 8 | H: 24 G: 15 W: 6 |
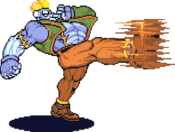
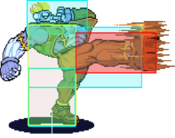
5LK
| Startup | Active | Recovery | Hit Adv. | Block Adv. | Renda Bonus |
|---|---|---|---|---|---|
| 6 | 3 | 8 | 8 | 7 | H: 11 G: 7 |
| Guard | Cancel | Invuln | Red Damage | White Damage | Gauge |
| mid | yes | - | 9 | 4 | H: 6 G: 3 W: 0 |
5MK
| Startup | Active | Recovery | Hit Adv. | Block Adv. | Renda Bonus |
|---|---|---|---|---|---|
| 9 | 3 | 21 | 0 | -1 | N/A |
| Guard | Cancel | Invuln | Red Damage | White Damage | Gauge |
| mid | no | - | 19 | 7 | H: 15 G: 9 W: 3 |
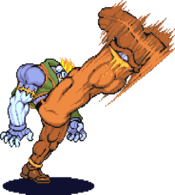
5HK
| Startup | Active | Recovery | Hit Adv. | Block Adv. | Renda Bonus |
|---|---|---|---|---|---|
| 13 | 6 | 32 | 2 | 11 | N/A |
| Guard | Cancel | Invuln | Red Damage | White Damage | Gauge |
| mid | no | - | 23 | 8 | H: 24 G: 15 W: 6 |
Close Normals
CL.5MP
| Startup | Active | Recovery | Hit Adv. | Block Adv. | Renda Bonus |
|---|---|---|---|---|---|
| 9 | 3 | 22 | -4 | -5 | N/A |
| Guard | Cancel | Invuln | Red Damage | White Damage | Gauge |
| mid | no | - | 20 | 7 | H: 15 G: 9 W: 3 |
CL.5HP
| Startup | Active | Recovery | Hit Adv. | Block Adv. | Renda Bonus |
|---|---|---|---|---|---|
| 11 | 4 | 33 | 4 | -9 | N/A |
| Guard | Cancel | Invuln | Red Damage | White Damage | Gauge |
| mid | no | - | 25 | 9 | H: 24 G: 15 W: 6 |
CL.5LK
| Startup | Active | Recovery | Hit Adv. | Block Adv. | Renda Bonus |
|---|---|---|---|---|---|
| 5 | 3 | 11 | 5 | 4 | H: 8 G: 7 |
| Guard | Cancel | Invuln | Red Damage | White Damage | Gauge |
| mid | yes | - | 10 | 5 | H: 6 G: 3 W: 0 |
CL.5MK
| Startup | Active | Recovery | Hit Adv. | Block Adv. | Renda Bonus |
|---|---|---|---|---|---|
| 11 | 3 | 24 | -3 | -4 | N/A |
| Guard | Cancel | Invuln | Red Damage | White Damage | Gauge |
| mid | no | - | 21 | 8 | H: 15 G: 9 W: 3 |
CL.5HK
| Startup | Active | Recovery | Hit Adv. | Block Adv. | Renda Bonus |
|---|---|---|---|---|---|
| 16 | 3 | 25 | 0 | -1 | N/A |
| Guard | Cancel | Invuln | Red Damage | White Damage | Gauge |
| mid | no | - | 26 | 9 | H: 24 G: 15 W: 6 |
Crouching Normals
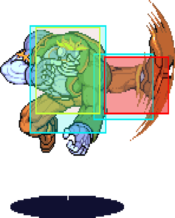
2LP
| Startup | Active | Recovery | Hit Adv. | Block Adv. | Renda Bonus |
|---|---|---|---|---|---|
| 5 | 3 | 9 | 7 | 6 | H: 10 G: 9 |
| Guard | Cancel | Invuln | Red Damage | White Damage | Gauge |
| mid | yes | - | 9 | 4 | H: 6 G: 3 W: 0 |
2MP
| Startup | Active | Recovery | Hit Adv. | Block Adv. | Renda Bonus |
|---|---|---|---|---|---|
| 9 | 3 | 19 | 2 | 1 | N/A |
| Guard | Cancel | Invuln | Red Damage | White Damage | Gauge |
| mid | no | - | 18 | 6 | H: 15 G: 9 W: 3 |
2HP
| Startup | Active | Recovery | Hit Adv. | Block Adv. | Renda Bonus |
|---|---|---|---|---|---|
| 11 | 6 | 31 | 4 | -7 | N/A |
| Guard | Cancel | Invuln | Red Damage | White Damage | Gauge |
| mid | no | - | 23,22 | 8,8 | H: 24 G: 15 W: 6 |
2LK
| Startup | Active | Recovery | Hit Adv. | Block Adv. | Renda Bonus |
|---|---|---|---|---|---|
| 6 | 3 | 7 | 9 | 8 | H: 12 G: 11 |
| Guard | Cancel | Invuln | Red Damage | White Damage | Gauge |
| low | yes | - | 8 | 4 | H: 6 G: 3 W: 0 |
2MK
| Startup | Active | Recovery | Hit Adv. | Block Adv. | Renda Bonus |
|---|---|---|---|---|---|
| 10 | 2 | 18 | 3 | 2 | N/A |
| Guard | Cancel | Invuln | Red Damage | White Damage | Gauge |
| low | no | - | 17 | 6 | H: 15 G: 9 W: 3 |
2HK
| Startup | Active | Recovery | Hit Adv. | Block Adv. | Renda Bonus |
|---|---|---|---|---|---|
| 14 | 2 | 24 | - | -2 | N/A |
| Guard | Cancel | Invuln | Red Damage | White Damage | Gauge |
| low | no | - | 20 | 8 | H: 24 G: 15 W: 6 |
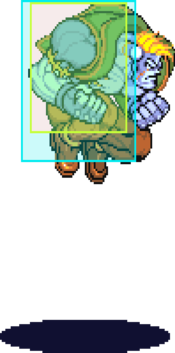
Air Normals
J.LP
| Startup | Active | Recovery | Hit Adv. | Block Adv. | Renda Bonus |
|---|---|---|---|---|---|
| 9 | 5 | 1 | - | - | N/A |
| Guard | Cancel | Invuln | Red Damage | White Damage | Gauge |
| high | no | - | 9 | 4 | H: 6 G: 3 W: 0 |
J.MP
| Startup | Active | Recovery | Hit Adv. | Block Adv. | Renda Bonus |
|---|---|---|---|---|---|
| 10 | 5 | 12 | - | - | N/A |
| Guard | Cancel | Invuln | Red Damage | White Damage | Gauge |
| high | no | - | 18 | 6 | H: 15 G: 9 W: 3 |
J.HP
| Startup | Active | Recovery | Hit Adv. | Block Adv. | Renda Bonus |
|---|---|---|---|---|---|
| 9 | 5 | 12 | - | - | N/A |
| Guard | Cancel | Invuln | Red Damage | White Damage | Gauge |
| high | no | - | 24 | 8 | H: 24 G: 15 W: 6 |
J.LK
| Startup | Active | Recovery | Hit Adv. | Block Adv. | Renda Bonus |
|---|---|---|---|---|---|
| 6 | 5 | 4 | - | - | N/A |
| Guard | Cancel | Invuln | Red Damage | White Damage | Gauge |
| high | no | - | 9 | 4 | H: 6 G: 3 W: 0 |
J.MK
| Startup | Active | Recovery | Hit Adv. | Block Adv. | Renda Bonus |
|---|---|---|---|---|---|
| 9 | 4 | 15 | - | - | N/A |
| Guard | Cancel | Invuln | Red Damage | White Damage | Gauge |
| high | no | - | 18 | 7 | H: 15 G: 9 W: 3 |
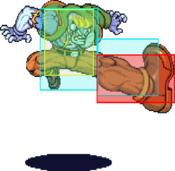
J.HK
| Startup | Active | Recovery | Hit Adv. | Block Adv. | Renda Bonus |
|---|---|---|---|---|---|
| 15 | 2 | 16 | - | - | N/A |
| Guard | Cancel | Invuln | Red Damage | White Damage | Gauge |
| high | no | - | 22 | 8 | H: 24 G: 15 W: 6 |
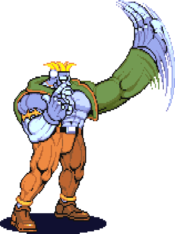
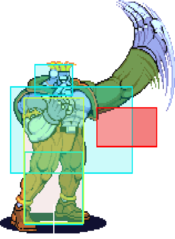
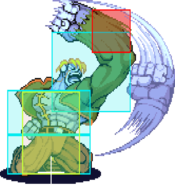
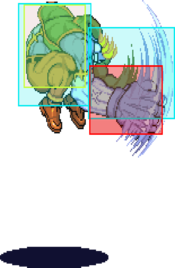
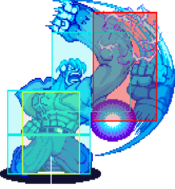
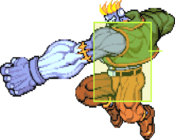
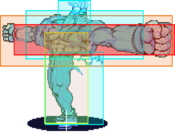
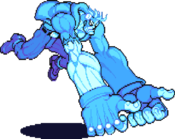
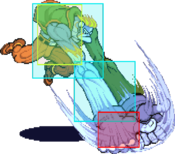
9J.HP
| Startup | Active | Recovery | Hit Adv. | Block Adv. | Renda Bonus |
|---|---|---|---|---|---|
| 12 | 6 | 22 | - | - | N/A |
| Guard | Cancel | Invuln | Red Damage | White Damage | Gauge |
| high | no | - | 20 | 7 | H: 24 G: 15 W: 6 |
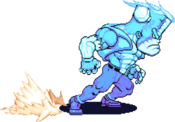
Electric Normals
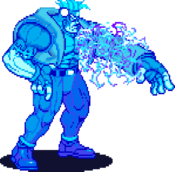
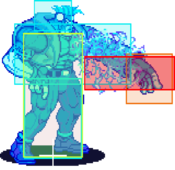
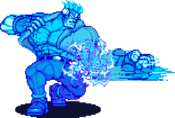
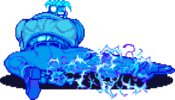
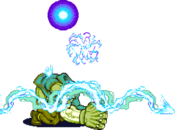
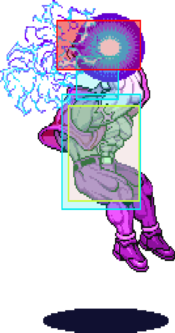
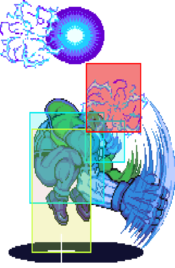
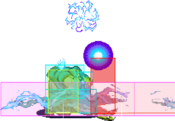
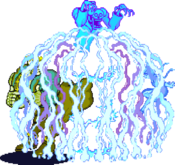
Victor has an additional version of most medium & heavy attacks which is activated by holding the attack button. This can make Victor's offense relentless. There are numerous benefits & a single downside to this ability:
- Advantage - No pushback
- Advantage - Negates projectiles
- Advantage - Causes chip damage
- Advantage - Some attacks force a reset
- Disadvantage - Slightly less damage
- Disadvantage - All electric normals have more recovery, with heavies being significant
CL.5[MP]
| Startup | Active | Recovery | Hit Adv. | Block Adv. | Renda Bonus |
|---|---|---|---|---|---|
| 13 | 8 | 19 | 7 | -7 | N/A |
| Guard | Cancel | Invuln | Red Damage | White Damage | Gauge |
| mid | no | - | 17 | 6 | H: 15 G: 9 W: 3 |
CL.5[HP]
| Startup | Active | Recovery | Hit Adv. | Block Adv. | Renda Bonus |
|---|---|---|---|---|---|
| 15 | 8 | 33 | 43 | -9 | N/A |
| Guard | Cancel | Invuln | Red Damage | White Damage | Gauge |
| mid | no | - | 21 | 8 | H: 24 G: 15 W: 6 |
CL.5[MK]
| Startup | Active | Recovery | Hit Adv. | Block Adv. | Renda Bonus |
|---|---|---|---|---|---|
| 13 | 12 | 16 | 6 | -8 | N/A |
| Guard | Cancel | Invuln | Red Damage | White Damage | Gauge |
| mid | no | - | 17 | 6 | H: 15 G: 9 W: 3 |
CL.5[HK]
| Startup | Active | Recovery | Hit Adv. | Block Adv. | Renda Bonus |
|---|---|---|---|---|---|
| 21 | 3 | 29 | 47 | -5 | N/A |
| Guard | Cancel | Invuln | Red Damage | White Damage | Gauge |
| mid | no | - | 21 | 8 | H: 24 G: 15 W: 6 |
5[MP]
| Startup | Active | Recovery | Hit Adv. | Block Adv. | Renda Bonus |
|---|---|---|---|---|---|
| 8 | 5 | 31 | 3 | -11 | N/A |
| Guard | Cancel | Invuln | Red Damage | White Damage | Gauge |
| mid | no | - | 15 | 5 | H: 15 G: 9 W: 3 |
5[HP]
| Startup | Active | Recovery | Hit Adv. | Block Adv. | Renda Bonus |
|---|---|---|---|---|---|
| 16 | 10 | 35 | 41 | -11 | N/A |
| Guard | Cancel | Invuln | Red Damage | White Damage | Gauge |
| mid | no | - | 19 | 7 | H: 24 G: 15 W: 6 |
5[MK]
| Startup | Active | Recovery | Hit Adv. | Block Adv. | Renda Bonus |
|---|---|---|---|---|---|
| 10 | 3 | 33 | 1 | -13 | N/A |
| Guard | Cancel | Invuln | Red Damage | White Damage | Gauge |
| mid | no | - | 15 | 5 | H: 15 G: 9 W: 3 |
5[HK]
| Startup | Active | Recovery | Hit Adv. | Block Adv. | Renda Bonus |
|---|---|---|---|---|---|
| 18 | 10 | 36 | 35 | -17 | N/A |
| Guard | Cancel | Invuln | Red Damage | White Damage | Gauge |
| mid | no | - | 19 | 7 | H: 24 G: 15 W: 6 |
2[MP]
| Startup | Active | Recovery | Hit Adv. | Block Adv. | Renda Bonus |
|---|---|---|---|---|---|
| 8 | 5 | 29 | 5 | -9 | N/A |
| Guard | Cancel | Invuln | Red Damage | White Damage | Gauge |
| mid | no | - | 15 | 5 | H: 15 G: 9 W: 3 |
2[HP]
| Startup | Active | Recovery | Hit Adv. | Block Adv. | Renda Bonus |
|---|---|---|---|---|---|
| 17 | 13 | 27 | 46 | -5 | N/A |
| Guard | Cancel | Invuln | Red Damage | White Damage | Gauge |
| mid | no | - | 18 | 7 | H: 24 G: 15 W: 6 |
2[MK]
| Startup | Active | Recovery | Hit Adv. | Block Adv. | Renda Bonus |
|---|---|---|---|---|---|
| 9 | 3 | 26 | 8 | -6 | N/A |
| Guard | Cancel | Invuln | Red Damage | White Damage | Gauge |
| mid | no | - | 15 | 5 | H: 15 G: 9 W: 3 |
2[HK]
| Startup | Active | Recovery | Hit Adv. | Block Adv. | Renda Bonus |
|---|---|---|---|---|---|
| 14 | 4 | 36 | - | -16 | N/A |
| Guard | Cancel | Invuln | Red Damage | White Damage | Gauge |
| mid | no | - | 18 | 7 | H: 24 G: 15 W: 6 |
Normal Throws
6MP or 4MP
| Startup | Active | Recovery | Hit Adv. | Block Adv. | Renda Bonus |
|---|---|---|---|---|---|
| 1 | - | 254 | 25 | - | N/A |
| Guard | Cancel | Invuln | Red Damage | White Damage | Gauge |
| throw | no | 1-229 whole body | 4x(3~10) (2x(3~10)) | 4 (2) | H: 9 G: 0 W: 0 |
6HP or 4HP
| Startup | Active | Recovery | Hit Adv. | Block Adv. | Renda Bonus |
|---|---|---|---|---|---|
| 1 | - | 250 | - | - | N/A |
| Guard | Cancel | Invuln | Red Damage | White Damage | Gauge |
| throw | no | 1-225 whole body | 4x(3~10) (2x(3~10)) | 4 (2) | H: 9 G: 0 W: 0 |
6MP or 4MP~28P
6K or 4K
| Startup | Active | Recovery | Hit Adv. | Block Adv. | Renda Bonus |
|---|---|---|---|---|---|
| 1 | - | 56 | - | - | N/A |
| Guard | Cancel | Invuln | Red Damage | White Damage | Gauge |
| throw | no | 1-42 whole body | 25 (6) | 8 (2) | H: 9 G: 0 W: 0 |
J.6P or J.4P
| Startup | Active | Recovery | Hit Adv. | Block Adv. | Renda Bonus |
|---|---|---|---|---|---|
| 1 | - | 37 + 18 + landing 1 | - | - | N/A |
| Guard | Cancel | Invuln | Red Damage | White Damage | Gauge |
| throw | no | 1-37 whole body | 23 | 8 | H: 9 G: 0 W: 0 |
Command Movement
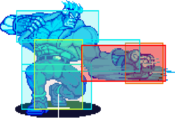
2KKK
| Startup | Active | Recovery | Hit Adv. | Block Adv. | Renda Bonus |
|---|---|---|---|---|---|
| 0 | 11 | 33 | - | - | N/A |
| Guard | Cancel | Invuln | Red Damage | White Damage | Gauge |
| - | no | 1-11 feet | - | - | H: 0 G: 0 W: 0 |
Special Moves
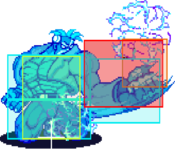
Giga Forehead
[4],6P
| Startup | Active | Recovery | Hit Adv. | Block Adv. | Renda Bonus |
|---|---|---|---|---|---|
| 15 | 6 | 37 | - | -19 | N/A |
| Guard | Cancel | Invuln | Red Damage | White Damage | Gauge |
| mid | no | 1-12 upper body | 23 | 5 | H: 24 G: 21 W: 18 |
Not used as other versions have better advantages
| Startup | Active | Recovery | Hit Adv. | Block Adv. | Renda Bonus |
|---|---|---|---|---|---|
| 15 | 10 | 42 | - | -28 | N/A |
| Guard | Cancel | Invuln | Red Damage | White Damage | Gauge |
| mid | no | 1-12 upper body | 25 | 6 | H: 24 G: 21 W: 18 |
Not used as other versions have better advantages
| Startup | Active | Recovery | Hit Adv. | Block Adv. | Renda Bonus |
|---|---|---|---|---|---|
| 15 | 14 | 44 | - | -34 | N/A |
| Guard | Cancel | Invuln | Red Damage | White Damage | Gauge |
| mid | no | 1-12 upper body | 27 | 7 | H: 24 G: 21 W: 18 |
Not used as other versions have better advantages
| Startup | Active | Recovery | Hit Adv. | Block Adv. | Renda Bonus |
|---|---|---|---|---|---|
| 15 | 8,4,4 | 40 | - | -24 | N/A |
| Guard | Cancel | Invuln | Red Damage | White Damage | Gauge |
| mid | no | 1-12 upper body | 15x3 | 4x3 | H: 0 G: 0 W: 0 |
Giga Stake
[2],8P
| Startup | Active | Recovery | Hit Adv. | Block Adv. | Renda Bonus |
|---|---|---|---|---|---|
| 32 | 1,5 | 45 | - | -26 | N/A |
| Guard | Cancel | Invuln | Red Damage | White Damage | Gauge |
| high | no | 1-5 | 26 | 6 | H: 32 G: 27 W: 22 |
Quickest version, so it may be used to deathblow or counterpoke
| Startup | Active | Recovery | Hit Adv. | Block Adv. | Renda Bonus |
|---|---|---|---|---|---|
| 35 | 1,5 | 45 | - | -26 | N/A |
| Guard | Cancel | Invuln | Red Damage | White Damage | Gauge |
| high | no | 1-5 | 28 | 7 | H: 32 G: 27 W: 22 |
Not used as other versions have better advantages
| Startup | Active | Recovery | Hit Adv. | Block Adv. | Renda Bonus |
|---|---|---|---|---|---|
| 37 | 1,5 | 45 | - | -26 | N/A |
| Guard | Cancel | Invuln | Red Damage | White Damage | Gauge |
| high | no | 1-5 | 30 | 8 | H: 32 G: 27 W: 22 |
Not used as other versions have better advantages
| Startup | Active | Recovery | Hit Adv. | Block Adv. | Renda Bonus |
|---|---|---|---|---|---|
| 39 | 1,1,1,2,1,2 | 45 | - | -23 | N/A |
| Guard | Cancel | Invuln | Red Damage | White Damage | Gauge |
| high | no | 1-5 | 16x3 | 5x3 | H: 0 G: 0 W: 0 |
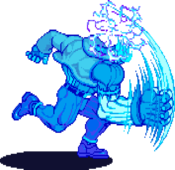
Giga Burn
623K
| Startup | Active | Recovery | Hit Adv. | Block Adv. | Renda Bonus |
|---|---|---|---|---|---|
| 10 | 8 | 20 | - | -4 | N/A |
| Guard | Cancel | Invuln | Red Damage | White Damage | Gauge |
| mid | no | - | 22,18 | 5,5 | H: 24 G: 21 W: 18 |
Used to occasionally advance at neutral as it is a quick movement tool.
| Startup | Active | Recovery | Hit Adv. | Block Adv. | Renda Bonus |
|---|---|---|---|---|---|
| 10 | 8 | 20 | - | -4 | N/A |
| Guard | Cancel | Invuln | Red Damage | White Damage | Gauge |
| mid | no | - | 24,19 | 6,5 | H: 24 G: 21 W: 18 |
Used as a tick throw on-block as Victor lands just as they come out of throw invulnerability.
| Startup | Active | Recovery | Hit Adv. | Block Adv. | Renda Bonus |
|---|---|---|---|---|---|
| 10 | 8 | 24 | - | -8 | N/A |
| Guard | Cancel | Invuln | Red Damage | White Damage | Gauge |
| mid | no | - | 26,20 | 7,5 | H: 24 G: 21 W: 18 |
Used to chase a knockeddown opponent as it advances with little recovery.
| Startup | Active | Recovery | Hit Adv. | Block Adv. | Renda Bonus |
|---|---|---|---|---|---|
| 13 | 3,3,3 | 20 | - | -2 | N/A |
| Guard | Cancel | Invuln | Red Damage | White Damage | Gauge |
| mid | no | - | 14x3 | 4x3 | H: 0 G: 0 W: 0 |
Guard Cancels
623K
| Startup | Active | Recovery | Hit Adv. | Block Adv. | Renda Bonus |
|---|---|---|---|---|---|
| 10 | 8 | 20 | - | -4 | N/A |
| Guard | Cancel | Invuln | Red Damage | White Damage | Gauge |
| mid | no | - | 10,8 | 2,2 | H: 24 G: 21 W: 18 |
Version is not prioritized
| Startup | Active | Recovery | Hit Adv. | Block Adv. | Renda Bonus |
|---|---|---|---|---|---|
| 10 | 8 | 20 | - | -4 | N/A |
| Guard | Cancel | Invuln | Red Damage | White Damage | Gauge |
| mid | no | - | 12,9 | 3,2 | H: 24 G: 21 W: 18 |
Version is not prioritized
| Startup | Active | Recovery | Hit Adv. | Block Adv. | Renda Bonus |
|---|---|---|---|---|---|
| 10 | 8 | 24 | - | -8 | N/A |
| Guard | Cancel | Invuln | Red Damage | White Damage | Gauge |
| mid | no | - | 12,9 | 3,2 | H: 24 G: 21 W: 18 |
Use this without meter as it is the most damage & has the same start-up as the weaker versions.
| Startup | Active | Recovery | Hit Adv. | Block Adv. | Renda Bonus |
|---|---|---|---|---|---|
| 13 | 3,3,3 | 20 | - | -2 | N/A |
| Guard | Cancel | Invuln | Red Damage | White Damage | Gauge |
| mid | no | - | 7x3 | 2x3 | H: 0 G: 0 W: 0 |
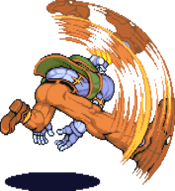
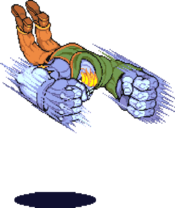
Gyro Crush
214P
| Startup | Active | Recovery | Hit Adv. | Block Adv. | Renda Bonus |
|---|---|---|---|---|---|
| 9 | 4 | 24 | -3 | -4 | N/A |
| Guard | Cancel | Invuln | Red Damage | White Damage | Gauge |
| mid | no | - | 20 | 5 | H: 17 G: 14 W: 12 |
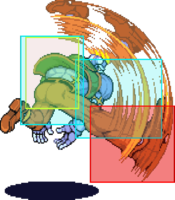
Use to counter poke. Kara cancel with a St.hk for amazing meter gain. This move is grounded UB, so it is also used as a UB guard break if you want a damaging knockdown or a deathblow. The attack hits a bit more in front of Vic than his other anti-airs, so it is also used at ranges where cr.hp would whiff.
| Startup | Active | Recovery | Hit Adv. | Block Adv. | Renda Bonus |
|---|---|---|---|---|---|
| 9 | 4(4)4(4)4 | 24 | -3 | -4 | N/A |
| Guard | Cancel | Invuln | Red Damage | White Damage | Gauge |
| mid | no | - | 9x3 | 2x3 | H: 17+5x2 G: 14+2x2 W: 12 |
Not used as other versions have better advantages.
| Startup | Active | Recovery | Hit Adv. | Block Adv. | Renda Bonus |
|---|---|---|---|---|---|
| 9 | 4(4)4(4)4(4)4(4)4 | 24 | -11 | -12 | N/A |
| Guard | Cancel | Invuln | Red Damage | White Damage | Gauge |
| mid | no | - | 10x5 | 3x5 | H: 17+5x4 G: 14+2x4 W: 12 |
Used to juggle after 214PP or after 623KK or ES GC. You can influence your movement during the recovery frames.
| Startup | Active | Recovery | Hit Adv. | Block Adv. | Renda Bonus |
|---|---|---|---|---|---|
| 10 | 4(4)4(4)4(8)4 | 20 | - | 3 | N/A |
| Guard | Cancel | Invuln | Red Damage | White Damage | Gauge |
| mid | no | - | 10x3+20 | 2x3+4 | H: 0 G: 0 W: 0 |
Pursuits
8P/K or 8KK/PP
| Startup | Active | Recovery | Hit Adv. | Block Adv. | Renda Bonus |
|---|---|---|---|---|---|
| 40 | 2 | 32 + landing 1 | - | - | N/A |
| Guard | Cancel | Invuln | Red Damage | White Damage | Gauge |
| mid | no | 1-4 feet | 9 | 9 | H: 24 G: - W: 6 |
Slow, goes a short fixed distance, only does recoverable damage. It doesnt recover in time to have a strong oki or mix. IN the corner, you can whiff thsi for an Oki scenario.
| Startup | Active | Recovery | Hit Adv. | Block Adv. | Renda Bonus |
|---|---|---|---|---|---|
| 40 | 2(11)2 | 44 + landing 1 | - | - | N/A |
| Guard | Cancel | Invuln | Red Damage | White Damage | Gauge |
| mid | no | 1-4 feet | 4+4+12 | 4+4+10 | H: 0 G: 0 W: 0 |
Command Throws
236LK
| Startup | Active | Recovery | Hit Adv. | Block Adv. | Renda Bonus |
|---|---|---|---|---|---|
| 1 | 1 | 45 | - | - | N/A |
| Guard | Cancel | Invuln | Red Damage | White Damage | Gauge |
| throw | no | - | 4x(3~13) | 2x(3~13) | H: 12 G: 0 W: 21 |
360+P
| Startup | Active | Recovery | Hit Adv. | Block Adv. | Renda Bonus |
|---|---|---|---|---|---|
| 1 | 1 | 45 | - | - | N/A |
| Guard | Cancel | Invuln | Red Damage | White Damage | Gauge |
| throw | no | - | 20+20 | 8 + 8 | H: 12 G: 0 W: 42 |
Ex Moves
[2],8KK
| Startup | Active | Recovery | Hit Adv. | Block Adv. | Renda Bonus |
|---|---|---|---|---|---|
| 27 | 16 | 51 | - | -31 | N/A |
| Guard | Cancel | Invuln | Red Damage | White Damage | Gauge |
| mid | no | 1-7 feet, 35-38 feet | 17 | 4 | H: 0 G: 0 W: 0 |
720+KK
| Startup | Active | Recovery | Hit Adv. | Block Adv. | Renda Bonus |
|---|---|---|---|---|---|
| 1 | 1 | 45 | - | - | N/A |
| Guard | Cancel | Invuln | Red Damage | White Damage | Gauge |
| throw | no | - | 7x6+12 | 2x7 | H: 0 G: 0 W: 0 |
Dark Force
Great Gerdenheim - Same strength P+K:
- Victor's Darkforces are often used defensively to beat your opponents OS throws. Aim to get out of DF as soon as possible. While in Darkforce, Victor gains a various buffs.
- (L/M Version):
His punch buttons become 1f command throws. He can chain into this grab attack to beat armor moves. Its funny, but not practical. He also gains a dashing speed buff, this one can be used to rush down. Aim to connect a dashing far st.lk so you can link into a combo or tick throw accordingly.
- (H Version):
All of his normal attacks become the close electric version, even at far ranges. Standing Heavy Kick becomes slightly faster at 19f startup. Effective offense or setups in this state are unknown.
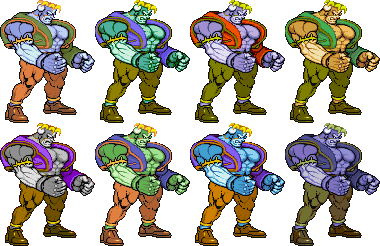
Colors
Notable Players
Japan
Japanese Player Index: http://www21.atwiki.jp/vsplayer/pages/26.html
| Name (English) | Name (Japanese) | Color | Location | Contact | Notes |
|---|---|---|---|---|---|
| Oboro | オボロ | KK |
Kansai | http://twitter.com/OBOROCK | Mega Offense |
| Kame | カメ (Sometimes 亀) | HK |
Kanto | http://twitter.com/kame_victor | Mega Defense |
| Oshikiri | 押切 | MP |
Kanto | Author of the manga "Hi Score Girl". | |
| Tate | タテ | PP |
North America
| Name (English) | Name (Japanese) | Color | Location | Contact | Notes |
|---|---|---|---|---|---|
| Amerikame | アメリカメ | HP |
Illinois, USA | https://twitter.com/AmeriKameFGC | Recent player that has found success. Has made many recent tutorials to assist newer players. |
