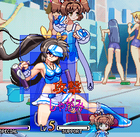
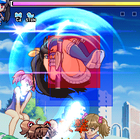
Vanguard Princess/Eri Hasumi
Profile
A supersoldier created by Blade Noa; a girl of great physical endurance and strength.
She escapes from the Blade Noa research labs to seek freedom.
Base Health: 900
Guts Threshold: 40%
Guts Factor: 25%
Total Effective Health: 990
Move List
Movement
66: Forward dash, hold to run.
44: Reverse Cartwheel. First 17F are completely invincible, so can be used as a reversal.
Throws
| 6C | |||
|---|---|---|---|

|
Guard | Air Guard | Support |
| Throw | - | Partial | |
| Damage | Hit / Counter Hit | Counter Scale | |
| 90 | Knockdown | 0% | |
| Eri throws opponent forward. You can hit them with an assist afterwards in the corner. | |||
Normal Moves
| 5A | |||
|---|---|---|---|

|
Guard | Air Guard | Support |
| Mid | No | Yes | |
| Damage | Hit / Counter Hit | Counter Scale | |
| 15 | - / - | +20% | |
| Short attack with the tonfa, chains into 5B. | |||
| 5C | |||
|---|---|---|---|

|
Guard | Air Guard | Support |
| Mid | No | Yes | |
| Damage | Hit / Counter Hit | Counter Scale | |
| 80 | - / Spin | +20% | |
| Longest ranged attack with the tonfa, moves Eri slightly forward. | |||
| 2B | |||
|---|---|---|---|

|
Guard | Air Guard | Support |
| Low | No | Yes | |
| Damage | Hit / Counter Hit | Counter Scale | |
| 52 | - / Butt Plant | +20% | |
| Low tonfa attack, links into 2A, 2B, and 6A. In the corner you can dash after 2B to hit with 5A. | |||
| 2C | |||
|---|---|---|---|

|
Guard | Air Guard | Support |
| Low | Yes | Yes | |
| Damage | Hit / Counter Hit | Counter Scale | |
| 98 | Knockdown | +20% | |
| Sticks out both her legs, moves eri slightly forward, low and knocks down. | |||
| j.B | |||
|---|---|---|---|

|
Guard | Air Guard | Support |
| High | Yes | Yes | |
| Damage | Hit / Counter Hit | Counter Scale | |
| 51 | - / - | +20% | |
| Eri elbows with her tonfa downwards. Links to 2B. Chains into j.C. | |||
| j.C (after hit j.B) | |||
|---|---|---|---|

|
Guard | Air Guard | Support |
| High | Yes | Yes | |
| Damage | Hit / Counter Hit | Counter Scale | |
| +50 | - / - | - | |
| Eri swings her tonfa downwards. Target combo. | |||
Command Normals
| 6A | |||
|---|---|---|---|

|
Guard | Air Guard | Support |
| Mid | No | Yes | |
| Damage | Hit / Counter Hit | Counter Scale | |
| 38 | - / Launch | +20% | |
| Eri does a knee attack. Launches on CH, follow up with j.BC. | |||
| 3B | |||
|---|---|---|---|

|
Guard | Air Guard | Support |
| Low | No | No | |
| Damage | Hit / Counter Hit | Counter Scale | |
| 32 | - / Butt Plant | +20% | |
| Short slide. | |||
| j.6A | |||
|---|---|---|---|

|
Guard | Air Guard | Support |
| High | Yes | Partial | |
| Damage | Hit / Counter Hit | Counter Scale | |
| 46 | Wall-Bound / Spinning Wall-Bounce | +20% | |
| Eri fully stretches out her leg, overhead. | |||
Special Moves
| +A (Stage 2) | |||
|---|---|---|---|

|
Guard | Air Guard | Support |
| High | No | No | |
| Damage | Hit / Counter Hit | Counter Scale | |
| 46 | - / Butt Plant | +40% | |
| Short upswing, misses crouching. | |||
| +B (Stage 3, after A) | |||
|---|---|---|---|
 
|
Guard | Air Guard | Support |
| Mid | No | No | |
| Damage | Hit / Counter Hit | Counter Scale | |
| 64 (+31) | Knockdown | +50% | |
| B Version of Air Spike. | |||
| +B (Stage 2) | |||
|---|---|---|---|

|
Guard | Air Guard | Support |
| Mid | No | No | |
| Damage | Hit / Counter Hit | Counter Scale | |
| 66 | - / Butt Plant | +40% | |
| Backswing punch, hits crouching. | |||
| +A (Stage 3, after B) | |||
|---|---|---|---|

|
Guard | Air Guard | Support |
| High | No | No | |
| Damage | Hit / Counter Hit | Counter Scale | |
| 90 | Launch | +40% | |
| High kick that launches the opponent. Misses crouching (except Luna?). | |||
| +B (Stage 3, after B) | |||
|---|---|---|---|

|
Guard | Air Guard | Support |
| Mid | No | No | |
| Damage | Hit / Counter Hit | Counter Scale | |
| 66 +21 | Knockdown | +50% | |
| C Version of Air Spike. | |||
| +C (Stage 2) | |||
|---|---|---|---|

|
Guard | Air Guard | Support |
| Overhead | No | No | |
| Damage | Hit / Counter Hit | Counter Scale | |
| 81 | - / - | +40% | |
| Overhead halfspin hop attack. | |||
| +2C (Stage 2 or 3) | |||
|---|---|---|---|

|
Guard | Air Guard | Support |
| Low | No | No | |
| Damage | Hit / Counter Hit | Counter Scale | |
| 83 | - / Butt Plant Knockdown (when close) |
+40% | |
| Sliding attack. | |||
| +C (Stage 3) | |||
|---|---|---|---|

|
Guard | Air Guard | Support |
| High | Yes | No | |
| Damage | Hit / Counter Hit | Counter Scale | |
| 91 | Wall-Bound | +40% | |
| Overhead hop attack, wallbounces if near corner. | |||
| +66 (Stage 3) | |||
|---|---|---|---|

|
Guard | Air Guard | Support |
| - | - | Yes | |
| Damage | Hit / Counter Hit | Counter Scale | |
| - | - | - | |
| Crossup somersault forward, cannot be done on whiff. Very unsafe. | |||
Liberty Arts
Strategy
Pokes
Your best jump-ins are j.6A for range, j.A for speed, and j.C as a crossup. There are too many characters with really good one button anti-airs to really approach from the air though, stick to the ground in general.
Eri has lots of VERY good ground pokes. 2A/2B/3B/2C are all very good, as are 5B/5C. 2A stuffs so many ground normals it's ridiculous, plus it's a low hit. 2B induces stagger on Counterhit and combos into itself but requires some skill to reaction combo into a 236B. 3B acts as a VERY long range low poke and is very solid when used with your assist correctly. 2C is a knockdown with very good range and solid damage.
5B is very fast and has very solid range. Same as 2B, you can combo into 236B on Counterhit, but it requires some practice. 5C has a very large hitbox, hits crouching, and gives you a combo on Counterhit. It also does solid damage to their assist meter on block and is just very strong in general.
Pressure/Mixups
Your preferred rekka is generally 236A->B->*, as it is a solid block string, hits crouching, and is very good for dealing damage to their assist and Calcium meters. 236A->A->A should only be used to start combos since it can be ducked under and punished very easily. 236A->B->A 6D is a pretty strong sequence that waits out pokes and mashers and allows you to run in again with another 236A->B->A, or whatever else.
236A->B->C is solid to use as a mixup against characters who can't punish it. It's hard for most since it leaves Eri a good distance away, but it does leave her at disadvantage, and Lilith can 360 it for free. Also, as with most slow block strings, you have to be aware they can call an assist to knock you out of it even while they are blocking. Use it along with an assist (3D perhaps) to make it safer. Similarly, you can use 236A->C and 236A->2C or 236A->A/B->2C as part of a mixup when you can cover it.
On a knockdown midscreen meaty 214B crossup is a decent option, but is easy to parry on reaction. If it hits you get a free strong combo. Be aware though because of the parry animation a crouch parry will actually push you out and make the crossup whiff. 6B can be used to cross up knocked down opponents, but its use is limited. Calling an assist then doing a crossup j.C is also a solid option.
Eri's throw is also very good. You can combo off a back throw at mid screen, and any throw that throws them into the corner. You can get upward of 25% or more damage from it, so it's a very good tool as part of mixups. 2A makes for an amazing tick setup (mixup with 6D~2B or whatever else), as does Eko's 6D or anything similar.
Defensive
Wake up super is a viable tactic if you have a meaty on you that isn't an assist, it is the only move she has with startup invincibility. The super is safe on block, and on hit near the corner, you can land a solid combo that will refill your super bar by up to ~50% again.
Despite not having any 'true' invincibility, Eri's 22X moves are very good on defense. They stuff all throws, and will stuff almost all moves. They are very unsafe of course, so you will want to be careful with how you use them. For Anti-Air, her 22B is generally her best option if done early as it has a huge initial, air unblockable hitbox. 22A or 22C are better if they are deeper, as 22C has upper body invincibility and 22A is just extremely fast.
Eri's backdash is also very good. It has complete invincibility, including to throws, for the initial 17F of the backdash. This means it can be used as a reversal, and can dodge pretty much all normals. Don't be afraid to use this, but be careful of the somewhat laggy recovery.
Matchups
Yui
Haruka
Lilith
Luna
Kurumi
Saki
Kaede
Natalia
Eri
Ayane
Combos
Damage is VS Lilith.
6B Notes: Any corner combos involving 6B can generally be looped, see the loop section below for examples. Also, you can generally link the Super after a 6B if done low enough to the ground in any of these combos.
Without Assist
2A, 2B (58)
2B, 2B (100)
5A 5B, 2C (160)
Misses crouching Lilith.
5A 5B, 236A ...
Doesn't work on some characters.
5B, 236A ...
5B Wiffs VS crouching.
6B, 22C (210, Corner)
6B, 6B, 22C (268)
Slightly out of the corner.
CH 6A, j.B j.C (230)
CH 5B, 236B-> ...
CH 2B, 236B-> ...
CH 5C, 66 5C (133)
CH 5C, [6] 2C (172)
CH 5C, 2[6]2C (186)
CH 5C, 236B+C ... (297+)
CH 5C, 6B ... (250+, Corner)
j.6A, 6B, 22C (238, Near Corner)
CH j.6A, 66, 236B->A->B (176, Mid)
j.C (crossup), 236C-> ...
236A->B->2C (167)
236A->B->A, 5C (229, Mid)
236A->B->A, 236B->A->B (272, Corner)
Solid on BLOCK, but ->A won't launch on crouching hit. Use the 2C combo in these cases.
236A->A->A, 6B, 2[6]2C (287, Corner)
(236A->A/B)->C, 22C (215)
Corner, Combo off overhead.
214B, 22C (208)
214B, 6B, 236B+C ... (Take off 6B in corner)
214B, 6B, 22C (259, Corner)
CH 22A, 22C
CH 22A, 236B+C ...
Only works if 22A hits them near the peak of their jump. 22C can connect in the corner or as a crossunder.
... 236B+C, C
... 236B+C, 22C
Eko
1A~6D~1B, 236B->B->2C (220) Works even against crouching Lilith.
6D~3B, 66 5B, 236A-> ...
6B, 6D~5C, 6B, 22C (313, Corner)
6B, 6B, 6D~5C, 6B, 22C (357)
Slightly out of the corner.
... 6B, 5C~6D, j.6A, 6B, 22C
Stronger wall bounce combo, but only stronger on the last rep of a loop. Kind of finicky.
... 6B, 6D~5C, 6B ...
... 6B, 5C~2D, 6B ...
Generic corner loops. 6D version does a little more damage and costs a little less, but doesn't work if they juggle too high. You can generally use these anywhere you can land a 6B in the corner.
2C+D, 236B->A->B (~264, Mid)
2C+D, 6B, 236B->A->B (~292, Corner)
(Knockdown, 3D, 236A->C), 6B, 22C (~205)
(Knockdown, 3D, 236A->2C), 6B, 22C (~205)
236A->A->A, 6D~6B, 236B->A->B (288)
236A->A->A, 6D~6B, 236B+C ... (367+)
Mid Screen Combos.
236A->A->A, 6B~6D, 23[6]B->B->C, 22C (349)
236A->A->A, 6B~6D, 23[6]B->B->C, 236B+C (442+)
Cross under combos, mid screen only. Don't work on some characters unless near the corner.
236A->A->A, 6B+6D, 23[6]B->B->A, j.B j.C (321)
Cross under combo, mid screen, works on anyone. Pause between each hit of the rekkas.
236A->B->A, 5C~6D, j.6A, 6B, 22C (370)
236A->B->A, 5C~6D, 6B, 5C~6D, j.6A, 6B, 22C (391)
236A->B->A, 5C~6D, 6B, 236B+C ... (445+)
236A->B->A, 5C~6D, 6B, 236B+C, 2D, 6B, 5C~6D, j.6A, 6B, 22C (475)
Corner Combos.
(236A->A/B)->C, 2C~2D, 6B, 22C (338, Corner)
214B, 6D~6B, 236B->B->C, 22C (338, Mid)
214B, 6B, 5C~6B, j.6A, 6B, 22C (352, Corner)
... 236B+C, 2D, 6B, 22C
... 236B+C, 2D, 6B, 5C~6D, j.6A, 6B, 22C
Throw, 2D, 6B, 22C (280, Corner)
Throw, 2D, 6B, 5C~6D, j.6A, 6B, 22C (392, Corner)
Throw, 2D, 66, 22C (~258)
Throw, 2D, 236B+C (340+)
Works at mid screen off a back throw reliably. May work off a forward throw depending on assist position.
Sierra
2A, 5A 5B~5D, 236B-> ...
VS standing.
5A 5B~5D, 236B->B->2C
VS crouching.
... 6B~6D, 5C, 6B, 22C (~292+, Corner)
236A->A->A, 6B~6D, 5C, 6B, 22C (314, Corner)
236A->A->A~6D, 6B, 66, 214C, 22C (257, Mid)
236A->A->A~6D, 6B, 66 236B+C, 22C (379+, Mid)
236D~A->C, 236C->A->A ...
236D~A->2C, 214B, 22C (227, Mid)
236D~A->2C, 6B, ... (Corner)
Basic high/low mixups with assist coverage.
214B/C, 6D, 6B, 66, ...
4Throw~3D, 214B, 2[6]2C (284)
4Throw~3D, 236B+C ... (~364)
Juliet
... 6B, 5C~3D, 66, 6B, 236B->A->B (~337+, Corner)
... 6B, 5C~3D, 66, 6B, 5C~3D, 66, 6B, 236B->A->B (~415+, Corner)
Easy and safe combos off a wallbounce. Sets up from almost anything in the corner.
... 6B, 5C~3D, j.6A, 6B, 22C (~368+, Corner)
... 6B, 5C~3D, j.6A, 6B, 5C~3D, j.6A, 6B, 22C (~439+, Corner)
Stronger but slightly harder.
... 6B, 2D, 6B, 22C (~431+, Corner)
Very strong but somewhat finicky on spacing.
5A+5D 5B, 66, 5B, 236A->A->A, 6B ...
5A+5D 5B, 66, 5A+5D 5B, 66, 5B, 236A->A->A, 6B ...
Corner loop. Good for pressure too.
236A->A->A+3D, 214B, 2[6]2C (308, Mid)
236A->A->A, 6B~6D, 6B, 22C (399, Corner)
236A->A->A, 6B ... (Corner)
(236A->A/B)->C, 3D~2C, 6B, 236B->A->B (360, Corner)
(236A->A/B)->C, 3D~2C, 6B ... (360, Corner)
236D~B->C, 22A (252, Overhead)
236D~B->2C, 22A (243, Low)
(Knockdown) 6D, 6, 6B (cross over), 22C (270, Crossup)
Works as a basic mixup set off a knockdown or otherwise.
214B/C, 3D, 214B, 2[6]2C (275, Mid)
214B/C, 6B ... (Corner)
22D~C (284)
... 236B+C, 22D~A (301)
6Throw~6D (245)
4Throw~2D (275)
Input is somewhat strict, have to input the assist somewhat late after inputting the throw.
Kanae
3D, 236B->A->B (137)
3D, 6B ... (Corner)
2D, 66, 236B->A->B
2D, 66, 236B->B->C, 22C (383)
Cross under combos, mid screen only. Don't work on some at all (Lilith).
2D, 66, 236B->B->A, j.B j.C (321)
Cross under combo, works on anyone? Pause between each hit of the rekkas.
236A->A->A, 5D~6B, 6B, 22C (323, Corner)
236A->A->A~2D, 6B, 66 236B->A->B (304, Mid)
236A->A->A~2D, 6B, 66, 6B ... (350+, Near Corner)
236A->A->A~2D, 6B, 66, 236B->B->C, 22C (383)
236A->A->A~2D, 6B, 66, 236B->B->A, j.B j.C (367)
Cross under combos.
2D~22B, 66, 236B->A->B (274)
2D~22B, 66, ... (Cross Under Combos) (385+)
... 6B, 2D, 5C, 6B ...
Somewhat out of the corner. Tricky but big damage. Works off other stuff too.
6Throw+6D, 22C (225)
Only works at Mid, Kanae must be close.
Frame Data
| Move | Start-up | Duration | Recovery | Total | On Hit | On Block |
|---|---|---|---|---|---|---|
| 44 | - | - | - | 53 | - | - |
| Jump | 4 | - | 3 | - | - | - |
| Reflect | 1 | 9 | 29 | 39 | - | - |
| Throw | 7 | 1 | 28 | 36 | Down | - |
| 5A | 5 | 3 | 14 | 22 | 0 | 0 |
| 5B | 13 | 3 | 18 | 34 | +15 | +9 |
| 5C | 16 | 3 | 23 | 42 | +4 | +4 |
| 2A | 4 | 3 | 12 | 19 | +9 | +9 |
| 2B | 3 | 6 | 12 | 21 | +8 | +8 |
| 2C | 3 | 4 | 27 | 34 | Down | -4 |
| j.A | 2 | 30 | 3 | - | [27] | [30] |
| j.B | 8 | 13 | 6 | - | [36] | [36] |
| (j.B) +j.C | 13 | 4 | 8 | - | [35] | [35] |
| j.C | 10 | 4 | 4 | - | [45] | [34] |
| 6A | 7 | 4 | 24 | 35 | -3 | -12 |
| 6B | 23 | 3 | 29 | 55 | Down | +1 |
| 3B | 17 | 12 | 25 | 54 | -9 | -9 |
| j.6A | 18 | 7 | 16 | - | Down | [51] |
| 22A | 2 | 19 | 64 | 85 | Down | -54 |
| 22B | 9 | 20 | 67 | 96 | Down | -58 |
| 22C | 5 | 23 | 69 | 97 | Down | -61 |
| 214A (Dash) | - | - | - | 74 | - | - |
| 214A (Attack) | 59 | 3 | 38 | 100 | +20 | +4 |
| 214B | 19 | 29 | 32 | 80 | Down | -2 |
| 214C | 19 | 32 | 35 | 86 | Down | -11 |
| 236A | 11 | 3 | 38 | 52 | -3 | -3 |
| 236B | 20 | 3 | 38 | 61 | -3 | -3 |
| 236C | 28 | 3 | 38 | 69 | -3 | -3 |
| (236X) +A | 25 | 3 | 37 | 65 | -14 | -7 |
| (236X +A) +A | 21 | 3 | 30 | 54 | Down | -1 |
| (236X +A) +B | 22 | 15 | 67 | 104 | Down | -53 |
| (236X) +B | 35 | 2 | 44 | 81 | -10 | -14 |
| (236X +B) +A | 32 | 4 | 24 | 60 | Down | -4 |
| (236X +B) +B | 29 | 22 | 67 | 118 | Down | -47 |
| (236X) +C | 43 | 3 | 25 | 71 | +6 | [1] -3 |
| (236X) +2C | 36 | 16 | 12 | 64 | Down | 0 |
| (236X +X) +C | 43 | 3 | 33 | 79 | [2] Down |
[3] -7 |
| (236X +X) +66 | - | - | - | 61 | -38 | -32 |
| 236BC: 1st Hit 2nd Hit |
13 26 |
2 5 |
27 | 73 | Down | 0 |


