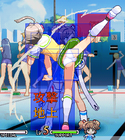
Vanguard Princess/Kurumi Mirumati
Profile
Kurumi Mirumati appeared in the wreckage of a plane crash without any answers as to how or why. She lacks basic fighting skills, but is said to hold a massive amount of hidden power.
Kurumi fights in support of the assist characters.
Base Health: 900
Guts Threshold: 40%
Guts Factor: 33.3%
Total Effective Health: 1020
Move List
Note: Kurumi's assist meter will freeze if she is a fullscreen away from the opponent and has at least 4 levels except when in the corner. Kurumi will need to move forward to restart assist meter regen. Returning to neutral, neutral jumping, and performing most attacks in place will not restart the assist meter regen.
Movement
66: Short dash.
44: Short back hop.
Throws
| 6C/4C | |||
|---|---|---|---|

|
Guard | Air Guard | Support |
| Throw | - | No | |
| Damage | Hit / Counter Hit | Counter Scale | |
| 110 | Knockdown | +0% | |
| Kurumi grabs the opponent and slams them into the ground and rolls over to the other side. | |||
Normal Moves
| 5A | |||
|---|---|---|---|

|
Guard | Air Guard | Support |
| High | No | Yes | |
| Damage | Hit / Counter Hit | Counter Scale | |
| 5 | - / Increased Hitstun | +20% | |
| Standard standing jab. Can chain into her 2A, 6A, 5B, 5C or 2C. | |||
| 5C | |||
|---|---|---|---|

|
Guard | Air Guard | Support |
| High | No | Yes | |
| Damage | Hit / Counter Hit | Counter Scale | |
| 80 | - / Butt Plant | +20% | |
| High spin kick, useful as an anti-air but not so great for footsies. | |||
| 2A | |||
|---|---|---|---|

|
Guard | Air Guard | Support |
| Mid | Yes | Yes | |
| Damage | Hit / Counter Hit | Counter Scale | |
| 5 | - / Increased Hitstun | +0% | |
| Same as 5A. Can chain into itself. Doesn't hit low. | |||
| 2B | |||
|---|---|---|---|

|
Guard | Air Guard | Support |
| Low | - | Yes | |
| Damage | Hit / Counter Hit | Counter Scale | |
| 36 | - / Butt Plant | +20% | |
| Throws out a mid range kick on her knees. Good for footsies. | |||
| 2C | |||
|---|---|---|---|

|
Guard | Air Guard | Support |
| Low | - | Yes | |
| Damage | Hit / Counter Hit | Counter Scale | |
| 60 | Knockdown | +20% | |
| Sliding kick, has a bit of startup and recovery. Not too great outside of chaining from 5B. | |||
| j.B | |||
|---|---|---|---|

|
Guard | Air Guard | Support |
| High | Yes | Yes | |
| Damage | Hit / Counter Hit | Counter Scale | |
| 55 | - / Increased Hitstun | +15% | |
| Aerial punch angled 45 degrees downward. Jump in of choice, and has active frames. | |||
Command Normals
| 6A | |||
|---|---|---|---|

|
Guard | Air Guard | Support |
| Low | No | Yes | |
| Damage | Hit / Counter Hit | Counter Scale | |
| 35 | - / Increased Hitstun | +20% | |
| Shin kick, can be chained into 5B, 5C, 2C, or 6B. Hits low. | |||
Special Moves
| 22+B with Juliet | |||
|---|---|---|---|

|
Guard | Air Guard | Support |
| Mid | Yes | No | |
| Damage | Hit / Counter Hit | Counter Scale | |
| 181 | Knockdown / Spinning Wall-Bounce | +40% | |
| Juliet will hurl Kurumi at the opponent. (Consumes 2 levels) | |||
Liberty Arts
Strategy
At first Kurumi seems like a flawed character, having only one special move and fairly weak normals. However, her strength lies in the fact that her assist gauge fills very fast up until it hits 4. Kurumi is able to use assists much more frequently than other characters. As well as this, her normals are all very fast and she can chain them together into natural combos which deal substantial damage with only minor support.
Anti Air
5B and 5C are your best friends, especially 5B. When timed correctly 5B will beat out most jump ins if not trade. Opponents should have a real hard time jumping in on Kurumi when you're being cautious of it.
Dead Body Cross Up
Kurumi's 6B can be used to cross up a knocked down opponent. Timing 6B just before the opponent wakes up, you'll land on the opposite side, add assist to make it more effective.
Corner Throw
In the p1 corner. If you throw into the corner then walk back, you will crossup your opponent and be in the corner. if you dont walk back, you wont crossup. Possible 3/4 way mixups. In p2 corner if you throw into the corner, even if you walk back you wont crossup, but if you immediately jump your sprite will looked to have crossed up. A meaty air attack will hit crossup (need verification) and you will land out of the corner even though your sprite was turned around in the air. More 3/4 way mixup possibilities.
Matchups
Yui
Haruka
Lilith
Luna
Kurumi
Saki
Kaede
Natalia
Eri
Ayane
Combos
Note: Kurumi can replace most 6A>5C and 5B>6B enders with 214B+C
Without Assist
6A > 6B / 2C / 5C (10%)
6B will whiff on crouchers and Lilith
6A > 5B > 2C (14%-16%) / 6B (13%-15%)
- 6A combos can start off of 5A if you are really close
j.B > 214BC (30%-38%) / 6A > 5B > 6B (19%-20%) / 2C (18%-20%)
j.C > 214BC (32%-41%) / 6A > 5B > 6B (21%-24%) / 2C (20%-23%)
- The 5B in 6A > 5B combos is optional, but it'll do less damage and it will cause 6B to wiff against Lilith
j.22 > 214BC (30%-40%) / 6A > 6B (16%)
CH 2B > 6A > 6B (13%-15%)
Replace 6B with 5B when against Lilith
CH 5B > 214BC (31%-40%) / 2C (13%-15%) / 6A > 6B (16%-18%)
Against Kurumi walk forward then attack after CH 5B
CH 5C > 214BC (32%-41%) / 6A > 6B (18-20%)
214BC does not work against Kurumi
Corner: j.B > 5B > 214BC (33%-41%)
This combo can be used midscreen against Kurumi only
Corner: j.C > 5B > 214BC (38%-45%)
This combo can be used midscreen if you cross-up with j.C
Corner: 623X > 214BC (36%-45%) / 6A > 6B (21%-23%)
Eko
22B > 623X or 214B+C or walk 6A > 5B > 2C
6A+D > 5B > (6D hits) > 623X
6A+D > 5C > (6D hits) > 6A > 5B > 2C
6A+D > 5C > (6D hits) > 5B > 6B
6A+D > 2C > (6D hits) > 5B > 6B
- Useful against Lilith, who can crouch under 5B.
6A > 2C > 2D > 6A > 5C
j.22 > 6A+D > 6B > 5B > 6B
Corner: 6A~5D~5B > (dash 6A~5D~5B)xN
Corner: 6A > 5B > 2C > 2D > 6A > 5C
Corner: 6A+D > 5B > (6D hits) > 623X > 6A > 6C+D > [6]9 (walk then jump) > j.B > 214B+C
- Harder to do than in previous versions due to increased pushback and 5C possibly being nerfed
Corner: 6A+6D > 5B > (6D hits) > 623X > 6A > 6B > 2D > [6]9 (walk then jump) > j.B > 214B+C
- Alternate version of above combo, tiny bit more damage
Corner: 6A+D > 5B > (6D hits) > 623X > 6A+D > 6B > 6A > 5C
Corner: 6A > 5B > 6D~6B > 6A+D > 5C > (6D hits) j.B > 214B+C
Sierra
6A > 5B~5D > 623X
j.22 > 6D > 6A > 6B > (6D hits) > 5B > 6B
Corner: 6A+D > 5B > 6B > (6D hits) > dash up 5B > 6B
Corner: 623X > 6D > 5A > (6D hits) > 5B > 6B
Corner: 6A > 5B+D > 623X~6D > 2A > j.B > 5C/214B+C
Corner: 6A > 5B+D > 623X~3D > 6B > j.B > 5C/214B+C
Juliet
6A~6D > 5B > 2C > 6D hits
- Can end with 214B+C, 6D needs to be done as late as possible before 5B, 5B>2C needs to be chained immediately
6A > 5B > 2D~2C > (2D hits) > 5C (or 214B+C)
6A > 5B > 3D+2C > (3D hits) > delay 6A > 5C
Corner: CH 22B > 6A > 5C
Corner: 6A > 5B~5D > (5D hits) > j.B > 6A > 5B > 2C+3D > 6A > 5C
- Pretty hard to do, use combo below instead unless you really wish to preserve support meter
Corner: 6A > 5B~3D > (3D hits twice) j.C > 6A > 5B > 2C+3D > 6A > 5C
- Can replace first 5B with 5C for more damage, though you will have to walk a forward a bit during 3D's pushback before jumping into j.C
Kanae
Note: All 623X enders can be replaced with j.B > 5C/214B+C
623X~6D > 6A > 5C
5A+5D > 5B > 2C > 5C
2D > 623X
- Timing for 623X is right when the dog spits them out
2D > 6A > 5B > (2D dog eats/spits) > 2D~623X > (opponent grabbed by dog) > 623X
- Requires nearly full support meter
- Low start
2D~623X > 2D~623X > (2D dog eats/spits) > 623X
- Requires nearly full support meter
- Overhead start
3D > 6A > 5B > 2D > 5B > (2D dog eats/spits) > 6D > dash 5B > (6D ghost hits) > 6A > 5C
- Requires nearly full support meter
- Unfortunately doesn't do much damage for the work put in it (even ending with Liberty Art still does only about 49%) but it at least lands a free ghost and looks cool
6A+6D > 5B > 2C > 3D > 623X
- This is a reset. On wakeup, the opponent will be forced to take either the ghost or the manhole either way. Some characters can escape the follow up by doing a backdash but will still be tagged by the ghost.
Hilda
3D > 5B > 6B
j.22 > 2D > 6A > 6B > 5B > 6B
Corner: j.22~5D > 6A > 6B > (5D hits) > 214B+C
Corner: 623X > delayed 5D > 6A > 6B > (5D hits) > 214B+C
Frame Data
| Move | Start-up | Duration | Recovery | Total | On Hit | On Block |
|---|---|---|---|---|---|---|
| 66 | - | - | - | 34 | - | - |
| 44 | - | - | - | 32 | - | - |
| Jump | 7 | - | 3 | - | - | - |
| Reflect | 1 | 10 | 29 | 40 | - | - |
| Throw | 8 | 1 | 31 | 40 | Down | - |
| 5A | 7 | 4 | 21 | 32 | -3 | -4 |
| 5B | 11 | 5 | 22 | 38 | +9 | +4 |
| 5C | 13 | 7 | 25 | 45 | +1 | -6 |
| 2A | 9 | 2 | 15 | 26 | -1 | -1 |
| 2B | 9 | 5 | 20 | 34 | +4 | +3 |
| 2C | 26 | 19 | 32 | 77 | Down | -21 |
| j.A | 1 | Landing | 7 | - | [29] | [32] |
| j.B | 14 | 24 | 9 | - | [35] | [44] |
| j.C | 12 | 12 | 9 | - | [47] | [38] |
| 6A | 5 | 5 | 22 | 32 | -7 | -8 |
| 6B | 24 | 7 | 30 | 61 | +14 | -7 |
| 623X | 34 | 9 | 36 | 79 | Down | -12 |
| 214C | - | - | - | 73 | - | - |
| j.22 | Landing | 5 | 45 | - | Down | -22 |
| Eko 22B: 1st Hit 2nd Hit |
10 52 |
4 9 |
26 | 101 | +48 +33 |
-12 -8 |
| Jul. 22B | 34 | 17 | 58 | 109 | Down | -85 |
| Sie. 22B[1] | 44 (+32) | 17 | 32 | 125 | Down | -22 |
| Kan. 214B | 13 | 1 | 32 | 46 | 0 | - |
| 214BC | 1 | 6 | 43 | 50 | Down | -17 |
| 236BC | 22 | 120 | 49 | 191 | Down | -25 |
- ↑ Assumes default slide kick. There are 44 frames until Sierra lets go and 32 frames after that until the slide comes out.


