Vanguard Princess/Luna Himeki
Profile
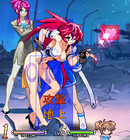
Luna is a former member of the Special Forces "Blade Noa". Currently, she is a renowned bounty hunter in the underground community. After obtaining information about a large bounty, she heads to the battlefield ...
Base Health: 1000
Guts Threshold: 40%
Guts Factor: 25%
Total Effective Health: 1100
Neutral Stance
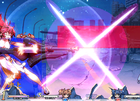
Note: Last Shooting does half the damage a regular horizontal bullet does, but it is unblockable and causes knockdown on hit. You have only two of these bullets per round.
Normals
| 5A | |||
|---|---|---|---|

|
Guard | Air Guard | Support |
| Low | No | Yes | |
| Damage | Hit / Counter Hit | Counter Scale | |
| 25 | - / Increased Hitstun | +20% | |
| Quick shin kick. | |||
| 5C | |||
|---|---|---|---|
|
Guard | Air Guard | Support |
| Mid | No | Yes | |
| Damage | Hit / Counter Hit | Counter Scale | |
| 84 | - / Butt Plant | +20% | |
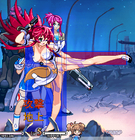
| Long range side kick attack, good long range poke. Will whiff against crouchers (except Luna). | |||
| 2A | |||
|---|---|---|---|
|
Guard | Air Guard | Support |
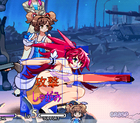
| Low | No | Yes | |
| Damage | Hit / Counter Hit | Counter Scale | |
| 25 | - / Increased Hitstun | +20% | |
| Quick low kick, fast but very weak. | |||
| 2B | |||
|---|---|---|---|

|
Guard | Air Guard | Support |
| Low | No | Yes | |
| Damage | Hit / Counter Hit | Counter Scale | |
| 51 | - / Butt Plant | +20% | |
| Moves forward a little in a slide kick. Slow but good range. | |||
| 2C | |||
|---|---|---|---|
|
Guard | Air Guard | Support |
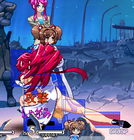
| Low | No | Yes | |
| Damage | Hit / Counter Hit | Counter Scale | |
| 90 | Knockdown | +20% | |
| Long range sweep, her longest range low normal. | |||
| j.A | |||
|---|---|---|---|
|
Guard | Air Guard | Support |
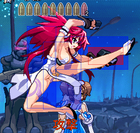
| High | Yes | Yes | |
| Damage | Hit / Counter Hit | Counter Scale | |
| 25 | - / Increased Hitstun | +20% | |
| Fast upward kick, her fastest air normal. Causes knockdown on aerial counterhit. | |||
| j.C | |||
|---|---|---|---|
|
Guard | Air Guard | Support |
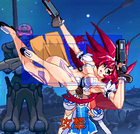
| High | Yes | Yes | |
| Damage | Hit / Counter Hit | Counter Scale | |
| 112 | - / Increased Hitstun | +20% | |
| Elbow drop with the forward arm. Causes knockdown on aerial counterhit. | |||
Command Normals
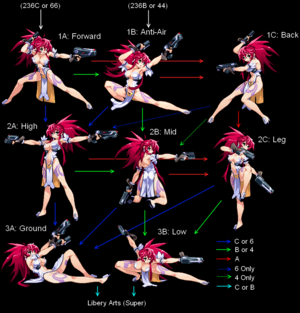
66: Goes into stance 1A
44: Goes into stance 1B
Special Moves
| 236+C: Revolver Method: First | |||
|---|---|---|---|
 
|
Guard | Air Guard | Support |
| Mid | Yes | Yes | |
| Damage | Hit / Counter Hit | Counter Scale | |
| 52 (SS 100) | - / - | +20% | |
| Spins forward into stance 1A and fires once with her forward gun. One hit, goes into stance 1A. If you do the command quickly, there is a shot at head height first before she switches to stance, SPEED SHOOTING appears under her health bar. | |||
| 236+B: Revolver Method: Second | |||
|---|---|---|---|
|
Guard | Air Guard | Support |
| Mid | Yes | Yes | |
| Damage | Hit / Counter Hit | Counter Scale | |
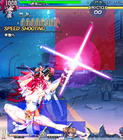
| 47 * n (SS 170) | - / - | +20% | |
| Spins backwards and shoots upwards with both guns at a 45 degree angle. Four shots, goes into stance 1B. If you do the command quickly, the hits come out faster without the spin, Luna gets upper body invulnerability, and SPEED SHOOTING appears under her health bar. | |||
Shortcuts
A+C: Shortcut to 236B. No speed shooting.
B+C: Shortcut to 236C. No speed shooting.
A+B+C: Shortcut to 63214C. No speed shooting.
Stances
Common Moves
Reload
Pressing 8 during any stance causes Luna to cancel the stance and reload a number of bullets. The number of bullets returned depends on the stance:
1: Forward (1A), Anti-Air (1B)
2: Back (1C), High (2A), Mid (2B), Ground (3A)
3: Leg (2C), Low (3B)
Reloading in this way is also Luna's primary way to build Super Meter. How much meter you build depends on which stance you Reload from, similar to the number of bullets you reload.
Stance Shift
By pressing 4 or 6 during any stance, except for Ground (3A) or Low (3B), Luna will switch to another stance without firing any bullets. Doing so will build a small amount of super meter instead.
The stance you switch to follows the same as the B/C buttons:
6: Switches to the same stance the C button would.
4: Switches to the same stance the B button would.
Note: You can still Stance Shift during Back stance, even though B/C do not switch stances as normal.
Stance Cancel
During any stance (except for Back), you can use a Reflect (A+B/E) to return yourself to Neutral quickly. Doing so won't build any Super Meter or restore bullets like the Reload will, but it is very fast.
1A - Forward Stance
Leaning forward, aiming straight. (66/236C/B+C)
A: Rushes forwards 1/2 screen distance and hits the opponent with her shoulder. Hits once. Causes launch. Goes into stance 1C.
B: Moves back and fires both guns upwards at a 45 degree angle. Hits four times. Goes into stance 1B.
C: Points one arm in each direction and fires both guns. Hits once. Goes into stance 2A.
6/4+C: Dashing throw. Can't be comboed after. 85 damage. Causes knockdown. Returns you to Neutral.
4: Goes into stance 1B.
6: Goes into stance 2A.
8: Reloads one bullet. Returns you to Neutral.
1B - Anti-Air Stance
Leaning back, aiming up. (44/236B/A+C)
A: Rushes forwards 1/2 screen distance and hits the opponent with her shoulder. Hits once. Causes launch. Goes into stance 1C.
B: Assumes a kneeling position and fires once. Shoots at mid body height. Goes into stance 2B.
C: Points one arm in each direction and fires both guns. Hits once. Goes into stance 2A.
6/4+C: Dashing throw. Can't be comboed after. 85 damage. Causes knockdown. Returns you to Neutral.
6: Goes into stance 2A.
4: Goes into stance 2B.
8: Reloads one bullet. Returns you to Neutral.
1C - Back Stance
Back turned to opponent.
A: Moves forward in a spinning leaping kick with the forward leg (similar in appearance to Neutral 6B). Overhead. Opponent can tech quickly in the corner. Goes into stance 2C.
B: Fires horizontally once with the rear gun. Hits once. Stays in stance. Extremely weak and almost useless.
C: Fires upwards diagonally once, then jumps and spins away from the opponent and fires downwards diagonally four times. Hits five times total, moves Luna backwards, NOT an overhead. Very strong, good to finish combos. Returns you to Neutral.
2A: Spinning forwards sweep. Great range, hits low and knocks down. Returns you to Neutral.
6: Goes into stance 2A.
4: Goes into stance 2B.
8: Reloads two bullets. Returns you to Neutral.
2A - High Stance
Standing up, aiming both sides.
A: Moves forward in a spinning leaping kick with the forward leg (similar in appearance to Neutral 6B). Overhead. Goes into stance 2C.
B: Assumes a kneeling position and fires once. Hits mid body height. Goes into stance 2B.
C: Rolls forwards onto her back and shoots upwards at a 45 degree angle. Hits twice. Goes into stance 3A.
6/4+C: Dashing throw. Can't be comboed after. 85 damage. Causes knockdown. Returns you to Neutral.
6: Goes into stance 3A.
4: Goes into stance 2B.
8: Reloads two bullets. Returns you to Neutral.
2B - Mid Stance
Kneeling, aiming forward.
A: Moves forward in a spinning leaping kick with the forward leg (similar in appearance to Neutral 6B). Overhead. Opponent can tech quickly in the corner. Goes into stance 2C.
B: Spins into a crouching stance and fires once. Hits very low to the ground (but not a low hit). Goes into stance 3B.
C: Rolls forwards onto her back and shoots upwards at a 45 degree angle. Hits twice. Goes into stance 3A.
6/4+C: Dashing throw. Can't be comboed after. 85 damage. Causes knockdown. Returns you to Neutral.
6: Goes into stance 3A.
4: Goes into stance 3B.
8: Reloads two bullets. Returns you to Neutral.
2C - Leg Stance
Standing on one leg.
A: Two upwards kicks, same in appearance as j.B. Very fast, and causes very long untechable time so can be comboed after easily. Returns you to Neutral.
B: Spins into a crouching stance and fires once. Hits very low to the ground (but not a low hit). Goes into stance 3B.
C: Rolls forwards onto her back and shoots upwards at a 45 degree angle. Hits twice. Goes into stance 3A.
6/4+C: Dashing throw. Can't be comboed after. 85 damage. Causes knockdown. Returns you to Neutral.
6: Goes into stance 3A.
4: Goes into stance 3B.
8: Reloads three bullets. Returns you to Neutral.
3A - Ground Stance
Laying down, aiming up.
A: Returns you to Neutral.
B or C: Terminal Emission
6: Returns you to Neutral.
4: Returns you to Neutral.
8: Reloads two bullets. Returns you to Neutral.
3B - Low Stance
Spread eagle, aiming low.
A: Two upwards kicks, same in appearance as j.B. Very fast, and causes very long untechable time so can be comboed after easily. Returns you to Neutral.
B or C: Terminal Emission
6: Returns you to Neutral.
4: Returns you to Neutral.
8: Reloads three bullets. Returns you to Neutral.
Liberty Arts
| (While in a tier 3 stance) B or C: Terminal Emission | |||
|---|---|---|---|
|
Guard | Air Guard | Support |
| High | Yes | Yes | |
| Damage | Hit / Counter Hit | Counter Scale | |
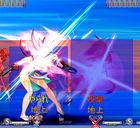
| 98 * n (7Hits 393) | Knockdown | +20% | |
| Rushes forward past opponent. Starts firing once past opponent, for a total of 7 hits. Can be hit out of the move with a projectile during the rush. Must switch blocking direction to successfully block. Reloads two bullets. Goes into Neutral. | |||
Stance Attacks
| A: Into 1C | |||
|---|---|---|---|
|
Guard | Air Guard | Support |
| Mid | No | No | |
| Damage | Hit / Counter Hit | Counter Scale | |
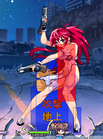
| 126 | Launch | +20% | |
| Back Rush: Luna quickly slams her back into the opponent. Can be used to catch those who dash in after proxying Luna's bullets. It is still a terrible move outside of combos though. | |||
| C: From 1C | |||
|---|---|---|---|
|
Guard | Air Guard | Support |
| Mid | Yes | Yes | |
| Damage | Hit / Counter Hit | Counter Scale | |
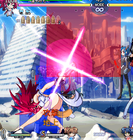
| 45 * n (5Hits 201) | - / - | +20% | |
| First hit whiffs crouchers. If the last hit lands, it is possible to followup with 236C(s). | |||
| 2A: From 1C | |||
|---|---|---|---|
|
Guard | Air Guard | Support |
| Low | - | Yes | |
| Damage | Hit / Counter Hit | Counter Scale | |
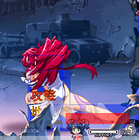
| 90 | Knockdown | +20% | |
| Probably your best option after a blocked Back Rush as you can't Reflect Cancel the Back Stance. | |||
| A: Into 2C | |||
|---|---|---|---|

|
Guard | Air Guard | Support |
| High | Yes | No | |
| Damage | Hit / Counter Hit | Counter Scale | |
| 84 | - / Butt Plant | +20% | |
| Very much like 6B. Can crossup and not hit when really close and the opponent is crouching. | |||
| A: From 2C/3B | |||
|---|---|---|---|
|
Guard | Air Guard | Support |
| Mid | Yes | Yes | |
| Damage | Hit / Counter Hit | Counter Scale | |
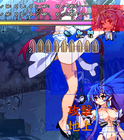
| 106 +84 (2Hits 168) | Launch | +20% | |
| Whiffs crouchers. | |||
| B: Into 2B | |||
|---|---|---|---|
|
Guard | Air Guard | Support |
| Mid | Yes | No | |
| Damage | Hit / Counter Hit | Counter Scale | |
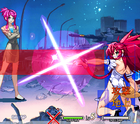
| 52 | - / - | +20% | |
| Moves Luna backwards. | |||
| B: Into 3B | |||
|---|---|---|---|
|
Guard | Air Guard | Support |
| Mid | Yes | Yes | |
| Damage | Hit / Counter Hit | Counter Scale | |
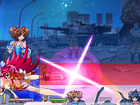
| 52 | - / - | +20% | |
| Moves Luna backwards. | |||
| C: Into 2A | |||
|---|---|---|---|

|
Guard | Air Guard | Support |
| High | Yes | No | |
| Damage | Hit / Counter Hit | Counter Scale | |
| 60 | - / - | +20% | |
| Whiffs crouchers and standing Lilith. | |||
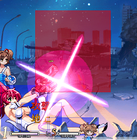
| C: Into 3A | |||
|---|---|---|---|
|
Guard | Air Guard | Support |
| Mid | Yes | No | |
| Damage | Hit / Counter Hit | Counter Scale | |
| 47 * n (3Hits 113) | - / - | +30% | |
| Juggles aerial opponents. | |||
Strategy
Luna has access to fast, full-screen projectiles that do good damage and some chip damage. She can also use her assist at almost any time. 236C > C > B > B is going to be your BnB. All shots are horizontal and Luna moves backwards at the same time. 236B > B > B is useful in keeping Luna low to the ground and hitting crouchers quickly which helps against Ayane, Kaede, and Lilith. If the opponent is fairly close, you can occasionally use Luna's throw as a mixup, though you will usually have to create a setup for it to catch, as it is easy to beat with most normals. Blast Rain should be used sparingly, but it can help against opponents who rush-in since it evades low attacks, mid attacks, and throws. Gun Port Roar is somewhat questionable in usage outside of combos since it can just be ducked or proxy guarded, but it can be useful to force the opponent to keep their head down while Luna gets a small reload. The non speed shooting version is pretty terrible overall, but the speed shooting version is fairly decent due to the fast speed.
Her super does good damage and chip, but it requires one bullet, to be in a final stance, and it can be proxy guarded. The super is lightning fast so you can bait pokes with it. However, if you throw the super out at random, a smart opponent will simply proxy guard it and then punish you, so be careful how you use it. The super is also great for ending short combos.
Luna builds Super meter primarily by doing Stance Switching, and Reloading from a stance. Shooting bullets does not refill meter very fast. If for one reason or another you have some spare time with Luna (say, after a long range knockdown), you can do some empty Stance Switching and Reloading to build super meter and reload bullets.
Her bullets can be proxy guarded, so blindly firing will not get you anywhere. You will want to reload by hitting 8 mid-stance most of the time. Note that hitting 8 will likely not reload all of the bullets used, so use Charm Bullet when the opportunity presents itself. Mix up Luna's stances and how many bullets you fire before reloading so your opponent can't take advantage of the "holes" in your shooting strings.
Without any bullets, Luna becomes a huge target. 5B and 5C both whiff crouchers. 5A and 2A are fast, but do not have much more range than others' A button attacks. 5B and j.A will be the closest you have to an anti-air. You are going to need to land a 2C, 6B, or a counterhit to buy enough time to reload with a Charm Bullet. Using your assist defensively to buy some time is also very helpful. The best strategy is to just avoid running out of bullets in the first place!
Matchups
Yui
Haruka
Lilith: Don't let Lilith get in. This is not as easy as it sounds since Lilith is a short character who can only be combo'd with bullets at close range (which is, of course, bad). Lilith's sliding headbutt and Brainbuster go under 236C(s), and Face Crusher is quick and works on Luna even when she's crouching. So it's better to use 236B(s) > B > B/C as often as you can to keep Lilith out. Even if Lilith blocks the bullets, she will be pushed away. Her options at fullscreen are limited to a few assist attacks that are easily proxy guarded. At close range, Lilith is a nightmare for Luna. Her 2A and 360 throw makes staying on the ground bad, but her 2C and air Stunner makes staying in the air not good either. Luna's 5A is a decent poke here to interrupt some throw attempts since it's so fast. 6B is also good to evade throws but can be hit by Lilith's 5B and lead to a 2C counterhit to air Stunner. If you can land a counterhit follow it up with 2C to give you a chance to put some distance between you two.
Luna
Kurumi
Saki
Kaede
Natalia: Luna's worst nightmare. Natalia auto-parries one projectile/assist hit. Now, you could throw out your assist and shoot, but it is likely Natalia will use Sierra's 6D to take your assist out of the equation. You could try to parry, but Natalia can pile cancel and go for a high pilecharge, low pilecharge, or command throw. Blast Rain can help some, but it's not a game-changer. Rely more on Luna's normals to stop the pilecharge approaches and take advantage of whatever mistakes Natalia makes.
Eri
Ayane: Overall disadvantage. Unlike the rest of the cast, Ayane has a fullscreen game that nearly equals Luna's with her arrows. A single arrow will lead to an arrow juggle for 30+% and a hard knockdown. So getting hit by one lets Ayane get in for free. Ayane's normals are pretty good, though not that damaging, but will serve her well in keeping you off guard until she gets her command throw in for more arrow juggling. Stay crouching and use 236B(s) > B > B as you BnB here, but be careful with it as there are times when switching stances where Luna can be hit by an arrow. Ayane can 4D during her arrow, so Luna has a hard time hitting her. Additionally, all of Luna's reloading methods cause her to stand, and can give Ayane enough time to hit Luna with an arrow even if you managed to shoot her. Gun Port Roar can duck under arrows, but the timing is tight and does not necessary mean that Gun Port Roar will hit. This matchup really requires you to take advantage of Ayane's mistakes. Go for whatever chip damage you can as well.
Combos
All damage listed is against Yui. Damage may alter slightly against other characters.
236B(s): Nickname for Speed Shooting version of 236B.
236C(s): Nickname for Speed Shooting version of 236C.
63214C(s): Nickname for Speed Shooting version of 63214C.
Back Rush: Nickname for switch into Back Stance.
Hop Kick: Nickname for switch into Leg Stance.
Combos marked with a * require a Super.
General Combo Strategy
If you currently have a full Super Meter, your best bet for combos is almost always to find the shortest combo into the Super. The Super does less and less damage the later into the combo it is used, and as a result, even squeezing in a single extra shot before the super often leads to you getting less damage.
Failing having a Super ready, your best bet for damage is to combo into the Back Rush. Unfortunately, the hitbox on this move is fairly finicky, so proper spacing is needed to land it. If you fail to space it correctly, you may cross under the opponent, or miss entirely. This can be especially difficult in the corner. In addition, you only get the strongest combos from Back Rush near the corner, where you can fully land the C followup. You should only rarely use the B followup to the Back Rush, and this is only in the case where it will allow you to combo into the C followup where you otherwise could not.
Comboing into the Hop Kick (switch into Leg Stance) can be useful at mid screen. If the opponent reaches the corner from this move, they will tech out extremely quickly, making additional hits impossible. For combos that require Back Rush into Hop Kick, you will need a very large amount of space from the corner to get the full combo.
Failing combos into Super or Back Rush, your next best bet is generally to just combo as many shots as you can get, and Reload to build super meter. Alternatively, if you need bullets more than Super Meter, you can Stance Cancel and do a manual reload with Charm Bullet.
Many Launchers (like Eko 2D or 3D) give you the change to start into juggles with 6B before continuing into a Speed Shooting combo. Doing so generally increases the damage of the combo by a little. However, using 6B like this causes you to become much closer to the opponent. This can make it much harder to land the Back Rush. You can adjust for being too close by using 236B instead of 236B(s). It's probably better just to juggle into 63214(s). Get a feel for how these combos behave so you can maximize damage.
As a rule of thumb, 236B(s) does more damage than 236C(s), but it damage scales worse. Generally, 236C(s) will provide you better damage if you plan to combo into the Super, and 236B will give you better damage otherwise. Be aware of course that 236C moves you forward, instead of backwards like 236B.
Without Assist
Reflect Loop:
236C(s)->C~E->236C(s)->C~E ...
Only works on an aerial opponent. Can be used to add a bit more damage to some combos and stall to allow for your assist meter to regen.
CH 5B, 2C (137)
AA CH 5B, 236C(s) ...
Counterhit 5B gives you plenty enough time to combo into 236C(s). Very useful as Anti-Air.
AA 421A, 236C(s) ...
Can combo off this special the same as the stance version.
Possible to combo off this VS a standing opponent, but very situational and difficult.
AA 6B, 236B/C(s) ...
... 6B, 236B/C(s) ...
Get slightly more damage from juggles by starting with 6B before speed shooting.
Pushes you closer though, so harder to land Back Rush combos.
Generally more useful when comboing into super and less useful when not.
... 6B, 63214C(s)
236C->C->B->B (232)
236C->C->B->B->B/C (478, Near Corner)*
These don't hit crouching characters. Doesn't work on standing Lilith either. Works VS air.
236C(s)->C->B->C (205, Close)
236C(s)->B->A->A->B (322, Mid)
236C(s)->B->A->C (~340, Corner)
236C(s)->C->C->B/C (406)*
Combos from any launcher, or as Anti-Air.
236B(s)->C->C (211)
236B(s)->C->C->B/C (360)*
236B(s)->C->B->C (226, Close)
236B(s)->C->A->B (242, Close, Mid)
236B(s)->A->C ... (241~315, Far)
236B(s)->A->A->B (265, Far, Mid)
Combos from any launcher, or as Anti-Air.
Most combos can be started from 236C(s) as well, depending on spacing.
Also: In some situations it's easier to start from 236B without speed shooting, if you are comboing to A after.
236B(s)->A->A->B (350, Mid)
236B(s)->A->C (385, Corner)
Combos VS a Standing opponent only.
(Leg)->A, j.A (196, Far, Mid)
(Leg)->A, 236B(s) ... (302-415, Close)
Leg stance combos
... Back Rush->C, 236C(s)->C->B->B->8
Gets very poor damage at the end of long combos, but can be used to finish short ones and build super meter.
Works at mid screen on some characters if they are low enough to the ground, making it a better way to end combos than the ->A->B alternative. Squeezes out an extra ~50 damage or so at the expense of more bullets.
... Back Rush->B->C, 236C(s)->C->B->B->8
Works on other characters (like Lilith) at mid screen that the above combo does not, but does slightly less damage. Again, they have to be very low to the ground, usually off a Back Rush vs standing.
Eko
5B~6D, 236B/C(s) ...
Works VS standing or always on CH.
6D~6B, 2C (213)
6D~2B, 236B(s)->A->A->B (379, Mid)
6D~2B, 236B(s)->A->C (398, Corner)
6D~2B, 236B(s)->C->C->B/C (409)*
Only work VS standing
6D~2C, 236C(s)->C->B->C (281)
6D~2C, 236C(s)->C->A->B (297, Mid)
6D~2C, 236C(s)->C->C->B/C (415)*
6D~2C, 236B(s)->A->A->B (351, Mid)
6D~2C, 236B(s)->A->C (353, Corner)
6D~2C, 236C(s)->B->A->A->B (357, Mid)
6D~2C, 236C(s)->B->A->C (370, Corner)
2C, 2D, 236C(s)->B->A ...
(Leg)->A, j.B, 2D, 6B, 236B->A->C (~443, Corner)
Leg stance combo, don't need to do speed shooting to connect.
(Back)->2A, 2D, 236B(s) ...
Need to be fairly close for 2D to connect.
Back Rush->3D~A->C->B/C (500+)
Back Rush->3D,A->A,2D, 6B, 236B(s)->C->B->B->8 (~494, Close)
Corner extended combos.
63214C(s), 6D, 236C(s)->C->C->B/C (605, Corner)*
... 6B, (Reflect Loop), 236C(s)->C->C->6D, 6B, 63214C(s) (~450)
6D might need to be delayed slightly if juggled high. Luna is put in a bad position if 63214C(s) misses, so use 6B as a way of hitconfirming the 6D.
... (5C~2D, 6B)*1~2, 236B ... (Corner)
Gets slightly more damage off a launcher in the corner. Expensive though.
... Super, 6D, 63214C(s)
Depends on Eko's position. Use 6D after the opponent starts falling to the ground, except when hit very low to the ground.
Sierra
2D/6D, 6B, 236B/C(s) ...
2D/6D, 2B, 236B/C(s) ...
2B~5D, 2C (150)
2B~5D, 236C(s)->C->B->B (262)
236C(s)~6D, C, E, (6D hits), 63214C(s) (~400)
236B(s)~6D, B/C, E, (6D hits), 63214C(s) (~400)
For these two, the B/C will need to be delayed slightly to increase the length the opponent is in hitstun. Otherwise, the opponent will be able to block the 6D.
... Back Rush->6D,A->A+B, 236C(s)->C->B->B->8 (~356, Mid)
... Back Rush->C, 2D, 63214(s) (~533, Corner)
... Super, 3D, 63214C(s)
Very situational. It isn't too likely to hit, so avoid using it if you need the meter.
Juliet
5D~2B, 236C(s)->C->B->B
3D+2C, 6B, 236B(s)->A ...
3D+2C, 6B, 236C(s)->C->C->B/C (464)
6D~6B, 236B(s)->A->A->B (386, Mid)
6D~6B, 236B(s)->A->C (410, Corner)
6D~6B, 236B/C(s)->C->C->B/C (486)
6D~2B/2C, 236C(s)->C ... (311~451)
2B is easier to combo off of, but has less range and damage.
6D~421A, 236B(s)->A ... (341+)
6D~421A, 236C(s)->C->C->B/C (387)
Nasty crossup setup combos.
... Back Rush->C~2D, 236C(s) ...
... Back Rush->3D~A (whiff)->C->B/C (Corner)
... Super~2D
Gets a little extra damage off a super.
Kanae
2D/3D, 6B, 236C(s)->C->C->B/C (407)
2D/3D, 6B, 236C(s)->A ...
Back Rush->6D~A->C->B/C (522, Corner)
Back Rush->C~6D, 236C->C->B->B (408, Corner)
63214C, 2D, 236C(s)->C->B->B (478)
63214C, 2D, 63214C(s) (586)
63214C, 2D, 236C->C->C->B/C (648)
Hilda
5D, 6B, 2C (211)
5D, 2C, 236C(s) ... (290~357)
2D, 6B, 6B, 236B/C ... (390~417)
2D, 2C, 6B, 236B/C ... (394~407)
2D, 421A, 236C(s) ... (264~303, Crossup)
6D~6B, 236B/C ...
3D~2C, 6B ...
... 6B, 3D~5D, 63214C(s) (~550)
Huge damage but difficult to land. Can be done off any 6B that floor bounces.
... 6B, (3D~5C, 6B)*1~2, 236B/C or 5B/5C... (490~520)
Loops off a 6B floor bounce combo. Works even at mid screen with some difficult spacing and timing.
... 6B, 63214(s), 2D, 236C(s) ...
... 6B, (Reflect Loop), 236C(s)->C->C->3D->6, 6B, 63214C(s)
... 6B, (Reflect Loop), 236C(s)->C->5D->C->6, (5D hits), 6B, 63214C(s)<br\>
Harder to time but uses less meter. The 5D needs to hit low enough so that the 6B can hit while the opponent is stunned.
... Super, 3D, 63214(s)
If you Super into the corner, you may be able to add a 6B in after the 3D lands.
Corner: ... 6B, 63214C(s), 3D, 6B, 63214C(s)
Frame Data
| Move | Start-up | Duration | Recovery | Total | On Hit | On Block |
|---|---|---|---|---|---|---|
| Jump | 8 | - | 5 | - | - | - |
| Reflect | 1 | 10 | 32 | 43 | - | - |
| 5A | 5 | 4 | 12 | 21 | +1 | 0 |
| 5B | 6 | 4 | 23 | 33 | +6 | +3 |
| 5C | 10 | 4 | 32 | 46 | -7 | -9 |
| 2A | 8 | 5 | 15 | 28 | -1 | -4 |
| 2B | 15 | 6 | 22 | 43 | -1 | -2 |
| 2C | 20 | 5 | 37 | 62 | Down | -15 |
| j.A | 3 | 27 | 4 | - | [29] | [32] |
| j.B | 7 | 24 | 3 | - | [34] | [34] |
| j.C | 22 | 8 | 4 | - | [34] | [34] |
| 6B | 43 | 9 | 16 | 68 | +3 | +2 |
| 44 | - | - | - | 43 | - | - |
| 66 | - | - | - | 43 | - | - |
| 236C | 35 | 3 | 27 | 65 | +24 | +9 |
| 236C (SS): 1st Hit 2nd Hit |
8 16 |
5 5 |
27 | 61 | +24 | +9 |
| 236B | 31 | 26 | 13 | 70 | +33 | +20 |
| 236B (SS) | 13 | 26 | 13 | 52 | +33 | +20 |
| 63214A | 71 | 39 | 13 | 123 | -13 | -13 |
| 63214C: 1st Hit 2nd Hit |
47 47 |
3 3 |
111 | 211 | Down | [1] -47 |
| 63214C (SS): 1st Hit 2nd Hit |
26 29 |
3 3 |
111 | 172 | Down | -47 |
| 421A | 80 | 23 | 44 | 147 | +9 | -14 |
| 421B | 65 | 23 | 44 | 132 | +9 | -7 |
| 421C | 67 | 23 | 44 | 134 | +9 | -7 |
| Reload | 42 | 1 | 27 | 70 | - | - |
| Stance Canceled Reflect | 1 | 10 | 25 | 36 | - | - |
| (Stance) 4C | 8 | 1 | 58 | 67 | Down | - |
| (Stance) 6C | 28 | 1 | 56 | 85 | Down | - |
| (Tier 1A/1B) +A | 25 | 2 | 14 | 41 | Down | +15 |
| (Tier 1A) +B | 30 | 26 | 9 | 65 | +36 | +19 |
| (Tier 1B/2A) +B | 20 | 3 | 11 | 34 | +41 | +28 |
| (Tier 1A/1B) +C | 13 | 2 | 12 | 27 | +40 | +23 |
| (Tier 1C) +B | 6 | 2 | 40 | 48 | Down | +18 |
| (Tier 1C) +C: 1st Hit 2nd Hit |
16 44 |
2 22 |
33 | 117 | Down +19 |
[2] -3 |
| (Tier 1C) +2C | 13 | 6 | 48 | 67 | Down | -23 |
| (Tier 1C/2A/2B) +A | 28 | 6 | 20 | 54 | +7 | +2 |
| (Tier 2C) +A | 8 | 28 | 41 | 77 | Down | -37 |
| (Tier 2B/2C) +B | 23 | 3 | 14 | 40 | +39 | +26 |
| (Tier 2) +C | 31 | 13 | 10 | 54 | +44 | +30 |
| (Tier 3) +4/6 | - | - | - | 45 | - | - |
| (Tier 3) +B/C | 51 | 63 | 72 | 186 | Down | -36 |

