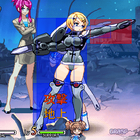
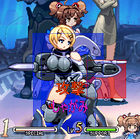
Vanguard Princess/Natalia Glinka
Profile
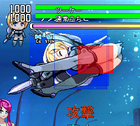
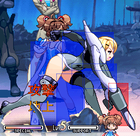
Natalia Glinka is an intelligence officer and soldier from an unknown country. She is very religious, obeys orders to the letter, and is always calm and level-headed.
Natalia enters the fight to gather information on numerous disappearances caused by a new weapon.
Base Health: 1000
Guts Threshold: 45%
Guts Factor: 28.2%
Total Effective Health: 1127
Move List
Movement
66: Short hop dash. Can actually be used to crossup after knockdown. Evades throws.
44: Short back-dash.
Throws
Normal Moves
| 2B | |||
|---|---|---|---|

|
Guard | Air Guard | Support |
| High | No | Yes | |
| Damage | Hit / Counter Hit | Counter Scale | |
| 91 | - / Launch | +20% | |
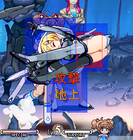
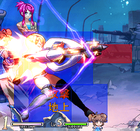
| Anti Air palm strike. Fast and has upper body invulnerability. Whiffs crouchers. | |||
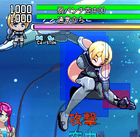
| j.A | |||
|---|---|---|---|
|
Guard | Air Guard | Support |
| High | Yes | Yes | |
| Damage | Hit / Counter Hit | Counter Scale | |
| 43 | - / - | +10% | |
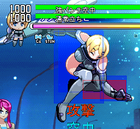
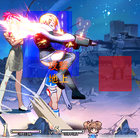
| Air chop that aims down. Has very poor hitstun but has a lingering hitbox. | |||
Command Normals
Special Moves
Liberty Arts
Strategy
Natalia strong points lie in her very powerful mixup, as well as good chip and calcium damage. Every time you score a knockdown you can subject your opponent to a 2-3 way mixup that is almost completely in your favor. She can also ignore some projectiles and assists with her pilebunker attacks which will not only go through but dissipate projectiles and assist moves. Even in non-okizeme situations her mixup capability is quite strong, she is definitely a character adept at breaking open defenses.
Natalia's best assist is without a doubt Sierra, who in addition to having the basic uses most assists have, has a very important tool for Natalia: 6D. Natalia is often moving forward very fast, and outside of the corner you will find any other assist move to be pretty much useless. 6D is vital in not only compensating for Natalia's weakness in neutral game, but also plays a key role in her okizeme and combos.
However, Natalia does have a fairly large weakness. At first her normals seem good and she has a good variety of them, but several other characters in Vanguard Princess have much better normals and will make her feel a lot of pain at neutral. Pilecharges are not normally an effective approach on their own, and assist cover isn't free so it's obvious that Natalia has to do something to get in so she can start her mixups. Generally she has to play it carefully and make use of both assists and her very good anti-airs until a good chance shows up.
Okizeme and Mixups
Pilecharge Mixups:
- Knockdown > ...
- Time 6D to hit meaty >
- 214C (Low, Neutral / + on block)
- 421C (High, Neutral / - on block)
- 236C 22 > ...
- 360C Tick throw off 6D, or 360 during Proxy Guard
- 6A or some other poke and continue with a blockstring or some other mixup
- Activate 6D right after the activation of a pilecharge > ...
- 236C 22 360C before 6D hit
- 236C 22 2B etc...
- 214C > 5B > 6D (hit) > 236C (Low, stronger combo options on success)
- 421C > 6D (hit) > 236C (High, strong combo options on success)
- To bait DPs either use a meaty 6D setup where you delay the pilecharge slightly, or use 236C 22 and simply block the DP.
Crossup j.C: In the corner 2C and regular throw create a situation where j.C can crossup. This is a very situational, but strong mixup.
2C / Throw > walk forward slightly (do not push into corner) > 6D > j.9 > deep j.C (crossup) > 236A
- Corner crossup into a midscreen pilecharge setup.
2C / Throw > walk forward slightly more (pushes into corner) > 6D > j.9 > deep j.C (does not cross up) > 2C
- Resets back into corner crossup situation.
A more advanced version of the previous combo is also possible, and should work on most characters. ...j.C > 6D hit > walk forward 6A > 5A+5D > 2C
On either of these setups you can do the j.C slightly early, causing it to whiff. Then you can go straight into a 360A tick throw or 2B/2C for a low option. All these taken into account this is effectively a 4 way mixup with the option of tick throwing.
Body Hop
Natalia can dash after any knockdown where she is close enough. Set up anywhere off 2C or a regular throw, or situational distances near the corner. You dash over and meaty 5D them with Sierra assist or something similar and go into a combo with a 236C or 214C. 6A can also be used to hop over corpses..
Matchups
Generally speaking Natalia has good matchups against characters who need to rely on projectiles, and bad matchups against characters with high speed / range on their normals. Anyone else is generally pretty fair game for anyone.
Yui: Her normals are 1000x better than Natalia's, and her shoulder charge is faster and more safe than pilecharge. Her overhead is quick and completely safe unless you can shield it, and all her attacks have huge range. Definitely not in Natalia's favor. Block patiently as best as you can and shield your way out of her slower attacks if you're able to. When you win in this matchup, it's going to be because of Natalia's okizeme. Save your super for guaranteed situations if you can because you need the damage.
Haruka
Lilith: She can grab Natalia out of any of her pilecharges, so you have to limit your mixup options in order to stay safe. Completely unable to use pilecharge as an approach because of her throw, so Natalia has to rely a lot on her normals which are mediocre/average. Not falling for DDT/dashing throw/loli elbow drop/headbutt is key to not getting lamed out. Block or parry the elbow and headbutt to punish. Duck DDT and punish. Just 1B counterhit the dashing throw. Once you get Lilith in block stun you might be able to go for some safe mixups. Don't bother trying to tick throw; the risk-reward is not in Natalia's favor. At least minor disadvantage overall because even if Natalia is able to react very consistently, a well timed grab beats everything she has except for 5C, which is punishable by grab on block.
Luna: Major advantage, Luna has a hard time getting you to even block her fullscreen shots, and when you do you can always just use proxy guard. She ends up needing to rely completely on her jumping shots attack as well as her other moves which are capable of avoiding attacks up close. Risk-reward is almost never in her favor. Matchup is slightly less advantageous for Natalia now because her pilebunker's auto-parry dropped from absorbing two projectiles to only one.
Kurumi
Saki: This matchup is slightly better than against Yui, but still not very good for Natalia. Saki's normals are shorter than Yui's but still cause Natalia trouble. Also, forget about Saki's DP, just her teleports will screw up Natalia's okizeme, which she really needs. Dive kicks, multi-hitting axe kicks, and lows with assist confirms means Saki has a decent mixup game of her own. Thankfully, Saki does not have much going for her at mid- or long-range, so this is a matchup where assists other than Sierra can be useful.
Kaede
Natalia
Eri
Ayane: Average advantage, Ayane's 236A arrows are pretty useless against Natalia. However her 214A arrows can still trade even if she is punished for them, and she has a lot of very high speed pokes which can catch Natalia off guard if you get overzealous. Pilecharge approach and assist cover are game winners in this matchup, don't try to press her with your poking game too hard.
Combos
Without Assist
j.B > 5A / 2A / 1/3B (15%) / 2B (17%-20%)
DEEP j.C > 236A (20%-28%) / 236B+C (38%-44%)
6A > 5A / 2A
1/3B connects if the second hit of 6A hits Meaty
214X > 5A (14%-18%) / 5B (15%-20%)
CLOSE 421X > 5B (21%) / 236X (24%-27%)
5B does not work when opponite is cornered.
236X combo only works when Natalia's back is in the corner
CORNER 421X > 5A
CH 5C > 236X (22%-30%)
CH air-to-air j.C > land > 236X (28%-37%)
CH 2B > 236X (22%-26%)
CH CLOSE 1/3B > 6A / B+C (23%-28%)
B+C does not work on Lilith
CH 1/3B > 2C (25%-27%) / 236X (20%-23%) / 236B+C (33%-40%)
CH 5B > 5B (18%-20%) / 236X (20%-24%) / 236B+C (33%-40%)
Eko
5B/C +6D > 214C > 5B
5B/C +6D > 236B+C > late 2D(2 hits, in corner) > 236A
Corner: 236A > 6D/2D > 236C
214X > 6D > 236A / late j.B > 236C
421X > 6D > 236A / late j.B > 236C
Sierra
5B~5D / 5A+D > 236A / 236B+C
5A+D / 2B~5D > 214C > 5B
214A > 5D > 236C
421A > 5D > 236C
6D > 214C > 421C > 236C
421C > 6D > 421C > 236C
214C > 6D > 5A > 421C > 236C
421C > 2D > 421C > 236C
2D~214C > 421C > 236C
6D > j.C > j.C > 236B+C / 236C / assist combo
CH 5C > 6D > 5B > 236C
CH j.C > 236C / 421C
high CH j.C~6D > 421C > 236C
Corner: 6A > 2B~5D / 5A+5D > 236C / 236B+C
Corner: 5C / 5B > 3D > deep j.C > B+C
Corner: CH 236C > 6D > 5A > 236C
Corner: xx > 236B+C > 6D (activated on first hit) > 236A
Corner: xx > 236B+C > 3D (activated 2nd hit) > j.C (after 2 hits of 3D)
Juliet
5A+D > 236C / 236B+C
214C > 6D > 421C (hit right after 6D lands) > 236C
421C > 6D > 421C (hit right after 6D lands) > 236C
214C > 3D > 421C > 236C
421C > 3D > 421C > 236C
Corner: 5C~3D > j.C > 236C / 236B+C
Corner: 236B+C > 2D
Kanae
214C > 5D > 236C
421C > 5D > 236C
6D > 214C > 236C
421C > 6D > 421C > 236C
3D > 421C > 6D > 421C > 236C
214C > 2D > 421C > 236C
421C > 2D > 421C > 236C
214C > 2D > 421C > 6D > 236C
Hilda
5D > 214C > 421C > 236C
5D~421C > 421C > 236C
6D~5B > 421C > 236C
- The 5B has to push the opponent into the second hit of the 6D.
3C+D > 421C > 236C
2D > 2C > 421C > 236C
214C > 2D > 5B > 421C > 236C
421C > 2D > 421C > 236C
- Can use 3D instead of 2D if close.
Frame Data
| Move | Start-up | Duration | Recovery | Total | On Hit | On Block |
|---|---|---|---|---|---|---|
| 44 | - | - | - | 33 | - | - |
| 66 | - | - | - | 38 | - | - |
| Jump | 12 | - | 2 | - | - | - |
| Reflect | 1 | 8 | 30 | 39 | - | - |
| Throw | 7 | 1 | 34 | 42 | Down | - |
| 360A | 13 | 1 | 33 | 47 | Down | - |
| 360B | 15 | 1 | 22 | 38 | Down | - |
| 360C | 17 | 1 | 19 | 37 | Down | - |
| 5A | 5 | 4 | 15 | 24 | 0 | -3 |
| 5B | 13 | 10 | 18 | 41 | 0 | -2 |
| 5C | 26 | 12 | 24 | 62 | -5 | -5 |
| 2A | 5 | 5 | 11 | 21 | +4 | +4 |
| 2B | 8 | 9 | 15 | 32 | +1 | - |
| 2C | 18 | 14 | 33 | 65 | Down | -17 |
| j.A | 8 | 17 | 7 | - | [29] | [30] |
| j.B | 16 | 2 | 8 | - | [35] | [32] |
| j.C | 13 | 4 | 8 | - | [47] | [49] |
| 6A: 1st hit 2nd hit |
22 32 |
4 6 |
11 | 79 | +11 | +11 |
| 1B / 3B | 7 | 5 | 20 | 32 | +4 | +4 |
| 236A | 29 | 3 | 75 | 107 | Down | -34 |
| 236B | 38 | 3 | 75 | 116 | Down | -34 |
| 236C | 45 | 3 | 75 | 123 | Down | -34 |
| 214A | 38 | 5 | 37 | 80 | Down | +4 |
| 214B | 50 | 5 | 37 | 92 | Down | +4 |
| 214C | 62 | 5 | 37 | 104 | Down | +4 |
| 421A | 45 | 2 | 34 | 81 | Down | +7 |
| 421B | 58 | 2 | 34 | 94 | Down | +7 |
| 421C | 68 | 2 | 34 | 104 | Down | +7 |
| BC | 23 | 18 | 62 | 103 | Down | -42 |
| 236BC | 14 | 64 | 61 | 139 | Down | -22 |


