Verdict Guilty/Yohan

From Mizuumi Wiki
Jump to navigation Jump to search
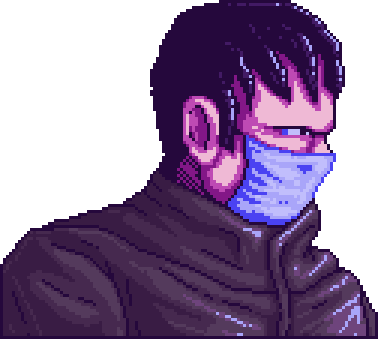
Yohan Yohan.png
VG-YohanVS.png
Ammo Capacity 3
Reload Time 53 frames
Throw Bomb
Playstyle Zoning
Setplay
Preferred Range Close-Far

Introduction

Yohan is a Criminal character who turns the entire game into a 50/50 with his projectiles and okizeme, allowing him to easily snowball his way to victory. However, he can just as easily be snowballed himself, due to his poor frame data and lackluster anti-airs


Playstyle
Yohan.png Yohan is a snowball character who turns Verdict Guilty into a constant guessing game, as long as he doesn't run out of ammo.
Strengths Weaknesses
  • Obnoxious Zoning: Yohan has access to an overhead projectile and a low projectile. On top of that, they apply stun on hit, which reverses the opponent's horizontal and vertical controls.
  • Excellent Okizeme: On top of having access to 2B/2D mix, Yohan has also access to throw setups and reversing the opponent's controls off of any hit.
  • Good Damage: Yohan's combos does good damage, provided he's willing to use ammo for that.
  • Mental Stack Overflow: If his zoning and oki weren't enough, Yohan's C normals also allows him to feint a projectile, further reinforcing his neutral mindgames.
  • Hard to Catch: Yohan's fast jump combined with Mine Drop and his projectiles makes him rather hard to catch for most characters.
  • Struggles to Comeback: Due to his slow walk speed, short jump and bad normals, making a comeback as Yohan is very difficult.
  • Bad Anti-airs: Yohan's grounded normals aren't meant for anti-airing opponents, forcing him to meet his opponents in the air.
  • Resource Management: Yohan is extremely dependant on his vials to compete with the rest of the cast. However, he doesn't have many opportunities to reload without putting himself at risk.
  • Difficult Hitconfirms: Since his projectiles hits twice, Yohan's hitconfirms are much tougher than for most characters.

Move List

Normal Attacks

5A
VG-Yohan5A.png
Damage Guard Startup Active Recovery On Hit On Block Ammo
80 Mid 2 7 1 - +1 -
Total: 9

Yohan's best anti-air. Mostly used for throw confirms.

5B
VG-Yohan5B.png
Damage Guard Startup Active Recovery On Hit On Block Ammo
80 Mid 5 7 3 - -3 -
Total: 14

While very slow for VG standards, 5B is one of Yohan's main pokes. Generally outclassed by 2D, but due to how inputs are registered keyboard players can use it for easily hitconfirm into 66B.

5C
VG-Yohan5C.png
Damage Guard Startup Active Recovery On Hit On Block Ammo
60 Mid 2 7 1 - +1 -
Total: 9

Can be used as a far range anti-air, but its main use is in neutral, as a 66C feint.

5D
VG-Yohan5D.png
Damage Guard Startup Active Recovery On Hit On Block Ammo
60 Mid 5 7 4 - -3 -
Total: 15

Very unique among 5Ds, in that it's not a dedicated anti-air! Instead, it's Yohan's furthest reaching attack, thus making it his best poke. It does less damage than 2D though, so keep that in mind.


AA
VG-YohanAA.png
Damage Guard Startup Active Recovery On Hit On Block Ammo
60 Mid 1 4 0 - +14 -
Total: 4

5C, except it can't be used as a feint

AAC
VG-YohanAAC.png
Damage Guard Startup Active Recovery On Hit On Block Ammo
160 Low 5 - Total 25 Launch ~ 1
Total: 24

One of Yohan's main zoning tools. While it's the slowest and most laggy of Yohan's projectiles, it's slow enough for Yohan to throw out another projectile and cover more space. Used for covering ground approaches.

  • Applies stun on hit
  • Stun will only be applied if both hits connects


c.P
VG-YohanClosePunch.png
Damage Guard Startup Active Recovery On Hit On Block Ammo
80 Mid 2 6 0 - +8 -
Total: 7

Universal unexploitable plus frames.

c.K
VG-YohanCloseKick.png
Damage Guard Startup Active Recovery On Hit On Block Ammo
60 Mid 2 7 0 - +2 -
Total: 8

Standard proximity normal. Useless.


2A
VG-Yohan2A.png
Damage Guard Startup Active Recovery On Hit On Block Ammo
80 Low 2 7 1 - +1 -
Total: 9

Short poke that is outclassed by Yohan's other normals

2B
VG-Yohan2Kick.png
Damage Guard Startup Active Recovery On Hit On Block Ammo
80 Low 3 8 3 - -2 -
Total: 13

The low half of Yohan's 50/50. Also works decently well as a low poke, although it has less range than 5B.

2C
VG-Yohan2C.png
Damage Guard Startup Active Recovery On Hit On Block Ammo
80 Low 3 8 2 - -1 -
Total: 12

On paper, 2C is just a worse 2A. However, due to the animation, it can be used in neutral for feinting an AAC projectile.

2D
VG-Yohan2Kick.png
Turns out moving your sprite 5 pixels forward turns low kicks into overheads
Damage Guard Startup Active Recovery On Hit On Block Ammo
80 High 3 8 3 - -2 -
Total: 13

The overhead part of Yohan's 50/50. Also works well as a poke alongside 5D and 2B, since has the same range as 5B.


j.P
VG-YohanjPunch.png
Damage Guard Startup Active Recovery On Hit On Block Ammo
80 High 1 13 0 - ~ -
Total: 13

Yohan's main air-to-air, though he'll rarely press it since j.K is generally better.

j.K
VG-YohanjKick.png
Damage Guard Startup Active Recovery On Hit On Block Ammo
80 High 3 13 3 - -~ -
Total: 18

Yohan's jump-in, but it also works well in covering aerial escapes.


Special Attacks

Acid Vial
Keyboard: 66C
Pad: 236C
VG-YohanAcidVial.png
Damage Guard Startup Active Recovery On Hit On Block Ammo
45, 135 High 2 - Total 17 Launch ~ 1
Total: 16

Yohan's overhead projectile. Mainly used in zoning with AAC, but it can also be used in oki for throw setups. It also covers aerial approaches very well.

  • Applies stun on hit
  • Stun will only be applied if both hits connects
Acid Low
Keyboard: 66A
Pad: 236A
VG-YohanAcidLow.png
Damage Guard Startup Active Recovery On Hit On Block Ammo
45, 135 Low 2 - Total 10 Launch ~ 1
Total: 9

Yohan's main combo ender when he has ammo. However, keep in mind that this is a 2-hit attack, so people will be able to block it (and not get stunned) if more than one move was used prior to that.

  • Applies stun on hit
  • Stun will only be applied if both hits connects
Bomb Drop
Keyboard: 44D
Pad: 214D
VG-YohanBombDrop.png
Version Damage Guard Startup Active Recovery On Hit On Block Ammo
Bomb Drop - - 4 - Total 29 - ~ -
Bomb Drop
Explosion
240 Mid 4+75 - 0 Launch ~ -
Total: 28

Pretty good runaway and escaping tool. Leaves a bomb behind him that explodes after around 75 frames.

  • The explosion can also hurt Yohan.
Slide
Keyboard: 66B
Pad: 236B
VG-YohanSlide.png
Damage Guard Startup Active Recovery On Hit On Block Ammo
240 Mid 6 22 11 Launch -24 ~ -3 -
Total: 38

Only used in combos for setting up 2B/2D mix. Not much value in neutral since it's a mid. Very easy to hitconfirm into for keyboard players.

  • Is slightly minus on hit if done at point blank
  • Can't be done by player 2 if they're using a controller
Suicide
]C[
VG-YohanSuicide.png
Version Damage Guard Startup Active Recovery On Hit On Block Ammo
Bomb
Set
- - 13 - Total 32 - - -
Bomb
Explosion
750 Unblockable 600 1 0 Launch - -
Total: 31

Extremely risky, but very rewarding move that turns Yohan into a literal ticking bomb. If the opponent was close when the timer reaches 0, they'll get hit with the most damaging move in the game. And it's unblockable too!

However, Yohan don't always have 40% HP to spare for this, and while his zoning is excellent, his approaches aren't so great.

  • The explosion also hurts Yohan
  • Can't be used by player 2 if they're using a controller


Universal Moves

Grab
VG-YohanGrab.png
Version Damage Guard Startup Active Recovery On Hit On Block Ammo
Bomb
Set
120 - 2 13 0 Launch - -
Bomb
Explosion
400 Unblockable 900 1 0 Launch - -
Total: 14

Bomb throw. Applies a timer on the opponent, which will trigger an unblockable knockdown once it reaches 0.

  • The explosion can also hurt Yohan, although this is unlikely to happen


Strategy

General Gameplan

  • Placeholder


Neutral

  • Placeholder


Defense

  • Placeholder


Offense/Okizeme

  • Placeholder


Matchups

Gun

  • Placeholder

Gyeong

  • Placeholder

Hyuk

  • Placeholder

Jae

  • Placeholder

Minso

  • Placeholder

Reese

  • Placeholder

Si'u

  • Placeholder

Yohan (mirror)

  • Placeholder


Combos

Midscreen

  • 5b/5D > 66A, 66B (480 to 500 damage)
Poke BnB. Leads to 2B/2D mix. Replace 66B with 66C for a throw setup on wakeup or a free reload, if that was your last bullet.
  • 2B/2D > 66A, 66B (500 damage)
Same combo than above, but slightly more damaging. Replace 66B with 66C for a throw setup on wakeup or a free reload.
  • [2B/2D]*3 > 44D (180 damage)
In case you happen to be out of ammo. Gives you the opportunity to safely reload and lets him zone again.
  • 66A, 66B (420 damage)
BC combo. Going for a throw setup after 66A is not recommended, since it's extremely expensive.
  • Throw, walk 2B/2D > 66A, 66B (620 damage)
Throw combo. Omit 66B if the opponent ends up in the corner.


Corner

  • 2B/2D > [66A]*n, 44D (620 damage)
Yohan is one of the only characters in the game to have increased damage output in the corner, although it's very expensive. Puts Yohan back to zoning.


Anti-Air

  • 5A > Throw
Throw confirm.
  • 5C > AA > 66B (300/360 damage)
Damage depends on whether or not AA connects.
  • 5C > [66A]*n, 44D (300 to 600 damage)
Only works in the corner.


General
FAQ
Controls
HUD
System
Changelog
Characters
Gun
Gyeong
Hyuk
Jae
Minso
Reese
Si'u
Yohan