Wonderful World/Cielo

Profile
Background
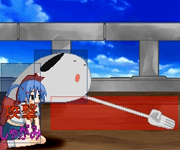
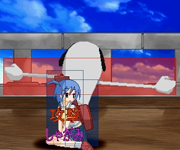
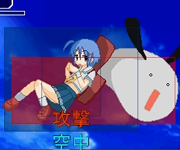
Attends Ouritsuhouken(*) school. Around six years old, she succeeded in communicating with ghosts, became seen as a child prodigy. Since then, however, she's faded into the obscurity of a typical student. Tends to act as a sort of leader among her friends. Is somewhat afraid of large people. It may not look like it, but the spirit behind her is that of a normal human.
(*) TL note: Literally translates to something like "sword of royal law", but I felt it better to leave it as such, since it's a name.
Game Play
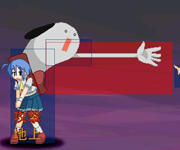
Cielo is the game's archetypal grappler. Her movement is somewhat slow and she lacks an airdash, but she can superjump and doublejump. Her forward and backwards hops can avoid low attacks which make them important tools for approaching your enemy.
Cielo can recover life and increase her super meter by guarding right as a move is about to hit. Guarding in this way also reduces blockstun, negates pushback, and interrupts chains.
Character Specific Data
Total Life - 850
Move List
Strategy
You're going to be blocking quite a lot. Learn to time your guard to take advantage of Cielo's just defend bonuses and hit back with a devastating command grab.
Cielo can get most of her damage from okizeme mixups. This usually means either meaty 2K/2S or command grab. Her forward hop is more than enough to close distance for oki after a command grab. Jumps or backdashes on wakeup can be punished with a tiger knee'd command grab.
63214S can be used as a tech punish even at long ranges! In the corner this can start her loop quite nicely.
If you're up on life, consider cancelling your 63214 move with 22 and get a 50/50 mixup out of it. If your opponent is afraid of your command grab, opt for a quick 2A and confirm it into 2HS > 63214HS to start it all over again. It does not take Cielo many hits to win a round!
Neutral Game
Stay calm and poke at a distance using 5S, 2S, and 236P to force your opponent's hand.
Use whatever opportunity you can to build meter by walking, hopping, or jumping forward.
Although it's tempting to jump in with J.S all the time, J.HS has better potential to beat other moves and anti-airs.
Pressuring
Use your double jump to position yourself on top of an opponent during okizeme for an ambiguous j.S crossup.
Be sure to mix up blocked normals with either nothing or cancelling into 63214S. If done properly any blocked normal can be potentially safe.
After a successful command grab, forward hop twice to get back in throw range. If done near the corner, the second hop will cross up and prevent wakeup backdashes. Even better in this situation, delaying your hops so that it will not cross up!
Combos
BnBs
Meterless, Anywhere (j.S/j.HS) > 5P > 5S > 2HS > 236P > 5K > 5S > 5HS > 63214HS
Meterless, Corner (j.S/j.HS) > 5P > 5S > 2HS > 236P > 5K > 5S > 5HS > 6HS > 63214HS
Meterless, Anywhere CH j.HS > land > (5S) > 63214HS
•Depending on the height, you may not be able to use 5S.
Meterless, Close 5HS > 6HS > 4123694P
•It is important to learn the timing for the command grab, which is not immediate.
50% Meter, Corner 63214 > BRK > 5HS > 63214HS
•Cielo's corner throw loop.
50% Meter, Anywhere 412364P > BRK > 5HS > 63214HS
•Command grab combo extender.
100% Meter, Anywhere 412364P > BRK > 5HS > 236P > BRK > 6HS > 4123694P
•The best use possible for 100% meter.
100% Meter, Anywhere (j.S/j.HS) > 5P > 5S > 2HS > 236P > 5K > 5S > 5HS > 236P > 41236412369P
•The timing is very strict.
100% Meter, Corner (j.S/j.HS) > 5P > 5S > 2HS > 236P > 5K > 5S > 5HS > 6HS > 41236412369P
•An easier variant of the previous combo. Delay the P input for the super in order to jump far enough.
Meterless, Corner 5HS > 6HS 5P > 5HS > 6HS 5P > 5HS > 63214HS > BRK > 66 > 5P > 5HS
Confirms
Meterless, Anywhere xx > 2HS > 63214HS
•Close range hitconfirm.
Meterless, Slightly far away xx > 2HS > 236P > 5K > 5S > 5HS > 63214HS
•If you're too close 236P will cause your opponent to fly over you.
Meterless, Anywhere 5S/5HS/2S > 63214S
•Long range hitconfirm.
v0.55
Meterless, Mid Range 6HS > 63214HS
•Ideal when your opponent is too far for 4123694P.
Situational
Meterless, Midscreen from Corner xx > 63214 > 5P > 5S > 63214HS
•This is an infinite if the opponent chooses not to tech after the second 63214 wallslam. Most recoveries can be caught using 63214HS again. A quick recovery will require you to hop forward for a command grab.
100% Meter, Slightly away from Corner xx > 63214 > 41236412369P > 2K > 2HS
•Great way to combo into TK super command grab.
100% Meter, Air to Ground j.K > 4123641236P
•You can buffer part of the super with 412369K for a devastating instant overhead.
50% Meter, Fullscreen from Corner xx > 63214 > 236P > BRK > 6HS > 4123694P
•Simple way to combo into TK command grab. The super version may also be used here.
200% Meter, Corner 412364P > 5P > 5HS > 63214HS > 236236HS > 5P > 5S > 63214HS > 236236P > 5P > 5S > 63214HS
•100% Death Combo. A few characters like Sabe and Cielo can survive this at full HP, but it's generally a guaranteed kill.
OTGs
You can OTG using 2K > 2HS > 236236HS (I'm Angry!) to finish off an opponent, otherwise it is in your best interest to not OTG.
Post OTG Game
Congratulations you threw the round.
Okizeme
Match-ups
- You must respect Ryuza's projectile oki at all times, as your only real option against them is blocking. On wakeup in addition to jumping and backdashing he can also avoid a grab using his DP. DP beats tiger knee'd air throw as well but will miss Cielo's 2K entirely, giving you plenty of time to punish. You can also fish for counterhits in the air using J.HS as it will stuff his DPs at certain ranges.
Duna:
- Aiwhen will mix you up nonstop and there is very little you can do about it. Keep blocking and suck up the damage until the Aiwhen player decides to use something unsafe. Aiwhen has the lowest HP in the game, and as such Cielo only needs to combo her twice to win. While annoying, Aiwhen's full BnBs do not harm Cielo all that much. In neutral, make good use of 2HS to catch random teleport dashes, as it won't matter if Aiwhen decides to cross up or not. Cielo's 421K counter is nearly useless in this matchup.
- If you get caught in her doll loop, you absolutely must not just-defend any of the hits other than from her doll, as the pushback is the only reason the loop ends at all.
Sabe:
Neva:
- Her unblockable anti-airs make jumping in dangerous. Even if you double jump to avoid getting hit, you will not be able to punish her for whiffed anti-airs. Stay on the ground and aim for full screen punishes with 236P and 236236HS. If she starts to rush you down wait until she tries something unsafe and poke her out of it. Neva deals enough damage that trades are generally not in your favor.
- Always be wary of Lynia when she has meter, as you cannot throw her out of her super and she can make any of her specials safer than they look. If Lynia attempts to use Blue Shooter as okizeme, you can super jump on wakeup to dodge it even if it looks like it's hitting you. This won't work at point blank range, but at that point you should just throw her. If Lynia attempts to zone you out using Rain of Lamentation, stay calm and walk back and forth to build meter for I'm Angry! to punish.
Move Details
Specials
| Running Away is Pointless! - 236P [ Mid, Knockdown, BRK ] | |
| A wide slash which knocks down on hit. Normally this move will pull the opponent towards you. If used in an OTG combo, it will push the opponent away. This is your standard tool for confirming long range pokes, as it will set up oki with no effort on your part. Must be cancelled immediately on hit.
25 Damage. | |
| I'll Send You flying! - 63214S [ Mid, BRK ] | |
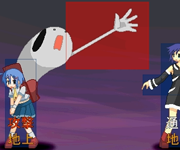
| Mid range blockable throw. Doesn't work on airborne opponents, but can be comboed into. If you're not sure if you're in range, opt to combo into 236P instead. Once it hits, it is identical to the HS version, and as such can be cancelled into Cielo's corner loop.
1 Damage on hit, 96 Damage when thrown. | |
| I'll Send You flying! - 63214HS [ Throw, BRK ] | |
| Long range anti air throw. Can be cancelled shortly after you release the opponent. The hitbox doesn't reach very high, however.
1 Damage on hit, 90 Damage when thrown. | |
| Heaven's Punishment! - 412364P [ Throw, BRK (Ground) ] | |
| Command throw, can be performed in the air. Ground version only works against grounded opponents, aerial version only works against airborne opponents. The ground version can be cancelled after you let go of the opponent on the last hit. The aerial version can be comboed into after 6HS. On oki, using this on the ground or TK-ing the air version is a guaranteed 50/50 mixup, and can be quite dangerous in the right hands.
Ground - 230 Damage. Air - 215 Damage. | |
| Don't Come Near Me! - 421K [ Counter ] | |
| Being hit while this move is active will cause Cielo to counterattack with a huge uppercut. The startup is rather quick at 4 frames but is still not a reversal. Countering quick moves will also leave Cielo punishable, so be careful. This counter cannot defend against low attacks.
160 Damage. 5% Prorate |
Finishing Moves
| I'm Angry! - 236236HS [ Mid ] | |
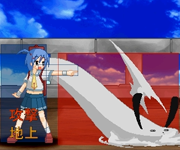
| Cielo's spirit companion slams the ground which sends a large rock spike upwards. More or less hits the entire screen in front of her at once. Does poor damage in combos, but will hit OTG. This is one of Cielo's fastest moves (Even compared to her normals!) and can be used to punish literally anything from full screen. Uses 100% meter.
230 Damage. | |
| Heaven's Great Punishment! (Ground) - 4123641236P [ Throw ] | |
| Slightly longer range than 412364P, cannot be comboed into. Invulnerable on startup, otherwise not worth the 100% meter requirement.
390 Damage. | |
| Heaven's Great Punishment! (Air) - 4123641236P [ Throw ] | |
| The grab range is ridiculous, and it comboes off pretty much anything. What's more, the damage will never scale down. Invulnerable on startup.
360 Damage. |
Command Normals
| 4S [ High, Jump on hit ] 4S > 5HS/2HS | |
| "Hot Blow" New in .62 Chains from 5K and allows Cielo to convert into damage from her fastest normal. Links to 5P on counterhit. | |
| 6HS [ High, Jump on hit ] 6HS > N/A | |
| Very slow overhead, can OTG. As a launcher though it is useful in many setups, such as linking to 5P or 4123694P. There are more possibilities in the corner. v0.55 75 Damage | |
| 4/6HS [ Knockdown ] | |
| Standard throw. Only works at point blank but near instantaneous startup can be useful. v0.55 130 Damage, throws can be teched by an opposing throw attempt! | |
| air 4/6HS [ Knockdown ] | |
| Standard air throw. Only works at point blank but near instantaneous startup can be useful. 90 Damage, throws can be teched by an opposing throw attempt! |
Normals
| 5P [ Mid ] 5P > 5S, 2S, 5HS, 2HS, 6HS | |
| A quick jab, the high vertical box makes this move a practical anti-air in emergencies.
20 Damage. | |
| 2P [ Mid ] 2P > 5S, 2S, 5HS, 2HS, 6HS | |
| A quick low jab, not particularly noteworthy.
18 damage. | |
| 5K [ Mid ] 5K > 5S, 2S, 5HS, 2HS, 6HS | |
| A kick with very short range. This is Cielo's fastest normal. Can OTG.
16 Damage. | |
| 2K [ Low ] 2K > 5S, 2S, 5HS, 2HS, 6HS | |
| A low kick with decent range. This move is low enough to go under Dragon Punches, guaranteed. Can OTG.
15 Damage. | |
| 5S [ Mid ] 5S > 5HS, 2HS, 6HS | |
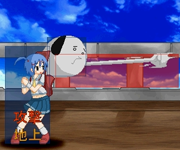
| Long range punch. This is Cielo's main poke, however some characters can crouch under it.
55 Damage. | |
| 2S [ Low ] 2S > 5HS, 2HS, 6HS | |
| Long range chop. Less range than 5S, but still good.
29 Damage. | |
| 5HS [ Mid ] 5HS > 6HS | |
| A large swipe. Very slow but causes groundbounce on aerial opponents and is an essential combo tool.
45 Damage. | |
| 2HS [ Mid ] 2HS > N/A | |
| Cielo punches either side, useful for catching attempted crossups. Launches slightly on hit.
35 Damage. |
Air Normals
| j.P [ High ] j.P > j.P, j.K, j.S, j.HS | |
| A quick jab. 30 Damage. v0.55 22 Damage | |
| j.K [ High ] j.K > N/A | |
| Launches the opponent slightly on hit. 25 Damage. v0.55 18 Damage | |
| j.S [ High ] j.S > N/A | |
| Cielo's body splash, crosses up easily. This move has many active frames but has low hitstun. 40 Damage. v0.55 30 Damage | |
| j.HS [ High ] j.HS > N/A | |
| A two hand smash, has a good hitbox to beat other moves. Causes groundbounce on counterhit. 55 Damage. v0.55 The hitbox is a bit trickier, it hits very far in front of her and slightly above, then two frames later hits below her. 50 Damage |
Frame Data
Normals
| Move | Startup | Duration | Recovery | Total | Attack Level | Grounded Frame Advantage | Aerial Frame Advantage |
|---|---|---|---|---|---|---|---|
| 5P | _ | _ | _ | _ | _ | _ | _ |
| 5K | _ | _ | _ | _ | _ | _ | _ |
| cl.5S | _ | _ | _ | _ | _ | _ | _ |
| f.5S | _ | _ | _ | _ | _ | _ | _ |
| 5HS | _ | _ | _ | _ | _ | _ | _ |
| 2P | _ | _ | _ | _ | _ | _ | _ |
| 2K | _ | _ | _ | _ | _ | _ | _ |
| 2S | _ | _ | _ | _ | _ | _ | _ |
| 2HS | _ | _ | _ | _ | _ | _ | _ |
| j.P | _ | _ | _ | _ | _ | _ | _ |
| j.K | _ | _ | _ | _ | _ | _ | _ |
| j.S | _ | _ | _ | _ | _ | _ | _ |
| j.HS | _ | _ | _ | _ | _ | _ | _ |
| 6HS | _ | _ | _ | _ | _ | _ | _ |
Specials
| Move | Startup | Duration | Recovery | Total | Attack Level | Grounded Frame Advantage | Aerial Frame Advantage |
|---|---|---|---|---|---|---|---|
| <special1> | _ | _ | _ | _ | _ | _ | _ |
| <special2> | _ | _ | _ | _ | _ | _ | _ |
Finishing Skills
| Move | Startup | Duration | Recovery | Total | Attack Level | Grounded Frame Advantage | Aerial Frame Advantage |
|---|---|---|---|---|---|---|---|
| <super1> | _ | _ | _ | _ | _ | _ | _ |
| <super2> | _ | _ | _ | _ | _ | _ | _ |
Notes
- *1: <note1>
- *2: <note2>
