Bloody Roar Extreme/System
Basic Mechanics
Movement
Movement is done with the D-Pad or Control Stick, with multiple movement types existing:
- Pressing (and holding) forward or back will cause the character to walk at a moderate speed in the desired direction.
- Characters can also quick dash and run by tapping the direction twice in quick succession (dash) or double tapping and then holding (run). Both dashing and running can be canceled, with dash-canceling being the fastest way to move around and create space.
- Characters are also able to shuffle by pressing down-forward or down-back. While slow, this allows characters to close or create space while crouching.
Lastly, characters are able to jump in various ways and, as with grounded movement, multiple types of jumps exist:
- Standard jumping, which can be used in 3 directions: Up, Up-Forward and Up-Back.
- Jumping while running allows fighters to cover greater distance and jump higher by using the run's momentum.
- Finally, a stop jump allows the player change the angle of a running jump. This is done by performing a run, releasing forward and tapping up a split second later.
Attacking
Bloody Roar Extreme features four attack categories:
- Punch: this category concerns all Punch-classified attacks. Punch attacks are assigned to the B Button by default, and are notated as P.
- Kick: this category concerns all Kick-classified attacks. Kick attacks are assigned to the A Button by default, and are notated as K.
- Beast: this category concerns all Beast-classified attacks; these attacks are only available when a fighter has already transformed. Beast attacks are assigned to the X Button by default, and are notated as B.
- Throw: this category concerns all Throw-classified attacks. Standard throws are performed with 6G (G being assigned to the Y Button by default), while command throws require more complex inputs (some being character-specific).
These categories create specific interactions against certain moves. For example, Marvel's Leg Trap (64P) is a counterattack that only works against Kick-classified attacks.
In turn, all of these attacks are classified as either High, Middle or Low attribute, or a combination thereof. With a few exceptions, all throws are considered High-attribute attacks. The attack's attribute determines factors such as the type of Guard needed to block an attack and the states that can avoid said attack, among others.
The game also features Guard Breaks, a type of attack highlighted with a gold burst and featuring a special sound effect. These can be either a normal attack or a special move, and most non-throw-based Beast Drives are Guard Breaks. Each character has multiple Guard Breaks and they come in various forms, with various other properties depending on the character and attack.
Defending
Bloody Roar Extreme uses a multi-layered guarding system.
- Light Guard: to perform a Light Guard, simply leave the stick in a neutral position (while holding Down on the Control Stick or D-Pad to guard against lows).
- Heavy Guard: to perform a Heavy Guard, hold either back or the G button (while holding Down-Back or Down + G for lows).
- Evade: an attack can be evaded by pressing G just before said attack connects against the fighter. Evade's window only lasts a few frames, so it must be timed right; in return, evaded attacks do not inflict blockstun, allowing for a much faster retaliation.
- Just Defend / Dashing Guard: to perform a Just Defend, quickly input a 44G at just the right time before the attack connects.
Beast Change and Beast Form
Every character in Bloody Roar Extreme has 3 forms: Human, Beast, and Hyperbeast. The term "Beast Change" will appear at the bottom of the screen when the fighters are capable of entering into their Beast Form, which can be done when the Beast Gauge at the bottom of the screen is 50% full (signified by the blue meter being completely filled, thus changing into a yellow meter). Hyperbeast Form can be activated at nearly any time; however, characters will receive a damage penalty upon transforming, based on how much of their Beast Gauge was empty at the time.
While in Beast Form, a character will gain the following advantages and changes:
- Gains new attacks with the Beast button, as well as Beast Drives.
- Deals more damage and receives less.
- Becomes heavier and harder to juggle.
- Gradually recovers a portion of lost, blue life.
- Can jump higher without momentum, as well as perform wall jumps.
- Gains access to Air Cancel.
- Attacks gain new Cancel Points and other properties.
- The hitboxes and hurtboxes of the character (and their attacks) change.
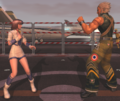
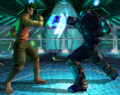
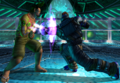
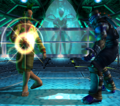
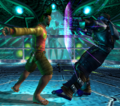
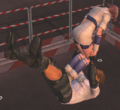
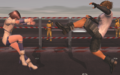
When Alice has obtained enough Beast Gauge...
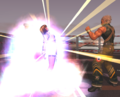
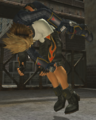
A Beast Change can be performed...
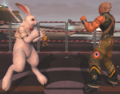
Transforming into her Beast Form.
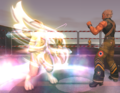
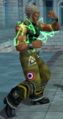
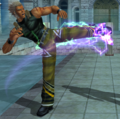
Hyperbeast activation is distinguished by the displaying of the character's emblem.
.png)
.png)
.png)
.png)
Beast Gauge
The Beast Gauge fills gradually as time passes. It can also be filled (with varying amounts based on the interaction) by whiffing attacks, dealing damage, taking damage, and pressing B while unable to transform. Beast Gauge fills faster the lower health the character has. Any damage taken in Beast Form also deals damage to the Beast Gauge; upon complete depletion, the character will not immediately revert back to Human Form, but will do so when knocked down, launched or if the Life Gauge is also depleted.
The Beast Gauge can enter 4 different states:
- When the fighter is in Human Form and the meter is filling up, the gauge is colored Blue.
- When a character is capable of transforming, the gauge is colored Yellow, further indicated by the "Beast Change" text on top of it.
- If the character has transformed, the gauge will flash Yellow/White. In this state, they cannot gain Beast Gauge, and getting hit reduces its capacity.
- If the character has entered their Hyperbeast Form, the gauge will flash Red/White. Unlike the previous state, the gauge is strictly time-based, meaning incoming attacks do not reduce the amount of time spent in Hyperbeast Form.

Blue Beast Gauge

Gold Beast Gauge (Beast Change OK)
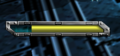
Gold Beast Gauge (Beast Form)

Hyperbeast Gauge
.png)
.png)
.png)
Beast Drives
Beast Drives are powerful super moves that can be used while in Beast Form; using them, however, comes at the cost of all remaining Beast Gauge and reverting fighters to their Human Form. The more Beast Gauge the character has at the time of using a Beast Drive, the more damage it will do. Every character has at least 2 Beast Drives, with some characters having more. Using a Beast Drive also recovers a portion of blue health equal to the amount of Beast Gauge available when the Beast Drive was used.
Ability Plus
Ability Plus are traits that characters receive when entering Hyperbeast Form, only being active for as long as Hyperbeast Form lasts. These can range from super armor to life steal and even other effects. Each character gains 2 traits (Uranus being the exception, having access to 3), some being exclusive to a given character.
List of Ability Plus
| Name | Description | Character(s) |
|---|---|---|
| All Guard Break | All attacks gain Guard Break properties. | Gado |
| Any Cancel A | All normals become special-cancelable. | Bakuryu, Busuzima, Gado, Kohryu, Xion, Yugo |
| Any Cancel B | All normals and specials become special-cancelable; a special cannot cancel into itself, but can be canceled into other specials. | Fang, Ganesha, Marvel, Shenlong, Uranus |
| Consecutive Hit | All attacks have increased hitstun and blockstun. | Fang, Long, Yugo |
| Consecutive Hit (air) | All attacks have increased hitstun against airborne opponents. | Alice |
| Counter Hit Effect | All attacks gain the on-hit effects as if they were Counter Hits. | Long, Marvel, Uranus, Uriko |
| Energy Drain | Attacks steal a portion of the damage dealt to restore the user's health. | Jenny |
| Invisibility | The user remains invisible for the duration of Hyperbeast, so long as damage is not taken. | Busuzima |
| Kezuri A | All attacks deal full damage through Guard as Chip Damage. | Bakuryu |
| Kezuri B | All attacks become multi-hit and deal damage through Guard. | Xion |
| Power Guard | Light Guard can no longer be broken by Guard Breaks. This extra protection also extends to Guard Attacks and Counter moves. | Shenlong, Stun |
| Power Launcher | All launching attacks disable the opponent's ability to use Air Recovery. | Jenny, Kohryu |
| Power Legs | All Kick-based attacks deal significantly more damage, earn Guard Break properties and gain the on-hit effects as if they were Counter Hits. | Alice |
| Rave | All attacks have decreased startup and become special-cancelable. | Cronos |
| Speed Up | Dash and walk speeds are greatly increased, and all attacks have less startup and recovery. | Stun |
| Super Armor | Light Guard becomes permanently active, and the character cannot be put in hitstun (still takes damage). | Ganesha |
| Transformation | The user's Beast Form changes, gaining new moves, stats and attack properties. | Cronos, Uranus |
| Void Opponent's Defense | The user's attacks ignore the opponent's Beast defense modifier, dealing the same amount of damage as if they were in Human Form. | Uriko |
Light Guard, Heavy Guard and Guard Breaks
Bloody Roar Extreme uses a multi-layered guarding system: Light Guard and Heavy Guard.
- Light Guard is the standard guard found in most 3D fighting games, activated when a character is left in a neutral state. A Standing Light Guard protects against incoming High- and Middle-attribute attacks, but not against Low-attribute ones; to use Light Guard against Low-attribute attacks, simply hold 2. When a Light Guard is used to block an attack, the character will have a visual display of guarding with one arm.
- Heavy Guard is activated by holding G for High- and Middle-attribute attacks (and 2G for Low-attribute attacks). When using a Heavy Guard, characters take significantly increased blockstun against all attacks, making it not something to be used in every situation. As a visual cue, when using Heavy Guard, characters will visibly block with both arms.
Attacks with Guard Break properties can only be blocked with a Heavy Guard; attempting to block these attacks with a Light Guard (whether on its own or as part of Guard Attacks, Super Armor and various Counter-type moves) will result in a Guard Crush, placing the defender into a vulnerable state (where they will stumble backwards and receive half of the original damage of the Guard Break) and leaving them open to a follow-up attack.
Light Guard
Heavy Guard
A Guard Break during startup
A succesful Guard Crush


Damage Scaling and Aerial Diminishing Returns
After an opponent is launched into the air, every subsequent hit deals less damage (by about 25%) and causes their character to sink closer to the ground as if they were heavier, making them harder to juggle. Groundbounces ignore the Diminishing Returns' sinking effect, but not the damage scaling. Throws and hitgrabs bypass damage scaling even when used in combos, making hitgrabs such as Gado's Demolition Fang (236B) good combo enders.
Air Recovery and Air Guard
Aerial Recovery is performed by pressing any of the attack buttons (or G) after being launched. Air recovering with G and a directional input allows players to fall in their chosen direction in an attempt to escape incoming attacks. Be warned: using Air Recovery will reset all air hits' Diminishing Returns and damage scaling. If a character is hit by a launcher or another attack that puts them into a spinfall animation, they will be unable to use Air Recovery.
After using Air Recovery, it is possible to Guard with G (or holding 4); however, airborne characters can only block once and, after a successful Air Guard, they will go into a falling, Guard-Crushed state, even if hit by a non-Guard-Break attack. In this state, characters are unable to attack or defend, but will fall to the ground quicker than normal.
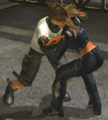
Throws and Throw Teching
Throws are split into 5 types: Neutral Throws, Crouching Throws, Back Throws, Air Throws and Command Throws.
- Neutral Throws are performed by pressing 6G near a standing opponent. Neutral throws change depending on what form the character is in, and can be teched with any of the attack buttons, provided no directions are being held when attempting to tech.
- Crouching Throws are performed by pressing 6G when near a crouching opponent. As with Neutral Throws, they can be teched with any of the attack buttons, again without pressing a direction.
- Back Throws are performed by pressing 6G when behind an opponent. Unlike every other type of throw, Back Throws are completely untechable.
- Certain characters possess Air Throws, performed by pressing 6G near their opponent; notably, Air Throws can be combo'd into. As with Ground Throws, they can be teched by pressing any of the attack buttons, but without pressing a direction.
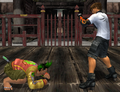
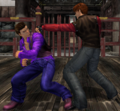
- Command Throws are performed with a special input, usually (though not always) 236G. Every character has at least one Command Throw, with some having multiple ones. Command Throws must be teched with an attack button + the last directional input of the Command Throw itself (236G would be teched with 6P/K/B, for example), and inputting the wrong direction will result in a tech lockout, where the throw cannot be broken even if the correct input is pressed afterwards. Unlike Neutral Throws, is it possible to evade Command Throws by crouching (unless it's a special, low-hitting command throw, like those of Stun and Marvel).
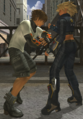
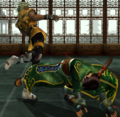
Yugo attemps to throw Marvel, but she's out of reach.
Yugo's Neutral Throw (Human Form)
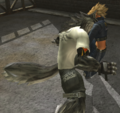
Yugo's Neutral Throw (Beast Form)
Yugo's Crouching Throw
Yugo's Back Throw
Yugo's Command Throw
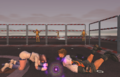
Marvel succesfully escapes Yugo's throw.
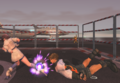
Alice is one of the few characters with an Air Throw.
Yugo succesfully escaping Alice's Air Throw.
.png)
.png)
.png)


Evade
Evade allows a character to quickly dodge an opponent's attack. This can be performed by pressing G just before being hit; because the window of success is just a few frames, an attack must already be in motion before it's possible to attempt to evade it (even within the evade window), making preemptive evade attempts impossible. Evade cannot be performed if a character is already blocking; attempting to do so (or getting hit during the attempt) will result in a small lockout period where evading becomes impossible. If successful, the character will do an evasive maneuver and the opponent's attack will whiff; the recovery period of an evade can be cancelled with a throw, attack or movement if done just after the point the evade succeeds. Successfully evading in Human Form will build Beast Gauge. It is also possible to evade multiple attacks in quick succession, but throws cannot be evaded at all.

A successful Evade

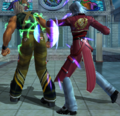
Guard Attacks
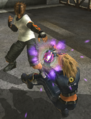
Guard Attacks are special, armored attacks highlighted with a green, electric aura. Each character has one of these moves with either 214P or 214K. Guard Attacks only have upper-body armor, so they will lose to low attacks, as well as throws and Guard Breaks. The amount of armor, as well as other properties of the attack, varies depending on the character.
A Guard Attack during startup.
A Guard Attack's active frames.
Guard Attacks are protected with upper-body Armor, plowing through high and mid attacks.
.png)
.png)
.png)
Lie Down/Ducking
Pressing and holding 22 will cause the character to go into a lie down/ducking stance. In this stance, all High- and Middle-attibute attacks will be evaded, but the characer will take increased damage and hitstun from Low-attribute attacks. There are 3 moves that can be performed from this stance (one for each attack button) and they vary depending on character. The ducking stance has a limited duration, eventually returning to a crouching position. It's possible to cancel out of this position with a dash or command move.
Busuzima ducks...
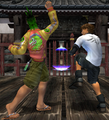
then retaliates with a Ducking Attack.


Stagger State and Lever Recovery/Quick Recovery
Various attacks put the opponent into a stagger state on hit (or Counter Hit). While in the stagger state, characters are unable to attack or defend (though attempting to tech throws is still possible). Various types of stagger exist, each one with slightly different properties and effects. Getting hit while in stagger causes the attack's hit effect to rank up (for example, Marvel's Task Force Upper (236P) normally causes floating stagger, but it will cause a Launch against an already staggered opponent). It's possible to reduce the duration of stagger by rotating the Control Stick or D-Pad in either direction.
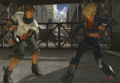
Crushing
Various attacks in Bloody Roar Extreme feature a built-in dodge system based on the attack's attribute, letting them beat those attacks clean. This system relies on the character's current state:
- High-attribute attacks are crushed by moves and states where the character is considered as crouching (internally referred to as
SIT). - Middle-attribute attacks are crushed by moves and states where the character is considered as ducking (internally referred to as
FUSE). - Low-attribute attacks are crushed by moves and states where the character is considered as floating (internally referred to as
FLOATandSMALL).
The amount of moves that can crush (and what they can crush) varies depending on the character and their current form.
Shenlong's 1P is a High Crush, thus allowing it to dodge Fang's 5P, which is classified as a High-attribute attack.
Cronos' 6K is a Low Crush, protecting him from Long's 1K, a sweeping kick considered to be a Low-attribute attack.


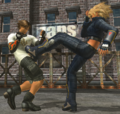
Rising Attacks and Tech Roll
After getting knocked down and while lying prone on the floor, players have the option to use a Rising Attack or a Tech Roll.
- A Rising Attack is performed by pressing K. This move is fully invincible on startup, deals damage and causes a knockdown on Counter Hit, but is extremely punishable if blocked or evaded.
- A Tech Roll is performed by pressing any of the four directions, causing the character to roll in the direction pressed. Tech Rolls are good for putting space between the player and their opponent, but are vulnerable to Pursuit Attacks during startup.

Yugo's Rising Attack.

Yugo's Tech Roll.


Pursuit Attacks
Pressing Down + one of the attack buttons against an opponent lying on the ground will cause the character to do a Pursuit Attack. These can be done quite late and are good for catching people trying to tech roll.
Alice's P Pursuit Attack
Alice's K Pursuit Attack

Alice's B Pursuit Attack
.png)
.png)
.png)
Air Chains
Air attacks can be chained into each other, but no same attack can be used more than twice in a single chain. The standard, basic air chain path is K > P > B.
Hard Knockdown
A hard knockdown prevents a character from performing any action for a short period after being knocked down. hard knockdowns usually come from attacks that send a character forcefully across the arena, into walls or slammed down into the ground. The duration of a hard knockdown depends on the amount of damage done, with the attack or combo that caused the hard knockdown having a longer duration the higher its damage is.
Meaties and wakeup
During wakeup, characters gain temporary invulnerability. However, upon inputting any command (be it an attack, guarding or movement of any kind), the wakeup invulnerability becomes void; and allows for meaties from any type of attack.
Hyper Burst
Hyperbeast activation can be used as a Hyper Burst to escape situations that would not normally be escapable, such as combos. To do this, simply enter Hyperbeast during hitstun or blockstun. When using Hyperbeast this way, its properties will change, causing it to deal a small amount of damage and blast the opponent away; this comes at the cost of increasing the overall recovery time, making it susceptible to bait-and-punish attempts. It is also possible to Hyper Burst out of a knockdown, causing the character to be put into the air briefly. Hyper Burst cannot be used against throws.
Blue Health
When taking damage, a portion of the damage dealt will remain as blue health (about 40% of the total damage). Entering Beast From will cause this blue health to recover at a character-specific rate (see individual character stats sections; lower Rcv = faster health regeneration). Using a Beast Drive will instantly restore a portion of this blue health equal to the amount of Beast Gauge available when used.
Weight
In Bloody Roar Extreme, all character have a weight class, which affects, among other things:
- How high characters are launched.
- How fast they fall during air combos and juggles.
- How they are affected by bounces.
A character's weight class can change depending on their current form, with heavier characters generally being harder to juggle.
Facing Backward
While facing backwards, characters take increased damage. However, they are given access to Backturned Attacks. Holding G while facing backwards will cause the character to quick turn after being attacked; this is good for avoiding strings but not against single, high-damage hits.
Walls and Ringout
Walls can be broken in Bloody Roar Extreme. Each wall is made up of several segments, which are broken individually by knocking the opponent into it; the amount of hits required to break it depends in the force of the attack. Once a segment has been removed, it is possible to knock the opponent through the gap and score a Ringout. Wall settings can be changed in the Extra Options menu.
Advanced Mechanics
Command Cancel and Cancel Points
Command Cancels allow players to cancel most special moves during startup by pressing G. The point and window at which a special move can be cancelled varies depending on the move, character and form, but almost all can be canceled within the first few frames. On top of this, many strings have cancel points that allow canceling an attack into a special move (Shenlong's 8P>6P for example); again, these cancel points vary greatly from character to character. When combining these two techniques together, it's possible to create extremely strong mixups, tick throws and various other setups to great effect, and is key to Bloody Roar Extreme's offensive game (the previous Shenlong example becomes 8P>6P xx 214P,G). Canceling different specials can give different effects, such as burst movement (Cronos' 214K, for example, has a lot of forward momentum even when canceled).
Air Cancel
Air Cancel is the ability to cancel the recovery of an attack against an airborne opponent. Air Cancels can only be used while in Beast Form. This can be done in 3 ways:
- Jumping: this allows players to pursue their opponent into the air and attack them with an air chain or other jumping attack.
- Up + P/K/B: this allows players to directly cancel into an attack.
- Tiger Knee a special or super input: this allows players to directly cancel into one of their special moves.
Air Cancels are an important part of Bloody Roar Extreme's combo system, allowing players to bridge the gap after a launcher and prevent air recovery by following up with an air chain or another move. There is no limit to how many times air cancels can be used per combo as long as the opponent is still airborne.
Un-Jump
Un-jumping is a method to stay grounded after performing an Air Cancel with a jump. It is performed by rolling the direction from up at the point of cancellation to either forward or backward, and can be used in conjunction with various forward or back attacks (such as Busuzima's 4K) to extend combos that would not normally be possible.
Dash Cancel
Normally, when dashing (be it forward or backward), characters need to go through some recovery in order to go back to neutral state. By pressing the Guard (G) button while doing so, however, allows players to instantly brake their dash into a Heavy Guard. This can be used to quickly defend against incoming attacks, but above all, can allow for some solid backdash-spacing if used continuously.
On top of this a dash can be partitioned allowing for a rapid double dash, by keeping the second directional input of the dash held down and tapping G for a split second making the character dash immediately upon releasing their Heavy Guard button without needing to input the full dash command again, which can then be cancelled as normal by releasing the directional input and tapping G again. Note only 2 dashes (or 3 if quick enough) can be performed in this way without having to re-input the full dash command.
A dash can also be performed with a diagonal input (down-back or down forward) after the first back/forward input which allows for a partial crouch state causing some high attacks to whiff while dashing and increases the distance of a partitioned dash by a small amount which is incredibly useful when trying to escape or avoid attacks.
This style of Korean-dashing/Korean-backdashing akin to other 3D fighters can be chained together back to back for extremely strong and fast movement when those aspects are chained altogether. Visually, the input sequence will look like this:
4 > 1 [hold] > Tap G > release 1 > G > 4 > 1 [hold] > Tap G > release 1 > G > 4 > 1 [hold] > Tap G > release 1 > G > etc.
While it should be done as soon as possible to ensure the Korean-dashing can occur, it's still best to time it so that a decent amount of distance is gained between a single Korean-dash/backdash (or between both). Mastering this aspect of dash canceling is more effective than simply trying to immediately let go of the stick to return to neutral upon tapping G and trying to input a dash again.
Even then, dash-canceling works great when needing to block an incoming attack that can catch out any dash (especially a backdash) when trying to create some distance between the characters.
Hyper Cancel
Inputting H during a Normal or a Special Move's recovery will allow it to cancel into Hyperbeast activation; this form of cancelling ignores the restrictions of other types of cancelling and can even be done in the air. This can be used to make moves safer, extend combos or activate Hyperbeast safely.
OTG Combos
After a knockdown, characters will enter a brief state where they can be hit by various attacks while lying on the ground; this is denoted by a bouncing, shockwave effect. Not all attacks are able to land as OTGs, and the ones that can vary by character (and even form).
Instant Air Evade
Performing an Evade in the air is similar to its grounded countepart; a key difference, however, is that a successful evade it will place the player to the side/behind the opponent. Instant Air Evade consists of using an Air Evade on the first few frames of a jump, which requires frame-perfect timing but grants a much larger reward.
Dash Guard/Just Defend
A form of just defend that can be used while moving back from a dash (where Evade is not normally allowed) with a 44G input. Althout carrying an extremely tight window, Just Defend allows the defender to block high and low at the same time while building a large amount of meter, but comes at the cost of Heavy Guard Blockstun.
Dash Command Buffering
It is possible to buffer a Special Move input during a backdash or forward dash, allowing for faster whiff-punishing.
G Command Store
A special form of negative edge, Bloody Roar Extreme allows storing moves briefly with a G press and have them come out when G is released; this is done by holding G, inputting a Special Move motion and then releasing G. This is extremely useful when combined with Dash Command Buffering.
Just Frame Backturn Throw
It is possible to to an Instant Backturned Throw by pressing 6 and then pressing G on the very next frame. This can also be done with a Command Throw by inputting a reverse Command Throw input followed by a 6 on the next frame, then followed by G on the frame after.
Guard Attack Flash Parry
A method of "parrying" by using the armored portion of a Guard Attack to absorb a hit, then instantly cancelling the Guard Attack. This is useful for characters whose Guard Attacks don't offer much on hit.
Miscellaneous Info
Character Defense/Health Ratings
All characters have a total health of 200 points; however, some characters take more damage than others. The table below shows the damage modifiers applied for each character (and their Beast Forms).
A lower defense rating means more damage taken.
| Defense Modifier | Character (Form) |
|---|---|
| 1.25 | Stun (Insect) |
| 1.11 | Ganesha (Elephant) |
| 1.05 | Gado (Lion), Uranus (Chimera) |
| 1.00 | Yugo (Wolf), Fang (Wolf), Long (Tiger), Kohryu (Iron Mole) |
| 0.95 | Marvel (Leopard), Shenlong (Tiger), Cronos (Phoenix) |
| 0.91 | Alice (Rabbit), Xion (Unborn), Busuzima (Chameleon), Jenny (Bat), Bakuryu (Mole) |
| 0.87 | Uriko (Half-Beast) |
| 0.80 | Stun (Human), Gado (Human), Kohryu (Human), Ganesha (Human) |
| 0.77 | Yugo (Human), Fang (Human), Long (Human) |
| 0.74 | Alice (Human), Uriko (Human), Marvel (Human), Busuzima (Human), Jenny (Human), Bakuryu (Human), Cronos (Human) |
| 0.71 | Xion (Human), Shenlong (Human), Uranus (Human), Cronos (Penguin) |
| 0.59 | Uranus (Hyperbeast) |
Character Weight Rating
| Weight | Character (Form) |
|---|---|
| 2500 | Ganesha (Elephant) |
| 2132 | Stun (Insect) |
| 1600 | Kohryu (Iron Mole) |
| 1500 | Uranus (Chimera) |
| 1100 | Ganesha (Human), Stun (Human) |
| 1050 | Gado, Kohryu (Human) |
| 650 | Yugo, Fang, Long, Shenlong, Cronos (Human/Phoenix), Busuzima, Xion, Alice, Marvel, Jenny, Uranus (Human/Hyperbeast) |
| 550 | Cronos (Penguin) |
| 500 | Bakuryu, Uriko |
Movement speed per character
Forward walk
| Character | Human | Beast | Hyperbeast |
|---|---|---|---|
| Alice | 24.22 | 25.07 | |
| Bakuryu | 23.17 | 25.06 | |
| Busuzima | 13.82 | 19.56 | |
| Cronos | 15.45 | 10.75 | 10.99 |
| Fang | 27.00 | 25.06 | |
| Gado | 21.75 | 17.19 | |
| Ganesha | 16.05 | 13.12 | |
| Jenny | 18.89 | 17.70 | |
| Kohryu | 23.17 | 25.06 | |
| Long | 22.63 | 17.19 | |
| Marvel | 21.75 | 17.19 | |
| Shenlong | 22.67 | 17.19 | |
| Stun | 18.30 | 15.09 | 76.92 |
| Uranus | 52.29 | 17.19 | |
| Uriko | 22.76 | 22.17 | |
| Xion | 22.63 | 18.02 | |
| Yugo | 27.00 | 25.06 |
Back walk
| Character | Human | Beast | Hyperbeast |
|---|---|---|---|
| Alice | 20.69 | 23.82 | |
| Bakuryu | 21.50 | 17.50 | |
| Busuzima | 9.41 | 18.19 | |
| Cronos | 15.02 | 5.42 | 15.48 |
| Fang | 21.84 | 17.50 | |
| Gado | 18.36 | 15.48 | |
| Ganesha | 8.46 | 11.22 | |
| Jenny | 15.62 | 13.87 | |
| Kohryu | 21.50 | 17.50 | |
| Long | 19.15 | 15.48 | |
| Marvel | 15.95 | 15.60 | |
| Shenlong | 18.59 | 15.48 | |
| Stun | 8.21 | 12.44 | 46.15 |
| Uranus | 43.57 | 15.48 | |
| Uriko | 18.71 | 23.78 | |
| Xion | 19.15 | 15.73 | |
| Yugo | 21.84 | 17.50 |
Backdash distance and duration
| Character | Total distance traveled | Total time in frames |
|---|---|---|
| Alice | 18.00 | 34 |
| Bakuryu | 17.88 | 36 |
| Busuzima | 15.44 | 36 |
| Cronos | 17.88 (Penguin 10.46) | 36 |
| Fang | 17.88 | 36 |
| Gado | 17.88 | 36 |
| Ganesha | 14.62 (Beast 14.63) | 36 |
| Jenny | 17.00 | 29 |
| Kohryu | 17.88 (Beast 18.00) | 36 |
| Long | 17.88 | 36 |
| Marvel | 17.88 | 36 |
| Shenlong | 18.00 | 36 |
| Stun | 14.62 (Hyperbeast 23.00) | 34 |
| Uranus | 21.87 (Beast and Hyperbeast 27.5) | 39 |
| Uriko | 18.00 | 36 |
| Xion | 18.00 | 36 |
| Yugo | 17.88 | 36 |
Backdash Acceleration/Movement by frame
Guard Attack Properties
| Character | Startup | Active | Recovery | Level | Amount of armor | Additional properties |
|---|---|---|---|---|---|---|
| Alice | 27 | 6 | 29 | Middle | 25 | Stagger on hit Launch on Counter Hit |
| Bakuryu | 40 | 1x9 | 35 | Middle | 34 | Multi-hit Knockdown on hit Knockback on Counter Hit |
| Busuzima | 40 | 2 | 43 | Middle | 34 | Knockdown on hit Knockback on Counter Hit |
| Cronos | 30/11 | 2/4 | 2/35 | Middle | 24 | Two hits that can each be canceled individually Knockdown/Knockback |
| Fang | 29 | 3 | 35 | Middle | 29 | Stagger on hit Launch on Counter Hit (Beast only) |
| Gado | 33 | 4 | 26 | High / Middle | 27 | Leads into Pressure of Tyrant string |
| Ganesha | 34 | 4 | 23 | Middle | 25 | Stagger on Counter Hit |
| Jenny | 33 | 4 | 37 | Middle | 35 | Stagger on hit Groundbounce on Counter Hit |
| Kohryu | 40 | 3 | 51 | Middle | 38 | Knockdown on hit Knockback on Counter Hit Throw immunity |
| Long | 34 | 3 | 27 | Middle | 34 | Knockdown on hit Knockback on Counter Hit |
| Marvel | 28/5x3/6 | 2/1x4 | 4x4/38 | Middle (x4) High (last) |
15 | Five hits that can each be canceled individually Knockback on last hit |
| Shenlong | 34 | 3 | 31 | Middle | 34 | Knockdown on hit Knockback on Counter Hit |
| Stun | 23 | 2 | 33 | Middle | 23 | Knockdown on hit Throw immunity |
| Uriko | 26 | 7 | 22 | High | 28 | Airborne Stagger on hit Groundbounce on Counter Hit |
| Xion | 25 | 6 | 33 | Middle | 21 | Knockdown on hit Knockback on Counter Hit |
| Yugo | 29 | 3 | 35 | Middle | 29 | Stagger on hit Launch on Counter Hit (Beast only) |