Buntaro Kuno
Introduction
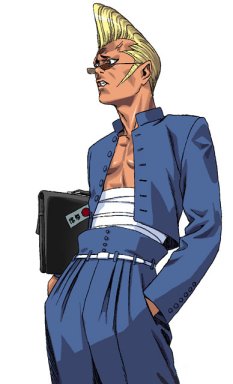
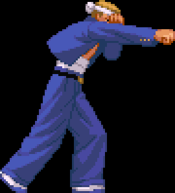
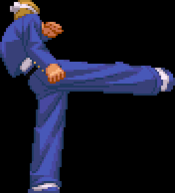
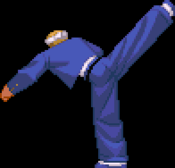
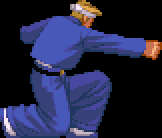
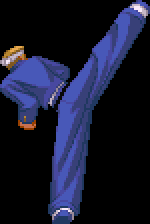
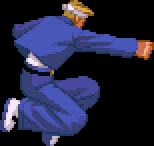
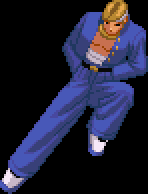
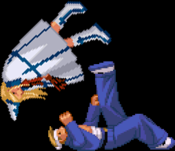
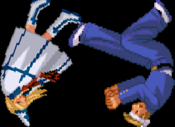
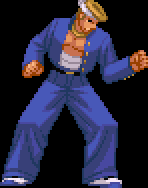
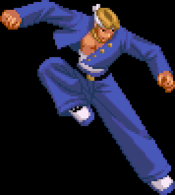
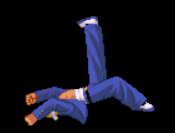
Buntaro is a schoolboy with his own gang, who cheers him on in fights. He is also the older brother to Shintaro Kuno and share similar techniques with slight differences. Although, Buntaro likes to pretend to be a tough guy, he is truthfully very emotional and tends to cry every time he feels moved. Especially when he is watching an emotional scene in an anime. Buntaro's in-game character design different from his character select portrait. Buntaro doesn't wear glasses, wears a bandana on his head and has a completely different hairstyle.
Buntaro's involvement in the Matrimelee tournament is to meet his role model, Reiji Oyama. Winning the tournament is just a bonus to Buntaro's ego.
Overview
| Strengths |
Weaknesses
|
- 63214.K is a great combo ender up to stomp level 2.
- 623.K is a decent anti-air thanks to its startup invincibility.
- Good Natural Chain combos, 2.B > D being the best.
- cl.C is an amazingly fast normal, used for fast pokes and combo confirms.
- 6.A has a load of hitstun on hit, which can confirm any special or super.
- 236-3214.D is a great anti-air that does decent damage raw.
- 4.BDBD does a load of damage and can be linked from multiple combo routes.
- 63214.P counter can be used to make hard reads and also strengthens from his stomp leveling system.
- Level 2 63214.P counter can be canceled into 236-3214.D
|
- Stomp levels are risky to get unless you cause a hard knockdown on the opponent
- Gaining a level is traded for taunting for meter build.
- Each level-up requires more time per charge.
- Whiffing 63214.K/P will deplete one stomp level.
- 63214.P counter doesn't counter low attacks.
- Cannot combo into his stomp Lvl.3 63214.K due to its large start-up.
- J.236.K's follow-ups can whiff easily.
- Very short CD attacks.
|
Strategy
Buntaro is a very short-ranged character that lacks good grounded options. He has very good neutral options but lacks a good approach option for his grounded routes are very limited forcing him to use his jump normals to approach.
Buntaro's neutral play is excellent thanks to his 623.K. It's not air unblockable, but it does have start-up invincibility and beats out most jump-in attacks. If you have Stress Meter opt in to use his Stress Shot, 214-1236.D. It's air unblockable and does a solid chunk of damage. Buntaro's grounded options are seriously limited by how short his normals are. 2.B is going to be your best friend along with 7/9.B, 7/9.D, and 7/9.C. All three of these air normals can cross-up and 7/9.B chains into j.D, allowing for scary and damaging cross-ups. Buntaro also has access to an air 50/50 thanks to his j.236.K and two optional follow-ups. J.236.K > 236.D is a high to low and J.236.K > 236.B is a high to high combo. Use this sparingly for the B follow-up has an identifiable start-up. Buntaro has an easy time applying pressure and comboing. If you're 63214.K gets blocked (excluding level 0, it's minus) you can set-up a grab since it immediately puts you right in grab range. This is a nice option select if your 63214.K ever gets blocked.
Buntaro's leveling system isn't worth it past level 1. I can really only recommend that you charge once since the time it takes to get any more levels is way too difficult thanks to the stomp's long animation. DO NOT BOTHER LEVELING UP TO LEVEL 3!! For one, it takes 3 stomps to fully level. Your opponent can easily walk over and punish you during the stomps' animation. Your 63214.K at max level cannot be comboed into under any circumstances. The 63214.P counter gains extra hits per level, a total of 4 hits at max, and is very situational in use.
Normal Moves
Far Standing Normals
5.A
|
| Total Damage
|
Permanent Damage
|
Cancel
|
Guard
|
Gauge
|
Startup
|
Active
|
Recovery
|
Hit Adv
|
Block Adv
|
| 4
|
2
|
Special
Super
|
Mid
|
-
|
-
|
-
|
-
|
-
|
-
|
Air Unblockable.
Decent, but fast standing jab. Has too much pushback to do anything with so use it sparingly.
|
|
5.B
|
| Total Damage
|
Permanent Damage
|
Cancel
|
Guard
|
Gauge
|
Startup
|
Active
|
Recovery
|
Hit Adv
|
Block Adv
|
| 11
|
4
|
Special
Super
|
Mid
|
-
|
-
|
-
|
-
|
-
|
-
|
Air Unblockable.
Extremely limited uses outside of hitconfirms and denying hops.
|
|
5.C
|
| Total Damage
|
Permanent Damage
|
Cancel
|
Guard
|
Gauge
|
Startup
|
Active
|
Recovery
|
Hit Adv
|
Block Adv
|
| 17
|
8
|
Special
Super
|
Mid
|
-
|
-
|
-
|
-
|
-
|
-
|
Air Unblockable.
Extremely limited uses thanks to it's immense pushback but can be used for juggles.
|
|
5.D
|
| Total Damage
|
Permanent Damage
|
Cancel
|
Guard
|
Gauge
|
Startup
|
Active
|
Recovery
|
Hit Adv
|
Block Adv
|
| 21
|
11
|
Special
Super
|
Mid
|
-
|
-
|
-
|
-
|
-
|
-
|
Air Unblockable. Lower Body Invincibility.
Not used often outside of 2.B > 5.D but can be used to avoid sweeps and as a poking tool.
|
|
5.CD
|
| Total Damage
|
Permanent Damage
|
Cancel
|
Guard
|
Gauge
|
Startup
|
Active
|
Recovery
|
Hit Adv
|
Block Adv
|
| 25
|
25
|
Special
Super
|
Mid
|
-
|
-
|
-
|
-
|
-
|
-
|
Air Unblockable. Hard WallSlam.
Very mediocre Great Attack that's only good for the wallslam and okizeme.
|
|
Close Stand Normals
cl.5A
|
| Total Damage
|
Permanent Damage
|
Cancel
|
Guard
|
Gauge
|
Startup
|
Active
|
Recovery
|
Hit Adv
|
Block Adv
|
| 4
|
2
|
Self
Special
Super
|
Mid
|
-
|
-
|
-
|
-
|
-
|
-
|
Air Unblockable.
Extremely fast close jab that can confirm into combos. Only time you're going to use this is cl.5A > 3.C.
|
|
cl.5B
|
| Total Damage
|
Permanent Damage
|
Cancel
|
Guard
|
Gauge
|
Startup
|
Active
|
Recovery
|
Hit Adv
|
Block Adv
|
| 11
|
4
|
Special
Super
|
Mid
|
-
|
Special
Super
|
-
|
-
|
-
|
-
|
Air Unblockable.
Natrual Chains into cl.5D and is excellent for adding extra damage onto cross-up combos.
|
|
cl.5C
|
| Total Damage
|
Permanent Damage
|
Cancel
|
Guard
|
Gauge
|
Startup
|
Active
|
Recovery
|
Hit Adv
|
Block Adv
|
| 17
|
8
|
Special
Super
|
Mid
|
-
|
-
|
-
|
-
|
-
|
-
|
Air Unblockable
Excellent button that can lead to hitconfirms and is safe on block.
|
|
cl.5D
|
| Total Damage
|
Permanent Damage
|
Cancel
|
Guard
|
Gauge
|
Startup
|
Active
|
Recovery
|
Hit Adv
|
Block Adv
|
| 20
|
10
|
Special
Super
|
Mid
|
-
|
-
|
-
|
-
|
-
|
-
|
Air Unblockable<.br>Although it may look like it, this normal is not a great anti-air. It's best used when in a natural chain with cl.5B > cl.5D.
|
|
Crouch Normals
2.A
|
| Total Damage
|
Permanent Damage
|
Cancel
|
Guard
|
Gauge
|
Startup
|
Active
|
Recovery
|
Hit Adv
|
Block Adv
|
| 5
|
2
|
Self
Special
Super
|
Mid
|
-
|
-
|
-
|
-
|
-
|
-
|
Fast, short jab that's good for quick and short combo confirms.
|
|
2.B
|
| Total Damage
|
Permanent Damage
|
Cancel
|
Guard
|
Gauge
|
Startup
|
Active
|
Recovery
|
Hit Adv
|
Block Adv
|
| 9
|
4
|
Special
Super
|
Low
|
-
|
-
|
-
|
-
|
-
|
-
|
Your main poke and combo tool. 2.B is your best friend.
Natrually chains into 5.D.
|
|
2.C
|
| Total Damage
|
Permanent Damage
|
Cancel
|
Guard
|
Gauge
|
Startup
|
Active
|
Recovery
|
Hit Adv
|
Block Adv
|
| 15
|
7
|
Special
Super
|
Mid
|
-
|
-
|
-
|
-
|
-
|
-
|
Extremely short normal that doesn't have much uses thanks to it's big pushback and being unsafe on block. (Find out how unsafe.)
|
|
2.D
|
| Total Damage
|
Permanent Damage
|
Cancel
|
Guard
|
Gauge
|
Startup
|
Active
|
Recovery
|
Hit Adv
|
Block Adv
|
| 21
|
10
|
Special
Super
|
Low
|
-
|
-
|
-
|
-
|
-
|
-
|
This sweep sucks. The sweep doesn't become active until a few frames after the slide starts.
|
|
2.CD
|
| Total Damage
|
Permanent Damage
|
Cancel
|
Guard
|
Gauge
|
Startup
|
Active
|
Recovery
|
Hit Adv
|
Block Adv
|
| 18
|
9
|
Special
Super
|
Low
|
-
|
-
|
-
|
-
|
-
|
-
|
Air Unblockable.
Extremely slow start-up but can be used as a launcher in combos. NOT a reliable anti-air.
|
|
Jumping Normals
8.A
|
| Total Damage
|
Permanent Damage
|
Cancel
|
Guard
|
Gauge
|
Startup
|
Active
|
Recovery
|
Hit Adv
|
Block Adv
|
| 8
|
4
|
Air Special
|
High
|
-
|
-
|
-
|
-
|
-
|
-
|
His worst air normal. Can be used for instant overhead hops into j.236.K.
|
|
8.B
|
| Total Damage
|
Permanent Damage
|
Cancel
|
Guard
|
Gauge
|
Startup
|
Active
|
Recovery
|
Hit Adv
|
Block Adv
|
| 11
|
5
|
Air Special
|
High
|
-
|
-
|
-
|
-
|
-
|
-
|
Very sub-par air to air. Very low priority. Use 8.D for a better air to air.
|
|
8.C
|
| Total Damage
|
Permanent Damage
|
Cancel
|
Guard
|
Gauge
|
Startup
|
Active
|
Recovery
|
Hit Adv
|
Block Adv
|
| 13
|
6
|
Air Special
|
High
|
-
|
-
|
-
|
-
|
-
|
-
|
Decent air to air. Use 8.D for a better air to air.
|
|
8.D
|
| Total Damage
|
Permanent Damage
|
Cancel
|
Guard
|
Gauge
|
Startup
|
Active
|
Recovery
|
Hit Adv
|
Block Adv
|
| 17
|
8
|
Air Special
|
High
|
-
|
-
|
-
|
-
|
-
|
-
|
|
|
|
7/9.B
|
| Total Damage
|
Permanent Damage
|
Cancel
|
Guard
|
Gauge
|
Startup
|
Active
|
Recovery
|
Hit Adv
|
Block Adv
|
| 11
|
5
|
Air Special
|
High
|
-
|
-
|
-
|
-
|
-
|
-
|
Buntaro's most versatile normal. Starts most of his combos and can be used for instant overhead combos into j.236.K.
Self chains into j.D. Can cross-up.
|
|
7/9.C
|
| Total Damage
|
Permanent Damage
|
Cancel
|
Guard
|
Gauge
|
Startup
|
Active
|
Recovery
|
Hit Adv
|
Block Adv
|
| 13
|
6
|
Air Special
|
High
|
-
|
-
|
-
|
-
|
-
|
-
|
One of his best buttons for jump-ins. It has great horizontal range but widens his hurtbox.
Can cross-up.
|
|
7/9.D
|
| Total Damage
|
Permanent Damage
|
Cancel
|
Guard
|
Gauge
|
Startup
|
Active
|
Recovery
|
Hit Adv
|
Block Adv
|
| 17
|
8
|
Air Special
|
High
|
-
|
-
|
-
|
-
|
-
|
-
|
Not used often outside of 9.B > D. Decently long air normal though.
Can cross-up.
|
|
Command Normals
6.A
|
| Total Damage
|
Permanent Damage
|
Cancel
|
Guard
|
Gauge
|
Startup
|
Active
|
Recovery
|
Hit Adv
|
Block Adv
|
| 16
|
8
|
Special
Super
|
High
|
-
|
-
|
-
|
-
|
-
|
-
|
Air Unblockable.
Very slow start-up and is unsafe on block (find out how much). Use sparingly.
|
|
3.C
|
| Total Damage
|
Permanent Damage
|
Cancel
|
Guard
|
Gauge
|
Startup
|
Active
|
Recovery
|
Hit Adv
|
Block Adv
|
| 16
|
8
|
Special
Super
|
Mid
|
-
|
-
|
-
|
-
|
-
|
-
|
Air Unblockable.
Although it may seem like it, 3.C is not a great anti-air due to it's shallow hitbox but is excellent tool for combos and super confirms thanks to it's massive hitstun. Unsafe on block (find out how much)
|
|
Dash Normals
66.P
|
| Total Damage
|
Permanent Damage
|
Cancel
|
Guard
|
Gauge
|
Startup
|
Active
|
Recovery
|
Hit Adv
|
Block Adv
|
| 18
|
9
|
Special
Super
|
Mid
|
-
|
-
|
-
|
-
|
-
|
-
|
Air Unblockable.
Great for advanced combos. 2.B links from this normal.
|
|
66.K
|
| Total Damage
|
Permanent Damage
|
Cancel
|
Guard
|
Gauge
|
Startup
|
Active
|
Recovery
|
Hit Adv
|
Block Adv
|
| 25
|
12
|
Special
Super
|
Mid
|
-
|
-
|
-
|
-
|
-
|
-
|
Air Unblockable. Lower Body Invincible.
Knocks down on hit.
|
|
Misc Normals & Grabs
Throws 4/6.C 4/6.C j.4/6.C j.4/6.C
|
| Total Damage
|
Permanent Damage
|
Cancel
|
Guard
|
Gauge
|
Startup
|
Active
|
Recovery
|
Hit Adv
|
Block Adv
|
| 20
|
10
|
No
|
Grab
|
-
|
-
|
-
|
-
|
-
|
-
|
Can be done on the ground or in the air.
|
|
Rage Explosion
|
| Total Damage
|
Permanent Damage
|
Cancel
|
Guard
|
Gauge
|
Startup
|
Active
|
Recovery
|
Hit Adv
|
Block Adv
|
| 6
|
3
|
No
|
Mid
|
-
|
-
|
-
|
-
|
-
|
-
|
Air Unblockable.
Launches into juggle state. Requires 1 meter to activate.
|
|
Guard Cancel 5.CD (on block) 5.CD (on block)
|
| Total Damage
|
Permanent Damage
|
Cancel
|
Guard
|
Gauge
|
Startup
|
Active
|
Recovery
|
Hit Adv
|
Block Adv
|
| 8
|
8
|
No
|
Mid
|
-
|
-
|
-
|
-
|
-
|
-
|
Air Unblockable.
Requires 1 Stress Meter and can only be done on block.
|
|
Special Moves
Kiai 17's
22.B/D Kiai 17's Kiai 17's
|
| Total Damage
|
Permanent Damage
|
Cancel
|
Guard
|
Gauge
|
Startup
|
Active
|
Recovery
|
Hit Adv
|
Block Adv
|
| 0
|
0
|
No
|
No
|
-
|
-
|
-
|
-
|
-
|
-
|
Buntaro's signature leveling move. Can be used 3 times and is used to add more hits to Many Spirit Burst and changes the properties of Super Speed! Slider!.
Each level adds an additional stomp which also takes more time.
|
|
SuperSpeed! Slider!
63214.B/D Gekisoku! Slider!
(SuperSpeed! Slider!) Gekisoku! Slider!
(SuperSpeed! Slider!)
|
This move is leveled and can be powered up by Kiai's 17.
| Total Damage
|
Permanent Damage
|
Cancel
|
Guard
|
Gauge
|
Startup
|
Active
|
Recovery
|
Hit Adv
|
Block Adv
|
| 18
|
9
|
No
|
Mid
|
-
|
-
|
-
|
-
|
-
|
-
|
Level 0.
Leaves standing on hit.
|
| Total Damage
|
Permanent Damage
|
Cancel
|
Guard
|
Gauge
|
Startup
|
Active
|
Recovery
|
Hit Adv
|
Block Adv
|
| 25
|
13
|
No
|
Mid
|
-
|
-
|
-
|
-
|
-
|
-
|
Level 1.
Knocks down on hit.
|
| Total Damage
|
Permanent Damage
|
Cancel
|
Guard
|
Gauge
|
Startup
|
Active
|
Recovery
|
Hit Adv
|
Block Adv
|
| 30
|
15
|
No
|
Mid
|
-
|
-
|
-
|
-
|
-
|
-
|
Level 2.
Knocks down on hit.
|
| Total Damage
|
Permanent Damage
|
Cancel
|
Guard
|
Gauge
|
Startup
|
Active
|
Recovery
|
Hit Adv
|
Block Adv
|
| 40
|
40
|
No
|
Unblockable
|
-
|
-
|
-
|
-
|
-
|
-
|
Level 3.
Hard WallSlam on hit. Can't be comboed into.
|
|
Manly Spirit! Burst!
63214.A/C Baku! Otokogi!
(Manly Spirit! Burst!) Baku! Otokogi!
(Manly Spirit! Burst!)
|
Each level of Kiai's 17 adds additional hits to Manly Spirit! Burst! increasing damage.
| Total Damage
|
Permanent Damage
|
Cancel
|
Guard
|
Gauge
|
Startup
|
Active
|
Recovery
|
Hit Adv
|
Block Adv
|
| 12
|
6
|
No
|
Counter
|
-
|
-
|
-
|
-
|
-
|
-
|
Level 0.
1 hit High Counter.
|
| Total Damage
|
Permanent Damage
|
Cancel
|
Guard
|
Gauge
|
Startup
|
Active
|
Recovery
|
Hit Adv
|
Block Adv
|
| 18
|
9
|
No
|
Counter
|
-
|
-
|
-
|
-
|
-
|
-
|
Level 1.
2 hit High counter.
|
| Total Damage
|
Permanent Damage
|
Cancel
|
Guard
|
Gauge
|
Startup
|
Active
|
Recovery
|
Hit Adv
|
Block Adv
|
| 28
|
14
|
No
|
Counter
|
-
|
-
|
-
|
-
|
-
|
-
|
Level 2.
3 hit High counter.
|
| Total Damage
|
Permanent Damage
|
Cancel
|
Guard
|
Gauge
|
Startup
|
Active
|
Recovery
|
Hit Adv
|
Block Adv
|
| 42
|
21
|
No
|
Counter
|
-
|
-
|
-
|
-
|
-
|
-
|
Level 3.
4 hit High counter.
|
|
Kakatsun Ki~ck!
J.236.B/D Kakatsun Ki~ck! Kakatsun Ki~ck! 236.B 236.B 236.D 236.D
|
| Total Damage
|
Permanent Damage
|
Cancel
|
Guard
|
Gauge
|
Startup
|
Active
|
Recovery
|
Hit Adv
|
Block Adv
|
| 12
|
6
|
No
|
High
|
-
|
-
|
-
|
-
|
-
|
-
|
Can be canceled off of any air normal. Air Unblockable.
Has follow-ups listed below.
|
| Total Damage
|
Permanent Damage
|
Cancel
|
Guard
|
Gauge
|
Startup
|
Active
|
Recovery
|
Hit Adv
|
Block Adv
|
| 20
|
10
|
No
|
High
|
-
|
-
|
-
|
-
|
-
|
-
|
|
|
| Total Damage
|
Permanent Damage
|
Cancel
|
Guard
|
Gauge
|
Startup
|
Active
|
Recovery
|
Hit Adv
|
Block Adv
|
| 20
|
10
|
No
|
Low
|
-
|
-
|
-
|
-
|
-
|
-
|
|
|
|
Bun-Chan Kick!
623.B Bun-Chan Kick! Bun-Chan Kick!
|
| Total Damage
|
Permanent Damage
|
Cancel
|
Guard
|
Gauge
|
Startup
|
Active
|
Recovery
|
Hit Adv
|
Block Adv
|
| 18
|
9
|
No
|
Mid
|
-
|
-
|
-
|
-
|
-
|
-
|
|
|
|
623.D Bun-Chan Kick! Bun-Chan Kick!
|
| Total Damage
|
Permanent Damage
|
Cancel
|
Guard
|
Gauge
|
Startup
|
Active
|
Recovery
|
Hit Adv
|
Block Adv
|
| 23
|
12
|
No
|
Mid
|
-
|
-
|
-
|
-
|
-
|
-
|
Two hits and has more vertical range compared to the light version.
|
|
dash 623.K
|
| Total Damage
|
Permanent Damage
|
Cancel
|
Guard
|
Gauge
|
Startup
|
Active
|
Recovery
|
Hit Adv
|
Block Adv
|
| 31
|
16
|
No
|
Mid
|
-
|
-
|
-
|
-
|
-
|
-
|
Can only be done dashing.
3 hits and has the most vertical range.
|
|
Super Moves
Stress Shot
214-1236.D Overwhelming Kick! Overwhelming Kick!
|
| Total Damage
|
Permanent Damage
|
Cancel
|
Guard
|
Gauge
|
Startup
|
Active
|
Recovery
|
Hit Adv
|
Block Adv
|
| 60
|
30
|
No
|
Mid
|
-
|
-
|
-
|
-
|
-
|
-
|
Air Unblockable.
Buntaro's best anti-air and is great for ending combos with.
|
|
Ippatsu Ougi
4.BDBD Tokumori Bun-Chan Special!
(Bun-Chan's Mortal Special) Tokumori Bun-Chan Special!
(Bun-Chan's Mortal Special)
|
| Total Damage
|
Permanent Damage
|
Cancel
|
Guard
|
Gauge
|
Startup
|
Active
|
Recovery
|
Hit Adv
|
Block Adv
|
| 85
|
43
|
No
|
Mid
|
-
|
-
|
-
|
-
|
-
|
-
|
Buntaro's most high damaging move. Extremely good for ending combos.
|
|
Combos
(Note: 63214.K can only be comboed up to level 2. Level 3 cannot be comboed into.)
| Combo
|
Total Damage
|
Permanent Damage
|
Notes
|
| Basic Combos
|
| 2.B > 3.C xx 63214.K
|
35
|
17
|
Only works up to lvl.2.
|
| 2.B > 3.C xx 623.D
|
38
|
19
|
|
| 2.C > 6.A xx 63214.K
|
45
|
22
|
Only works up to lvl.2.
|
| 9.D >> 66.A xx 623.D
|
45
|
22
|
|
| 9.B > D >> 2.B > 3.C xx 63214.K
|
43
|
21
|
Only works up to lvl.2.
|
| 9.B > D xx J.236.B > 236.B
|
33
|
16
|
Air Combo.
|
| 9.B > D >> 2.B > 3.C xx 214-1236.D
|
62
|
32
|
Requires 1 Stress Meter.
|
| 9.B > D >> 2.B > 3.C xx 4.BDBD
|
75
|
37
|
Requires 2 Stress Meter.
|
| Intermediate Combos
|
| (Juggle) cl.5D > 3.C xx 623.D
|
49
|
24
|
|
| 9.C >> 2.B > 5.D > 3.C xx 63214.K
|
44
|
22
|
Only works up to lvl.2.
|
| 9.C >> 2.B > 5.D > 3.C xx 623.D
|
47
|
23
|
|
| 9.B > D >> 2.B > 5.D xx 63214.K
|
49
|
24
|
Only works up to lvl.2.
|
| 9.B > D >> 9.B > D xx J.236.B > 236.B
|
43
|
21
|
Air Combo
|
| 9.C >> 6[6].C > 6.A xx 4.BDBD
|
81
|
40
|
Requires 2 Stress Meter.
|
| 9.B > D >> 2.B > 5.D xx 214-1236.D
|
62
|
31
|
Requires 1 Stress Meter.
|
| 9.D >> 2.B > 5.D > 3.C xx 4.BDBD
|
48
|
39
|
Requires 2 Stress Meter.
|
| Advanced Combos
|
| 9.B > D >> 5.A ~> 2.B > 3.C xx 4.BDBD
|
T
|
P
|
5.A ~> 2.B Is a CPS1 Chain. Requires 2 Stress Meter.
|
| (Cross-up) 9.B > D >> 2.A ~> cl.5C > 3.C xx 63214.K
|
T
|
P
|
2.A ~> cl.5C is a CPS1 Chain. Only works up to lvl.2.
|
| 9.B > D >> 66.C > 2.B > 3.C xx 4.BDBD
|
84
|
42
|
Requires 2 Stress Meter.
|
Additonal Character Resources
- Buntaro Combo Expo 1 (Some basic and advanced combos are shown):
- https://www.youtube.com/watch?v=4Kz3PL0TZGM&t
