 |
Under Construction
- This page is a work in progress.
- Please be patient and check back later for additional changes.
|

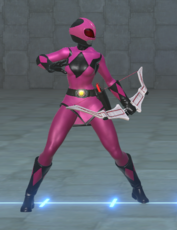
Kimberly Ann Hart
Ranger Slayer Introduction
Health: 1000
Walk Speed: 800 Forward, 450 Back
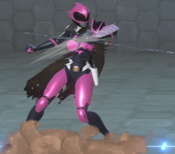
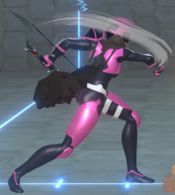
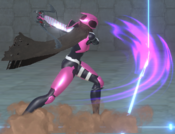
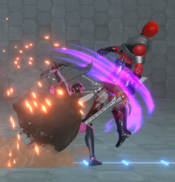
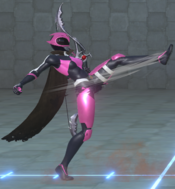
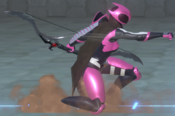
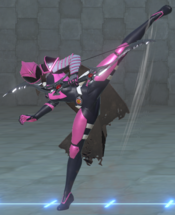
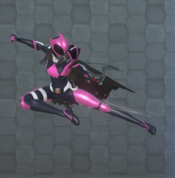
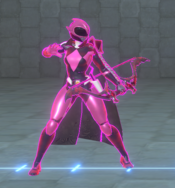
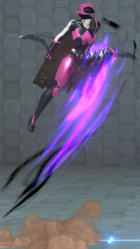
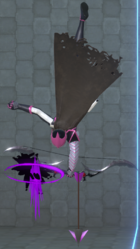
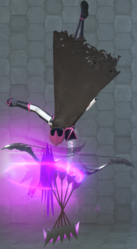
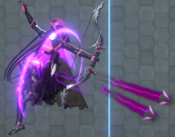
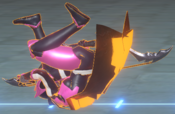
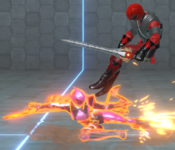
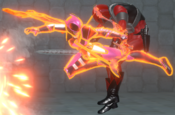
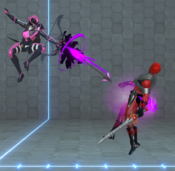
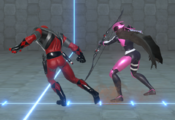
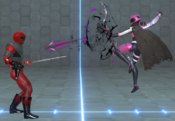
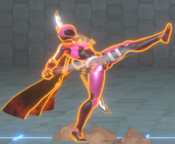
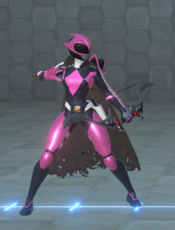
Kimberly Hart was once the Pink Power Ranger, until she was brainwashed by Lord Drakkon and forced to do his evil bidding against her will. She eventually breaks free from his grasp and rejoins the fight on the side of good.
Playstyle
|
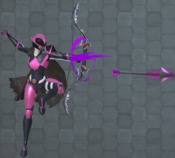
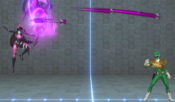
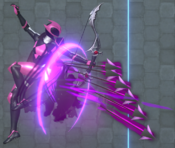
The Ranger Slayer is a zoner with outstanding safety and zoning capabilities |
| Pros |
Cons |
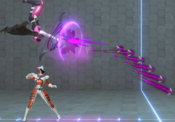
- Long range - 2M's slide, as well as her arrows, allow her to play from exceptionally long ranges
- Strong zoning - A dash cancellable 5M and her unique arrow cancels give Kim very strong space control
- Safe options - 4S and dash cancels make her able to escape from many dicey situations and start zoning again
- High flexibility - Dash and arrow cancels allow the player to respond to many different situations on the fly
- Great assist - Especially as a counter call, Kim's assist is among the best in the entire game
- Good tag-outs- Ranger Slayer can easily open opportunities to safely get another character in
|
- Weak damage - Kim's damage is nowhere near the peak of this game, needing difficult throw whiff cancels to consistently kill higher health characters
- High APM - While strong and flexible, better zoning patterns often require fast execution with dash cancels or plinks
- Zord feeder - Kim's neutral style of dealing some chip and hitting occasional pokes builds Zord meter very quickly while keeping the enemy team relatively healthy
- Lacking solo mix - Without the assistance of her partners, she can sometimes struggle to open especially small opponents up
|
Overview
Kim is one of the game's dedicated zoners. She shines in neutral due to her arrow cancels and dash cancellable 5M. However, she has generally weak solo mixup options paired with subpar damage.
Slayer requires a team that can help her enforce her zoning patterns and convert stray hits into big damage. For example, Scorpina complements Slayer quite well because her assist provides Kim with a gigantic fullscreen presence and you can tag into Scorpina for ToD combos.
Also look to setup sandwich situations by calling assist and doing 6S~L. When setting up pressure with Slayer, you will live and breathe this mixup, as it is quite potent while also doubling as a safe way to rotate characters.
Her assist is great for this too as she jumps backwards first before firing a volley of arrows, so you don't have to worry about tagging into a scramble.
With how she controls the screen, Slayer can go toe to toe in the neutral against many of the game's top tiers while having few truly poor matchups. That being said, she lacks significant payoff and struggles to open the opponent up. She's a character who needs a lot of help from her team, but contributes quite a bit as well, and is worth picking if you enjoy zoning or want an easy way to disengage from scramble situations.
Unique Mechanic: Nock Charge
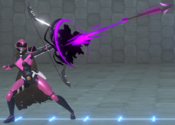
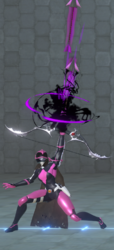
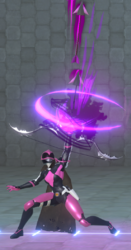
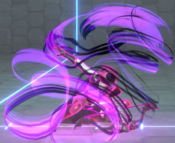
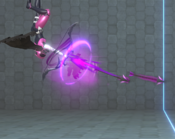
Kim's 5S is a power-up move called Arrow Nock.
- You can store one nock charge at a time.
- Attempting to charge again when already powered up only regains you the same charge.
- Charge is expended whenever you use a move with arrows (that being: 5M, 4M, 6M, j.M, 4S, 6S~L and 6S~M) or use 6S~H.
- A nock charge powers up exactly one valid move.
- Nock charge allows 5M and 4M to do chip damage and increases fired arrow count on all arrow moves (see movelist for more details).
- 5S itself can be comboed into and out of with the right routes, giving you a much appreciated damage increase if you can fit in more arrow moves.
Normal Moves
Click "Expand" for images of powered-up versions of moves (when applicable).
5L
5L
|
| Damage
|
Guard
|
Startup
|
Active
|
Recovery
|
Frame Adv (Block)
|
Frame Adv (Hit)
|
| 40
|
High/Low/Air
|
5
|
-
|
-
|
+4
|
-
|
Typical jab. Use only for flipouts.
|
|
5LL
5LL
|
| Damage
|
Guard
|
Startup
|
Active
|
Recovery
|
Frame Adv (Block)
|
Frame Adv (Hit)
|
| 33*
|
High/Low/Air
|
-
|
-
|
-
|
-8
|
-
|
|
5LLL
5LLL
|
| Damage
|
Guard
|
Startup
|
Active
|
Recovery
|
Frame Adv (Block)
|
Frame Adv (Hit)
|
| 56
|
High/Low/Air
|
-
|
-
|
-
|
-9
|
-
|
|
|
|
5M
5M
|
| Version
|
Damage
|
Guard
|
Startup
|
Active
|
Recovery
|
Frame Adv (Block)
|
Frame Adv (Hit)
|
| 5M
|
50
|
High/Low/Air
|
13
|
-
|
-
|
-12
|
-
|
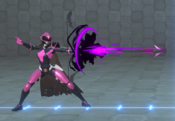
Shoots a single arrow forward. Frame advantage listed refers to up close 5M.
- On hit or whiff, this move as well as 4M and 6M can be cancelled into each other. You can repeat moves, but you cannot do the same move twice in a row and a maximum of 3 shots total can be used.
- Dash Cancellable
Special Cancels
Because this move can be cancelled into any S move you can perform the following special cancels:
- 5[S]~L (EX)
- 5[S]~H (Super)
- 5[S]~A1 (Snap)
|
| Nocked
|
25x3
|
High/Low/Air
|
15
|
-
|
-
|
-12
|
-
|
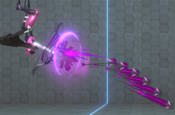
If powered up by 5S, she shoots three arrows.
|
|
4M
4M
High Shot
|
| Version
|
Damage
|
Guard
|
Startup
|
Active
|
Recovery
|
Frame Adv (Block)
|
Frame Adv (Hit)
|
| 4M
|
40
|
High/Low/Air
|
12
|
-
|
-
|
-9
|
-
|
Shoots an arrow angled slightly upwards. Frame advantage listed refers to up close 4M.
- On hit or whiff, this move as well as 5M and 6M can be cancelled into each other.
- Can be dash-cancelled with 5[M]~L or 6[M]~L providing it is not the 3rd M shot in the chain.
Special Cancels
Because this move can be cancelled into any S move you can perform the following special cancels:
- 5[S]~L (EX)
- 5[S]~H (Super)
- 5[S]~A1 (Snap)
|
| Nocked
|
25x3
|
High/Low/Air
|
12
|
-
|
-
|
1
|
-
|
If powered up by 5S, she shoots three arrows, making the move more reliable.
|
|
6M
6M
Arrow Rain
|
| Version
|
Damage
|
Guard
|
Startup
|
Active
|
Recovery
|
Frame Adv (Block)
|
Frame Adv (Hit)
|
| 6M
|
25x2
|
High/Low/Air
|
-
|
-
|
-
|
-
|
-
|
Shoots two arrows directly upwards that then rain down on the opponent. Can use to shoot opponents directly above Kim as well. Excellent to use in tandem with other moves, but pretty bad on its own.
- On hit or whiff, this move as well as 4M and 5M can be cancelled into each other.
- Dash cancellable with 5[M]~L providing it is not the 3rd M shot in the chain.
Special Cancels
Because this move can be cancelled into any S move you can perform the following special cancels:
- 5[S]~L (EX)
- 5[S]~H (Super)
- 5[S]~A1 (Snap)
|
| Nocked
|
35x5
|
High/Low/Air
|
-
|
-
|
-
|
-
|
-
|
If powered up by 5S, she shoots five arrows, vastly increasing the overall amount of space taken.
|
|
5H
5H
|
| Damage
|
Guard
|
Startup
|
Active
|
Recovery
|
Frame Adv (Block)
|
Frame Adv (Hit)
|
| 60
|
High/Low/Air
|
9
|
-
|
-
|
-9
|
-
|
Short-ranged heavy attack. Kara throw out of this move with 6H~M
|
|
5HH
5HH
|
| Damage
|
Guard
|
Startup
|
Active
|
Recovery
|
Frame Adv (Block)
|
Frame Adv (Hit)
|
| 60
|
High/Low/Air
|
-
|
-
|
-
|
-9
|
-
|
- Causes a ground bounce in a juggle.
|
|
5HHH
5HHH
|
| Damage
|
Guard
|
Startup
|
Active
|
Recovery
|
Frame Adv (Block)
|
Frame Adv (Hit)
|
| 90
|
High/Low/Air
|
-
|
-
|
-
|
-22
|
-
|
- Begins a juggle on grounded opponents.
|
|
6H
6H
Spartan Kick
|
| Damage
|
Guard
|
Startup
|
Active
|
Recovery
|
Frame Adv (Block)
|
Frame Adv (Hit)
|
| 100
|
High/Low/Air
|
-
|
-
|
-
|
-
|
-
|
|
|
|
2L
2L
|
| Damage
|
Guard
|
Startup
|
Active
|
Recovery
|
Frame Adv (Block)
|
Frame Adv (Hit)
|
| 40
|
High/Low/Air
|
4
|
-
|
-
|
4
|
-
|
Kim's 2L is not a low, unlike most others.
|
|
2M
2M
|
| Damage
|
Guard
|
Startup
|
Active
|
Recovery
|
Frame Adv (Block)
|
Frame Adv (Hit)
|
| 50
|
Low/Air
|
5
|
-
|
-
|
-9
|
-
|
The money button. A great option in almost every situation. Dash 2M reaches very far, so you can use this as a way to call out the opponent's movement options as they attempt to navigate your arrow patterns. Don't let the -9 on block fool you either, if pushblocked, 2M 4S is a safe disengagement option, and if they don't pushblock (and even sometimes if they do), then you can kara throw with 5H~M for a sneaky tick throw.
|
|
2H
2H
Chin Breaker
|
| Damage
|
Guard
|
Startup
|
Active
|
Recovery
|
Frame Adv (Block)
|
Frame Adv (Hit)
|
| 65
|
High/Low
|
11
|
-
|
-
|
-22
|
-
|
Dedicated Launcher and anti-air.
|
|
j.L
j.L Could be mistaken for a heavy. Could be mistaken for a heavy.
|
| Damage
|
Guard
|
Startup
|
Active
|
Recovery
|
Frame Adv (Block)
|
Frame Adv (Hit)
|
| 40
|
High/Air
|
1
|
-
|
-
|
-
|
-
|
A kick that mostly shines as an instant overhead.
|
|
j.M
j.M
|
| Version
|
Damage
|
Guard
|
Startup
|
Active
|
Recovery
|
Frame Adv (Block)
|
Frame Adv (Hit)
|
| j.M
|
50
|
High/Low/Air
|
8
|
-
|
-
|
-
|
-
|
Shoots an arrow in the air. Pretty spammable considering a lot of people tend to jump around a lot.
|
| Nocked
|
25x3
|
High/Low/Air
|
-
|
-
|
-
|
-
|
-
|
If powered up by 5S, this move shoots shoots three arrows.
|
|
j.H
j.H
|
| Damage
|
Guard
|
Startup
|
Active
|
Recovery
|
Frame Adv (Block)
|
Frame Adv (Hit)
|
| 70
|
High/Air
|
9
|
-
|
-
|
-
|
-
|
Attacks with her bow. Mainly combo filler.
|
|
Special Moves
Click "Expand" for images of powered-up versions of moves.
5S
Arrow Nock
5S The party starter
As Zordon said, too much pink energy is dangerous
The party starter
As Zordon said, too much pink energy is dangerous
|
| Damage
|
Guard
|
Startup
|
Active
|
Recovery
|
Frame Adv (Block)
|
Frame Adv (Hit)
|
| 70
|
High/Low/Air
|
11
|
-
|
-
|
-13
|
-
|
Kim exudes a dark aura. Upon finishing, she'll start glowing pink, powering up the next arrow-related attack.
Can be used in combos due to having a hitbox.
|
|
4S
Pterodactyl Escape
4S
|
| Version
|
Damage
|
Guard
|
Startup
|
Active
|
Recovery
|
Frame Adv (Block)
|
Frame Adv (Hit)
|
| 4S
|
25x2
|
High/Low/Air
|
-
|
-
|
-
|
-
|
-
|
Jumps backward while shooting two arrows. Mainly a retreat tool.
|
| Nocked
|
25x6
|
High/Low/Air
|
-
|
-
|
-
|
-
|
-
|
If powered up by 5S, Kim will shoot six arrows.
|
|
6S
Pterodactyl Flight
6S
|
| Version
|
Damage
|
Guard
|
Startup
|
Active
|
Recovery
|
Frame Adv (Block)
|
Frame Adv (Hit)
|
Pterodactyl Flight
6S
|
60
|
High/Low/Air
|
-
|
-
|
-
|
-
|
-
|
- Not affected by Arrow Nock's buff.
Command jump that possesses four followups. Covers quite the horizontal distance and has a hitbox while rising, though it only hits standing characters.
|
Spike Shot
6S-L
|
40
|
High/Low/Air
|
-
|
-
|
-
|
-
|
-
|
Pressing L shoots an arrow directly downward.
Gained OTG properties in version 1.6.
|
Spike Shot
6S-L (Nocked)
|
25x5
|
High/Low/Air
|
-
|
-
|
-
|
-
|
-
|
If powered up by 5S, pressing L shoots five arrows downward.
Gained OTG properties in version 1.6.
|
Advancing Shot
66S-M
|
30x2
|
High/Low/Air
|
-
|
-
|
-
|
-
|
-
|
Pressing M shoots two arrows at an angle down-forward.
|
Advancing Shot
6S-M (Nocked)
|
30x5
|
High/Low/Air
|
-
|
-
|
-
|
-
|
-
|
If powered up by 5S, pressing M shoots 5 arrows at an angle down-forward.
Gained OTG properties in version 1.6.1.
|
Bird of Prey
6S-H
|
70
|
High/Low/Air
|
-
|
-
|
-
|
-
|
-
|
Pressing H makes Kim does a kick on her way down. Is not an overhead.
|
Bird of Prey
6S-H (Nocked)
|
90
|
High/Low/Air
|
-
|
-
|
-
|
-
|
-
|
If powered up by 5S, pressing H makes Kim does a kick that goes farther and uses wall bounce. Still is not an overhead.
|
Time Bomb
6S-S
|
80
|
High/Low/Air
|
-
|
-
|
-
|
-
|
-
|
Pressing S places a mine in the air. Identical to j.S.
|
Time Bomb
6S-S (Nocked)
|
50x2
|
High/Low/Air
|
-
|
-
|
-
|
-
|
-
|
If powered up by 5S, pressing S places two mines in the air. Identical to the powered up version of j.S.
|
|
j.S
Time Bomb
j.S
|
| Version
|
Damage
|
Guard
|
Startup
|
Active
|
Recovery
|
Frame Adv (Block)
|
Frame Adv (Hit)
|
Time Bomb
j.S
|
80
|
High/Low/Air
|
-
|
-
|
-
|
-
|
-
|
Places a mine in the air. Can easily get followups if it hits, making it a great okizeme pressure tool.
|
Time Bomb
j.S (Nocked)
|
50x2
|
High/Low/Air
|
-
|
-
|
-
|
-
|
-
|
If powered up by 5S, Kim places two mines in the air. The mines cannot be disengaged if Kim is hit.
|
|
EX Attack
Pterorumble Attack
5S+L
|
| Damage
|
Guard
|
Startup
|
Active
|
Recovery
|
Frame Adv (Block)
|
Frame Adv (Hit)
|
| 35x4, 65
|
Low/Air
|
24
|
-
|
-
|
-21
|
-
|
- If the first hits are blocked, the rest of the move will not come out.
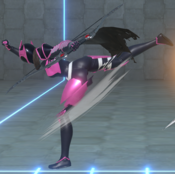
Kim performs a forward combat roll into a slide kick, which then transitions into a flying kick. This move has some invincibility, and is unique from other EX Attacks in that the third hit is a low. Can use 2M to combo off it.
|
|
Throws
Forward Throw
5M+H/6M+H
|
| Damage
|
Guard
|
Startup
|
Active
|
Recovery
|
Frame Adv (Block)
|
Frame Adv (Hit)
|
| 121
|
Throw
|
7
|
-
|
-
|
-
|
-
|
- Causes a Hard Knockdown, can be picked up with OTG 2M.
|
|
Back Throw
4M+H
|
| Damage
|
Guard
|
Startup
|
Active
|
Recovery
|
Frame Adv (Block)
|
Frame Adv (Hit)
|
| 161
|
Throw
|
7
|
-
|
-
|
-
|
-
|
- Switches sides.
- Knocks down.
|
|
Super
Pterodactyl Assault
H+S "You should run." "You should run."
|
| Damage
|
Guard
|
Startup
|
Active
|
Recovery
|
Frame Adv (Block)
|
Frame Adv (Hit)
|
| 80, 1, 50x2, 125
|
High/Low/Air
|
-
|
-
|
-
|
-39
|
-
|
Kim performs a flying kick which, if it hits, transitions into a cinematic sequence. The super is fairly reliable as a combo finisher, as it can hit airborne targets consistently.
|
|
Tag Actions
Assist
Assist
Pterodactyl Escape
A1/A2
|
| Damage
|
Guard
|
Startup
|
Active
|
Recovery
|
Frame Adv (Block)
|
Frame Adv (Hit)
|
| 25x6
|
High/Low/Air
|
-
|
-
|
-
|
-
|
-
|
Based on the powered up version of 4S. Covers a lot of space.
|
|
Swap Strike
Swap Strike
A1/A2+S
|
| Damage
|
Guard
|
Startup
|
Active
|
Recovery
|
Frame Adv (Block)
|
Frame Adv (Hit)
|
| 70
|
High/Low/Air
|
24
|
-
|
-
|
-4
|
-
|
Forces a character switch on hit; knocks down if only one character remains. Use sparingly.
Same animation and range as 6H.
|
|
Team Synergy
Combos
Solo
2LM5HH6H [2M5H6S-M]x2 2M5HS [2L5M4M5MH]x2 2L5M4M5M2M 2MH6H Super 6S-L 6H
Fullscreen BnB combo by Dostrow
2LM5HH6S-M 2L5M2M 2M5H6S-M 2M (delay if necessary)5HS 2L5M dash 6M4M5MH 2MHS 2L5M dash 6M4M5MH 2MH6H super 6S-L 6H
Alternative Fullscreen BnB combo by Dostrow
End these combos with EX if you have the meter for it and/or go for 2M if it is necessary to kill. Keep in mind that it sacrifices knockdown and corner position for damage.
If you can't kill, go for a flipout reset with 5L after 6S-L instead.
2M5HH6H Dash 2M5H2H J.LM 2M5H2L2M5H6H Dash 2M5H2H J.LM 2M5H [2L5M4M5M2M]x2 2M5HH6H Super Dashx2 2M5S
Fullscreen 0 bar 1k TOD by Rave-Kun
Colors
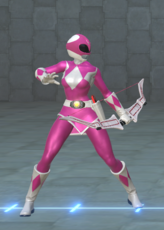
MMPR skin
External Links

