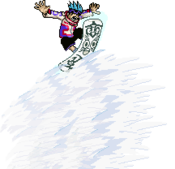
Usui Horokeu (碓氷ホロケウ)
Nickname: Horohoro (ホロホロ)
Introduction
SMP: 240
OSP: 80
Initial Spirit Percentage: 75%
GP: ???
Spirit Fusion, Koropokkuru Kororo! In Snowboard!
Character Voice: Yuuji Ueda
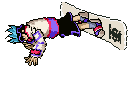
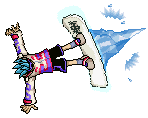
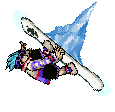
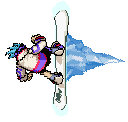
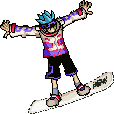
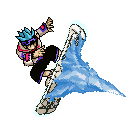
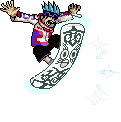
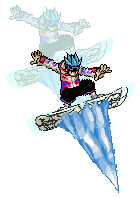
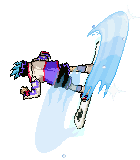
Usui Horokeu, more commonly referred to (including in-game) by his nickname Horohoro, is of the Ainu Tribe. He was raised from early on to be the one that partook in the Shaman Fights to save the Ainu village. He fights with cryokinesis and his snowboard which Kororo, a Koropokkuru spirit, possesses via Spirit Fusion.
Overview
Horohoro is a decently well-rounded extremely offensive oriented character with good, reliable pokes and explosive potential damage, aswell as suffocating and extremely scary pressure if he gets his opponent into the corner.
| Strengths |
Weaknesses
|
- Snowboard: Horo's f.5W and f.2W do an immeasurable amount for him; f.5W is a standard good poke and combo starter aswell as a bizarrely good anti-air, and f.2W is an even better combo starter that's also one of the longer ranged lows in the game, and both do great damage.
- Versatility: Much like his f.W attacks, Horo's specials (minus 6SP) are also very versatile and serve a lot of purposes; 5SP is a decent high damage projectile that does more damage the closer you are aswell as being as an anti-air from far away, and 2SP is a grounded overhead that is a deceptively good air-to-air when timed right, a very high damage OTG and, of course, an overhead.
- Never Not Plus: With his good safe pokes, 5SP, and great dash-attack, Horo can keep his turn in corner pressure for extremely obnoxious amounts of time, all the while applying insane amounts of chip damage.
- Ice Hurts: Horo has the blessing of being able to OTG with 2SP after any chain that ends with S Ender, which means that he gets extremely consistent and high damage off of most hitconfirms. On top of this, Horo can combo into his highly damaging 214SP super easily, and he gains an incredible amount of combo versatility in the corner (even access to roster-wide ToD combos).
- Cheating Supers: Horo is the only character in the game that has 3 supers, and they are all pretty great at something; 236SP can dodge out of the way of attacks and counter with some decent damage, 214SP is arguably one of the best supers in the game, and 66SP is hard to combo into but does great damage and is an okay anti-air.
|
- Reflector Problems: Horo relies on his specials heavily for pressuring, which means that if/when the opponent gets to 100% Spirit Percentage, his corner advantage state goes from one of the best/safest in the game to one of the riskiest, and he can lose his turn instantly. On top of this, 5SP is also one of the easier projectiles to reflect in the game regardless of Spirit Percentage.
- 6SP: This special is bad. Because of its input, you'll only really get it by mistake when trying to walk and use 5SP, and if you use it the opponent gets essentially a free jump-in training mode combo.
- Chunky Icebergs: All of Horo's S normals, except for c.2S, are pretty slow or situational with their hitboxes/range and also have the tendency of being quite unsafe on block.
- Snowboard Awkwardness: Confirming off of Horo's longer-ranged moves can be very awkward, whether because of the opponent getting pushed out of successive chain hits, very weird start-up/cancel times, or both.
|
Move List
Startup DOES NOT include the first active frame.
Damage values are based on the characters initial Spirit Percentage.
Moveset
Horo's normals tend to alter his hurtboxes quite a bit and as such can be used for counter offense. (Temp)
Standing Normals
f.5W
|
| Damage
|
Startup
|
Active
|
Recovery
|
Frame Adv
|
Guard
|
| 6
|
4
|
?
|
|
|
All
|
Horo hops off the ground with his snowboard before kicking it forwards. A very long poke with decent damage, and due to the odd angle Horo positions himself at, it makes a very good anti-air. Easily chains into itself and then into f.2W on hit.
|
|
c.5W
|
| Damage
|
Startup
|
Active
|
Recovery
|
Frame Adv
|
Guard
|
| 6
|
3
|
|
|
|
All
|
Horo does a small rotating flip with his snowboard. Not as good of an anti-air as f.5W, but can still work as a pretty decent one. Mostly used as filler on block and in chain combos.
|
|
f.5S
|
| Damage
|
Startup
|
Active
|
Recovery
|
Frame Adv
|
Guard
|
| 9
|
14
|
|
|
|
All
|
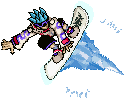
Horo does a hop as he thrusts his snowboard forwards, forming a small iceberg from the middle of the deck. Extremely slow normal that does decent damage but isn't a great combo starter. Can work as an anti-air, but its very much outshined by f.5W in almost all use cases.
|
|
c.5S
|
| Damage
|
Startup
|
Active
|
Recovery
|
Frame Adv
|
Guard
|
| 9
|
10
|
|
|
|
All
|
Horo does a front-flip with his snowboard as an iceberg forms on the bottom. Despite the animation and semi long start-up, it is not an overhead. This move can be used to combo into the S Chain Ender, but c.2S can also combo into S Ender and is usually preferred due to this move's tendency to whiff on smaller or crouching opponents. Cannot be comboed into after two W attacks, but can combo if you do c.2S after three L attacks due to the increased chain hitstun.
Has no lower hurtbox at all for a large part of its animation, so it can be used as a risky but hard call-out to low-reaching attacks that are being mashed, but it can also be quite difficult to get a follow-up chain.
|
|
Crouching Normals
f.2W
|
| Damage
|
Startup
|
Active
|
Recovery
|
Frame Adv
|
Guard
|
| 6
|
5
|
|
|
|
Low
|
Horo swings his legs around and strikes with his snowboard while hovering a bit off of the ground. Bit longer range than f.5W, and trades off the incredible anti-airing for being a pretty great low poke. Easily confirms just like f.5W.
|
|
c.2W
|
| Damage
|
Startup
|
Active
|
Recovery
|
Frame Adv
|
Guard
|
| 6
|
3
|
|
|
|
Low
|
Horo does a hand-stand as he does an axe-swing with his snowboard. Has very long range for a proximity low, and its usually never bad to get this instead of f.2W. Great as block pressure filler, but using it too many times in a row may make you prone to getting stuffed by other 3 frame moves.
|
|
f.2S The impossible low The impossible low
|
| Damage
|
Startup
|
Active
|
Recovery
|
Frame Adv
|
Guard
|
| 9, 9
|
|
|
|
|
Low
|
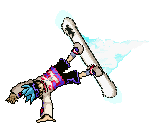
The strangest normal in Horo's kit, he ducks down as an iceberg forms from his snowboard, then does a hand-stand to thrust it into the air. This is a 2-hit move that has to be blocked low on both hits, despite the fact that it very much looks like a mid. Both hits can be special cancelled, which can be tricky with 2SP and 5SP. Very slow but extremely visually confusing move, does huge damage if both hits connect and can be comboed after via chain.
|
|
c.2S
|
| Damage
|
Startup
|
Active
|
Recovery
|
Frame Adv
|
Guard
|
| 9
|
9
|
|
|
|
Low
|
Horo does a backflip on his snowboard while kneeling close to the ground. Mostly the same move as c.5S with all the same uses, but is a frame faster and is more consistent in chain combos as it is less prone to whiffing. Cannot be comboed into after two W attacks, but can combo if you do c.2S after three W attacks due to the increased chain hitstun.
|
|
Chain Enders
W ender
|
| Damage
|
Startup
|
Active
|
Recovery
|
Frame Adv
|
Guard
|
| 9
|
|
|
|
|
?
|
Horo does a front flip before goomba-stomping his opponent with the board. Very average combo-ender, but you cannot OTG after the knockdown and due to its awkward start-up can be really hard to successfully end a chain with. Can be used for some gimmicky sideswitches, but you're generally better off not using this one in most instances compared to the S Ender.
|
|
S ender
|
| Damage
|
Startup
|
Active
|
Recovery
|
Frame Adv
|
Guard
|
| 3, 3, 3, 3 (12)
|
|
|
|
|
?
|
- Can be special cancelled on 1st/2nd hit; unable to cancel after becoming airborne
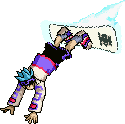
The standard combo ender, Horo does a hand-stand as an iceberg forms on the deck of his snowboard and he flies into the air like a propeller, drilling the iceberg into his opponent. Does 3 more damage than the W Ender, and outside of being generally much easier to combo into, it can also be special cancelled on its second hit for ridiculous amounts of combo versatility in the corner and from midscreen, you can easily OTG after the full 4 hits with 2SP which nets Horo's best easy damage.
|
|
Jump Normals
j.W
|
| Damage
|
Startup
|
Active
|
Recovery
|
Frame Adv
|
Guard
|
|
|
|
|
|
|
High
|
Horo thrusts his snowboard forward mid-air. This is basically the same exact move as f.5W/f.2W, except airborne. Decent air-to-air and can lead to some very high damage air-to-ground routes, but can also be a jump-in if timed late.
|
|
j.S
|
| Damage
|
Startup
|
Active
|
Recovery
|
Frame Adv
|
Guard
|
|
|
|
|
|
|
High
|
The quintessential jump-in, Horo projects a small iceberg from his board while falling on his snowboard. This move is a very faulty air-to-air (in those situations, just use j.W instead), but due to its large diagonal hitbox is your standard jump-in and can be very hard to anti-air for opponents in the corner. Has enough hitstun to be a pretty good combo starter.
|
|
Dash Normals
Forward Dash Attack spiderman pointing meme spiderman pointing meme
|
| Damage
|
Startup
|
Active
|
Recovery
|
Frame Adv
|
Guard
|
| 12
|
|
|
|
|
All
|
- Both Dash Attacks use the same animation
Horohoro skips on his snowboard while projecting a small iceberg from the bottom. He falls at a much sharper angle than the backwards version. Can cross up opponents and can situationally be linked after, but it depends on how far into the dash Horo was when he inputted the dash attack.
|
|
Backward Dash Attack spiderman pointing meme spiderman pointing meme
|
| Damage
|
Startup
|
Active
|
Recovery
|
Frame Adv
|
Guard
|
| 12
|
|
|
|
|
All
|
- Both Dash Attacks use the same animation
Horohoro skips backwards on his snowboard while projecting a small iceberg from the bottom. He floats more above the ground than the forward version, and obviously goes backwards, but the move is otherwise identical.
|
|
Special Moves
Kau Kau Priwenpe
(Hail of the Renegades)
(あらくれ者の雹)
5SP You're not experiencing face pareidolia, the board has a cute angry face You're not experiencing face pareidolia, the board has a cute angry face
|
| Damage
|
Startup
|
Active
|
Recovery
|
Frame Adv
|
Guard
|
| 21* (65)
|
|
|
|
|
All
|
(* 21 per individual shard, Kau Kau Priwenpe shoots 3)
Horo hops up and holds onto his snowboard before shooting 3 shards of ice as Kororo makes a funny face on the board. This move practically acts as a shotgun, in that it does more damage the closer you are since more projectiles will hit. Up-close, this is an incredible chip damage tool and a staple of Horo's corner pressure as it is also safe on block, whereas from farther away it can be easily reflected on reaction but is still a decent projectile at mid range, aswell as a very strangely serviceable anti-air. Be extremely careful when using this move in any circumstance if the opponent is at 100% Spirit Percent, however, as it is easily reacted to.
|
|
Mososo Kruppe
(The Frost That Wakes the Sleeping)
(眠っている者を目覚めさせる霜)
6SP Take your time watching those spikes while up there Take your time watching those spikes while up there
|
| Damage
|
Startup
|
Active
|
Recovery
|
Frame Adv
|
Guard
|
| Pillar: 10
Spike: 6, 6 (12)
|
|
|
|
|
All
|
- All spikes hit twice, max amount of spikes varies from 5 to 7
- Average damage is 24 OSP, but max/min amount is extremely variable
Horo does a cab, spinning on his board while he creates a pillar of ice to stomp onto, which freezes and causes spikes to raise from the ground. Outside of mixing up start-up times, there is almost no reason to use this move over 5SP as it is significantly more inconsistent in damage, does not control as much space, is much slower, and can easily be avoided completely by jumping over if the opponent is not already in the air.
Due to the pushback on block, this move funnily enough has the tendency to do more chip damage than actual damage because it pushes the opponent into more of the spikes. Not a great use, as 5SP does amazing chip, but still.
|
|
Emus Nokipekonr
(Icicle Sword)
(剣のつらら)
2SP
|
| Damage
|
Startup
|
Active
|
Recovery
|
Frame Adv
|
Guard
|
| 48
|
|
|
|
|
High
|
Horo jumps very high into the air, before squatting onto his board and then crashing back down with a huge iceberg. An incredibly high damage overhead, but has semi slow start-up which makes it a bit more reactable than what's desirable. Can also OTG, which makes it great for ending basic S ender chain combos with a burst of damage.
Due to the squat that Horo does at the apex of his jump, this move can very effectively avoid large pokes and some anti-airs, but it's not invincible.
|
|
Super Moves
Neike Fuike Kiroro
(Power That is Impeccable Anywhere)
(どことして何一つ非のうちどころのない力)
66SP Now available on a snowboard near you, outside of double OS! Now available on a snowboard near you, outside of double OS!
|
| Damage
|
Startup
|
Active
|
Recovery
|
Frame Adv
|
Guard
|
| 24, 24, 24, 24 (96)
|
|
|
|
|
All
|
i unironically need to use this super more to actually get more details on how it can be used lol
|
|
Epittarki Upas-Horkkek
(All-Swallowing Avalanche)
(全てをのみ込む雪崩)
236SP
|
| Damage
|
Startup
|
Active
|
Recovery
|
Frame Adv
|
Guard
|
| 14 Per hit*
|
|
|
|
|
All
|
(* Amount of hits wildly varies, averages at 2 with avalanche tip hit, 4-5 with very close avalanche hit. Can OTG)
Horo skips his snowboard off the ground as he flies towards the corner (always the wall behind Horo), then returns to his starting position with a gigantic avalanche to crush the opponent.
Despite the super flash being decently long, Horo's position changes incredibly quickly which makes this super great for dodging out of the way of long pokes or forward-moving normals/specials, but actually hitting the avalanche can be inconsistent as it doesn't perfectly match where Horo initially uses the super from and can whiff frequently. Situational, but definitely valuable super.
|
|
Nipopo Punch
(ニポポパンチ)
214SP BIONIC AAAAAARM - sadly does not Sub-Zero fatality in this game BIONIC AAAAAARM - sadly does not Sub-Zero fatality in this game
|
| Damage
|
Startup
|
Active
|
Recovery
|
Frame Adv
|
Guard
|
| 103
|
|
|
|
|
All
|
Horo does his signature move by unstrapping his board, then re-strapping it to his arm to encase it in a huge block of ice before using it as a gauntlet. Absolutely Horo's best super, as it:
- Deals humongous damage
- Has humongous range
- Is safe on block
- Is an amazing whiff-punish
- Will destroy people at red OSP due to high chip damage
- Is incredibly fast
It's also possible to hit confirm into this super for a devastatingly high damage combo, via c.2S or f.5S. All around amazing super that Horo should use very frequently if he is at the health range to (his other supers have their decent uses too, though).
|
|
Combos
Midscreen
- c.5W c.5W c.2W c.2S c.2W > S Chain Ender > 2SP (OTG hit)
- Very simple, high damage combo. Chain is variable and many moves can confirm into S Chain Ender, but this route is the most consistent.
- c.2W c.5W c.2S c.2S 5 / 2W* > 214SP
- (*) The W move that comes out here changes depending on spacing, but every W move that Horo has can confirm into Nipopo Punch (214SP) in this chain.
- Extremely high damage and stuns, very easy way to close out a round if super is available.
- f.5W f.5W f.2W f.2W c.2S > 214SP
- Similar to the above, only confirmed off of a longer normal.
- c.5W c.5W c.2W c.2S c.2W > S Chain Ender > 66SP
- Despite the very long knockdown period, you can't actually land a 2SP OTG after the Neike Fuike Kiroro (66SP) super. Less damage than combos that end in Nipopo Punch (214SP), but grants significantly more corner carry and looks cooler.
- An extremely simple hit-confirm if you land one of the two unlikely normals that are f.5S and f.2S.
Corner
- c.5W c.2W c.2S c.2W c.2S > S Chain Ender > 5SP > c.5W, c.5W c.5S c.2S > 2SP
- Absurdly high damage non-super combo that works because of S Chain Ender being special cancellable till the 3rd hit. Hitting the c.5W juggles and then chaining the second one into c.5S can be very tricky, but the combo is relatively simple after some practice.
[Video demonstration may be added]
Strategy
TBA

