Story
Once a war orphan slave named Patricia, Peacock’s body was gruesomely mutilated by slave traders that captured her. She was rescued by Dr. Avian’s Anti-Skullgirls Labs, and rebuilt with a reality-defying arsenal of biomechanical weaponry: the Argus System augmented her body, and the Avery Unit gave her access to unprecedented weaponry.
Alas, they couldn’t do anything for her mind: Peacock’s damaged psyche and abiding love of cartoons shaped her new “toys” into a terrifying gang of cronies, who she has no qualms using to paint the town red... with blood. Terrifying as she is, she may be the kingdom’s best bet against the Skullgirl.
Overview
Peacock is a zoning character whose goal is to fill the screen with garbage and not let the opponent close in on her. With all her projectiles and runaway tools she can slowly chip away at the opponent's health and build lots of meter in the process. While certainly more comfortable farther away from her opponent, her damage output on a clean confirm is phenomenal when she does get up close and personal.
- Projectile zoning: Peacock's projectile moves all work in synergy with each other and can force the opponent to maneuver around them, or suffer lengthy block stuns from full screen. Her 5HP is a fireball, and can cancel into a special move projectile. Her George bomb specials can also cancel into each other. Cycling through her projectiles through 5HP xx special, 5HP xx another special quickly lets her get control of the entire screen.
- Item Drop: (214P) drops a projectile from the top of the screen, which can be timed to be released when the button is released. With its tracking, fast startup on release, and large hitbox at Level 2, it can beat out many approach options and force characters to block. Using the M version well can allow Peacock to approach others in midrange distances despite her stubby normal attacks. Switching between far zoning and held item pressure allows Peacock to play in various approaches at will, making her quite deadly. She can also use it to setup powerful 50/50 reset vortexes from certain assists midcombo.
- Movement: On top of her zoning tools, she is also tricky to hit because of her movement options. Her backdash and air backdash move her backwards quite quickly, and her teleports let her escape should she get a bit uncomfortable at close range.
Playstyle
 Peacock is an oppressive zoner that builds a lot of meter and is difficult to approach. Peacock is an oppressive zoner that builds a lot of meter and is difficult to approach. |
| Pros |
Cons |
- Evasive: Peacock has a very quick backdash (both grounded and aerial), along with a double jump, several normals that double as mobility tools, and teleports that are invulnerable on frame 8. All of these options combined with zoning abilities make her very difficult for opponents to pin down.
- Forces Opponent to Approach: As the premiere lockdown zoner, Peacock has tools that allow her to excel fullscreen. This often gives the burden of approach to opponents unable to contest her at a distance, regardless of lifelead.
- Damage: While her meterless combo damage is low, Peacock more than makes up for it with high damage supers to dump meter into, and her zoning tools both threaten high chip damage anywhere on the screen while also fueling her metered combos.
- High Meter-gain: Builds a lot of bar while throwing out projectile specials, even on block, making her an exceptional battery for any team.
- Vortex Setups: Able to set up various left/rights with projectiles that force her opponent to guess which side she will be on when they reach the opponent.
- Projectile assists and safe DHC: Bombs are excellent neutral assists. Level 3 Item Drop is a high risk high reward combo assist. Lenny is a solid safe DHC.
|
- Poor Defensive Options: Peacock has limited reversals, none of which are fully invulnerable on startup, allowing opponents to put her into meaty wakeup situations where she's forced to guess regardless of if she has meter to super or not.
- Stubby Normals: Befitting a projectile zoner, Peacock has limited range on her normals that force her to get up close if she wants them to connect.
- Gameplan Requires Space: Because of her poor defensive options, Peacock excels as far away from her opponent as possible. If Peacock is unable to make a good amount of distance between her opponent she has to play incredibly patient to not risk getting hit and forced to block mixups that will exploit her lack of strong defensive options.
|
Video Overview
Stats
Chains
| Standing
|
5 Buttons:  → →  → →  → →  → →  or or 
|
| Crouching
|
6 Buttons: → → → → →
|
| Air
|
5 Buttons: → → → → or
|
Movement
| Weight
|
Dash
|
Double Jump
|
Airdash
|
IAD Lockout
|
| Light
|
Run
|
Yes
|
Yes
|
8
|
Wakeup Time
| Forward Tech
|
Backward Tech
|
Sliding KD
|
Hard KD
|
Crumple
|
| 40
|
40
|
94
|
34
|
32
|
Assists
Shadow of Impending Doom (default assist)
George at the Air Show (default assist)
Fully charged Shadow of Impending Doom (Level 3) (214PP)
Shadow of Impending Doom (default assist)
Drops a level 1 item as fast as possible. An attack that can't be avoided vertically. Vacuums forward on block, so it can pull the opponent out of the corner. The M version is default, and tracks slightly from point blank to about half screen away, but it will not reach further than that. If the H version is used, it tracks from about half screen away to full screen, but won't hit up close at the range M covers. In the corner, both versions can hit up close. The L version is not recommended - it just drops at a fixed position.
George at the Air Show (default assist)
Projectile assist that covers the normal jump angle and homes in on the opponents position from when it starts.
George's Day Out (236LK)
Projectile assist that slowly moves across the floor. Keeps a threat on the screen that lets you close distance safely behind it.
Boxcar George (236MK)
Projectile assist that travels faster than the L version and comes from the side of the screen behind Peacock.
Fully charged Shadow of Impending Doom (214PP)
Peacock will stay on screen looping her tag out animation until the item charges to level 3, which hits overhead. If Peacock is hit, the item shadow goes away. If the point character is hit, the item shadow stays, so it can interrupt combos from the opponent. The two punch buttons used to input at custom assist select determines the version:
- + = Light
- + = Medium
- + = Heavy
5HP
A horizontal projectile assist that doubles as a lockdown assist if used up close.
Throw (LP+LK)
Throw assist with a bug: if you use it as a combo starter, you can still call your assist during the combo.
Move List
Standing Normals
Poke! Toggle Hitboxes Toggle Hitboxes
|
| 5LP
|
s.
|
|
| x1, x2
|
Guard
|
Properties
|
Damage
|
Meter
|
On Hit
|
On Block
|
On Pushblock
|
| Mid
|
Chains Into Self
|
300
|
2.5%
|
+4
|
+3
|
|
| Startup
|
Active
|
Recovery
|
Hit Stun
|
Block Stun
|
Hit Stop
|
Super Hit Stop
|
| 6
|
2
|
14
|
19
|
18
|
7
|
N/A
|
|
|
|
- Peacock delivers a one finger jab, her fastest attack up close. Chaining it twice gives her a low risk hit confirm to a longer ground chain.
|
|
|
Pie Splat Toggle Hitboxes Toggle Hitboxes
|
| 5MP
|
s.
|
|
| Guard
|
Properties
|
Damage
|
Meter
|
On Hit
|
On Block
|
On Pushblock
|
| Mid
|
-
|
525
|
7.5%
|
-10
|
-12
|
|
| Startup
|
Active
|
Recovery
|
Hit Stun
|
Block Stun
|
Hit Stop
|
Super Hit Stop
|
| 15
|
3
|
29 (30 on miss)
|
22
|
20
|
9
|
N/A
|
|
|
|
- Far reaching normal, can be used at further distance than most other Peacock normals, making it occasionally useful.
|
|
|
Screwball Cannonball Toggle Hitboxes Toggle Hitboxes
|
| 5HP
|
s.
|
|
| Guard
|
Properties
|
Damage
|
Meter
|
On Hit
|
On Block
|
On Pushblock
|
| Mid
|
Projectile (2nd hit)
|
600, 500
|
5%, 5%
|
+6
|
-2
|
|
| Startup
|
Active
|
Recovery
|
Hit Stun
|
Block Stun
|
Hit Stop
|
Super Hit Stop
|
| 15
|
2, (10 / 17 on hit), -
|
26
|
33, 17
|
21, 15
|
11, 14 (8 on block)
|
N/A
|
|
|
|
- Peacock pulls out a cannon, hitting once at close range before launching the projectile as the second hit. The intermediate start up frames before launching the projectile are shortened by 7f if the first hit does not touch an opponent, effectively shortening the startup of the projectile.
- Due to being a normal, this is a projectile that is special cancelable. It's very useful to cancel the recovery into other zoning tools such as SoID or Georges, or teleport to escape the situation.
- Shoots out several random projectiles, but all the different projectiles have the same hitboxes and frame data.
|
|
|
Pop Eye Toggle Hitboxes Toggle Hitboxes
|
| 5LK
|
s.
|
|
| Guard
|
Properties
|
Damage
|
Meter
|
On Hit
|
On Block
|
On Pushblock
|
| Mid
|
-
|
400
|
2.5%
|
+6
|
+4
|
|
| Startup
|
Active
|
Recovery
|
Hit Stun
|
Block Stun
|
Hit Stop
|
Super Hit Stop
|
| 9
|
2
|
13
|
20
|
18
|
8
|
N/A
|
|
|
|
- Far reaching normal, can hit at certain ranges that 2LK can not otherwise, making it occasionally useful.
|
|
|
Springboard Panic Toggle Hitboxes Toggle Hitboxes
|
| 5MK
|
s.
|
|
| Guard
|
Properties
|
Damage
|
Meter
|
On Hit
|
On Block
|
On Pushblock
|
| Mid
|
Launcher
|
600
|
7.5%
|
+4
|
-10
|
|
| Startup
|
Active
|
Recovery
|
Hit Stun
|
Block Stun
|
Hit Stop
|
Super Hit Stop
|
| 16
|
3
|
25
|
31
|
17
|
11
|
N/A
|
|
|
|
- Peacock's launcher. Peacock is the only character who doesn't have a launcher on a heavy button.
|
|
|
Kick the Football, Peacock Toggle Hitboxes Toggle Hitboxes
|
| 5HK
|
s.
|
|
| Guard
|
Properties
|
Damage
|
Meter
|
On Hit
|
On Block
|
On Pushblock
|
| Mid
|
-
|
775
|
10%
|
KD
|
-14
|
|
| Startup
|
Active
|
Recovery
|
Hit Stun
|
Block Stun
|
Hit Stop
|
Super Hit Stop
|
| 19
|
3
|
33
|
25
|
21
|
12
|
N/A
|
|
|
|
- Peacock performs a clumsy kick, ending in a lengthy recovery animation. High damage and knockdown makes it a staple combo tool.
- Peacock moves forward slightly as she kicks, so special canceling this move after the forward movement is important for some midscreen combos.
|
|
|
Crouching Normals
Stuff n' Puff Toggle Hitboxes Toggle Hitboxes
|
| 2LP
|
c.
|
|
| x1
|
Guard
|
Properties
|
Damage
|
Meter
|
On Hit
|
On Block
|
On Pushblock
|
| Mid
|
Chains Into Self
|
300
|
2.5%
|
+7
|
+4
|
|
| Startup
|
Active
|
Recovery
|
Hit Stun
|
Block Stun
|
Hit Stop
|
Super Hit Stop
|
| 6
|
3
|
13
|
22
|
19
|
7
|
N/A
|
|
|
|
| x2
|
Guard
|
Properties
|
Damage
|
Meter
|
On Hit
|
On Block
|
On Pushblock
|
| Mid
|
-
|
300
|
2.5%
|
+5
|
+5
|
|
| Startup
|
Active
|
Recovery
|
Hit Stun
|
Block Stun
|
Hit Stop
|
Super Hit Stop
|
| 14
|
3
|
12
|
19
|
19
|
7
|
N/A
|
|
|
|
- Has a lower and larger hitbox than 5LP, making it useful to pick up characters for OTG purposes
|
|
|
Eyes of Tomorrow Toggle Hitboxes Toggle Hitboxes
|
| 2MP
|
c.
|
|
| Guard
|
Properties
|
Damage
|
Meter
|
On Hit
|
On Block
|
On Pushblock
|
| Mid
|
-
|
500
|
7.5%
|
+4
|
±0
|
|
| Startup
|
Active
|
Recovery
|
Hit Stun
|
Block Stun
|
Hit Stop
|
Super Hit Stop
|
| 12
|
3
|
15
|
21
|
17
|
9
|
N/A
|
|
|
|
- Drags mid-air opponents down to the ground and closer to peacock, making it very useful in combos for restands/consistency and the occasional anti-air tool.
|
|
|
Red Hot Buckshot Toggle Hitboxes Toggle Hitboxes
|
| 2HP
|
c.
|
|
| Guard
|
Properties
|
Damage
|
Meter
|
On Hit
|
On Block
|
On Pushblock
|
| Low
|
-
|
650
|
10%
|
-7
|
-15
|
|
| Startup
|
Active
|
Recovery
|
Hit Stun
|
Block Stun
|
Hit Stop
|
Super Hit Stop
|
| 16
|
3
|
30
|
25
|
17
|
10
|
N/A
|
|
|
|
- Avery shoots a shotgun blast out of Peacock's hat. With a 6 button chain for crouching normals, Peacock can chain cancel her 2HP when most characters cannot. 2HP chains into 5HK for higher damage ground chains, or 2HK for 3 low hits in a row.
|
|
|
Curb Your Shoe Toggle Hitboxes Toggle Hitboxes
|
| 2LK
|
c.
|
|
| Guard
|
Properties
|
Damage
|
Meter
|
On Hit
|
On Block
|
On Pushblock
|
| Mid
|
-
|
350
|
2.5%
|
+1
|
+4
|
|
| Startup
|
Active
|
Recovery
|
Hit Stun
|
Block Stun
|
Hit Stop
|
Super Hit Stop
|
| 7
|
5
|
13
|
18
|
21
|
7
|
N/A
|
|
|
|
- Disjointed and tall hitbox that moves Peacock's hurtbox lower to the ground, making it one of her better anti-air tools in neutral.
- Fast startup also makes it an easier combo tool than 5LK in most situations.
|
|
|
Ant Wasted Toggle Hitboxes Toggle Hitboxes
|
| 2MK
|
c.
|
|
| Guard
|
Properties
|
Damage
|
Meter
|
On Hit
|
On Block
|
On Pushblock
|
| Low
|
-
|
525
|
7.5%
|
+1,
KD (vs. air)
|
-1
|
|
| Startup
|
Active
|
Recovery
|
Hit Stun
|
Block Stun
|
Hit Stop
|
Super Hit Stop
|
| 15
|
3
|
21
|
19
|
17
|
9
|
N/A
|
|
|
|
- Peacock's fastest low move, and also pulls in the opponent closer on hit making certain combos easier.
- If it's canceled before the active frames, the ant will be saved and will continue to move across the stage as a purely visual easter egg. You can then kill multiple ants with the same 2MK right after.
|
|
|
Banjo Trouble Toggle Hitboxes Toggle Hitboxes
|
| 2HK
|
c.
|
|
| Guard
|
Properties
|
Damage
|
Meter
|
On Hit
|
On Block
|
On Pushblock
|
| Low
|
Sweep
|
1100
|
10%
|
Soft KD (Invuln.)
|
-33
|
|
| Startup
|
Active
|
Recovery
|
Hit Stun
|
Block Stun
|
Hit Stop
|
Super Hit Stop
|
| 17
|
28
|
24
|
15
|
18
|
10
|
N/A
|
|
|
|
- Peacock's sweep moves her forward a far distance, which not only makes it a good poke, but also as a general movement tool.
- Can cancel into L George for certain combo conversions, teleport to escape situations, MP bang for an extended kara DP, or even SoID.
- Very useful to break the opponents armored moves or armored assists.
|
|
|
Jumping Normals
Hammer for the Worms Toggle Hitboxes Toggle Hitboxes
|
| jLP
|
j.
|
|
| Guard
|
Properties
|
Damage
|
Meter
|
On Hit
|
On Block
|
On Pushblock
|
| High (rising mid)
|
-
|
300
|
2.5%
|
-3
|
±0
|
|
| Startup
|
Active
|
Recovery
|
Hit Stun
|
Block Stun
|
Hit Stop
|
Super Hit Stop
|
| 8
|
2
|
19
|
17
|
20
|
7
|
N/A
|
|
|
|
- Disjointed air normal, making it one of Peacock’s better air options when coming down on the opponent close up or as an air-to-air tool
|
|
|
The Bear Trap of Seville Toggle Hitboxes Toggle Hitboxes
|
| jMP
|
j.
|
|
| Guard
|
Properties
|
Damage
|
Meter
|
On Hit
|
On Block
|
On Pushblock
|
| High
|
-
|
525
|
7.5%
|
+1
|
-6
|
|
| Startup
|
Active
|
Recovery
|
Hit Stun
|
Block Stun
|
Hit Stop
|
Super Hit Stop
|
| 11
|
2, (2), 3
|
21
|
28
|
21
|
10
|
N/A
|
|
|
|
- Far reaching air normal with large hitstun, making it very useful in combos for conversions and rejump combos.
|
|
|
Robo with a Shotgun Toggle Hitboxes Toggle Hitboxes
|
| jHP
|
j.
|
|
| Guard
|
Properties
|
Damage
|
Meter
|
On Hit
|
On Block
|
On Pushblock
|
| High
|
-
|
950
|
7.5%
|
±0
|
-7
|
|
| Startup
|
Active
|
Recovery
|
Hit Stun
|
Block Stun
|
Hit Stop
|
Super Hit Stop
|
| 14
|
2
|
27
|
28
|
21
|
10
|
N/A
|
|
|
|
- Peacock shoots a shotgun, causing her to fly backwards from the recoil. It can be used as a runaway tool, especially in conjunction with air backdash. Jump back > j.HP xx air backdash, j.HP cover quite a bit of distance.
- Is still useful in combos, since she can air dash cancel during the blast to stop the backward momentum.
|
|
|
How to Handle a Chainsaw Toggle Hitboxes Toggle Hitboxes
|
| jLK
|
j.
|
|
| Guard
|
Properties
|
Damage
|
Meter
|
On Hit
|
On Block
|
On Pushblock
|
| High
|
-
|
190 x3
|
2% x3
|
-8
|
-1
|
|
| Startup
|
Active
|
Recovery
|
Hit Stun
|
Block Stun
|
Hit Stop
|
Super Hit Stop
|
| 10
|
8 [1, 1, 1...]
|
22
|
19 x3
|
22 x3
|
8 x3 (7 x3 on block)
|
N/A
|
|
|
|
- Multihit air normal that hits downward at an angle, making it slightly useful for some far conversions in air combos. The downward angle also makes it useful as an easy IAD overhead tool when needed.
|
|
|
Nice Booby Trap Toggle Hitboxes Toggle Hitboxes
|
| jMK
|
j.
|
|
| Guard
|
Properties
|
Damage
|
Meter
|
On Hit
|
On Block
|
On Pushblock
|
| Mid
|
Projectile
|
500
|
7.5%
|
-6
|
-8
|
|
| Startup
|
Active
|
Recovery
|
Hit Stun
|
Block Stun
|
Hit Stop
|
Super Hit Stop
|
| 23
|
3
|
32
|
19
|
17
|
9
|
N/A
|
|
|
|
- An unusual jumping attack which alters Peacock's air momentum and summons a projectile on the ground which hits mid.
- Can be used to catch opponents approaching from the ground, or sometimes as a decent air button to hit opponents OTG for certain combos.
- When used instantly from the ground, can be canceled immediately before the hit with an air dash to slow peacock's ascent, which can then go into a jLP or jLK. While odd, this kara sequence keeps peacock lower to the ground than her IAD height, resulting in lower air normals, allowing her to convert easier off of jLP (though IAD jLP is still the same speed).
|
|
|
Buzzin Buzzard Toggle Hitboxes Toggle Hitboxes
|
| jHK
|
j.
|
|
| 1st hit
|
Guard
|
Properties
|
Damage
|
Meter
|
On Hit
|
On Block
|
On Pushblock
|
| High
|
-
|
600
|
7.5%
|
-14
|
-1
|
|
| Startup
|
Active
|
Recovery
|
Hit Stun
|
Block Stun
|
Hit Stop
|
Super Hit Stop
|
| 13
|
2
|
35
|
22
|
25
|
11
|
N/A
|
|
|
|
| Avery
|
Guard
|
Properties
|
Damage
|
Meter
|
On Hit
|
On Block
|
On Pushblock
|
| Mid
|
Projectile
|
250 x2
|
2.25% x2
|
N/A
|
N/A
|
|
| Startup
|
Active
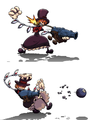
|
Recovery
|
Hit Stun
|
Block Stun
|
Hit Stop
|
Super Hit Stop
|
| 6
|
6, 6...
|
N/A
|
19 x2
|
17 x2
|
5 x2
|
N/A
|
|
|
|
- Peacock launches Avery from her hat for the first, close range hit. As Avery falls he acts as a 2 hit projectile and stays active until he hits the ground.
- The first hit will pop grounded opponents up into the air.
- Very useful tool to aid in running away, due to the falling Avery acting as a wall.
- The following moves will cause Avery to disappear (since he appears in the animation): 5HK, 2HP, 2LK, 2HK, j.HK, Argus Agony, and taunt
|
|
|
Universal Mechanics
Burlap Beatdown Toggle Hitboxes Toggle Hitboxes
|
| Throw
|
+
|
|
| Guard
|
Properties
|
Damage
|
Meter
|
On Hit
|
On Block
|
On Pushblock
|
| Throw
|
50% Damage Scaling
|
150 x5, 400
|
2% x5, 5%
|
Sliding KD
|
N/A
|
|
| Startup
|
Active
|
Recovery
|
Hit Stun
|
Block Stun
|
Hit Stop
|
Super Hit Stop
|
| 7
|
1
|
28
|
N/A
|
N/A
|
N/A
|
N/A
|
|
|
|
- Above average range for a throw. Causes a sliding knockdown which is untechable and sets up okizeme.
- In the corner or fullscreen, she can also confirm using an Argus Agony. Canceling the recovery of the throw into a SoID before the Argus can net Peacock another Argus, or even a full combo confirm when near the corner.
- Can confirm meterlessly with H Bang on the following characters: Big Band, Eliza, Painwheel, Cerebella, Valentine, Double, Beowulf. When combined with certain assists, can allow peacock a full meterless confirm from a grounded throw.
- As an assist, when combo’d after the throw as a starter, it is the only assist in the game that allows you to call another assist within the same combo
- "As the only two moves in the game to put you directly into sliding knockdown with no chance of hitting the victim out of the air first, Eliza’s Weight of Anubis assist and Peacock’s normal throw assist cause twice as much sliding time before the opponent is allowed to tech."
|
|
|
Big Ball of Violence Toggle Hitboxes Toggle Hitboxes
|
| Air Throw
|
+ (in air)
|
|
| Guard
|
Properties
|
Damage
|
Meter
|
On Hit
|
On Block
|
On Pushblock
|
| Air Throw
|
50% Damage Scaling
|
200 x5
|
1.43% x5
|
KD
|
N/A
|
|
| Startup
|
Active
|
Recovery
|
Hit Stun
|
Block Stun
|
Hit Stop
|
Super Hit Stop
|
| 7
|
3
|
18
|
N/A
|
N/A
|
N/A
|
N/A
|
|
|
|
- Peacock ends her air throw with a rather long recovery animation. If she manages to hold a Shadow of Impending Doom before landing the throw, the extra hit from the falling item gives her enough time to land and attempt an extended combo.
- Can also convert with an airdash cancel j.LK, j.LP, or j.MK. If close enough, only a falling j.LK can work as well.
|
|
|
Pop Goes the Weasel Toggle Hitboxes Toggle Hitboxes
|
|
| Guard
|
Properties
|
Damage
|
Meter
|
On Hit
|
On Block
|
On Pushblock
|
| Mid
|
Tag
|
500
|
7.5%
|
KD
|
-35
|
|
| Startup
|
Active
|
Recovery
|
Hit Stun
|
Block Stun
|
Hit Stop
|
Super Hit Stop
|
| 42
|
6
|
43
|
10
|
13
|
20 (12 on block)
|
N/A
|
|
|
|
- Peacock's tag appears from the bottom of the screen.
|
|
|
Who's on Second? Toggle Hitboxes Toggle Hitboxes
|
|
| Guard
|
Properties
|
Damage
|
Meter
|
On Hit
|
On Block
|
On Pushblock
|
| Mid
|
Snapback
|
0
|
-100%
|
N/A
|
-10
|
|
| Startup
|
Active
|
Recovery
|
Hit Stun
|
Block Stun
|
Hit Stop
|
Super Hit Stop
|
| 12 + 3
|
3
|
25
|
14
|
17
|
13
|
9
|
|
|
|
|
|
|
|
Specials
"Gotcha!" Toggle Hitboxes Toggle Hitboxes
|
| Bang! (L Bang)
|
 + +
|
|
| Guard
|
Properties
|
Damage
|
Meter
|
On Hit
|
On Block
|
On Pushblock
|
| Mid
|
Invuln. (Throw)
|
700 (150)
|
(2.5%) 11.25%
|
Stagger (+26 / +41 CH),
Soft KD (Invuln.) (vs air)
|
-17
|
|
| Startup
|
Active
|
Recovery
|
Hit Stun
|
Block Stun
|
Hit Stop
|
Super Hit Stop
|
| 16
|
3
|
36
|
26
|
21
|
9
|
N/A
|
|
|
|
- Staggers the opponent. If this move is used for the second time in a combo or against an airborne opponent, the opponent is knocked down with full invulnerability.
- If close enough, can follow up the hit with a light normal or even a throw. However, note that the opponent can shake out of the stagger so you have to be quick, and the throw attempt is techable for staggered opponents. Cancel into Lonesome Lenny for an easier and damaging combo.
- Throw invulnerable from the 1st frame, can be used as a reversal if you have a hard read on the opponent doing a throw. But, jumping away from throws is much less risky. If you do choose to use it as a reversal and they block it, canceling into Lenny on block is -1.
|
|
|
"Reach for the sky!" Toggle Hitboxes Toggle Hitboxes
|
| BANG! (M Bang)
|
+
|
|
| Guard
|
Properties
|
Damage
|
Meter
|
On Hit
|
On Block
|
On Pushblock
|
| Mid
|
Invuln. (Strike)
|
700 (150)
|
(2.5%) 11.25%
|
Wall Bounce
|
-16
|
|
| Startup
|
Active
|
Recovery
|
Hit Stun
|
Block Stun
|
Hit Stop
|
Super Hit Stop
|
| 20
|
4
|
26
|
12
|
13
|
11
|
N/A
|
|
|
|
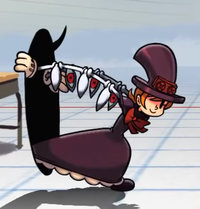
- Peacock's reversal which is only strike invulnerable, so it will lose to throws. The hitbox doesn't extend upwards either, making it risky to use against jump-ins.
- -16 on block, so throwing it out carelessly will lead to a punish. Can cancel into Lonesome Lenny on block to make Peacock -10 instead of -16, making it somewhat safer.
- Peacock can use the wall bounce for combos near the corner.
- Shoots out several random swords, but all the different swords have the same properties.
|
|
|
"Here, catch!" Toggle Hitboxes Toggle Hitboxes
|
| George's Day Out (L George)
|
+
|
|
| Guard
|
Properties
|
Damage
|
Meter
|
On Hit
|
On Block
|
On Pushblock
|
| Mid
|
Projectile
|
550 (200)
|
(2.5%) 4.5%
|
+12
|
-2
|
|
| Startup
|
Active
|
Recovery
|
Hit Stun
|
Block Stun
|
Hit Stop
|
Super Hit Stop
|
| 11
|
-
|
25
|
27
|
13
|
9
|
N/A
|
|
|
|
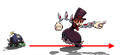
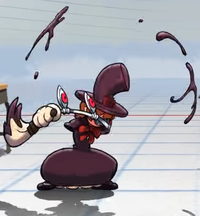
- Peacock pulls out a George bomb from her pocket, who leisurely walks along the ground. His slow speed makes him a threat the opponent has to deal with for a long time, and avoids most projectiles by being low to the ground.
- Somewhat useful up close on grounded opponents, and can convert with a light normal if close enough.
- Has a different hitbox depending on whether the opponent is in hitstun or not. When the opponent is in hitstun, George has a long, backwards-hitting hitbox and is thrown in a slightly longer trajectory.
- None of the Georges will explode or disappear if Peacock gets hit.
- Each of the Georges can be canceled into each other once using an additional corresponding button press, or into an L Teleport using 214LK.
- When directly beside the opponent, L George cancelled into L Teleport is -42 on block and -28 on hit.
- Only two Georges can be on the screen at once, and only one of each type.
|
|
|
"And they're off!" Toggle Hitboxes Toggle Hitboxes
|
| Boxcar George (M George)
|
+
|
|
| Guard
|
Properties
|
Damage
|
Meter
|
On Hit
|
On Block
|
On Pushblock
|
| Mid
|
Projectile
|
650 (250)
|
(2.5%) 4.5%
|
N/A
|
N/A
|
|
| Startup
|
Active
|
Recovery
|
Hit Stun
|
Block Stun
|
Hit Stop
|
Super Hit Stop
|
| 15
|
-
|
24
|
23
|
17
|
9
|
N/A
|
|
|
|
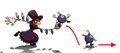
- Peacock calls a George bomb in go-kart, and appears from the side of the screen behind Peacock and zooms across the floor at a high speed. Can catch opponent teleports and airdashes that go behind Peacock. Otherwise similar to the LK version since he avoids most projectiles by being low to the ground.
- None of the Georges will explode or disappear if Peacock gets hit.
- Each of the Georges can be canceled into each other once using an additional corresponding button press, or into an L Teleport using 214LK.
- Only two Georges can be on the screen at once, and only one of each type.
|
|
|
"Bombs away!" Toggle Hitboxes Toggle Hitboxes
|
| George at the Air Show (H George / Plane)
|
+
|
|
| Guard
|
Properties
|
Damage
|
Meter
|
On Hit
|
On Block
|
On Pushblock
|
| Mid
|
Projectile
|
550 (250)
|
(2.5%) 4.5%
|
N/A
|
N/A
|
|
| Startup
|
Active
|
Recovery
|
Hit Stun
|
Block Stun
|
Hit Stop
|
Super Hit Stop
|
| 15
|
-
|
21
|
23
|
17
|
9
|
N/A
|
|
|
|
- Peacock calls a George bomb in plane, appearing from the side of the screen above the screen and crashing to the ground in an arc. Tracks the opponent's location for trajectory upon being summoned, but stays on same course once it starts moving towards the opponent. This makes it somewhat tough to dodge. Unlike the LK and MK Georges, this version will explode on his own once it hits the floor.
- None of the Georges will explode or disappear if Peacock gets hit.
- Each of the Georges can be canceled into each other once using an additional corresponding button press, or into an L Teleport using 214LK.
- Only two Georges can be on the screen at once, and only one of each type.
|
|
|
"Look out below!" Toggle Hitboxes Toggle Hitboxes
|
| Shadow of Impending Doom (Item Drop)
|
 + [ + [  ] ]
|
|
| Summon
|
Guard
|
Properties
|
Damage
|
Meter
|
On Hit
|
On Block
|
On Pushblock
|
| N/A
|
-
|
N/A
|
(2.5%)
|
N/A
|
N/A
|
|
| Startup
|
Active
|
Recovery
|
Hit Stun
|
Block Stun
|
Hit Stop
|
Super Hit Stop
|
| 14
|
N/A
|
16
|
N/A
|
N/A
|
N/A
|
N/A
|
|
|
|
| Item (Lv. 1)
|
Guard
|
Properties
|
Damage
|
Meter
|
On Hit
|
On Block
|
On Pushblock
|
| Mid
|
Projectile,
60% Damage Scaling
|
850 (200)
|
6.26%
|
N/A
|
N/A
|
|
| Startup
|
Active
|
Recovery
|
Hit Stun
|
Block Stun
|
Hit Stop
|
Super Hit Stop
|
| 9~81, 3
|
(Until ground)
|
N/A
|
26
|
21
|
9
|
N/A
|
|
|
|
| Item (Lv. 2)
|
Guard
|
Properties
|
Damage
|
Meter
|
On Hit
|
On Block
|
On Pushblock
|
| Mid
|
Projectile,
60% Damage Scaling
|
1400 (300)
|
7.2%
|
N/A
|
N/A
|
|
| Startup
|
Active
|
Recovery
|
Hit Stun
|
Block Stun
|
Hit Stop
|
Super Hit Stop
|
| 82~205, 2
|
(Until ground)
|
N/A
|
34
|
21
|
11
|
N/A
|
|
|
|
| Item (Lv. 3)
|
Guard
|
Properties
|
Damage
|
Meter
|
On Hit
|
On Block
|
On Pushblock
|
| High
|
Projectile,
60% Damage Scaling
|
2100 (500)
|
9%
|
Ground Bounce
|
N/A
|
|
| Startup
|
Active
|
Recovery
|
Hit Stun
|
Block Stun
|
Hit Stop
|
Super Hit Stop
|
| 206~241, 2
|
(Until ground)
|
N/A
|
38
|
24
|
14
|
N/A
|
|
|
|
| Item (Road Roller)
|
Guard
|
Properties
|
Damage
|
Meter
|
On Hit
|
On Block
|
On Pushblock
|
| High
|
Projectile,
Hit Grab,
80% Damage Scaling
|
2400 (500)
|
(2.5%) 0%
|
KD
|
N/A
|
|
| Startup
|
Active
|
Recovery
|
Hit Stun
|
Block Stun
|
Hit Stop
|
Super Hit Stop
|
| 206~241, 2
|
(Until ground)
|
N/A
|
N/A
|
24
|
N/A (14 on block)
|
N/A
|
|
|
|
| Item (Tenraiha)
|
Guard
|
Properties
|
Damage
|
Meter
|
On Hit
|
On Block
|
On Pushblock
|
| High
|
Projectile
|
1300, 200 x7 (500, 80 x7)
|
(2.5%) 11.25%, 5.14% x7
|
Ground Bounce
|
N/A
|
|
| Startup
|
Active
|
Recovery
|
Hit Stun
|
Block Stun
|
Hit Stop
|
Super Hit Stop
|
| 206~241, 3
|
(Until ground)
|
N/A
|
38, 18 x7
|
24, 15 x7
|
14, 11 x7 (14, 6 x7 on block)
|
N/A
|
|
|
|
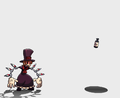
- Peacock blows a whistle which causes a shadow to appear on the ground. On the release of P, an item falls where the shadow is. The item levels up as P is held, starting at level 1, and gaining levels as exclamation points appear on the shadow, up to a max of level 3. The increased levels increase the hitstun/blockstun, have bigger hitboxes, and hit overhead at level 3.
- The button used determines how the shadow tracks the opponent.
-
- The shadow is at a set distance directly in front of Peacock
-
- The shadow will track the opponent on the half of the screen closest to Peacock.
- Holding this version discourages opponents from dashing in on Peacock.
-
- The shadow will track the opponent on the half of the screen farthest from Peacock.
- Tapping this version is good for fullscreen zoning.
- There are several different random items that can appear. All items within the same level have the same properties except for slightly different hitboxes. There are two unique level 3 items which are exceptions to this
- The Road Roller level 3 item appears rarely, causes a cinematic on hit and deals significantly higher damage than other level 3 items.
- After using a taunt, the next level 3 item is upgraded to Tenraiha, a multi-hitting item.
- The shadow will go away without dropping an item if Peacock is hit.
- After an item drops, this move can't be done again until the dropped item starts flashing.
- Air blocking an item drop will add some slight forward momentum to the blocking character as they fall back to the ground.
- The item will fall from the very top of the screen no matter where the camera is. After an initial 9 frames after the summon animation, the item will fall 3 frames after the button is released for level 1 items, 2 frames for level 2 and 3 items. In the frame startup, ~ means the range for the item levels, and the data following is the additional item release timings.
- Each item seems to have it's own falling speed before they touch the ground, but generally the falling speeds are as follows: level 1 items - 16~18 frames, level 2 items - 16 frames, level 3 items - 12~16 frames. These are time until items hit the ground and have their "ground hit" animation, and do not include the item release timings mentioned above. **needs full verification**
- If an item is released on block, then the item waits for 20 frames post-blockstun before releasing. You can PBGC to remove blockstun and have the item fall immediately, making it a risky but unexpected defensive tool.
- When used as an assist, will drop the item ASAP. If you select the assist with 2 punch buttons however, the item will charge to Level 3 before dropping. Peacock stays on the screen for the entire time the item charges.
|
|
|
Toggle Hitboxes Toggle Hitboxes
|
| Fire in the Hole! (Fake Teleport)
|
During M or H The Hole Idea:
[ ]
|
|
| Guard
|
Properties
|
Damage
|
Meter
|
On Hit
|
On Block
|
On Pushblock
|
| Mid
|
Invuln. (Full) (Frame 8),
Projectile
|
550 (100)
|
(2.5%) 6.92%
|
N/A
|
N/A
|
|
| Startup
|
Active
|
Recovery
|
Hit Stun
|
Block Stun
|
Hit Stop
|
Super Hit Stop
|
| 52, 27
|
5
|
20
|
23
|
17
|
9
|
N/A
|
|
|
|
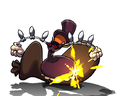
- Peacock fakes a teleport, reappearing in the same place while placing a bomb at the opponent's feet. There is only one version of this attack so the button pressed doesn't matter.
- The input makes it impossible to teleport forward while holding a P button for SoID. L teleport can still be used.
- If the opponent is ready, they can throw peacock in between when Peacock returns from the ground and when the bomb hits. However if an L or M item is currently being held, then the item can be released early to keep peacock safe during this move.
|
|
|
Supers
"Eyes of Argus!" Toggle Hitboxes Toggle Hitboxes
|
|
| Guard
|
Properties
|
Damage
|
Meter
|
On Hit
|
On Block
|
On Pushblock
|
| Mid
|
Projectile,
Beam
|
300x5, 750, 180x30 (100 x6, 25 x30)
|
-100%
|
-3
|
-11
|
|
| Startup
|
Active
|
Recovery
|
Hit Stun
|
Block Stun
|
Hit Stop
|
Super Hit Stop
|
| 6 + 10
|
6 x6, (33), -
|
37
|
25 x5, 43, 30 x30
|
17 x36
|
8 x5, 25, 2 x30 (4 x6, 8 x30 on block)
|
9
|
|
|
|
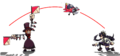
- Peacock's hat and arms transform into a laser array, shooting a 6 hit initial, full screen beam, then 30 smaller single hit projectiles. Since the first part of the attack is a beam, the laser's attack box covers the entire length of the screen as soon as it becomes active. It can hit multiple defending characters and nullify all oncoming projectiles on the same frame. For the second part, all of the hits will not connect in most situations since their pattern is slightly random.
- Pushes the opponent to full screen on hit hits, which allows Peacock to reset her zoning game.
- If the first part is blocked, most characters can find a way to punish either by super jumping over the second part or using a move that avoids projectiles.
- If used in the corner, it's unsafe on hit and block.
- A SoID item can be held during the duration of this super, which allows several things. If an opponent happens to block the first beam parts of Argus, then an item can be released between the gap of the first and second parts to keep the opponent blocking, ensuring better chip damage from the full super. It can also be dropped after the second part hits to allow for follow-up combos.
|
|
|
"Fall down, go boom!" Toggle Hitboxes Toggle Hitboxes
|
Lonesome Lenny
Level 1
|
+  + +
|
|
| Guard
|
Properties
|
Damage
|
Meter
|
On Hit
|
On Block
|
On Pushblock
|
| Mid
|
-
|
3800 (800)
|
-100%
|
KD
|
N/A
|
|
| Startup
|
Active
|
Recovery
|
Hit Stun
|
Block Stun
|
Hit Stop
|
Super Hit Stop
|
| 4 + 7
|
1
|
18
|
24
|
27
|
16
|
7
|
|
|
|
- Peacock plants a massive Lenny bomb, which has 4800 HP that acts as a timer, counting down at 1 HP per frame and ending with a massive, single hit explosion that damages opponents, Peacock, and Peacock's teammates. Both teams can hit Lenny, pushing him across the screen and damaging him, effectively shortening his fuse. Creative use of Lenny in a DHC can lead to combos that last long enough to guarantee the opponent gets stuck in the explosion.
- Lenny can act like a shield in certain cases, either absorbing hits entirely for Peacock, or keeping the opponent wary if they want to avoid getting hit with the explosion themselves. The player who summoned Lenny can hit Lenny with projectiles, but the projectiles will remain active.
- While both players can hit Lenny, the distance he travels is much greater for Peacock than it is for the opponent, making him a useful neutral tool as well against other projectiles.
- While Lenny is active and Peacock is the point character, Peacock's meter gain is reduced to 33% of its normal value.
- If Peacock is in a super, her own Lenny will not explode.
- If Lenny is hit by a Argus laser or Argus bullet from its own Peacock, it will reduce the timer to 0 and explode once Argus ends
- If Lenny is hit by the explosion from level 3, it explodes instantly.
- To convert off of the explosion from Lenny, use a well timed M George into H Teleport (uses OTG), or use 5HP into H Teleport (more difficult and variable weight timing, but doesn't use OTG).
- Lenny's explosion hits physically and can not be countered by Valentine's Countervenom or avoided by projectile invul moves.
- Skullgirls Tuestorials 04 - Peacock's Lenny Super
|
|
|
"All together now!" Toggle Hitboxes Toggle Hitboxes
|
Goodfellows
Level 3
|
During Throw:
+ +
|
|
| Point
|
Guard
|
Properties
|
Damage
|
Meter
|
On Hit
|
On Block
|
On Pushblock
|
| N/A
|
45% Minimum Scaling
|
6225 (total)
|
-300%
|
Sliding KD
|
N/A
|
|
| Startup
|
Active
|
Recovery
|
Hit Stun
|
Block Stun
|
Hit Stop
|
Super Hit Stop
|
| N/A
|
N/A
|
N/A
|
N/A
|
N/A
|
N/A
|
N/A
|
|
|
|
| DHC
|
Guard
|
Properties
|
Damage
|
Meter
|
On Hit
|
On Block
|
On Pushblock
|
| Mid
|
Hit Grab,
55% Minimum Scaling
|
6225 (total) (250)
|
-200%
|
Sliding KD
|
-35
|
|
| Startup
|
Active
|
Recovery
|
Hit Stun
|
Block Stun
|
Hit Stop
|
Super Hit Stop
|
| 6
|
3
|
56
|
N/A
|
23
|
N/A (10 on block)
|
N/A
|
|
|
|
- Peacock's level 3 is a follow up to her throw and cannot be done on its own, unless it's a DHC.
- From a throw, doing a metered combo with Argus Agony does more damage, so this is mostly a style super.
- The explosion at the end of the throw will detonate Lonesome Lenny in a single hit.
|
|
|
Taunt
"Why ya so bad at video games?"
|
|
| Guard
|
Properties
|
Damage
|
Meter
|
On Hit
|
On Block
|
On Pushblock
|
| N/A
|
-
|
N/A
|
0%
|
N/A
|
N/A
|
|
| Startup
|
Active
|
Recovery
|
Hit Stun
|
Block Stun
|
Hit Stop
|
Super Hit Stop
|
| N/A
|
N/A
|
94
|
N/A
|
N/A
|
N/A
|
N/A
|
|
|
|
- If Peacock completes the animation, the next level 3 item drop will be upgraded to Tenraiha.
|
|
|
"Toodles!"
|
| Assist Taunt
|
Automatically done after an assist move
|
|
| Guard
|
Properties
|
Damage
|
Meter
|
On Hit
|
On Block
|
On Pushblock
|
| Mid
|
-
|
N/A
|
0%
|
N/A
|
N/A
|
|
| Startup
|
Active
|
Recovery
|
Hit Stun
|
Block Stun
|
Hit Stop
|
Super Hit Stop
|
| N/A
|
N/A
|
64
|
N/A
|
N/A
|
N/A
|
N/A
|
|
|
|
- Amount of time it takes for the character to turn invulnerable after they finish performing their assist action.
- Longer recovery → more time to punish the assist.
|
|
|
Colors
Intro Poses
Peacock has 3 different intro poses that can be selected by holding a light, medium or heavy button during the loading screen before a match.
|
Intro pose 1:
Hold OR
Peacock paints herself into existence.
It's time to paint the town red!
Here comes trouble!
|
|
Intro pose 2:
Hold OR
Peacock climbs out of her eye and puts it back on her face.
Cartoon noises.
|
|
Intro pose 3:
Hold OR
Peacock teleports onto the stage.
Of course you know, this means war.
I'll gladly pay you Tuesday for a knuckle sammich today!
|
Win Poses
Players to Watch
Disclaimer: This list is derived from community input and is in no way comprehensive or a form of ranking of any kind. Our community criteria can be found here.
| General
|
|
| Characters
|
|
|
|
|
| Mechanics
|
|
| Other
|
|