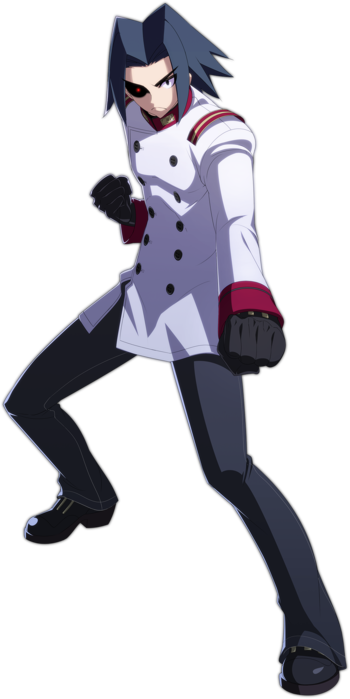
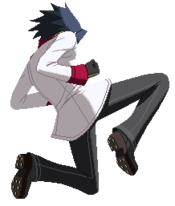
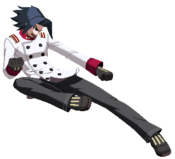
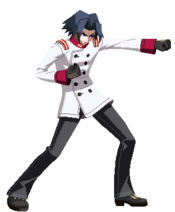
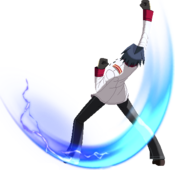
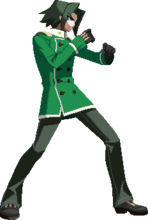
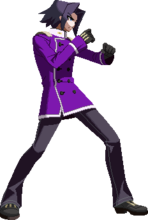
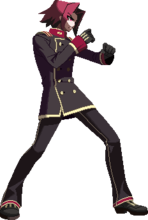
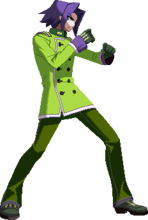
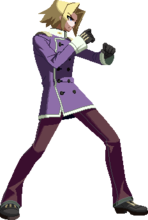
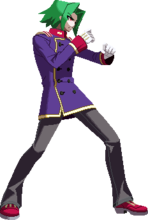
Under Night In-Birth/UNIEL/Akatsuki
Outdated Version
|
Introduction
"EXS...? If you mean this 'Power', it's a military secret so I can't tell you."
Story
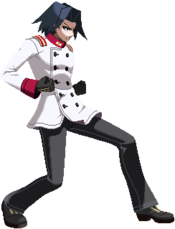
A man of mystery who suddenly appeared in this world. His body is endowed with a vital secret, he acts in with utmost secrecy.
After awakening from his long slumber, he returned to his homeland to discover the scenery had become all too unfamiliar. Despite not knowing left from right in this land, he fully intends to accomplish the mission that he was entrusted with.
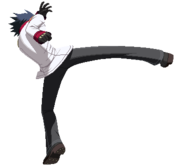
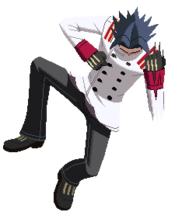
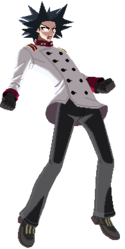
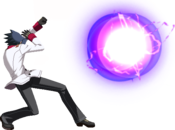
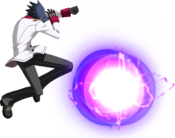
He possesses a body forged from constant training and martial arts and has the ability to discharge electricity through his "Blitzanzug". Possessing a projectile, anti-air, and rushing attacks all together, it's as if he's the main character. Just who is this man...
Unique Trait/Health
Health: 10,000
Dash Type: Step-Dash
Jump Startup: 4f
Backdash: 22f total, 1-9f invulnerable
Ability: Double-jump, air throw
Gameplay
In Blitzkampf, Akatsuki is a very flexible character with great normals, solid mixups, and powerful combos. His moves allow him to punish mistakes on the fly with oftentimes devastating results.
In UNIEL, Akatsuki suffers heavily from his lack of range in a cast dominated by characters who have excellent control of space. However, he makes up for it by being stronger than most in the close-range game. He is a character that requires heavy patience in order to get his gameplan running, but is well equipped to rush down and punish other characters for attempting to escape his grasp.
Pros
- Quick normals
- Easy access to frame advantage
- Strong frame traps
- Third highest health rating in the game (tied with Carmine)
- Access to a double jump
- Not reliant on meter for his best options
- Access to both a 1f counter and an invulnerable DP to answer different situations
- Four anti-air options (air throw, DP, parry, 6C)
- Highest meterless damage potential in the corner.
Cons
- Low ground mobility
- Is outspaced and zoned easily by a majority of the cast
- Lack of good knockdown outside of corner (Currently can trade off damage to retain midscreen oki)
- Subpar high/low mix-up game, reliant on out-poking, punishing and throws
- Supers have very low utility, often used to secure a kill or simply reset a failed mix-up to neutral
UNIEL[ST] Changelist
- Overall increased untech time (universal game change), allows for new combo routes
- Force Function Property Changes
- Now gains GRD on successful use
- New vorpal trait increases damage and proration on parry starter, allowing for strong combos.
- 5B revert to f.B, cl.B added as a new normal
- Kamikaze's first post-barrage move is now cl.B, raw damage increased to 3.9k
- cl.B properties:
- 0 on block
- High hitting hitbox, good for juggles, relaunches, and situational anti-airing
- Can chain cancel to f.5B, f.5B counted as a separate normal
- Can OTG
- f.5C no longer whiffs on crouching opponents at max range, stronger hitbox overall
- 6B now safe on normal block, can be punished by 5f jab point blank on shield
- 6C can be chain shifted on block
- Dash C now has increased range, more active frames
- B Lightning Shot speed increased, increased juggle
- Human Canon (22X) changes:
- A version only has one hit, chain shift and super cancellable on block
- Has a bigger hitbox
- EX version has increased invulnerability, longer untech time, easier to combo off of in the corner
- Armor Piercing Legs (214X) changes:
- A version now causes tumble on counter hit, air version has faster recovery
- B version now juggles higher during hits, 236C now connects before they touch the ground
- B version can be followed up meterlessly near the corner
- EX version now has projectile invulnerability
- Air throw can be used to end combos
Move List
L = Low, H = High, UNB = Unblockable, CS = Chain Shift
Startup includes the first active frame.
Temporary note: "X" is a placeholder for any info that is currently unavailable. Once that info is known it will be filled out.
Normal Moves
| 5A |
|---|
| 2A |
|---|
| 5B |
|---|
| 2B |
|---|
| c.C |
|---|
| f.C |
|---|
| 2C |
|---|
| j.A |
|---|
| 7/9j.B |
|---|
| 7/9j.C |
|---|
Command Normals
| 5AA |
|---|
| 2AA |
|---|
| 6B |
|---|
| 6C |
|---|
| 8j.B |
|---|
| j.2C |
|---|
| 8j.C |
|---|
Dash Normals
| 66B |
|---|
| 66C |
|---|
Universal Mechanics
| Force Function B+C |
|---|
| Throw A+D |
|---|
| Air Throw j.A+D |
|---|
| Guard Thrust 214D |
|---|
| Veil Off A+B+C |
|---|
Special Moves
| Lightning Shot 「電光弾」 236X |
|---|
| Lightning Shot (Air Version) 「電光弾」 j.236X |
|---|
| Armor-Piercing Legs 「徹甲脚」 214X |
|---|
| Armor-Piercing Legs (Air Version) 「徹甲脚」 j.214X |
|---|
| Human Cannon 「人間迫砲」 22X |
|---|
Infinite Worth
| Divine Wind 「神風」 41236D |
|---|
Infinite Worth EXS
| Cherry Blossom Reformation 「桜花改」 A+B+C+D |
|---|
Combos
- (All damage listed is without Vorpal unless otherwise indicated)
- (All combos performed on Hyde)
- (22B Ender damage may vary slight due to hitboxes, as sometimes not all hit connect for max damage)
Because mix-up and mid-range neutral game are not his strong points, Akatsuki has to work his way in, and make every hit he lands hurt. Luckily, he boasts some of the highest damage in the game without the use of resources (and with resources stands next to the top characters in terms of damage output)
Akatsuki combo theory differs between midscreen and corner routes, but in general against standing/crouching opponents, your goal is to always hitconfirm into his 6C. On ground hit, it gives a high launch, that from there allows you to confirm into a variety of different routes, using the strong untech time on his normals to achieve either knockdown (214B/9j.C), or trade the knockdown for higher damage (22B).
The easiest way is using his 2C to float them low to the ground, and then go for 6C into one of his enders, but you can achieve similar results using any of his other normals in the same way. These routes are simple and difficult to drop, making them a nice consistent way to damage your opponent. But if you want to make the most of your hits, you will always want to go for his 6C loop. The idea is simple: upon air hit, 6C puts the opponent in a special air-juggle state that does not send them forward as much as other air hits. After the launcher, you use a well timed 6C to juggle, and cancel into his fireball. When done correctly, the fireball hits them in such a way where you recover before the untech time is over, and are able to hit them again with 6C, juggling them higher than before. Off any normal starter, you must cancel into your ender here. Off a raw 6C starter, however you are able to repeat this again, and after the 2nd rep, you use the last 6C to cancel into your ender. This route works off any starter, including assaults, but carries character specific timings (does not work on Eltnum except for 6C starter), making it a far more difficult route that requires a lot of practice.
When you use a starter that knocks the opponent down (6B, j.2C, and air throw all give this affect), you can OTG with most of his normals into a quick air combo/juggle into his enders. However, like the standing routes, you can also perform the 6C loop for more damage. You simply OTG the opponent with c.C or 5B (necessary off spaced 6B hits), and delay cancel into air hit 6C. Off all three of these starters, you are able to achieve the two repetitions into his enders, and the timing is more universal across the cast.
In the corner, Akatsuki loses his loop, but gains tools that more than make up for it. He possesses two normals which cause wall bounce, his 8j.C and his dash C, which are essential in providing extra juggle time with his normal. He is also able to combo into his j.2C more freely, using both wallbounce as well as the constant close proximity of hitboxes (midscreen combos into j.2C are possible, but require chain shift or character specifics to achieve, see combo listings for details).
For standing confirms, you still want to go into his 6C launcher, and juggle afterwards with either wallbounce or his c.C, before comboing into j.2C to bring them back down to the ground. From there, you OTG confirm into 6C, and perform his enders (preference goes to 214B to keep them in the corner). Off OTG starters, the idea is the same, sans the 6C launcher. You simply juggle the opponent using normals and wallbounce (but be careful, as the initial knockdown counts towards the 3 bounce rule), before comboing into j.2C into OTG ender. Though it may seem overly simple, that is because his combos become much easier in the corner. The reward also increases greatly, and with the exception of 6B and air throw starters, you will always hit above 3k damage. The corner is where Akatsuki's strengths truly shine.
For 6C starters in the corner, the idea is still the same; use normals and wallbounce to juggle for damage, before ending with j.2C > OTG ender string. However, his 6C is noteworthy as it gives him far greater combo time than any of his other normals or specials. This allows him to be more creative with his juggles, comboing normals into themselves and using fireball and his tatsu special as well. Thanks to the damage boost he receives for this increased untechable time, Akatsuki stands as the character with the highest damage potential without the use of resources, with a 4000 damage combo that needs no vorpal damage bonus, chain shift cancelling, or super meter.
USING METER TO END COMBOS: It is important to note that Akatsuki's supers carry little practical utility in extending combos, and are best only used to give extra damage at the end. Also important to note is that, outside of IW (which transports him midscreen regardless of position anyway), none of his supers grant him knockdown, and even IW loses it off of long combo routes. Therefore, they are best used only for the kill or when they will grant you a significant life lead. Adding them is easy: Simply cancel the last 6C of your combo into either 22C or IW. Off 214B midscreen, you can also use j.236C, though this does not work in the corner in many cases due to the 3 bounce rule (214B knocks down), and in cases where it will, it is often better to just cancel the landing recovery frames into 22C, which does more damage.
Midscreen Starter
2A
- 2A > 5B > 5C > 6C > 2C > 6C > 214B (2377 dmg)
- Easiest, most consistent midscreen combo.
- 2A > 5B > 5C > 6C > 2B > f.C > j.A > j.B > j.C (2394 dmg)
- Forces ground tech and allows you to chase down back tech
- 2A > 5B > 5C > 6C > 41236D (3611 dmg)
- Infinite Worth combo, recommend to use it only when it will kill the opponent
- 2A > 5B > 5C > 6C > delay 6C > 236A > 6C > 22B (2755 dmg)
- High damage meterless midscreen standing combo. Ends with air tech.
- The timing on the third 6C is character specific.
- Does not work on Eltnum.
- 2A > 5B > 5C > 6C > delay 6C > 236A > CS > dash j.2C > c.C > 6C > 22B (3415 dmg)
- Extremely high damage midscreen CS combo.
- Universal, can be ended with 214B to grant knockdown (3319 dmg).
5B
- 5B > 5C > 6C > dash 2A > c.C > 9j.B > j.A > 9j.C > 5A > 6C > 22B (2984 dmg)
- Highest damage midscreen standing combo
- Does not work off jabs or assaults
- Dash 2A must hit just before the ground.
- Can be ended in 214B to grant knockdown (2888 dmg).
6B/Air Throw/j.2C
- j.A+D > 2B > 6C > 214A > 5B > j.A > j.B > j.C (1945 dmg, 6B 1847 dmg, j.2C 2384 dmg)
- Ground tech route
- j.A+D > c.C > 6C > 214A > 5B > 9j.B > j.A > 9j.C > 5A > 6C > 214B (2226 dmg, 6B 2144, j.2C 2964 dmg)
- Slight delay between c.C and 6C is necessary against Linne
- Off 6B, replace c.C with 2B.
- j.A+D > c.C > 6C > 236A > 6C > 236A > 6C > 22B (2404 dmg, 6B 2340 dmg, j.2C 3251 dmg)
- High damage midscreen route. There is a slight delay between the c.C and 6C gatling.
- For max range 6B confirms, replace c.C with 5B.
- Can be ended in 214B on all characters but Linne.
- j.A+D > c.C > 5B > 9j.B > j.2C > 2B > 6C > 236A > 6C > 22B (2494 dmg, j.2C 3174 dmg)
- Merkava/Waldstein specific route. Recommended off air throw only due to scaling.
- Does not work off 6B without CS.
- Can be ended with 214B to grant knockdown.
6C
- 6C > 6C > 236A > 6C > 236A > 6C > 214B (3199 dmg)
- Main 6C BNB. Most often used as a punish combo.
- 6C > 66B > 6C > 236A > 6C > 236A > 6C > 214B (3436 dmg)
- Variation of the loop that helps adjust for spacing off anti-air 6C hits.
- 6C > 66B > 6C > 236A > CS > dash j.2C > c.C > 6C > 236A > 6C > 22B (4019 dmg)
- Chain Shift combo that adds extra damage.
- 6C > f.C > 236B > 41236D (4271 dmg)
- Extremely high damage confirm into IW.
- With vorpal, does almost 50% on most of the cast (4695 exact damage). Good for the kill.
22B
- 22B(1) > CS > j.2C > c.C > 6C > 236A > 6C > 236A > 6C > 22B (3259 dmg)
- DP chain shift combo into 6C loop.
- Can be ended with 214B for knockdown (3273 dmg, may be character specific)
Corner Starter
2A
- 2A > 5B > 5C > 6C > c.C > 8j.C > j.2C > c.C > 6C > 22B (3129 dmg)
- Corner standing confirm BNB. High damage, universal meterless route off of any normal that doesn't knockdown.
- Can be ended with 214B to grant knockdown (3033 dmg).
5B
- 5B > 5C > 6C > 66C > c.C > j.2C > c.C > 6C > 22B (3338 dmg)
- Corner route that works off any standing hit starter aside from jabs and assaults.
- Can be ended with 214B to grant knockdown (3242 dmg).
- 5B > 5C > 6C > 2B > 236A > f.5C > 8j.B > 8j.C > j.2C > c.C > 6C > 22B
- Difficult, high damage corner route. Universal but more difficult on some.
- Can be ended with 214B to grant knockdown
6B/Air Throw/j.2C
- j.A+D > c.C > 5B > 236A > 214A > 5B > j.8A > j.8B > j.8C > j.9A > j.9B > j.9C (2263 dmg, 6B 2237 dmg, j.2C 2964 dmg)
- Corner OTG confirm BNB. Leads to safe jump set-ups on certain DPs.
- Off spaced 6B, you must replace c.C with 2B or use CS to dash in to perform it.
- j.A+D > c.C > 5B > 236A > 214A > 5B > j.2C > c.C > 6C > 214B (2422 dmg, 6B 2443 dmg, 3163 dmg)
- Variation of the above route that forgoes the safe jump in turn for increased damage.
- j.A+D > c.C > 5B > 236A > 8j.C > f.5C > 236A > f.5C > 9j.B > 9j.C > j.A > cl.C > 6C > 22B (2485 dmg, 6B 2544 dmg, j.2C 3432)
- Current highest damage meterless OTG confirm. 8j.C > f.5C > 236A can be omitted.
- Can be ended in 214B to grant knockdown
6C
- 6C > dash c.C > c.C > 236A > 214A > 5B > 8j.B > 8j.C > j.2C > c.C > 6C > 22B (3864 dmg)
- High damage universal corner route.
- The first dash c.C can be replaced with 66B to adjust for spacing.
- Can be ended with 214B to grant knockdown on all characters except Linne (3795 dmg).
- 6C > 66C > 66B > 2B > c.C > 236A > 214A > 5B > j.8B > j.2C > 2B > 6C > 22B (4002 dmg)
- More difficult, but damaging, route.
- 66C must be hit at the lowest possible height, and 66B slightly delayed in order to link from 2B to c.C
- j.8B must be omitted against Hilda, Orie, Linne, and Chaos
- Can be ended with 214B to grant knockdown on all characters except Linne (3931 dmg).
- 6C > 66C > c.C > 236A > 66B > 8j.B > j.2C > 2B > 5B > 236A > f.5C > 9j.B > 9j.C > j.A > c.C > 6C > 22B (4036 dmg)
- Our highest damage meterless combo.
- 66C must be hit low to the ground, 66B slightly delayed.
- Can be ended in 214B to grant knockdown
Videos
Combo Demonstration video: https://youtu.be/gXWXxwDwaq0
Colors
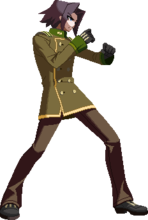
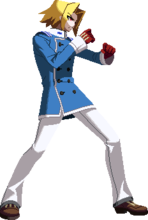
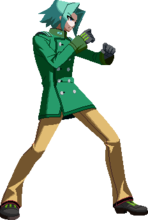
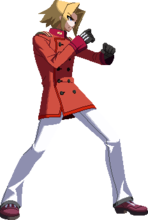
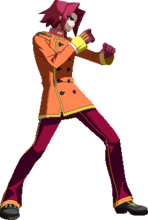
| Blanc Rouge | Strong Red | Freeze Crest | Vestige Garrigue | Idesl Empire |
|---|---|---|---|---|
| Snow Harbor | Neve Tempo | June Sprout | Viola Notte | Puro Vizio |
| Pond Mars | Neve Granulosa | Smaragd Fluss | Cloudy Weather | Primerose Flavor |
| Wildness Parakeet | Landa Sereno | Glanz Eis | Crepuscolo Lampo | Diablo Noche |
