 |
Under Construction
- This page is a work in progress.
- Please be patient and check back later for additional changes.
|
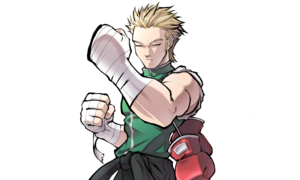
Burai
Estimated Health (After Scaling): 12019 Introduction
Burai is a close range boxer archetype, and has a variety of tools to get in and stay in, as well as some of the highest damage in the game. With an easily accessible dodge and parry, as well as a variety of strong buttons, he's an absolute menace, and sticks to the opponent like glue.
Known as the "Fine-Eyed Baron" because of how his eyes are near-constantly closed, Burai Yamamoto is a strong, disciplined boxer who was forced to aid Agito of the Dark keep control of the school. When Rouga Zanma defeated Agito, Burai swore loyalty to Rouga and joined the Wolf Fang Brigade.
Despite his general seriousness and unflappability, Burai has a crippling fear of girls, as seen whenever he fights Senna Kyoudou, Kunagi Tenrou, Kinako Tsukiyomi, Kendou and Kyuudou Nakanishi, or Erika Miyazato. He also dislikes ghosts to the same, or even greater, degree.
General Strategy
Though he has a few mid-range tools (most notably his Flicker Jabs), Burai is by and large a very up-close and personal fighter. With his stamina gauge, he has a number of devastating combos at his disposal due to the fact that it allows him to create many more chains than the textbook. In a pinch, it can also get him out of bad situations or put him into the fray relatively quickly. However, it is easy to overuse "stamina combos" and empty the gauge very quickly, so caution should be exercised to preserve it for the critical moment.
Burai's other great tool comes in the form of the parry. Though it takes timing and practice to do reliably, parrying a move at mid-or-close range will give him a strong opportunity to punish careless mistakes and combo the enemy to death.
Burai's supers can see standalone use, but they often don't, usually being tied into a combo to compensate for their relatively short range and semi-long windup. Dolphinfish Blow tends to be infinitely more useful for setting up juggle combos due to the ground bounce.
Normal Moves
Standing Normals
5A
5A
|
| Damage
|
Guard
|
Property
|
Startup
|
Active
|
Recovery
|
Block Adv
|
Cancel
|
| 150
|
Mid
|
-
|
-
|
-
|
-
|
-
|
J, N, Sp, Su
|
A very good jab. Burai needs his close range buttons and this is a great one, although it is super stubby.
|
|
5B
5B
|
| Damage
|
Guard
|
Property
|
Startup
|
Active
|
Recovery
|
Block Adv
|
Cancel
|
| 400
|
Mid
|
-
|
-
|
-
|
-
|
-
|
J, N, Sp, Su
|
A lightning fast normal like most of Burai's buttons. has slightly more range than 5A, but in general it has a lot of the same usage.
|
|
5C
5C
|
| Damage
|
Guard
|
Property
|
Startup
|
Active
|
Recovery
|
Block Adv
|
Cancel
|
| 900
|
Mid
|
-
|
-
|
-
|
-
|
-
|
J, N, Sp, Su
|
Burai dashes forward and does a quick strong punch. This is Burai's best normal for neutral poking, as it has high damage and very good range. This is an all around great button.
|
|
Crouching Normals
2A
2A
|
| Damage
|
Guard
|
Property
|
Startup
|
Active
|
Recovery
|
Block Adv
|
Cancel
|
| 150
|
Mid
|
-
|
-
|
-
|
-
|
-
|
N, Sp, Su
|
A fast crouching jab. It's decent in pressure strings, but it's not a low, making it not a great crouching tool over 2B.
|
|
2B
2B
|
| Damage
|
Guard
|
Property
|
Startup
|
Active
|
Recovery
|
Block Adv
|
Cancel
|
| 500
|
Low
|
-
|
-
|
-
|
-
|
-
|
J, N, Sp, Su
|
A fast low swipe. This is Burai's only low hitting normal, and a very strong one at that. A very good normal to use when tripping up the opponent.
|
|
2C
2C
|
| Version
|
Damage
|
Guard
|
Property
|
Startup
|
Active
|
Recovery
|
Block Adv
|
Cancel
|
| 2C
|
900
|
Mid
|
-
|
-
|
-
|
-
|
-
|
N, Sp, Su
|
Burai performs a launching uppercut. This is not a great button in neutral or pressure as it's very slow startup, but it can be used in combos, and it does launch.
|
| Version
|
Damage
|
Guard
|
Property
|
Startup
|
Active
|
Recovery
|
Block Adv
|
Cancel
|
| 2[C]
|
1000
|
Mid
|
-
|
-
|
-
|
-
|
-
|
N, Sp, Su
|
This version does more damage and launches better but is much slower. A very situational button you'll avoid most of the time.
|
|
Air Normals
jA
jA
|
| Damage
|
Guard
|
Property
|
Startup
|
Active
|
Recovery
|
Block Adv
|
Cancel
|
| 250
|
High
|
-
|
-
|
-
|
-
|
-
|
N, Sp, Su
|
A fast air jab. This button is best used as an air-to-air, as it doesn't have much combo potential. It is a decent jump-in too, although you won't get anything from it.
|
|
jB
jB
|
| Damage
|
Guard
|
Property
|
Startup
|
Active
|
Recovery
|
Block Adv
|
Cancel
|
| 600
|
High
|
-
|
-
|
-
|
-
|
-
|
N, Sp, Su
|
An air uppercut. This is pretty much only an air-to-air as its hitbox doesn't really hit grounded opponents at all. It can work, but it's best to just use it as an air-to-air and sometimes a combo tool.
|
|
jC
jC
|
| Damage
|
Guard
|
Property
|
Startup
|
Active
|
Recovery
|
Block Adv
|
Cancel
|
| 900
|
High
|
-
|
-
|
-
|
-
|
-
|
N, Sp, Su
|
A downward punch, This is Burai's best jumping attack, and a pretty great overhead in general. Definitely worth using.
|
|
Command Normals
6A
6A
|
| Damage
|
Guard
|
Property
|
Startup
|
Active
|
Recovery
|
Block Adv
|
Cancel
|
| 500
|
Mid
|
-
|
-
|
-
|
-
|
-
|
J, Sp, Su
|
A standing uppercut. This is a pretty good anti-air, as well as a strong pressure tool.
|
|
6B
6B
|
| Damage
|
Guard
|
Property
|
Startup
|
Active
|
Recovery
|
Block Adv
|
Cancel
|
| 750
|
Mid
|
-
|
-
|
-
|
-
|
-
|
N, Sp, Su
|
A strong close punch. This command normal is mostly used as combo filler and in pressure to catch an opponent mashing.
|
|
6C
6C
|
| Damage
|
Guard
|
Property
|
Startup
|
Active
|
Recovery
|
Block Adv
|
Cancel
|
| 700
|
Mid
|
-
|
-
|
-
|
-
|
-
|
N, Sp, Su
|
A slow punch downwards. Mostly used in combos to groundbounce an opponent, it doesn't have much use outside of it, but there is frametrap potential.
|
|
4C
4C
|
| Damage
|
Guard
|
Property
|
Startup
|
Active
|
Recovery
|
Block Adv
|
Cancel
|
| 700
|
Mid
|
-
|
-
|
-
|
-
|
-
|
N, Sp, Su
|
Burai steps back and throws a strong punch. This is an amzing tool in neutral and pressure as it allows you to dodge some of your opponent's buttons, as well as giving you a pretty decent combo on hit.
|
|
Universal Mechanics
5/4/2D
Dodge
5/4/2D Forward dodge Forward dodge Backward dodge Backward dodge Jump dodge Jump dodge
|
| Version
|
Damage
|
Guard
|
Property
|
Startup
|
Active
|
Recovery
|
Block Adv
|
Cancel
|
| 5D
|
N/A
|
N/A
|
Invincible
|
-
|
-
|
-
|
-
|
-
|
Burai dodges forward, and is invincible and intangible for the duration of the dodge, allowing you to dodge your way in.
|
| Version
|
Damage
|
Guard
|
Property
|
Startup
|
Active
|
Recovery
|
Block Adv
|
Cancel
|
| 4D
|
N/A
|
N/A
|
-
|
-
|
-
|
-
|
-
|
N,Sp,Su
|
Burai dodges backwards. This is essentially a better backdash, with more invincibility, and is a good tool to escape your opponents pressure if they leave gaps.
|
| Version
|
Damage
|
Guard
|
Property
|
Startup
|
Active
|
Recovery
|
Block Adv
|
Cancel
|
| 2D
|
N/A
|
N/A
|
Invincible
|
-
|
-
|
-
|
-
|
N,Sp,Su
|
Burai does a dodge jump, and is invincible for the duration of the dodge. Holding 1 or 3 will let you do a forward or backward jump as well, making this a pretty good dodge for avoiding many attacks, as well as jumping lows.
|
|
Parry
Parry
6/2
|
| Damage
|
Guard
|
Property
|
Startup
|
Active
|
Recovery
|
Block Adv
|
Cancel
|
| NA
|
NA
|
-
|
-
|
-
|
-
|
-
|
NC
|
Burai has a parry similar to Street fighter III. By pushing forward for highs and down for lows at the right time, Burai will parry and have a chance to punish. While not always useful, this is something you should get very good at doing, as parrying the right things will let you punish normally unpunishable moves.
|
|
Throw
Throw
4/5AB
|
| Damage
|
Guard
|
Property
|
Startup
|
Active
|
Recovery
|
Block Adv
|
Cancel
|
| 400
|
Unblockable
|
-
|
-
|
-
|
-
|
-
|
NC
|
Burai grabs the opponent and does a quick punch. The reasno for the low damage is that Burai leaves the opponent standing, leading to very easy combos off throw, this is a fantastic button for Burai.
|
|
Big Bang Mode
Big Bang Mode
ABC
|
| Damage
|
Guard
|
Property
|
Startup
|
Active
|
Recovery
|
Block Adv
|
Cancel
|
| N/A
|
N/A
|
-
|
-
|
-
|
-
|
-
|
-
|
Universal Big Bang Mode activation. Requires 3 bars and can be done anytime you have control on the ground. Lasts for about 7 seconds. During Big Bang Mode, Burai regains stamina extremely fast, allowing for crazy combos and pressure.
|
|
Special Moves
236X
Straight Combination
214C 1st Hit 1st Hit 2nd Hit 2nd Hit
|
| Damage
|
Guard
|
Property
|
Startup
|
Active
|
Recovery
|
Block Adv
|
Cancel
|
| 400+600 (982)
|
Mid
|
-
|
-
|
-
|
-
|
-
|
Su
|
Burai does two straight punches in combination. It' sa decent special but nothing amazing, it can only cancel into supers.
|
|
214A
Cross Upper
623C 1st Hit 1st Hit 2nd Hit 2nd Hit
|
| Damage
|
Guard
|
Property
|
Startup
|
Active
|
Recovery
|
Block Adv
|
Cancel
|
| 400+600 (982)
|
Mid
|
-
|
-
|
-
|
-
|
-
|
NC
|
Burai does a gut punch into an uppercut that launches the opponent. It's not great, but it has its uses.
|
|
214X
Flicker Jab
214A/B A version A version B version B version
|
| Version
|
Damage
|
Guard
|
Property
|
Startup
|
Active
|
Recovery
|
Block Adv
|
Cancel
|
| A
|
900
|
Mid
|
-
|
-
|
-
|
-
|
-
|
Sp, Su
|
Burai does a quick long jab. This is pretty uch his only midrange tool, and it's a great one at that, giving you a chance to get in and start using his truly terrifying moves.
|
| B
|
900
|
Mid
|
-
|
-
|
-
|
-
|
-
|
NC
|
This version has a delay, but can be used to trip up the opponent.
|
|
B-Power Arts
63214D
Dolphinfish Blow
63214D
|
| Damage
|
Guard
|
Property
|
Startup
|
Active
|
Recovery
|
Block Adv
|
Cancel
|
| 1600
|
High
|
-
|
-
|
-
|
-
|
-
|
-
|
Burai does a hard overhead punch. This is a strong overhead that groundbounces on hit, allowing for some pretty big combos.
|
|
41236D
Freedom Punch
41236D
|
| Damage
|
Guard
|
Property
|
Startup
|
Active
|
Recovery
|
Block Adv
|
Cancel
|
| 1200+200*6
|
Mid
|
-
|
-
|
-
|
-
|
-
|
NC
|
Burai does a straight punch with 7 hits. The first hit does the most damage. This does a fair amount of damage overall and is a good combo ender with 1 meter.
|
|
Big Bang Break
41236ABC
Fist of Freedom
41236ABC
|
| Damage
|
Guard
|
Property
|
Startup
|
Active
|
Recovery
|
Block Adv
|
Cancel
|
| 5222
|
All
|
-
|
-
|
-
|
-
|
-
|
-
|
Burai does a gut punch up close. If it connects, he goes into a Dolphinfish Blow before ending with a powerful straight punch. Good as a combo ender when in Big Bang mode, especially if you're aiming to kill. Ends Big Bang Mode instantly.
|
|
Combos
Combo Theory
- Combo damage varies from character to character, so all damage numbers come from testing on a full-health Rouga.
Midscreen
- jC > 5B > 5C > 6B > 2C > 6C > 6A > 2[C] > dl.jA > dl.jB > jB > jC (4821)
- This combo works both midscreen and corner, and give you enough time to B-Steal and still get oki. This is a good use of stamina too.
- jC > 5B > 5C > 6B > 2C > 6C > 6A > 2[C] > dl.6A > 2[C] > dl.6A > 2[C] > 63214D > dl.2[C] > dl.6A > 2[C] > dl.jB > j.C (6036)
- This is Burai's 2C loops, and is the strongest combo outside of BBM. This is a strong combo but not necessarily practical, although 2C loops can be used in other contexts.
Corner
Colors
BBBR Navigation


