Eternal Fighter Zero/Kaori Misaka
Introduction
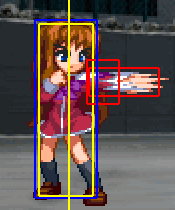
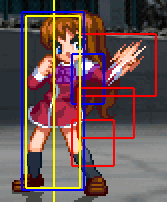
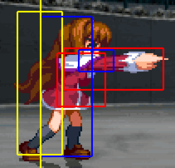
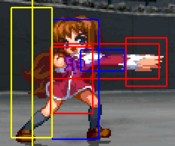
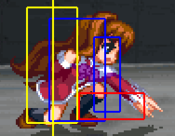
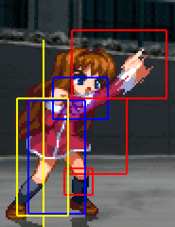
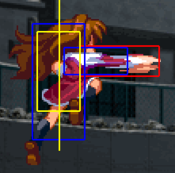
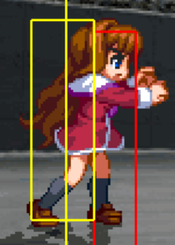
Misaka Kaori (美坂 香里) is the boxer-type fighter of EFZ, taking after Dudley from Street Fighter, even gaining his “ducking” move. As a boxer, Kaori is extremely strong in close quarters, and excels when the opponent is in the corner. She has basic combos that can carry the opponent to the corner, and with meter, has much more advanced combos that can deal massive damage. It is not unheard of to see a Kaori take back a match that she has been losing by 50, 60, even 70 percent life. Her weakness lies in being zoned out by characters with strong projectile games, and she must make masterful use of recoil guard and ducking to get in before she loses the match.
Kaori is one of the supporting characters of Kanon, a visual novel produced by Key in 1999. Kaori is Nayuki's closest friend, and is Yuuichi's and Nayuki's classmate. She is very smart and knows a lot about her classmates and the town, but does not seem to be aware of any of the supernatural happenings that take place. During Kanon, Yuuichi learns that Kaori has the same family name as Shiori, but Kaori strongly denies any relation...
Kaori was added to EFZ's cast in Bad Moon Edition.
Stage: Snowy Park (Night) (雪の公園(夜))
BGM: Frozen Plateau (凍土高原)
Character-Specific Notes
- Kaori's ground dashes are actually special moves, meaning they can be cancelled into. Her dash attacks will also be covered in the Special Moves section.
- Kaori is one of a few characters who gain some throw invincibility after double jumping.
- Kaori has the shortest jump in the game. You might need to double jump over things that only require a single jump for other characters.
- Kaori has no moves which can counterhit nor does she have any which can be counterhit.
Normal Moves
| Frame Data Help | |
|---|---|
| The notation for the move lists can be found under Controls. | |
| Cells filled with a "-" indicate a placeholder. Cells filled by a "/" indicate a non-applicable field. | |
| Values separated by a "~" (X~Y) indicate a range or variance. A "~" preceding a single value (~X) may indicate approximation. A "-" separating frame values of a property (X-Y) indicate the duration of the property. | |
| Cell data accompanied by a ※ indicate properties unusual to the template. Explanations for such properties can be found at another ※ in the description. If a move requires multiple ※'s, subscripts will be attached to indicate relation (※1, ※2, ※3...). | |
| Frame data with decimal values .33 or .66 relate to subframes. | |
| Version | Used for moves with multiple special attacks on one motion. |
| Damage | The base damage value that the specific hit will do. See damage scaling for more information. |
| Guard | Indicates how the move must be blocked, if it can be blocked at all.
Low: Crouch Block |
| Property | Shows what properties the move has and the time (in frames) that these properties are active. Example: "I: 0.33-9", which means the move is invulnerable on the first subframe of the move until the 9th full frame (or 27th subframe).
I: Full Invincibility |
| Startup | Indicates where the move's first active hitbox is. |
| Active | Total frames the hitbox is active for. |
| Recovery | Total frames until the character can block. Note: After the recovery of any action, before any other action may occur, there exists 1 frame in which the only action you may take is to block. |
| Adv Hit | Frame advantage on hit. |
| Adv Block | Frame advantage on block. |
| Cancel | Possible cancel options.
N: Normals |
Standing
5A
5A
|
|---|
c5B
c5B
|
|---|
f5B
f5B
|
|---|
5C
5C
|
|---|
Crouching
2A
2A
|
|---|
2B
2B
|
|---|
2C
2C
|
|---|
Jumping
j5A
j5A
|
|---|
j5B
j5B
|
|---|
j5C
j5C
|
|---|
Grabs
Ground Grab
Ground Grab
Close 6C/4C |
|---|
Air Grab
Air Grab
Close j6C |
|---|
Special Moves
Ducking Moves
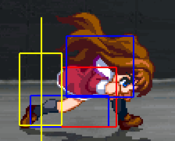
66*
Ducking
ダッキング 66 |
|---|
4466*
Recoil Ducking
反動ダッキング 44~66 |
|---|
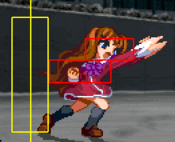
66A
Fast Upper
ファストアッパー 66A |
|---|
66B
Shine One Two
シャインワンツー 66B |
|---|
66C
Hell Charge
ヘルチャージ 66C |
|---|
662C
Leg Smasher
レッグスマッシャー 662C |
|---|
Specials
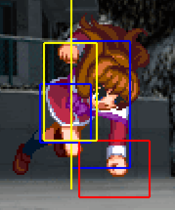
214*
Punishment Cross
パニッシュメント・クロス 214* |
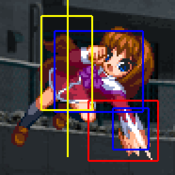
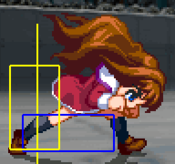
Kaori will wind back a bit and deliver a downward angled punch followed by an upward angled punch. This move is an overhead and a launcher. Safe on block. |
|---|
623*
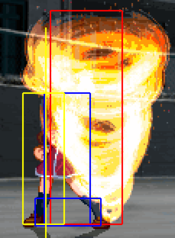
Cyclone Upper
サイクロンアッパー 623* |
|---|
Eternity Specials
236236*
Initial K
イニシャルK 236236* |
|---|
214214*
Fire Storm
ファイアーストーム 214214* |
|---|
641236*
Extreme Double
エクストリームダブル 641236* |
|---|
Final Memory
FM
Silent Pose
サイレントポーズ 666S |
|---|
Strategy
Default Gameplan
Kaori is a boxer-type character, very loosely correlated to how Dudley plays in SF3S. She has one of the fastest walk speeds in the game, letting her close the distance without having to rely on airdashes. She also boasts great corner carry thanks to her 66C. Once she gets in, her normals are great at keeping the opponent blocking, allowing her to run a decent strike/throw game. She has great damage due to her Fire Storm super (214214B), letting her convert to 5k+ damage anywhere on the screen as long as she has the meter. However, despite her great walk speed, she suffers against zoners; they can force her to lose ground by blocking, and because her jump doesn't go very high, she finds it hard to stop opponents from jumping away from her.
Kaori ideally wants to walk her opponent to the corner, using her long pokes f5B and 5C to threaten the opponent and prevent them from walking forward. From there, she uses 5A/2A to keep the opponent blocking and attempt tick throws when possible. Getting a 2A to hit allows her to go into a full BnB on confirm. She can also reset pressure into jAAA for a simple jA/2A mixup. Once she gets a knockdown, she has 623B for an easy meaty option, forcing the opponent to block into Kaori's 2A/214A mixup.
She boasts a very good 2B antiair for any jump-in attempts, making it hard for some characters to begin their offense. She can also do a sliding 2B (6.. 3+B on the same frame)for an unexpected closer, but inputting it on command is unreliable.
Notable normals/specials/supers
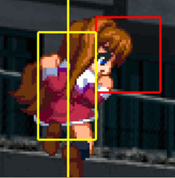
- 66 - Ducking, replaces her dash. Has upper-body invulnerability, though using it as such is usually unreliable. Changes her dash normals into different special followups.
- 5C - Always pre-buffer 214214 after this. You have 24 frames to confirm and press A/B, which is quite reasonable.
- 2B - Excellent anti-air and easily confirmable into a full combo.
- 623B - Very meaty, can 2A for a low, 214A for a high, or 5A for a tick throw setup. Can go into a full combo if 623B hits and you confirm.
- 623C/214C - Two invulnerable reversals, 623C is faster and fully invulnerable, and you can get a short combo on hit, but 214C is overhead and moves her forward, though it has a 1f vulnerable period right before it hits.
- 236236A - Metered reversal. If you have red IC, cancel on the 2nd hit for better damage and meter recovery.
- 641236 - Unblockable. 1st hit locks the opponent into block/hit stun, and the 2nd hit does damage. There are various counters to this, so knowing what your opponent can do will decide whether this super is worth it or not.
Combos
| Notation Help | |
|---|---|
| Disclaimer: Combos are written by various contributors, some combo notations may deviate slightly from the notation listed below. For more information, see Controls | |
| IC | Input Instant Charge (22C) when you have the right amount of RF Meter. |
| FIC | Input Flicker Instant Charge (22C) when you have the right amount of RF Meter. |
| {X/Y/Z} | Move X or Y or Z can be used. |
| #* | Indicates that any of A, B and C may be used with #. Example: 214*. |
| [<- X] [-> X] | Side switch notation. All inputs grouped by the square brackets are performed facing the arrow's direction. They are still written as if they were done facing right, however. |
| [X]xN | Loop the inputs in the square brackets as many times as N. |
| c5B | Proximity normal only usable while close. |
| f5B | Proximity normal only usable outside of c5B range or when cancelled from another normal. Known as far 5B. |
| jX | Button X is input during your first jump. |
| djX | Button X is input during your double jump. |
| X(whiff) | Indicates that X is intended to whiff. |
| X(tech trap) | Indicates a combo ender intended to catch the opponent's air tech. The most common kind of tech trap is j6C, which will air throw early techs and jC later techs. Executionally identical to X(whiff) but different in purpose. |
| ~ | Indicates a followup for moves which have them. Example: 236A~236A. |
| .. | Indicates a short delay. |
| IAD | Indicates an Instant Air Dash. |
| IABD | Indicates an Instant Air Back Dash. |
| (X) | X move is omittable from the combo. |
| tk.X | Indicates the motion "X" is input immediately after leaving the ground. Stands for tiger knee. |
Nagisa's Beginner BnB Collection
No IC
Anywhere
- 2A 5C 66AC 66AC 66C
- Basic BnB, works pretty much anywhere on screen. Omit a 66AC for guaranteed knockdown, as doing 2 reps can allow them to tech.
- 2B jB 66 jB(C) land jB 66 jAB(C) land c5B [4]AAAAA f5B 2C 9 jABC djC
- Anti air combo that works mostly full screen. The (C)s are for whiffing jC for more meter. Not necessary, but Kaori really enjoys the meter gain.
- 2A 5C (66AC)x1-2 214214A
- Meter dump, not worth doing 214214B without meter, but you can do C version if it will kill.
Near corner/Corner
- 2B jB 66 jB(C) 5C 66AC 66A c5B [4]AAAAA f5B 2C 9 jABC djC
- You can go into a 5C 66AC here since you're close to the corner for more damage.
- 2A 5C 66A 2C jAAB 623B(1) 2A(whiff) c5B [4]AAAAA f5B 2C 9 jABC djC
- Can switch out the jAAB for jB~jB but is harder and doesn't work on Makoto. Can just do 2AAC instead for a starter.
- 214B [623B(1) 5A/2A(whiff)]x3-4 c5B c5B [4]AAAAA f5B 2C 9 jABC djC
- If you get a 214B launcher, can go into a couple of tornadoes or even just loop c5B ~6-8 times.
- 623A/5C 2A 5C 623A 236236A
- Meme combo but shows off that 623A can be linked from. 5C 2A links in the same way.
Red IC
Anywhere
- ... 5C 214214B IC 623B(1) 5A(whiff) [*1] jB 66 jAB c5B c5B [4]AAAAA f5B 2C 9 jABC djC
- Red IC version of her tornado loop, can do up to 2-3 tornadoes depending on your confidence.
- [*1] Switch sides here depending on distance to corner
- 214A/236236A(2) IC [*2] 623B(1) c5B jB 66 jAB(C) c5B c5B [4]AAAAA f5B 2C 9 jABC djC
- If you open up your opponent with the overhead or 236236A as a reversal. Don't let all of the super hit as the proration is much worse and you get more damage/meter by not letting it finish.
- [*2] You can jump over the opponent here if you hit with the super, letting you side switch.
Corner
- (2A) 5C 214214B IC [623B(1) 5A(whiff)]x5 c5Bx3 [4]AAAAA f5B 2C 9 jABC djC
- Corner version, can do the full 5 tornadoes.
- ... 5C 214214A IC 623B(1) 2A(whiff) c5Bx4 [4]AAAAA f5B 2C 9 jABC djC
- Red IC nets you a good amount of damage here, can go for this if you're not close to BIC.
- 214A IC 623B(1) 2C jB~jB 5C 66AC AB [4]AAAAA f5B 2C 9 jABC djC
- Overhead starter. The 623B(1) gives a bit more meter and height so that the jB~jB is easy and works on Makoto.
Blue IC
Anywhere
- 2A 5C 66AC 214214A (5) BIC 623B(1) c5B jB 66 jAB(C) 5C 66AC 66AC c5B [4]AAAAA f5B 2C 9 jABC djC
- Easy corner carry with good damage.
- 2A 5C 66AC 214214B BIC [623B(1) 5A(whiff)]x4-5 c5B jB 66 jAB(C) 5C 66AC 66A 5AB [4]AAAA f5B 2C 9 jABC djC
- Level 2 version. Only do 4 tornadoes if you want to side switch towards a closer corner.
- 2A 5C 214214B BIC 7 dj8B 6[6] jB(C) land jB 66 jAB(C) 5C 66AC 66A 5AB [4]AAAAA f5B 2C 9 jABC djC
- Useful for characters that can't be hit by 623B after 214214B BIC.
- 214C BIC 7 66 jAB [623B(1) 5A(whiff)]x2 623B(1) c5B [623B(1) 5A(whiff)]x5 214214B IC [623B(1) 2A(whiff)]x4 5C 66A 5AB [4]AAAAA f5B 2C 9 jABC djC
- Optimal route off a 214C BIC starter. Feel free to cut out a couple of tornadoes for ease.
- [See (https://www.nicovideo.jp/watch/sm14393938) at 00:00 for example]
Corner
- 2A 5C 66AC 214214A BIC 623B(7-10) 66C 5ABC 66AC c5B [4]AAAAA f5B 2C 9 jABC djC
- Simple combo using only 1 meter. Lower number of hits on 623B makes it so the opponent is too low to the ground to connect the 5A after 66C.
- (2A 5C 66A) 5C 214214B BIC (2B) [623B(1) 5A(whiff)/5B(relaunch)]x5 [623B(1) 5A(whiff)]x3-4 623B(1) 2C jB~jB 5C 66A 5AB [4]AAAAA f5B 2C 9 jABC djC
- Corner version of her tornado loop, this is why you play Kaori. Good damage, excellent meter recovery. Sometimes easier to do 623[6]B~A to get a 5A whiff instead of 2A whiff. Only do the (2B) for characters that 623B doesn't work on.
- [Back to corner] 214C IC IAD jC(whiff) <- c5B 2B jB 66 jB(C) 623B(1) 5C 66AC 66A 5AB [4]AAAAA f5B 2C 9 jA jB jC djC
- Easier version of her reversal 214C BIC combo.
- [Back to corner] 214C IC IAD <- c5B 2B [623B(2) 5A/2A(whiff)]x5 [623B(1) 5A(whiff)]x3 5C 214214A IC 623B(1) 2A(whiff) 5AB [4]AAAAA f5B 2C 9 jA jB jC djC
- Harder version of her reversal 214C BIC combo. 2-hit versions of tornado loop can be character specific so further testing is needed.
- 2AA 5BC 214214B BIC {[623B(1) 5A(whiff)/5B(relaunch)]x4}x2 [623B(1) 5A(whiff)]x2 623B(1) 5C 214214A IC 623B(1) 2A(whiff) c5B 5AB 5AAAABB jABC djC
- 3 meters, blue IC, and red IC. Does about 8k but is difficult, so sticking to the simpler combos is suggested to start with.
- 2AA 5C 66AC 214214A BIC 623B(1) c5B [623B(1) 5A(whiff)/c5B(relaunch)]x5 [623B(1) 5A(whiff)]x4 214214B IC [623B(1) 5A(whiff)]x4 623B(1) 5C 66A 5AB 5AAAABBC 236236A
- 1 meter into blue IC into 2 meters into red IC into another meter. The ultra meter dump combo and is flashy as hell. About 8500 damage.
- [Replay is missing ender]
Character/Situation Specific Combos
- 2C 623A(3) 2B 5C 66AC 66AC 66A c5B [4]AAAAA f5B 2C 9 jABC djC
- If you normal block (not RG) Mai's 412C while she's in the corner. Timing on the 2C is faster than you would expect.
- 5C 214214B BIC 2B 623B(1) 5A(whiff) [623B(2) 5A(whiff)]x6 2C jB~jB 5C 66A 5AB [4]AAAAA f5B 2C 9 jABC djC
- VS Akiko, near-ish corner. Example 2-hit tornado loop. Other characters will need other routes.
- [Replay is missing ender]
Combo Notes
Kaori's 214124B IC into tornado loop does not work on all characters, requiring a different route to pick up instead. Below is a list of characters that it doesn't work on and the variations you can do instead.
- Neyuki, Shiori, Sayuri, Kano, Minagi, UNKNOWN, Nayuki, Kaori, Akiko
Red IC
- For red IC, the only reasonable variation is to cut short the super by 1 hit, losing most of your damage in the process. Highly suggested to just do the 214214A combo instead.
Blue IC
- j7 j8B 6[6] jB etc.
- Requires some awkward timing on the j66 jB but is otherwise easy and leads into good damage still.
- 2B -> tornado loop
- 1-2 frame link, but preferable if you can reliably do it, as your route doesn't change after that.
Okizeme
Kaori's okizeme is a little lacking, and most of the time you will open up your opponent with strike/throws instead.
Strike/throw
- Kaori's walk speed is one of the fastest in the game, and her 5A/2A are very good at catching opponents trying to jump out. c5B is also +4 on block, allowing you to time to close back in for more tick throw attempts.
623B
- While not a mixup in itself, this tornado is extremely meaty and can cancel into any other move. You will want to cancel into 2A or 214A for a high/low once you confirm they are blocking. Don't make this too obvious, as it can very easily be reversaled.
214A IC
- Her most used overhead. While you aren't forced to IC this, the damage return is very low and makes spending red IC here worth it. See combo section for an example conversion.
214B
- Similar to 214A but doesn't need IC for a full combo. Very, very slow and can be blocked on reaction quite easily. Only use this if you're disrespecting your opponent.
- In the Rumi matchup, this move gains value as a meaty option, as the hitbox will move far enough forward that Rumi's 623B DP will whiff completely.
214C BIC
- Used exactly the same way as 214A IC but you're forced to use BIC. More often used as a reversal since it has good invulnerability, but since it's fast it can also be used as a hail mary mixup.
jAAA
- Used to reset pressure. Kaori's jump is very low, making this somewhat viable. Mix up with less jAs into 2A.
Instant jC
- Rising overhead, very hard to block. Only works on characters with crouching height of 55 and above. Can't convert this into anything, so it's mostly a way to close out a round on an opponent with low health.
Win Quotes
| Japanese | English |
|---|---|
|
もう良いでしょ |
I hope you're satisfied. |
|
悪くは無いわね |
Not bad at all. |
|
ボディがお留守よ |
Your body's wide open. (Kaori is saying one of Vanessa's quotes, from The King of Fighters series.) |
|
チェックメイト |
"Checkmate" |
|
遅いわね… |
You're so slow... |
|
(To Shiori) |
(To Shiori) |
|
(To Kaori) |
(To Kaori) |
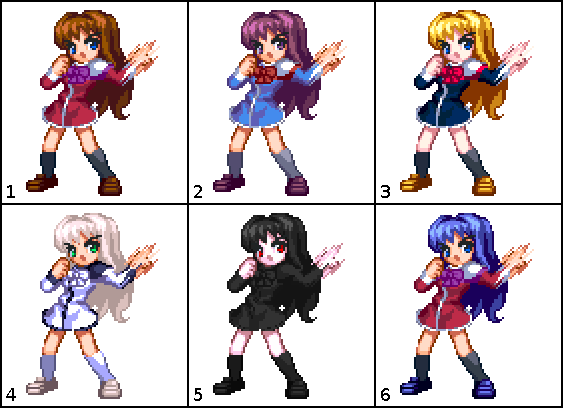
Colors
In-game References
External References
- Kaori's 623* is based on Cody's "Criminal Upper" featured in the Street Fighter series.
- Kaori's Final Memory is based on Slayer's "All Dead" instant kill move from the Guilty Gear XX series.
Kanon References
- The park with the fountain in the background is an important place of her sister, Shiori.
- The way that Kaori stares blankly at the toast during Akiko's "There is also some that isn't sweet" move is a reference to her previous experience with Akiko's "special" jam before the events of Kanon.

