JoJo's Bizarre Adventure: All-Star Battle R/System
- In this page, Forward and Back are terms used to describe the directions relative to the character; assuming the character is looking towards the right side of the screen, Forward would be the right side (
 ), while Back would be the left side (
 ). In other words, Forward refers to the direction the character is facing, while Back refers to the opposite direction. For the sake of consistency, this page assumes the character is facing to the right.
This page explains all the core mechanics featured in JoJo's Bizarre Adventure: All-Star Battle R.
Basic Abilities
Movement
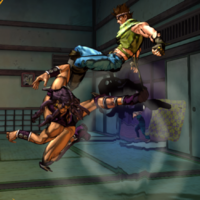
In JoJo's Bizarre Adventure: All-Star Battle R, characters are mostly locked on a 2D plane despite the stages being rendered with 3D space. As such, all characters can move by performing one of the following actions:
- Walking, done simply by holding the desired horizontal direction ( / ). This is the slowest form of movement, but also presents the least risk.
- Dashing, executed by tapping the desired horizontal direction twice in quick succession ( / ).
- When dashing backwards, it is possible to reduce the maneuver's recovery by performing Normal Attacks during it (with the backdash being canceled 12 frames sooner); this cannot be done with Special Moves, however, as Normal Attacks will come out instead. Actions involving a character's Style cannot cancel a backdash, but said actions can still be buffered during it.
- Certain characters (such as
 Pet Shop) possess the ability to dash while in midair; the ability may also be tied to a character-specific mode, or may only be restricted to one direction.
  Johnny (while Dismounted) is the only character who cannot dash at all.
- Running, by double-tapping in quick succession and holding it.
- Some characters (such as
 Hol Horse) are able to run backwards by double-tapping and holding instead.
  Giorno (with Gold Experience Requiem active) does not have a normal run, instead flying through the air momentarily and, if held, stopping after reaching a certain distance.
 Wamuu, Johnny (while Dismounted), and
  Wonder of U are the only characters who cannot run at all.
- Some characters (such as
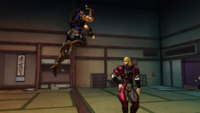
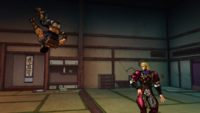
- Jumping, by tapping an upward direction, depending on the desired trajectory (
 /
/  /
/  ).
).
- Jumping while running will cause the character to perform a Dash-Jump: a type of jump that does not go as high, but instead covers a longer horizontal distance.
- Some characters (such as
 Dio Brando) possess Super Jump abilities, performed by pressing a downward direction (
 /
/  /
/  ) quickly followed by an upward direction ( / ).
 - Johnny (while Dismounted) is the only character who cannot jump at all.
All characters can crouch by holding a downward direction (![]() /
/ ![]() /
/ ![]() ). Although this does not act as a movement option per se, it does allow a character to avoid attacks that would have hit them otherwise.
). Although this does not act as a movement option per se, it does allow a character to avoid attacks that would have hit them otherwise.
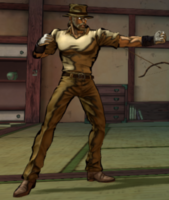
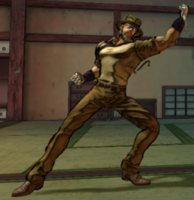
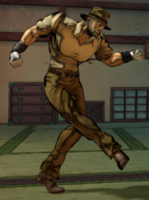
Jonathan standing.
Jonathan crouching.
Jonathan walking forward.
Jonathan walking backwards.
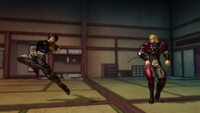
Jonathan executing a Back Dash.
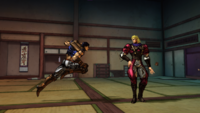
Jonathan executing a Forward Dash.
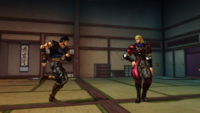
Jonathan running.
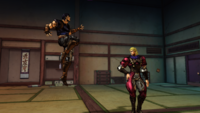
Jonathan jumping in place.
Jonathan jumping forward.
Jonathan jumping backwards.


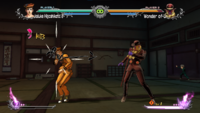
Offense
Normal Attacks
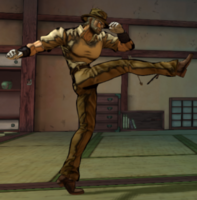
All characters have access to a Light Attack, a Medium Attack, and a Heavy Attack, which can all be chained together in a combo in order of increasing power; in-game, such a chain is referred to as a Chain Beat. Characters can also attack while crouching, being able to chain attacks just like when standing (and mix between standing and crouching versions). While characters also have Aerial Attacks (Normal Attacks that can be used while in the air), only certain characters can chain multiple of these attacks together (referred to in-game as an Aerial Chain Beat).
Generally, Normal Attacks can be described in the following ways based on their power:
- Light Attacks (
 ) are quick, but lack range and are weak.
 - Medium Attacks (
 ) are balanced between power, range, and speed.
 - Heavy Attacks (
 ) deal more damage and have more range, but are slower.
Most characters also have access to additional Normal Attacks beyond the universal Light, Medium, and Heavy Attacks. These are known as Command Normals (referred to as Specials in-game), and are performed by holding a certain direction and pressing one of the Attack buttons (such as ![]() +
+ ![]() or
or ![]() +
+ ![]() ). Depending on the character, their Command Normals may be usable on the ground and/or in the air, and may be restricted to character-specific modes. Command Normals can be chained from Normal Attacks (with a sound effect playing and the character briefly sparking on a successful chain), and most allow the character to chain into Special Moves from them, just like a Normal Attack would.
). Depending on the character, their Command Normals may be usable on the ground and/or in the air, and may be restricted to character-specific modes. Command Normals can be chained from Normal Attacks (with a sound effect playing and the character briefly sparking on a successful chain), and most allow the character to chain into Special Moves from them, just like a Normal Attack would.
Old Joseph executing a Light Attack.
Old Joseph executing a Medium Attack.
Old Joseph executing a Heavy Attack.
Old Joseph executing a Command Normal (
+ ).


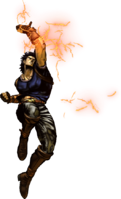
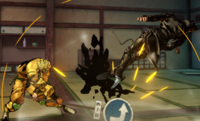
Special Moves
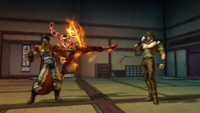
Special Moves (known in-game as Skills) are attacks that involve more complex inputs than a direction and a button, often requiring a motion to be performed before a button press. In exchange, they are generally more potent or have special properties. Typical examples of Special Moves include: projectiles that can hit the opponent across the stage; attacks that strike an opponent who is airborne or downed; abilities that activate special effects, etc. Most Normal Attacks can be canceled into Special Moves; if such a cancel takes place, a sound effect will play and the character will display sparkles around their body for a brief moment, demonstrating the technique's success.
Special Moves are performed by moving the Stick (or pressing the D-Pad arrows) from the beginning point to the direction marked at the end, and then pressing one of the Attack buttons. Depending on the button pressed, the Special Move changes its characteristics, such as becoming faster or slower, firing more or less projectiles, increasing or reducing its range, etc. Some characters also have access to Special Moves that can only be used with one specific button, such as the Style button (![]() ); these specific Special Moves tend to be unique from the rest of a character's kit due to not having alternate variants.
); these specific Special Moves tend to be unique from the rest of a character's kit due to not having alternate variants.
Typical Special Move motions include the following:
- Quarter-Circle: These are performed by starting from and then moving to the marked horizontal direction. Depending on the direction marked, they can be referred to as Quarter-Circle Forward (
 ; abbreviated as QCF) or Quarter-Circle Back (
 ; abbreviated as QCB).
 - Half-Circle: Similar to Quarter-Circles, these are performed by starting from a given horizontal direction and then moving to the opposite horizontal direction, while moving the Stick (or pressing the D-Pad arrows) across the downward directions. Depending on the direction marked, they can be referred to as Half-Circle Forward (
 ; abbreviated as HCF) or Half-Circle Back (
 ; abbreviated as HCB).
 - Dragon Punch: Most commonly presented in movelists as a graphic resembling the letter Z, these are performed by starting from a given horizontal direction (for example, ), then moving to and finishing by pressing a diagonal direction with the same orientation as the horizontal direction (in this case, ). Depending on the direction marked, they can be referred to as Dragon Punch (
 ; abbreviated as DP) or Reverse Dragon Punch (
 ; abbreviated as RDP).
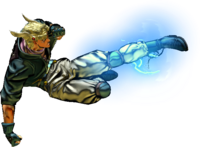
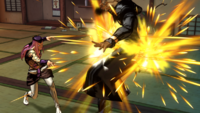
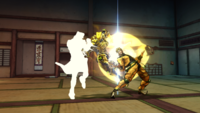
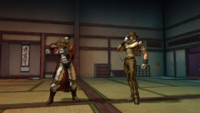
Caesar executing a Special Move, "Hamon Kick"
( + / / ).
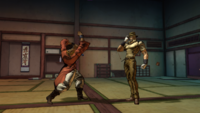
Special Moves such as Zeppeli's "Hamon Cutter" can serve as projectiles...
( + / / )
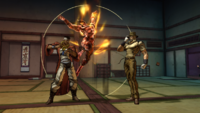
while others, like Jonathan's "Scarlet Overdrive", manifest as anti-airs...
( + / / )

some can act as counterattacks, like Joseph's "Guess I did it again!"...
( +  )
)
and a few can even be movement options, as demonstrated by Lisa Lisa's "Not one move wasted".
( + / / )


.png)
.png)

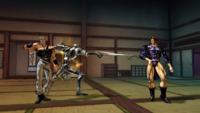
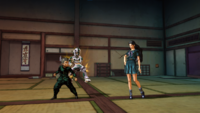
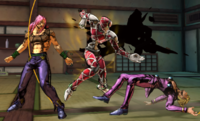
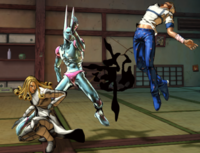
Throws
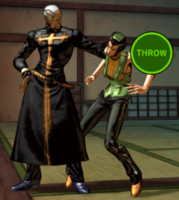
Characters can Throw their opponent by pressing a combination of two Attack buttons. Throws bypass the opponent's Guard, come out quickly and deal moderate damage, but can only connect within close range. Throws cannot chain into further attacks nor be chained from other attacks; additionally, they will not work against a character in an airborne state (or during the start of a character's jump). Characters have access to both Forward Throws and Back Throws; where the opponent is thrown depends on the direction held while throwing, defaulting to a Forward Throw with no additional input.
A character being thrown has a small window to press two Attack buttons to reject the opponent's Throw attempt and reset to neutral. This is known as a Throw Escape.
All Throws take 6 frames to come out and cause a Hard Knockdown upon successfully connecting. The Throw's damage, as well as the distance and frame advantage after a Throw, are character- and, in some cases, mode-dependent.
Throws beat Guard, Dodge, Stylish Evade, and Stylish Guard, making them an invaluable tool on offense. However, while they have relatively short recovery, it's easy to punish them if the opponent can predict and avoid the Throw.

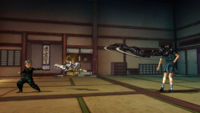
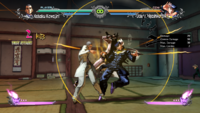
Kars attempts to Throw an opponent, but he's out of reach.
Kars executing a successful Throw.
Some characters have alternate animations on their Back Throws.
In some cases, Throws can also change depending on the user's form.
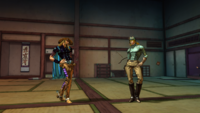
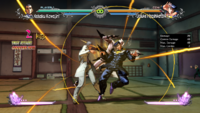
Joseph attempts to Throw Kars, who succesfully escapes...
causing both of them to recoil away from each other.
.png)
.png)
.png)
.png)
.png)
.png)
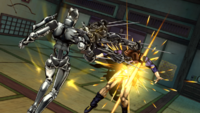
Command Throws
Certain Special Moves can also be classified as Throws; these are known as Command Throws (alternatively Command Grabs). Command Throws have some advantages over the standard Throw, such as increased range and the inability to escape them, in exchange for executing in a slower manner (being easier to react to as a result).
Anasui's Command Throw, showing its large reach.
Anasui successfully executing a Command Throw.
.png)
.png)
Attack Throws
A concept related to Throws but not subject to the same rules is the concept of Attack Throws (best known as Hitgrabs). Attack Throws are attacks which, upon successfully hitting the opponent, trigger a sequence of auto-attacks during which neither player has control over their character, preventing the opponent from being able to defend themself. Attack Throws do not bypass the defensive options that regular Throws or Command Throws do (Guard, Dodge, Stylish Evade, or Stylish Guard), meaning they can be blocked like any regular attack. However, this also means that it's possible to chain into them from other attacks, allowing them to be used in combos.
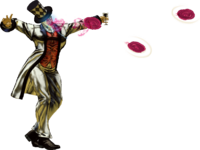
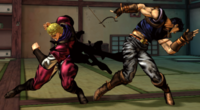
Polnareff initiating an Attack Throw.
Polnareff successfully executing an Attack Throw.
.png)
.png)
Defense
Guard
It is possible to defend oneself by holding either ![]() or
or ![]() in order to block attacks. Characters cannot block forever, however, as blocking attacks will drain the Guard Gauge. It is impossible to block attacks while airborne.
in order to block attacks. Characters cannot block forever, however, as blocking attacks will drain the Guard Gauge. It is impossible to block attacks while airborne.
If a character tries to block an attack within a certain distance, they will use a Proximity Guard (alternatively Proximity Block), causing them to stop in place and attempt to block even if the attack is out of their reach. The range where this happens is move-dependent.
A character who blocks an attack is considered to be in blockstun; while in this state, they cannot be affected by Throws, nor can they act (aside from switching their current Guard). In addition, until blockstun ends, the character is forced to block all incoming attacks, even after they stop Guarding. This mechanic is colloquially known as Absolute Guard.
Blocking Normal Attacks fully protects the defender, leaving them unscathed. On the other hand, blocking Special Moves makes the defender take a slight amount of damage, usually a fraction of the Special Move's full power; this damage is known as Chip Damage, and while it does reduce the defender's Health Gauge, their Health cannot be fully depleted by it. Although the rules for Chip Damage are consistent across the cast, two particular exceptions exist: ![]() Iggy (while in Stand Off) takes Chip Damage even from Normal Attacks, and characters of the Mounted Style will inflict Chip Damage with their Normal Attacks while on top of their respective Horse.
Iggy (while in Stand Off) takes Chip Damage even from Normal Attacks, and characters of the Mounted Style will inflict Chip Damage with their Normal Attacks while on top of their respective Horse.
Josuke (Part 4) performing a Standing Block.

Josuke (Part 4) performing a Crouching Block.

Josuke (Part 4) performing a Proximity Guard.


Guard and Attack Types
Attacks are classified in 5 types, which determines their interactions with the blocking character:
- Mid Attacks (labelled in-game as High) are attacks that can be blocked regardless of the type of Guard used.
- Overhead Attacks (labelled in-game as Middle) are attacks that can only be blocked by performing a Standing Guard, done by holding .
- Low Attacks are attacks that can only be blocked by performing a Crouching Guard, done by holding .
- Unblockable Attacks are attacks that cannot be blocked normally, requiring the usage of character-specific abilities or Stylish Guard. They feature a gold spark during startup, making them easy to discern.
- Throws are attacks that cannot be blocked at all.
It is important to note that, while it is not normally possible to defend from Low Attacks while standing (or from Overhead Attacks while crouching), trying to block both an Overhead Attack and a Low Attack at the exact same time will trigger Absolute Guard and allow for blocking both attacks at once. However, Absolute Guard will not protect the character from switching between Standing and Crouching Guards: for instance, ![]() Giorno's
Giorno's ![]()
![]() is a multi-hitting Low Attack that acts as a true blockstring (making it impossible to perform a reversal between hits); however, switching to a Standing Guard while blocking the move will result in the defender getting hit.
is a multi-hitting Low Attack that acts as a true blockstring (making it impossible to perform a reversal between hits); however, switching to a Standing Guard while blocking the move will result in the defender getting hit.
As a general rule, attacks done while standing are considered Mid Attacks, attacks done while crouching are considered Low Attacks, and attacks done while airborne are considered Overhead Attacks. However, there are moves that defy this classification: for example, ![]() Jotaro (Part 4)'s Standing Medium Attack (Stand Off) is considered a Low Attack, despite the fact that Jotaro is performing the attack while standing. Similarly, an attack may have a different attack type from what its appearance might suggest:
Jotaro (Part 4)'s Standing Medium Attack (Stand Off) is considered a Low Attack, despite the fact that Jotaro is performing the attack while standing. Similarly, an attack may have a different attack type from what its appearance might suggest: ![]() Ghiaccio's Crouching Medium Attack (Stand Off), despite aiming towards the opponent's chest, is considered a Low Attack instead of a Mid Attack.
Ghiaccio's Crouching Medium Attack (Stand Off), despite aiming towards the opponent's chest, is considered a Low Attack instead of a Mid Attack.
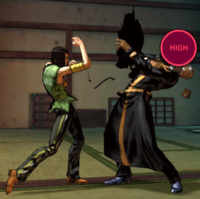
Ermes executing a Mid Attack (labelled as High).
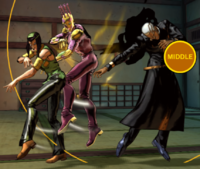
Ermes executing an Overhead Attack (labelled as Middle).
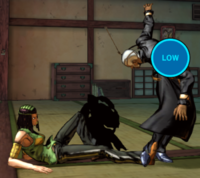
Ermes executing a Low Attack.
Pucci (WS) executing a Throw.
Pucci (Final) executing an Unblockable Attack.


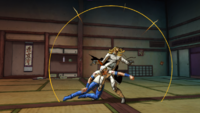
Dodge
Characters are able to shift the horizontal plane of gameplay respective to their opponent by performing a Dodge (alternatively known as Rotate), allowing them to easily avoid most linear attacks. Dodges can be executed by pressing the Dodge (![]() ) button (causing the character to move in the direction of the background) or
) button (causing the character to move in the direction of the background) or ![]() +
+ ![]() (which makes them move towards the foreground instead).
(which makes them move towards the foreground instead).
During a Dodge, characters are rendered invulnerable to physical attacks for a total duration of 16 frames starting from the moment the Dodge button is pressed. However, they will not be protected from Throws (including moves with hybrid Throw properties, such as ![]() Risotto's "Control iron within 5-10 meters") or moves considered to be projectiles (like
Risotto's "Control iron within 5-10 meters") or moves considered to be projectiles (like ![]() Pucci (WS)'s "I order you!").
Pucci (WS)'s "I order you!").
At certain points during a Dodge (following a period of 6 frames after the invulnerability ends), characters are able to perform certain other actions:
- Dodges can be canceled into Stylish Guard from frame 22 onwards.
- From frame 26 onwards, characters can use Forward Dashes (and continue into a Run, if applicable).
Hol Horse dodging to the back.
Hol Horse dodging to the front.


Down Evade
After getting knocked down by an attack, pressing ![]() will make the character quickly rise back up. This technique can be delayed for a moment to throw off the opponent's timing, but cannot be used at all if the character is hit by attacks that cause effects such as Groundbounce or Hard Knockdown (an example being Throws).
will make the character quickly rise back up. This technique can be delayed for a moment to throw off the opponent's timing, but cannot be used at all if the character is hit by attacks that cause effects such as Groundbounce or Hard Knockdown (an example being Throws).
Jotaro (Part 4) performing a Down Evade.

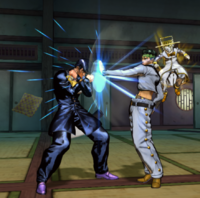
Stylish Evade / Stylish Guard
In addition to the Guard mechanic, two additional, closely related techniques can help in the defensive aspect. Unlike Guard, however, they must be manually timed, making them harder to use preemptively:
- Blocking an attack just before it connects activates Stylish Evade (also known as Stylish Dodge), which triggers a superflash and makes the defender automatically sidestep towards the camera while locking the opponent in their attack.
- Pressing + +
 performs a Stylish Guard: denoted by a white flash, the character enters a parry state where they will automatically Stylish Evade the attack upon being hit.
Both techniques allow the user to defend against attacks of all types (even most Unblockable attacks), but they are ineffective against any kind of Throw. Of note is that, since the sidestep they take will always move towards the camera, the techniques become less effective if the stage's walls are in front of it. Another important detail is that both of these actions are unavailable for a total of 20 frames after landing from a jump.
The differences between both abilites render Stylish Guard as more consistent and easier to use than Stylish Evade on defense, but it is much easier to counteract in return: while it has quick startup, it also has decent recovery, making it possible for the opponent to bait it out and then punish the user.
Aside from its defensive purpose, Stylish Guard can be cancelled from Normal Attacks, giving it offensive applications by acting as a way to defend against attacks or elements independent from the opponent, such as Reversal Assists.
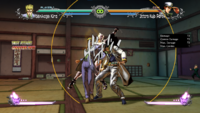
DIO performing a Stylish Evade against Jotaro (Part 3).
Jotaro (Part 3) performing a Stylish Guard to avoid DIO's "This is... The World!", an otherwise Unblockable attack.
Jotaro (Part 3)'s Stylish Guard is successful, locking DIO in place.

.png)
.png)
Styles
All characters have access to a Style, which determines the abilities they can use by pressing the Style button (![]() ). Each Style comes with their own unique system mechanics.
). Each Style comes with their own unique system mechanics.
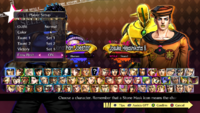
The Style a character is associated with can be seen on the Character Select Screen (under the character's name), as well as the VS screen.
There are 4 major Styles in the game, used by the vast majority of characters. However, certain characters do not make use of these Styles, instead possessing ones that are unique to them.
The VS Screen, showing the Styles of the selected characters.

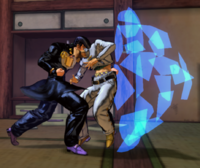
Hamon
A Style that allows the character to imbue their Special Moves with Hamon.
Holding ![]() activates Hamon Breathing, which slowly builds Heart Heat Gauge for as long as the button is held. Hamon characters can also input their Special Moves with
activates Hamon Breathing, which slowly builds Heart Heat Gauge for as long as the button is held. Hamon characters can also input their Special Moves with ![]() (instead of the usual
(instead of the usual ![]() /
/ ![]() /
/ ![]() buttons) to unleash Hamon Specials (powered up versions of said Special Moves; colloquially referred to as EX Moves as a result) for the cost of 0.5 bars of the Heart Heat Gauge. In addition to their enhanced properties, Hamon Specials can deal Hamon Damage, causing said move to deal 20% extra damage against Stone Mask characters.
buttons) to unleash Hamon Specials (powered up versions of said Special Moves; colloquially referred to as EX Moves as a result) for the cost of 0.5 bars of the Heart Heat Gauge. In addition to their enhanced properties, Hamon Specials can deal Hamon Damage, causing said move to deal 20% extra damage against Stone Mask characters.
Through Hamon Breathing, Hamon Style characters can refill their Heart Heat Gauge.
While capable of performing Special Moves like the rest of the cast...
their Hamon Specials can be distinguished by their blue glow...
and when used against a Stone Mask character, Hamon Damage will be dealt.
.png)
.png)
.png)
.png)
Mode
A Style that allows the character to enter an alternate state and gain access to various enhancements.
When a character of the Mode Style presses ![]() , their respective Mode will be activated. While active, the character sees various changes to their abilites, such as access to new moves, damage over time, immunity to projectiles, etc. However, while the character's respective Mode is active, they cannot build Heart Heat Gauge under any circumstances.
, their respective Mode will be activated. While active, the character sees various changes to their abilites, such as access to new moves, damage over time, immunity to projectiles, etc. However, while the character's respective Mode is active, they cannot build Heart Heat Gauge under any circumstances.
Mode Style characters also have access to a secondary, more powerful Mode by pressing ![]()
![]() +
+ ![]() , which costs 1 bar of the Heart Heat Gauge and provides a stronger power-up. While still having the Heart Heat Gauge penalty, they provide an additional benefit to compensate: in return for bringing the character back to their normal state, using a Heart Heat Attack will not cost any additional Heart Heat Gauge.
, which costs 1 bar of the Heart Heat Gauge and provides a stronger power-up. While still having the Heart Heat Gauge penalty, they provide an additional benefit to compensate: in return for bringing the character back to their normal state, using a Heart Heat Attack will not cost any additional Heart Heat Gauge.
Mode Style characters can enhance their abilities...
manifesting their respective elements and gaining specific benefits.
Mode Style characters also have access to stronger Modes...
in which the character's element manifests in a stronger form.
.png)
.png)
.png)
.png)
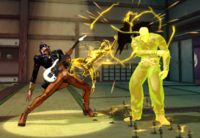
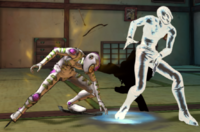
Stand
A Style that allows the character to use esoteric powers granted by their Stand.
Due to the wildly unique nature of Stands, characters of the Stand Style can be classified in two types: Active Stand and Passive Stand.
Active Stand
Characters with an Active Stand start each round by themselves (referred to as User Mode in-game, but better known as Stand Off). By pressing ![]() , the character will call forth their Stand (referred to as Stand Mode in-game, but better known as Stand On), changing up most of their attacks (if not all). As the Stand is considered an extension of the Stand User, Stands can be hit and damaged by opponents; if a character is thrown off their feet while their Stand is summoned (such as by receiving a knockdown), they will lose focus and deactivate their Stand (with
, the character will call forth their Stand (referred to as Stand Mode in-game, but better known as Stand On), changing up most of their attacks (if not all). As the Stand is considered an extension of the Stand User, Stands can be hit and damaged by opponents; if a character is thrown off their feet while their Stand is summoned (such as by receiving a knockdown), they will lose focus and deactivate their Stand (with ![]() Ghiaccio being a notable exception against most forms of knockdown). All characters with an Active Stand have access to the Quick Stand On ability (which allows them to quickly summon their Stand during combos), while most (but not all) have access to the Stand Rush ability (which can allow the Stand and the Stand User to attack independently).
Ghiaccio being a notable exception against most forms of knockdown). All characters with an Active Stand have access to the Quick Stand On ability (which allows them to quickly summon their Stand during combos), while most (but not all) have access to the Stand Rush ability (which can allow the Stand and the Stand User to attack independently).
- Characters with Active Stands:
- Part 3:
 Jotaro (Part 3),
  Old Joseph,
  Avdol,
  Kakyoin,
  Polnareff,
  Iggy,
Iggy,  Vanilla Ice, and
  DIO.
DIO. - Part 4:
 Josuke (Part 4),
  Jotaro (Part 4),
  Koichi,
  Okuyasu,
  Rohan,
  Yuya,
Yuya,  Akira,
  Kira, and
  Kosaku.
 - Part 5: Giorno,
 Bucciarati,
  Narancia,
  Fugo,
Fugo,  Trish,
  Abbacchio,
  Ghiaccio, and
  Diavolo.
 - Part 6:
 Jolyne,
  Ermes,
  Anasui,
  Weather,
  Pucci (WS), and
  Pucci (Final).
 - Part 7:
 Valentine.
 - Part 8:
 Josuke (Part 8).
- Part 3:
Characters with an Active Stand can fight on their own...
or call upon their Stand to fight alongside them.
These characters possess their own attacks when fighting alone...
while calling upon their Stand grants them access to a new set of moves.
.png)
.png)
.png)
.png)
Passive Stand
Characters with a Passive Stand function differently from their counterparts, as they cannot summon (or unsummon) their Stand at will; not only does this prevent them from changing their moveset, they don't have access to abilities like Quick Stand On or Stand Rush as a result. In return, they possess unique functions and abilities that are used with ![]() , which can go from replenishing a character-specific resource to even granting an exclusive enhancement.
, which can go from replenishing a character-specific resource to even granting an exclusive enhancement.
- Characters with Passive Stands:
- Part 3: Hol Horse,
 Mariah, and Pet Shop.
 - Part 4:
 Yukako,
  Shigechi, and
  Keicho.
 - Part 5:
 Mista, and
  Risotto.
 - Part 6:
 Foo Fighters.
 - Part 8: Wonder of U.
- Part 3:
While characters with a Passive Stand do not have manual control of their respective entities...
they still get to use them as part of their moveset...
and, in return, are given access to more unique abilities.
.png)
.png)
.png)
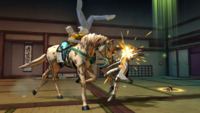
Mounted
A Style that allows the character to Mount or Dismount their Horse.
Mounted Style characters start each round mounting their Horse, but can Dismount (or Mount their Horse again if not on top of it) with ![]() . Because of this, they have different movesets while being on the Horse (referred to as Mounted Mode in-game, but better known as simply Mounted) or on foot (referred to as User Mode in-game, but better known as Dismounted).
. Because of this, they have different movesets while being on the Horse (referred to as Mounted Mode in-game, but better known as simply Mounted) or on foot (referred to as User Mode in-game, but better known as Dismounted).
While on the Horse, Mounted Style characters enjoy a number of benefits, such as inflicting Chip Damage with their Normal Attacks, as well as being immune to the Bind and Crumple hit effects. However, their Guard Gauge will not regenerate, and they also are locked out of Stylish Evade, Stylish Guard, and their own Throws. Being hit by an attack considered as a sweep (such as most Crouching Heavy Attacks) or by an attack with the Launch hit effect will force the character to Dismount, leaving them open until landing. They will also be forced to Dismount if any kind of Throw is performed against them (an automatic Throw Escape is triggered against a Normal Throw, while Command Throws will behave as normal).
While they are Dismounted, Mounted Style characters have access to the Quick Mount ability, which will cause their Horse to attack the opponent as the character gets on top of it.
Mounted Style characters can fight on foot...
or call their respective Horse to assist them in battle.
While Dismounted, Mounted Style characters possess their own moves...
but are allowed to call upon their Horse to gain a new set of abilities.
.png)
.png)
.png)
.png)
Unique Styles
- Ogre Street: A Style unique to
 Speedwagon that allows him to switch between two street fighting helpers with : Tattoo (a large ruffian wielding a knife) and the Kempo Fighter (a martial artist). Most of Speedwagon's Special Moves change depending on which helper he currently has beside him.
- Vampirism: A Style unique to Dio Brando that allows him to use to perform attacks that drain either Health or Heart Heat Gauge from the opponent.
- Best Science in the World: A Style unique to
 Stroheim, which switches between Heavy Machine Gun Mode and UV Laser Mode by pressing . How long Stroheim can stay in UV Laser Mode depends on his UV Laser Gauge.
- Bro and Mammoni: A Style unique to
 Prosciutto & Pesci. This Style allows Prosciutto to either have Pesci by his side to perform Special Moves, or send him away to call his Stand, The Grateful Dead, by pressing .
- Baoh Armed Phenomenon: A Style unique to
 Ikuro Hashizawa (Baoh) that grants him the ability to apply Super Armor to the startup of his next Special Move. This is done by pressing with at least 0.25 bars of the Heart Heat Gauge.
Speedwagon's unique Style, Ogre Street, lets him switch between his allies.
Dio Brando's unique Vampirism Style allows him to steal either Health or Heart Heat Gauge.
As part of his unique Style, Best Science in the World, Stroheim can enable his UV Laser Mode.
Prosciutto switches between Pesci and his Stand through his unique Bro and Mammoni Style.
Baoh Armed Phenomenon, Baoh's unique Style, allows him to imbue his next Special Move with Super Armor.


Style Notes
Despite the Style system being fairly consistent across the cast, some characters act as outliers, featuring traits from certain Styles despite being associated with another:
- Certain characters are considered Stone Mask characters. These characters incur White Damage whenever they are hit by an attack (regardless of the attack that hits them), take 20% extra damage when hit by Hamon Specials, and can only fight in certain stages without completing certain in-game conditions (only applies for local play; does not apply for Practice or Online modes). These characters are: Dio Brando, Wamuu,
 Esidisi,
  Kars, Vanilla Ice, and DIO.
- Of note is that Kars loses his vulnerability to Hamon Damage upon transforming into the Ultimate Life Form.
- Of note is that
- Despite his status as a character of the Stand Style, Old Joseph has access to Hamon Breathing and Hamon Specials, not unlike Hamon characters.
- Some characters with Active Stands, despite having access to the Quick Stand On ability, do not have access to the Stand Rush ability. These characters are: Old Joseph, Vanilla Ice, Ghiaccio, Pucci (WS), and Pucci (Final).
- For Pucci (Final), this distinction does not apply while having access to C-MOON.
- For
- While Prosciutto does have a unique Style, he is allowed to use the Quick Stand On ability (but only through a specific Command Normal). Uniquely, he is also allowed to use the ability while his Stand is active (again, only through a specific Command Normal), giving him access to a "Quick Stand Off" ability of sorts.
- However, Prosciutto does not have access to the Stand Rush ability despite possessing an Active Stand.
- However,
- Despite their status as Mounted Style characters, several of Johnny's,
 Diego's, and
  AW Diego's attacks involve their respective Stands.
- In particular, AW Diego is forced into a state reminiscent of Stand On while Dismounted, with his Stand, THE WORLD, being permanently active until going back to Mounted Mode.
- In particular,
Gauges
Health Gauge
When a character is hit by an opponent's attack, the Health Gauge (often referred to as simply health or HP) will be reduced by a certain amount in proportion to the attack received; when this happens, the character has taken damage. The Health Gauge's purpose is to determine the amount of damage a character can take before losing the round, with different characters having different amounts of health.
When full, the Health Gauge possesses a green color. After taking damage, it will become orange, with the damage taken being briefly shown in a shade of red that will drain after the character returns to a neutral state. A few abilities can cause the Health Gauge to slowly take damage over time; in these cases, the aforementioned shade of red will not appear. Certain moves can also poison the character, turning their Health Gauge purple while it lasts.
Under certain circumstances, a character will receive White Damage: a kind of damage which can be recovered passively over time. If the character takes damage while recovering, however, White Damage will be permanently removed.
If a character's health is low enough, they will activate either Rumble Mode or Resolve Mode (depending on the character) upon returning to a neutral state.
A Full Health Gauge.
A Health Gauge after taking damage.

A Poisoned Health Gauge.
A Health Gauge with White Damage.


Guard Gauge
The Guard Gauge is a resource that determines for how long a character can block attacks. It only gets depleted when blocking any kind of attack that can be blocked, receiving Guard Damage. If no Guard Damage is taken for a period of time, the Guard Gauge will slowly regenerate; if it is emptied, however, the character undergoes a Guard Break, entering a stun state lasting for 82 frames that leaves them wide open.
A character who attacks an opponent during the latter's Guard Break state will experience a special form of Damage Scaling, with their next attack dealing 20% less damage and subsequent attacks progressing from there.
As the Guard Gauge receives damage, it will change colors from blue, to yellow, to flashing (white and red). Guard Damage actually scales the longer a character is stuck in a blockstring, with attacks doing less and less Guard Damage the longer said character blocks. This means that, even if the attacker is running a heavy offense with Assault Assists filling in the gaps between their attacks, the chances of the defender getting Guard Broken in a single blockstring are practically non-existent. This leads to the attacker needing to eventually reset their blockstring on pressure, allowing for a Stylish Evade / Stylish Guard to blow up their offense.
Mounted Style characters (while mounting their Horse), as well as ![]() Iggy (while in Stand Off), are the only characters whose Guard Gauge does not regenerate naturally. This penalty doesn't apply to
Iggy (while in Stand Off), are the only characters whose Guard Gauge does not regenerate naturally. This penalty doesn't apply to ![]() AW Diego (a Mounted Style character) when he has possession of all 3 Holy Corpse parts.
AW Diego (a Mounted Style character) when he has possession of all 3 Holy Corpse parts.

A Blue Guard Gauge.

A Yellow Guard Gauge.

A Red Guard Gauge.
A Guard Break.

Heart Heat Gauge
The Heart Heat Gauge (shortened to HH Gauge and colloquially referred to as meter) is a special gauge that allows characters to perform strong techniques and other special abilities. It is filled by dealing and receiving damage as well as through other actions; once a bar is filled, a Stock is stored and the gauge empties again. The Heart Heat Gauge can store up to a maximum of 3 Stocks; characters will start each match with 1 Stock, and any HH Gauge accumulated will be carried over between rounds.
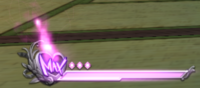
A full Heart Heat Gauge.
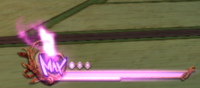
Certain abilities can alter it...
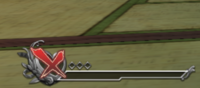
while others can disable it...
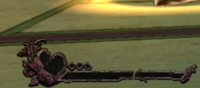
or even destroy it altogether.
.png)
.png)
.png)
.png)
Uses of the Heart Heat Gauge
System mechanics that make use of the Heart Heat Gauge are the following:
- Quick Stand On (QSOn): Only available to characters with Active Stands, and activated by pressing during Normal Attacks while in Stand Off, the character will flash white and quickly summon their Stand while resetting back to neutral. The ability costs 0.5 bars of HH Gauge and can only be used while on the ground, but it will take effect even if the attack does not connect.
- Stand Rush (SR): Only usable by characters with Active Stands, and activated by pressing during certain Special Moves while in Stand On, the ability causes the character and their Stand to 'de-sync', with the player instantly regaining control of their character as their Stand continues its attack. However, the corresponding character CANNOT block or use other attacks involving their Stand until it has finished its attack and disappears, "returning" to the Stand User. The ability costs 0.5 bars of HH Gauge, and is indicated by a slight slowdown and the character flashing white. While for the most part, it can be used even if the attack does not connect, some moves only allow Stand Rush usage if they successfully hit the opponent.
- Quick Mount (QM): Exclusive to Mounted Style characters and activated by pressing during Normal Attacks while Dismounted, the character will flash white and quickly summon their Horse, immediately mounting it; notably, the Horse's entrance carries Super Armor, in addition to dealing damage and launching opponents into the air. The ability costs 0.5 bars of HH Gauge, and while it can be used even if the attack does not connect, it cannot be used while airborne.
- Flash Cancel (FC): Referred to in Japanese (and more commonly known) as Puttsun Cancel (PC) (after the Japanese onomatopoeia "プッツン", referring to the sound of a string or chord snapping), Flash Cancels are activated by pressing all 3 Attack buttons during an attack (or through the Flash Cancel button macro). When activated, at the cost of 1 bar of HH Gauge, it puts the character immediately back into a neutral state following a superflash. Flash Cancels can be activated during most moves, even during their startup and/or if the move does not connect; exceptions include attacks which are considered airborne and/or invincible, as well as Heart Heat Attacks and Great Heat Attacks. Flash Cancels are reminiscent of the Roman Cancel system from the Guilty Gear series, closely resembling their Guilty Gear Xrd iteration.
- While Flash Cancels cannot be used while airborne, a niche situation where they can be performed is during the landing frames from an air recovery state. This can give the player enough time to react to any reset attempts.
- A unique quirk about Flash Cancels is that they give a very brief period of "invincibility" (about 1-2 frames), allowing them to evade very quick attacks without many active frames.
- Heart Heat Attack (HHA): Powerful attacks and abilities that are executed by performing a motion alongside any 2 Attack buttons, and cost 1 bar of HH Gauge to use. Most Heart Heat Attacks reward the player with a special animation while dealing significant damage, but some are not simple cinematic attacks: they can also be counterattacks, Unblockable attacks, or temporary power-up states (often referred to as installs). Heart Heat Attacks can be universally chained into, allowing the player to cancel nearly any Normal Attack or Special Move into them; this makes them effective combo finishers where applicable.
- Great Heat Attack (GHA): Particularly powerful attacks and abilities, typically being the highest damaging move in a character's arsenal; they are executed by performing a motion alongside all 3 Attack buttons (or through the GHA button macro), and require at least 2 bars of HH Gauge to be used. Much like Heart Heat Attacks, Great Heat Attacks can be simple cinematic attacks, or manifest as counterattacks, Unblockable attacks, or power-up states (either temporary or permanent); unlike Heart Heat Attacks, however, Great Heat Attacks can only either be executed by themselves or chained from Normal Attacks (with some exceptions). The damage for Great Heat Attacks (excluding those consisting of power-up states) can actually change depending on how much HH Gauge the character had at the time: using them with 2 bars causes them to deal their normal damage (denoted as LV1), using them with 2.5 bars applies a 1.2x damage bonus (denoted as LV2), and using them with all 3 bars applies a 1.5x damage bonus (denoted as LV3).
Giorno uses his Standing Medium Attack...
using Quick Stand On to summon his Stand, Gold Experience.
Jolyne executes a Stand Rush during her Special Move, "So you're the enemy, huh?" (Air).
Through Stand Rush, Jolyne can attack at the same time as her Stand, Stone Free.
Johnny uses his Standing Heavy Attack...
calling upon Slow Dancer through Quick Mount and attacking Valentine.
Josuke (Part 8) performing a Flash Cancel.
Baoh performing his Heart Heat Attack, "Laser Beam!".
Baoh performing his Great Heat Attack, "Time to cover up that stench!".
Baoh's Great Heat Attack successfully connects, triggering a LV3 damage bonus.
.png)
.png)
.png)
.png)
.png)
.png)


.png)
.png)
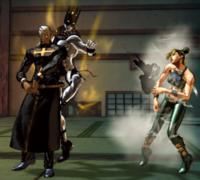
Support Attack
After selecting a character, players are then prompted to choose a second character, who takes on a non-playable role. Pressing the Assist button (![]() ) while in battle will summon said character to do a Support Attack.
) while in battle will summon said character to do a Support Attack.
It is possible to disable the use of Support Attacks in matches while in the Character Select Screen; however, this will apply for both players, making it impossible for only one player to have access to them. If disabled, the process of selecting a second character is entirely skipped, their space being occupied by a gray sign that reads "No Assist".
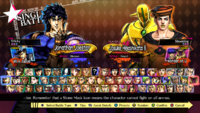
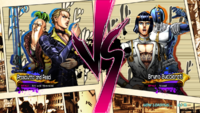
The Character Select Screen with Support Attacks enabled.
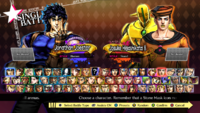
The Character Select Screen with Support Attacks disabled.


Assault Assist / Reversal Assist
The type of Support Attack used can vary depending on the context the partner character is called in:
- Available when the character is in a neutral state or attacking, Assault Assists (commonly referred to as simply Assists) bring the partner into play, who will perform an attack specific to said character and then leave. The number of times an Assault Assist can be used is determined by the Assault Assist Stocks, which are represented as
 pink dots below the character's portrait in the HUD. Assault Assists cannot be used when the player character is considered to be airborne, such as during a jump.
 - Reversal Assists (commonly referred to as Breakers or Bursts) can only be used when the character is Guarding, undergoing a Guard Break, getting hit, or knocked down. Upon being called, the partner will jump into the field while performing a non-damaging attack to interrupt the opponent's current action (taking a minimum of 20 frames), after which they will leave. The number of times a Reversal Assist can be used is determined by the Reversal Assist Stocks, which are represented as
 blue diamonds below the character's portrait in the HUD. All non-cinematic, non-hitgrab-based attacks can be broken out of with Reversal Assists (including non-cinematic Heart Heat Attacks!), but they can be avoided with well-timed uses of Stylish Evade, Stylish Guard, Guard Point, or moves with invulnerability.
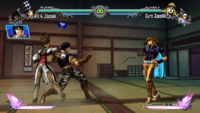
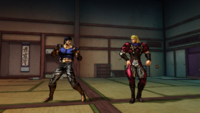
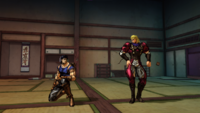
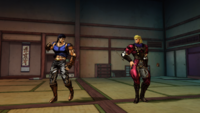
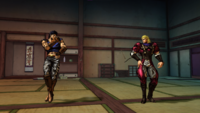
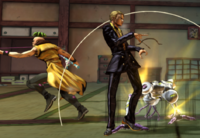
Zeppeli calls for Jonathan, who performs an Assault Assist.
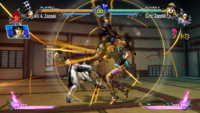
Zeppeli calls for Jonathan, who performs a Reversal Assist.


Assist Cooldown
Using either type of Support Attack will inflict a cooldown, preventing the partner character from being called again until it passes. Exactly how long this cooldown lasts is dependent on certain factors, such as the type of Support Attack used, the amount of Support Attack Stocks carried, the context they were called in, and if the point character receives damage:
- An Assault Assist used in neutral incurs no cooldown under normal conditions. If said Assault Assist is used during an attack from the player character, however, the Assist will incur a cooldown, its length depending on the total amount of Assault Assist Stocks the secondary character possesses.
- There is one special case in regards to an Assault Assist's cooldown: if a character calls an Assault Assist while in a neutral state, but the opponent is under any kind of hitstun while the Assist is called, the Assist will not be available until both characters come back to a neutral state, despite the fact that the Assist doesn't actually incur a cooldown.
- Using a Reversal Assist while blocking incurs a slight cooldown (only applies for Reversal Assists with two Reversal Assist Stocks), while using one while taking damage incurs a longer cooldown. As with Assault Assists, the cooldown's length is dependent on the total amount of Reversal Assist Stocks possessed by the secondary character; Reversal Assists with only one Reversal Assist Stock have a significantly shorter cooldown time as a result.
The Partner in a Ready state.
The Partner in an Unavailable state.
An Assault Assist in cooldown.
A Reversal Assist in long cooldown.


.png)
.png)
Other Mechanics
Clash
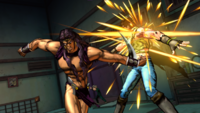
If two attacks happen to come in contact with each other during their active frames, whichever attack features higher priority will generally overpower the opponent's attack. Should said two attacks have the same priority, however, they will clash instead, canceling each other out and pushing both characters apart (with neither character taking damage). Clashes can happen regardless of whether the characters are grounded or airborne.
Generally, Light Attacks feature the least priority, being cleanly beaten by Medium Attacks. These, in turn, will be outprioritized by Heavy Attacks, which are themselves outprioritized by Special Moves.
Attacks that hit multiple times will not be entirely canceled out, as subsequent hits retain the ability to deal damage. Similarly, an attack (or specific hit) that causes a Clash does not actually disengage its hitboxes, meaning a Normal Attack can Clash against another Normal Attack from a given entity (such as a Stand) and still be capable of hitting another entity (in this case, the Stand User).
Throws can also Clash if performed at the exact same time, resulting in an automatic Throw Escape. If certain Special Moves clash with each other, Rush Mode will take place instead.
Old Joseph and Mariah executing their Standing Heavy Attacks, initiating a Clash.

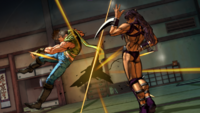
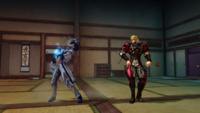
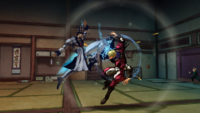
Counter Hit
If an attack happens to hit an opponent during an attack of their own, a Counter Hit (known as a Counterstrike in-game) will occur, as notified by a red message for the character who scored the Counter Hit. When a Counter Hit happens, the attack that causes it will deal double the damage than normal and incur 6 extra frames of hitstop. For attacks with multiple hits, as well as those that trigger a cinematic (such as Attack Throws, Heart Heat Attacks and Great Heat Attacks), only the hit that comes in contact with the opponent will be treated as a Counter Hit, with subsequent hits not benefitting at all.
Light Attacks cannot cause a Counter Hit against grounded opponents, while Throws cannot cause Counter Hits at all.
Kira's Standing Heavy Attack (Stand Off) under normal conditions.
Kira's Standing Heavy Attack (Stand Off) scoring a Counter Hit.
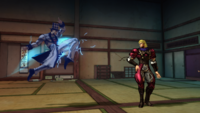
Kosaku's Standing Heavy Attack (Stand Off) under normal conditions.
Since Kosaku's Standing Heavy Attack (Stand Off) is a multi-hit attack, only the first hit is boosted by a Counter Hit.
.png)
.png)
.png)
.png)
Hit Effects
When an attack hits an opponent (whether they're standing or crouching), the victim will normally experience hitstun, preventing them from acting until it ends; once this happens, the affected character will return to a neutral state. Airborne characters, however, behave a little differently: if not hit again within a certain time window, they will enter an aerial recovery state, preventing them from acting until they land. This time window is very short (to the point that certain attacks won't combo during this state due to the decreased hitstun), and any sweep attacks landed during this interaction will knock the opponent down instead of enabling additional hits.
However, certain attacks may apply a Hit Effect instead, changing the way the opponent behaves upon being hit by the attack. Hit Effects are unique not only because of the properties they apply, but also because they can only be overwritten by other hit effects. Because of this, it is possible to manipulate their time of ocurrence through certain strategies.
Common hit effects include the following:
- Launch: An effect that causes the victim to be forced into the air, typically by launching the opponent upwards (the actual trajectory of the launch is move-dependent). They will transition into a knockdown unless a Down Evade is used.
- Bind: An effect that causes the victim to enter a state where they're restrained, unable to act. Typically transitions into the Crumple effect, but these are considered separate: an attack that causes the Bind effect may not induce a Crumple effect afterwards.
- Crumple: An effect that causes the victim to slowly fall to the ground, as if they suddenly became weak. Commonly happens after the Bind effect, but certain attacks can induce it on its own. Can only be applied once per combo.
- Hard Knockdown: An effect that causes the victim to violently spin in the air, causing a knockdown that cannot be avoided with a Down Evade. Some attacks that cause Hard Knockdown (such as sweeps) don't necessarily involve the spinning animation.
- Groundbounce: An effect that causes the victim to bounce off the ground, forcing a Hard Knockdown if not converted into a combo. Can happen after a Launch takes place.
- Knockback: An effect that, similar to the Launch effect, causes the victim to be forced into the air; the key difference, however, is that attacks with the Knockback effect will launch the victim at a very far distance and at a high velocity. As with the Launch effect, the actual trajectory of the knockback is move-dependent. In certain cases, a character who experiences this effect can undergo a Wallbounce should they reach the wall, which will transition into a Hard Knockdown if not converted into a combo.
- OTG Damage: Not so much an effect as it is a property, it enables certain attacks to hit opponents who are lying on the ground, something not normally possible.
Dio Brando attacking Jonathan, causing hitstun.
Kars causing Joseph to Wallbounce.

Mariah binding Avdol.
DIO inflicting a Hard Knockdown against Jotaro (Part 3).

Kosaku dealing Knockback to Josuke (Part 4).
Diavolo inflicting a groundbounce against Giorno.
Pucci (WS) causing Jolyne to crumple.
Valentine launching Johnny.

Wonder of U causing OTG Damage against Josuke (Part 8).


In some cases, upon hitting the opponent, attacks may also feature a graphic effect to denote an elemental attribute. While normally aesthetic, these effects may be associated with other, more passive effects:
- Freeze: An effect that causes the victim to be encased in ice. While typically associated with the Bind and Crumple hit effects, this elemental attribute does not actually feature any special properties.
- Electric: An effect that causes the victim to be electrocuted. Akira has a unique relationship with this elemental attribute: getting hit by an attack with this element will refill his Electricity Gauge.
- Burn: An effect that causes the victim to be surrounded by fire. Some attacks involving the Burn effect will cause the victim to slowly lose Health over time (either by dealing actual damage or by causing White Damage).
- Poison: An effect that causes the victim's head to be enveloped in fumes. Similar to the Burn effect, attacks involving the Poison effect will cause the victim to slowly lose Health over time; unlike said effect, however, victims will always receive actual damage.
Akira electrocuting Keicho.
Kira being affected by a Burn from Koichi.
Ghiaccio freezing Mista.
Pucci (Final) after being poisoned by Weather.


Super Armor / Auto Guard
Certain moves possess the ability to withstand the opponent's attacks during their execution, preventing the initial attacker from being interrupted. Two particular mechanics rule this process, with there being key differences between each:
- Super Armor: also known simply as Armor, it absorbs attacks while the move executes. In return, the wielder will take 50% of the damage from the attack that is being Armored through. Under normal circumstances, Super Armor will always fail against any kind of Throw (as well as Attack Throws), and certain attacks may only have Super Armor against a set amount of hits.
- Auto Guard: alternatively known as Guard Point, it distinguishes itself from Super Armor in that, for the most part, it nullifies any damage that would have been taken. It does not have an actual limit to the amount of attacks it can endure, at the cost of being restricted to a specific moment within the move (typically with a much shorter duration than that of Super Armor). For the most part, Auto Guard functions just like the actual Guard (meaning Throws will bypass it, and Chip Damage occurs when blocking a Special Move) but unlike it, Unblockable attacks cannot break through.

Esidisi's "Blood like lava!" possesses Super Armor, powering through Joseph's "Clacker Volley".
Avdol's "Now's my chance!" possesses Auto Guard for a brief moment, protecting him from Mariah's attack.


Rumble Mode / Resolve Mode
After falling under a certain health threshold, characters enter a powered up state (indicated by a manga panel featuring said character with an intense look) that can help them gain the upper hand and turn the tides of a match. The health threshold and passive attributes gained depend on the mode, which is denoted by a colored glow in the character's body and Health Gauge.
- Rumble Mode: Used by most of the cast. After falling below 30% HP, Rumble Mode characters deal 5% extra damage, their HH Gauge gain is increased by 10%, and they receive less Guard Damage. Characters in Rumble Mode feature a red glow.
- Resolve Mode: Unique to Giorno, Bucciarati, Mista, Fugo, Abbacchio, Prosciutto, Ghiaccio, and Ermes. After falling below 20% HP, Resolve Mode characters gain an extra 10% HH Gauge while getting hit. Their attacks will also deal 10% extra damage, in addition to gaining Super Armor during their active frames. Characters in Resolve Mode feature a yellow glow.
- Baoh Armed Phenomenon: Unique to Ikuro Hashizawa (Baoh), this state has 3 levels that activate after he reaches certain health thresholds. At 75% health, Baoh gains health regeneration, with the regeneration rate increasing at 50% health and increasing even further at 25% health. Baoh will not present special characteristics when first activated, but upon reaching 50% health, his body and Health Gauge feature a blue glow (which is replaced by a golden glow upon reaching 25% health).
Okuyasu entering Rumble Mode.
Mista entering Resolve Mode.
Baoh Armed Phenomenon (Level 1).
Baoh Armed Phenomenon (Level 2).
Baoh Armed Phenomenon (Level 3).


.png)
.png)
.png)
Taunt
Accessed by pressing the Taunt button (![]() ), Taunts cause the character to pose while verbally taunting their opponent. During battle, each character has access to two Taunt animations, which cycle between each other upon use; said Taunts (along with the quotes associated with them) can be changed in the Customize menu.
), Taunts cause the character to pose while verbally taunting their opponent. During battle, each character has access to two Taunt animations, which cycle between each other upon use; said Taunts (along with the quotes associated with them) can be changed in the Customize menu.
While mostly behaving like standard fighting game taunts (being simply meant as a mocking gesture), there is one key detail that sets them apart: once per match, after inflicting a Hard Knockdown, pressing the Taunt button triggers a Cinematic Taunt, activating a superflash as the camera moves close to the taunting character while also removing 1 bar of HH Gauge from the opponent. Cinematic Taunts also force a restand on the opponent afterwards, with them being unable to block for a very short period of time; this allows for setups where certain projectiles can be set before a Cinematic Taunt, which will hit the opponent after the Taunt is completed. Clever use of Cinematic Taunts is important, as they can both serve as a way to extend combos and lock the opponent out of some of their resources, reducing their options during a crucial moment in the match.
Rohan taunting Josuke (Part 4).
Rohan executing a Cinematic Taunt...
causing Josuke (Part 4) to lose HH Gauge.

.png)
.png)
Easy Beat
The Easy Beat system is an optional autocombo string that exists to give beginner players a means of performing an effective combo by using a simplified input. By repeatedly pressing ![]() , the character will automatically perform a preset combo, usually finishing with a Heart Heat Attack at the end (unless the character does not possess a standard Heart Heat Attack, such as having a counterattack). The use of Easy Beat carries the disadvantage of granting more HH Gauge to the opponent (and less HH Gauge to the attacker) than if the chain was to be performed manually. It is possible to disable the use of Easy Beat in matches while in the Character Select Screen.
, the character will automatically perform a preset combo, usually finishing with a Heart Heat Attack at the end (unless the character does not possess a standard Heart Heat Attack, such as having a counterattack). The use of Easy Beat carries the disadvantage of granting more HH Gauge to the opponent (and less HH Gauge to the attacker) than if the chain was to be performed manually. It is possible to disable the use of Easy Beat in matches while in the Character Select Screen.
![]() Vanilla Ice (only while in Stand On) and
Vanilla Ice (only while in Stand On) and ![]() Rohan (only while in Stand Off) are the only characters who cannot use Easy Beat at all.
Rohan (only while in Stand Off) are the only characters who cannot use Easy Beat at all.
The Easy Beat setting.

Easy Beat Rules
The Easy Beat chain almost always follows this combo structure:
The Special Move perfomed may change depending on certain factors, but will generally follow this set of rules:
- If a character can change movesets (through Stand On or an install, for example) and the Special Move remains available across said movesets, the version used changes depending on which mode the character's in at the time.
- If the Special Move is available in a given mode but not in another, a different Special Move will be used according to the mode the character's in.
- If the Special Move possesses a follow-up, it may be possible to use it with an additional button press before chaining into a Heart Heat Attack (depending on the character).
- If the Special Move possesses more than one follow-up, a preset follow-up will be used instead.
- If the character's Heart Heat Attack features a follow-up of its own, pressing the button again during said Heart Heat Attack will trigger said follow-up, so long as its criteria are met.
- If none of a character's Special Moves are considered suitable for the purpose, said character may use one of their Command Normals instead.
Below are a few examples of these interactions:
- Trish will make use of "Spice Girl!" in her Easy Beat chain both while in Stand Off and in Stand On, using the version available for the mode she was in at the time.
- Iggy will use "DIO Doppelganger" in his Easy Beat chain while in Stand Off, but because the move is not available while in Stand On, Iggy will instead use "The Fool" while in said mode.
- Josuke (Part 8) will use "So slippery!" in his Easy Beat chain while in Stand Off, with an additional button press triggering its "Zero Friction" follow-up.
 Joseph will use "Clacker Volley" in his Easy Beat chain. While the move possesses several follow-ups, an additional button press during an Easy Beat chain will trigger its "Now who's laughing?!" follow-up.
- Despite "ORA ORA!" having access to a follow-up in "ORAAA!" while in Stand On, Jotaro (Part 3) will not make use of it in his Easy Beat chain.
- Josuke (Part 4) will chain into his Heart Heat Attack in his Easy Beat chain, with an additional button press triggering its "Meet my homing missile!" follow-up so long as he has at least 0.5 bars of HH Gauge.
 Zeppeli will use his + Command Normal in his Easy Beat chain, as his Special Moves are too slow/cannot combo into his HHA.
Damage Scaling
Damage Scaling is a mechanic that limits the amount of damage a combo can do as it becomes longer and longer, preventing combos from becoming too overpowered.
Damage Scaling is calculated by the number of attacks used within a combo, with each attack dealing less and less damage. For this purpose, an attack's damage is decreased by a fixed percent for every attack used in the combo, rather than every individual hit. Even if an attack does not deal damage, it will still contribute to Damage Scaling so long as it hits the opponent.
With certain exceptions, Special Moves that feature follow-ups consider both the initial move and each follow-up to be separate moves, therefore increasing Damage Scaling; similarly, calling an Assist counts as a move for the purposes of Damage Scaling.
Damage Scaling Calculation

In addition to the individual amounts, Damage Scaling is calculated by "stages", which are denoted by the number of moves in a given combo. In the chart above:
- Stage 1 consists of the first move in a combo, which will always deal full damage.
- Stage 2 comprises the 2nd and 3rd moves used in a combo.
- Stage 3 comprises the 4th and 5th moves used in a combo.
- Stage 4 comprises the 6th and 7th moves used in a combo.
- Stage 5 comprises every move used in a combo from the 8th move onwards.
Unique Damage Scaling
There are also special interactions between Damage Scaling and certain moves:
- For moves such as Command Throws that allow for combos afterwards, Damage Scaling is imposed at a late stage automatically, reducing damage dealt by attacks to an initial threshold of roughly 25%.
- When hitting opponents lying on the ground via attacks with the OTG Damage effect, a special type of Damage Scaling will be applied, reducing damage dealt to roughly 45%.
- Any attack that lands on an opponent who is in a Guard Break state will have its damage reduced to an initial threshold of 80%.
- Any combo that starts from a counterattack will have its damage reduced to an initial threshold of 80%.
- Even if the harshest levels of Damage Scaling have been reached, Heart Heat Attacks and Great Heat Attacks are guaranteed to deal a minimum of 50% their total damage.
Flash Cancels and Damage Scaling
Flash Cancels have an interesting relationship with Damage Scaling: depending on the point where they're used within a combo, Flash Cancels will actually revert some Damage Scaling by moving the count back to a previous point. This does not apply to the initial threshold of OTG Damage or post-Command Throw Damage Scaling.
The effects of Flash Cancels on Damage Scaling are the following:
- A Flash Cancel used during Stage 1 has no effect on Damage Scaling.
- A Flash Cancel used during Stage 2 advances scaling from the 2nd move onwards.
- A Flash Cancel used during Stage 3 returns Damage Scaling to Stage 2, advancing scaling from the 3rd move onwards.
- A Flash Cancel used during Stage 4 returns Damage Scaling to Stage 3, advancing scaling from the 5th move onwards.
Taking this information into account, performing Flash Cancels would lead to increased damage even if they weren't needed to continue the combo. Mentioned below are some optimal points to use Flash Cancels for this purpose, with each number representing the amount of hits before using them:
- 5-5-3-3-3…
- 5-3-3-3-3…
- 3-4-3-3-3…
- 1-4-5-3-3…
- 1-4-3-3-3…
As an additional note, any multi-hitting move that has already landed an initial hit and features lingering hitboxes that remain active post-Flash Cancel, will be affected by this rolled back Damage Scaling without adding to the total move count in the combo. As a practical example, some characters that take advantage from this interaction are ![]() Kira, and
Kira, and ![]() Kosaku: it's possible to Flash Cancel the first hit of their respective detonations so the second hit deals rolled back damage.
Kosaku: it's possible to Flash Cancel the first hit of their respective detonations so the second hit deals rolled back damage.
Infinite Prevention System
The Infinite Prevention System (commonly abbreviated as IPS; referred to as Stale Moves in-game or as Same Move Limit in official patch notes) is a mechanic that mostly serves to limit unnatural or repetitive combos, such as those comprised of loops.
The game's combo system features an automatic combo lockout that triggers after an attack is used more than 2 times in a combo. After the third use, the opponent will enter an invincible state that makes them immediately fall out of the combo, transitioning into a knockdown that can be avoided with a Down Evade. Similarly, combos that feature more than 40 moves (unique or otherwise) will also trigger the combo lockout.
For the purposes of the system, characters with Active Stands (generally) have their Stand Off moves treated as separate from their Stand On ones, even if some of them are functionally identical. Mounted Style characters experience a similar treatment: Mounted moves are also treated as separate moves from Dismounted ones.
Attacks that hit opponents lying on the ground can normally hit in such a manner only once. However, certain Special Moves aren't restricted to a single OTG use; in these cases, these moves have separate IPS counts from those of the default IPS.
As an additional note, it is possible to trigger this mechanic during a groundbounce, which makes it impossible to land extra attacks during it. While the inability to perform a Down Evade out of this state leaves the victim vulnerable to additional OTG attacks (due to the aforementioned separate IPS counts), any such attacks landed after this interaction will lose their Hard Knockdown effect (if normally capable of it) as a consequence.
Notable interactions with the IPS system
- Normal Attacks for Mode characters share IPS restrictions across all Modes.
- Even though moves like Shigechi's "I can get anything I want!", Risotto's "The assassin that no one could find", and Baoh's "Baoh Hardened Saber" are actually series comprised of 3 completely different Special Moves, all versions are considered to be the same move (and thus share the same IPS restrictions).
- While in Watch Your Mouth! Mode, Josuke (Part 4) is allowed to use the same attack up to 8 times in a combo.
- The bullets fired by Mista during "Gonna light you up!" are all considered to be separate moves from each other.
- The Replays created by Abbacchio are counted as separate moves from Abbacchio's own versions.
- If Pucci (Final) evolves his Stand to C-MOON during a combo, all of its moves (except for its "I only need one punch." and "Now you've lost both arms!" Special Moves) share IPS restrictions with Whitesnake's counterparts.
- The following attacks can only be used once in a combo:
- Speedwagon's "That does it!" (against downed opponents).
- Joseph's "Time to bring down the hammer!" (against downed opponents).
- Kosaku's "Contact Bomb".
- Giorno's (Stand On).
- Prosciutto's (Stand Off) and "We're in it to the end!".
- Valentine's "Tah dah!".
- Josuke (Part 8)'s (Stand Off).
Easter Egg Mechanics
JoJo's Bizarre Adventure: All Star Battle R is designed as a love letter to the series first and foremost, which means it's littered with big and small easter egg references to the source material. Some of these, however, extend above just references and have actual impact on the gameplay, doing so in the form of unique interactions with certain characters, moves and stages.
Phantom Blood and Battle Tendency
- The energy of the sun: Hamon Specials will cause additional damage against Stone Mask characters, referencing how Hamon (an energy identical to that of the sun) can be used to fight against them; similarly, these characters (normally) cannot fight in stages that contain sunlight, as it would destroy their bodies. Of note is that, upon transforming into the Ultimate Life Form, Kars is no longer affected by Hamon Damage, a reference to his immunity to the sun upon achieving the form.
- Stroheim's attacks while in UV Laser Mode will also cause additional damage to Stone Mask characters (although at a lower amount), as they're comprised of ultraviolet light.
- Stone Mask characters also have a unique interaction with the DIO's Mansion stage: during the Dramatic Finish for the stage, Stone Mask characters will disintegrate from coming in contact with the sun (with Kars as the Ultimate Life Form being the exception).
- Caesar VS Wamuu: As a reference to their final battle, Wamuu's Vapor Barrier (which makes him immune to all non-HHA/GHA projectiles) will not protect him from Caesar's "Bubble Cutter" and "Gliding Bubble Cutter".
Stardust Crusaders
- Hol Horse loves the ladies!: When faced against female fighters, Hol Horse's attacks deal more damage but gain less HH Gauge, as a reference to his unwillingness to harm women.
- Of note is that, for the purposes of this mechanic (and staying true to the character's origins), Foo Fighters is not considered a female character.
- Now THIS is the greatest high!: Once per round, when DIO grabs a Joestar with his "Oh, this suits me well!" Special Move (excluding Johnny and Josuke (Part 8)), he'll gain extra HH Gauge and trigger a special cutscene, reenacting the moment where he did the same against Old Joseph in the story.
- "...And time moves again.": Characters with the ability to stop time (DIO, both versions of Jotaro, and AW Diego) can activate their own Time Stop while affected by their opponent's to instantly unfreeze time for themselves if they have at least 1 bar of HH Gauge. Should one of these characters run out of HH Gauge before their opponent does, they'll instead be stuck in the opponent's Time Stop until it ends.
- Jotaro VS DIO: During the final hit of DIO's GHA, right before the steamroller explodes, Jotaro (Part 3) can use his Time Stop (with at least 2 bars of HH Gauge) to escape the explosion and trigger a special cutscene, referencing their final battle.
Diamond is Unbreakable
- Electricity Gauge Interactions: If Akira gets hit by an attack with the Electric attribute (such as most of Weather's attacks during "Weather Report", Baoh's GHA, etc.), he will gain Electricity Gauge due to his Stand's ability of getting stronger by feeding off of electricity. In particular, Akira is immune to Morioh Town's Arena Gimmick, even gaining a full Electricity Gauge in the process.
- Echoes: 3 Freeze vs Sheer Heart Attack: Koichi can hit Sheer Heart Attack with his HHA, slowing both it and Kira down and triggering a unique voice line, referencing the autonomous entity's pursuit of Koichi. Furthermore, Kira features a unique animation while being affected by 3 Freeze.
- Killer Queen Bites The Dust: If Kosaku's "Bites The Dust" successfully hits the opponent, Kosaku will be healed a bit, the timer gets rewinded by 10 seconds, and both characters are returned to round start positions. In addition, any status the opponent has incurred (such as installs, evolutions and destroyed HH Gauges, as well as character-specific resources) will all be reversed. This is reminiscent of Killer Queen's Bites the Dust ability, which rewinds time by roughly an hour; to further exacerbate the reference, a unique voice line will be triggered if "Bites the Dust" hits while Kosaku is in Rumble Mode.
Vento Aureo
- Unlucky Number 4: If Mista gets hit by (or blocks) an attack while having 4 shots loaded in his revolver, he loses a bit of HH Gauge per hit taken, referencing his tetraphobia.
- Piercing Bullets: While in Resolve Mode, Mista's bullets will become unreflectable and pierce through non-HHA/GHA projectiles, a testament to his determination.
- White Album: As a reference to its extreme durability, White Album can remain active even after Ghiaccio receives non-cinematic knockdowns.
- Metallica: Despite being normally immune to non-HHA/GHA projectiles while invisible, Risotto can still get hit by the following attacks: the bullets fired by Aerosmith during Narancia's attacks, Avdol's "Flaming Detector", Mariah's "Sorry, but you'll have to die now.", and Yuya's "I got you!". All of these moves are attached to Stands that enable their Stand Users to track their targets in different ways.
- You will never reach the truth!: With Gold Experience Requiem active, Giorno's attacks will prevent Diavolo from activating his Erasing Time ability. This is reminiscent of Gold Experience Requiem's ultimate ability: to nullify the actions of anyone who opposes it, preventing them from becoming reality.
Stone Ocean
- Whitesnake: As only Whitesnake can create and manipulate DISCs in the source material, if Pucci (either version) has had his DISC stolen by another Pucci, connecting his HHA will automatically retrieve his DISC for him before stealing the enemy Pucci's own.
- Heavy Weather Immunity: Because Wamuu blinds himself upon using "I shall see with the wind.", he is completely immune to Weather's HHA (derived from Heavy Weather, a visual-based power) while under its effects.
- I can feel it! This is the spot!: If Pucci (Final) uses his Great Heat Attack in the Kennedy Space Center stage, its cinematic will become longer, spending more time off the clock.
Steel Ball Run
- Holy Corpse Parts: Whenever at least one Steel Ball Run character is in the match, three parts of the Holy Corpse will spawn over time for them to collect, with the character gaining different enhancements with each part obtained. Only 3 parts will spawn during the match, so if two Steel Ball Run characters happen to face each other, they'll be forced to fight for them. Both traits are reminiscent of the search for the highly coveted Holy Corpse, whose parts grant miraculous powers (often tied to Stand abilities) to their wielders.
- Infinite Spin: Johnny's and Gyro's Great Heat Attacks feature special animations if used against Valentine, which have slightly different properties than their normal counterparts. In the source material, the Infinite Spin is the only power that can counter Valentine's ultimate ability, D4C -Love Train-.

The Stone Mask icon that denotes Stone Mask characters, without the Red Stone of Aja equipped.

The Stone Mask icon that denotes Stone Mask characters, with the Red Stone of Aja equipped.
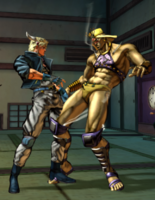
Wamuu's body sizzling after being hit by a Hamon-infused attack.
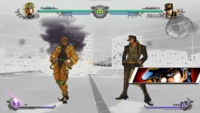
Jotaro (Part 3) after escaping DIO's Time Stop.
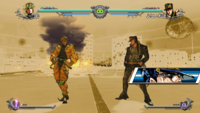
Jotaro (Part 3) being trapped in DIO's Time Stop after the previous escape.
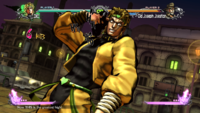
"Now THIS is the greatest high!".
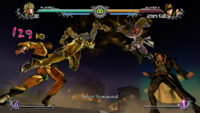
Jotaro (Part 3) clashing with DIO after escaping the steamroller by stopping time.
Akira and Okuyasu about to get hit by lightning...
from which the former comes out unscathed and recharged.
Echoes ACT 3 hitting Sheer Heart Attack.
"LOOK... OV... ER... HERE...".
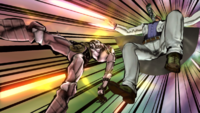
"I-I did it! It activated!".
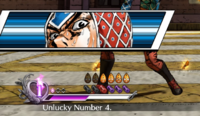
Mista's bad luck.
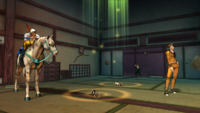
Two of the Holy Corpse parts.
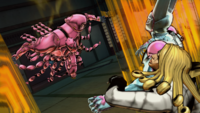
"Chumimi~n!".
"Steel Ball Infinite Spin Energy!".

.png)
.png)


.png)
.png)
.png)
.png)


.png)
.png)
Rush Mode
Upon clashing, certain Special Moves will activate Rush Mode, a unique event where both combatants will enter a tug-of-war style battle and a special bar (split in two for each side) will appear. Both characters have to mash ![]() repeatedly to push the opponent's bar away as much as possible. After one side of the bar completely overtakes the other (or if one side's bar is bigger than the other after a couple of seconds have passed), the winner knocks the loser away fullscreen while inflicting a bit of damage (although the loser's Health cannot be fully depleted by it). Should both bars be equal at the end of the clash, both players are reset back to a neutral state.
repeatedly to push the opponent's bar away as much as possible. After one side of the bar completely overtakes the other (or if one side's bar is bigger than the other after a couple of seconds have passed), the winner knocks the loser away fullscreen while inflicting a bit of damage (although the loser's Health cannot be fully depleted by it). Should both bars be equal at the end of the clash, both players are reset back to a neutral state.
Rush Mode can be triggered by the following moves:
 Jonathan's "Overdrive Barrage"
- Jotaro (Part 3)'s "ORA ORA!".
- Polnareff's "You miserable cur!" and "Cuts everywhere else!".
- DIO's "Right in front of me!?" and "Useless, useless, useless, useless!".
- Josuke (Part 4)'s "Break through, beat you up!" and "DORARARARARARARA!".
- Jotaro (Part 4)'s "ORA ORA!".
- Giorno's "Useless, useless, useless, useless!".
- Bucciarati's "I've got you!" and "ARI ARI ARI ARI".
- Mista's "I'll ask the damn questions!".
- Narancia's "You're not going anywhere!".
- Jolyne's "Sweet dreams, creep!" and "So you're the enemy, huh?".
- Johnny's "Who'll be the sacrifice?" and "Chumimin!".
- Josuke (Part 8)'s "Don't mess with me." and "The hell is your problem?!".
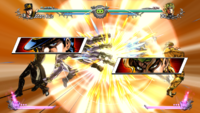
Star Platinum and The World clashing, initiating Rush Mode.
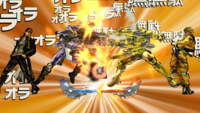
Rush Mode in progress.
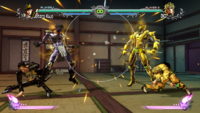
Star Platinum and The World end up stuck in a stalemate.
This time, Star Platinum has come out as the victor...
and thus sends both DIO and The World flying.
.png)
.png)
.png)
.png)
.png)