Help:Uploading Files
This is a guide to uploading and sharing images and videos to Mizuumi Wiki, primarily via Special:Upload.
Images and videos are very important and very helpful visual aids on Mizuumi wiki for showcasing interactions, technique, and strategy. In our goal of long-term preservation of the content of our games, we have a few simple and recommended procedures for users looking to add this content to pages on the wiki.
Sources
Foolproof Sources:
- Direct upload to the site via Special:Upload. As long as this site is up, your video will be up. Ideal for uploads that range from 30 seconds to a minute in length or less.
Acceptable Alternatives:
- YouTube (Video stays viewable as long as you don't private it or your Google account doesn't go down. Also ideal for longer uploads, like anything over 30 seconds.)
Fallible Sources (NOT RECOMMENDED):
- Streamable (Unwatched videos are deleted after 1 month)
- MEGA (Inactive accounts and their content are deleted after 3 months)
- Google Drive (All files on the Drive of a Google account that has been inactive for 2 or more years are automatically deleted)
File Name Convention
Please name files using the game abbreviations when possible, as well as a short description that will let the file be easily identifiable by name alone.
Other than the usual - (dash) and _ (underscore) characters, avoid using special characters in file names as it can lead to confusion and may not work nicely with templates.
- Format Examples
GAMEABBREVIATION_Logo.pngGAMEABBREVIATION_CHARACTERNAME_MOVEINPUT.pngorGAMEABBREVIATION_CHARACTERNAME_MOVENAME.png(Input preferred over move name)GAMEABBREVIATION_Help_EXAMPLE.png
- Examples for Under Night In-Birth
UNICLR_Logo.pngUNI_Linne_5B.pngUNI_Help_HUD.png
How to upload new files
- Have the file(s) you want to upload ready.
- (Optional for single file upload) Rename the file to Mizuumi Wiki file name convention above.
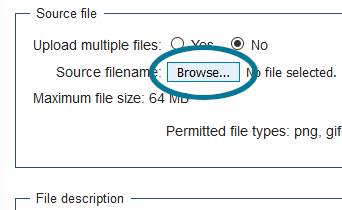
- If multiple files need to be uploaded, select "Yes" for the "Upload multiple files" option.
- Note: Please ensure files are named properly. The multiple file upload will overwrite any files with the same name without any warning.
- Click on the "Browse..." button.
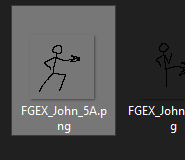
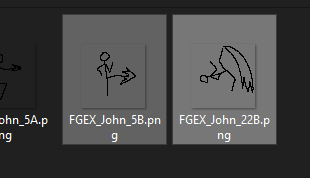
- Select the file(s) to upload.
- Tip: For multiple file upload, hold down
Ctrlwhen left-clicking to select multiple files.
- Tip: For multiple file upload, hold down
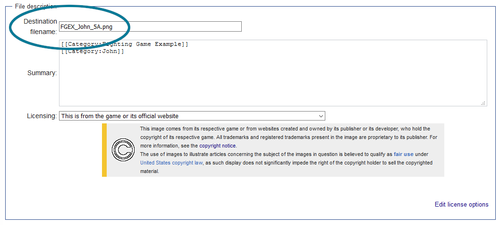
- (For single file upload) If the file isn't named to the convention above, rename the file using the "Destination filename" field.
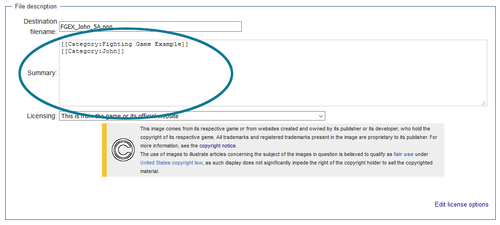
- Add categories for the file(s) by adding the following to the "Summary" field:
[[Category:GAMENAME]][[Category:CHARACTERNAME]]
- Example
[[Category:Under Night In-Birth Exe:Lateclr]][[Category:Linne]]
- (Optional) Also in the "Summary" field, feel free to add a short description for the file(s).
- Note: For multiple file uploads, the summary will be used for all files.
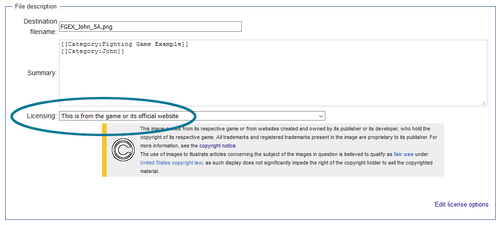
- Select a license.
- In most cases, "This is from the game or its official website" should be used.
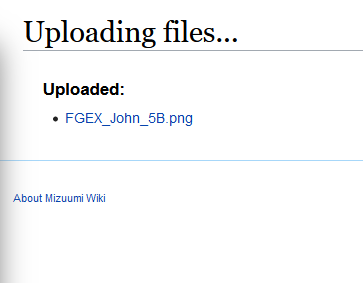
- Click the "Upload file" button.
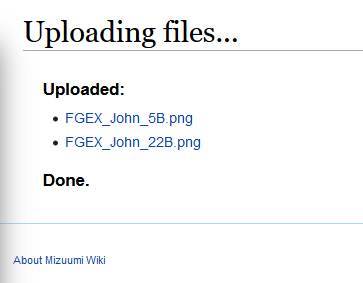
- (For multiple file upload) Before closing or navigating to a new page, wait for the "Done." message to indicate all files are uploaded.
File Compression
For the sake of our readers, Mizuumi Wiki, like many other independently hosted and run wikis, prefers to keep our file sizes as small as possible to preserve efficient page and content load times. In most cases, this can be done relatively easily while still retaining readability. Below are some methods on how to do so, for both images and videos.
Images
A very easy way that images can be compressed is by importing them into Photoshop (or any similar image editing software) and exporting the image back out again as "PNG8". This method condenses the image's usable color palette to 256 colors, down from the standard PNG's 16 million possible colors, which in practice can typically cut the file size of an image to less than 1/5ths of what it used to be.
Locally Hosted Videos
Compressing videos can be similarly easy. Various video editing tools can be used to compress videos to smaller resolutions and lower bitrates without affecting framerate or viewability of the video, and with large adjustability at that. Another quick method of compressing videos is uploading them to common video hosting websites (i.e. Streamable), then redownloading the most likely compressed video file and uploading it back onto Mizuumi wiki. For more precise adjustments, the following method is recommended:
Download FFmpeg
Windows: https://ffmpeg.org/download.html
Linux: sudo apt install ffmpeg
Go to FFmpeg
Open a cmd/terminal and type the following command:
For windows:
cd [directory where you have FFmpeg]
Example:
cd C:\Users\Dustloop\Downloads\FFmpeg-master-latest-win64-gpl\bin
For Linux:
This step isn't required. However, it might be necessary to use "usr/bin/ffmpeg" in the next step instead. If it still doesn't work type "whereis ffmpeg" in a terminal and use that result instead.
Convert the video(s)
In the following section, "video_name.format" refers to the name of the video to convert and its format (mp4.webm) and "output.webm" the name the compressed video should have. To make it easier, move the video(s) to the same directory as ffmpeg.
For 16:9 games (Type Lumina, Rivals of Aether, Idol Showdown...)
ffmpeg -i "video_name.format" -vf scale=-1:480 -b:v 1000k -vcodec libvpx-vp9 -threads 4 -y -an "output.webm"
For 4:3 games (MBAACC, most doujin games)
ffmpeg -i "video_name.format" -vf "crop=iw-480,scale=-1:400" -b:v 1000k -vcodec libvpx-vp9 -threads 4 -y -an "output.webm"
Those commands divide the size of the videos by a factor of 8~9.
Details:
- vf scale=-1:480: Resizes the video to be in 480p.
- b:v 1000k: Reduces the video bitrate.
- y: Overwrite the video.
- threads: Decrease the amount of time required to compress the video but increases CPU load.
- an: Removes the sound.
Trim the video:
ffmpeg can also be used to trim part of video with the -ss and -to options. They are respectively used to define the start and stop times.
For example:
ffmpeg -i "video_name.format" -ss 0:03.000 -to 0:08.000 -vf scale=-1:480 -b:v 1000k -vcodec libvpx-vp9 -threads 4 -y -an "output.webm"
Only keeps the part of the video between the 3rd and 8th seconds.
Keeping Audio:
If sound is required for audio cues, it is recommended to lower the volume of the video as they will be played at maximum volume by default. This can be done by replacing -an with -af "volume=0.1"
ffmpeg -i "video_name.format" -vf scale=-1:480 -b:v 1000k -vcodec libvpx-vp9 -threads 4 -y -af "volume=0.1" "output.webm"

